The Question mark — one of the great piece of punctuation, but in Mario's world, it often means secrets and rewards.
Mario Kart World's Free Roam mode is home to multiple ? Panels, all of which are tucked away in the game's many courses. In this guide, we'll be showing you where to find every single ? Panel in the game, and how to get them.
All ? Panels In Mario Kart World By Course
All ? Panels are found within the game's 30 courses — well, 29, as Rainbow Road doesn't have any. We've got all the courses laid out for you in alphabetical order, along with screenshots of where to find them.
So, with 150 ? Panels to find in total - so let's a-go!
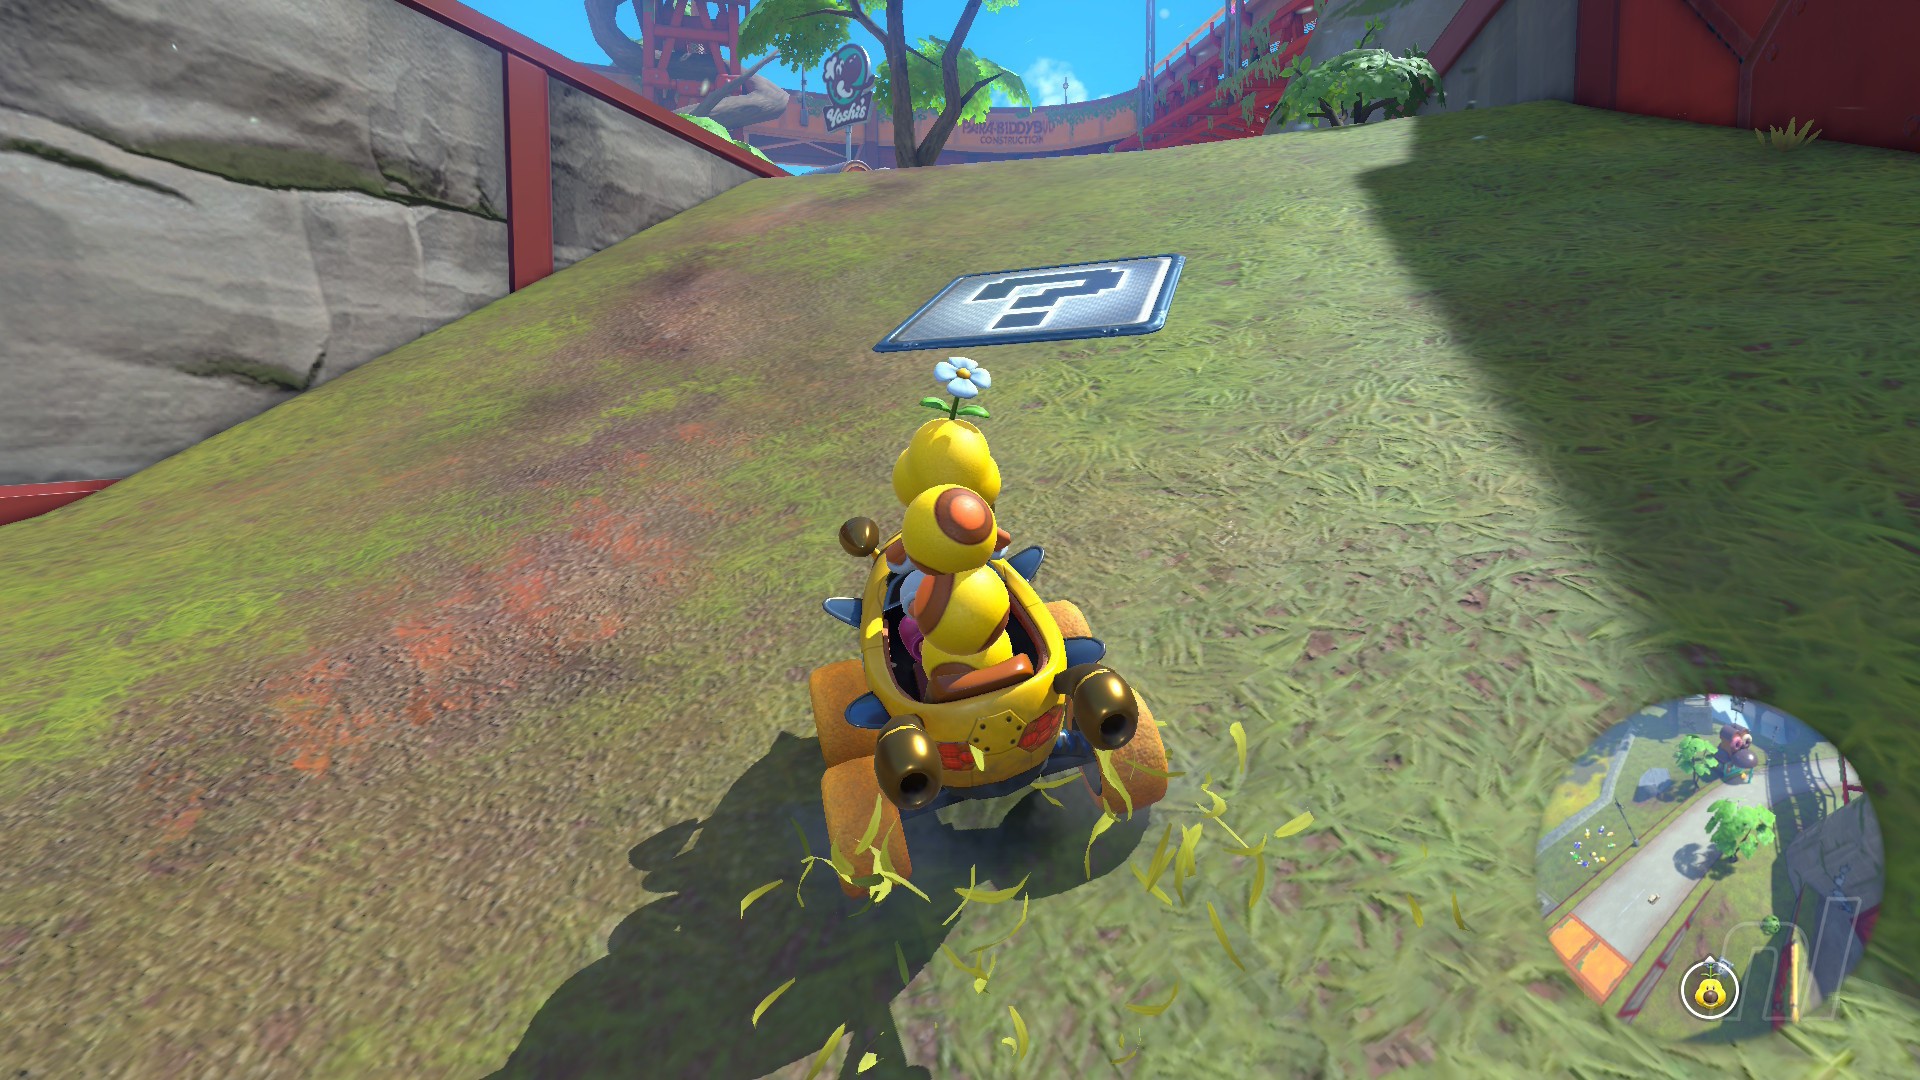
Acorn Heights Question Panels
Number of panels: 5
Collectibles region: Forest
Panel 1
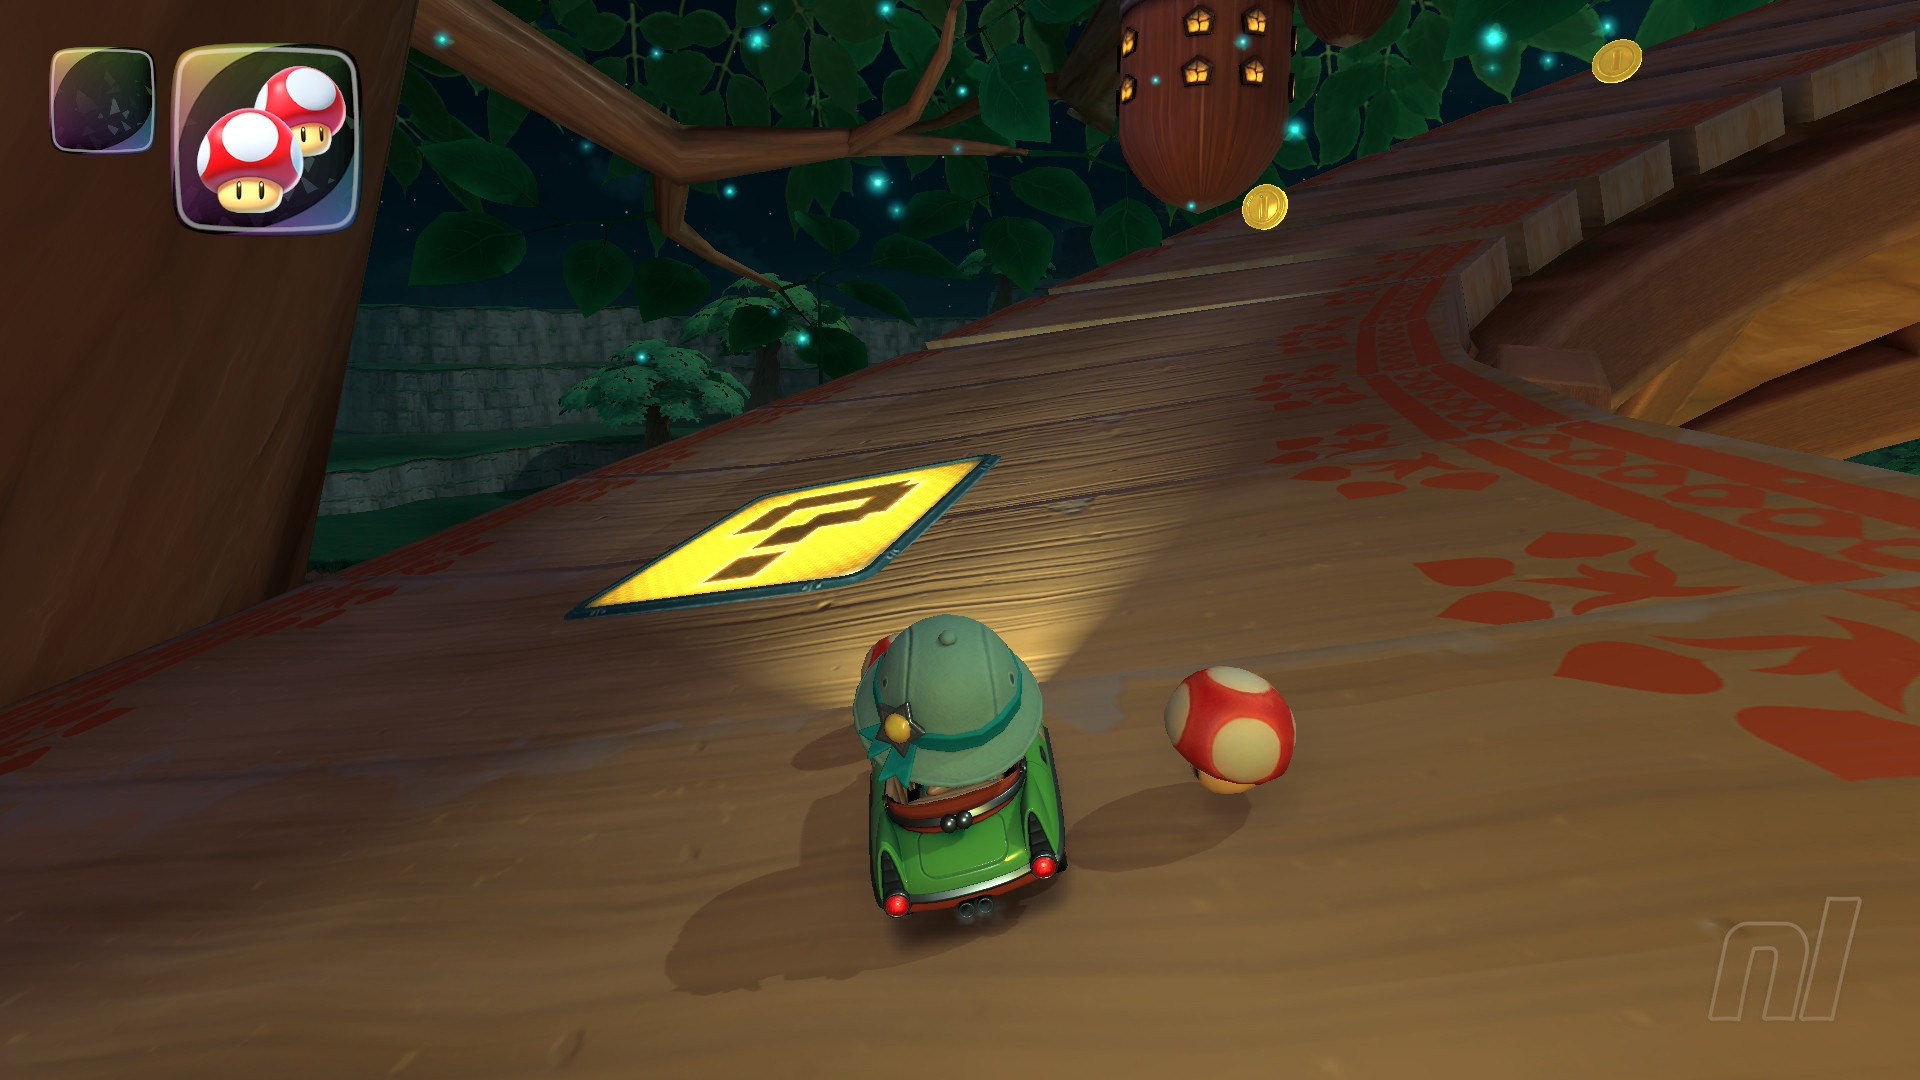
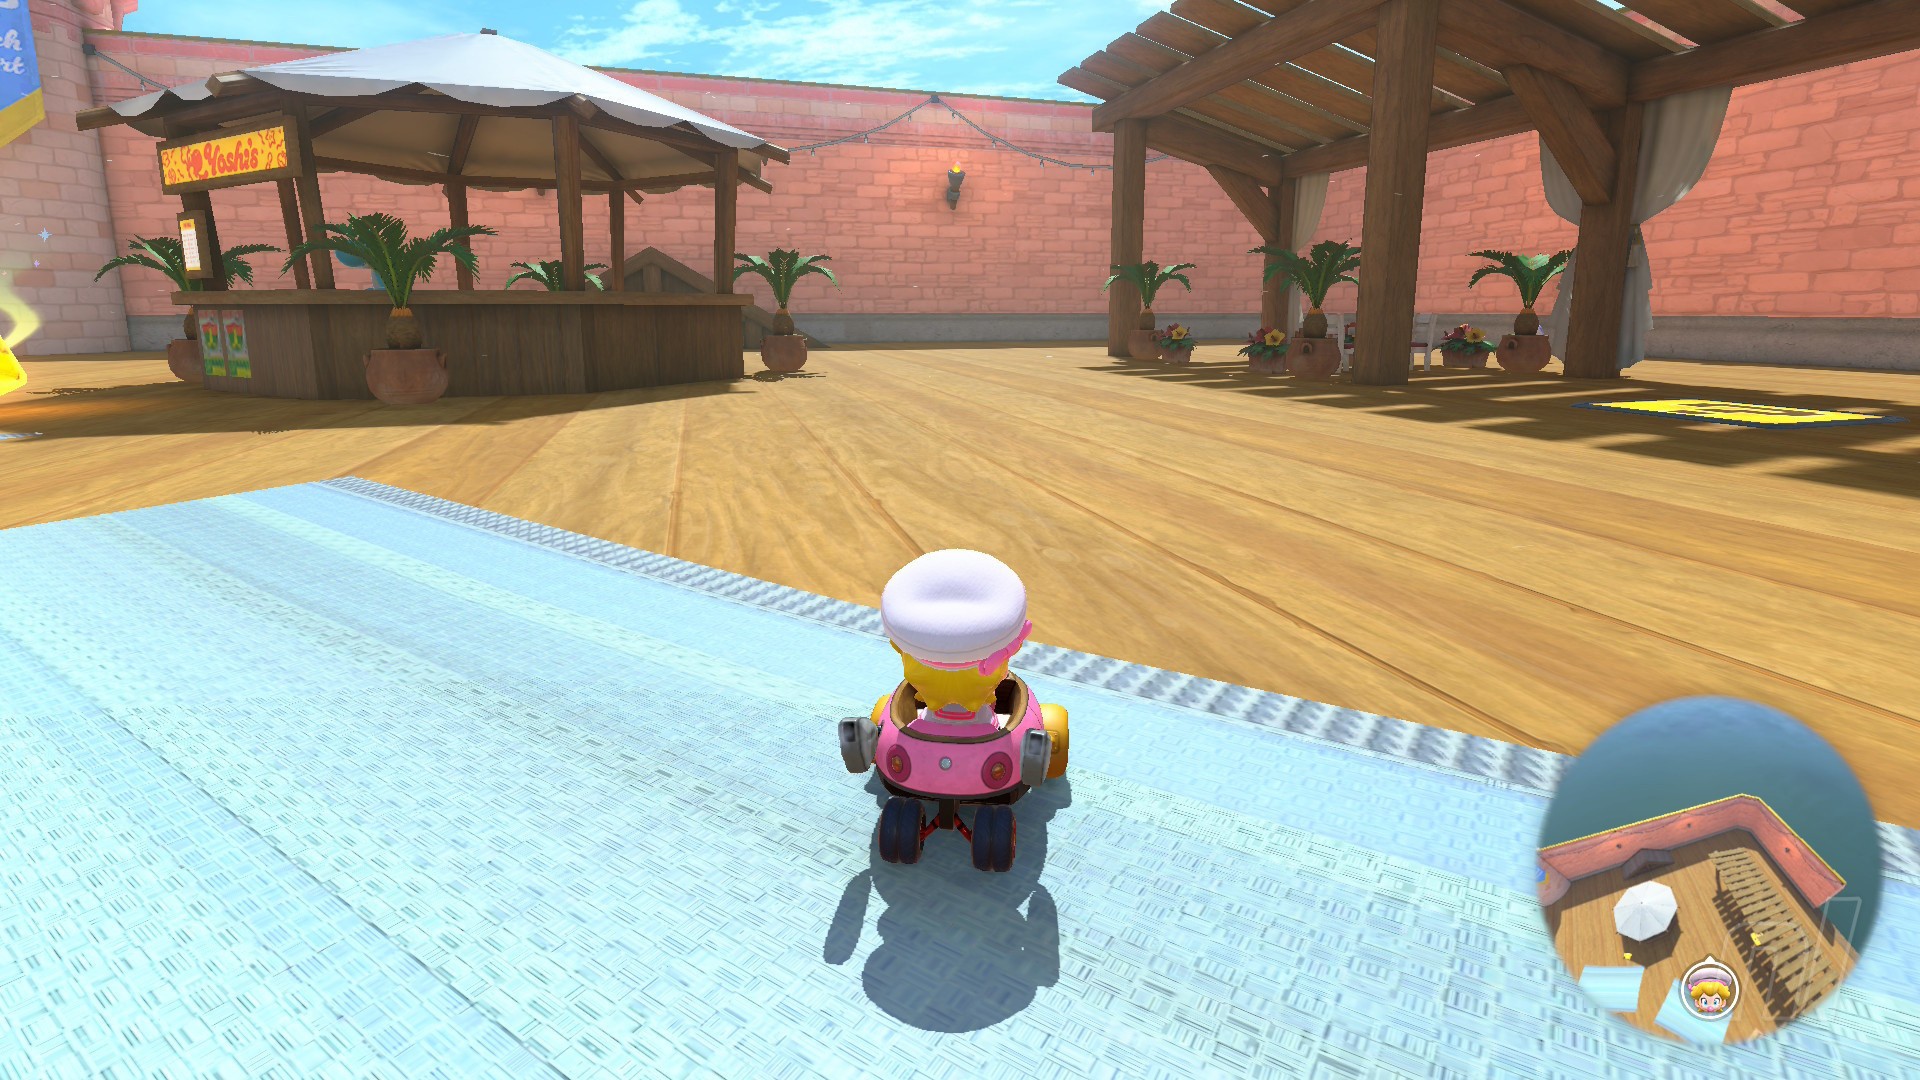
Location: Drive from the start line and then take a left when you see a Yoshi’s stand. The panel is on the wooden boardwalk here.
Panel 2
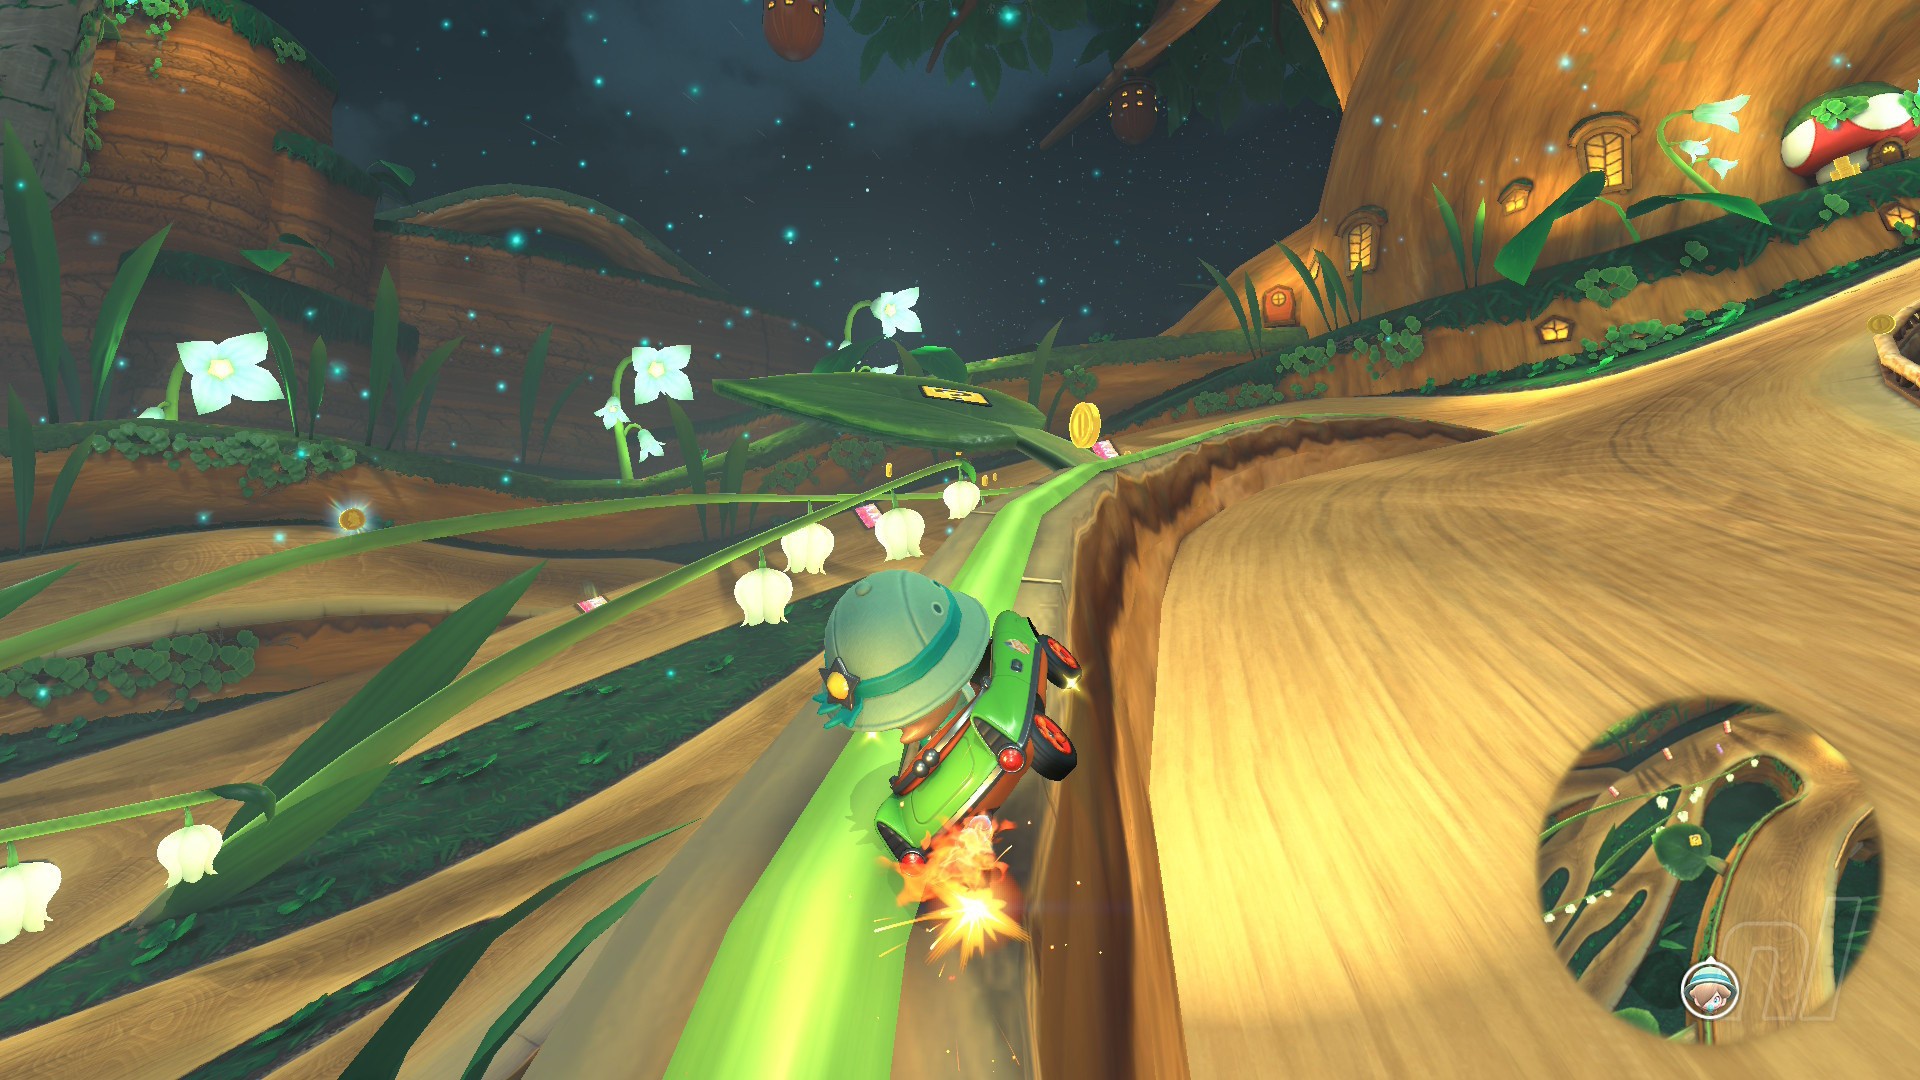
Location: Turn around from the starting line, then grind on the right rail and jump onto a leaf on the right. You might need to use rewind a few times to nail the landing.
Panel 3

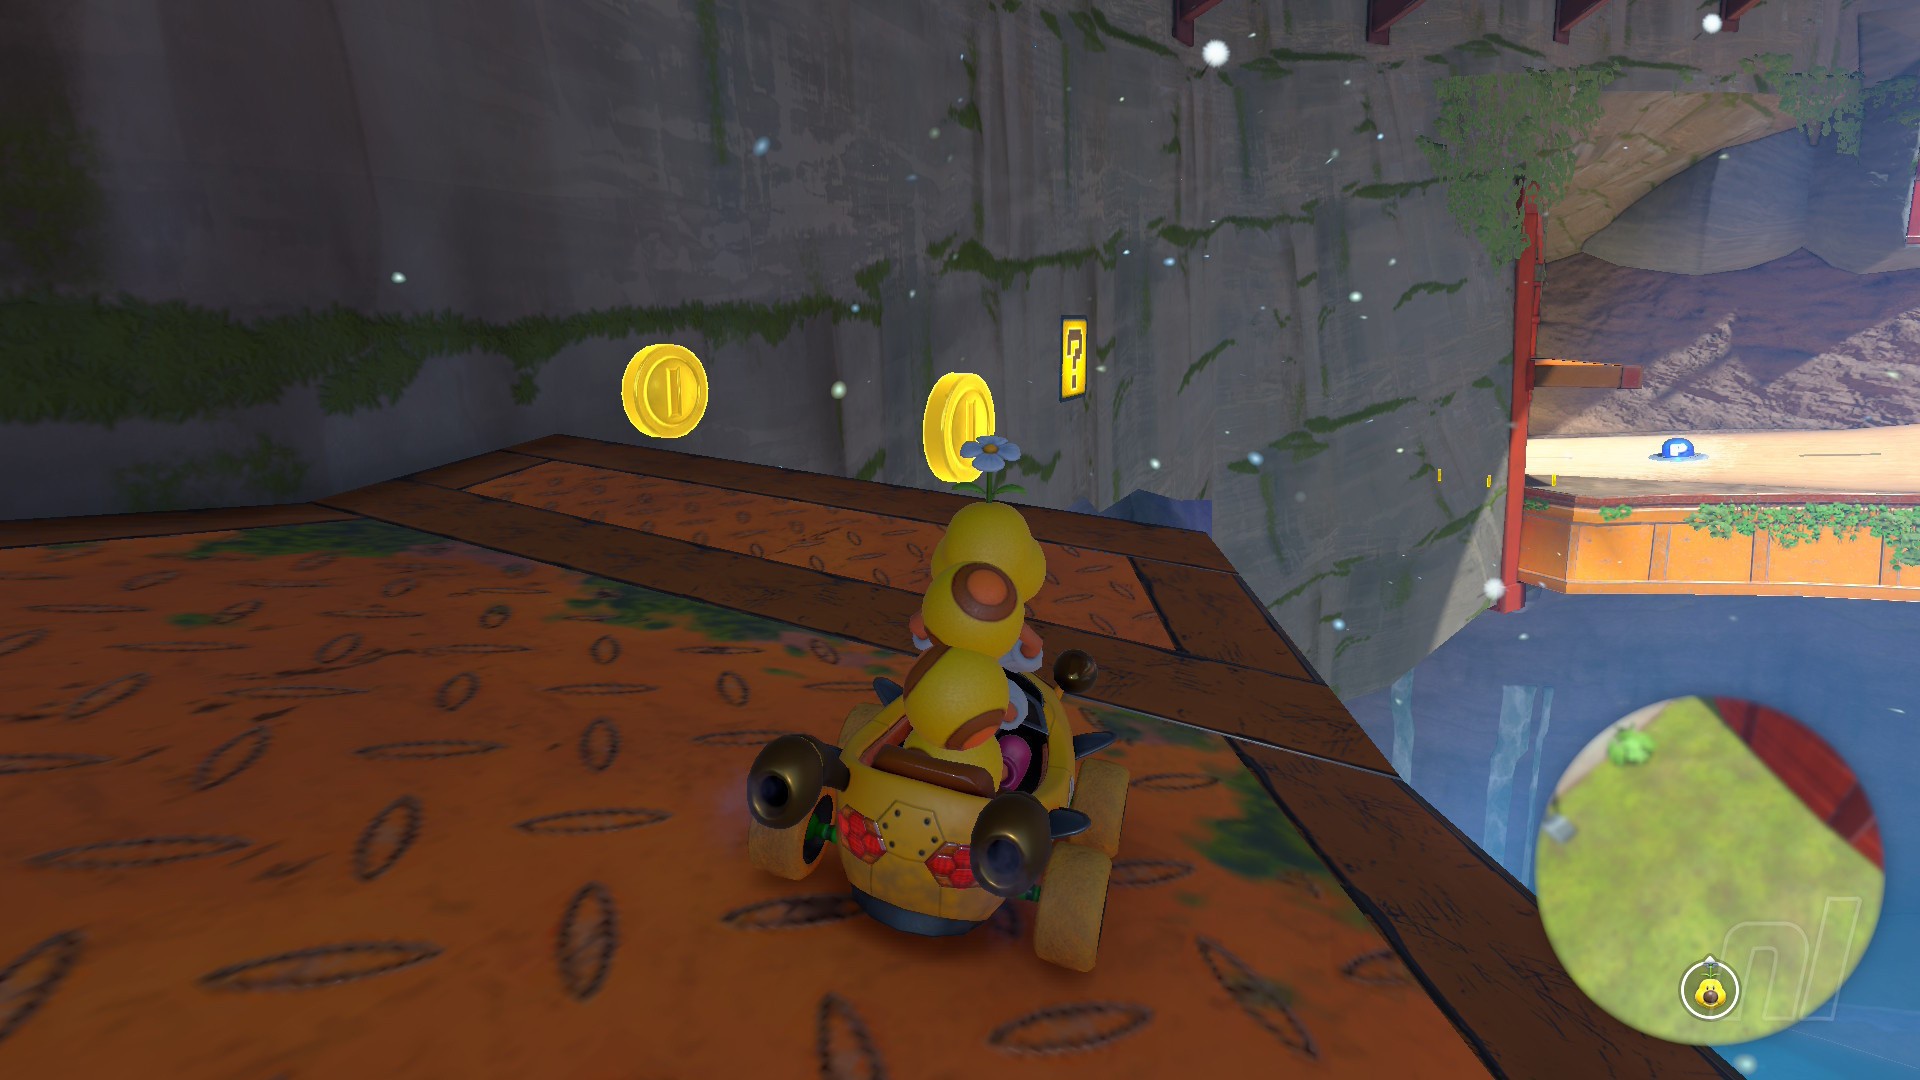
Location: Again, turn around at the start line and drive down the slope. Take a left to find an archway where there's a panel sitting underneath the tree root.
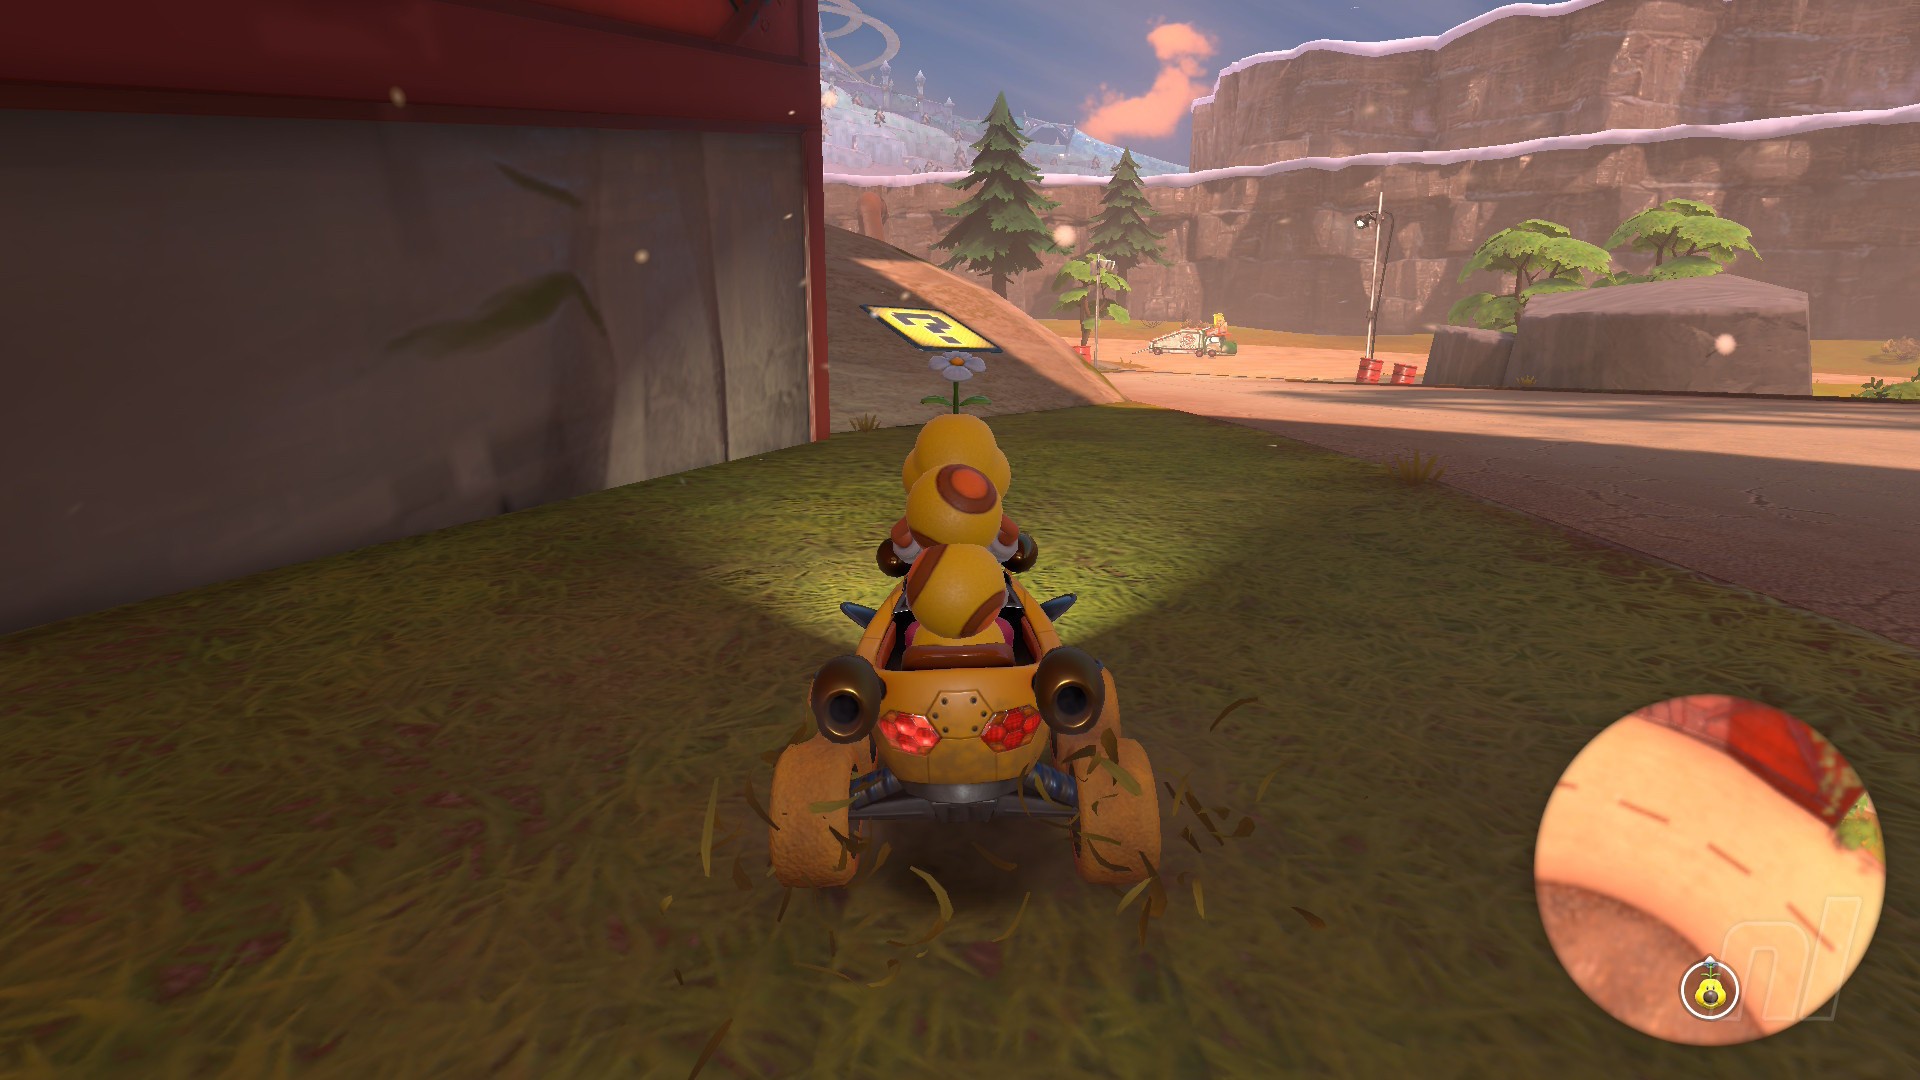
Panel 4
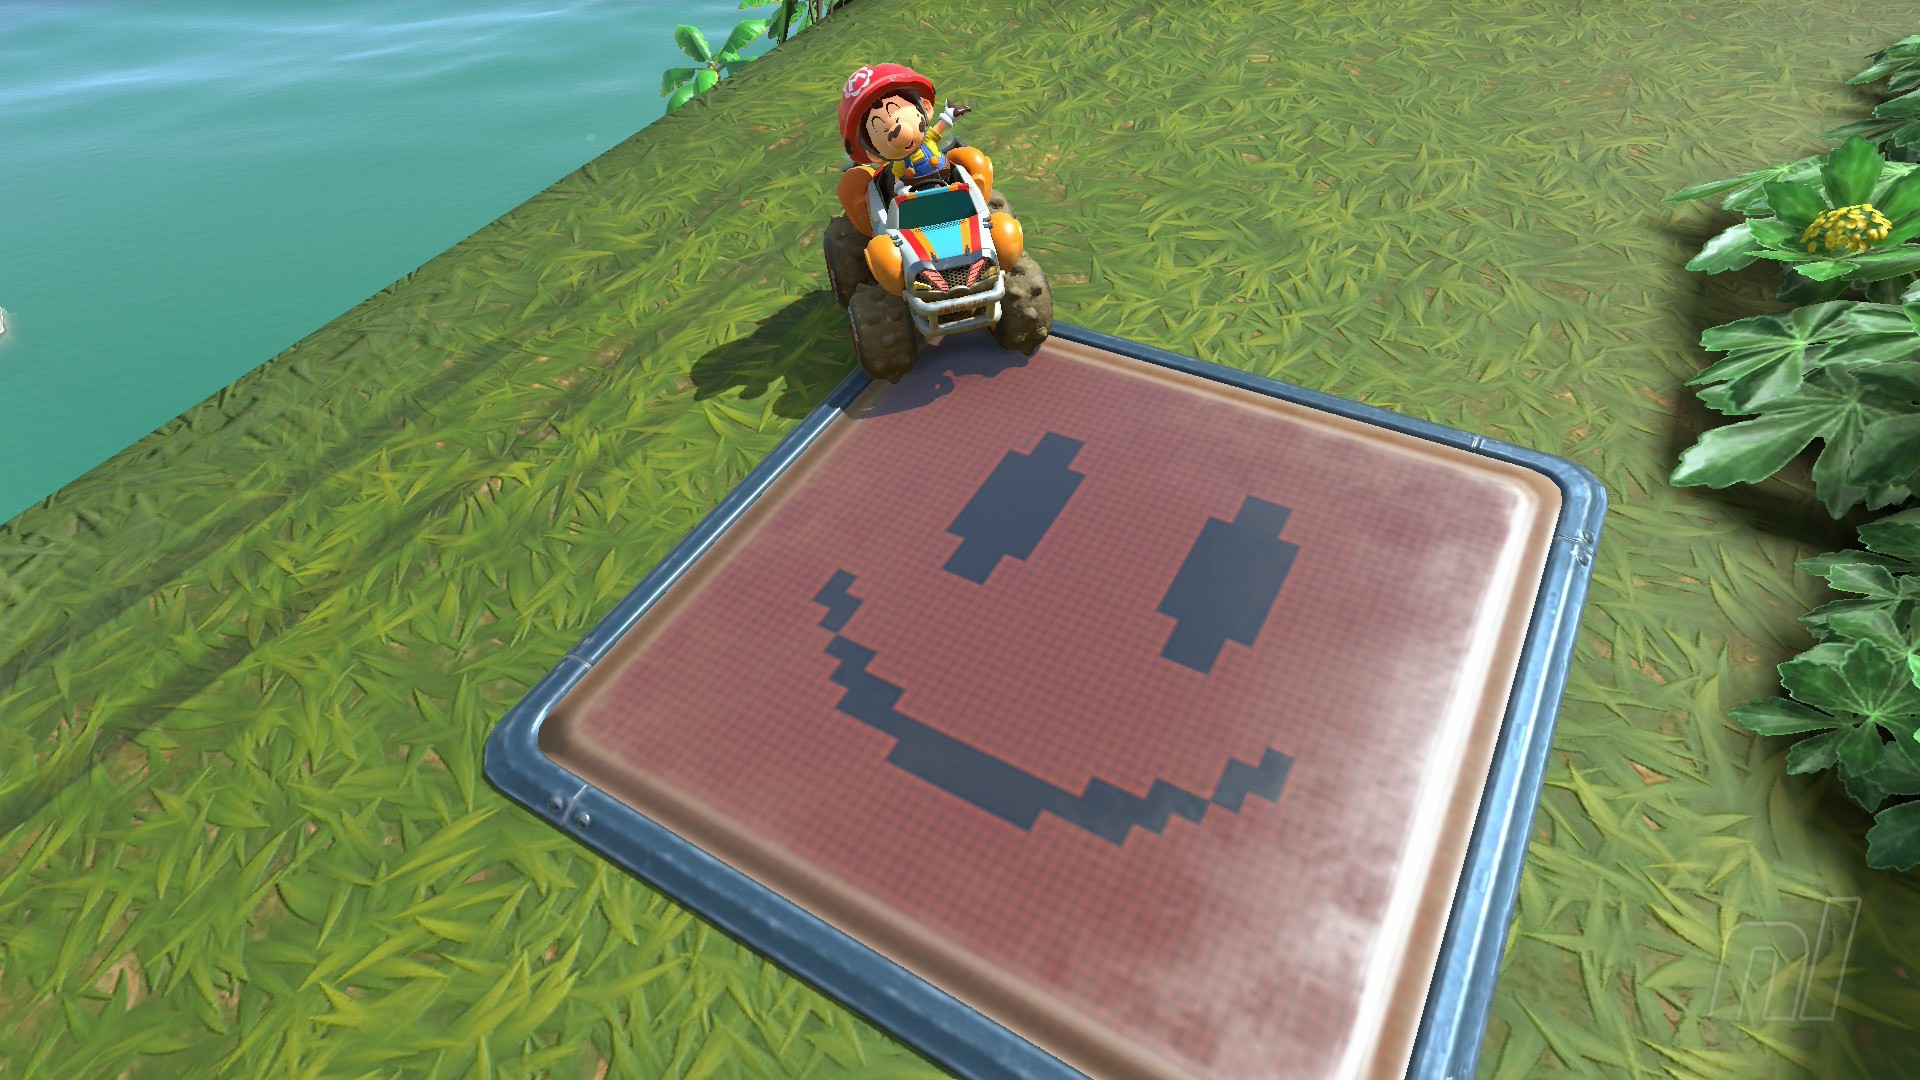
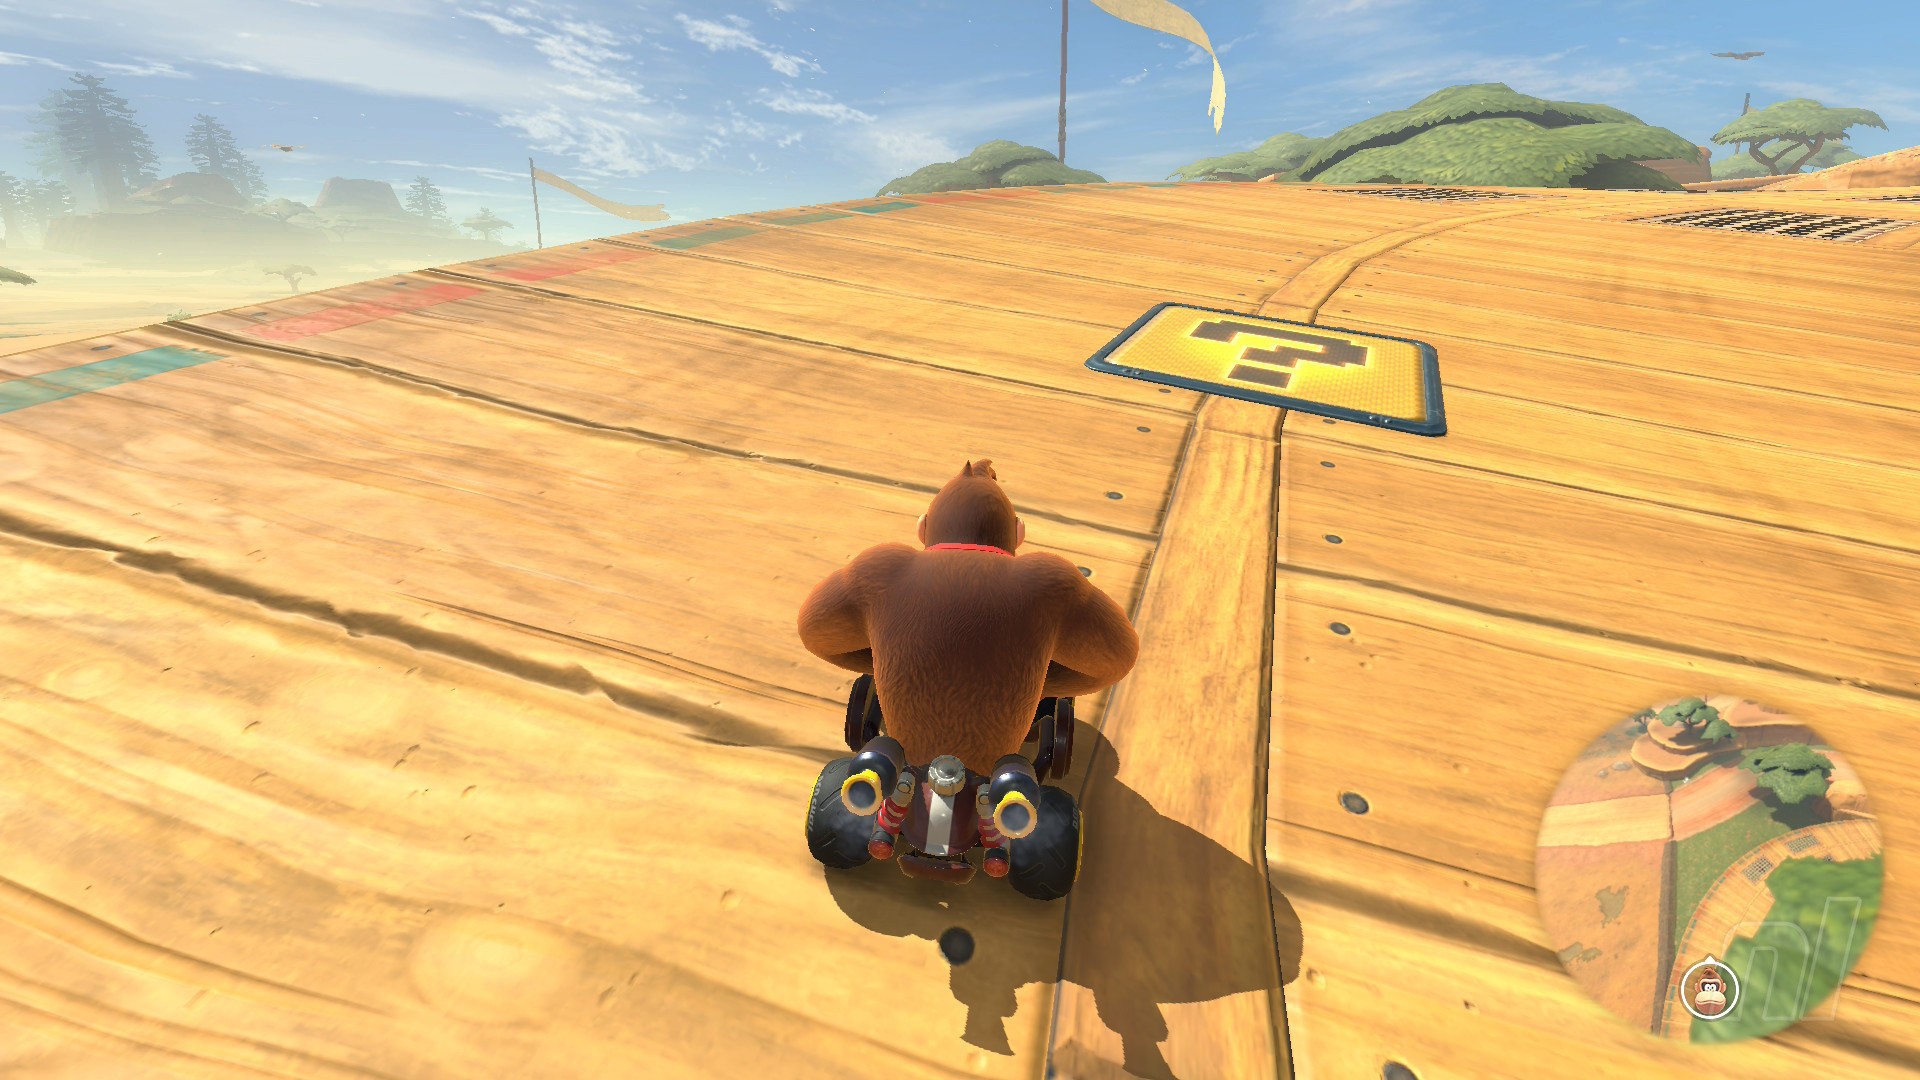
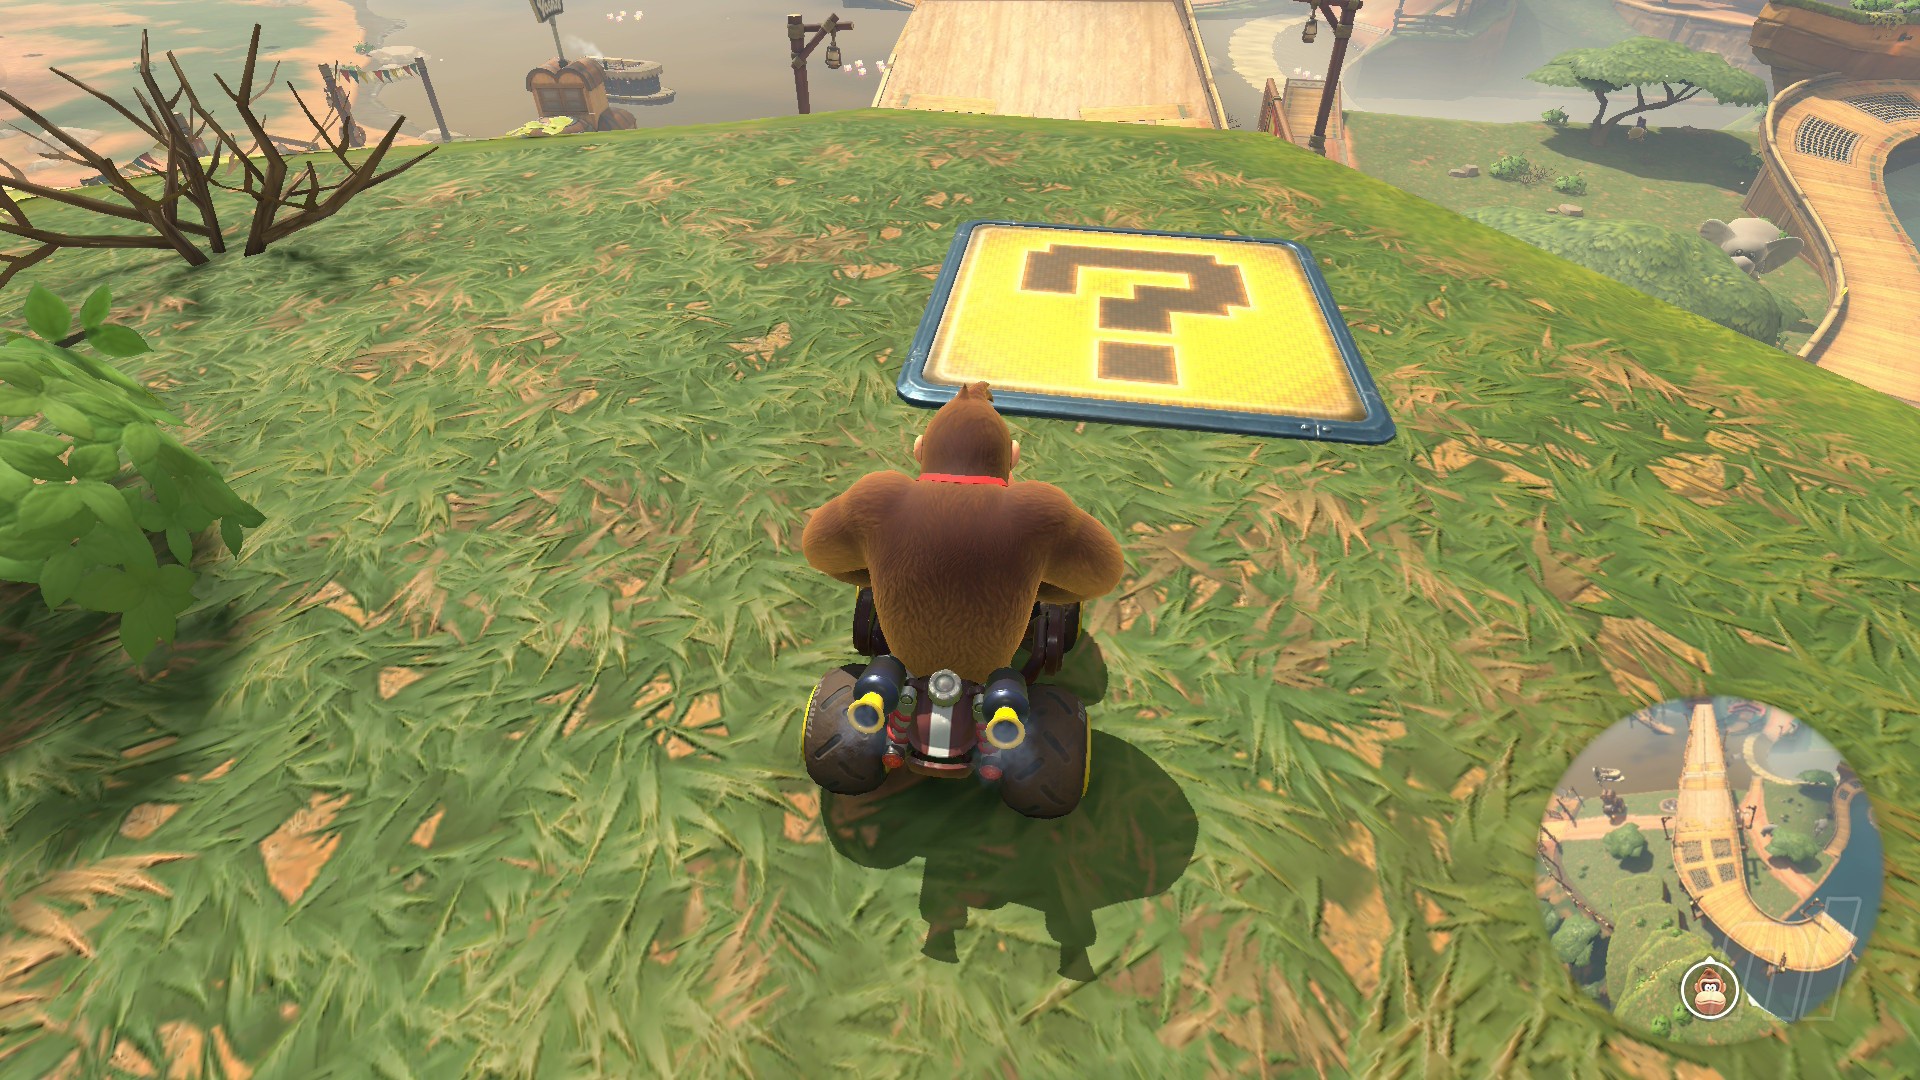
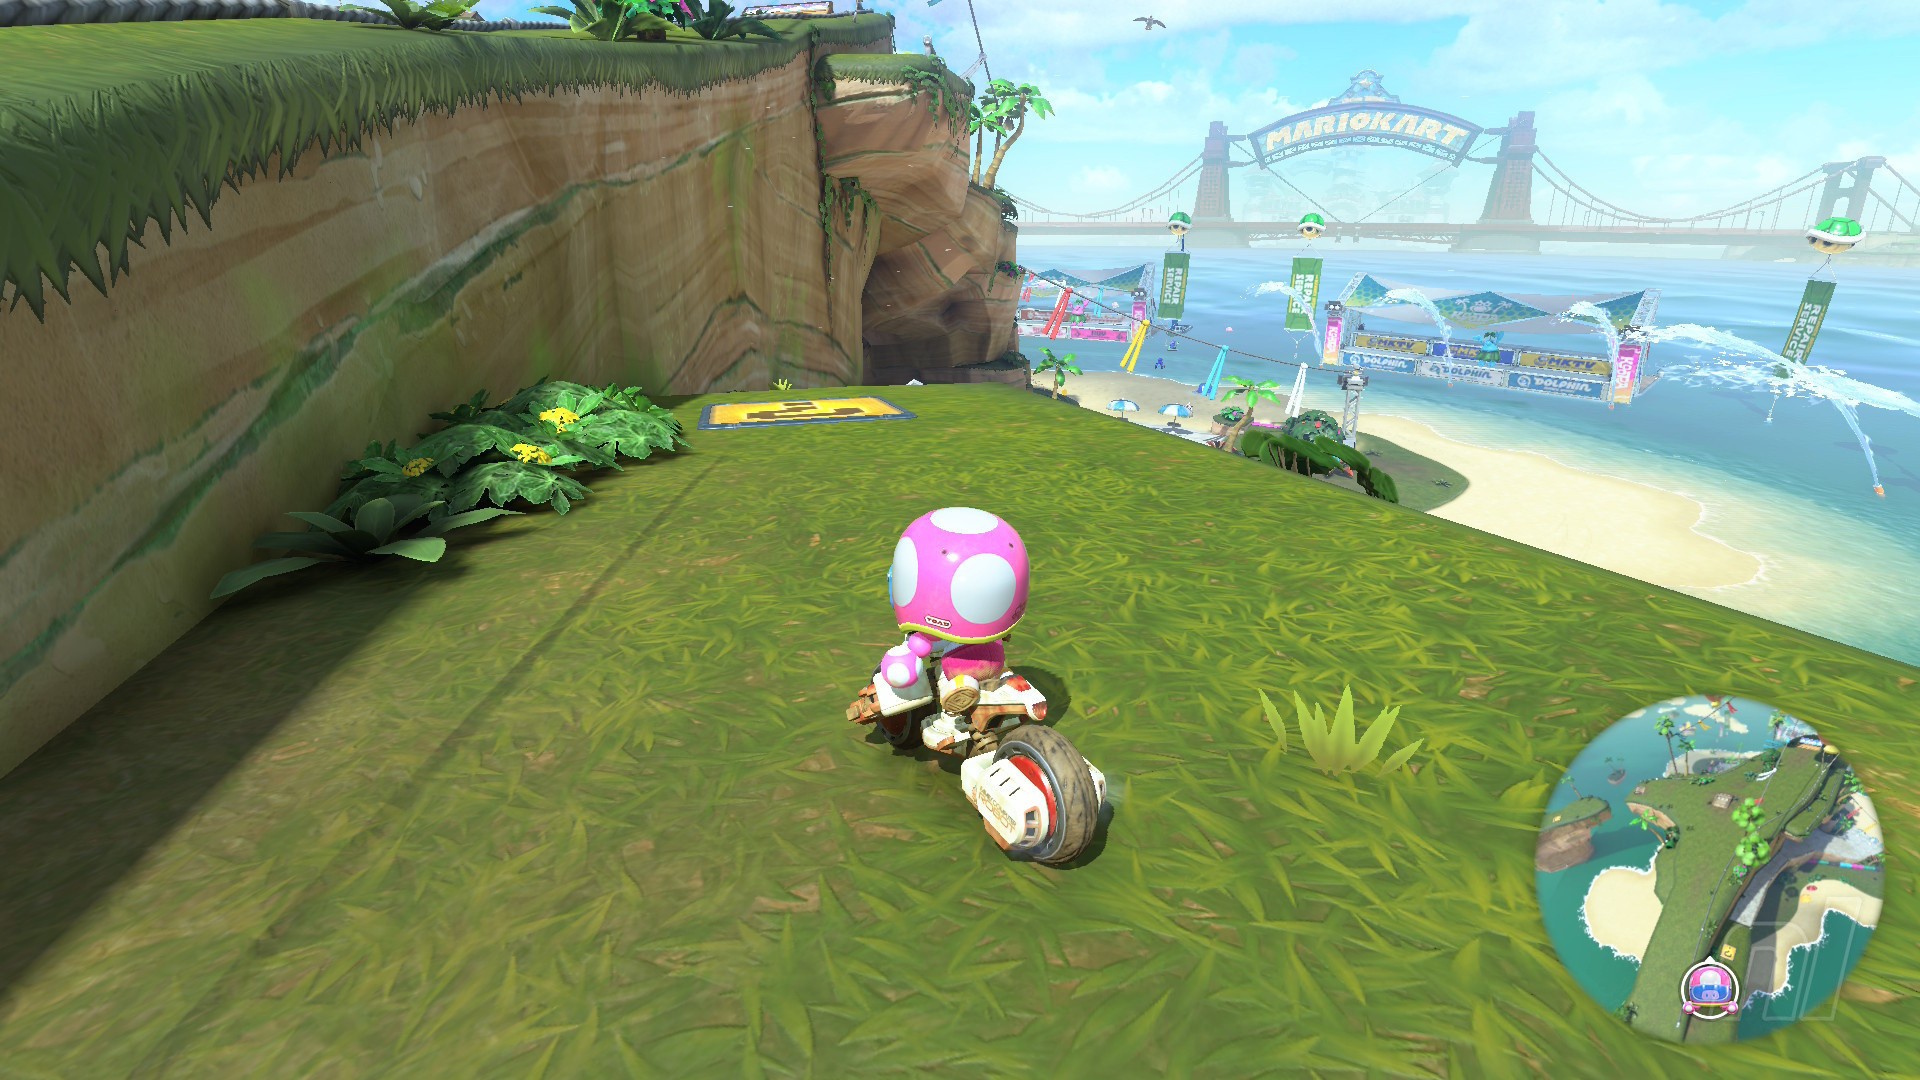
Location: After the section with the wooden boardwalk and the two grind rails, you'll be flying towards a ravine area. Take a sharp right and aim for the grassy patch there. You'll see the panel pretty clearly — yellow clashes with green nicely!
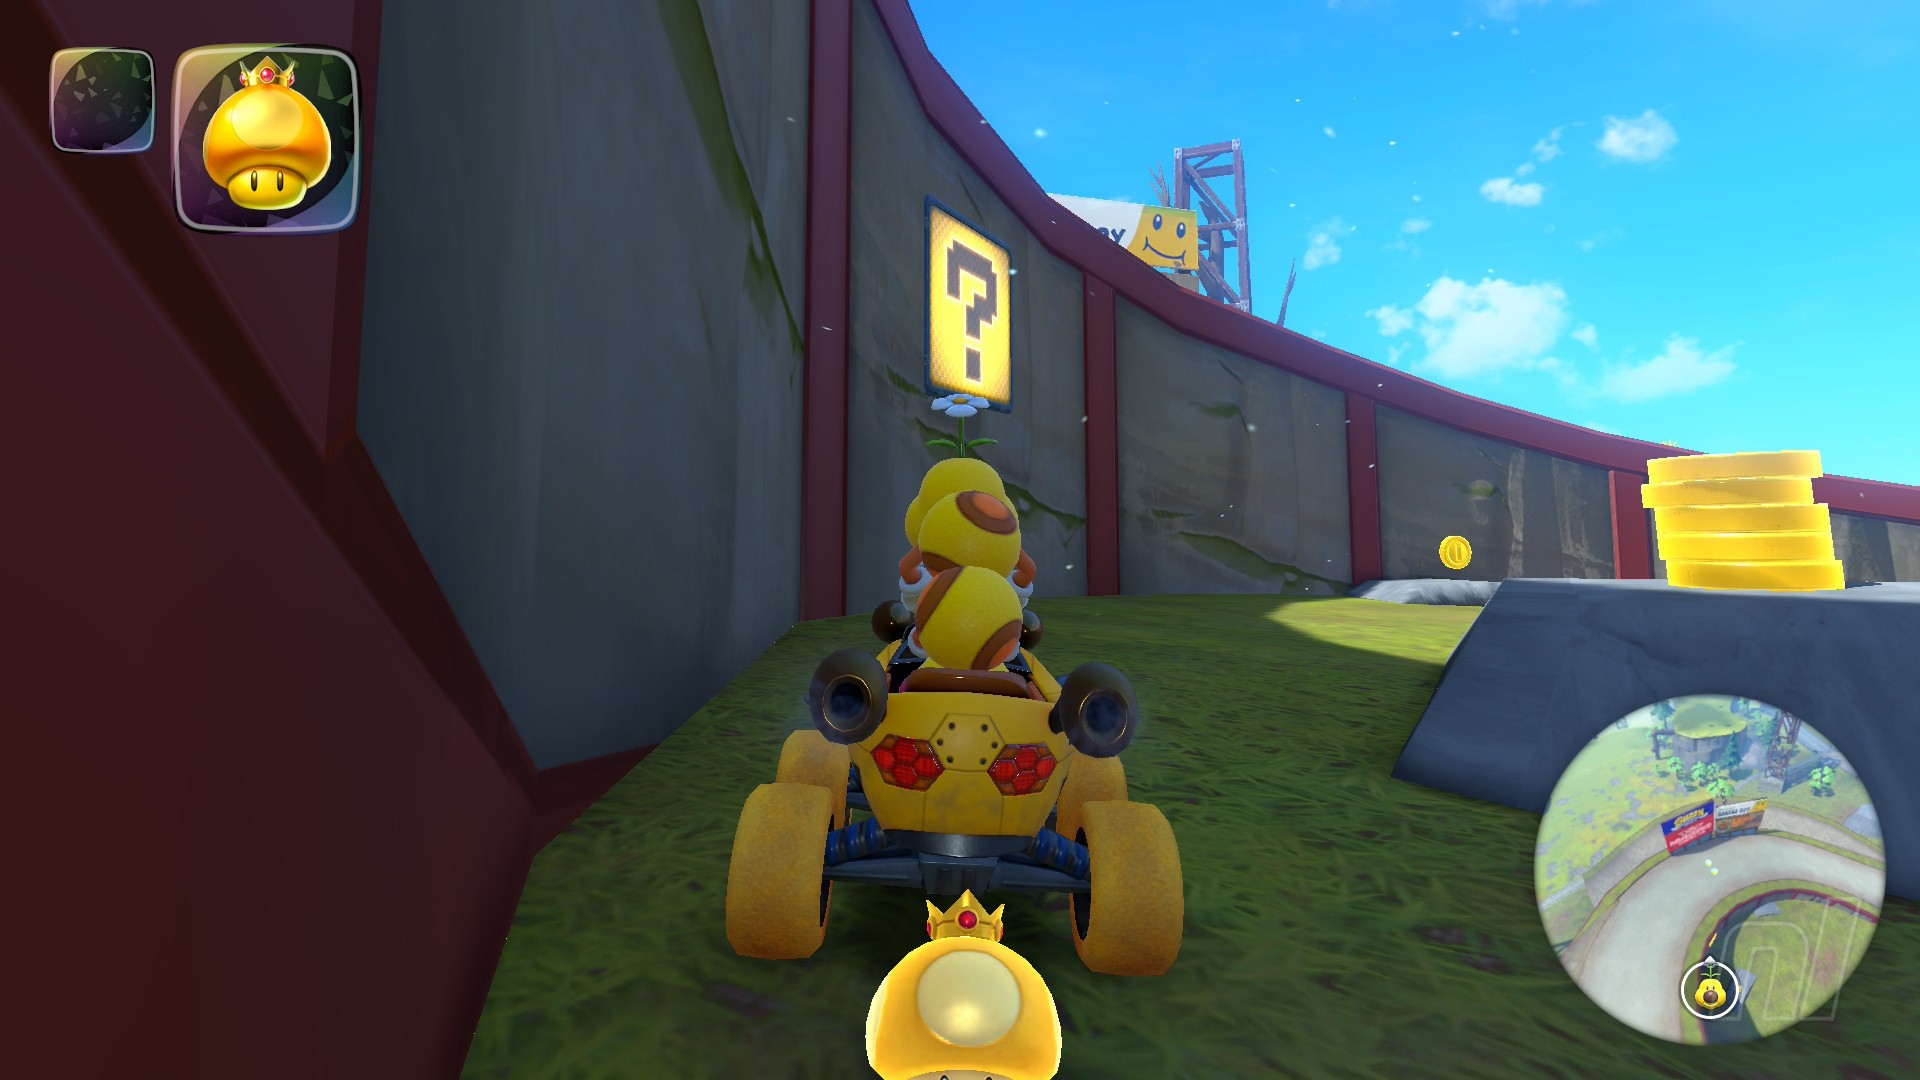
Panel 5
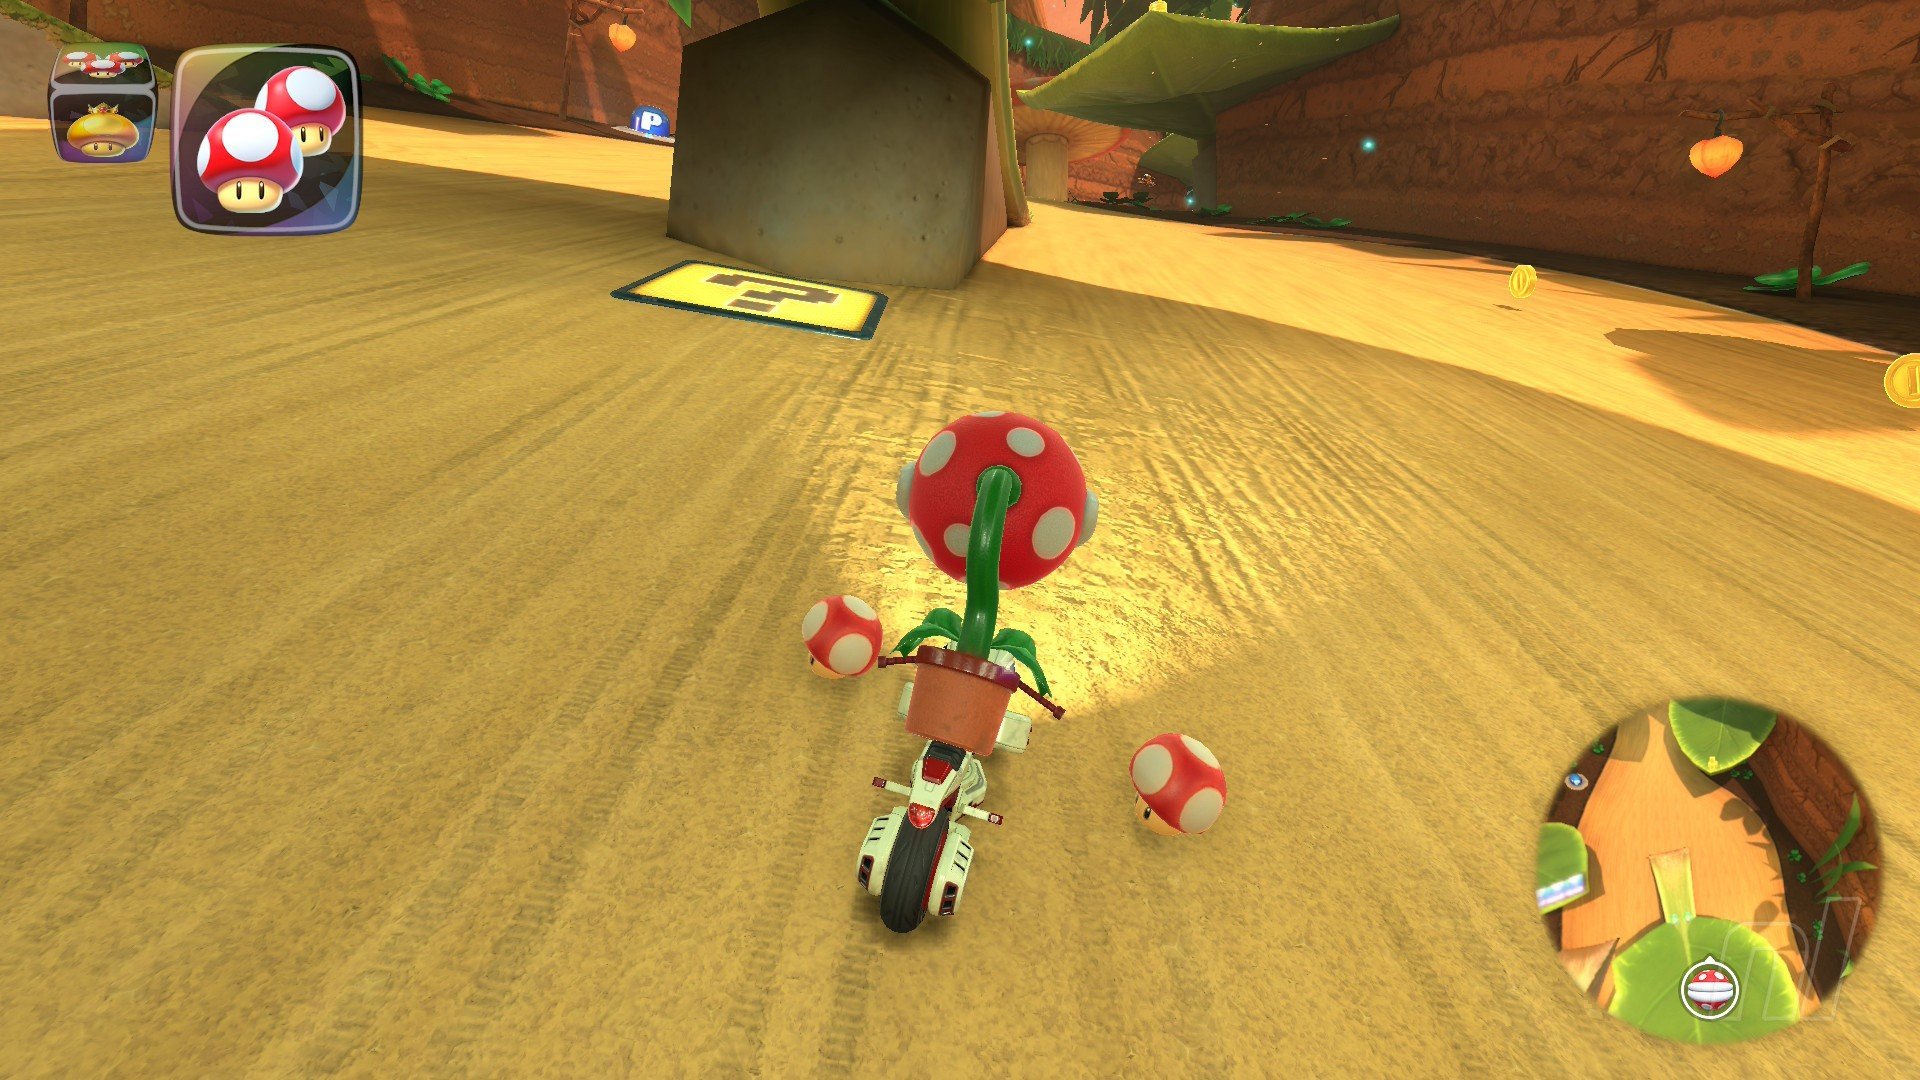
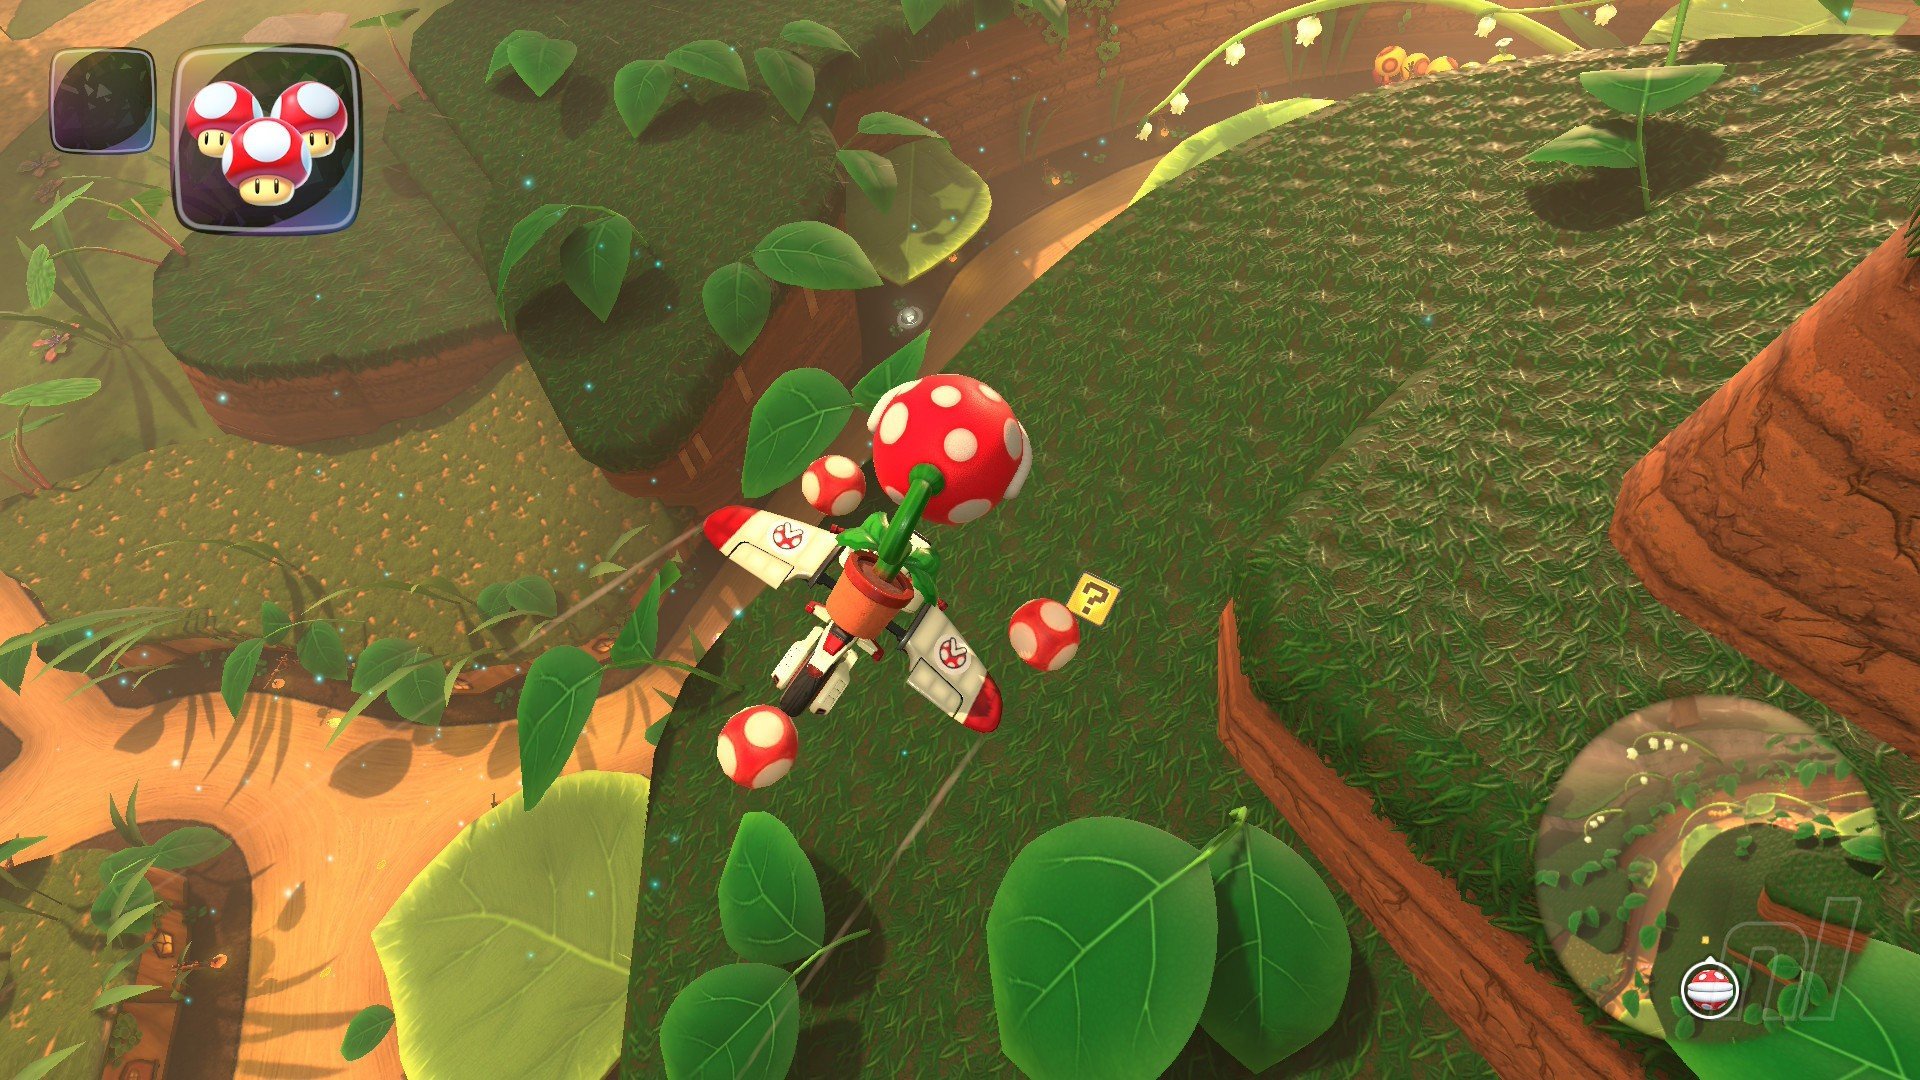
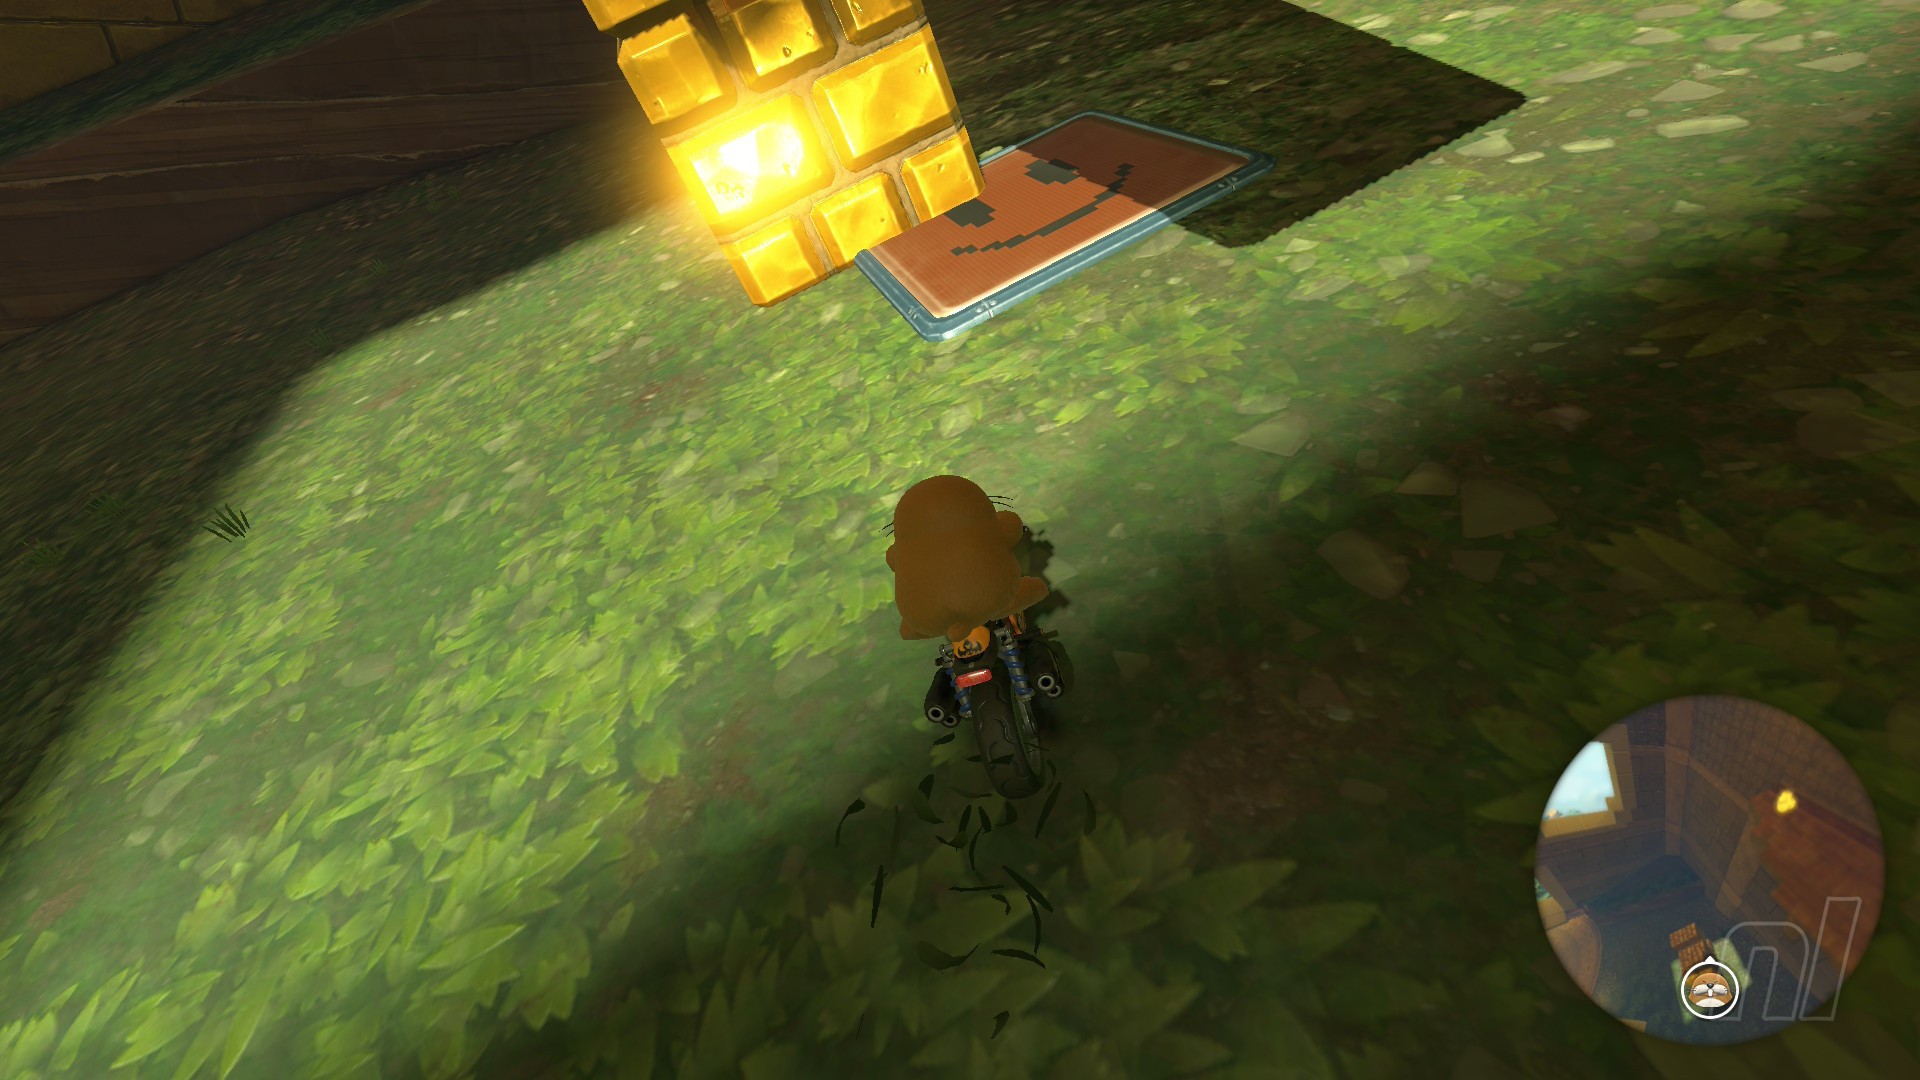
Location: In the long stretch of road with the leaves, grind rails, and piranha plants, you want to drive under one of the huge leaves, where the Panel sits directly under the leaf stem.
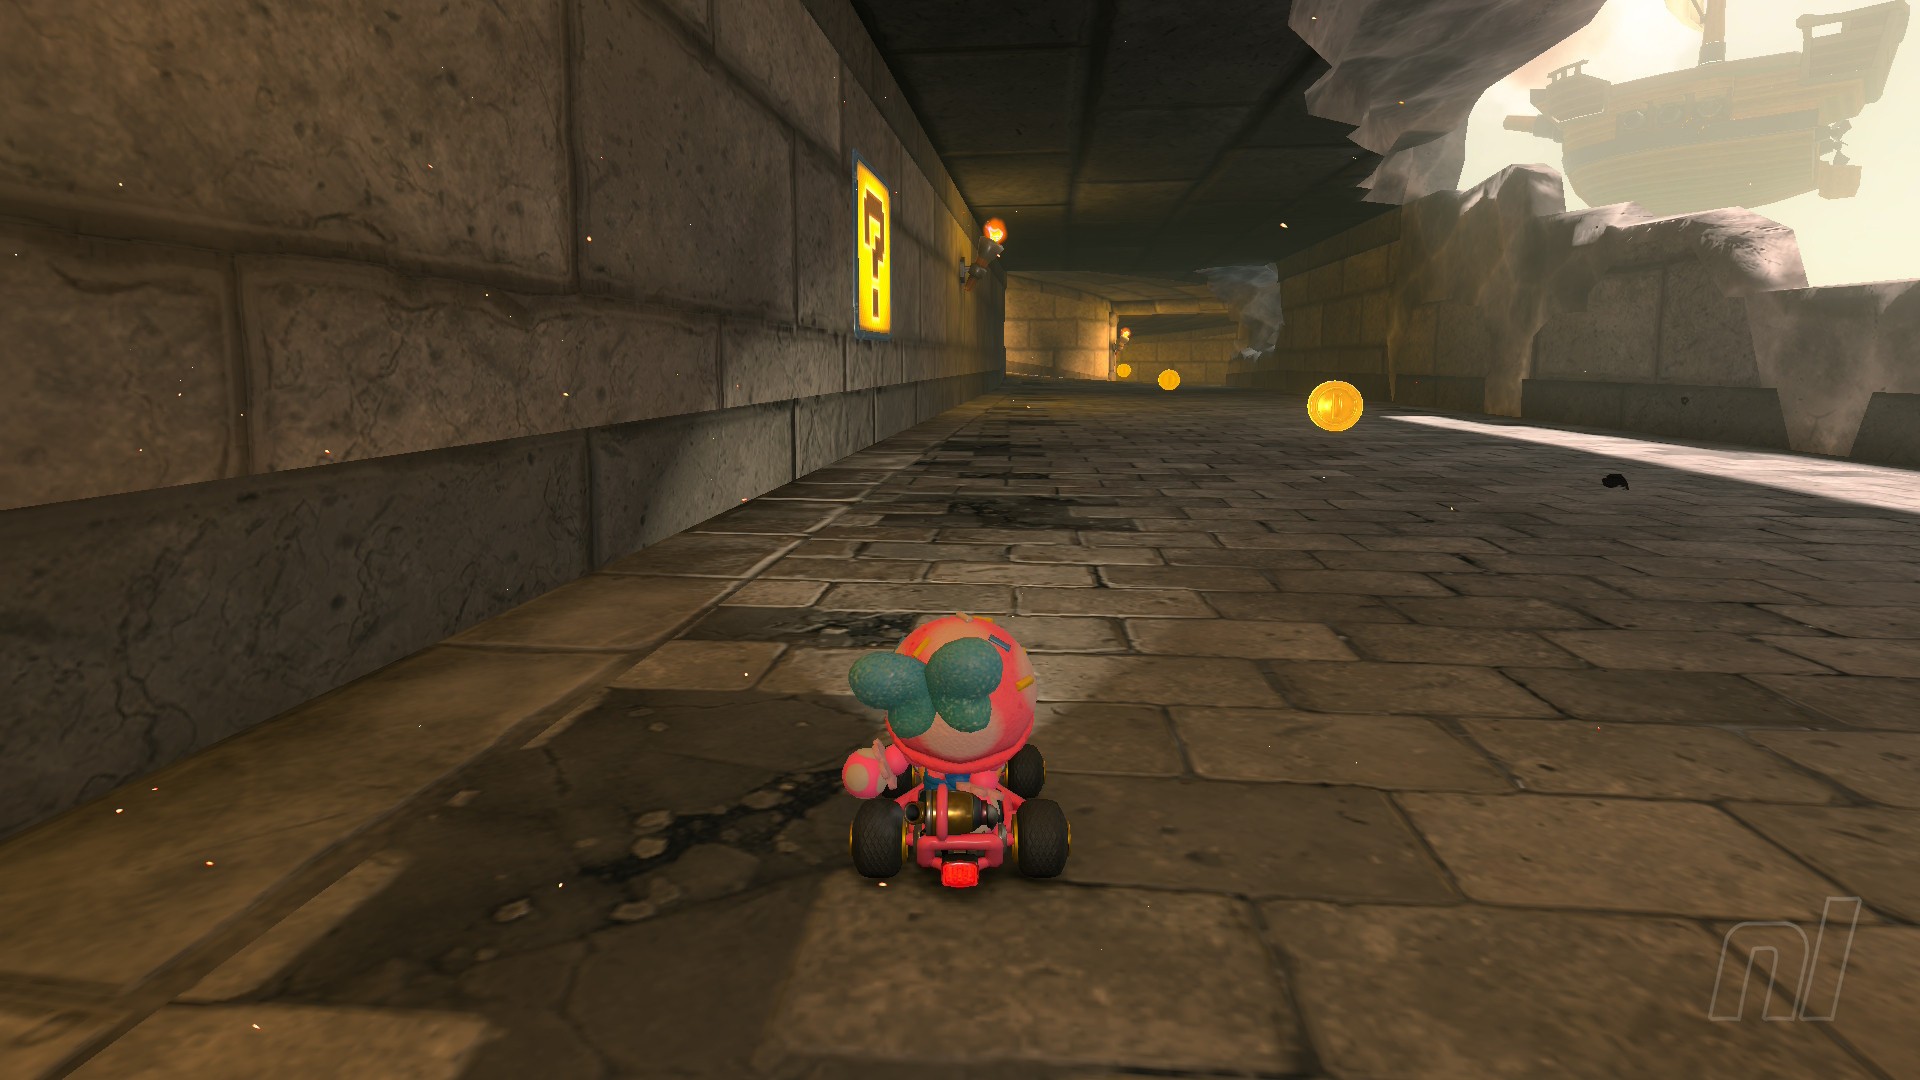
Airship Fortress Question Panels
Number of panels: 5
Collectibles region: Lava
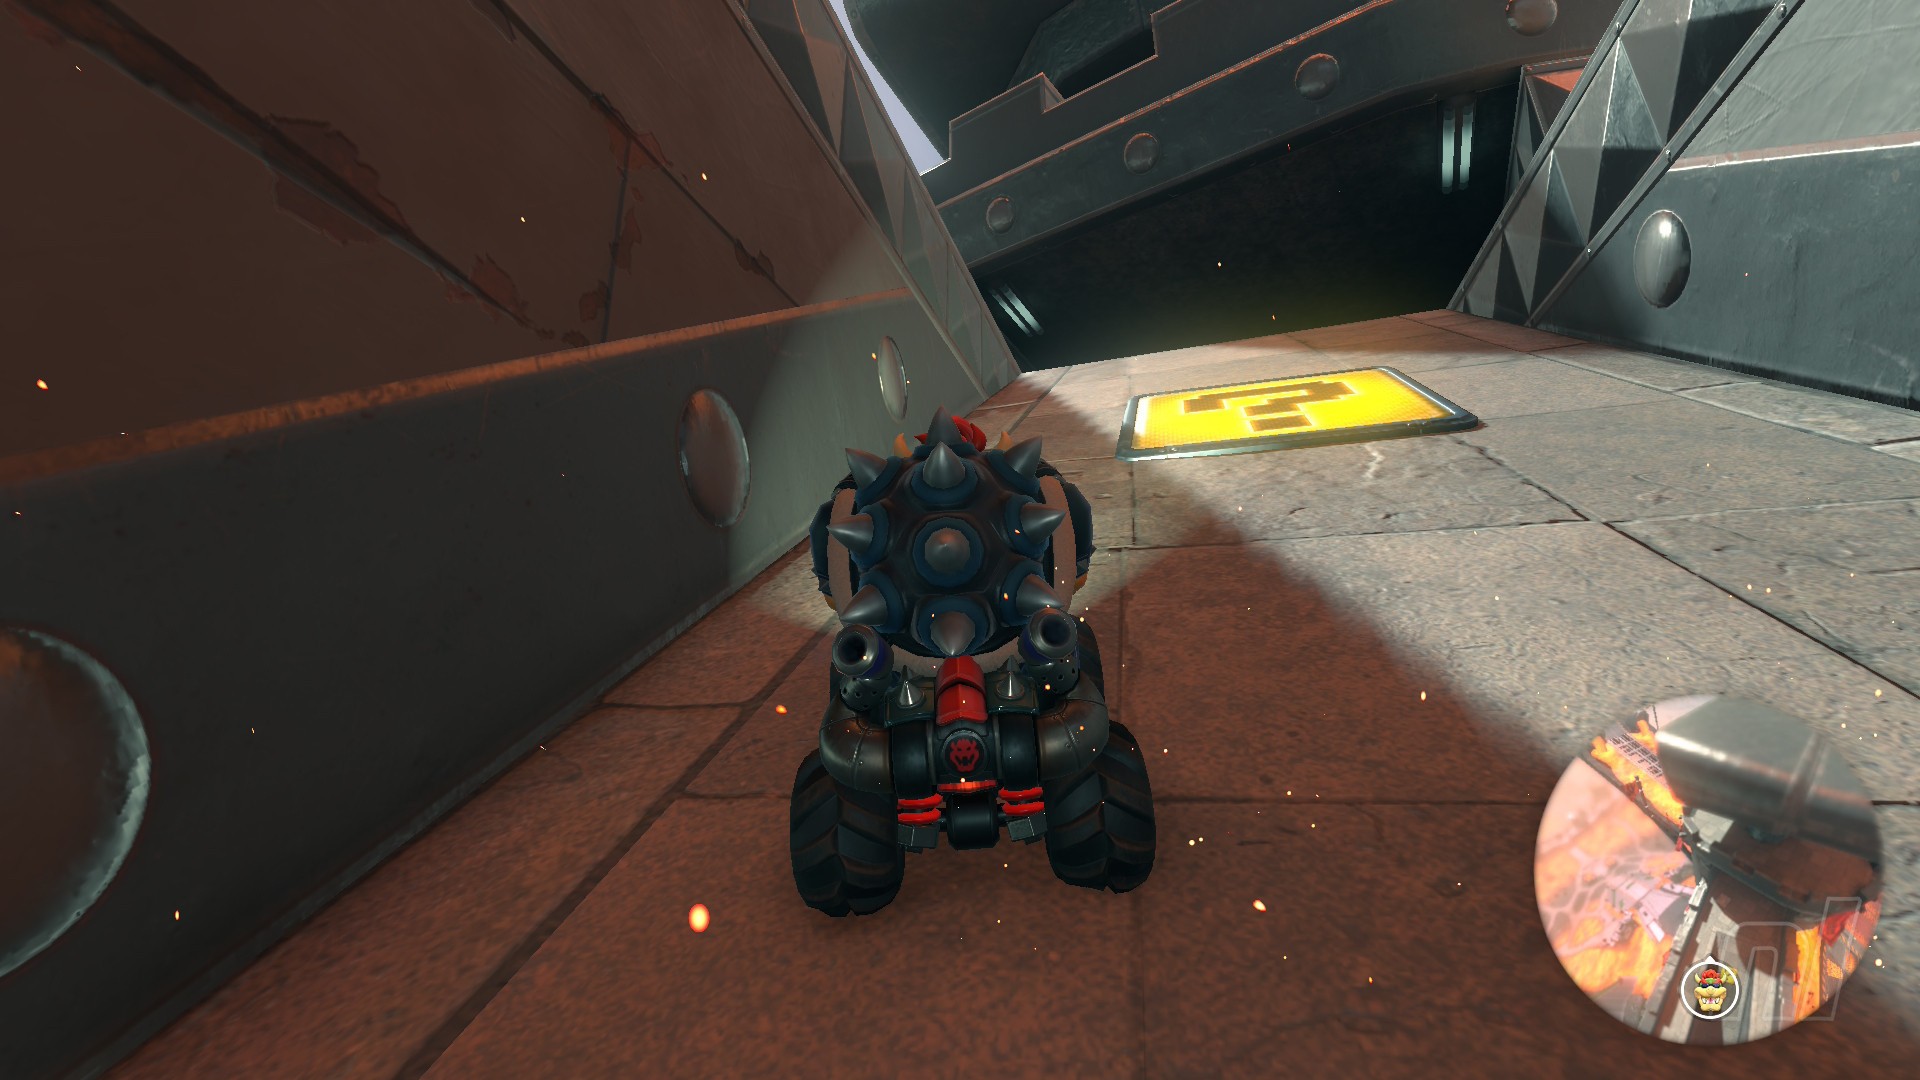
Panel 1
Location: Up the top of the fortress turret, on the left wall as you drive in a spiral to the top.
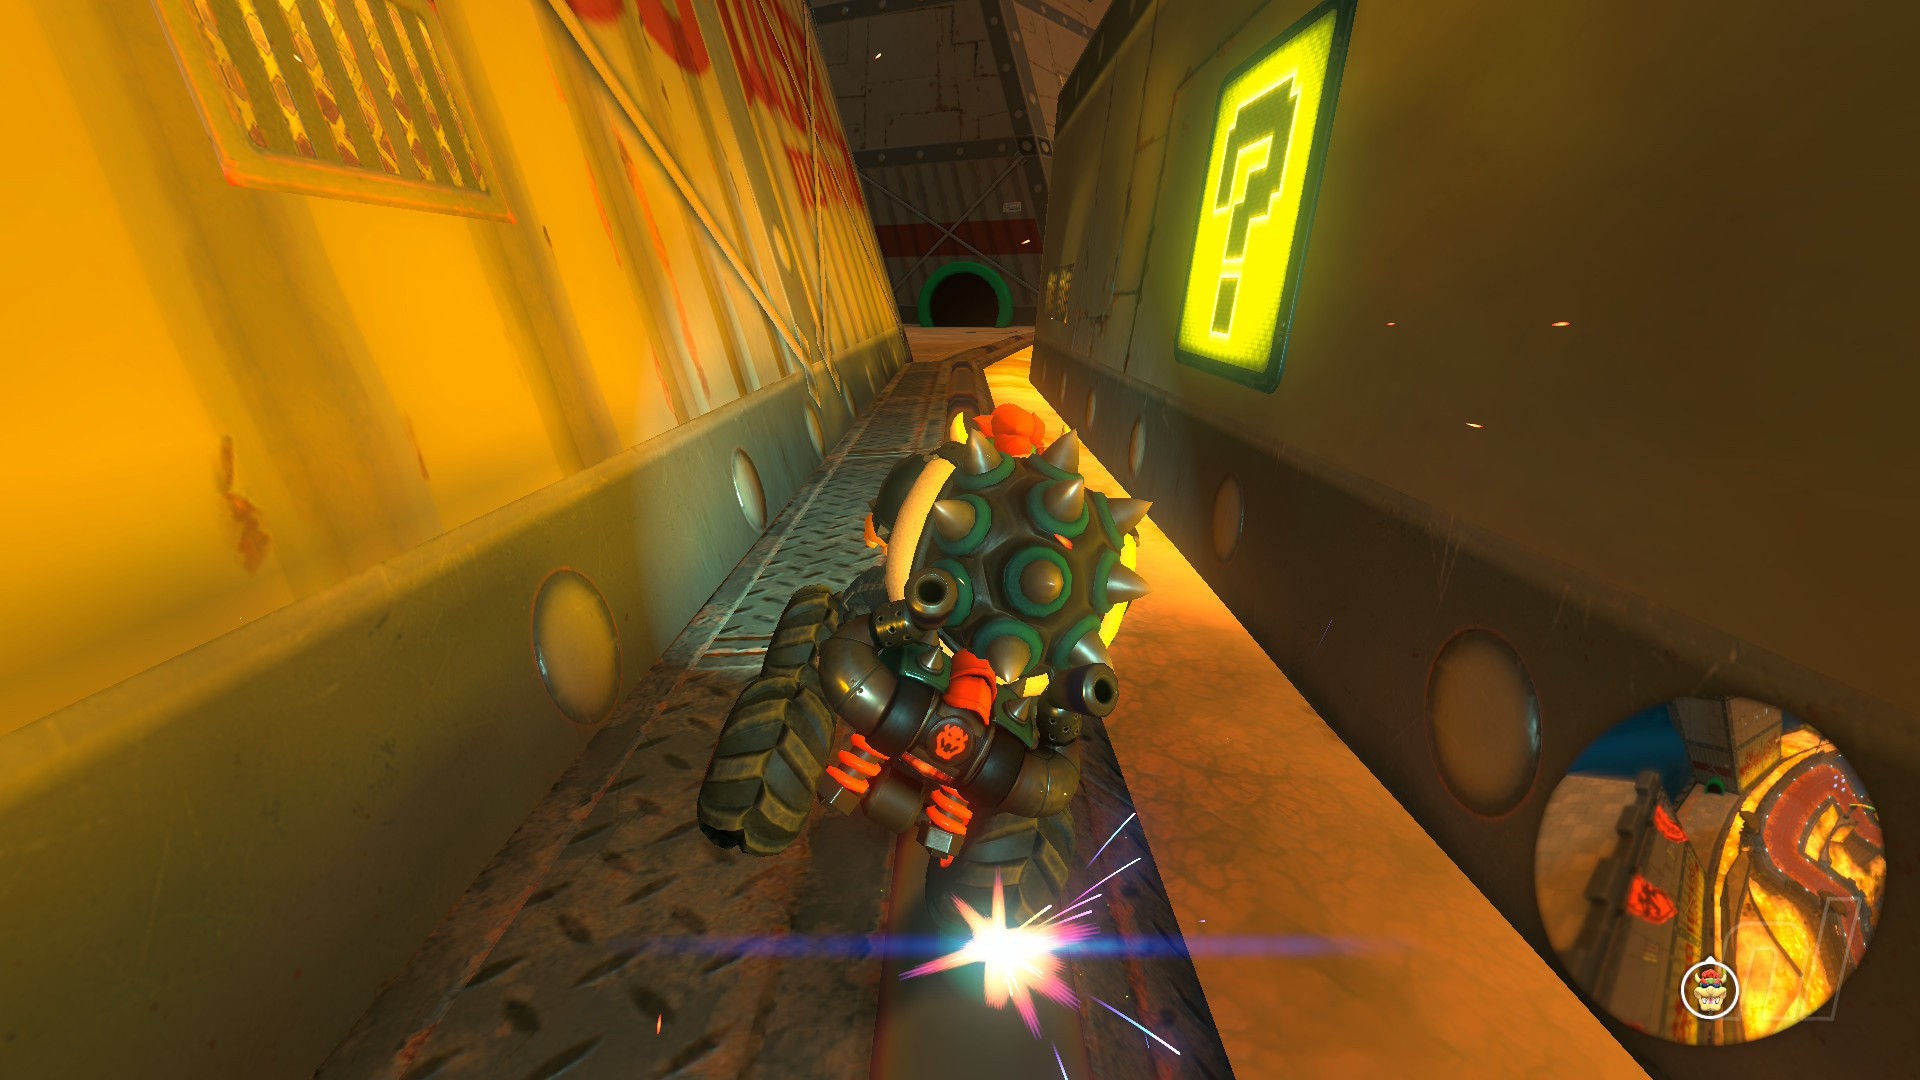
Panel 2
Location: Reverse straight from the start line and drop onto the wooden bridge. Turn left and you'll find this panel on the wall.
Panel 3
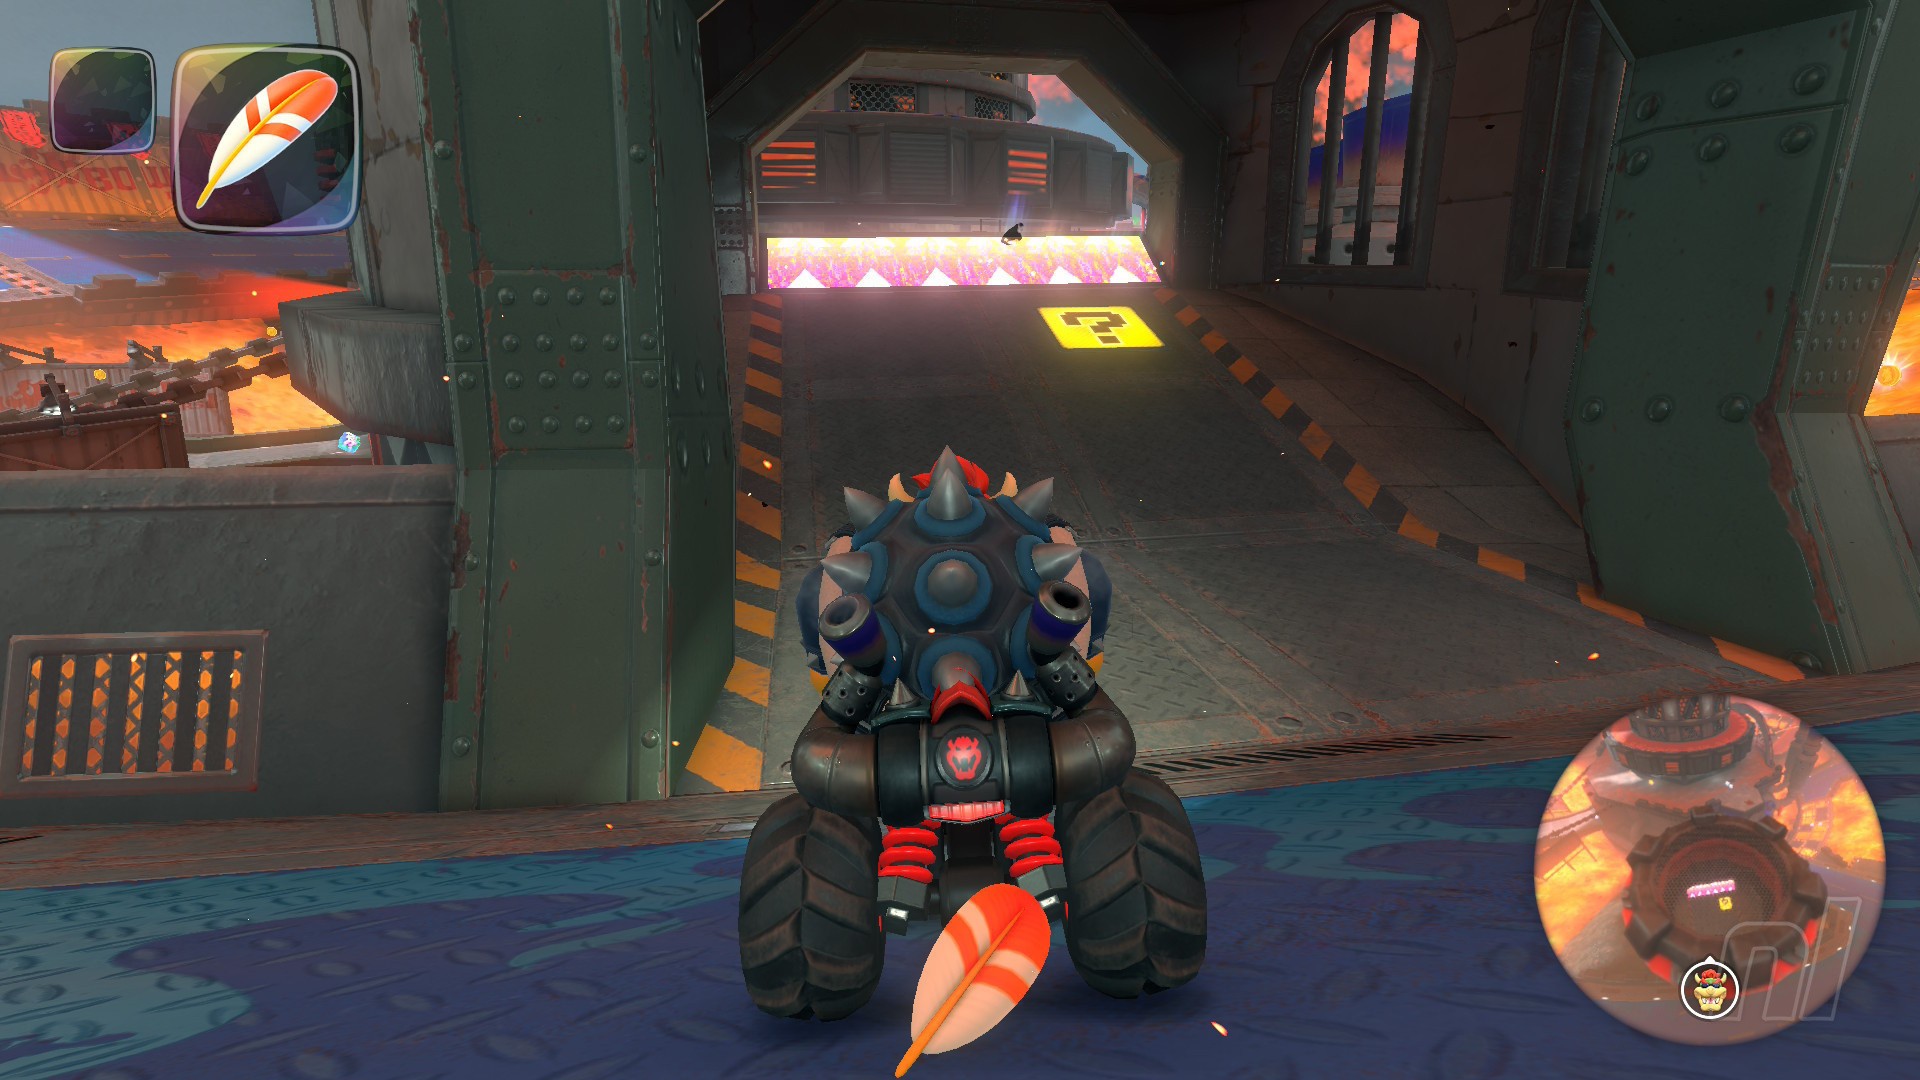
Location: Head straight from the start line and hop the wall at the end of the Bullet Bill run. Drive straight through the factory and rail ride the grey railing around to the left. The panel is on the left wall as you approach the other side of the ship.
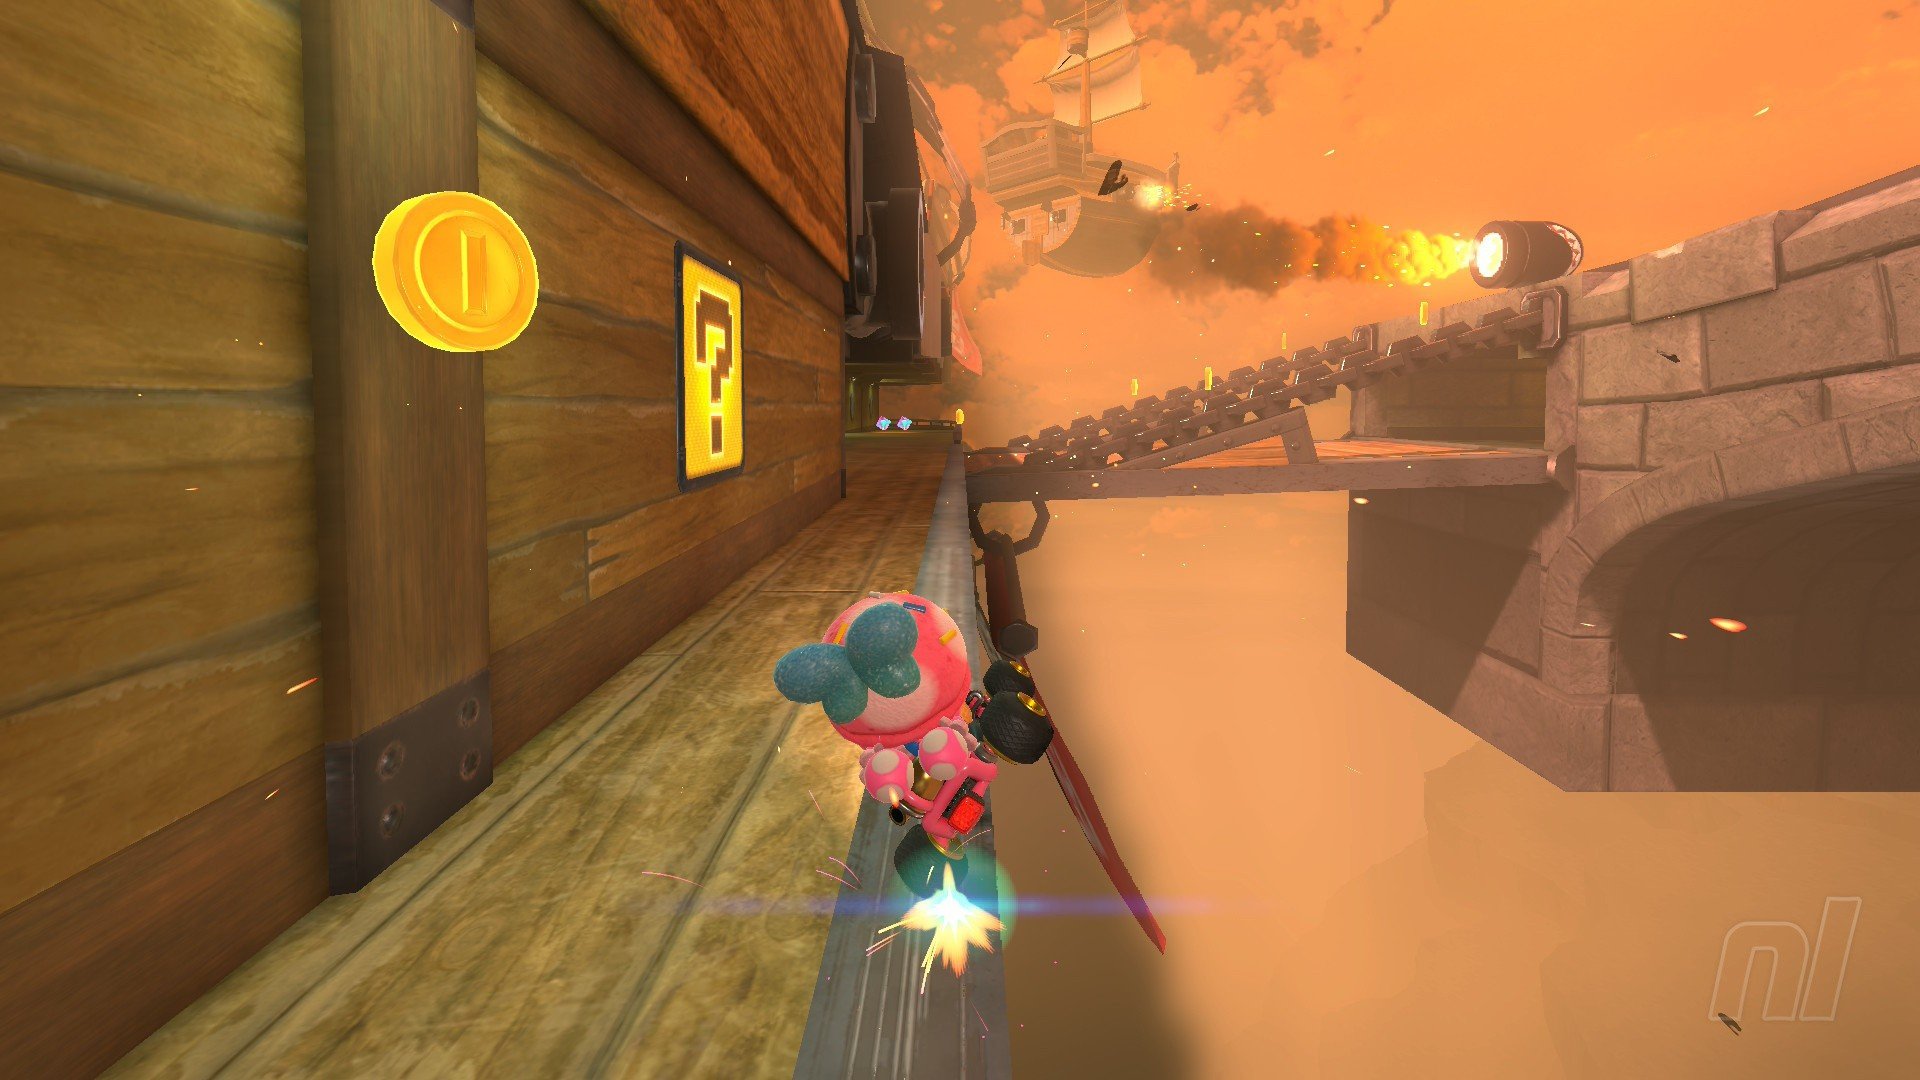
Panel 4
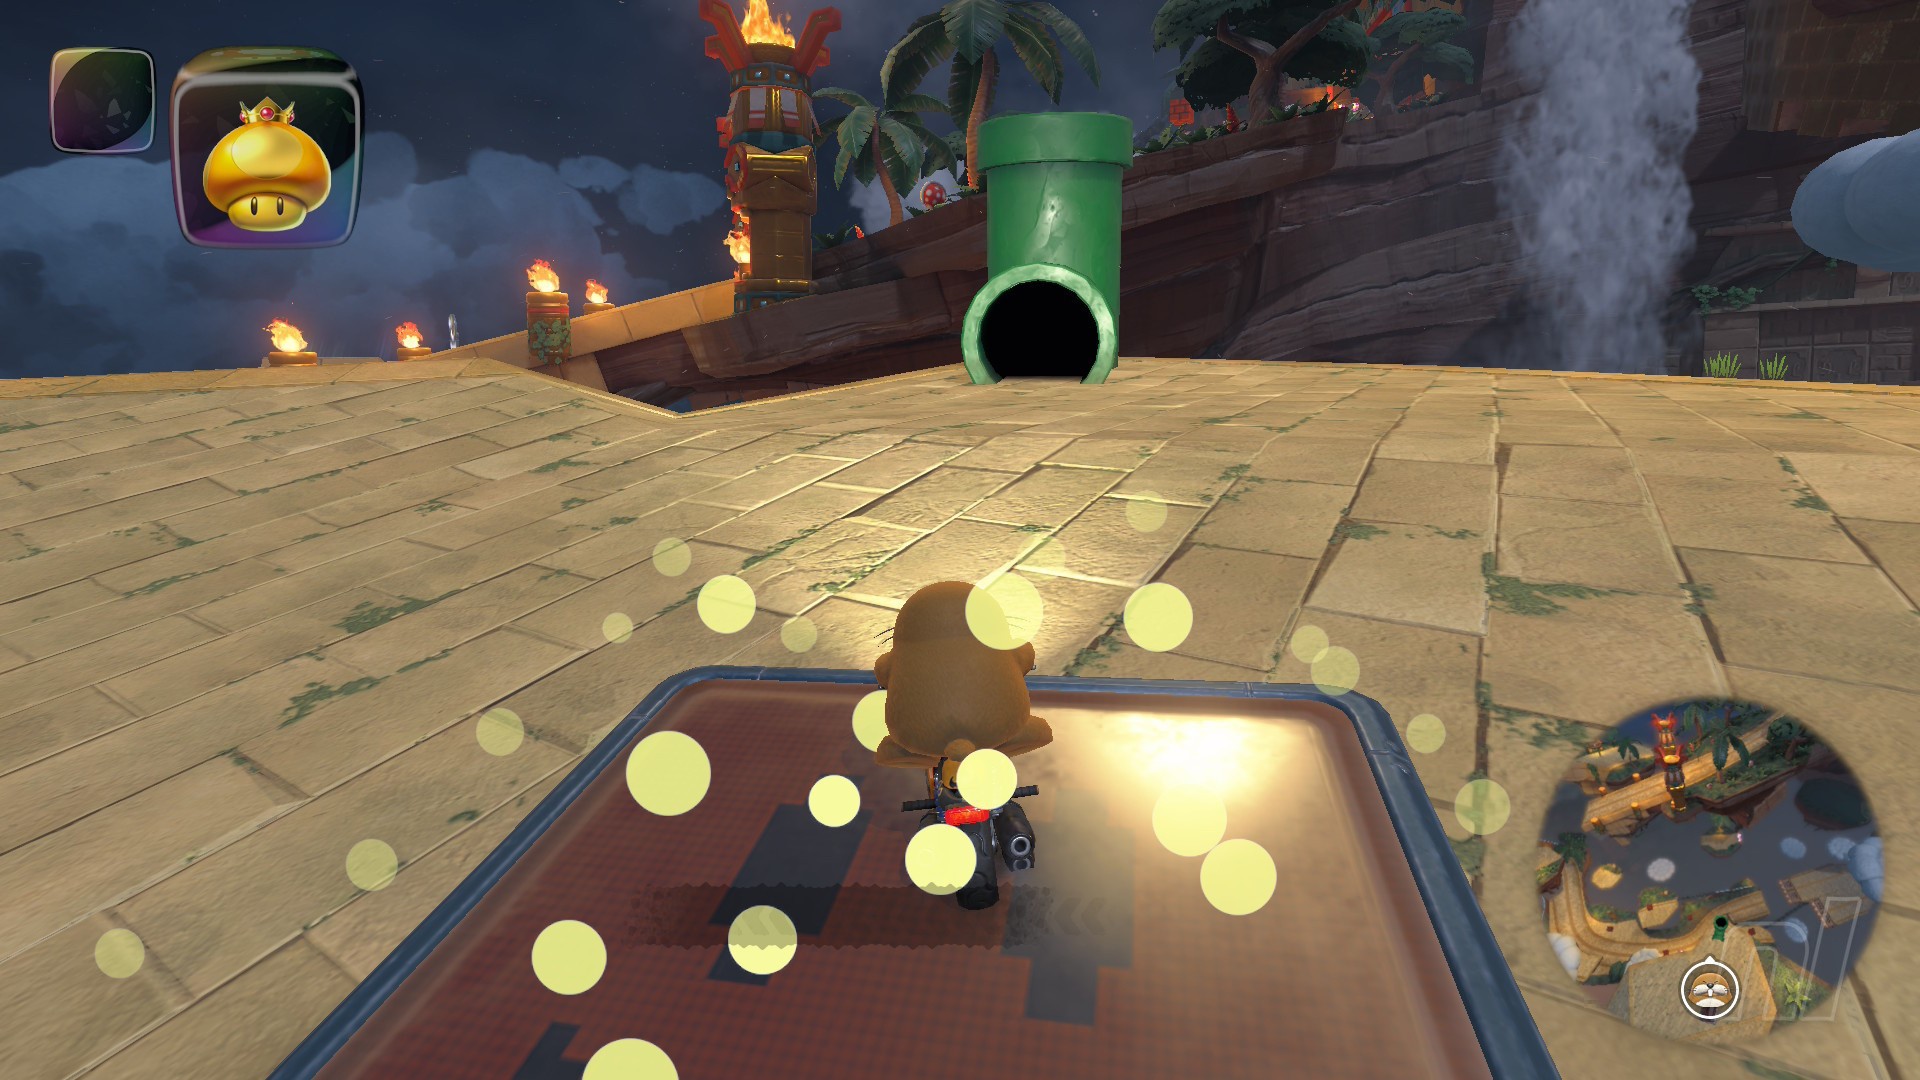
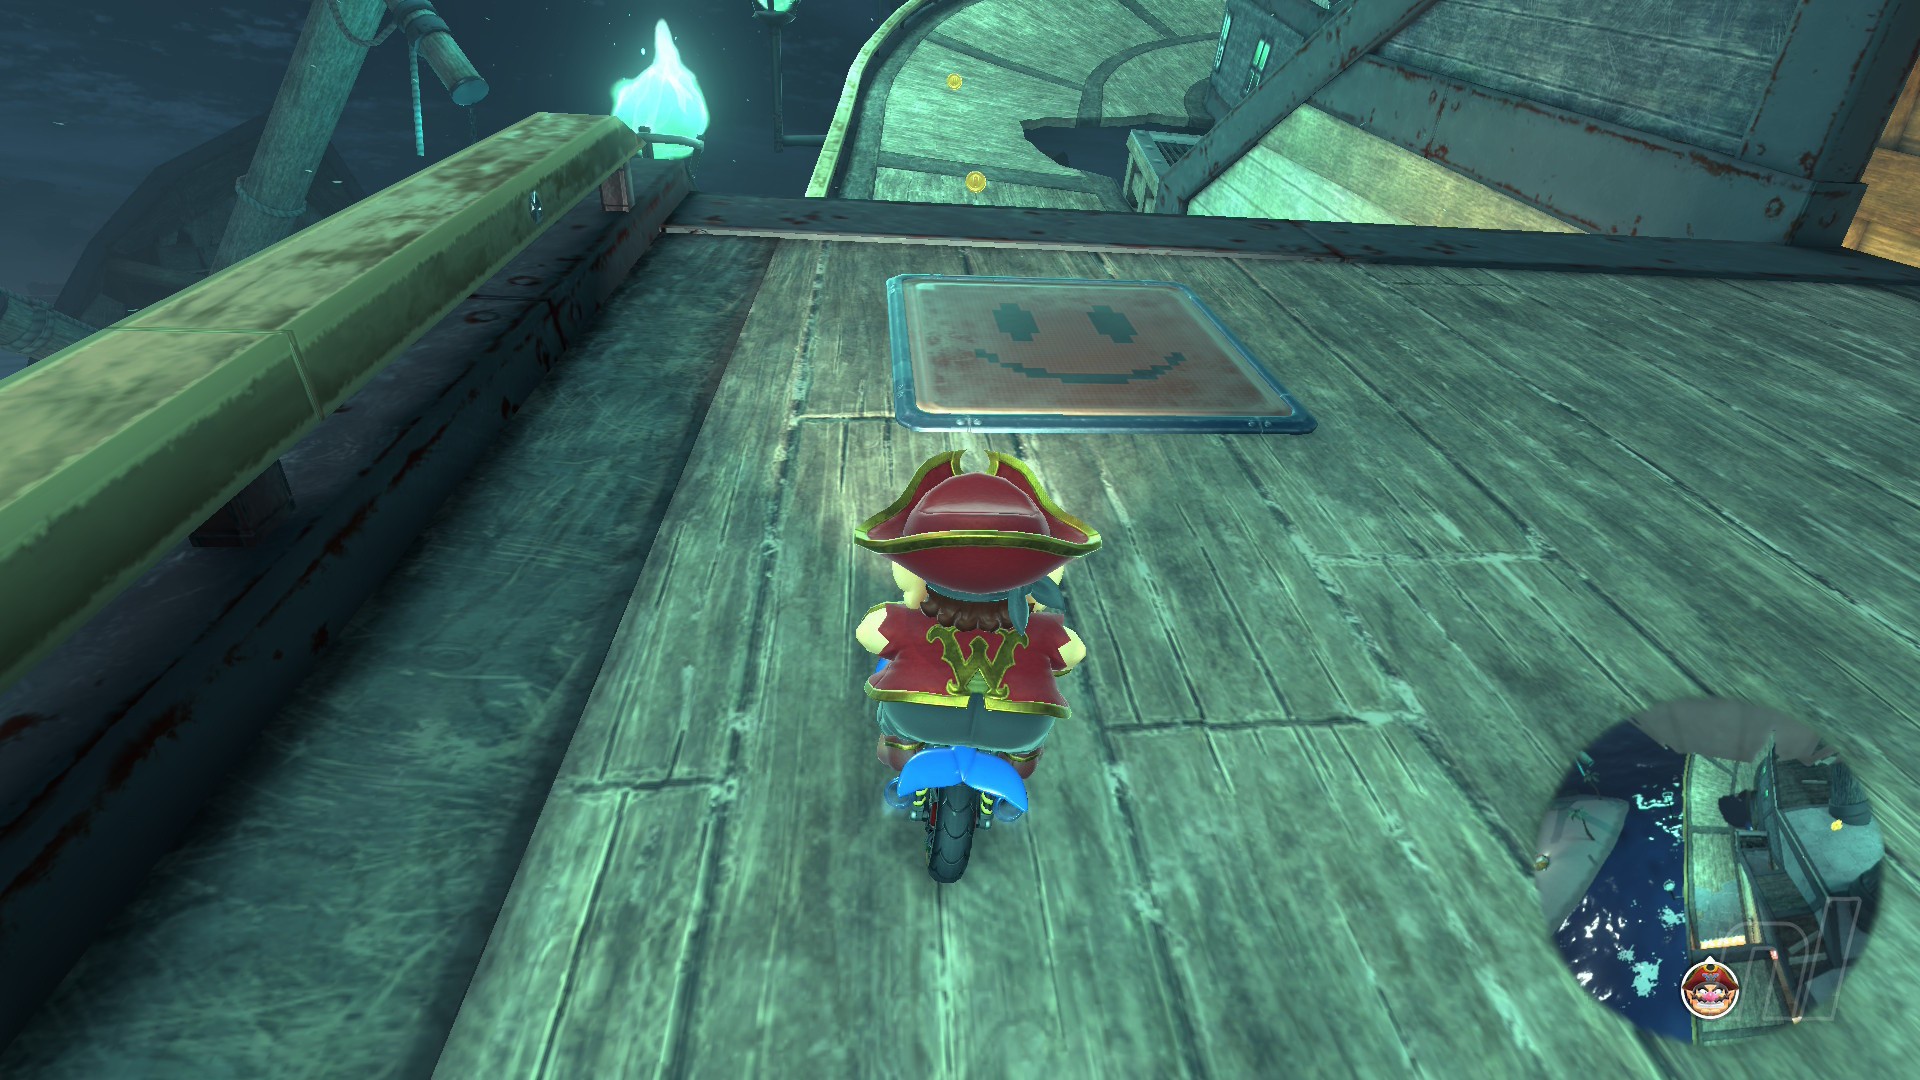
Location: Head into the warp pipe right next to Panel 3 and hop across the ship's rooftops to find this panel next to the mast.
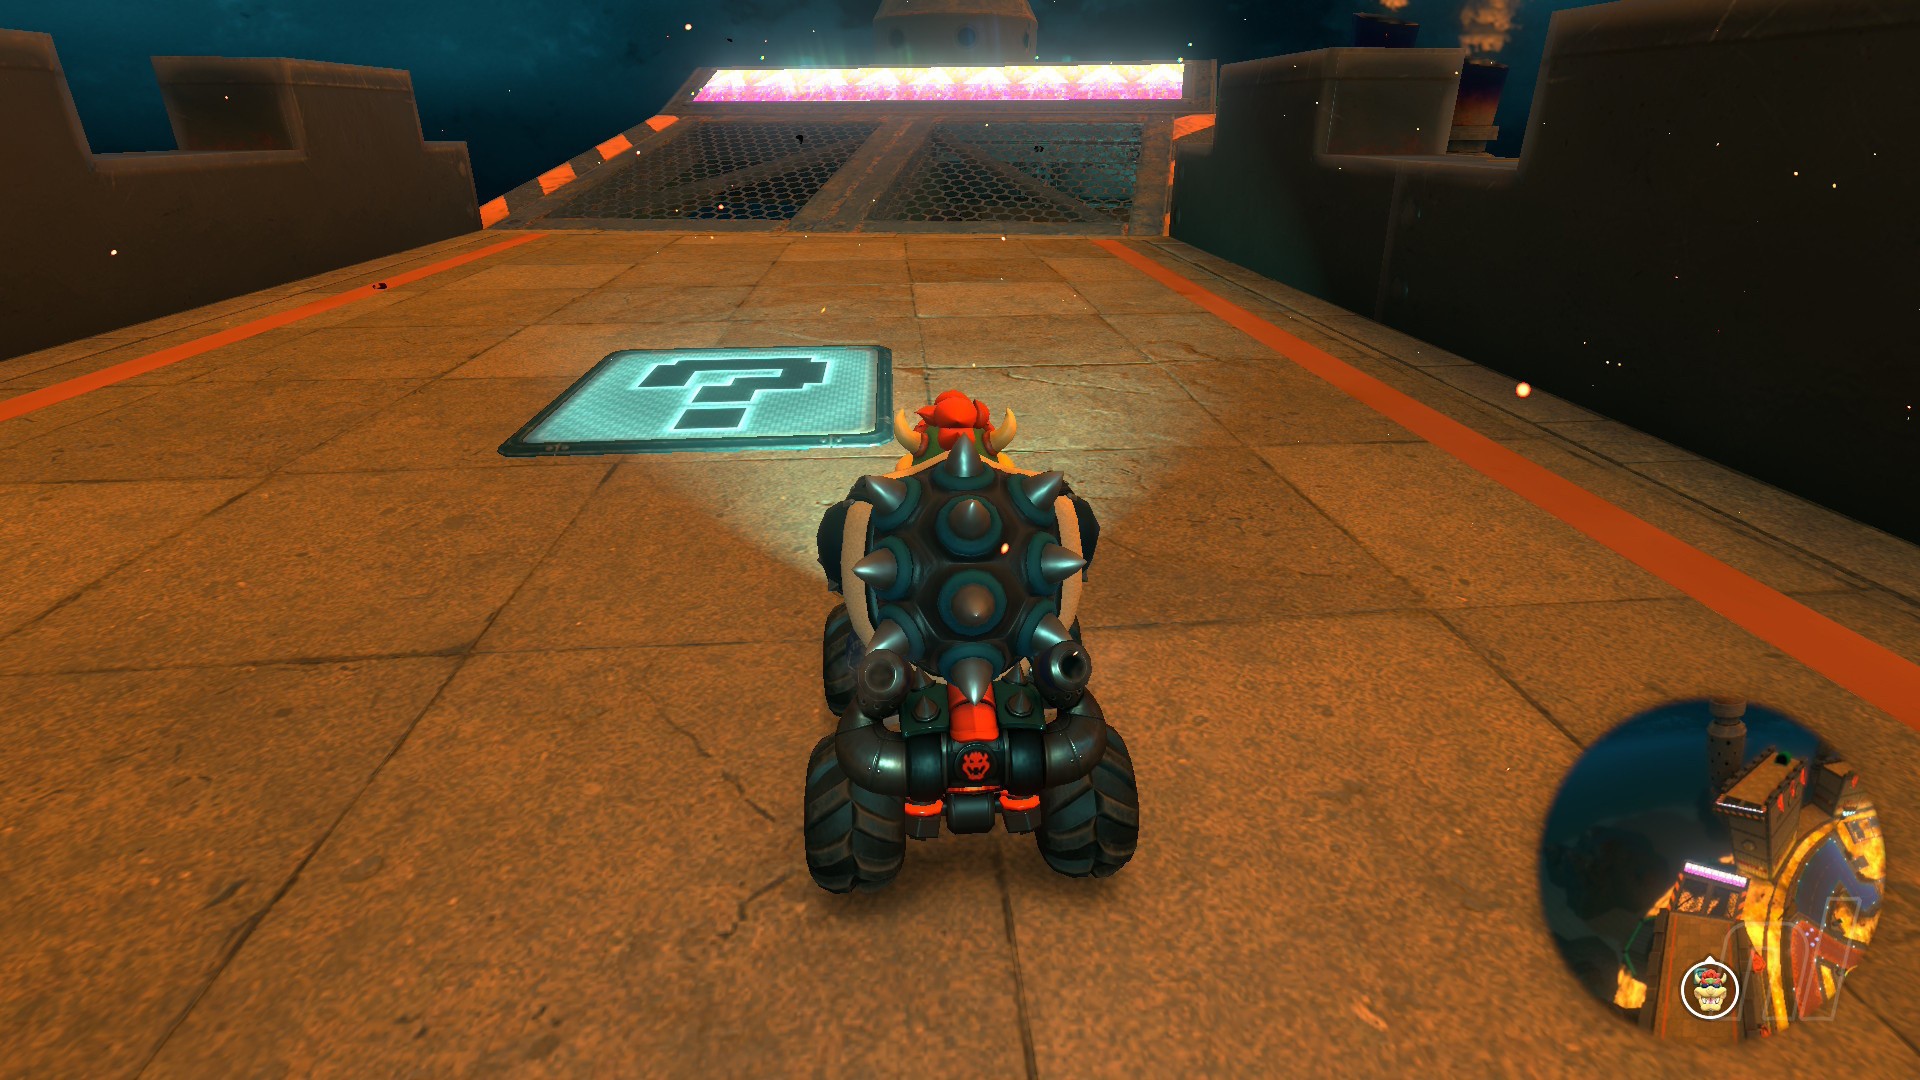
Panel 5
Location: On a wall at the back of the circuit's main ship
Boo Cinema Question Panels
Number of panels: 5
Collectibles region: Forest
Panel 1
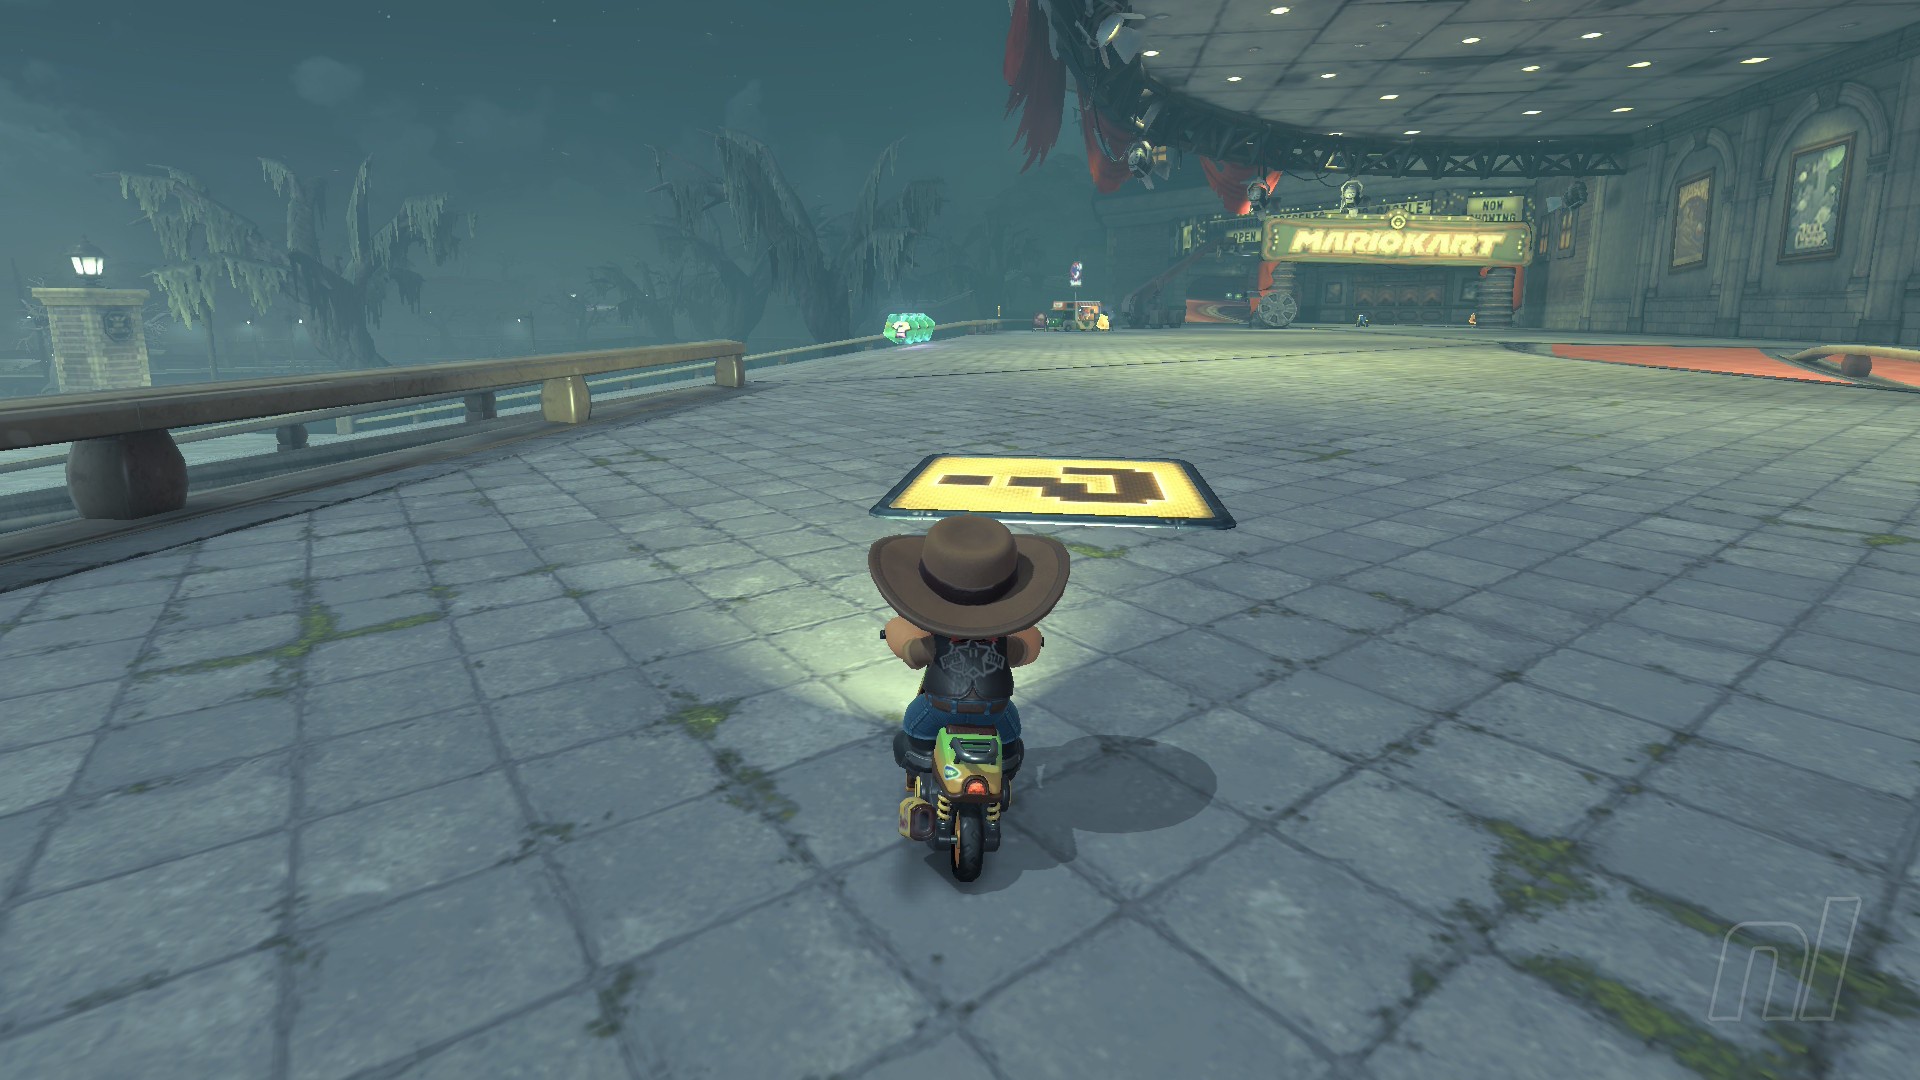
Location: Literally right outside the entrance. Turn around from the starting line and you’ll see it.
Panel 2
Location: Either drive through the cinema auditorium and come out through the stairway, or use the camera stands to grind up to the top of the cinema to reach this.
Panel 3
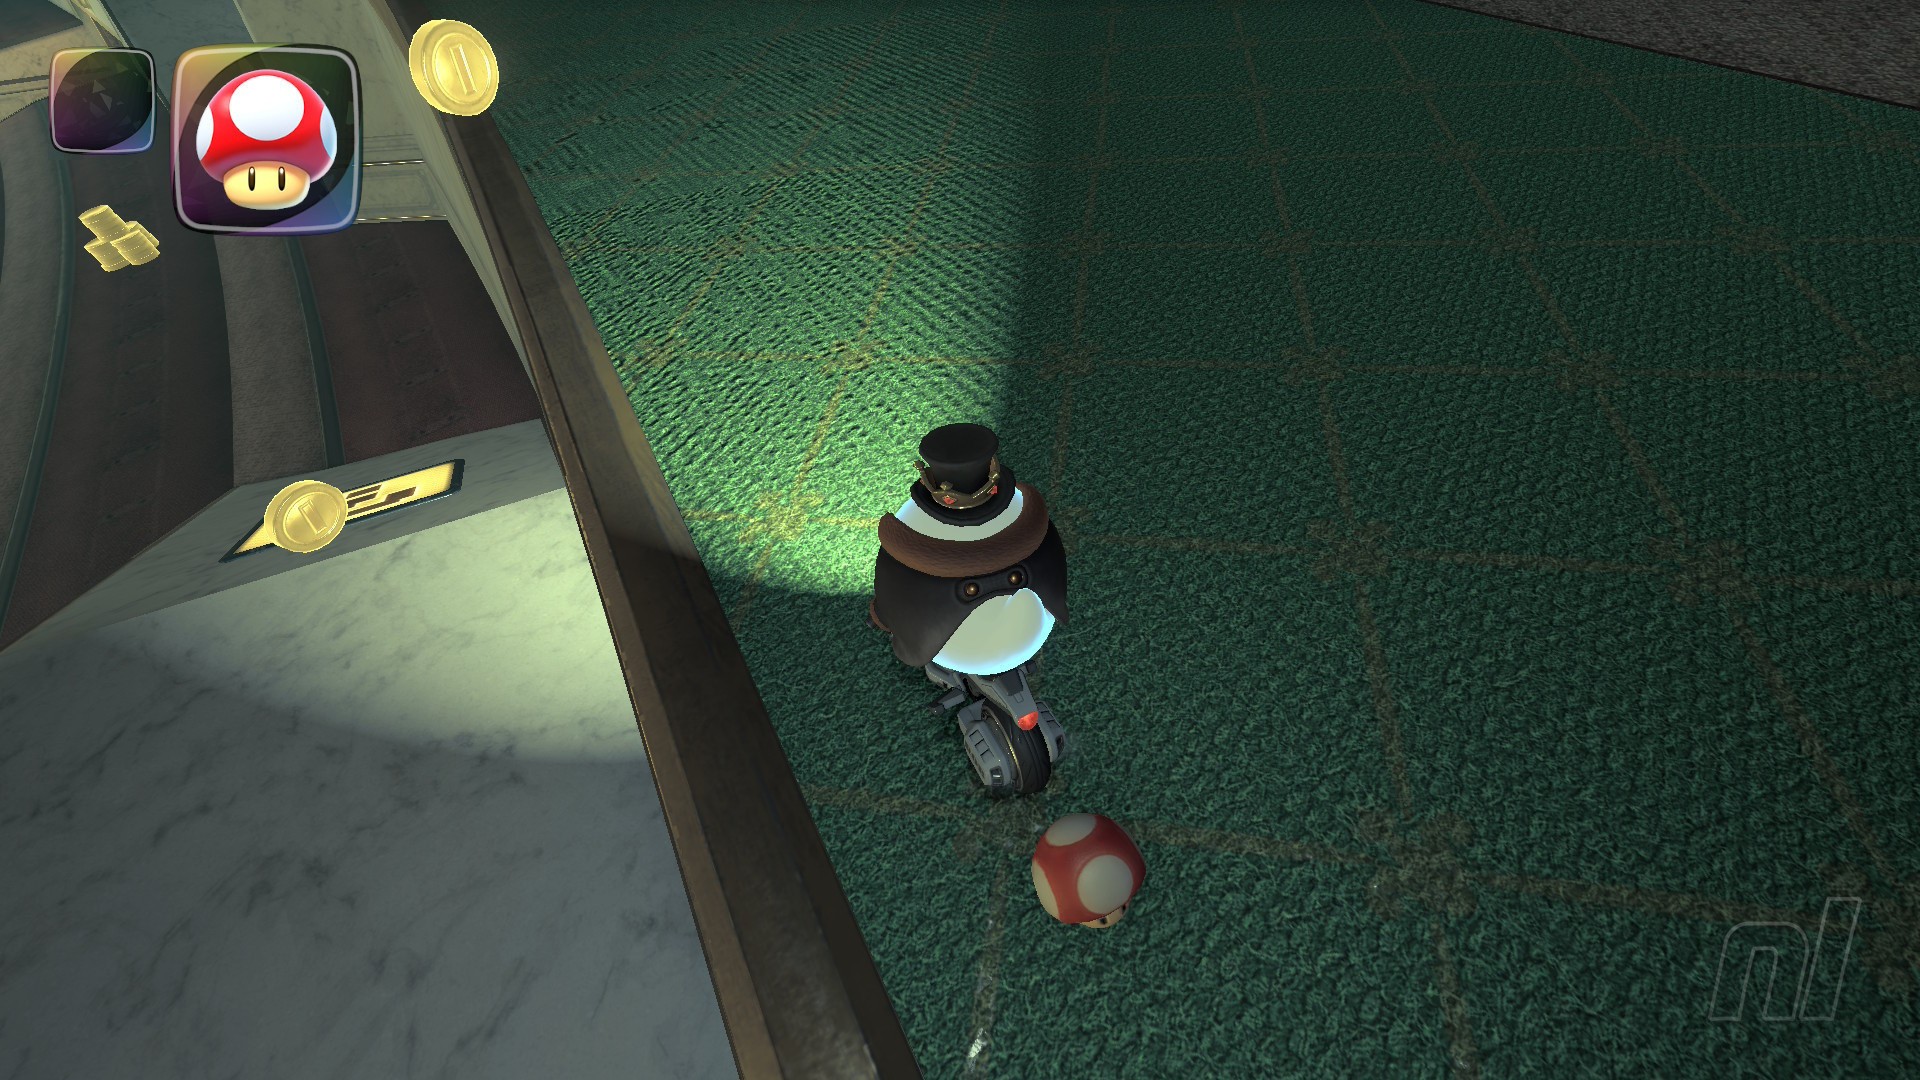
Location: The rest of the panels are in the auditorium now! As you head to the back of the cinema section and fly back out through the screen, follow the road up to the red carpeted area, and this panel is on the red slope to your right.
Panel 4
Location: This one's easy to spot in the balcony seats of the auditorium. It's literally just below the balcony seats, on a small white slope.
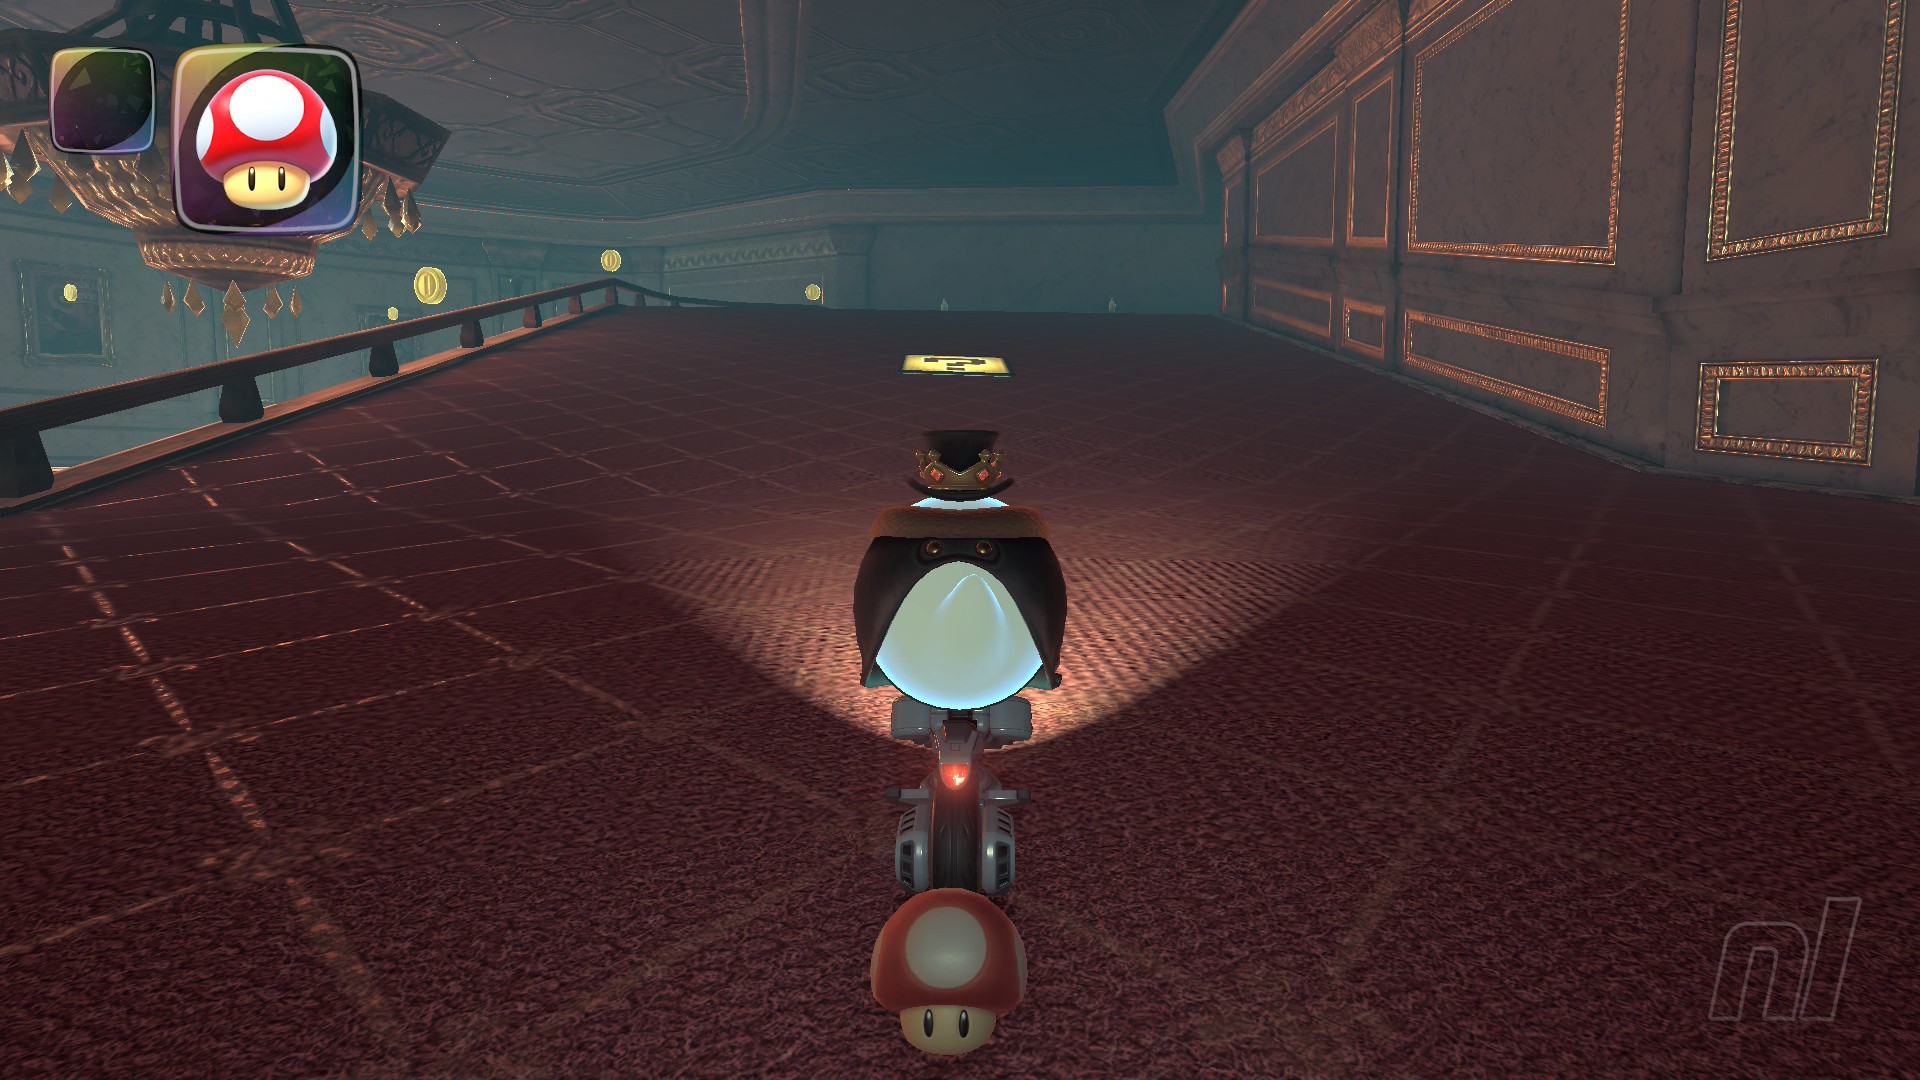
Panel 5
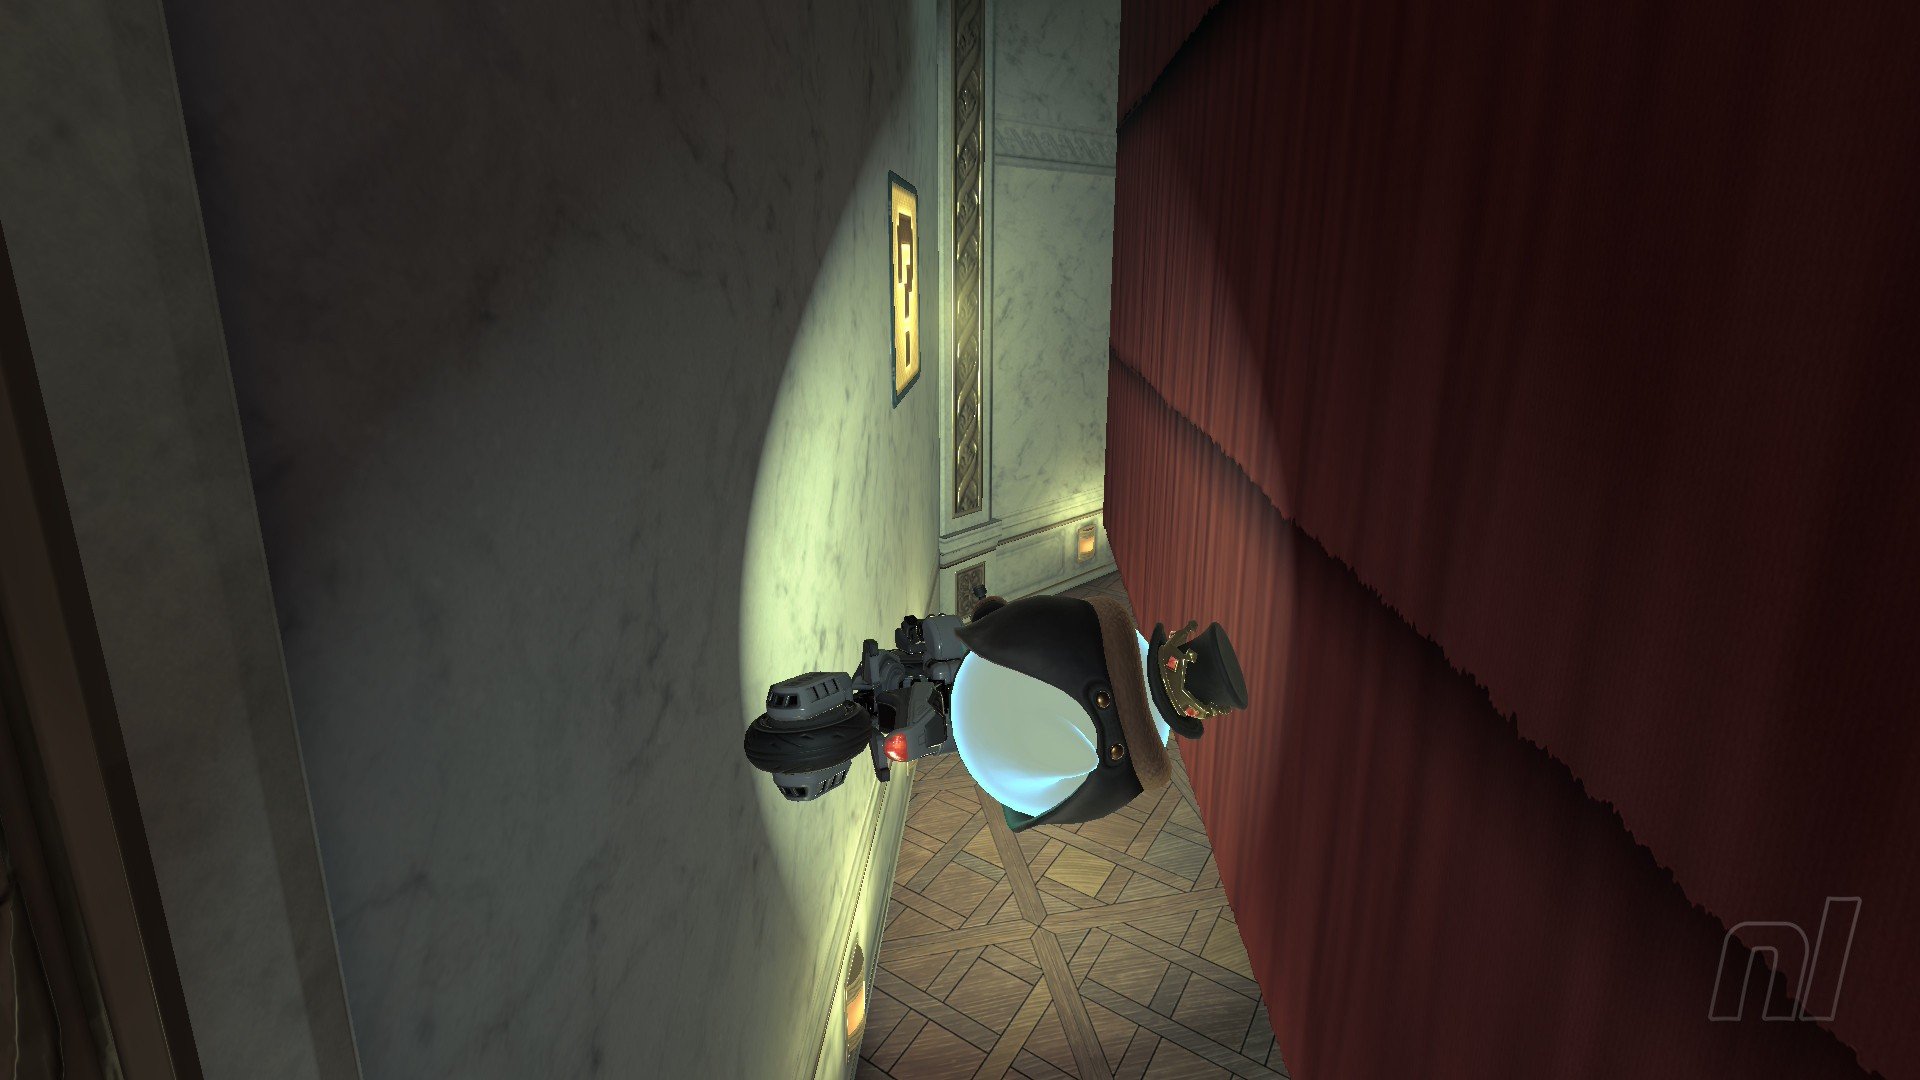
Location: This panel is hiding behind the curtain on the left side of the auditorium.
Tips: This will take more than a few tries, and honestly? We recommend a Feather here because it's pretty high up.
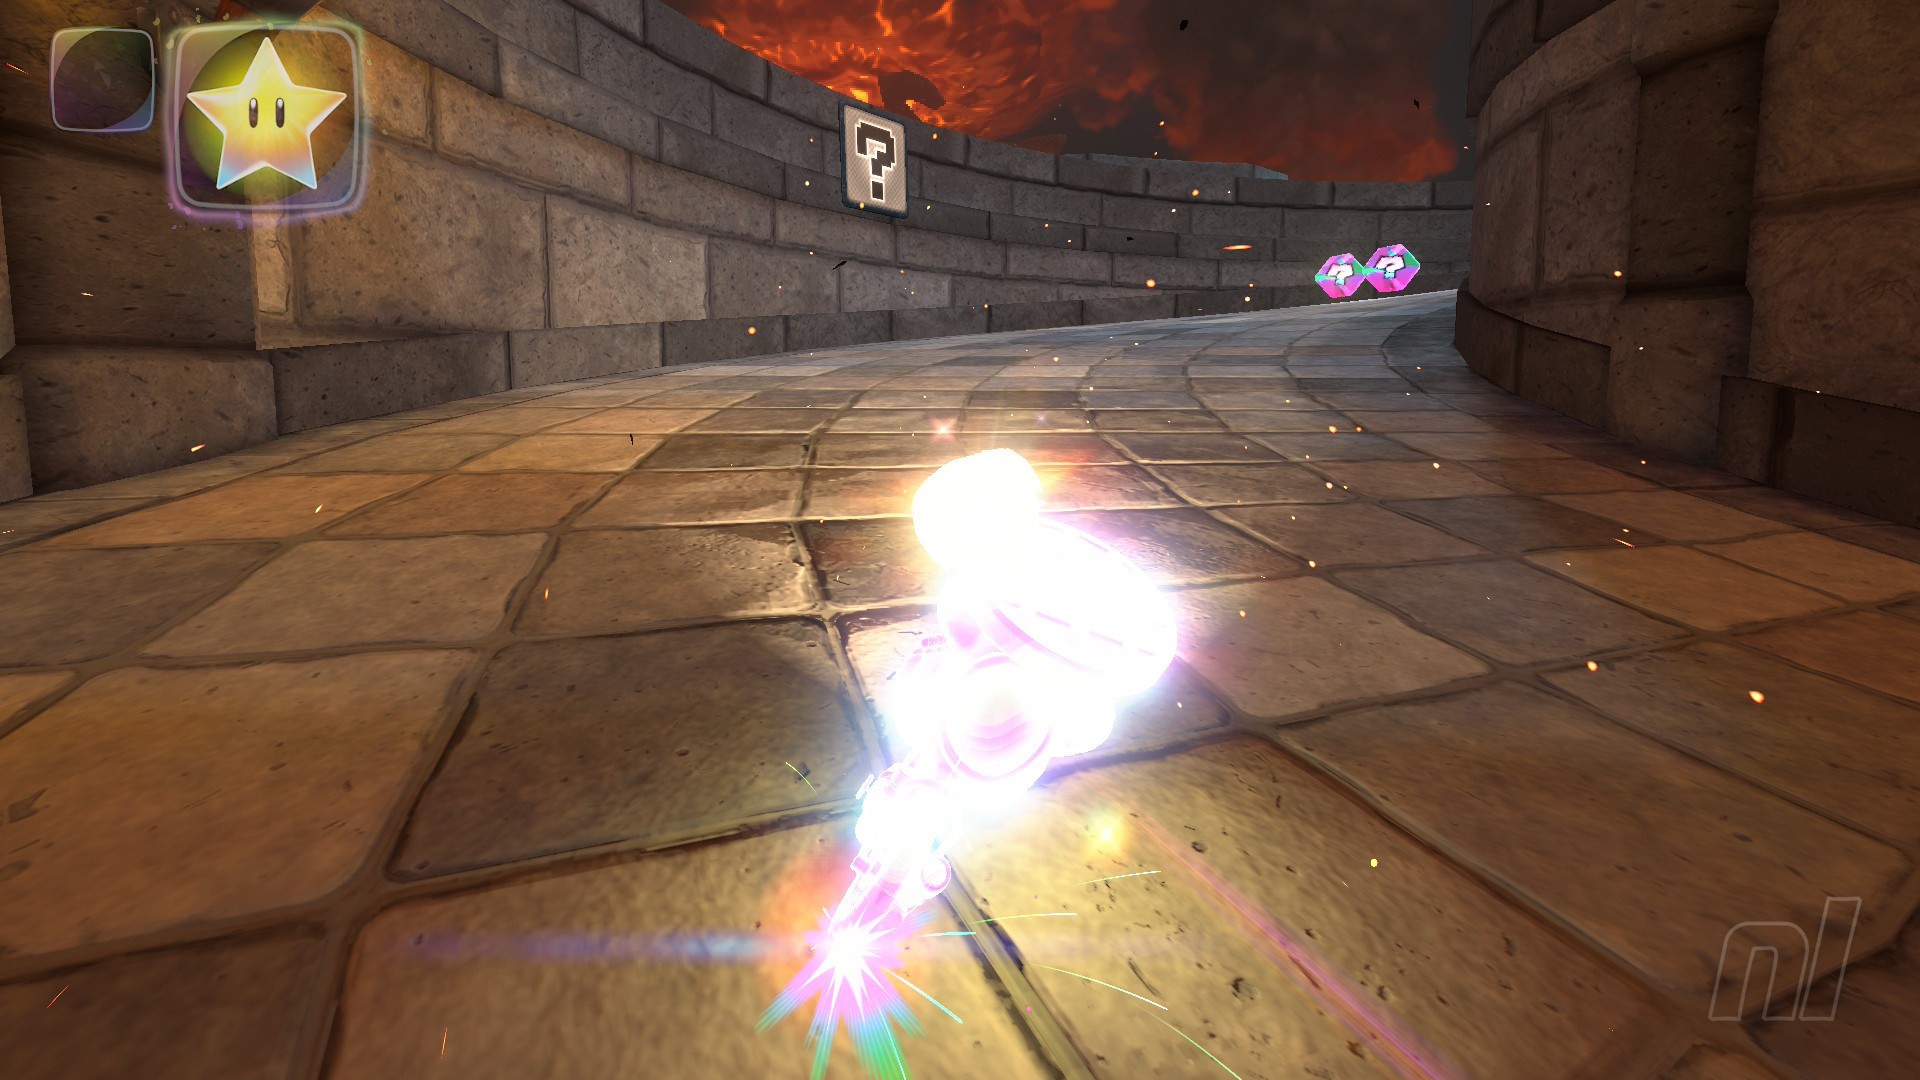
Bowser's Castle Question Panels
Number of panels: 5
Collectibles region: Lava
Panel 1
Location: On the central turret of the castle outside, overlooking the blue carpeted roads. You can either grind or trick up there.
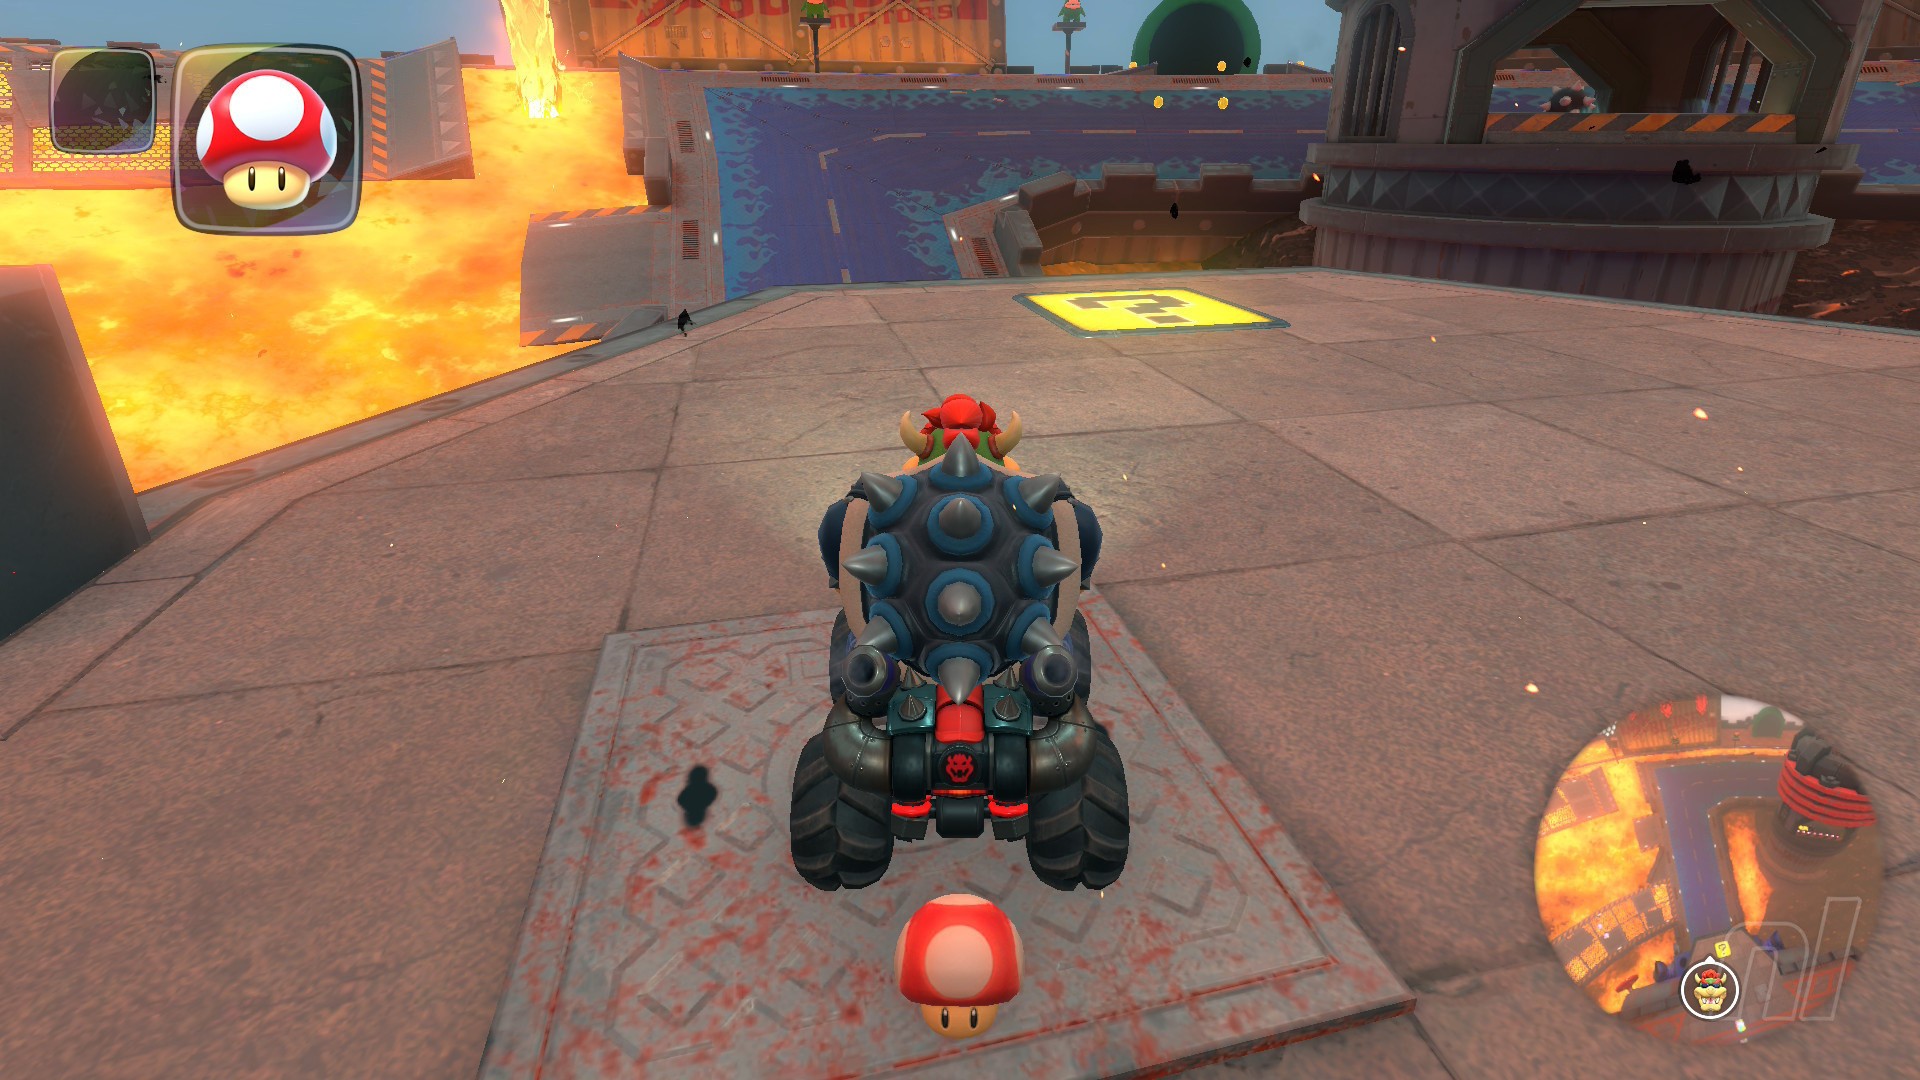
Panel 2
Location: Drive around the outer blue pathway to the pipe area where spiked balls are being thrown out. Head towards the ramp in the middle, and the panel is on the right side.
Panel 3
Location: Turn left at the start line and grind around the outer perimeter rail. Hop off at the second warp pipe and ride it up to find this panel on the roof.
Panel 4
Location: Turn left at the start line and use the outer rail to grind around the perimeter of the course. Wall jump off to the right when you see this panel.
Panel 5
Location: Ride circuit's outer rail clockwise for almost the full circumference, then hop off at the end to find the panel on a slope to the left.
Cheep Cheep Falls Question Panels
Number of panels: 5
Collectibles region: Fall
Panel 1
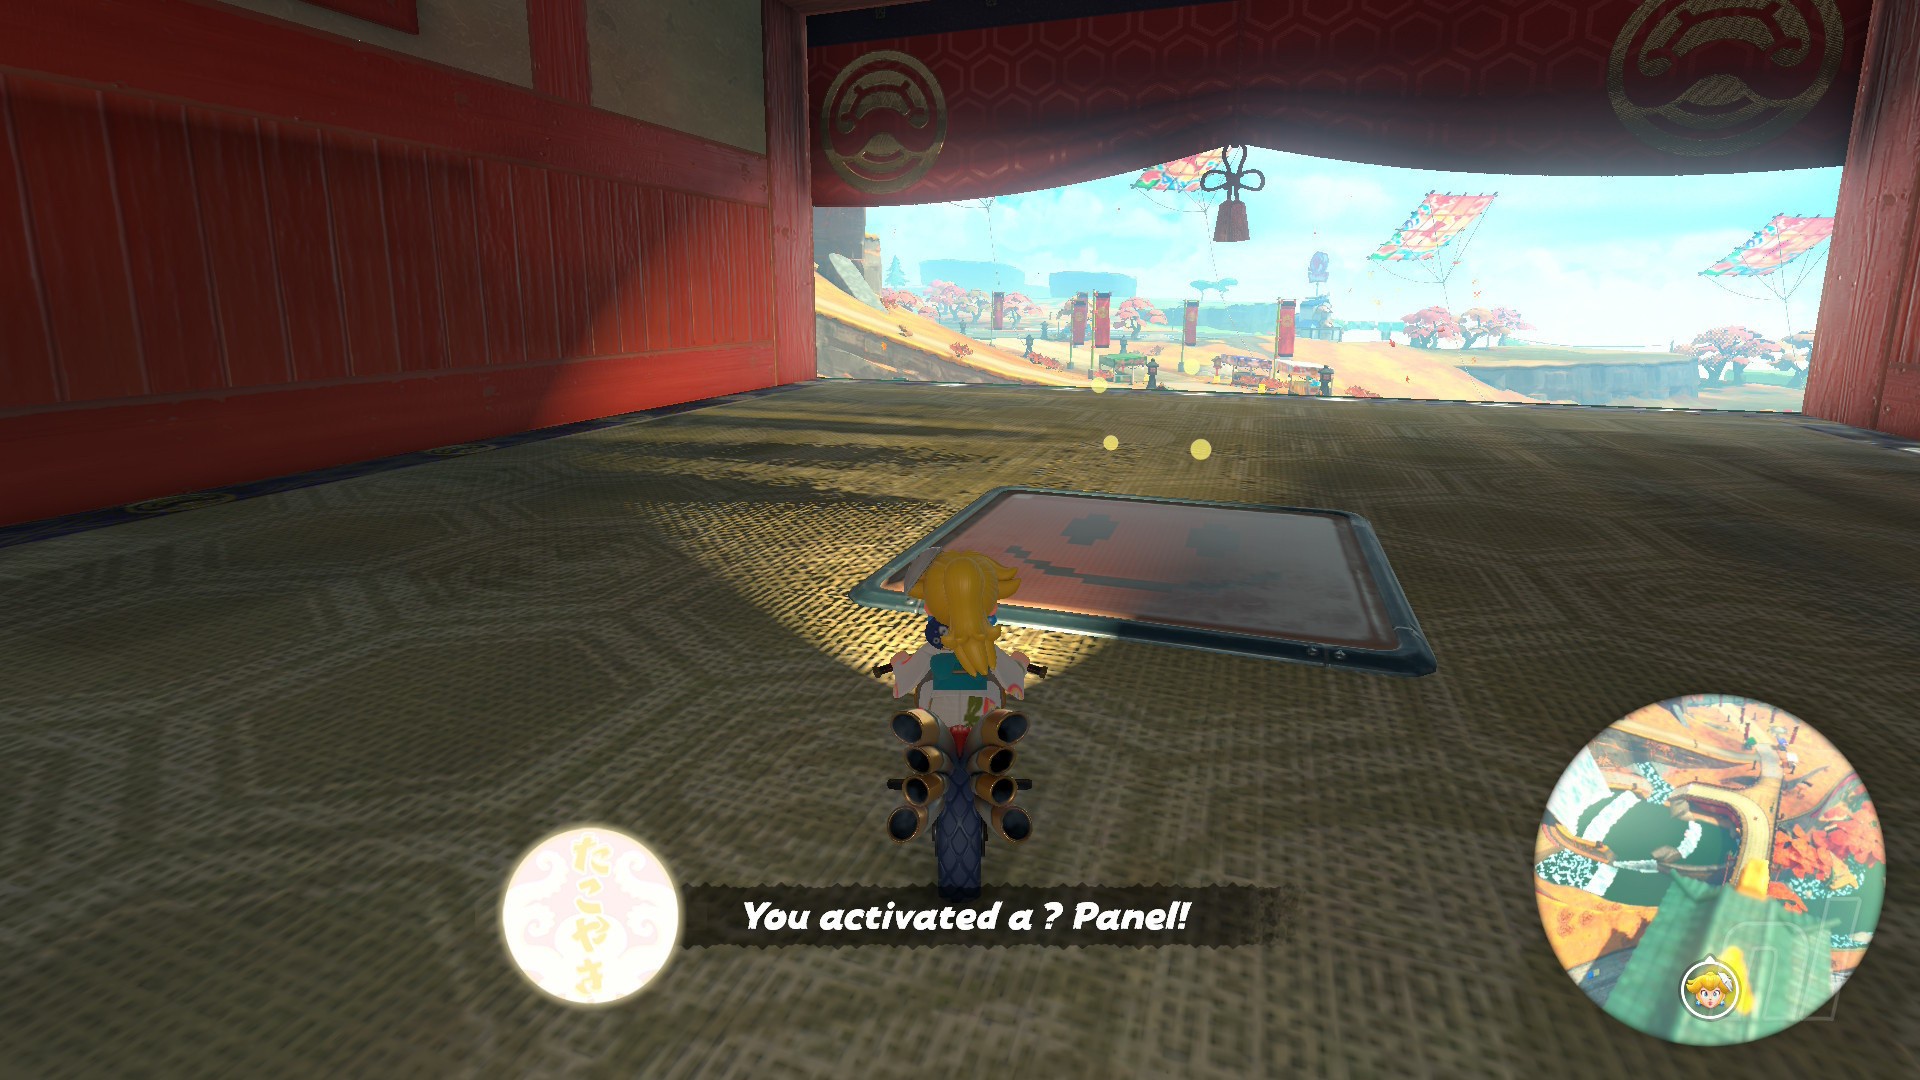
Location: Inside a pagoda on the outskirts of the course, overlooking the start line. Various ropes allow you to grind to these.
Panel 2

Location: Head to the Yoshi’s food stand court on the course, then drive across the river to a small canyon where the Panel is on the wall. You’ll need to wall ride (or drop from above if you’re feeling lazy!) to get this one.
Panel 3
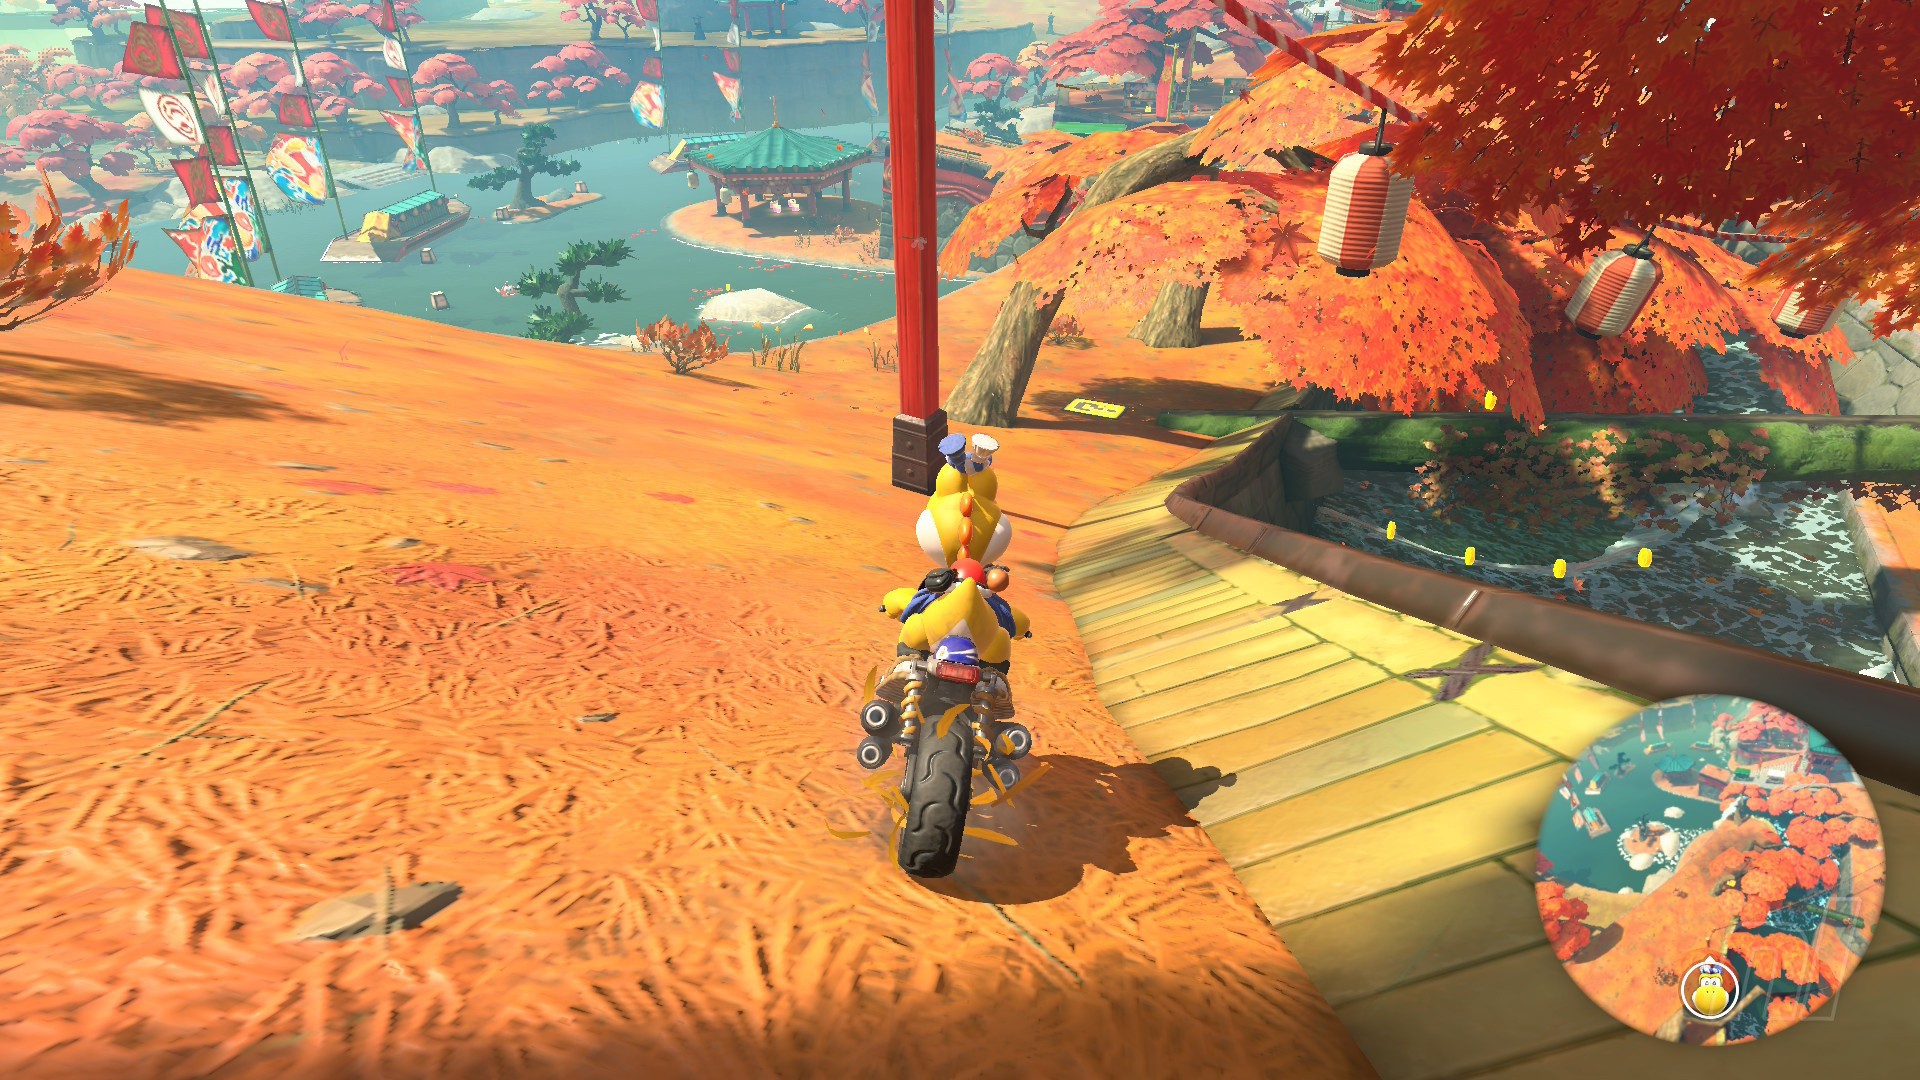
Location: Drive all the way up to the Yoshi food stalls partway through Cheep Cheep falls. Then, before the bridge, turn right to find a pipe hiding next to a pagoda. That pipe will take up up to the Question Mark Panel!
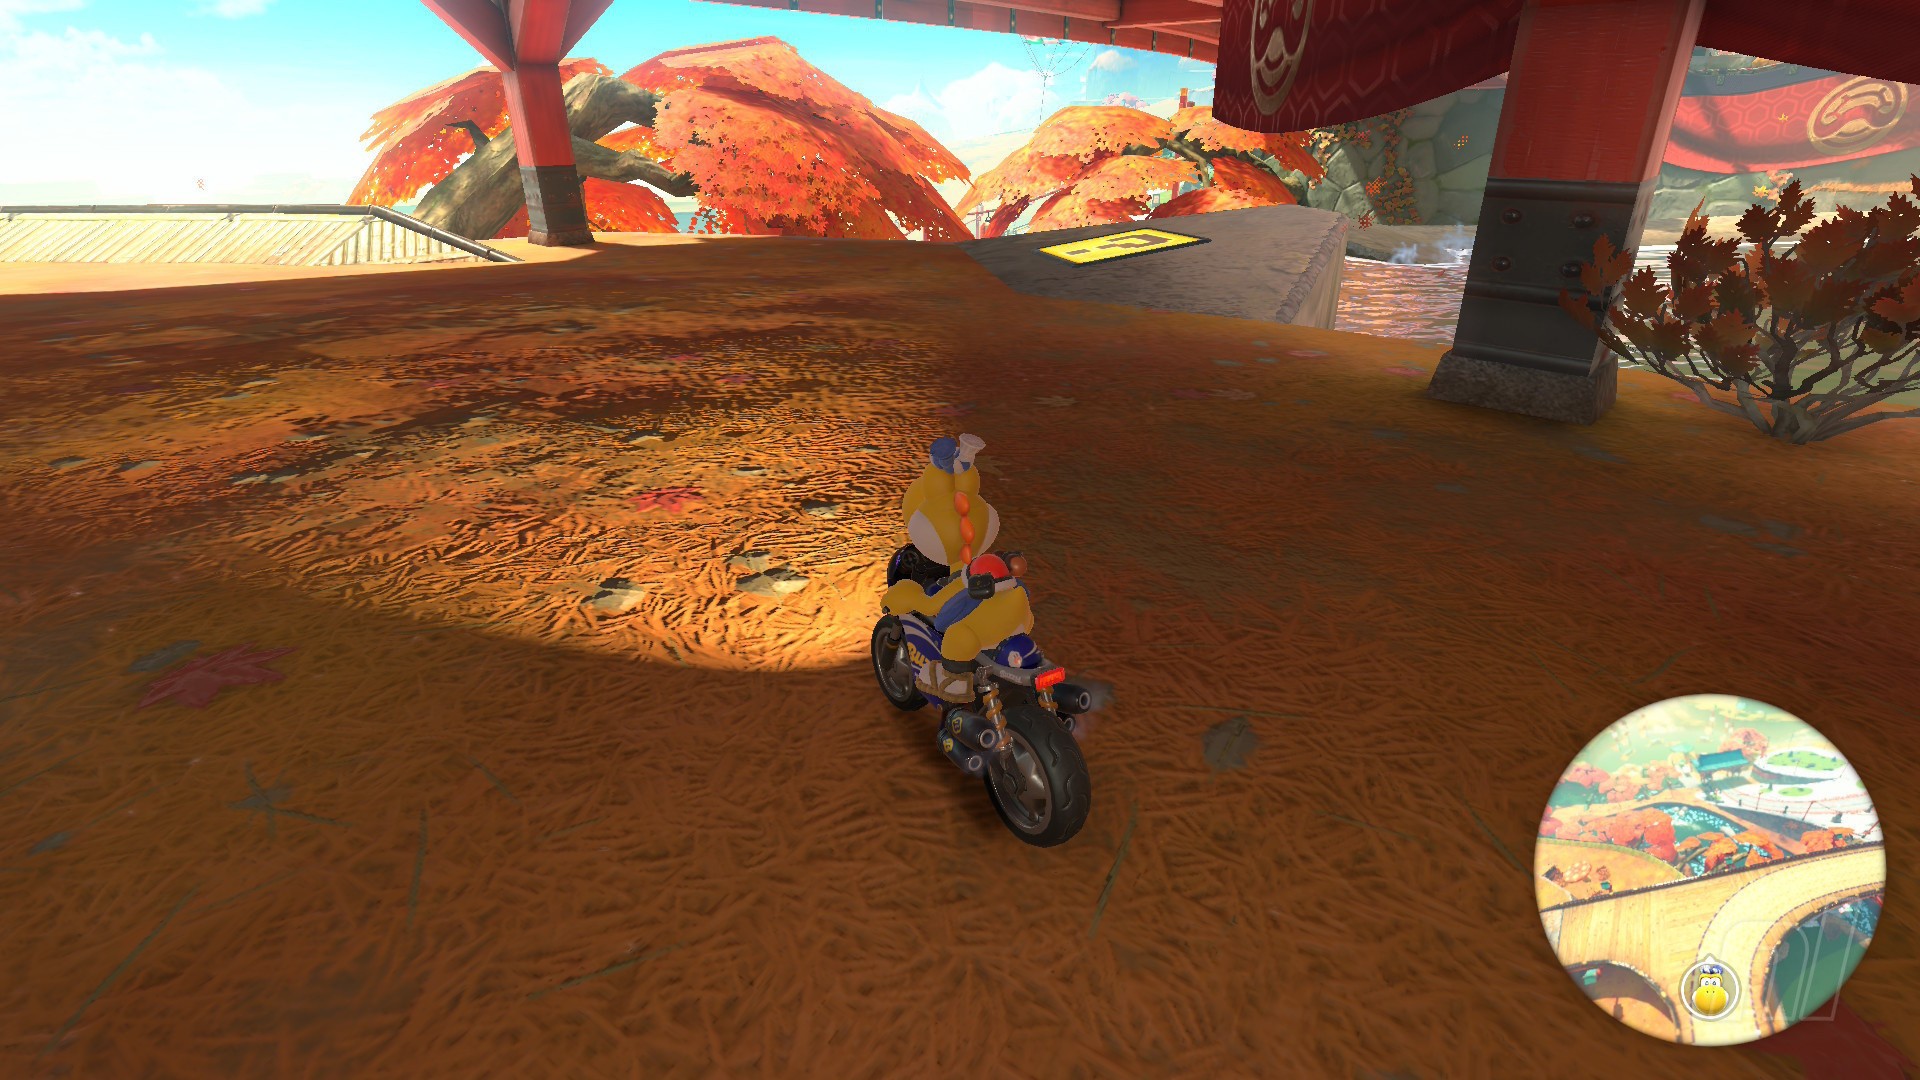
Panel 4
Location: Drive through the course normally from the start line until you reach the first pagoda. Drive through that and across the bridge, then before the two Yoshis, drop down to the left, turn around, and you'll see the panel underneath the bridge.
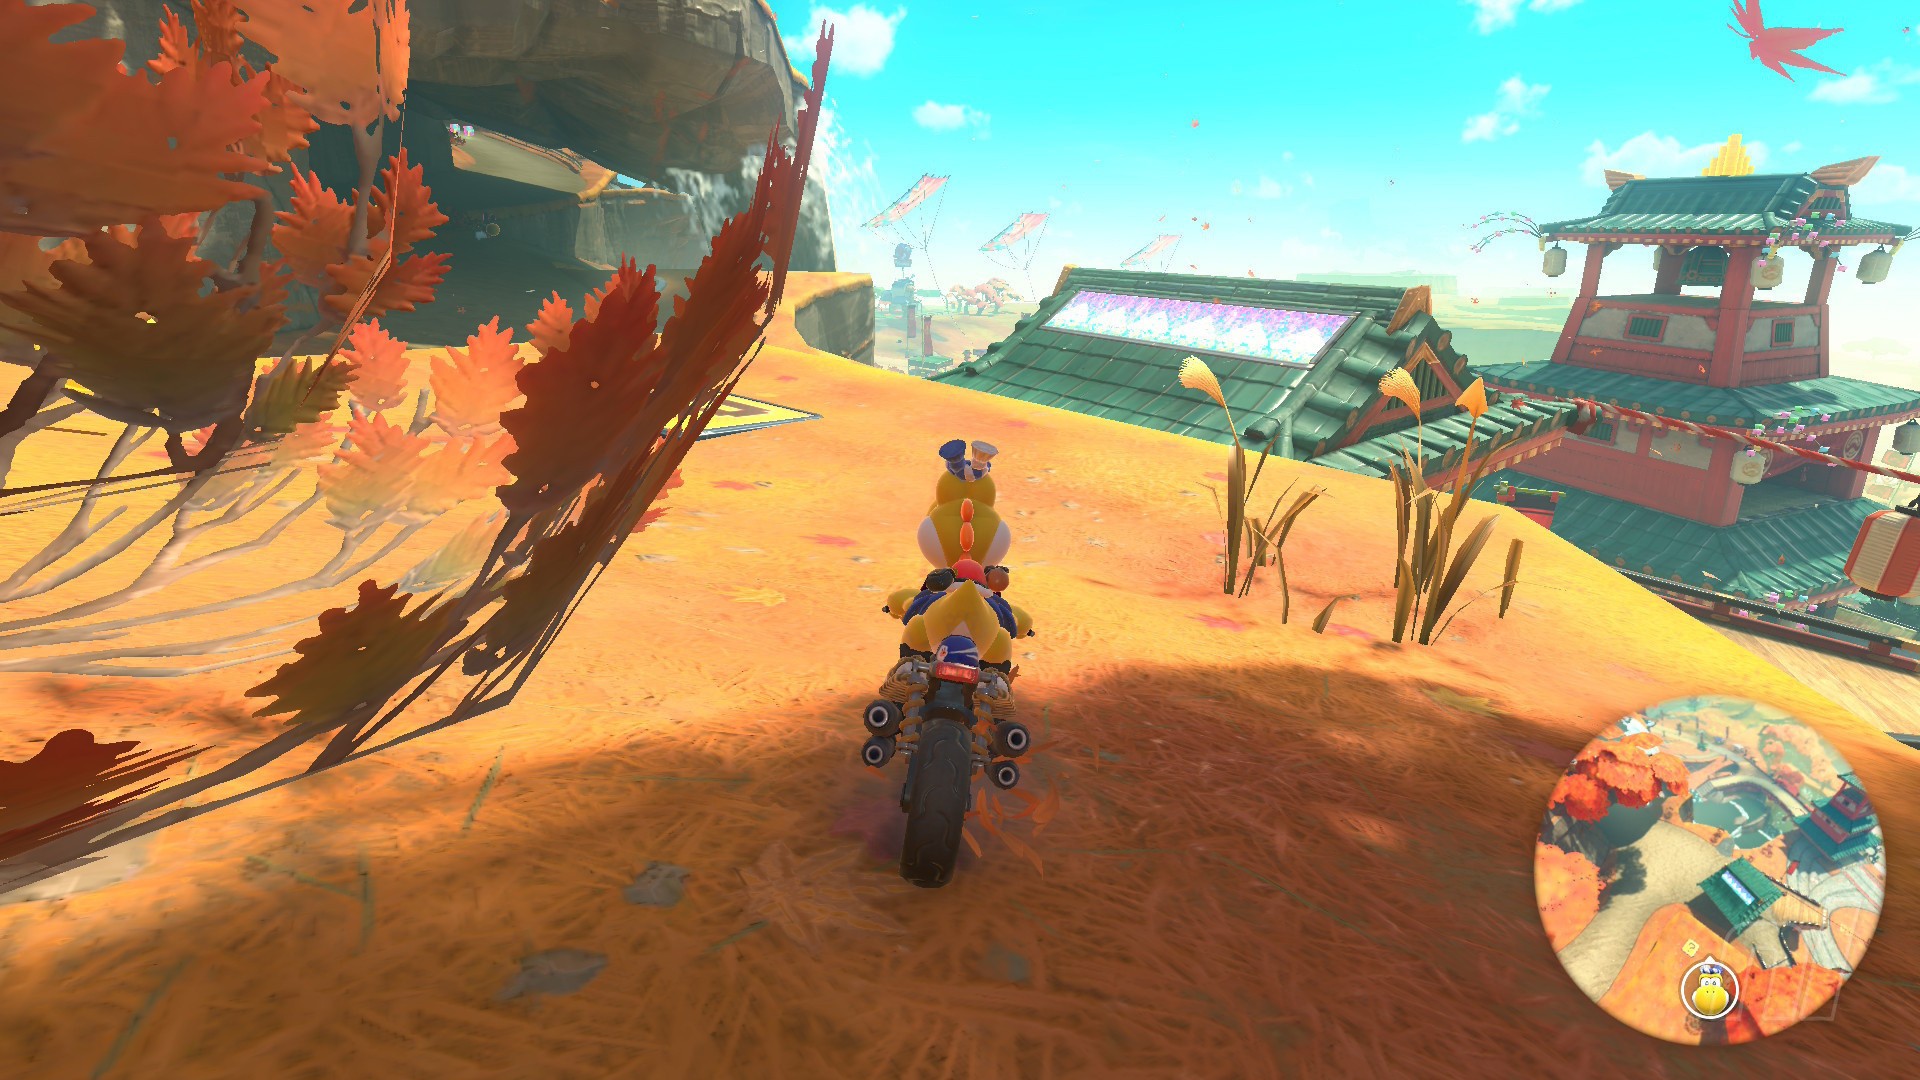
Panel 5
Location: Just after Panel 4, drive right past the Yoshi's to a small orange clearing above the starting line. Follow the path around to find the Panel in front of a green log.
Choco Mountain Question Panels
Number of panels: 5
Collectibles region: Central
Panel 1
Location: Grind up some yellow pipes near the chocolate lake part of the course, then jump off to the right. Drive forward to find the panel on a rocky slope.
Panel 2
Location: From Panel 1, turn around, then drive past the pipe to reach the next panel.
Panel 3
Location: This one's easy; just reverse from the start line, look right, and you'll see the panel. You'll probably want to jump though since that chocolate is sticky...
Panel 4

Location: From the starting line, turn around and follow the road until yous ee a small platform underneath some metal signs. The panel is on this, meaning you'll have to time a wall ride perfectly to reach it.
Tips: We're not shy about using Feathers here to get the angle just right. There are item boxes close by, at least!
Panel 5
Location: If you drive through the course normally, as you come to the "end" (aka, you can see the start line again), take a left and drop down to see a steel set of stairs, steel platforms, and a panel.
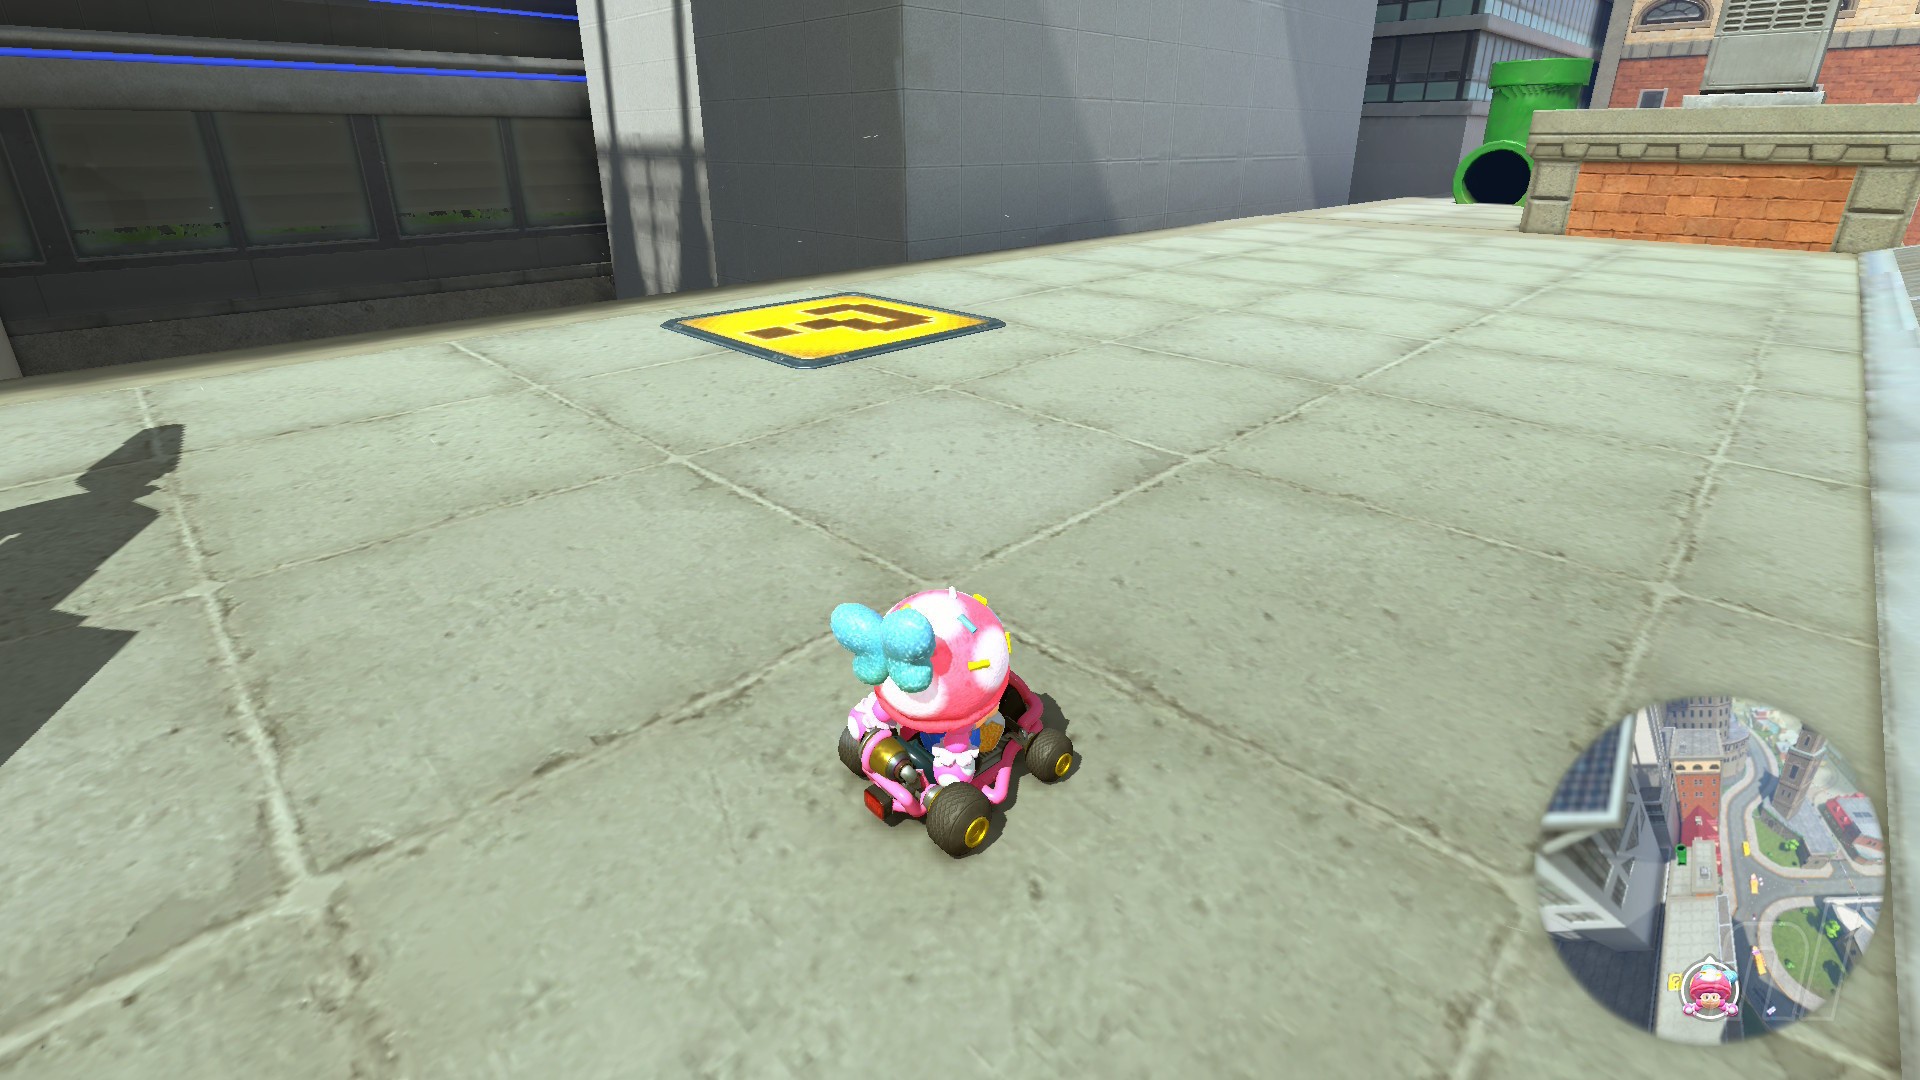
Crown City Question Panels
Number of panels: 10
Collectibles region: South Sea
Panel 1
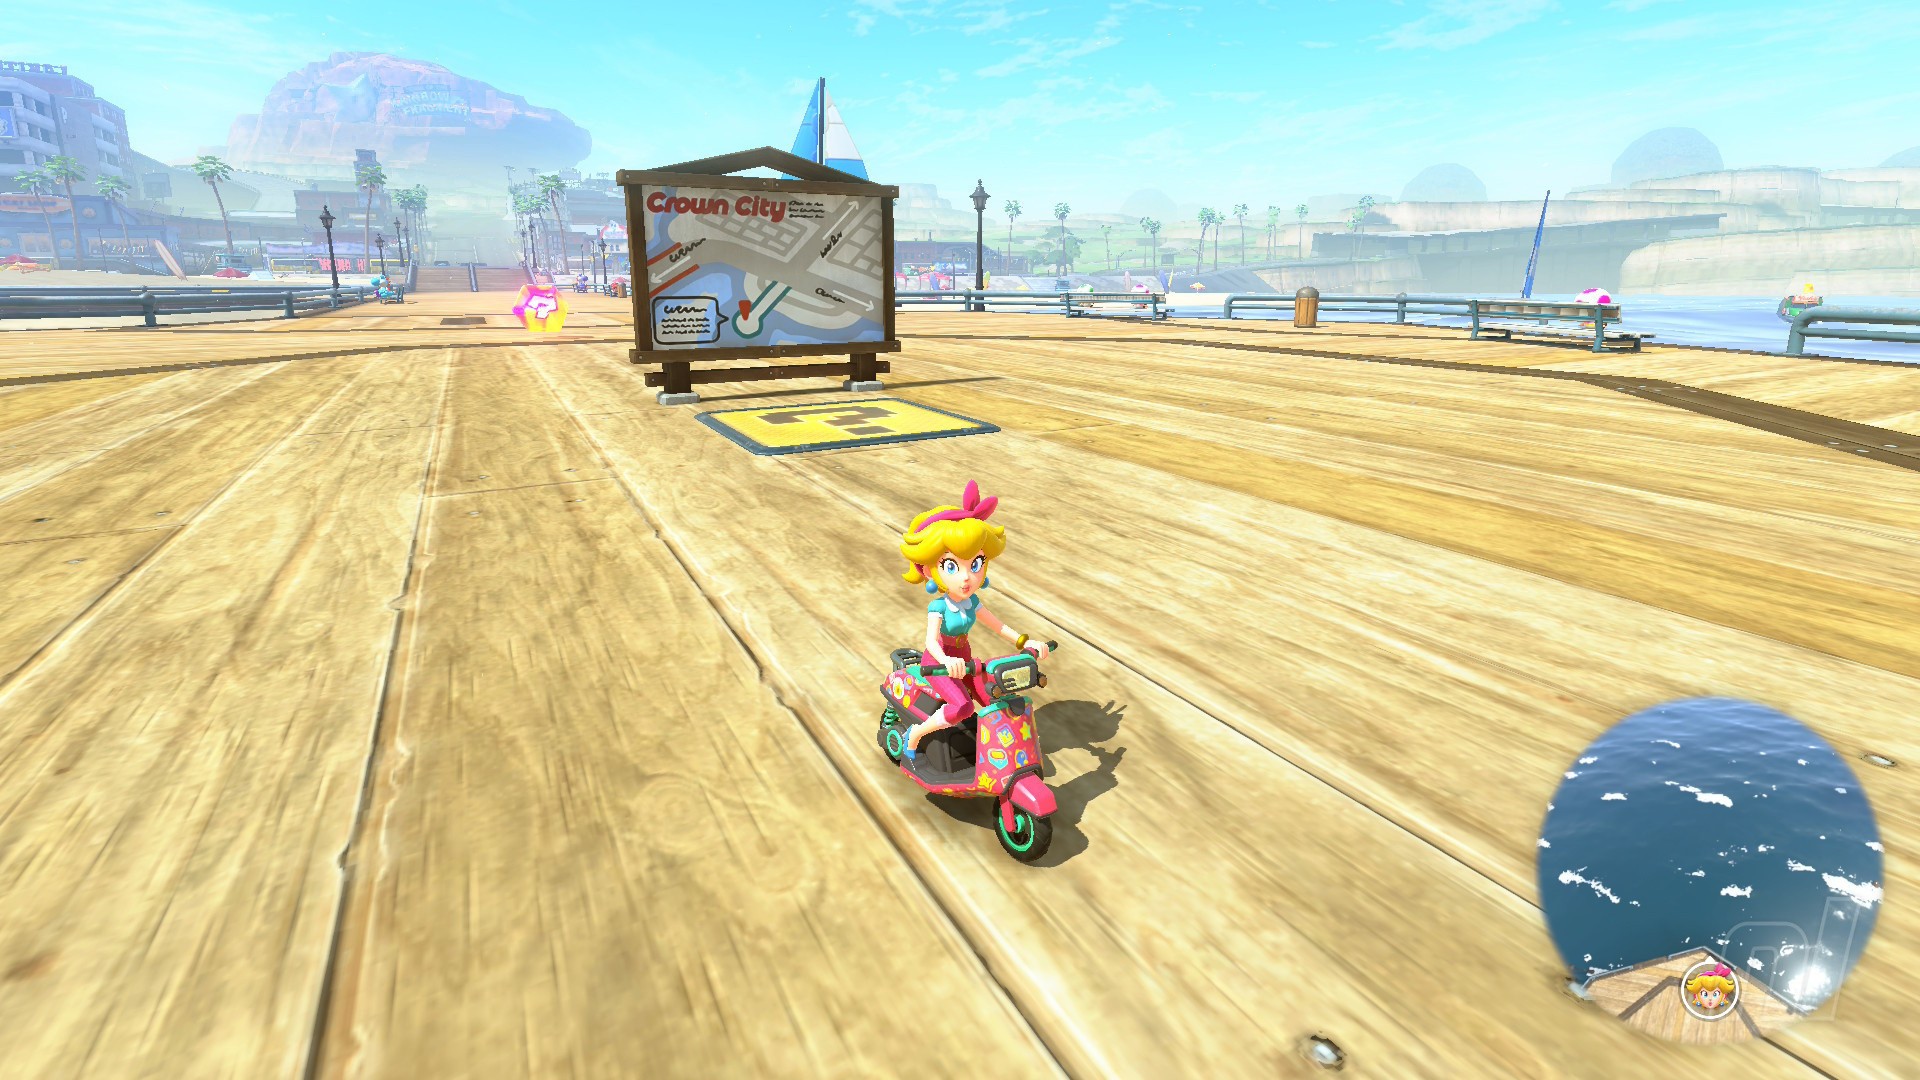
Location: Head to the pier on the north side of the course and drive right to the end to the Crown City map, where the Panel is hiding right behind the sign.
Panel 2
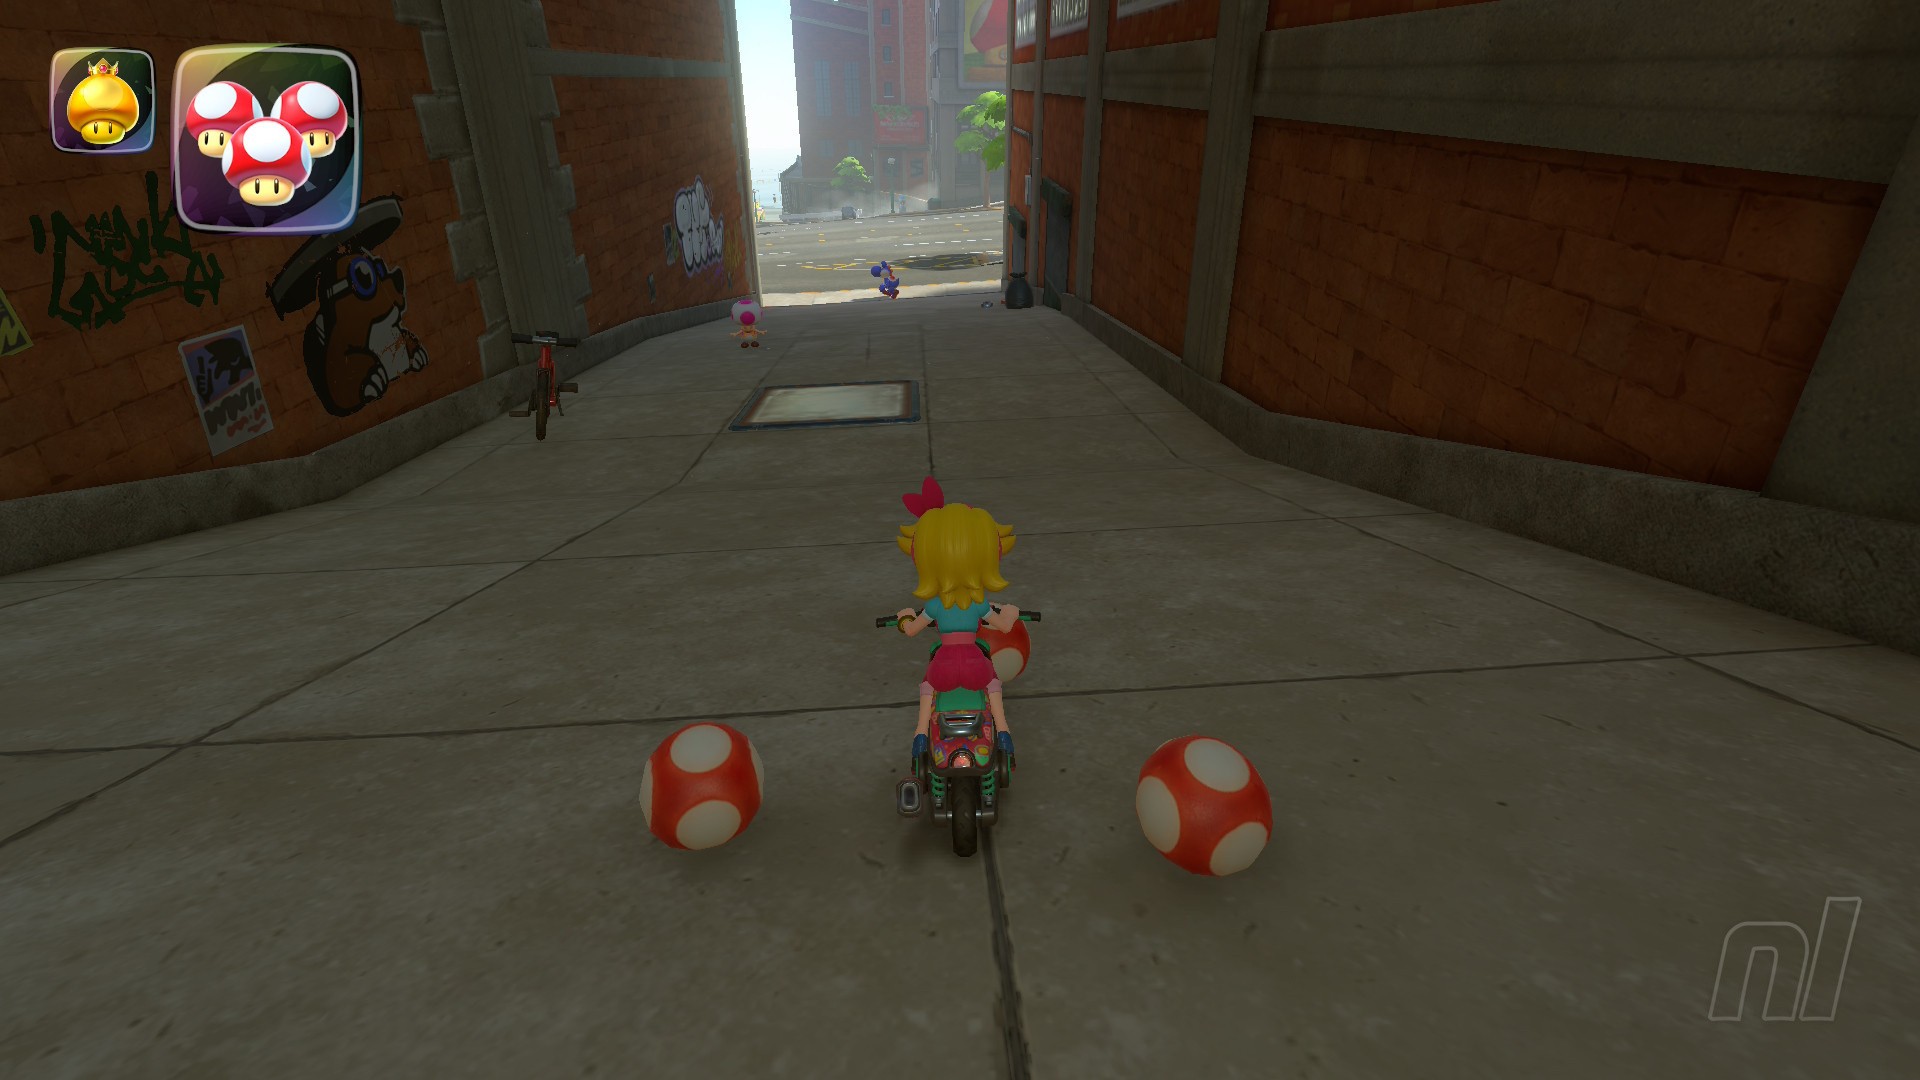
Location: This one’s tucked down an alleyway leading onto Crown City’s main street. You can get here from the food section of the city.
Panel 3
Location: On the beach strip, this panel is on top of a roof near some rails. However, you’ll want to wait for a ramp to come by so you can fly to the Panel as it’s too high up to trick to - or just grab a feather
Panel 4
Location: On the side of a building along the beach strip (northeast side) of the city. You'll need to use a boost ramp to reach this one
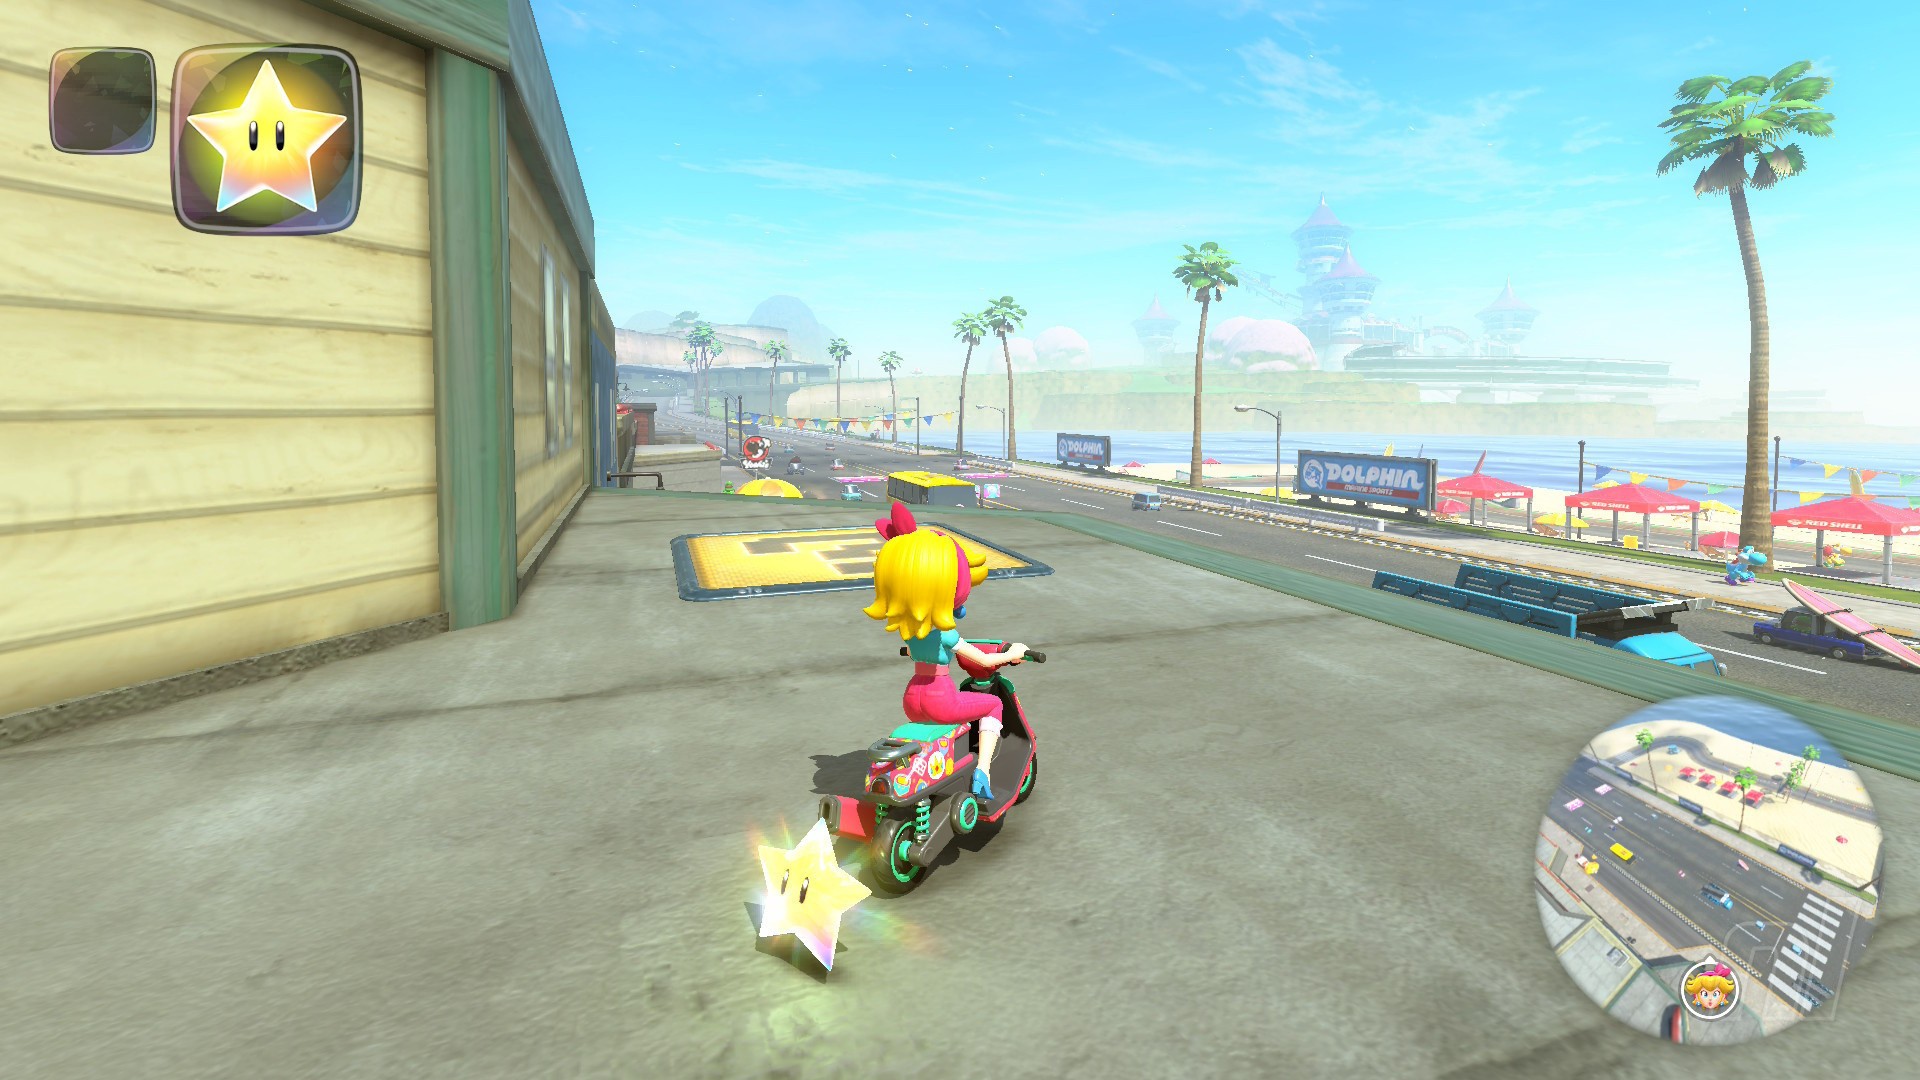
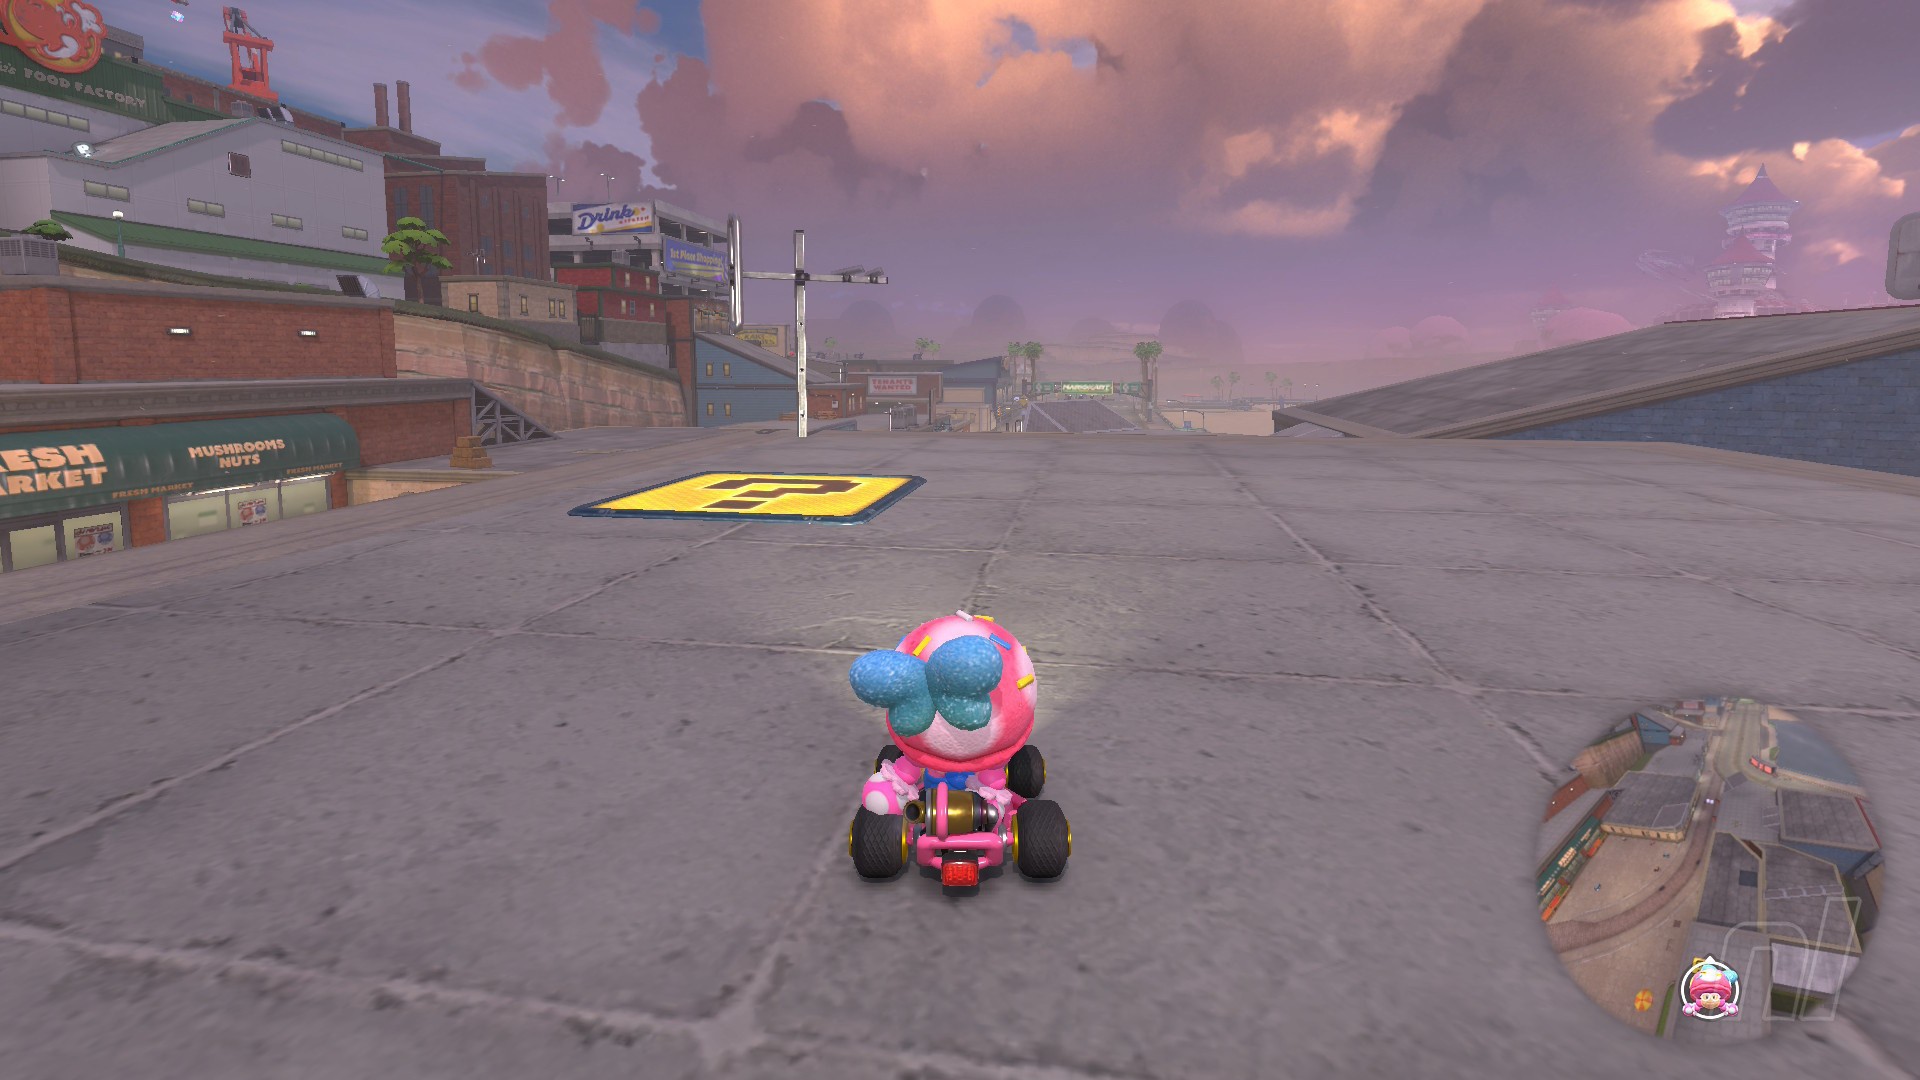
Panel 5
Location: From the starting line, turn left at the first intersection, then follow the ramp down until you reach a Drink Refresh billboard. You want to go off-course here, directly under the sign, and you'll see the panel just past it.
Panel 6
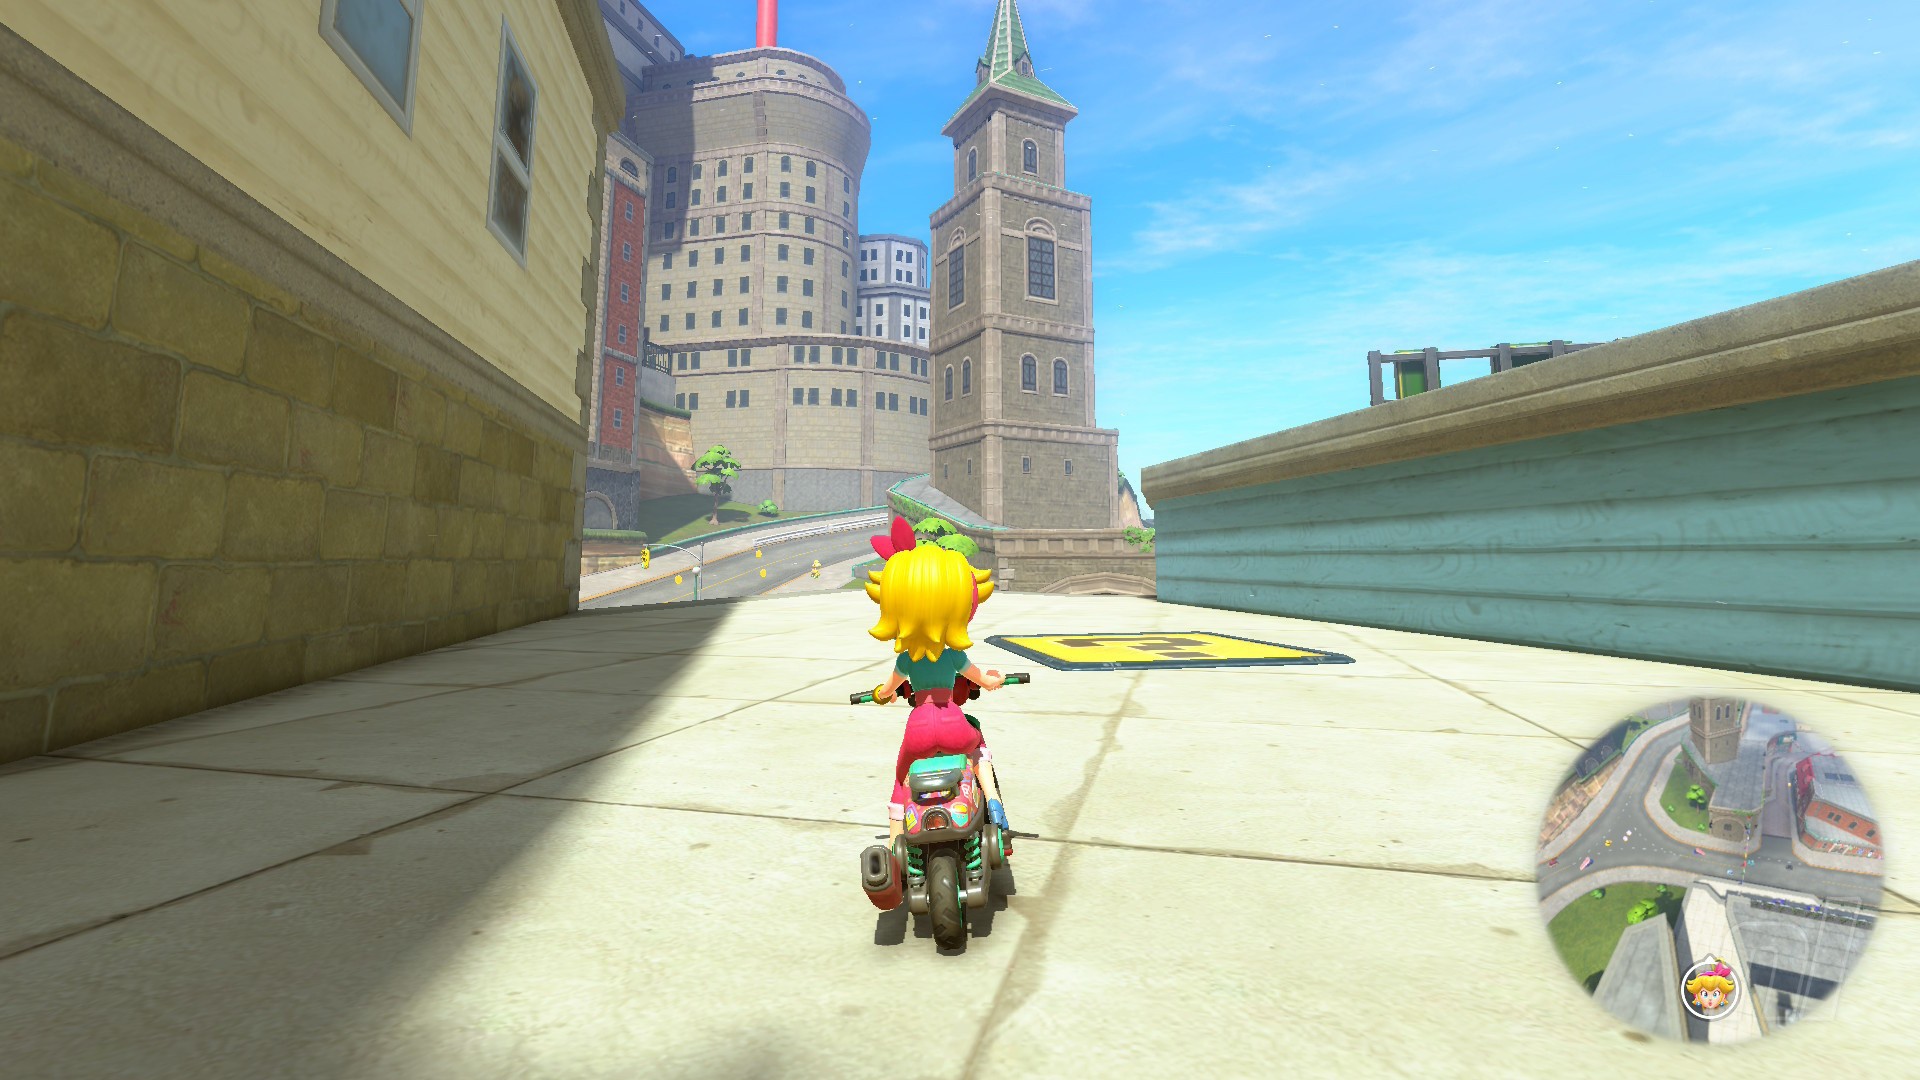
Location: From the starting line, you'll want to drive through the parking lot ramp. As you go up it, turn right through a gap, and then drive over a small ramp here to reach the panel close to a construction site.
Panel 7
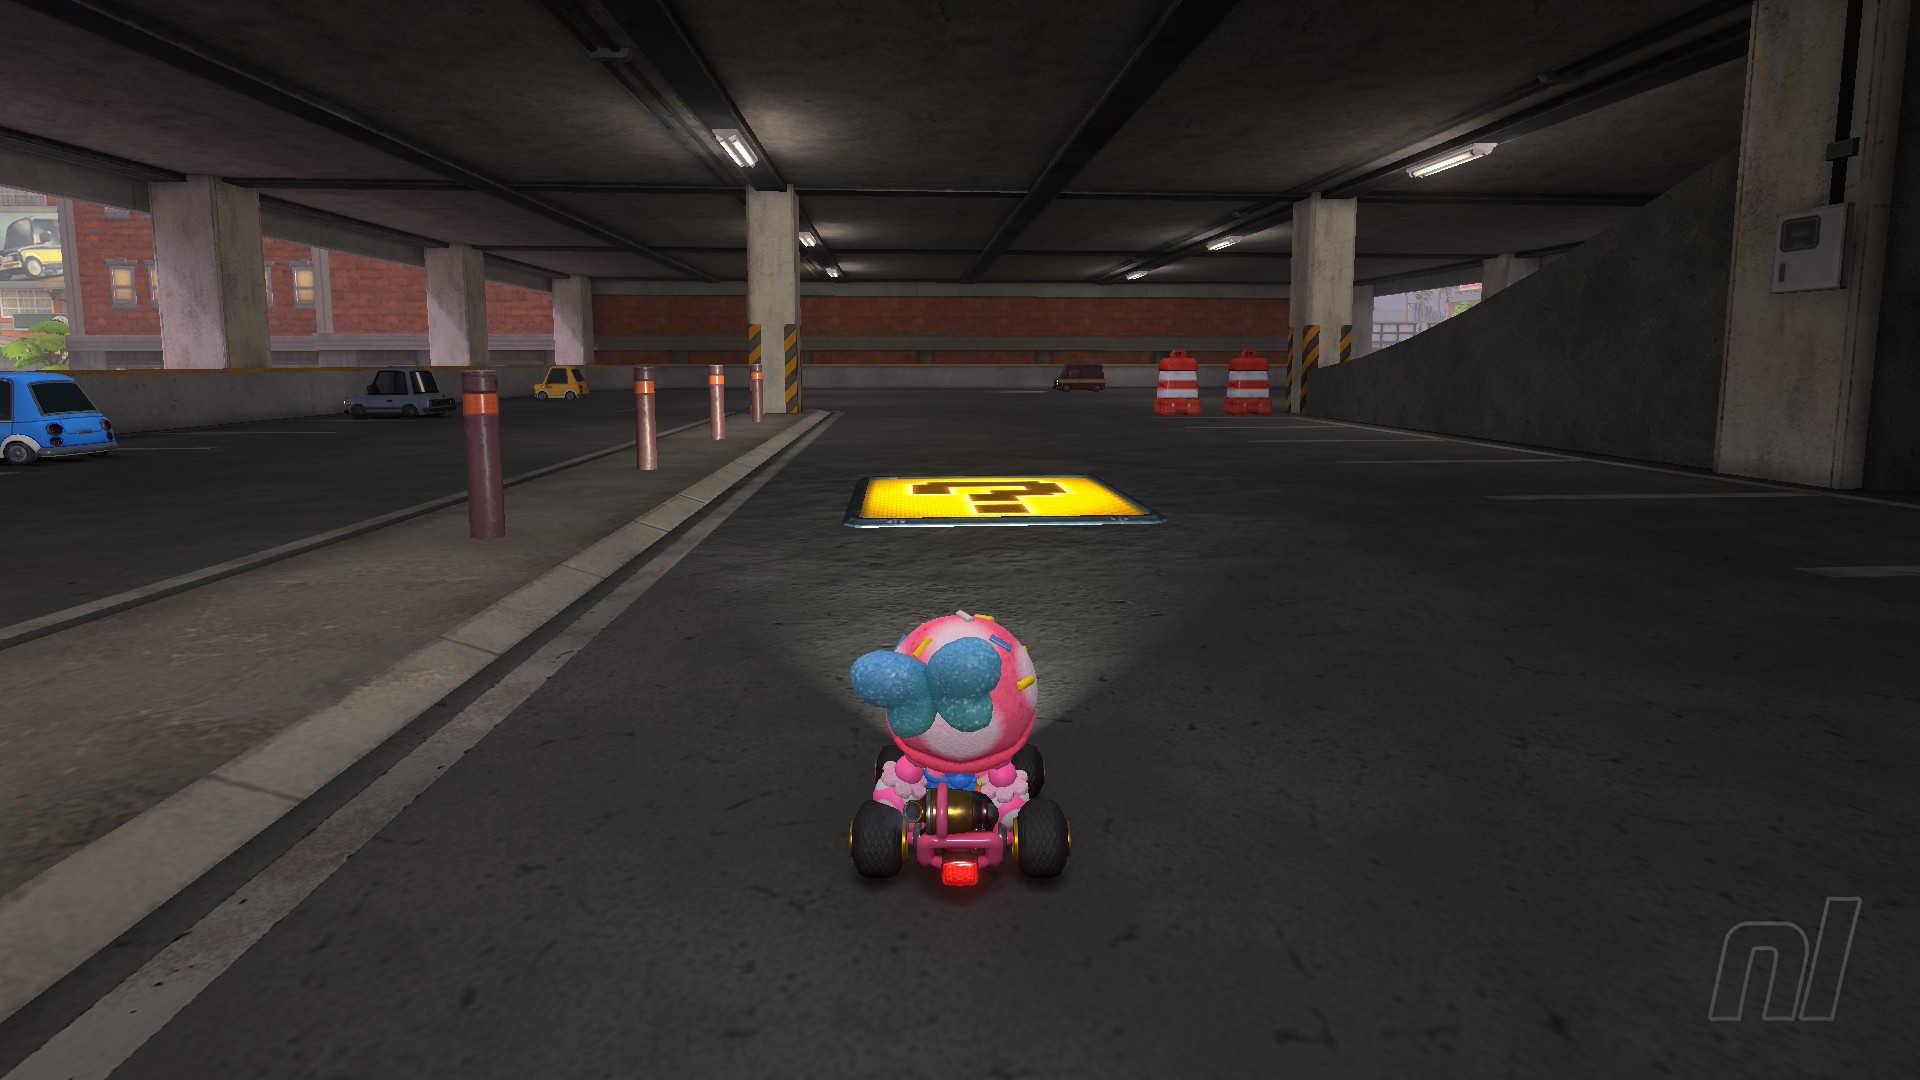
Location: Head into the parking lot on the north side of the city (turn around at the start line and take the first right after the bridge) and drive up the floors until you find the panel on the ground.
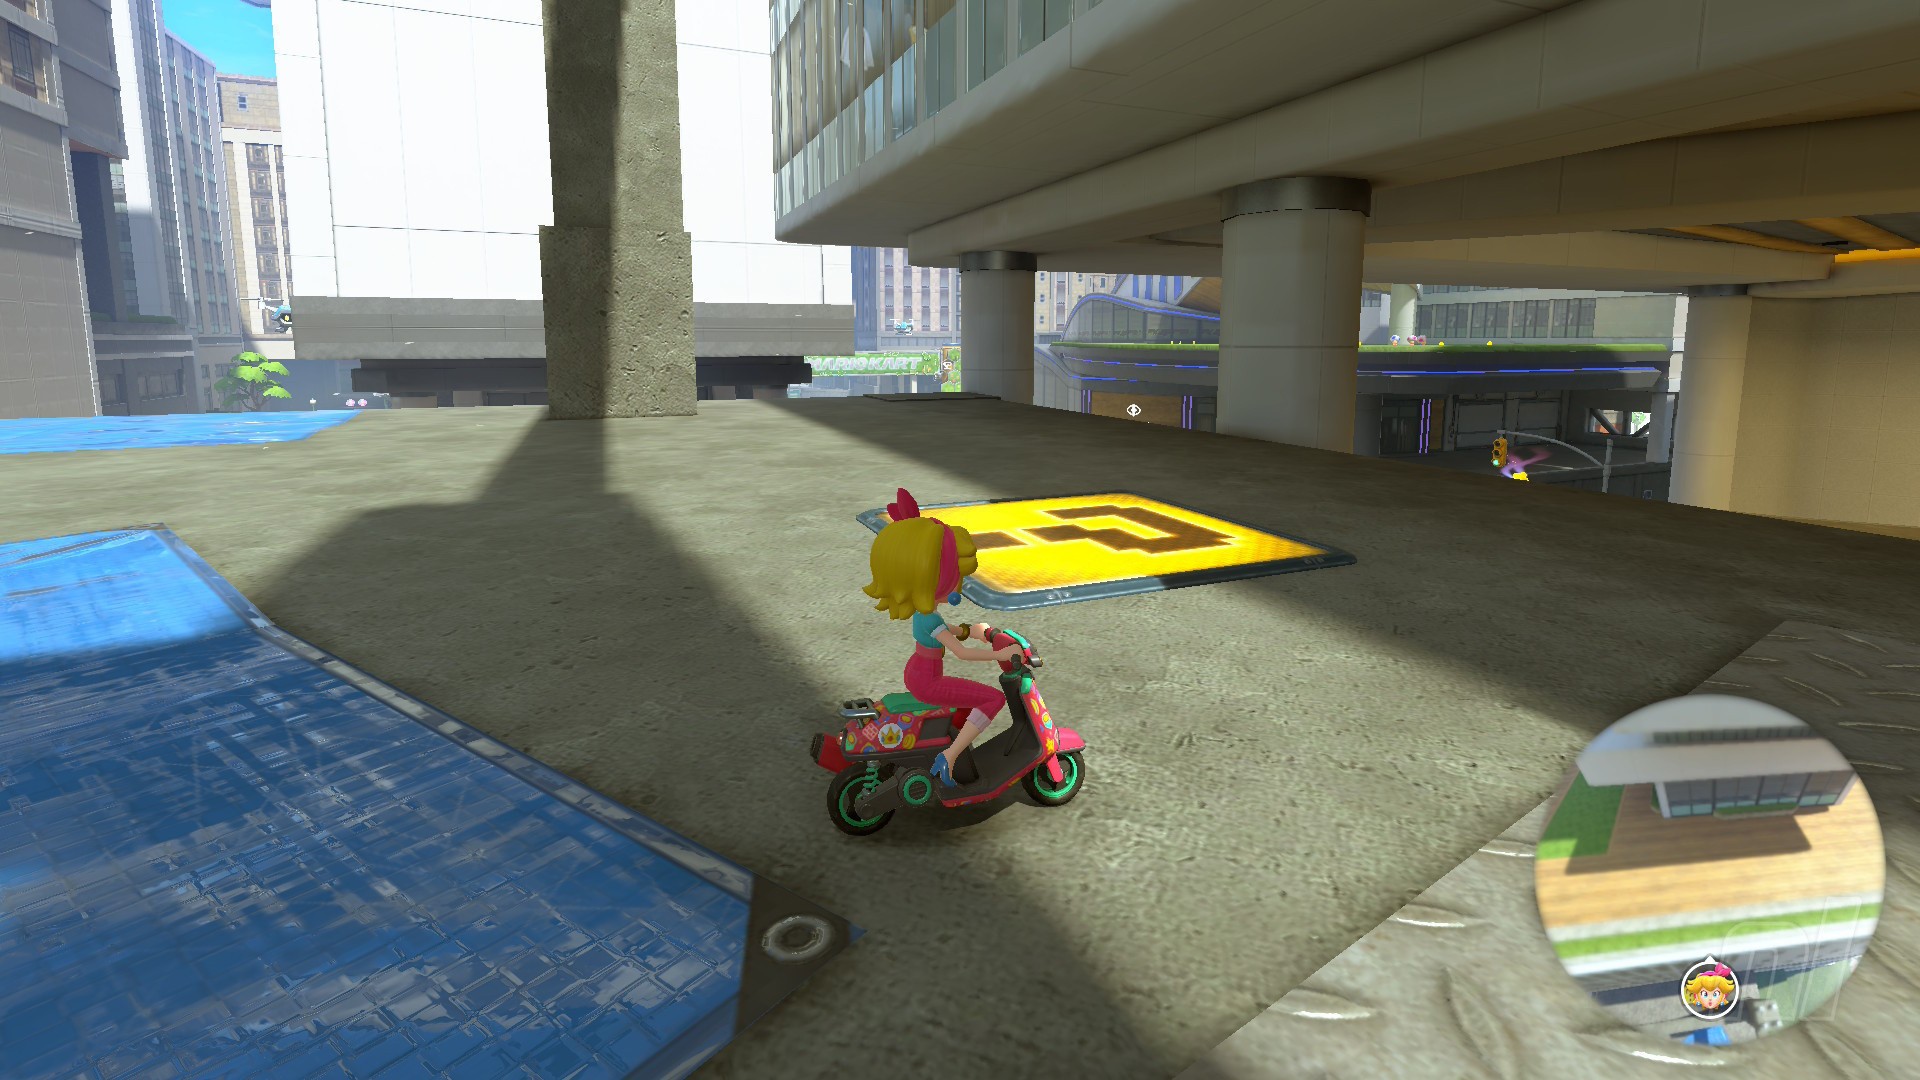
Panel 8
Location: Follow the track from the start line straight up the spiral ramp and across the solar panels. At the curved hanging road, jump straight off the top onto the building with the helipad, then straight again towards the billboard. The panel is next to the board.
Panel 9
Location: Hop onto the right solar panel roof from the track's opening spiral ramp then drop off the right edge just before the boost ramp to land on a roof with the panel.
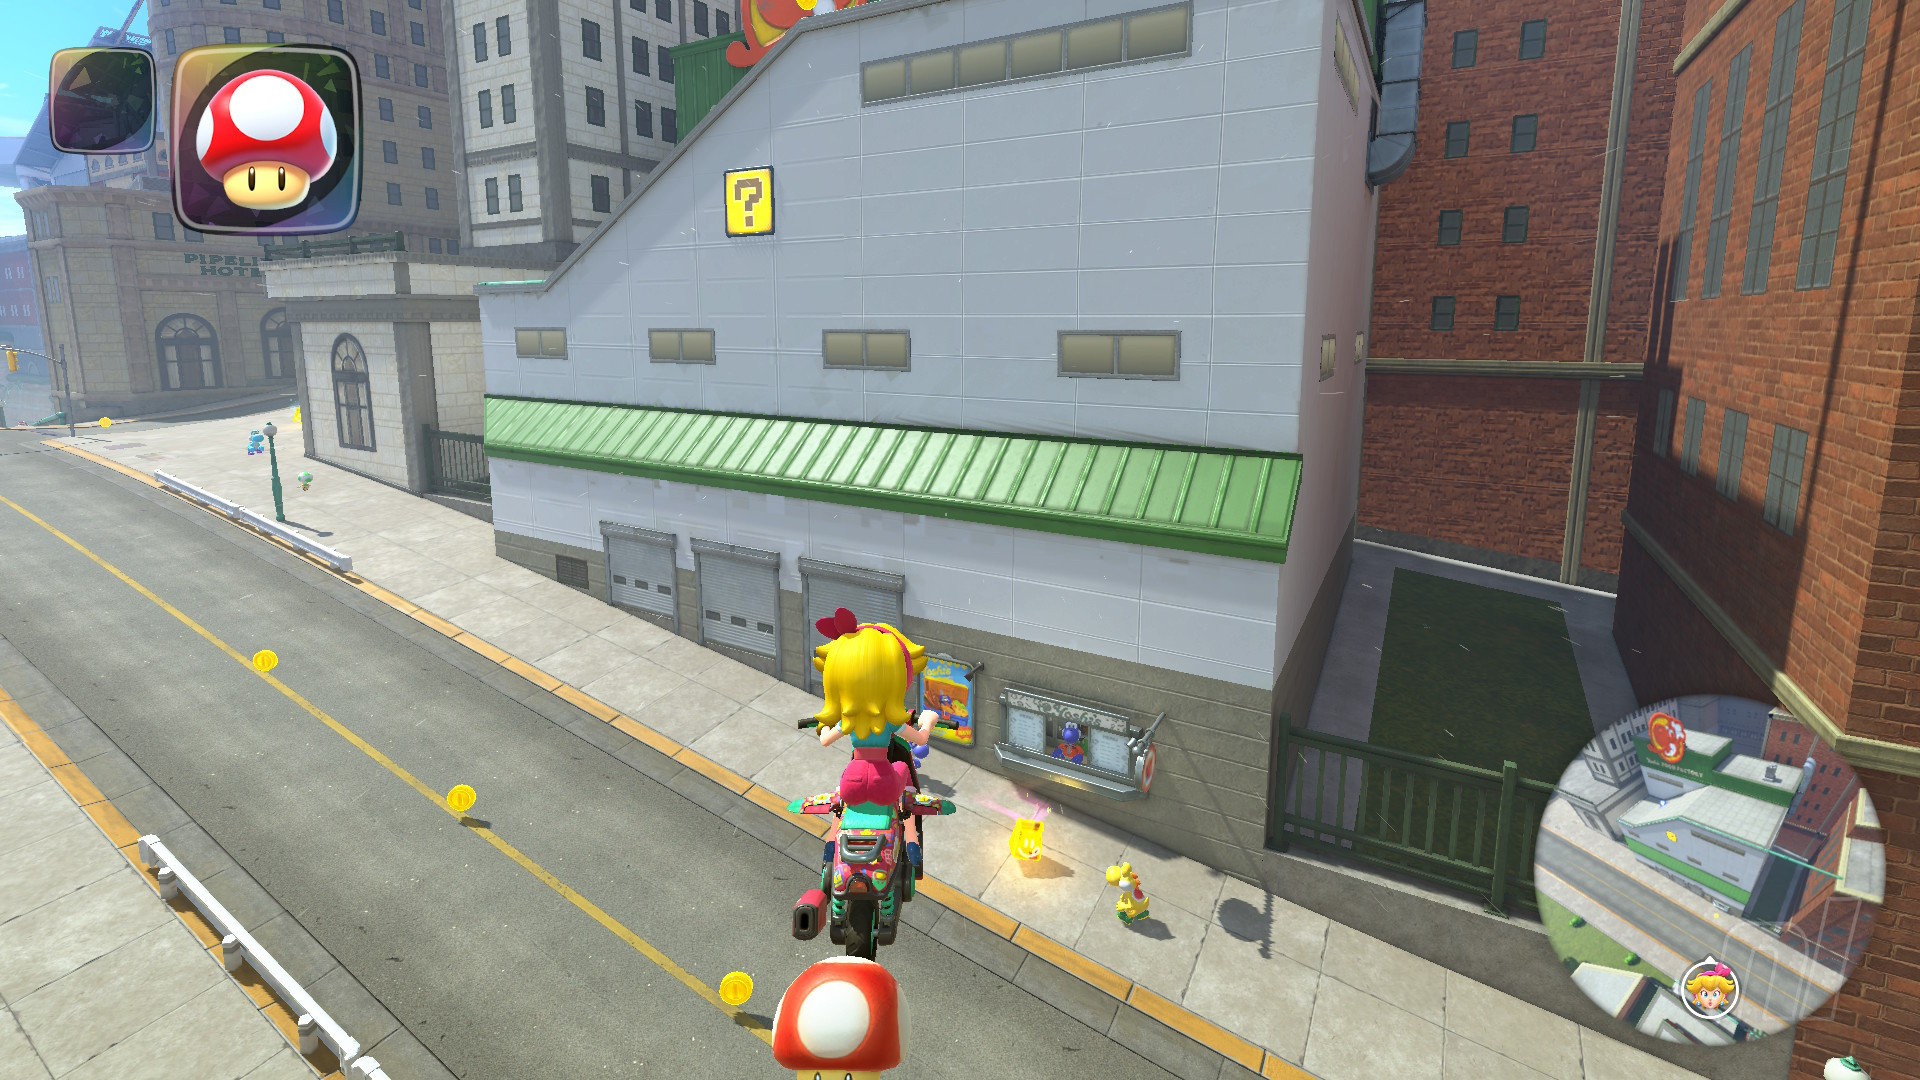
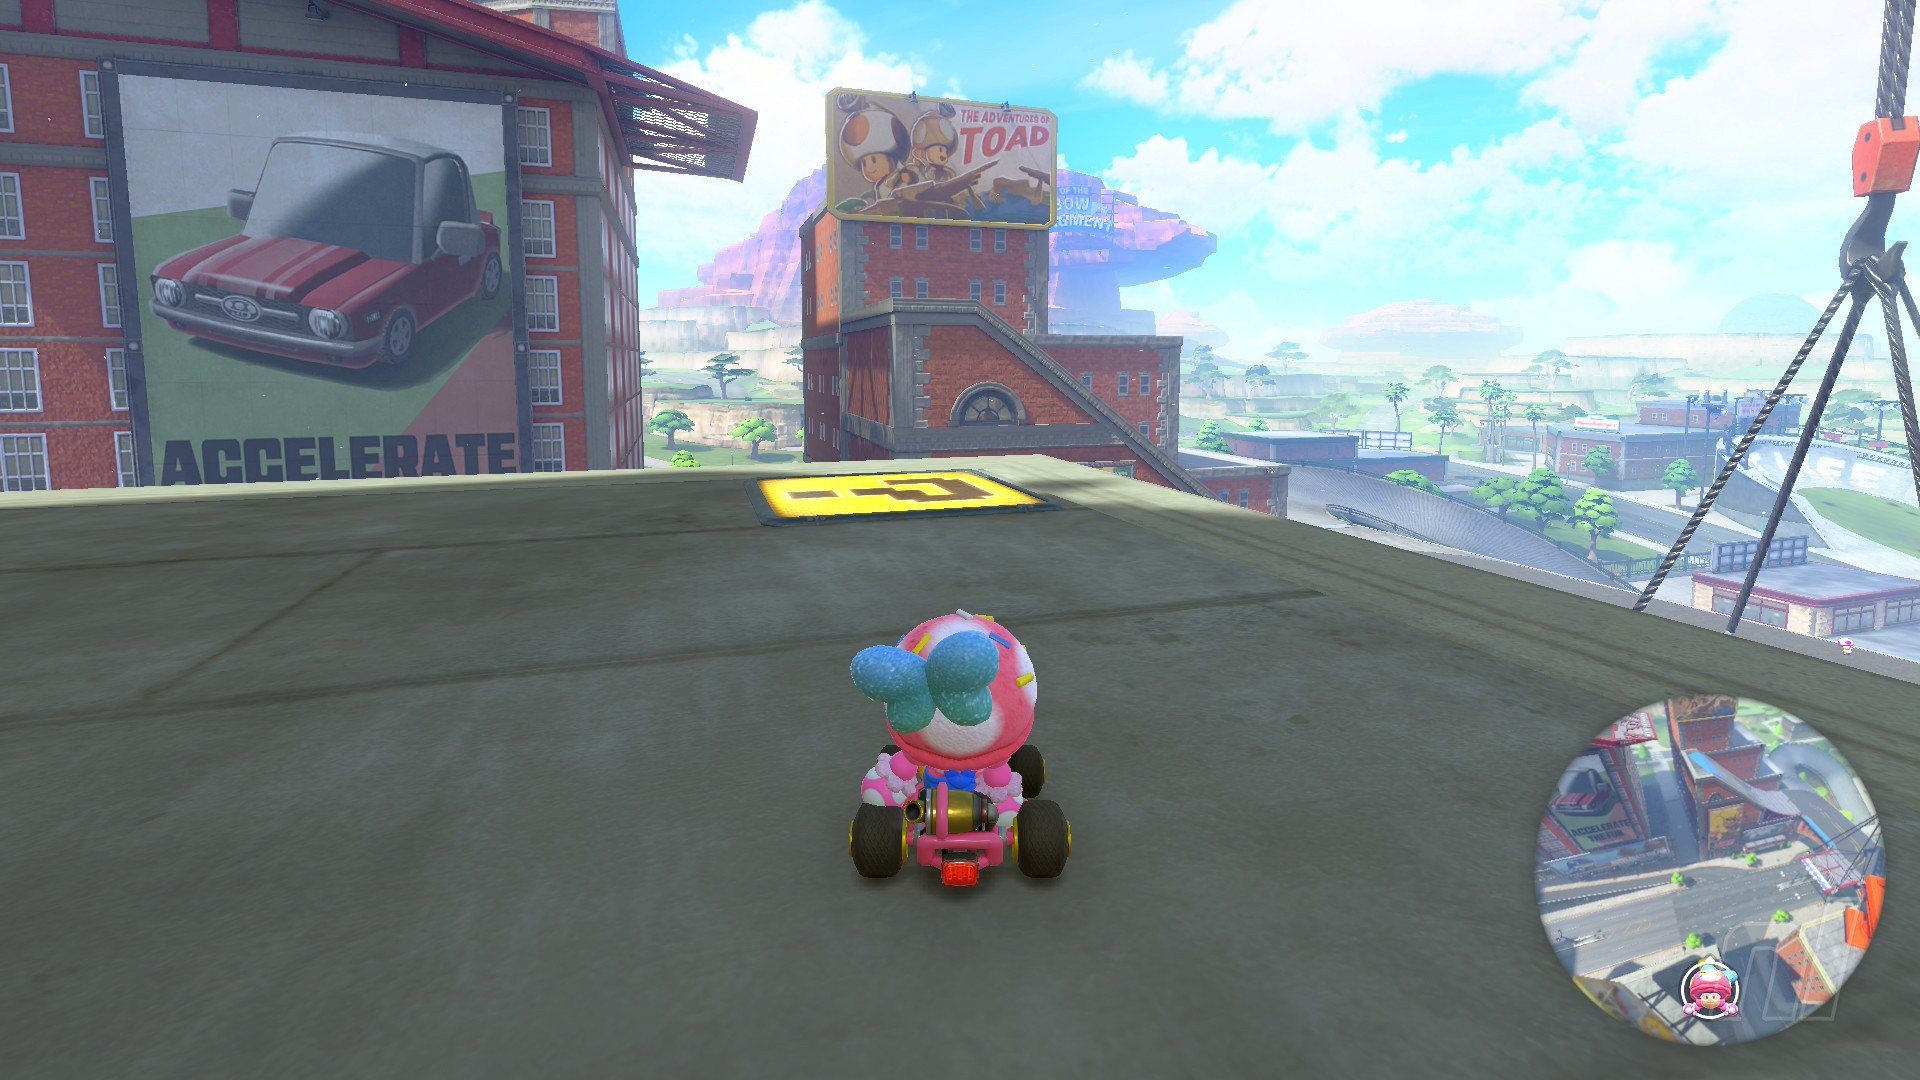
Panel 10
Location: On the roof of a building next door to the Fire Flower Diner, near the long red bridge leading east out of Crown City.
Dandelion Depths Question Panels
Number of panels: 5
Collectibles region: Fall
Panel 1
Location: From the starting line, drive as normal until you reach a two-way split. Ignore and instead drop off to the right. Keep driving to find the panel on wall ina ditch.
Panel 2
Location: Drive out of the ditch from Panel 1 and then head towards the small pond right ahead of it. Drive over it to a grassy slope to find this panel.
Panel 3
Location: The third panel is easiest to reach from the starting line. Turn around, drop off the track to your right, and drive towards a small slope where you’ll find the panel.
Panel 4
Location: Drive down the course as normal and follow the dirt corkscrew path until you reach a P Switch. You’ll see the panel on the stone wall above the huge watery cave. You’ll have to wall ride from here. You can also drop down from the top of the course to reach the metal platform on the other side.
Panel 5
Location: In the watery dandelion cave, the panel is on one of the many stone ramps – one of the bigger ones.
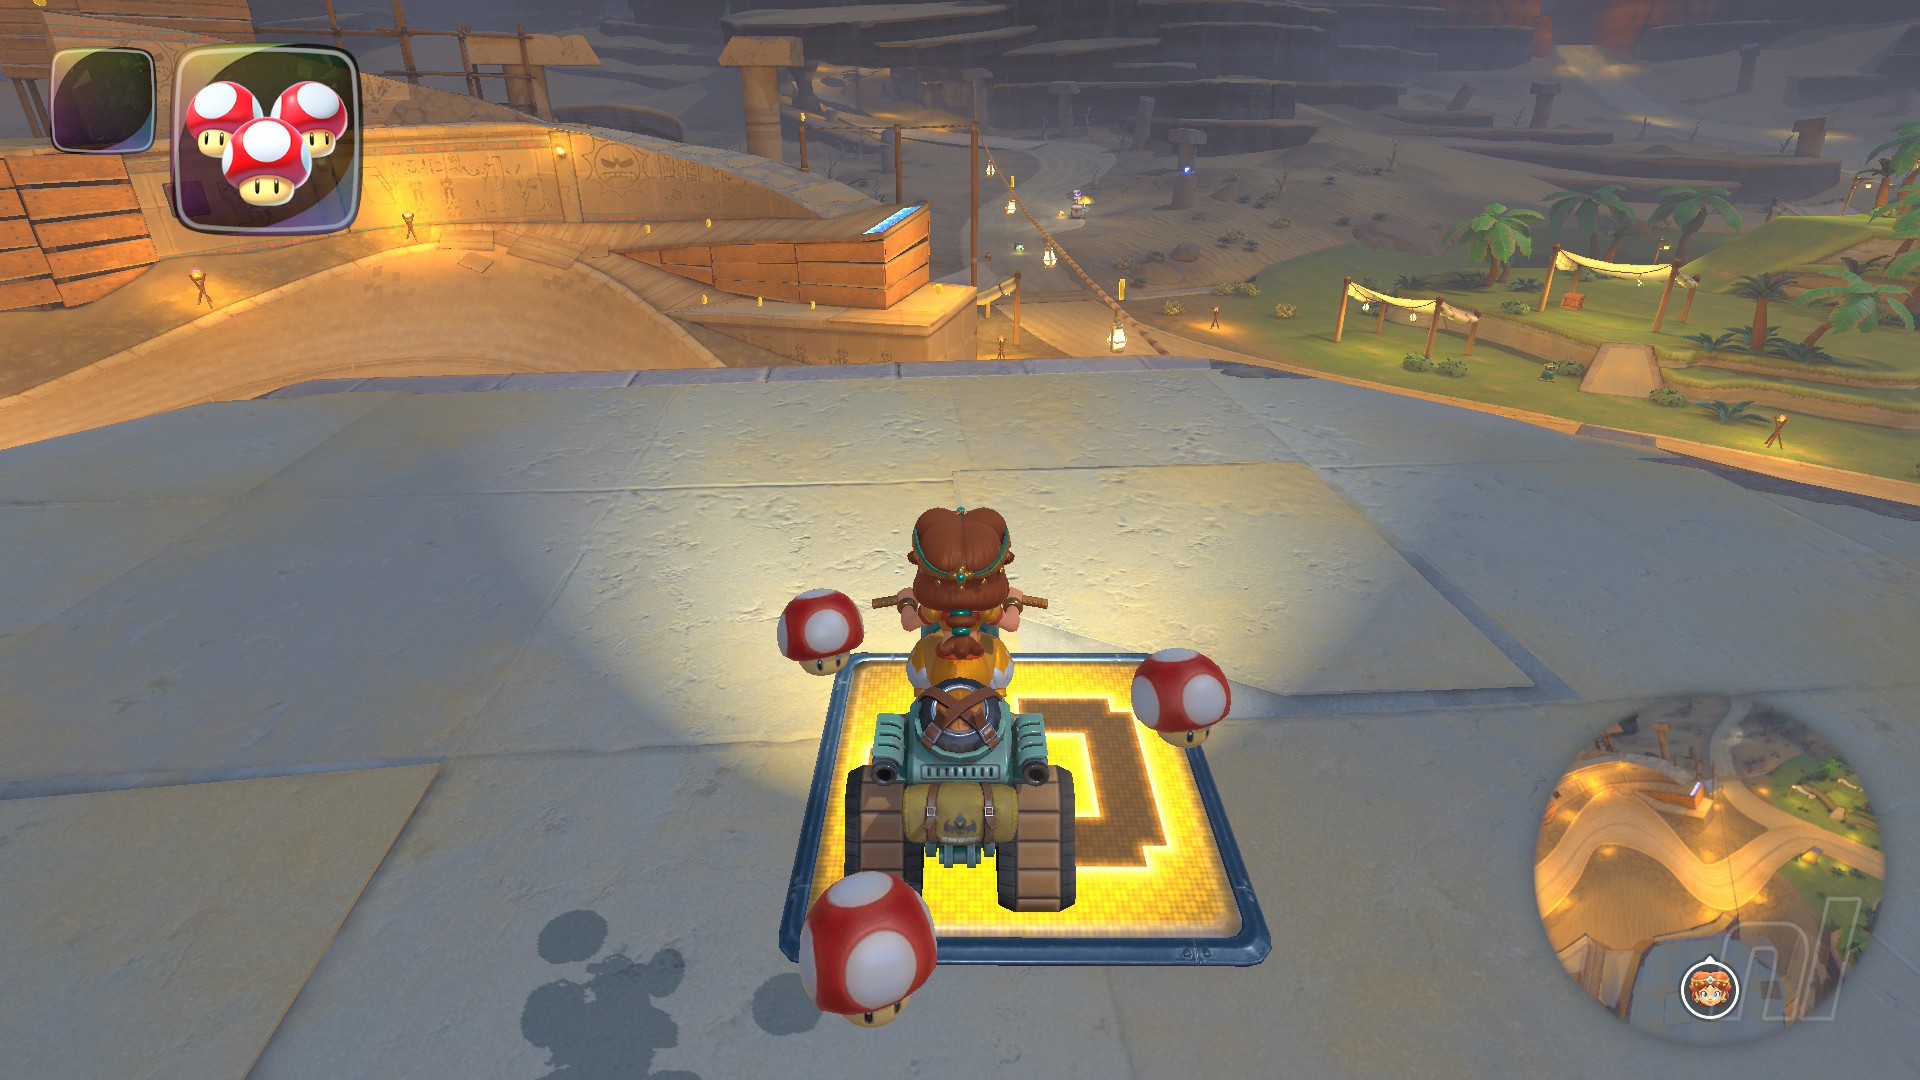
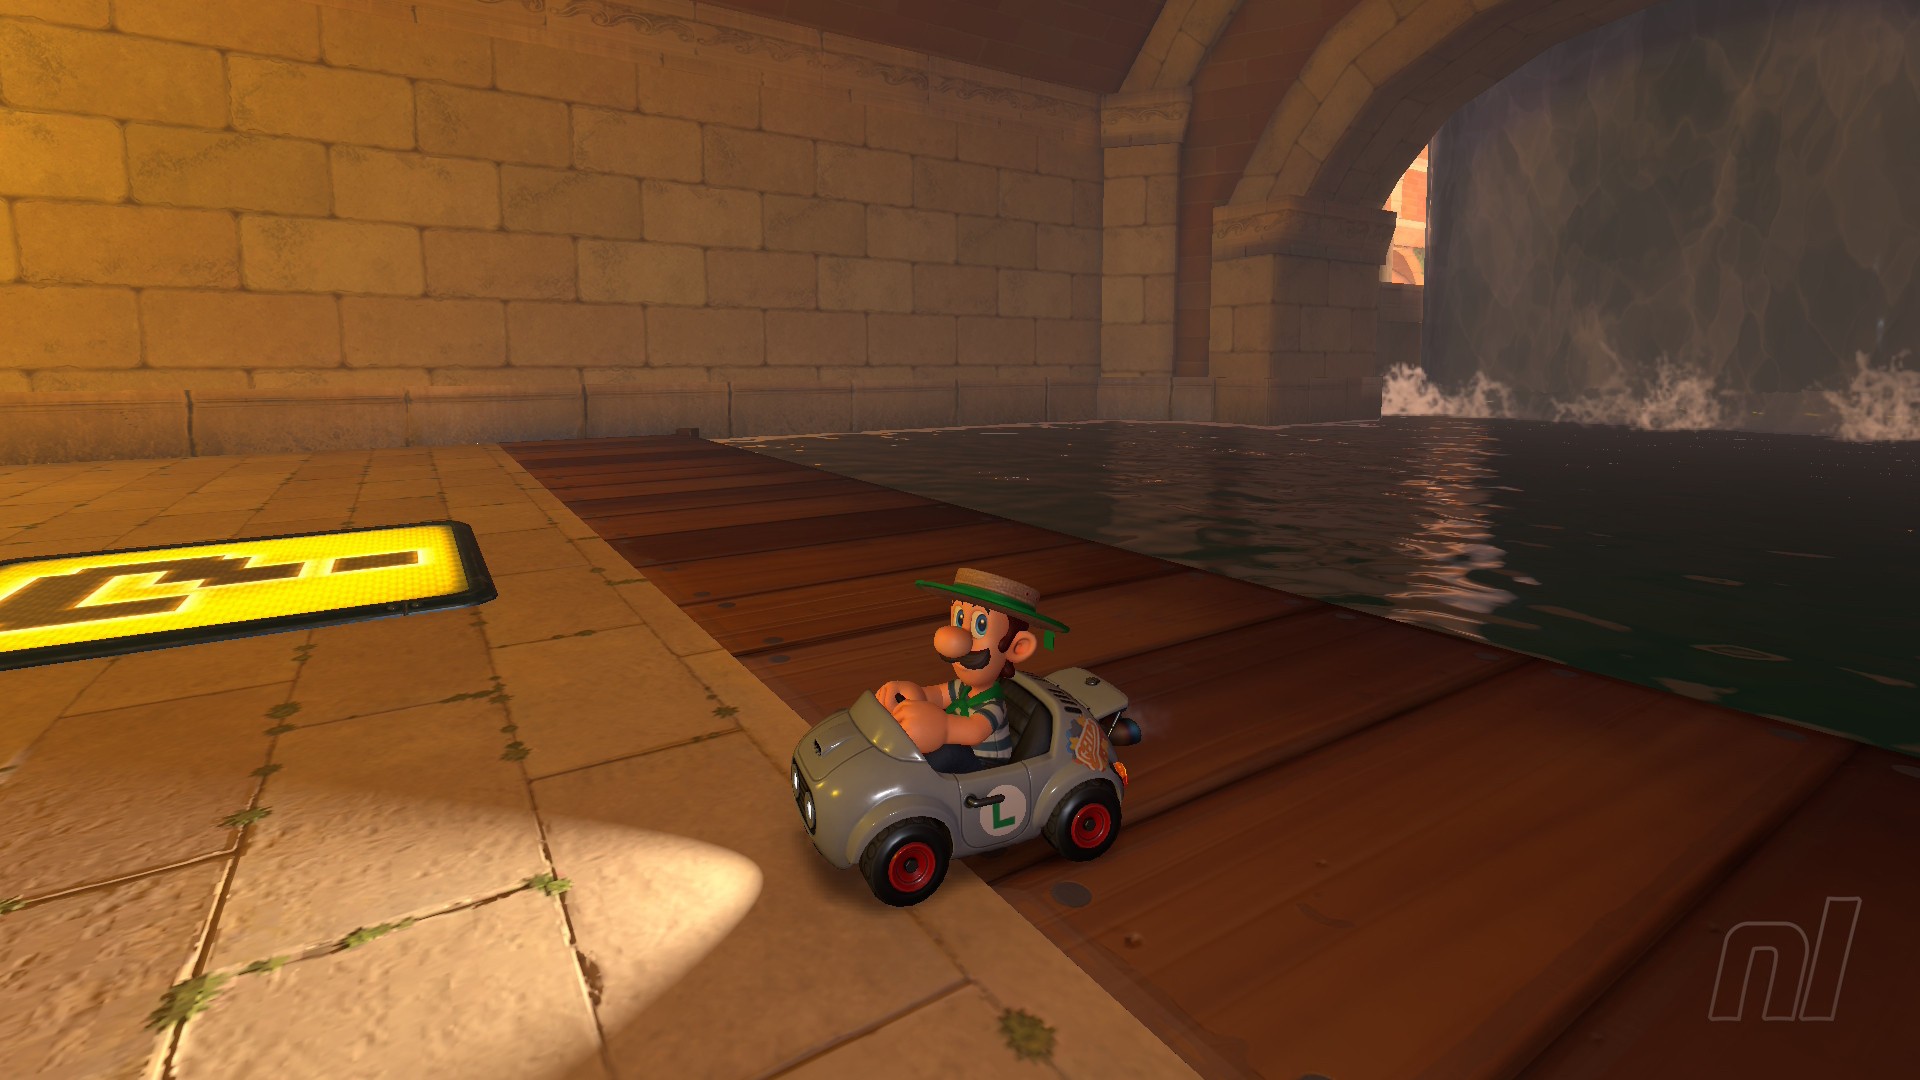
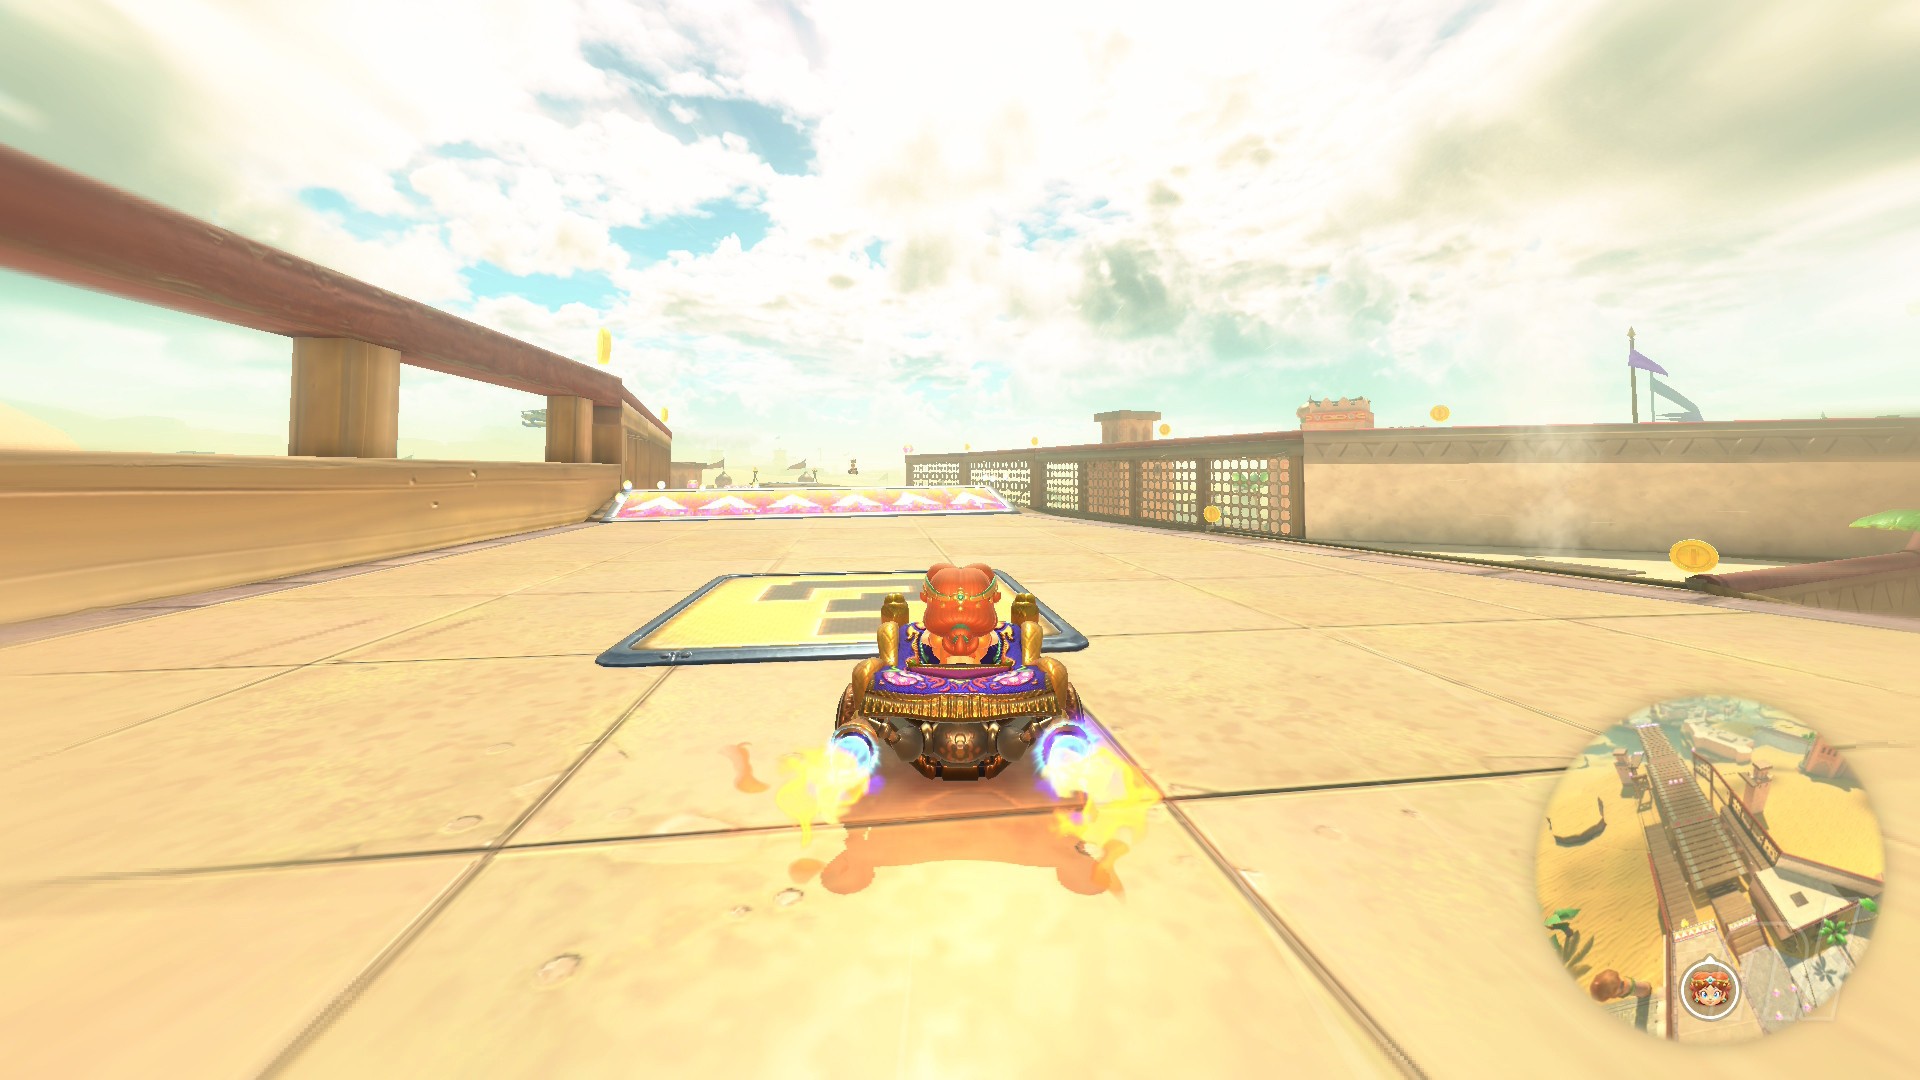
Desert Hills Question Panels
Number of panels: 5
Collectibles region: Desert
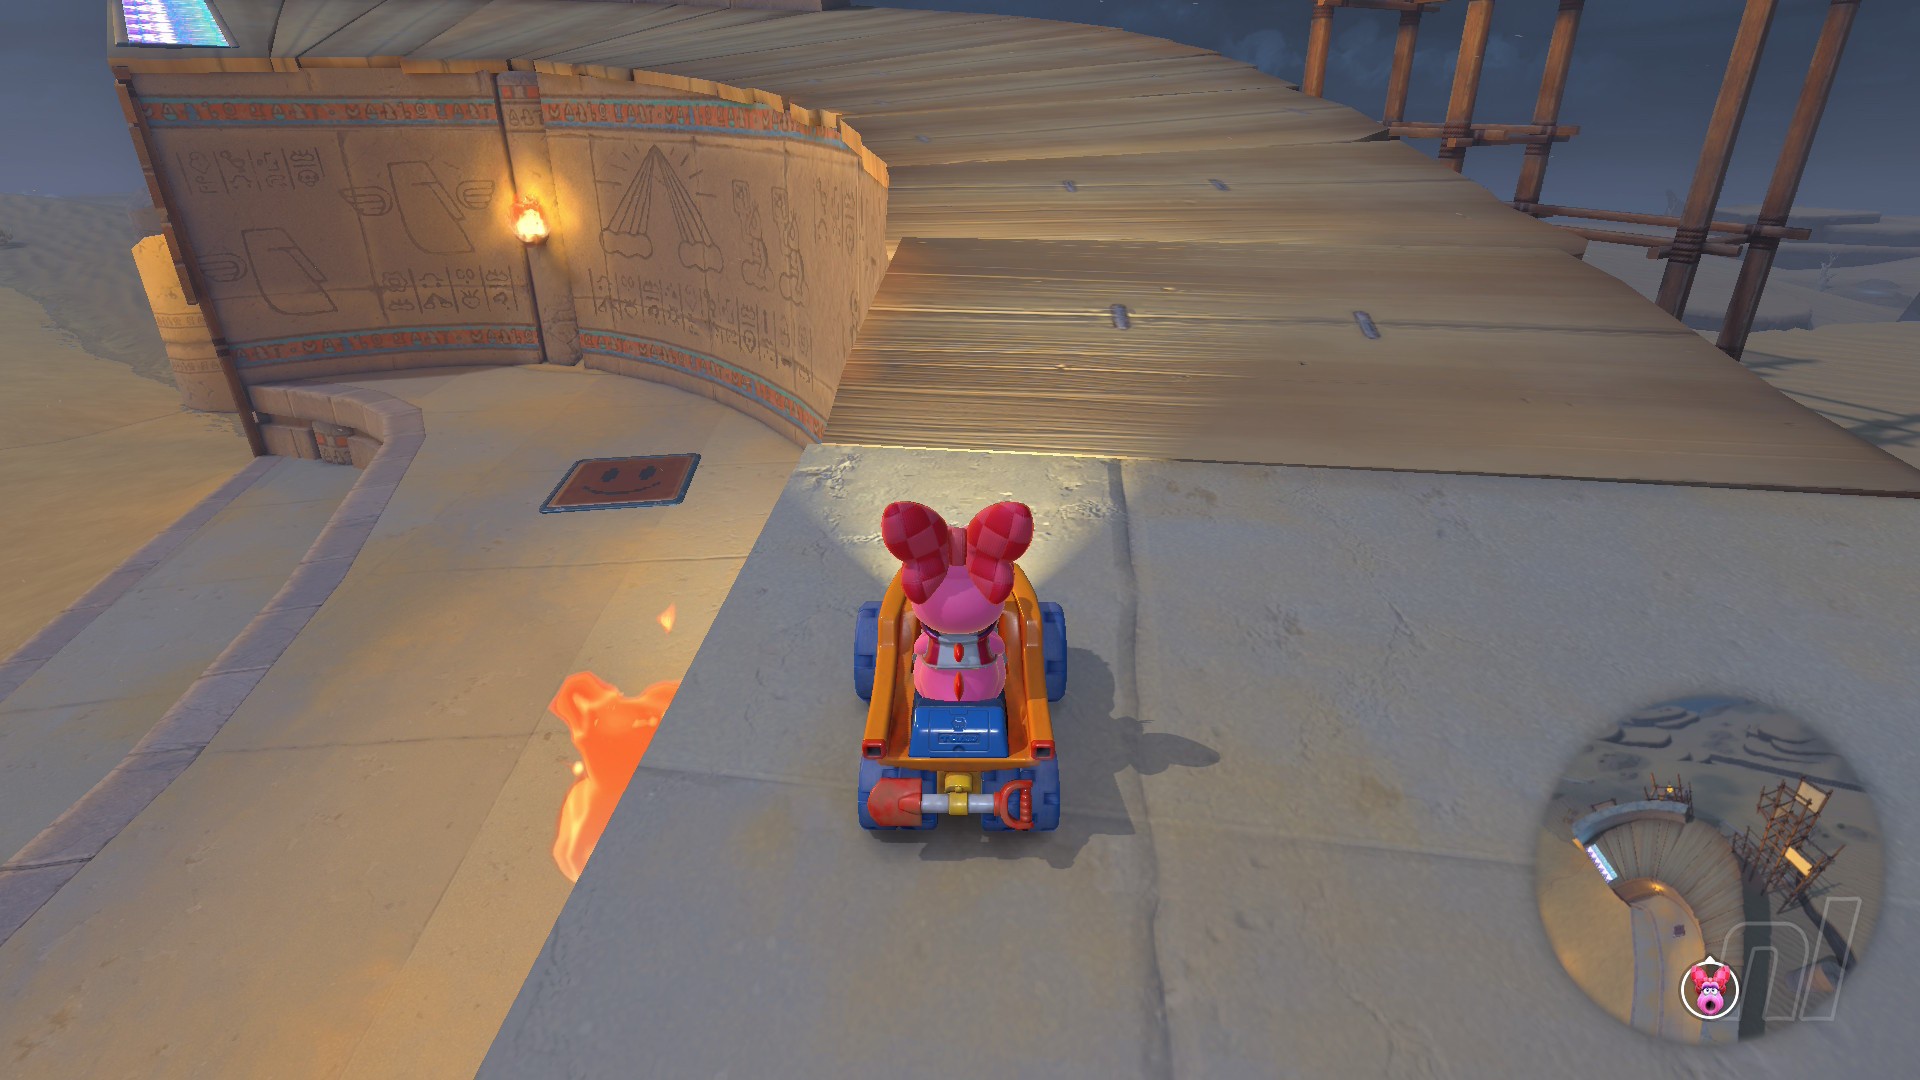
Panel 1

Location: At the start line, turn around and follow the road until you see the panel on a hieroglyphic wall.
Panel 2
Location: From the first panel, follow the road again but take a detour down a boardwalk path. Follow the lower path to reach this panel, right next to another hieroglyph wall.
Panel 3
Location: Just below a wooden boardwalk near the end of the course. If you turn around at the start line and then follow the road until you see a grassy patch on the right, the go up to the wooden path, you'll see the panel below.
Panel 4
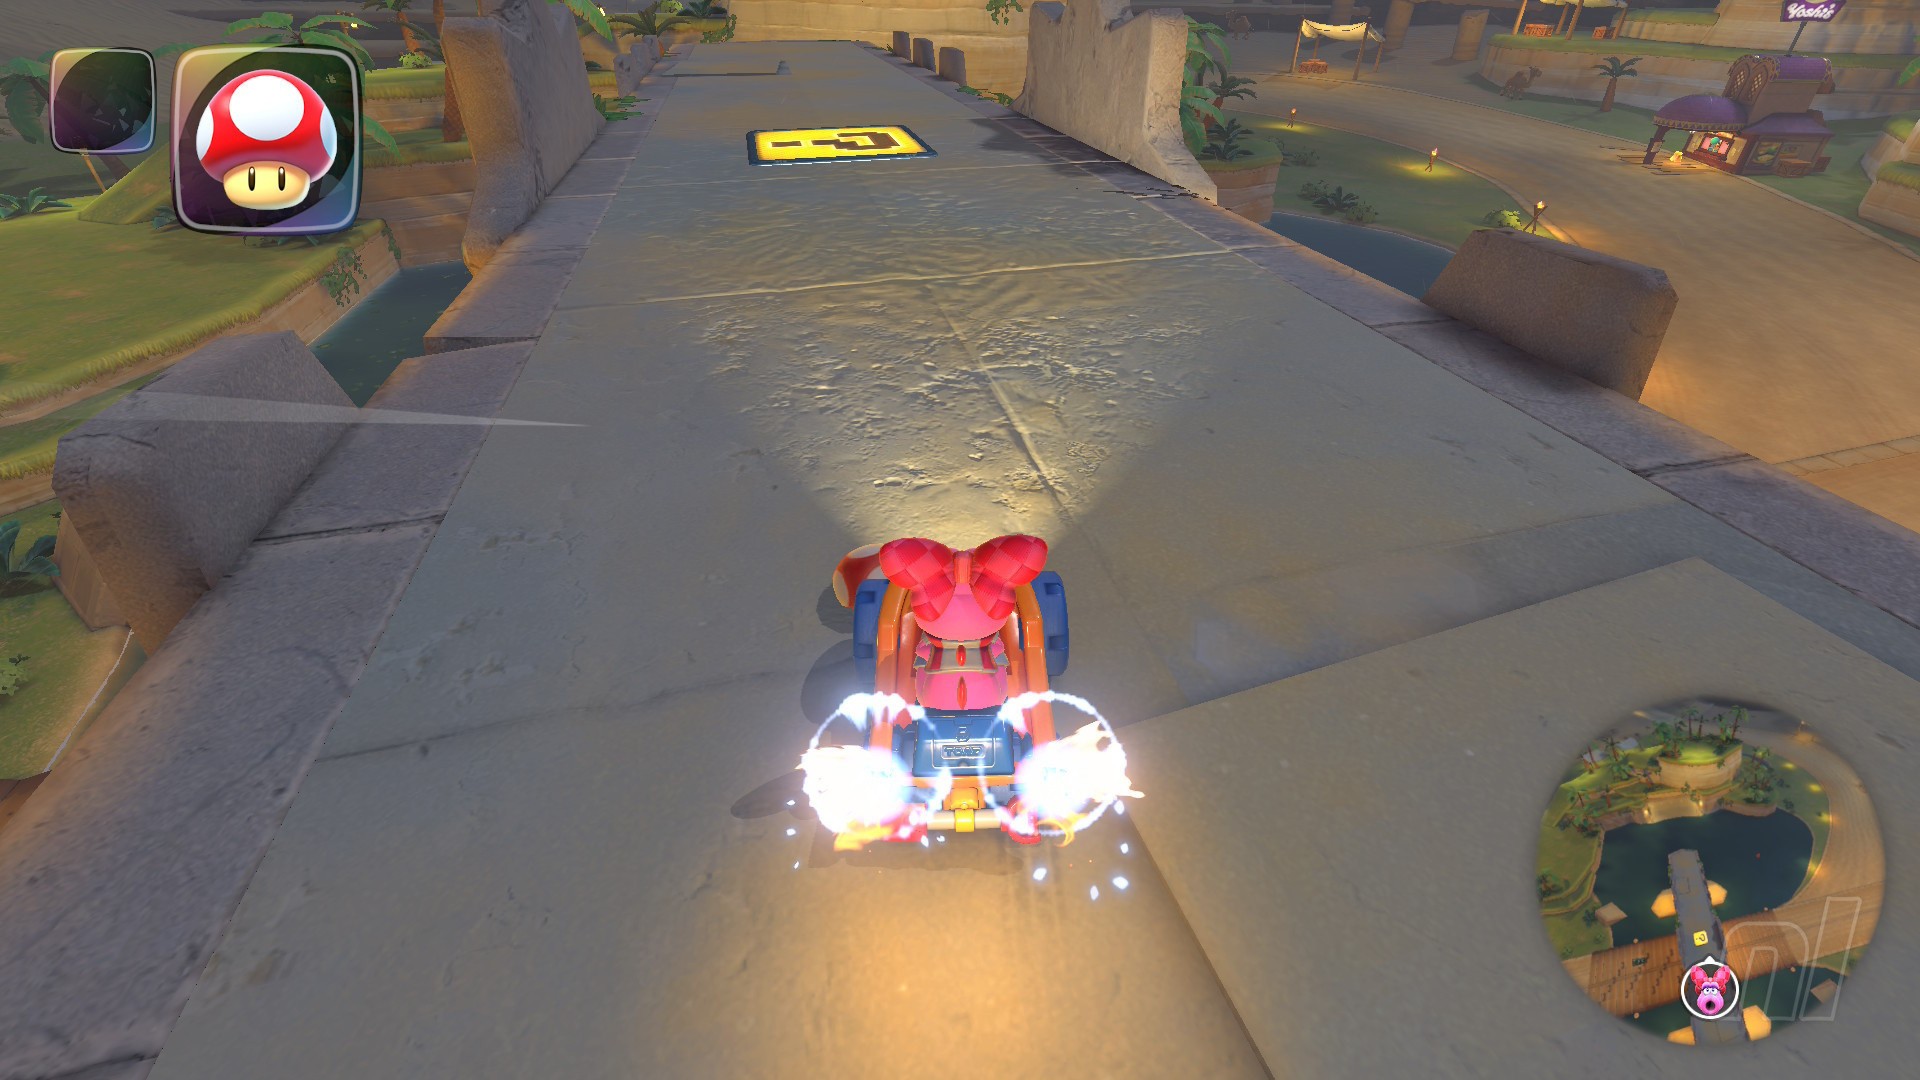
Location: On top of the Mario Kart banner start sign. Turn around, follow the road, then turn left off-road onto the grass. Use the ramp to reach the top of the start sign.
Panel 5
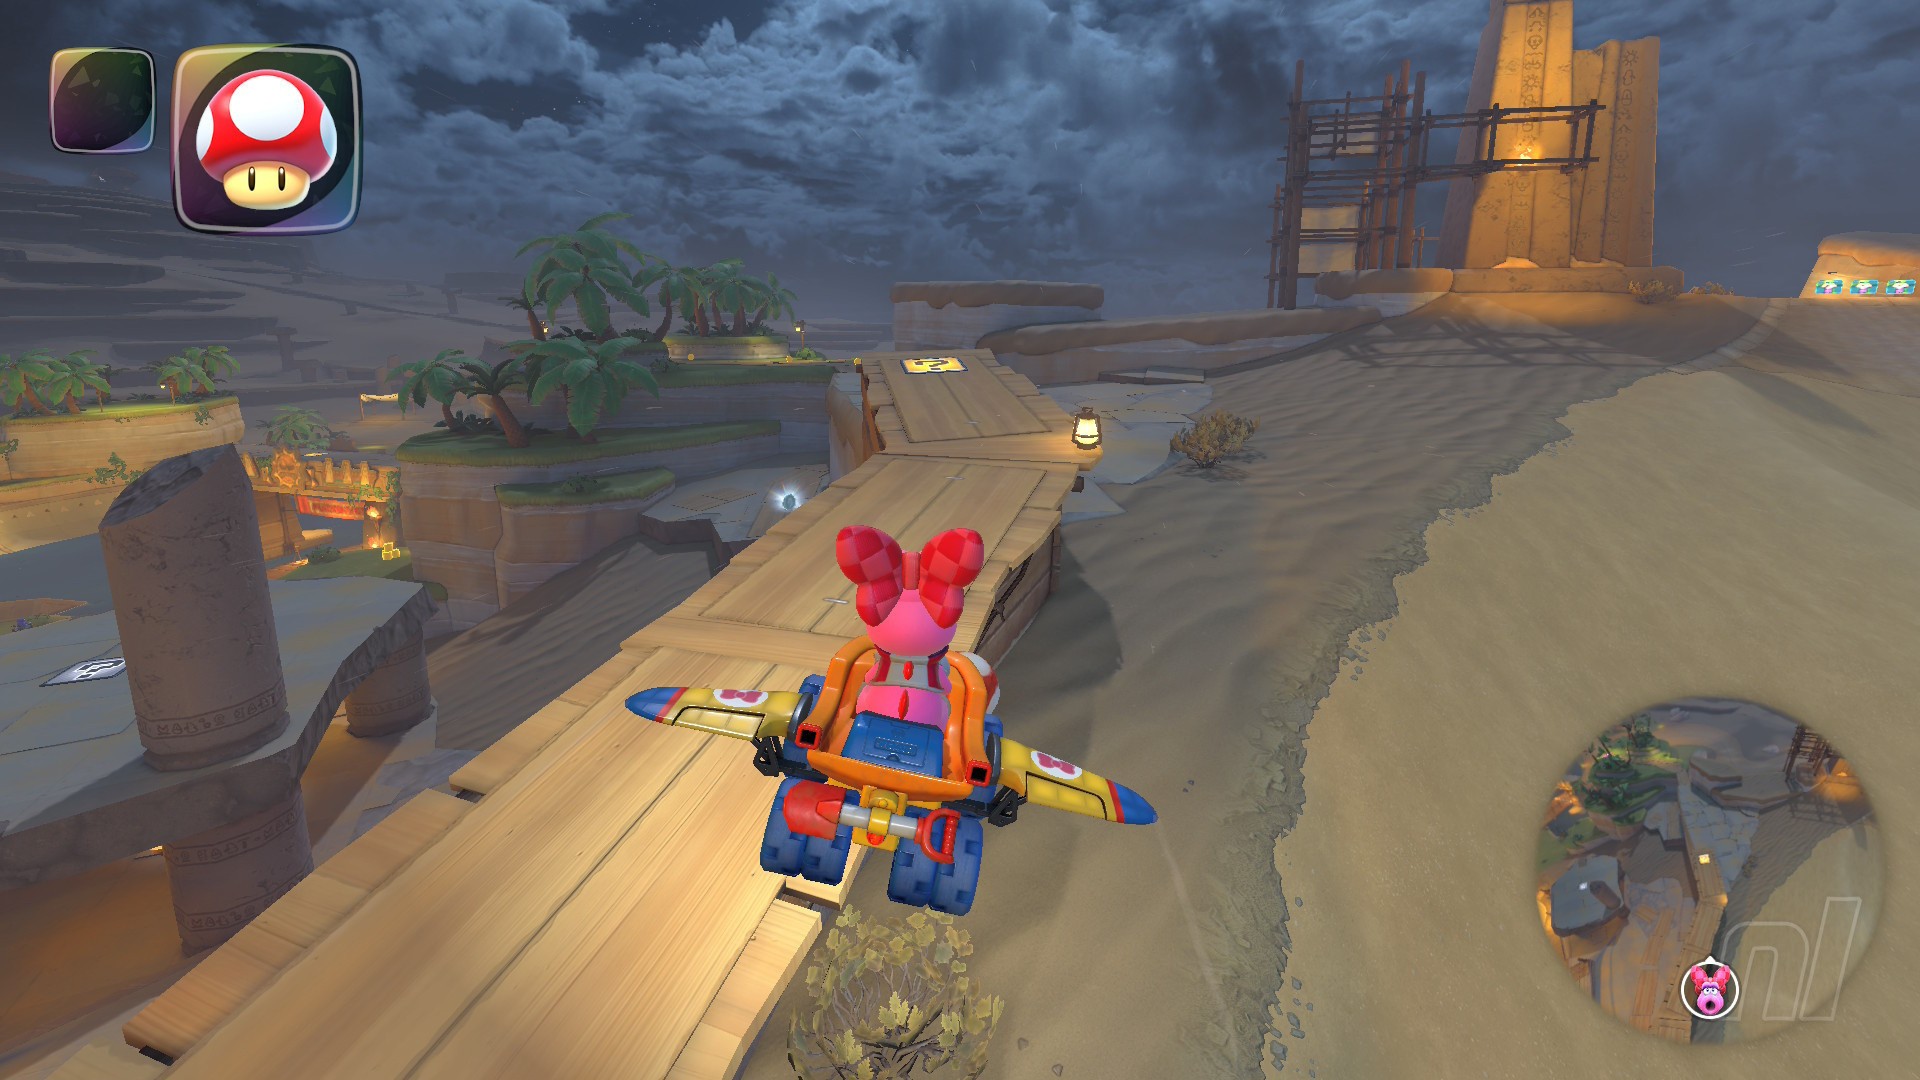
Location: Onb the end of a wooden walkway. Follow the steps for Panel 3 but keep following the wooden boardwalk until you hit a booster pad. Fly over to the other side and hit the panel.
Dino Dino Jungle Question Panels
Number of panels: 5
Collectibles region: Jungle Safari
Panel 1
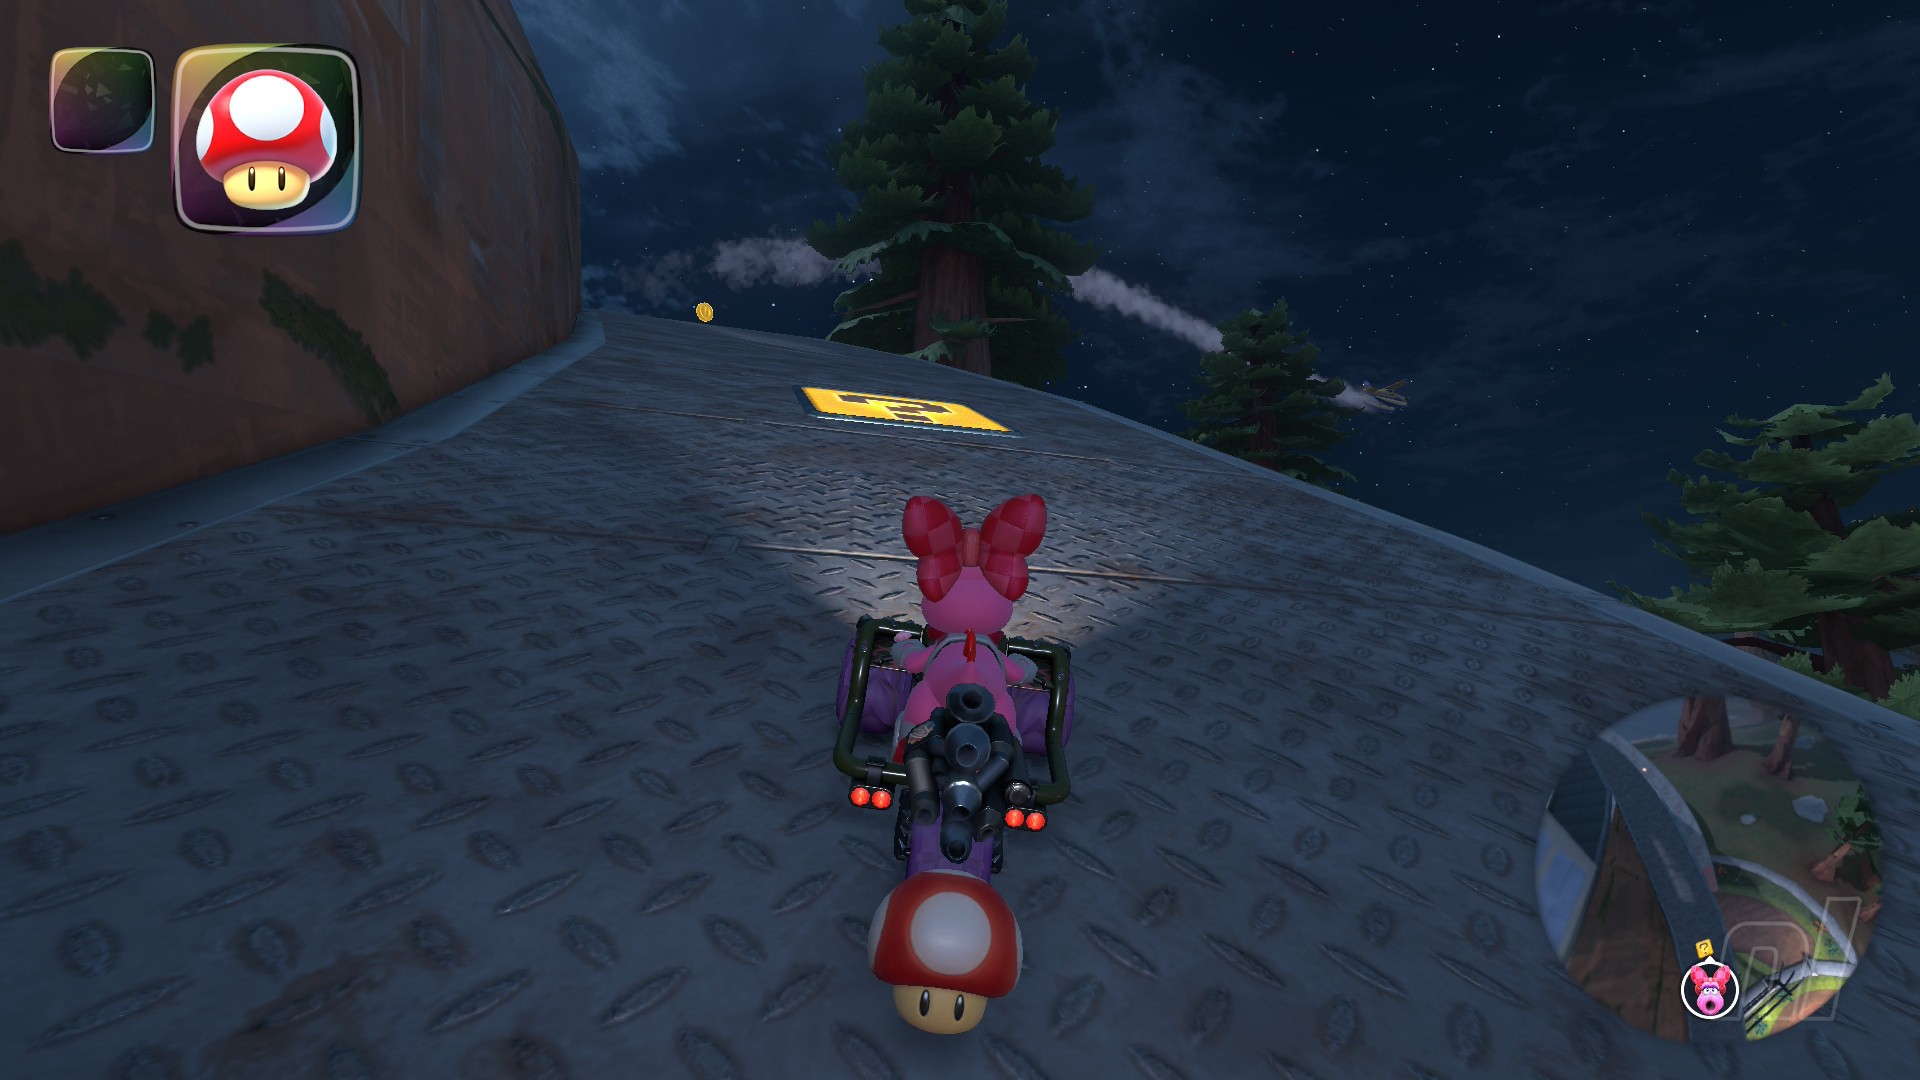
Location: Head to the upper level of the research facility (just drive straight and over the metal bridges at the start of the course), and then use the ramp to ride on the wall to grab this panel.
Panel 2
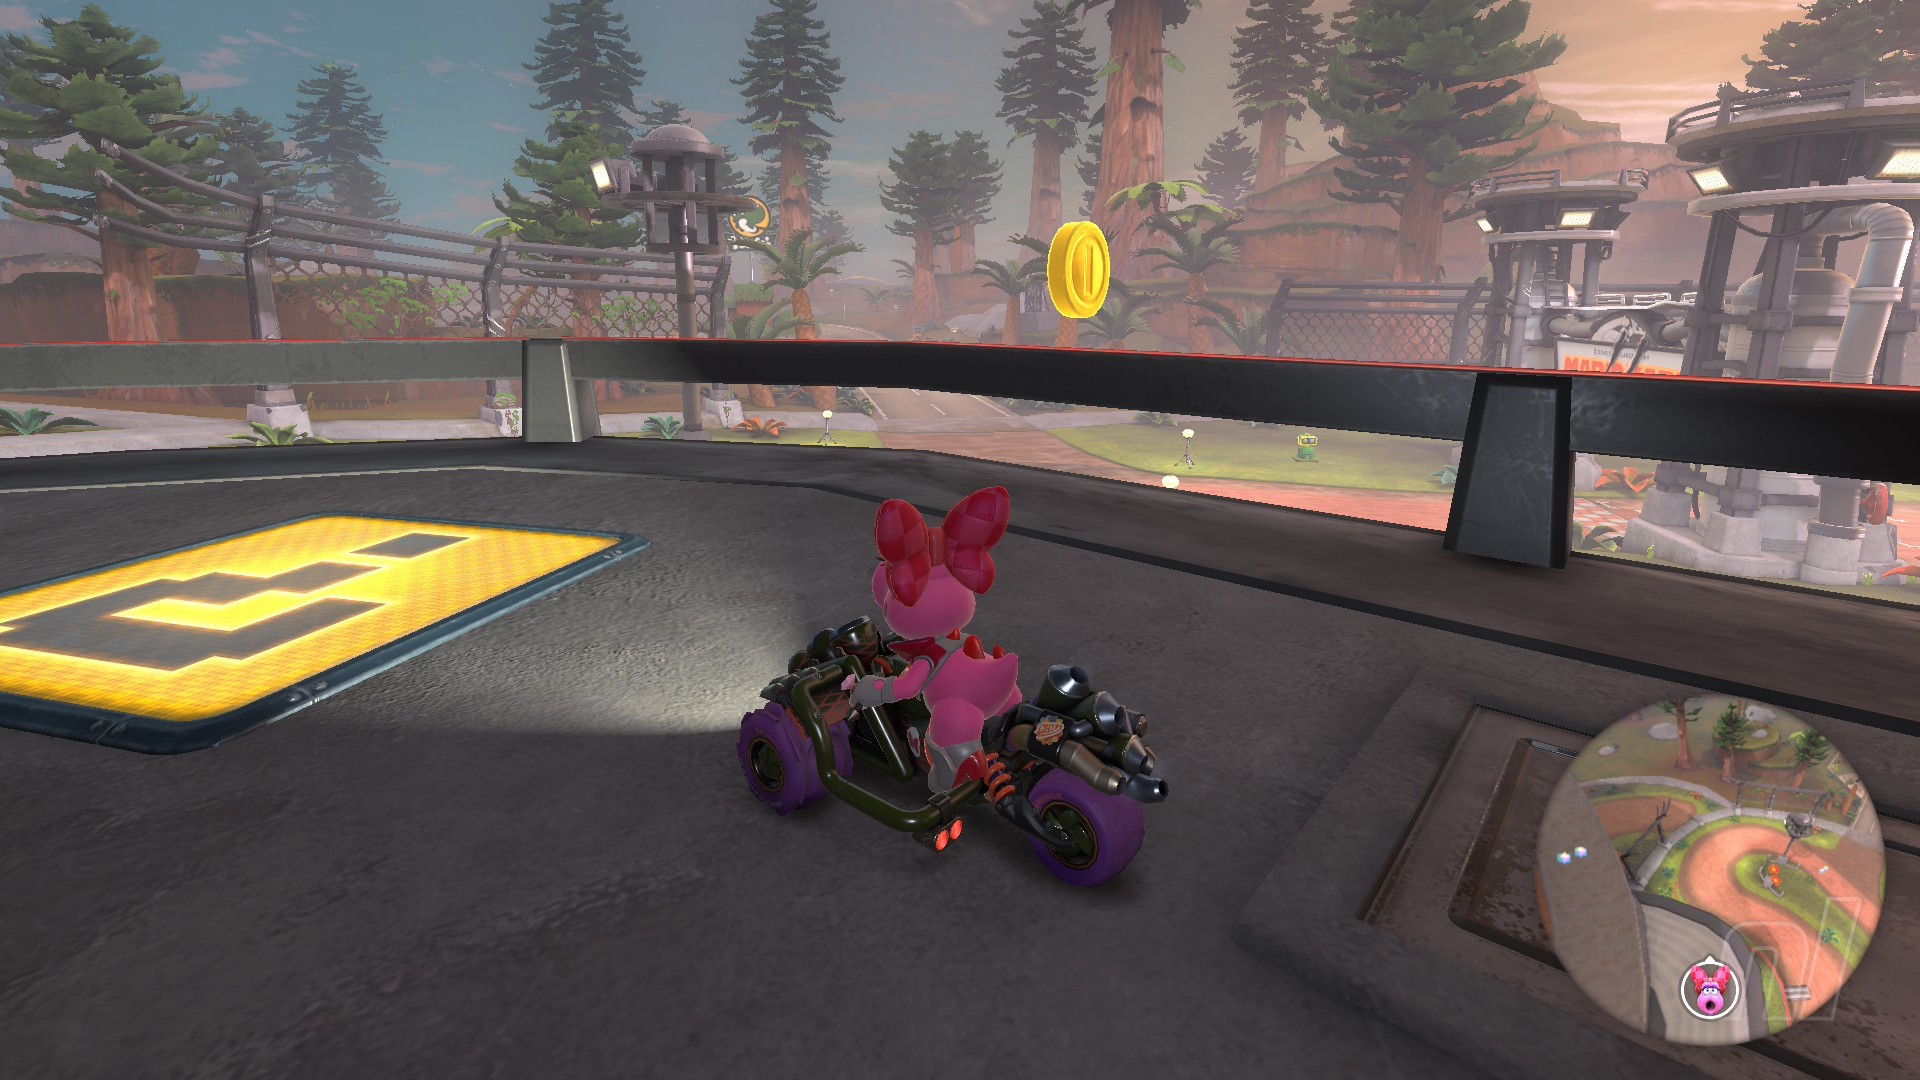
Location: From the ground floor of the research facility, head outside by taking the right door, Then, take a quick right up a metal ramp for the panel.
Panel 3
Location: Turn around from the start line and follow the course. Then, as you approach the curved metal slope, take a hard right up another path. Then, as you pass a broken bridge, drop down to the right to find this panel.
Panel 4
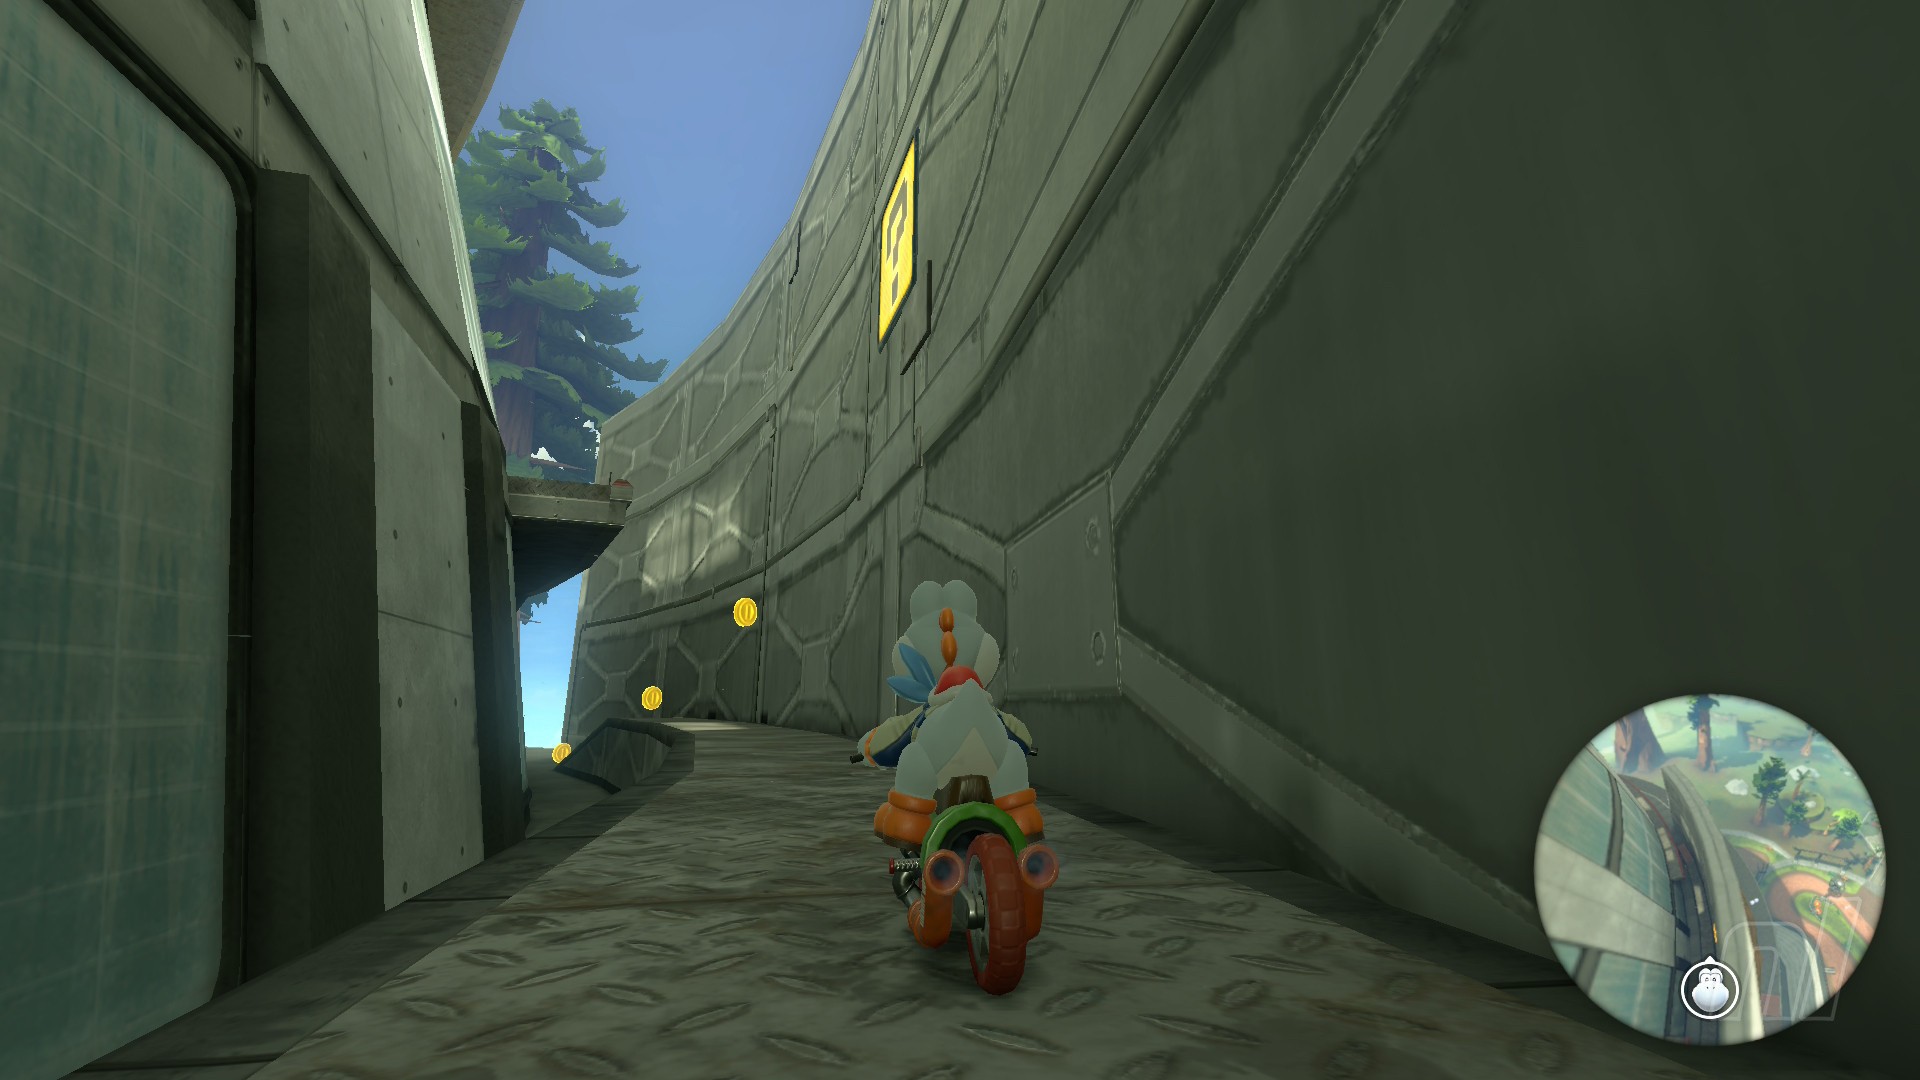
Location: Exit the lab's second layer and drive around the path that runs outside the windows to find this Switch against a large wall.
Panel 5
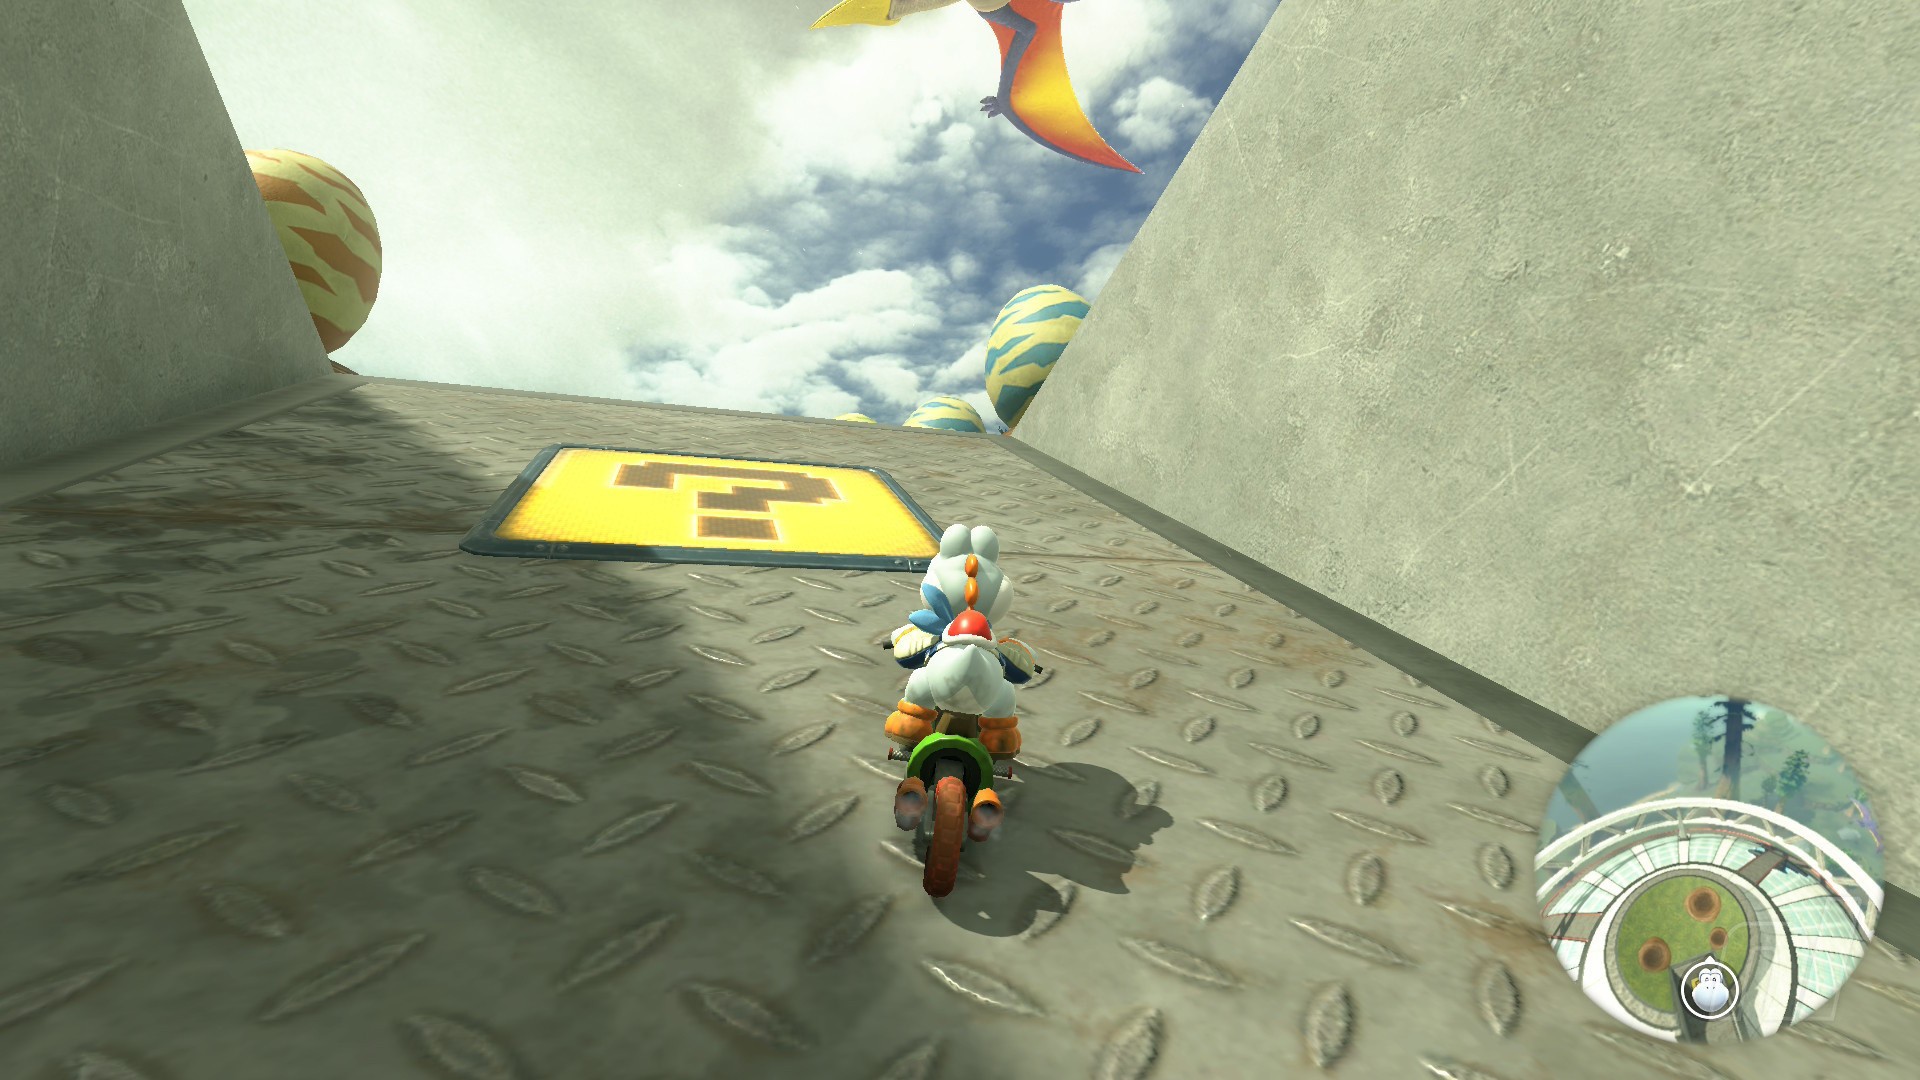
Location: Use the quarter pipe in the lab to access a high red grind rail. Ride it all the way to the top of the lab, hopping between rails as necessary and this panel is at the very end.
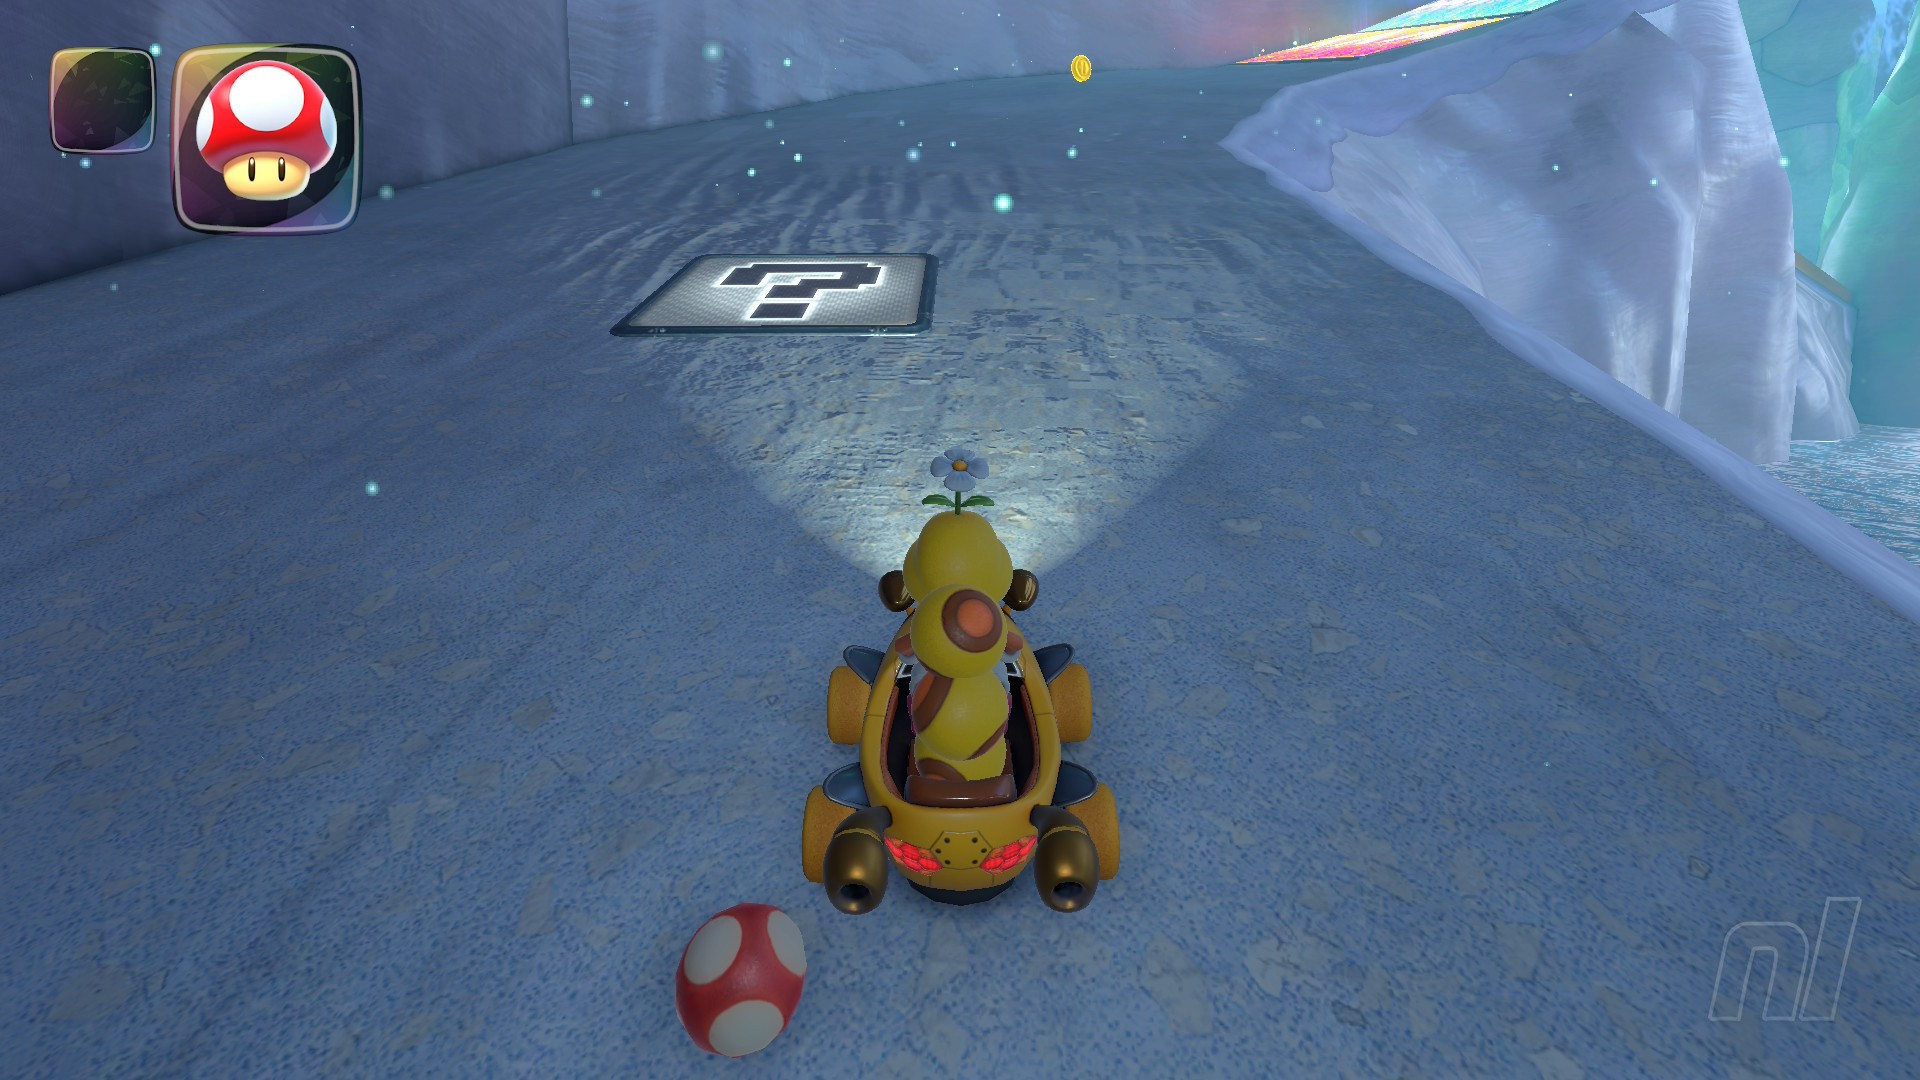
DK Pass Question Panels
Number of panels: 5
Collectibles region: Snow
Panel 1
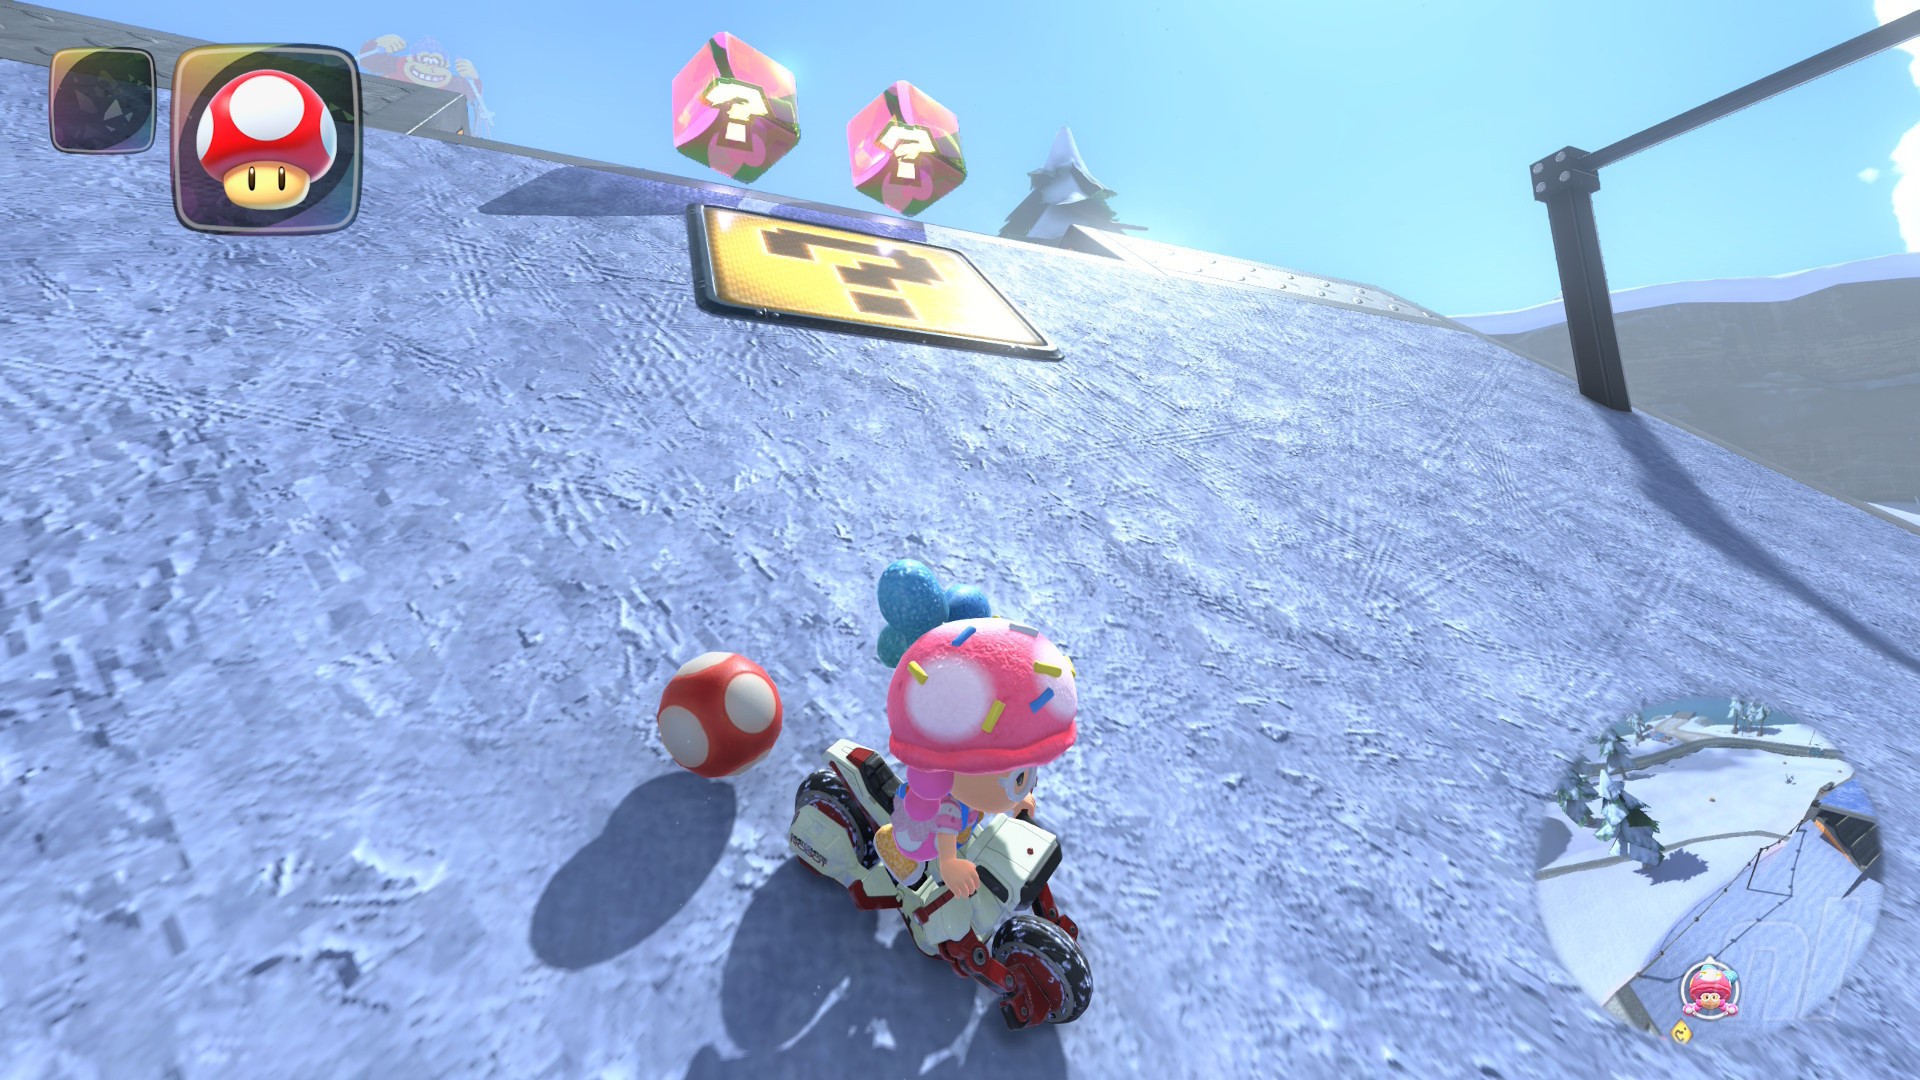
Location: Drive right of the start line and go over a couple of metal ramps until you reach some ski slopes, where this panel sits at an angle.
Panel 2
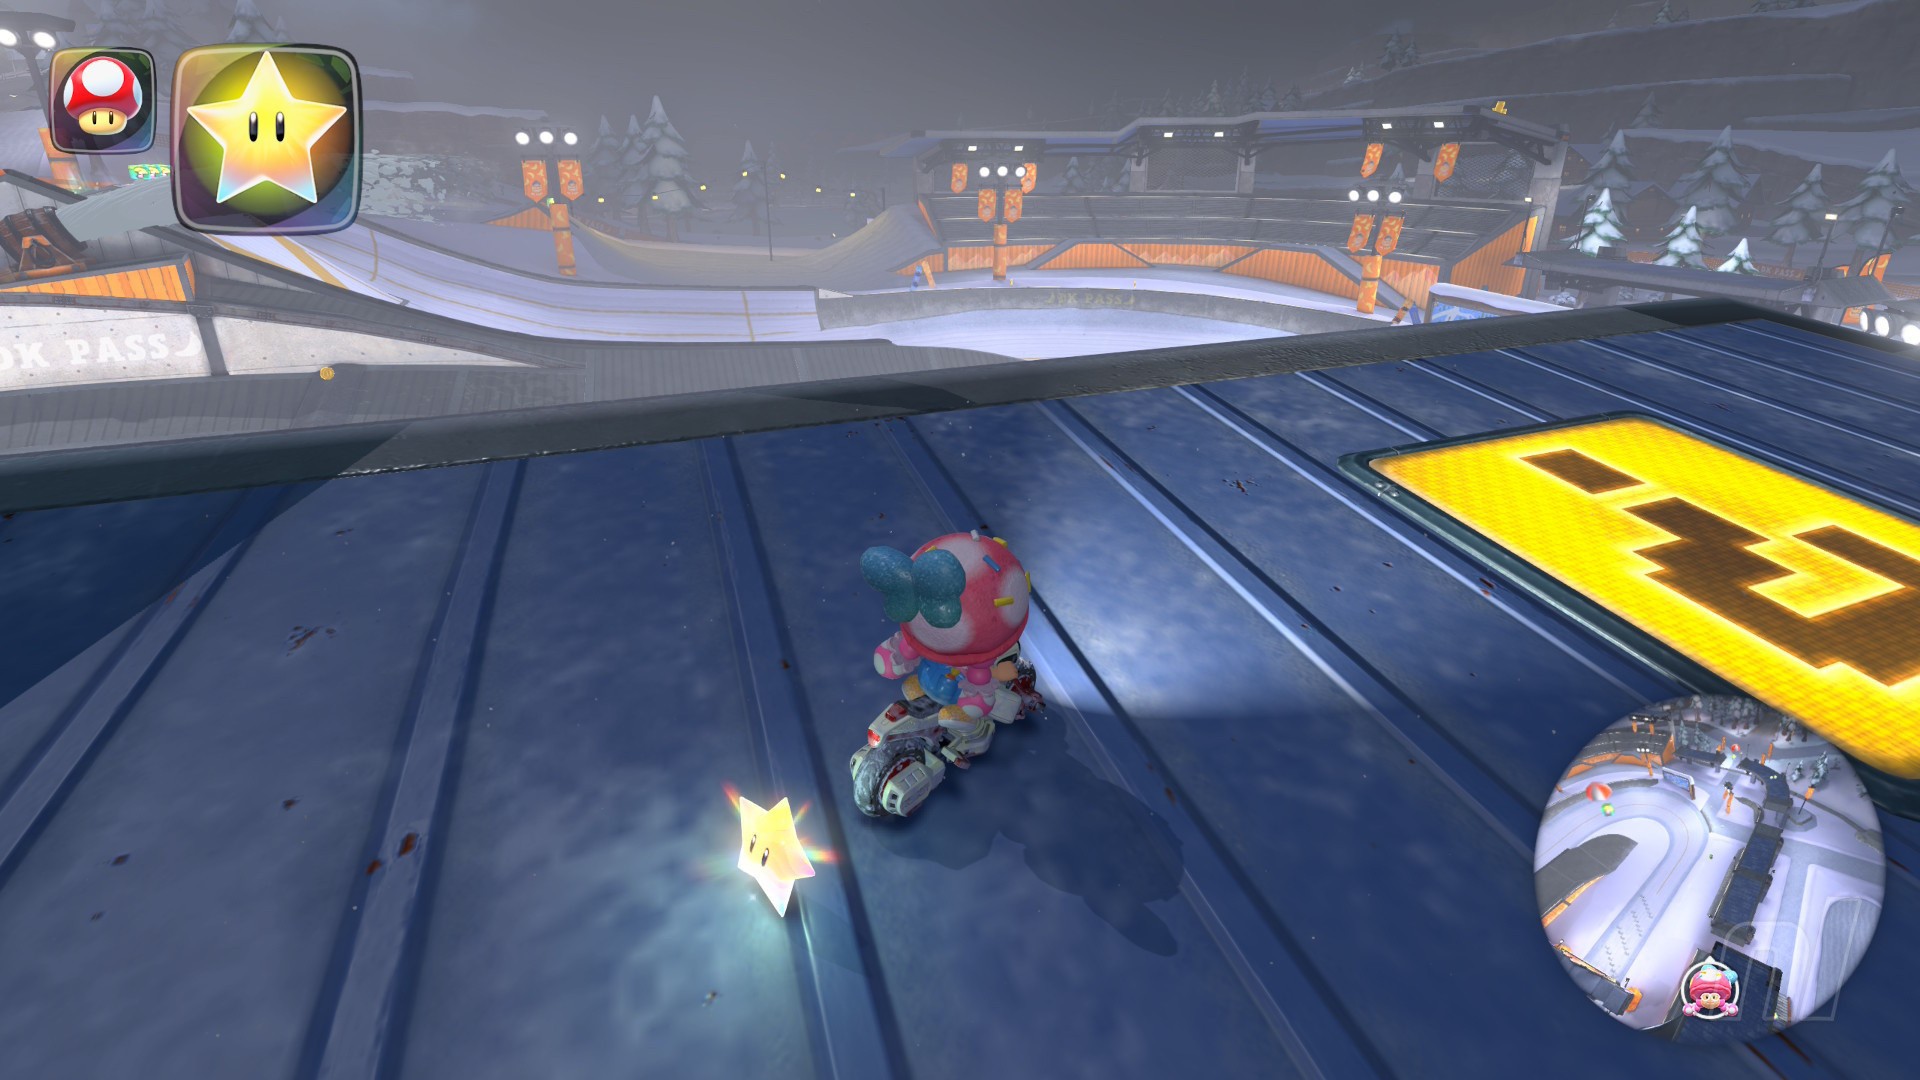
Location: At the start line, turn around and follow the charge ramps up the steep cliff. Take a hard left at the top, then head towards the flat metal roofing. The panel is on the very end of the longest roof.
Panel 3
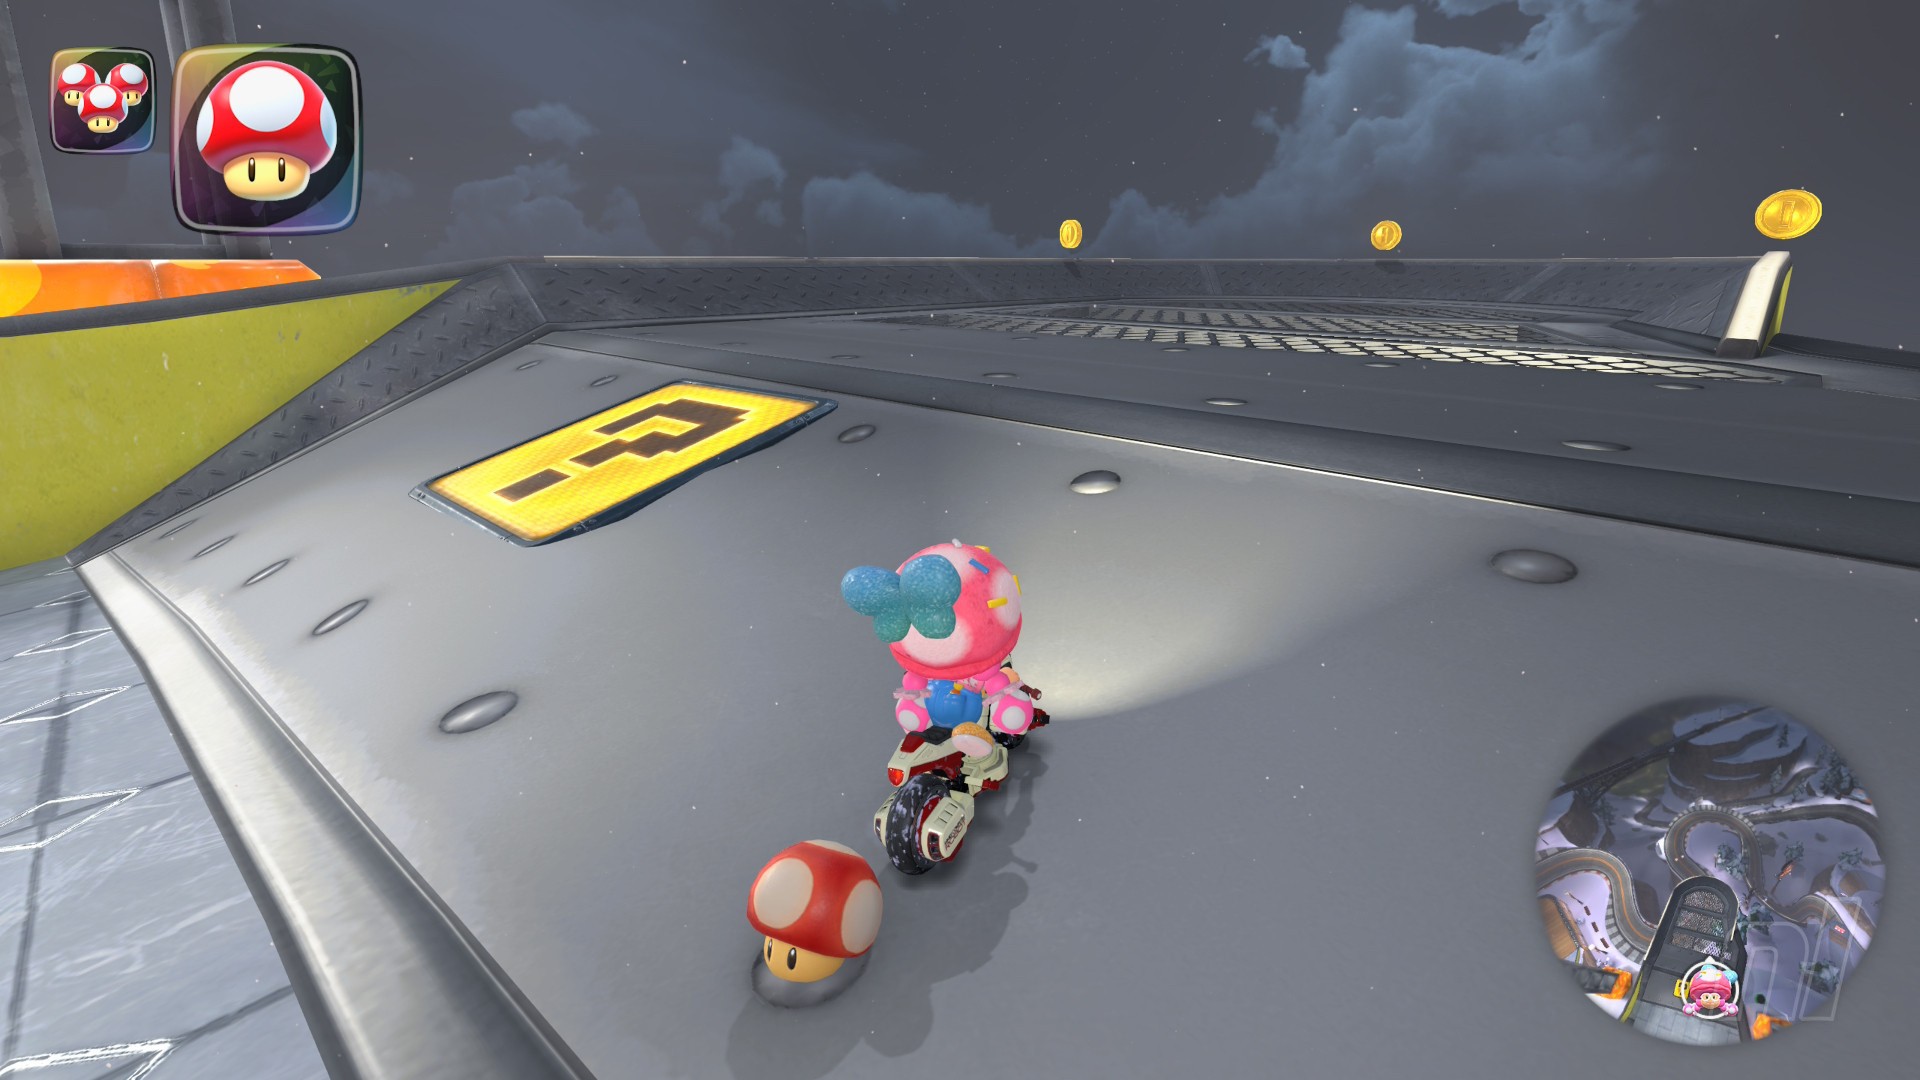
Location: Head to the very top of the DK Pass building at the end of the course – you can do this by following the steps to Panel 2, then just keep driving past the snowmen instead of heading to the roof. Go right to the top to find the panel underneath the DK sign.
Panel 4

Location: At the start line, turn around and follow the charge ramps up the steep cliff. Then, when you finish jumping over the ramps, take a left towards a snowman (past a DK Pass sign) where the panel sits nicely in the snow.
Panel 5
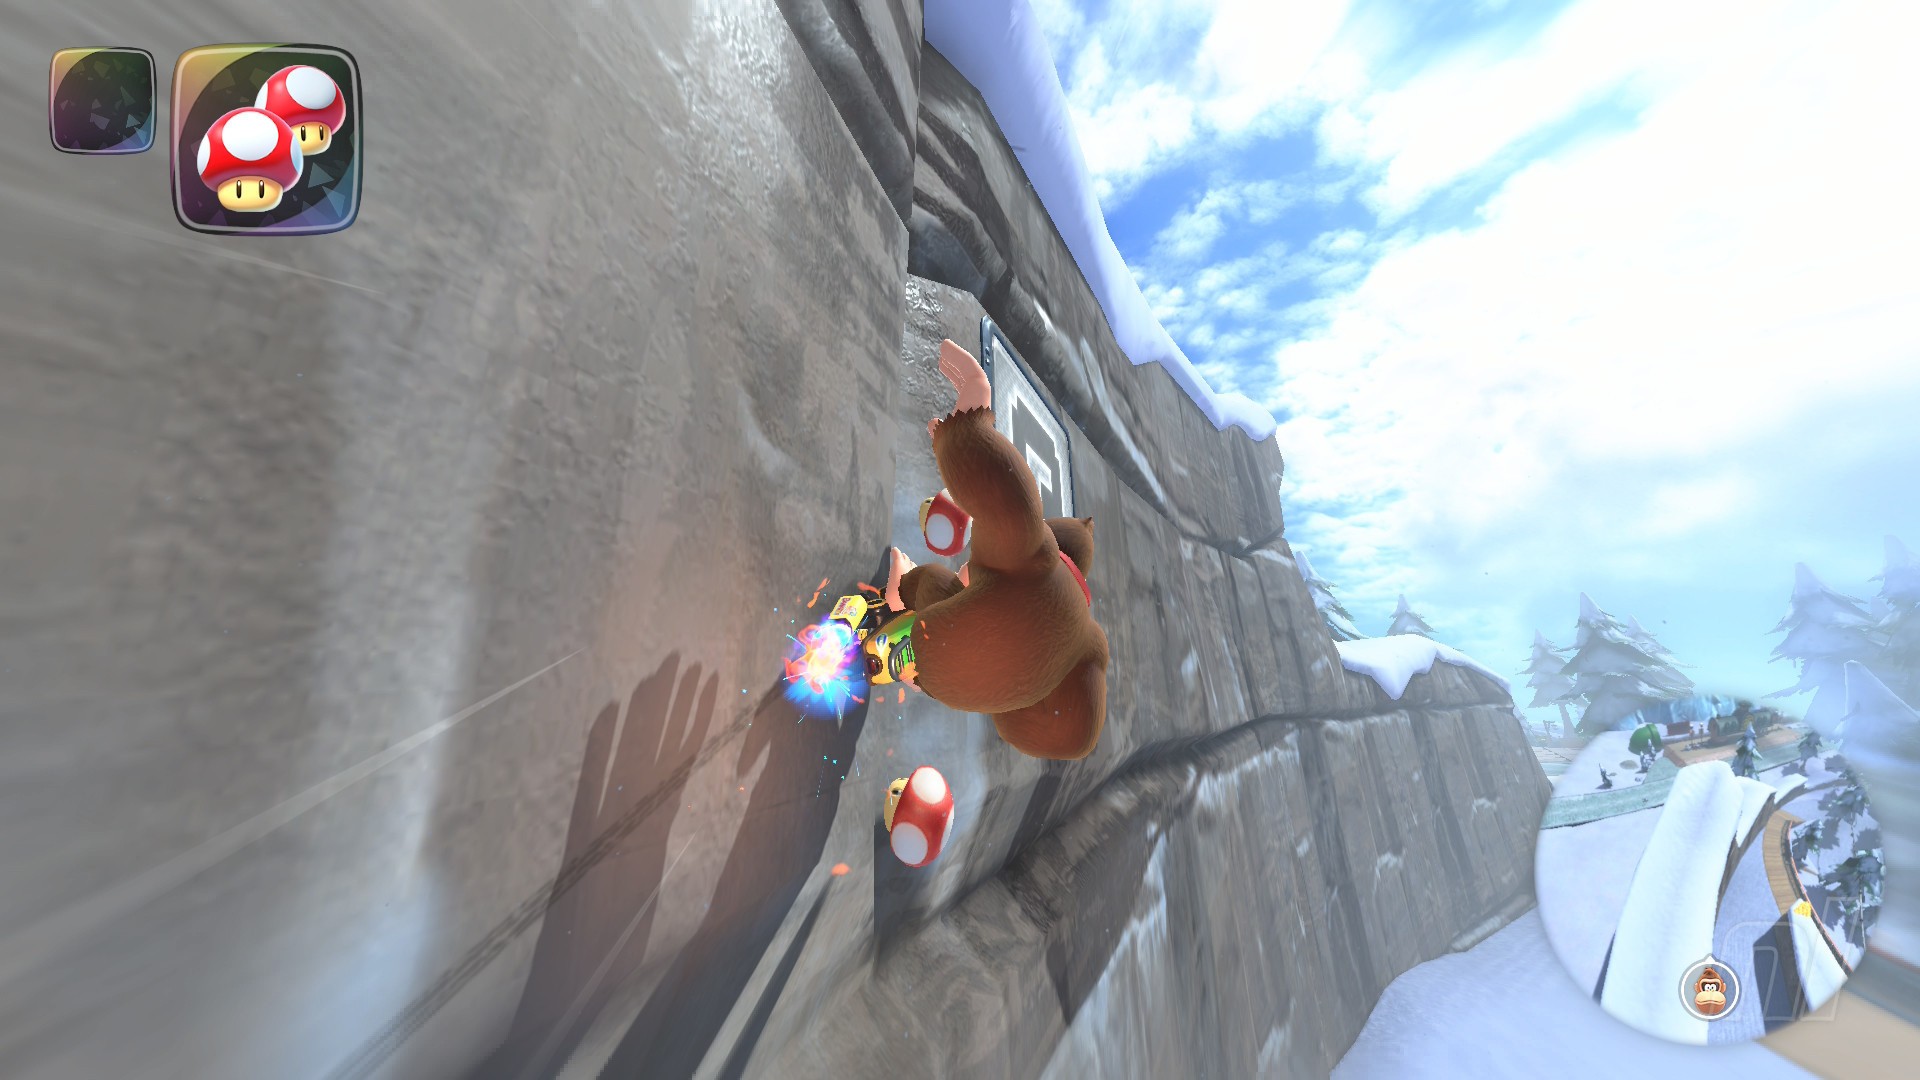
Location: Simply follow the path of snowmen from Panel 4 to the left, and you’ll spot a panel on the wall. Use the ramp to trick into a wall ride.
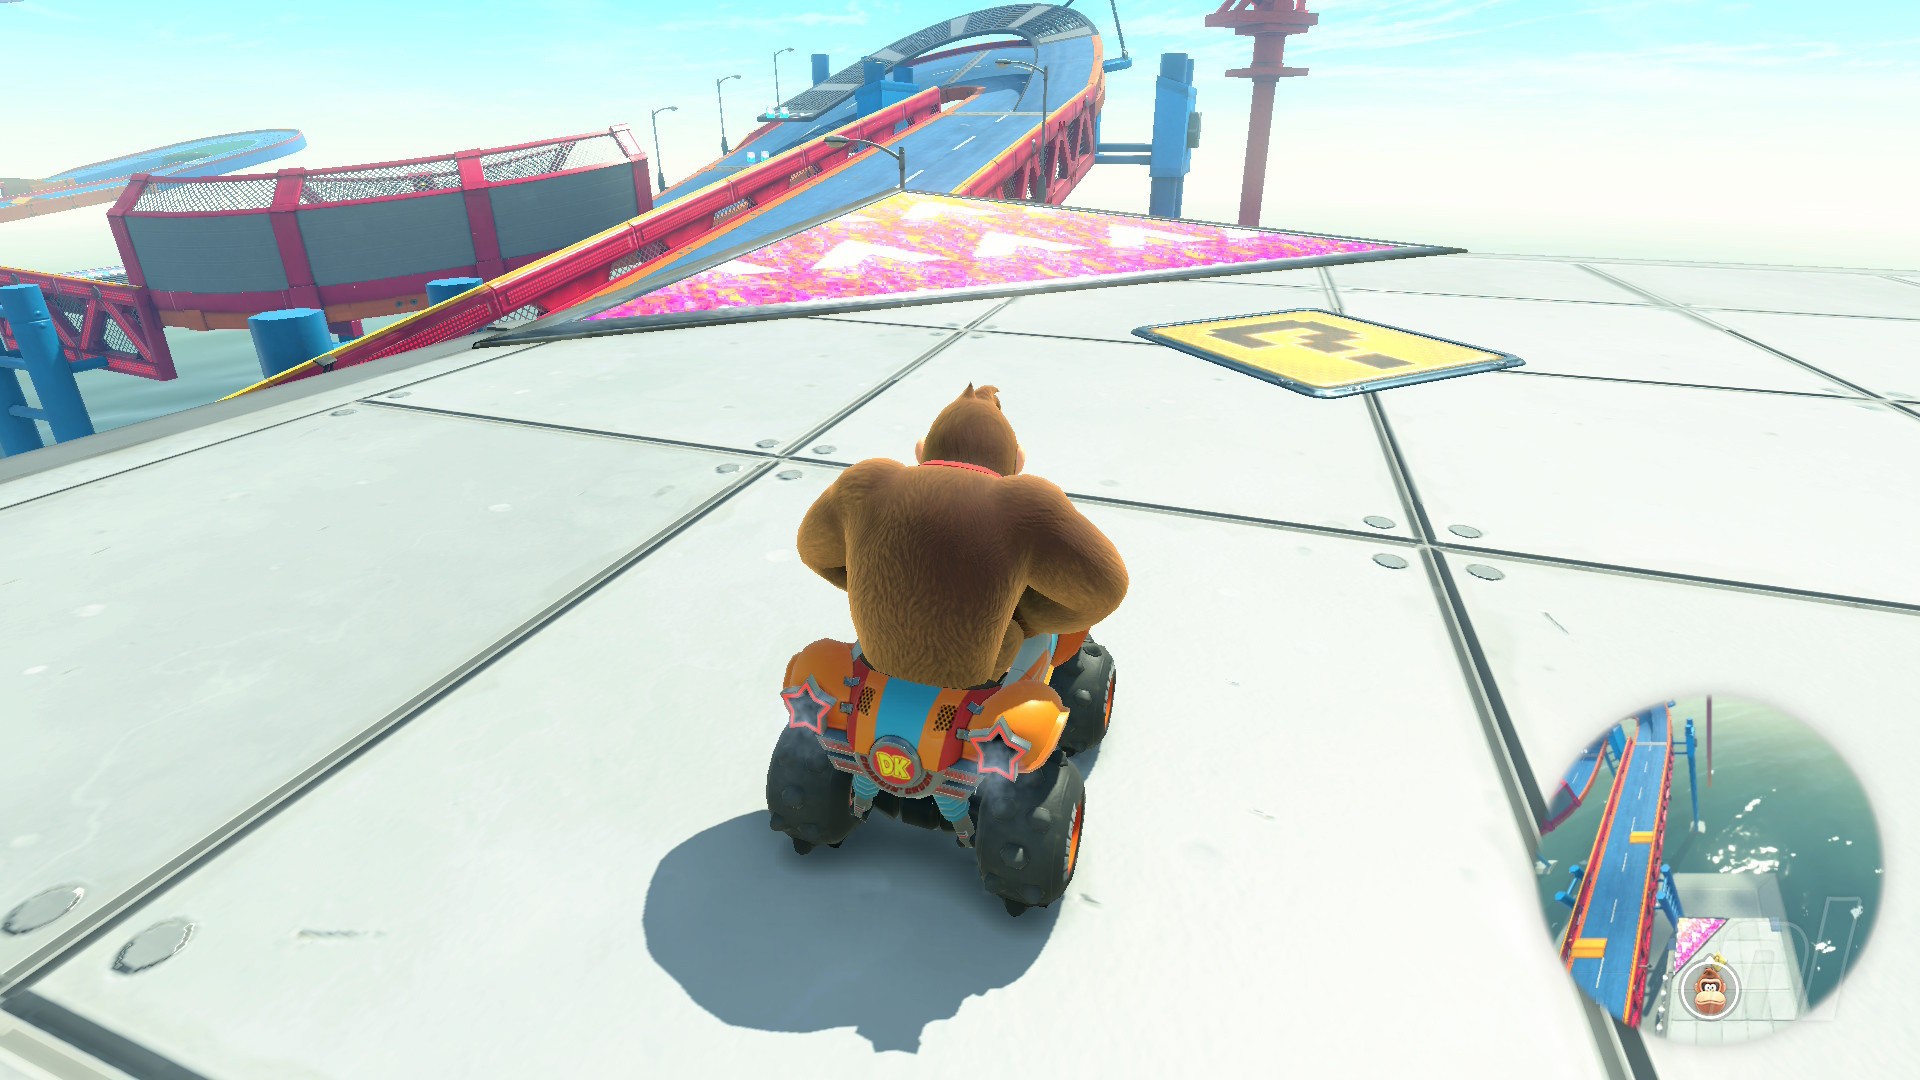
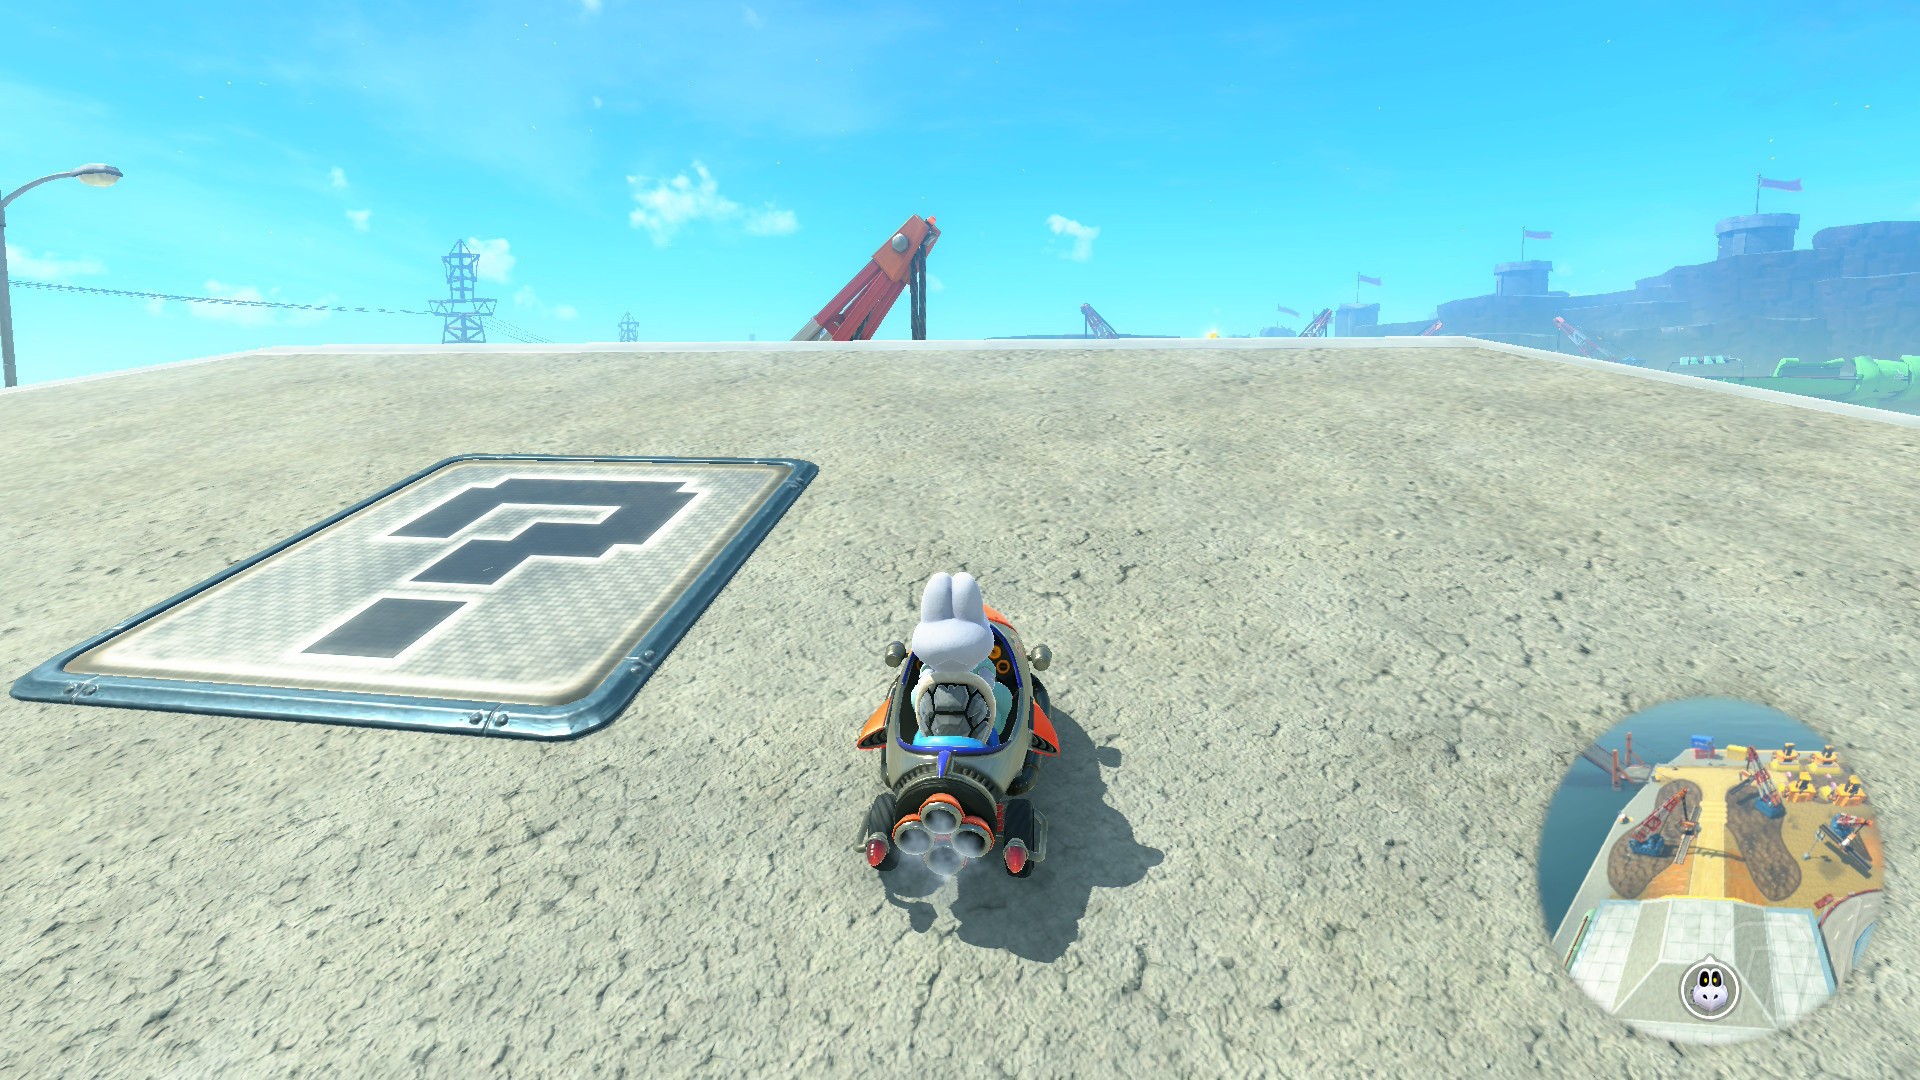
DK Spaceport Question Panels
Number of panels: 5
Collectibles region: South Sea
Panel 1
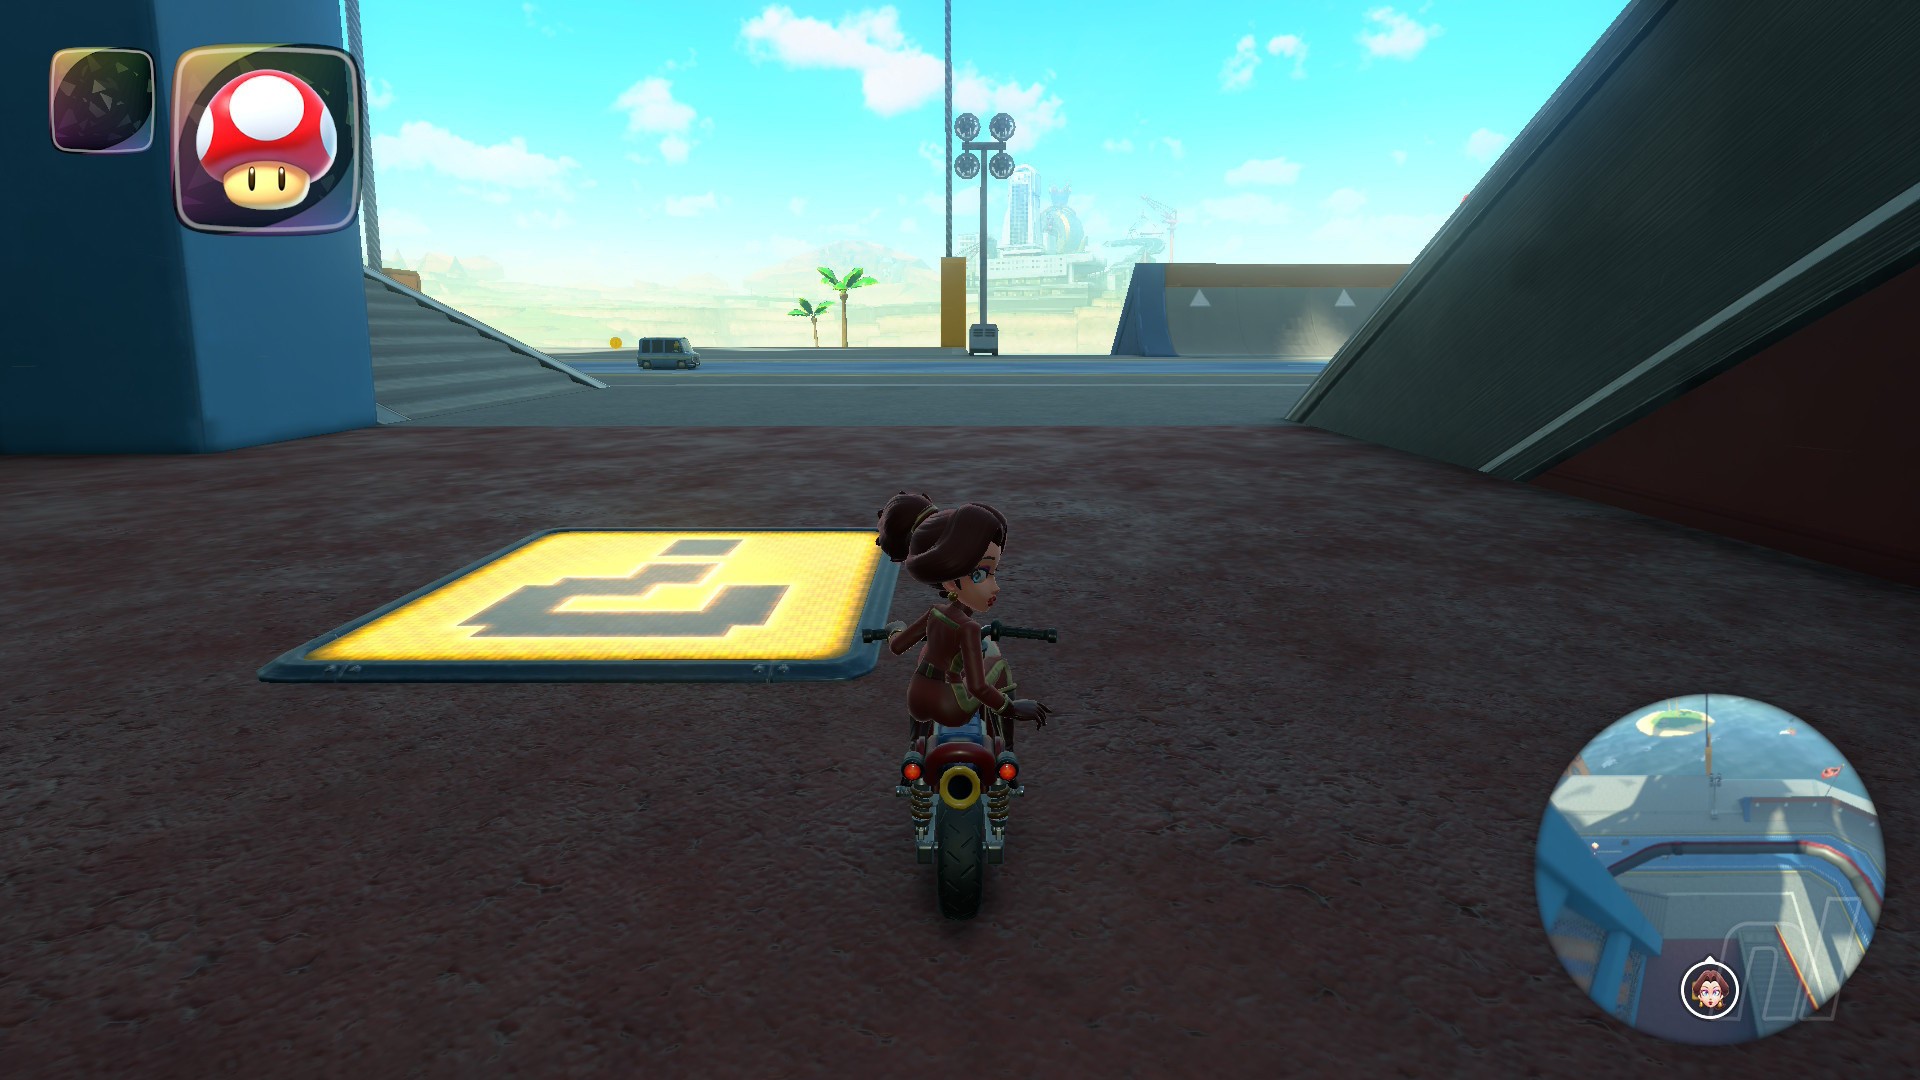
Location: Drop down to the bottom of the course and head towards the gap next to some stairs (where there’s cars driving on the road, northwest corner). The panel is hidden in a little alleyway
Panel 2
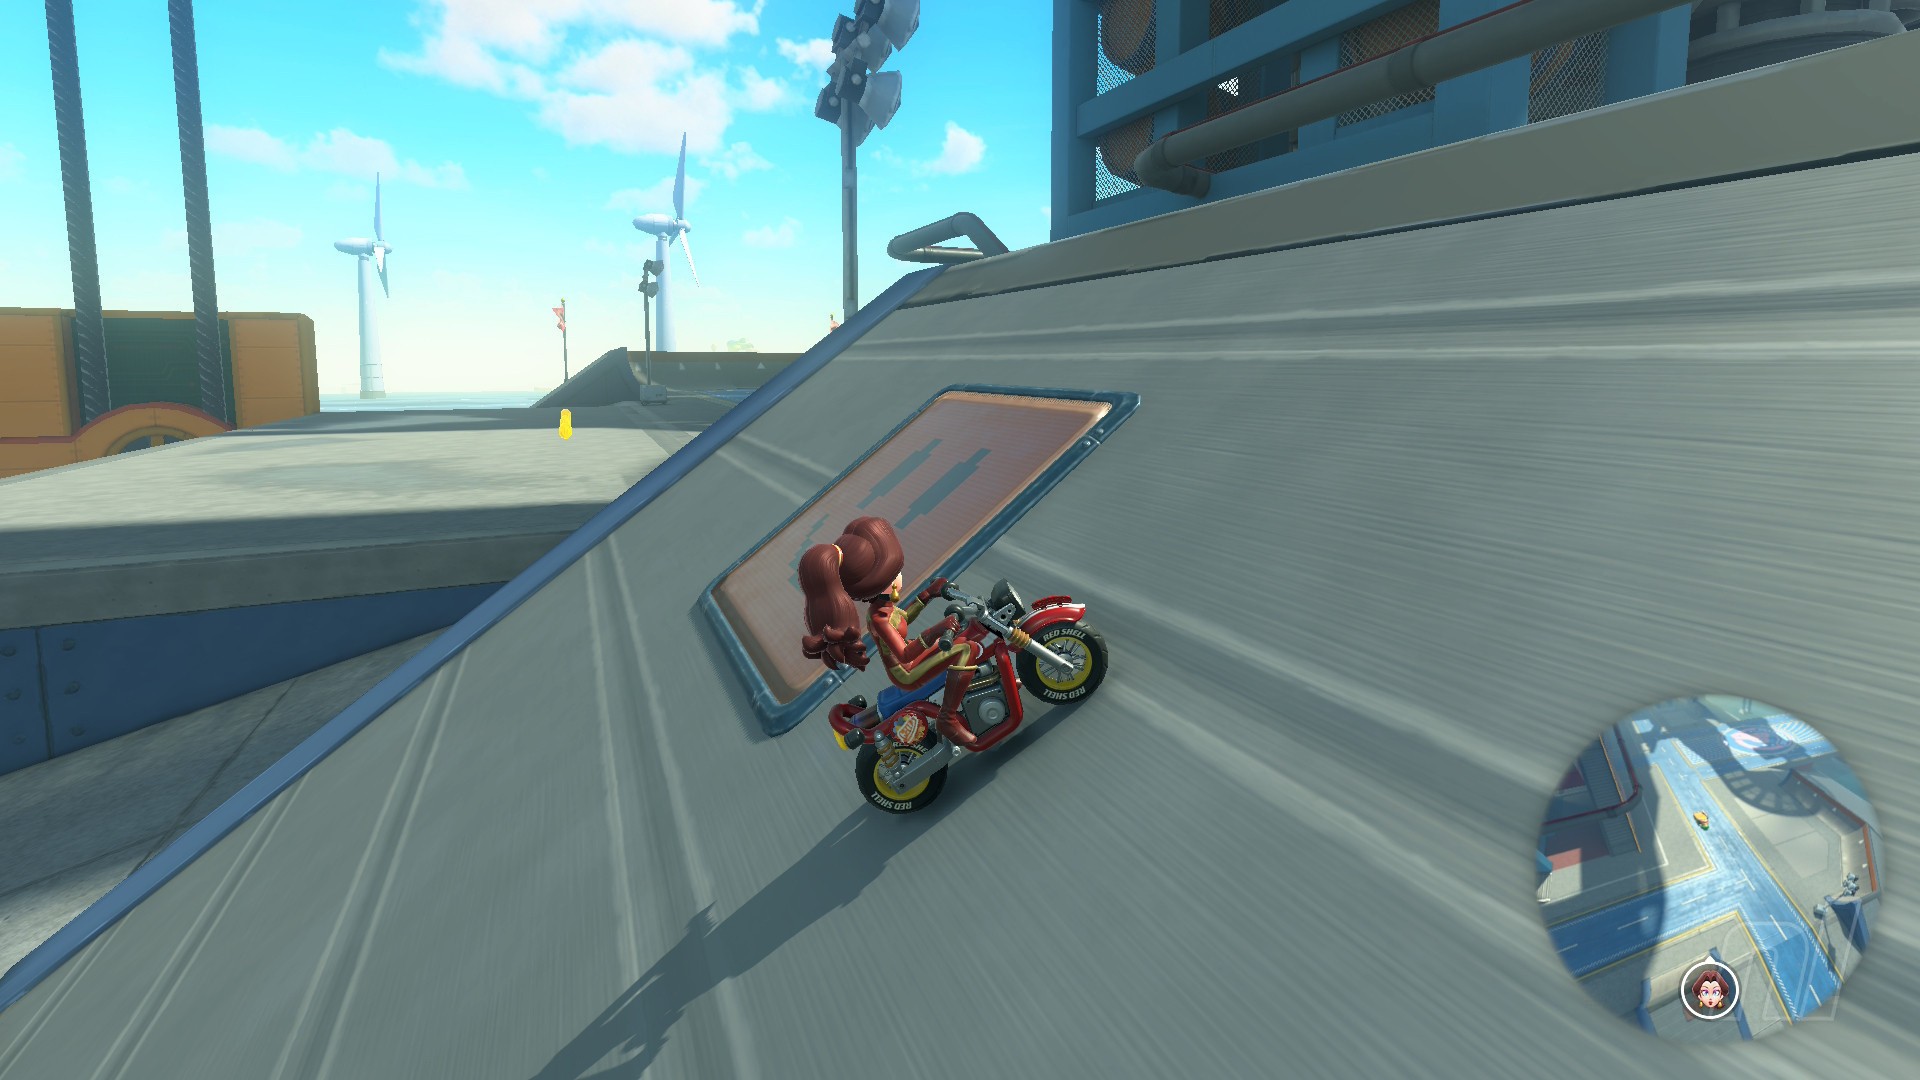
Location: Drive on the water and head to the DK Boosters slopes at the base of the course, where you’ll find a panel on the slope
Panel 3
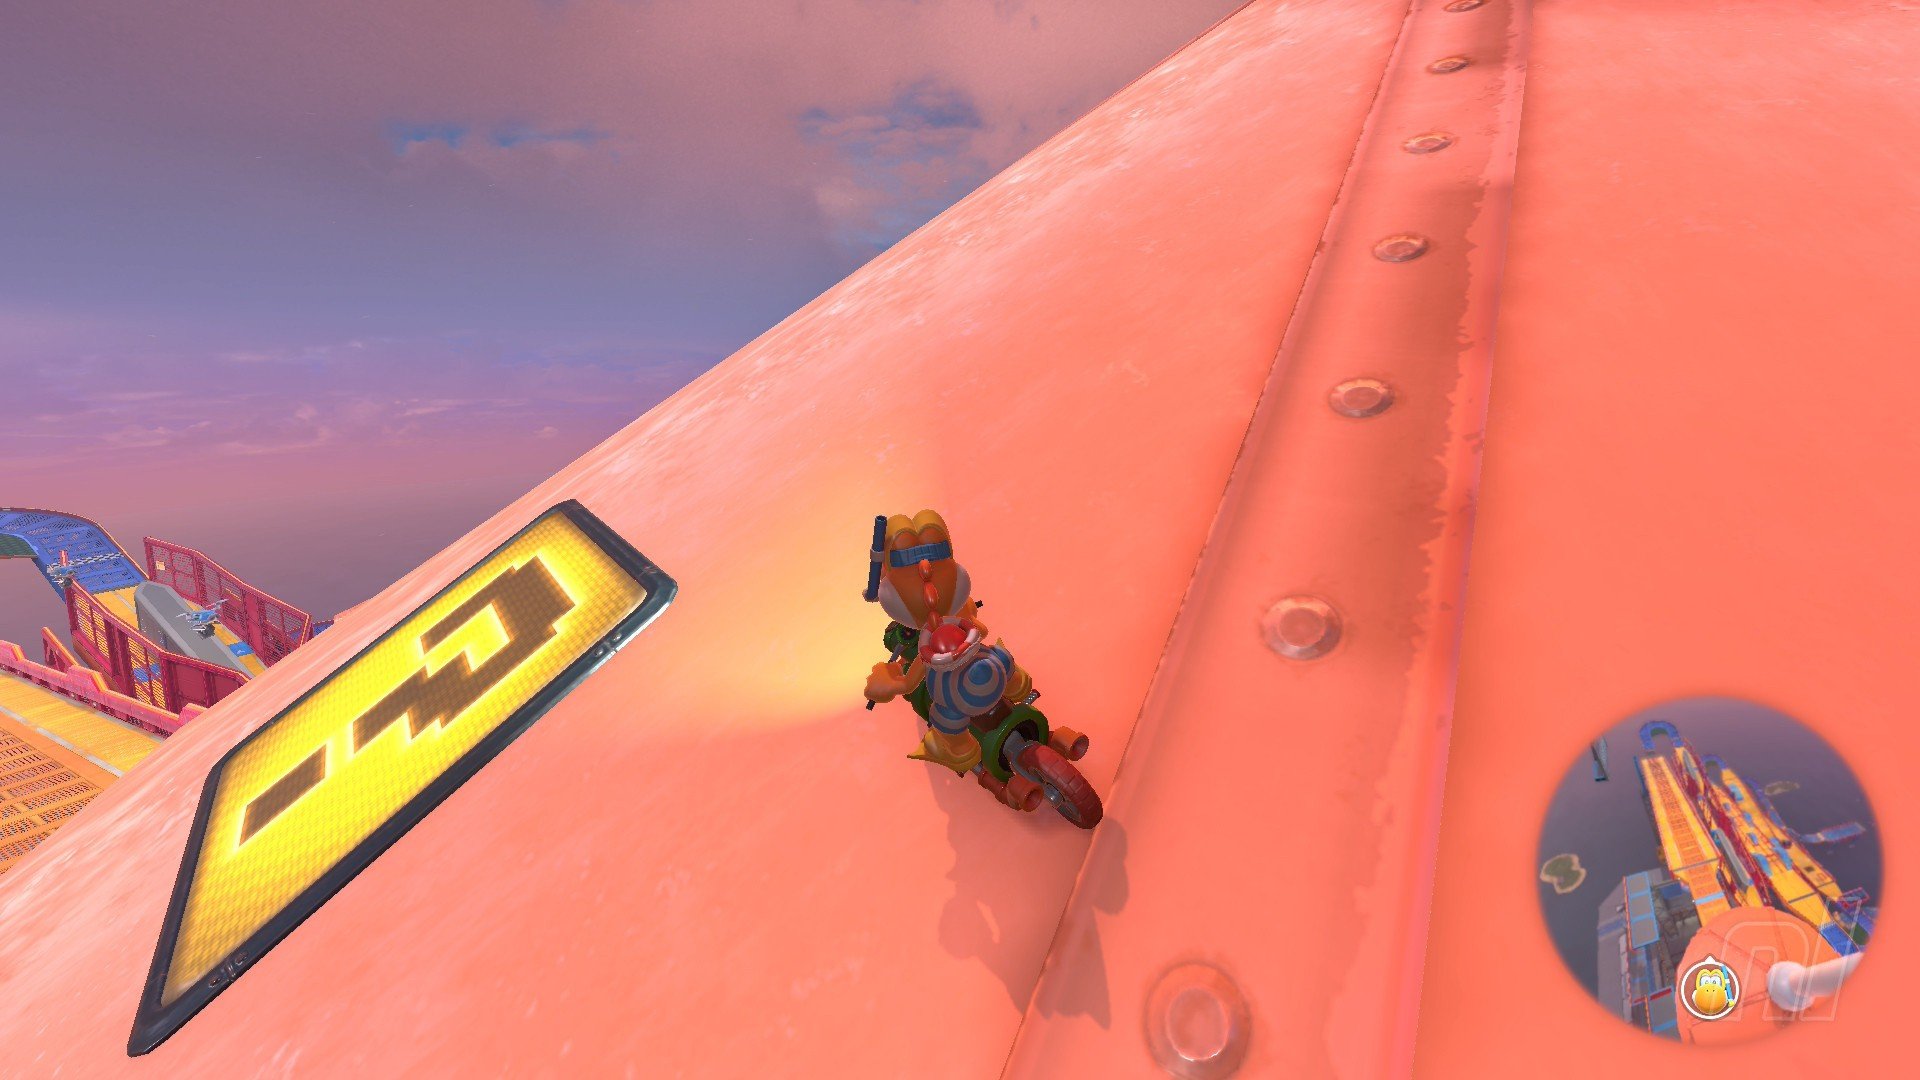
Location: Enter DK Spaceport from the base of the rocket and climb its frame using the stairs and boosts onto the girders. At the final set of stairs, use the Blast Barrel on the right to fire onto the rocket's roof, where this panel is waiting.
Panel 4
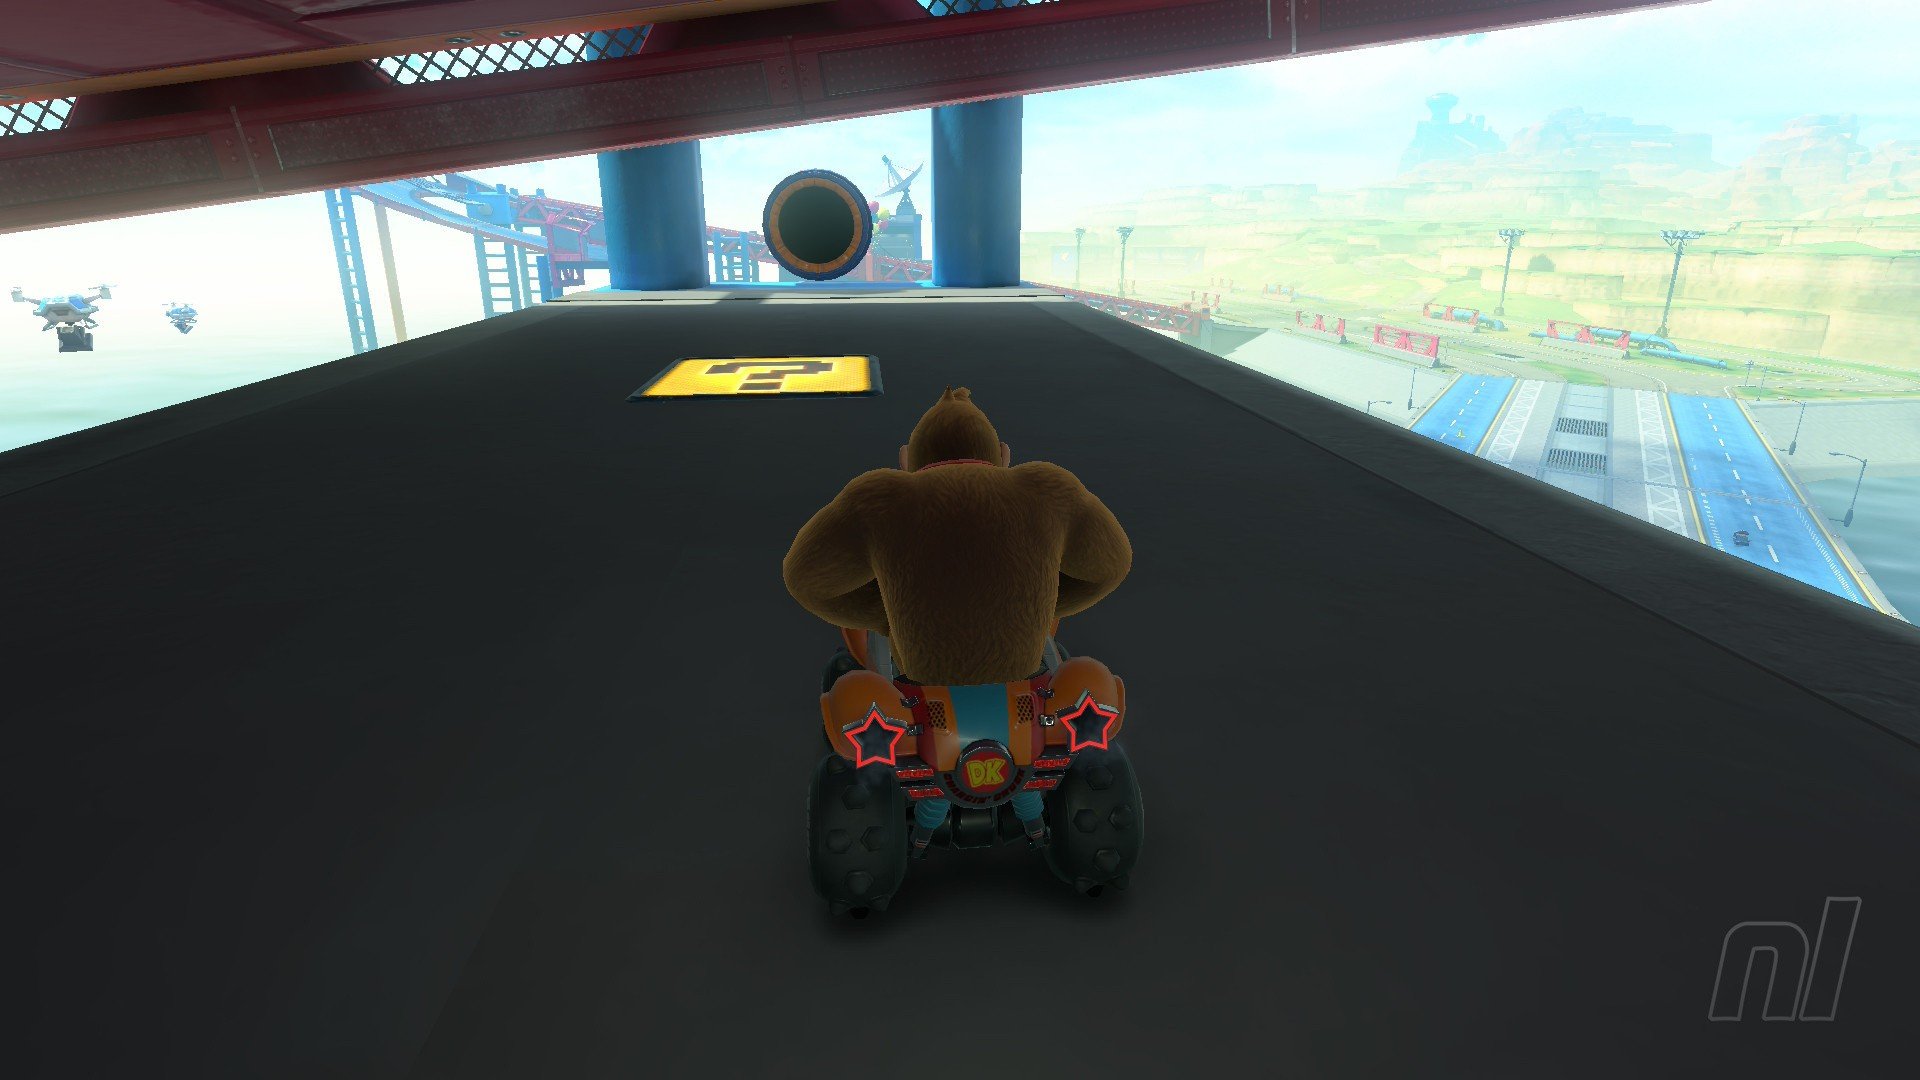
Location: Head up two flights of stairs under the rocket then turn right and follow the path under a blue support beam. The panel is on the floor just before the Blast Barrel.
Panel 5
Location: Use the Warp Pipe in the blue wall near the Yoshi's under the start line and you'll end up right on top of this panel.
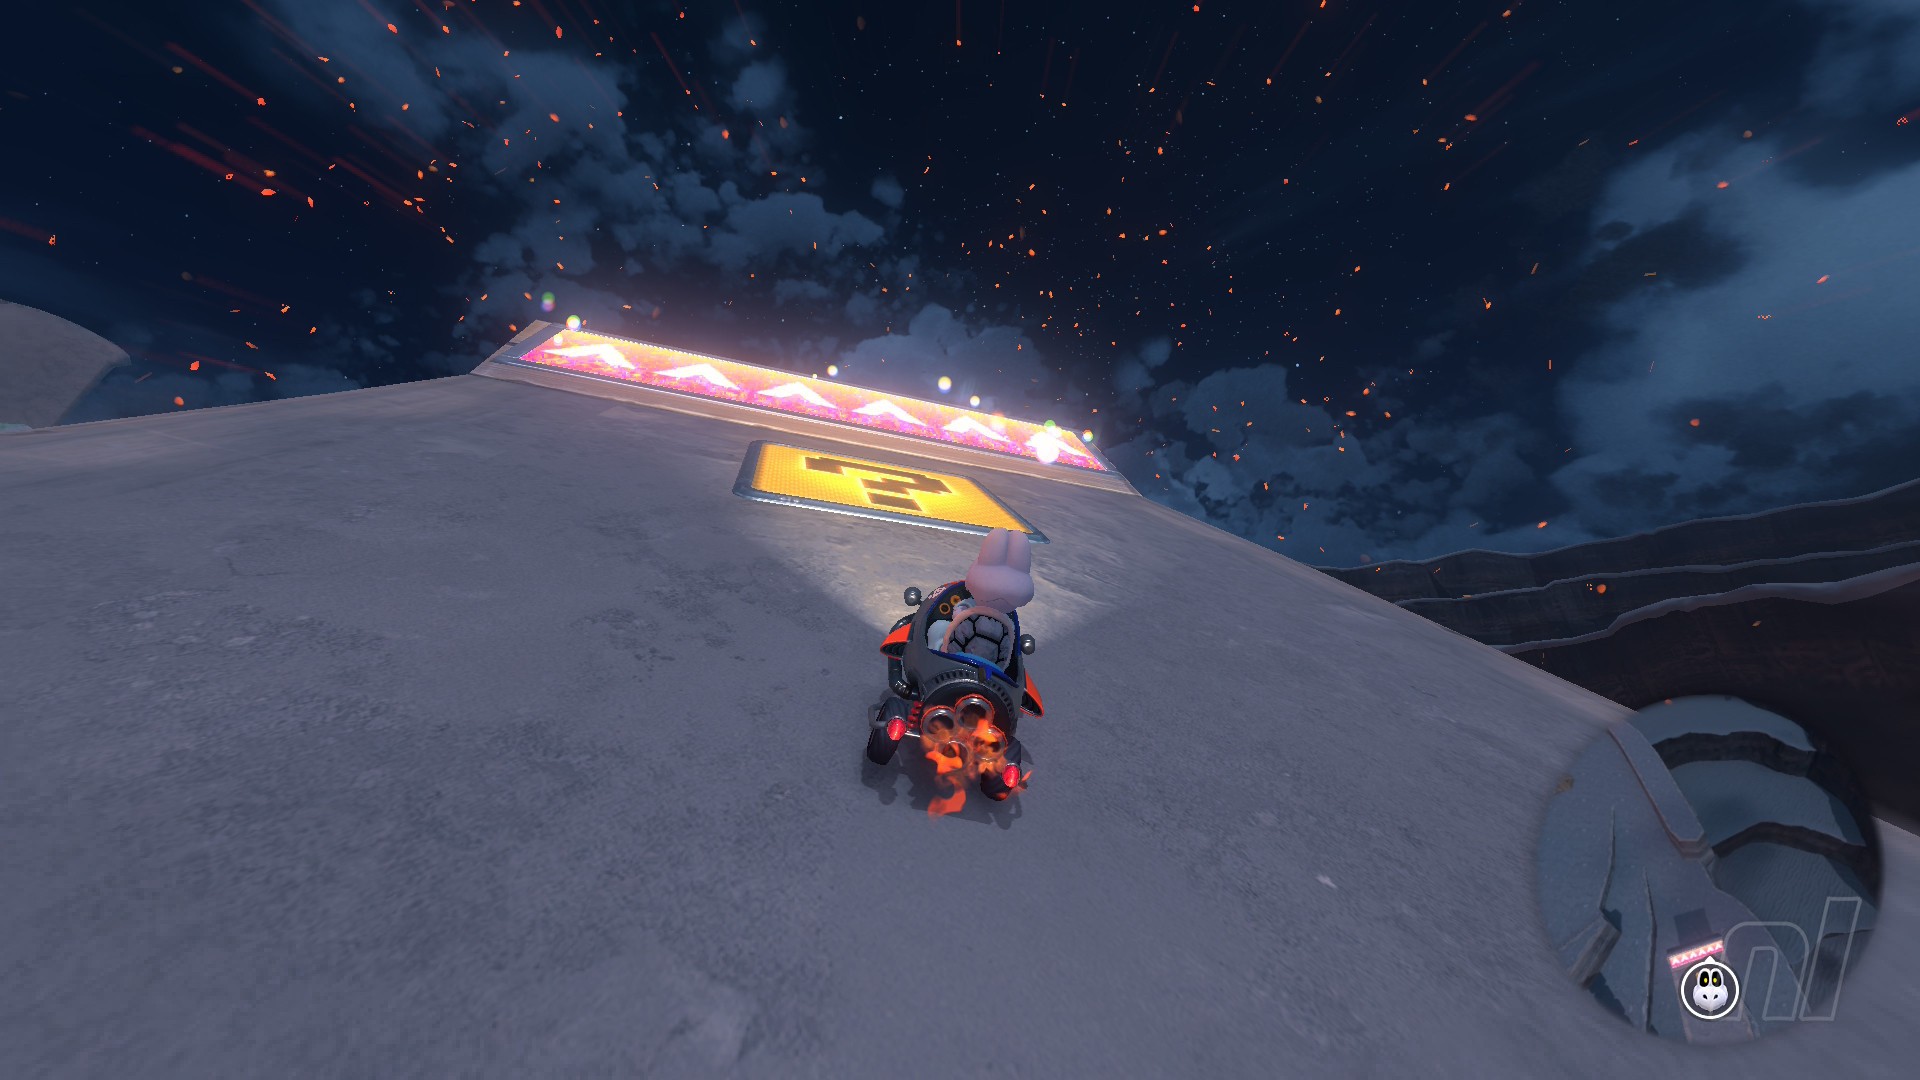
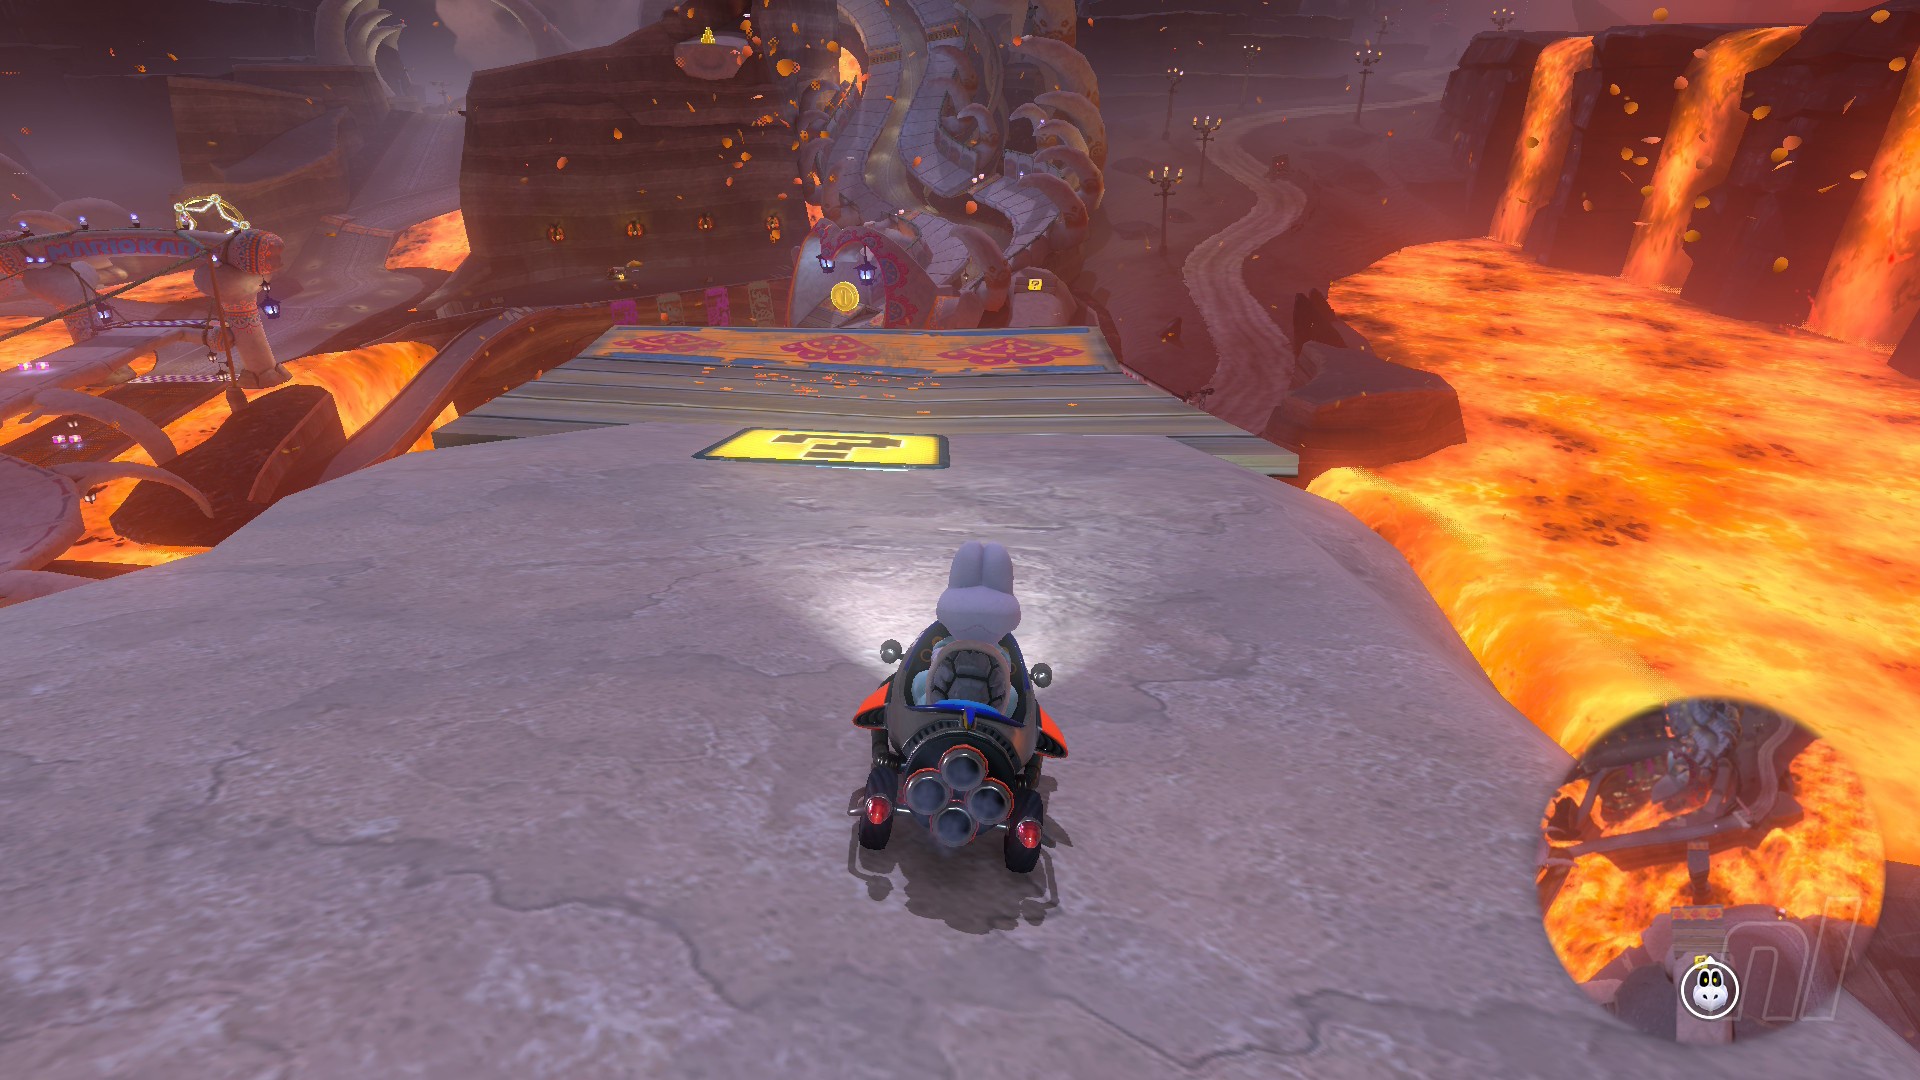
Dry Bones Burnout Question Panels
Number of panels: 5
Collectibles region: Lava
Panel 1
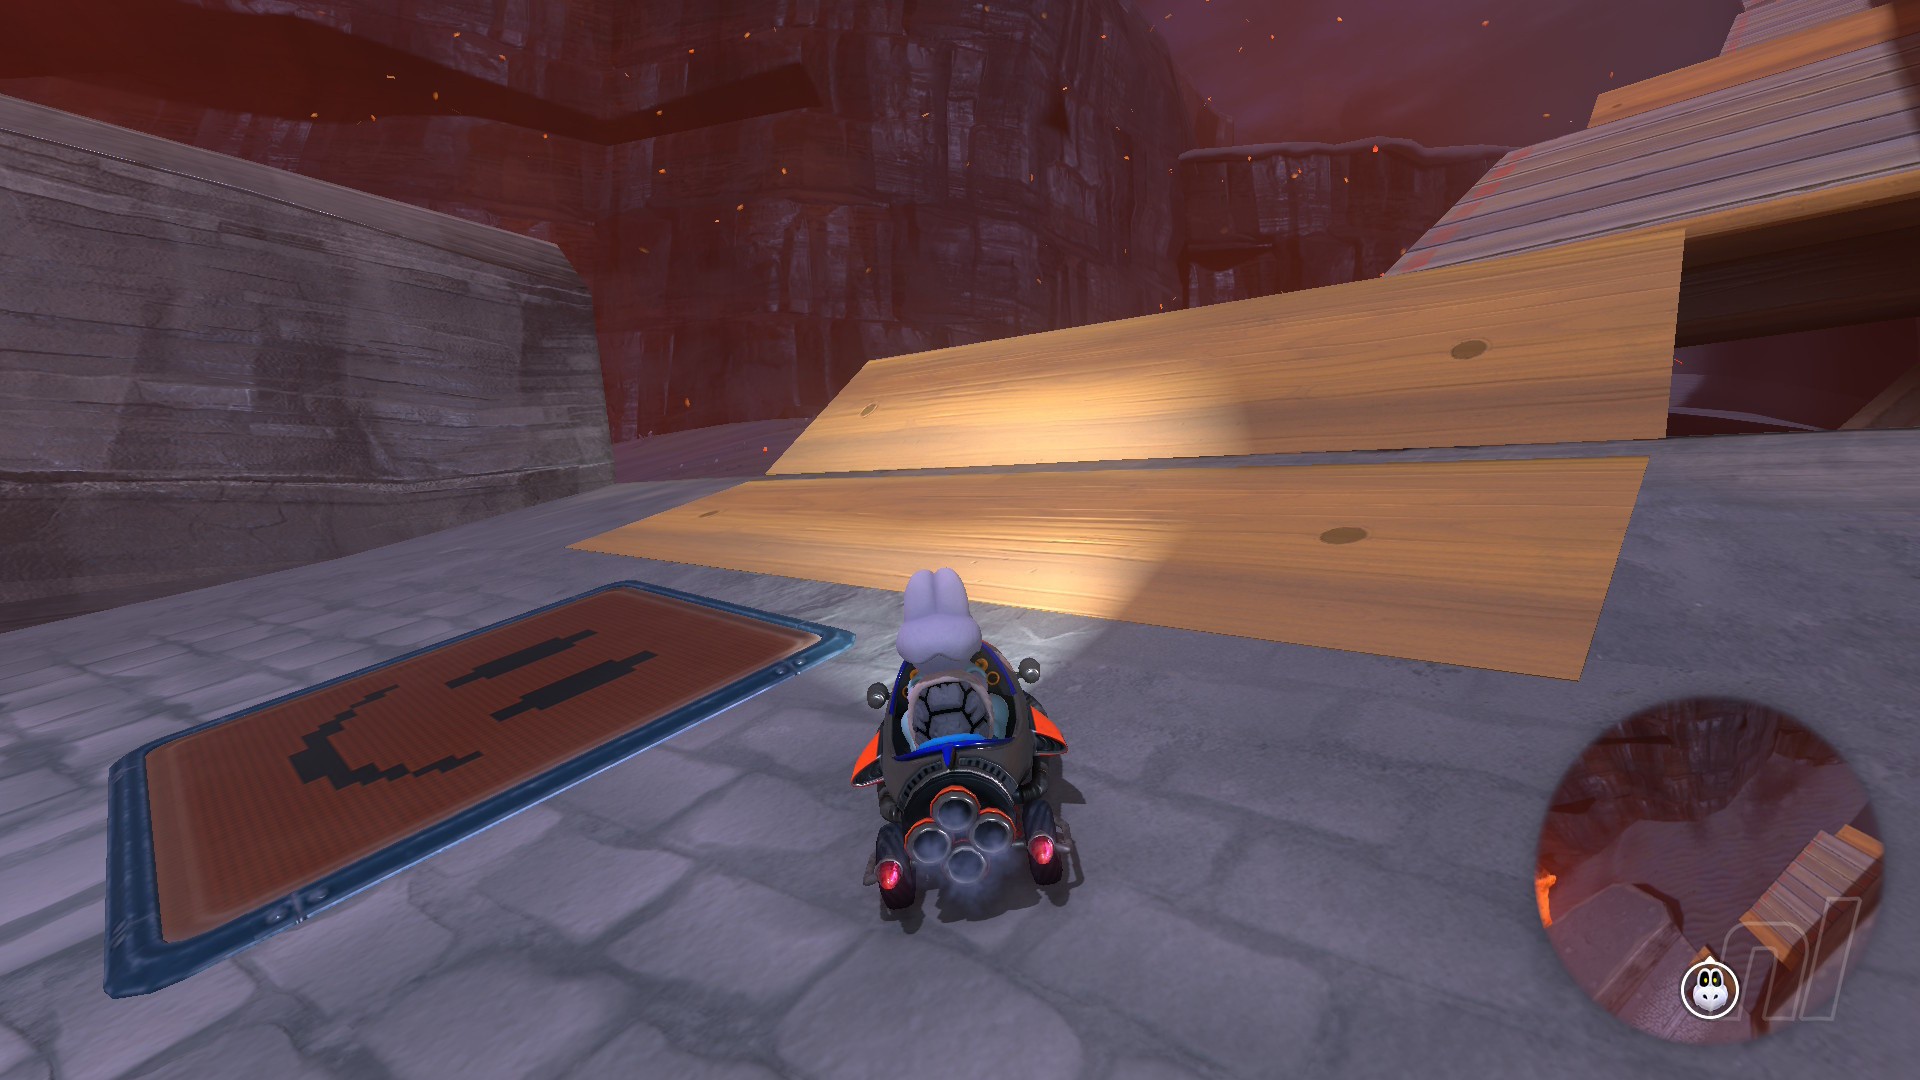
Location: From the start, take the left path, but instead of heading towards the Mario Kart banner, go right. You’ll see a Yoshi stand to your left. Use the small ramp to jump over the lava, pass the Yoshi, and a panel lies just below a wooden ramp.
Panel 2
Location: Follow the left path from the starting line, then head towards the second Mario Kart banner. When you reach it, drop down left onto the boney ramps where a panel lies up top.
Panel 3
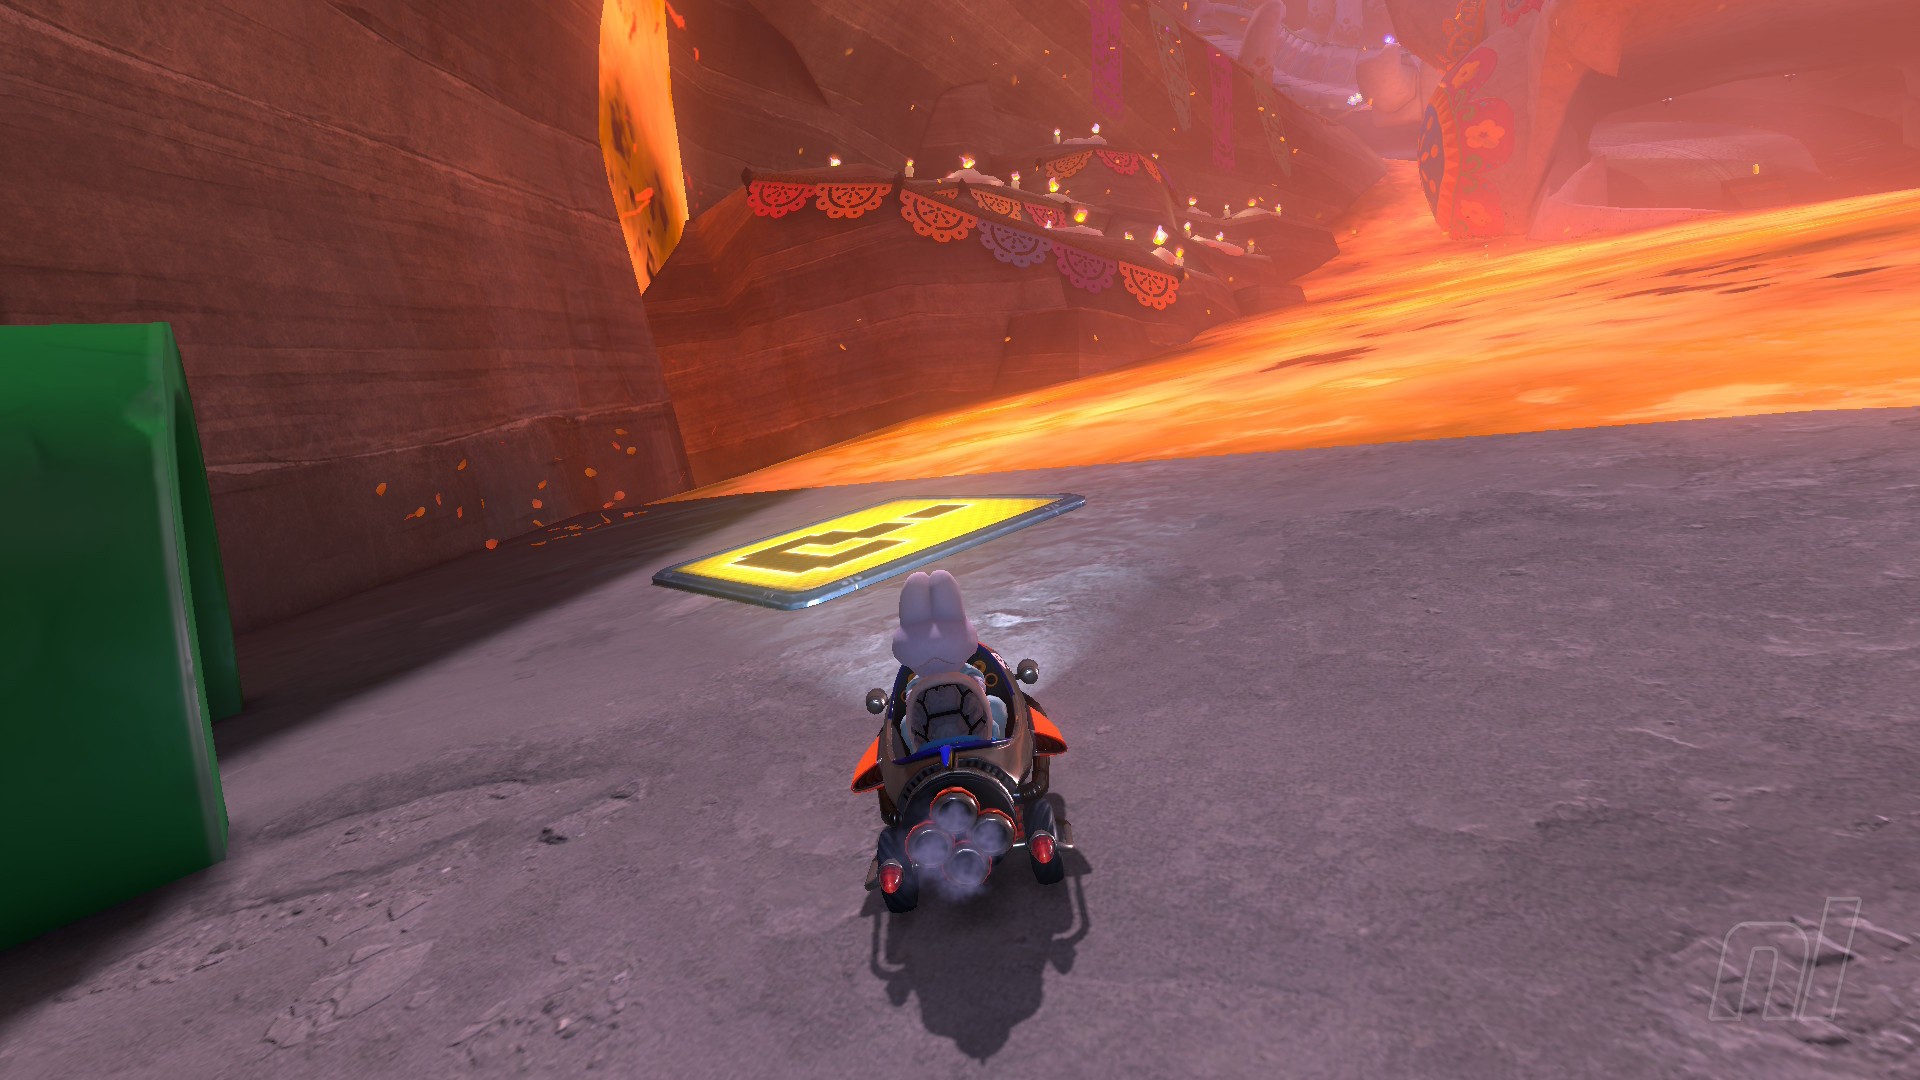
Location: Follow the track in reverse until you hit the first large jump over the lava. Instead of using the boost to cross the gap, fly low and you'll find this panel next to a warp pipe on the other side of the lava pool.
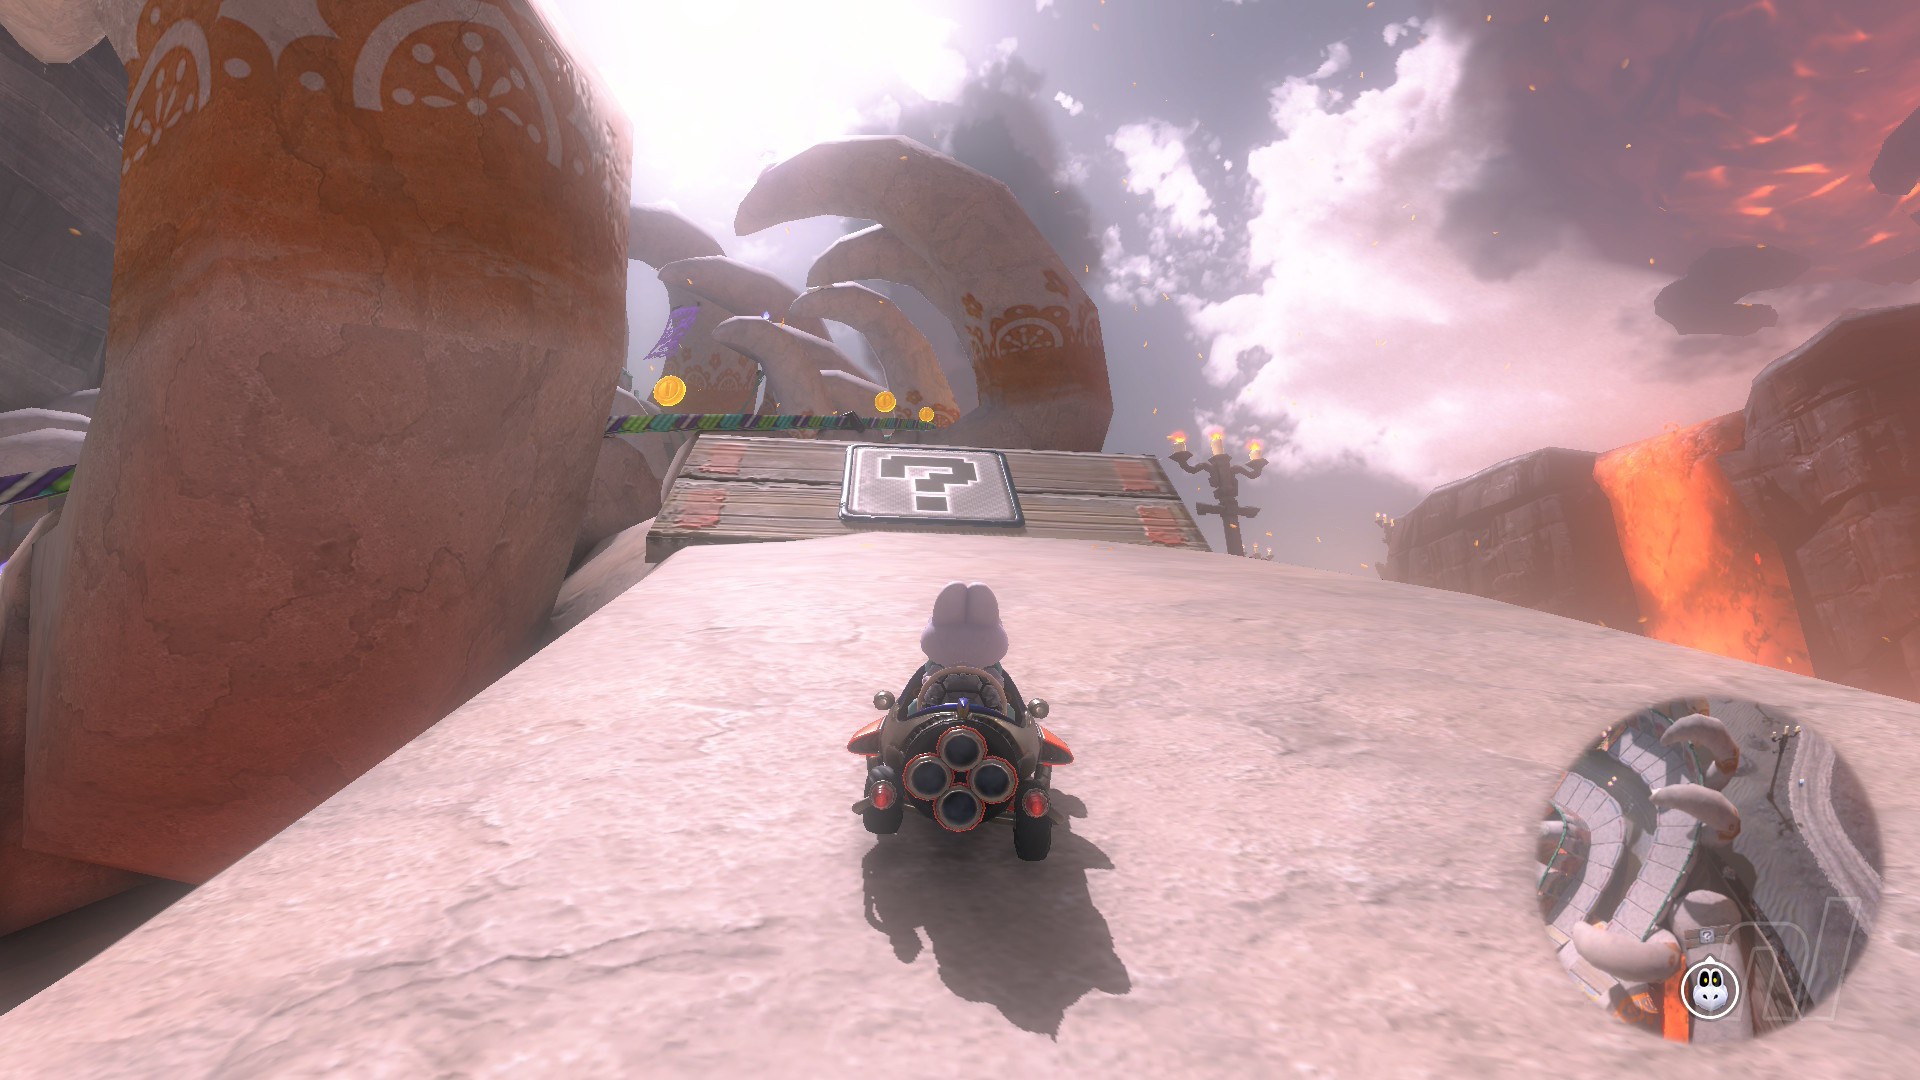
Panel 4
Location: Head straight from the start line, then turn right and head off-road to the left before the Yoshi's van. Make a sharp left turn as soon as the wall on your left levels out and follow the path left around a bone pillar. Make another sharp left turn at the edge of the cliff onto a boost ramp and you'll find the panel after the jump.
Panel 5
Location: Follow the same route off road as Panel 4, but follow the dirt track up the hill. At the top, make a left, past a P Switch, and use the grind rail in the first archway to reach the panel.
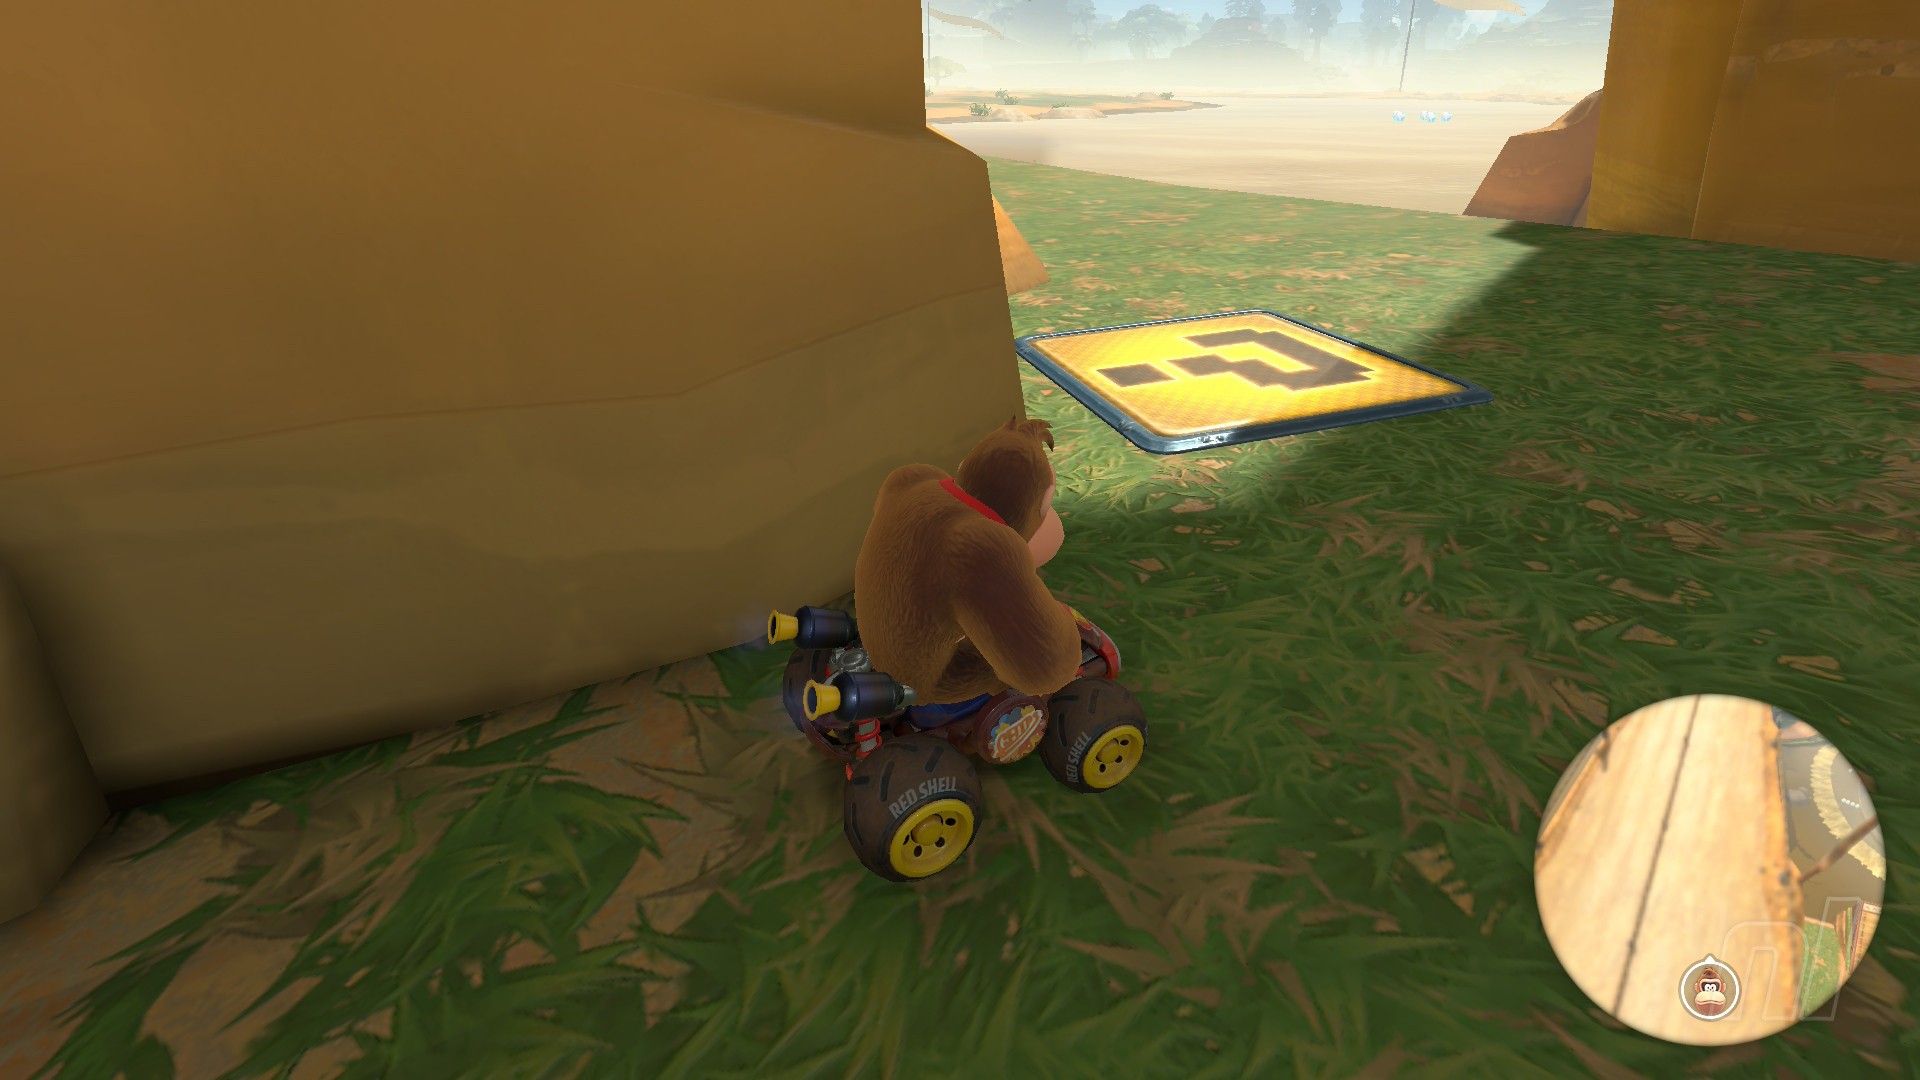
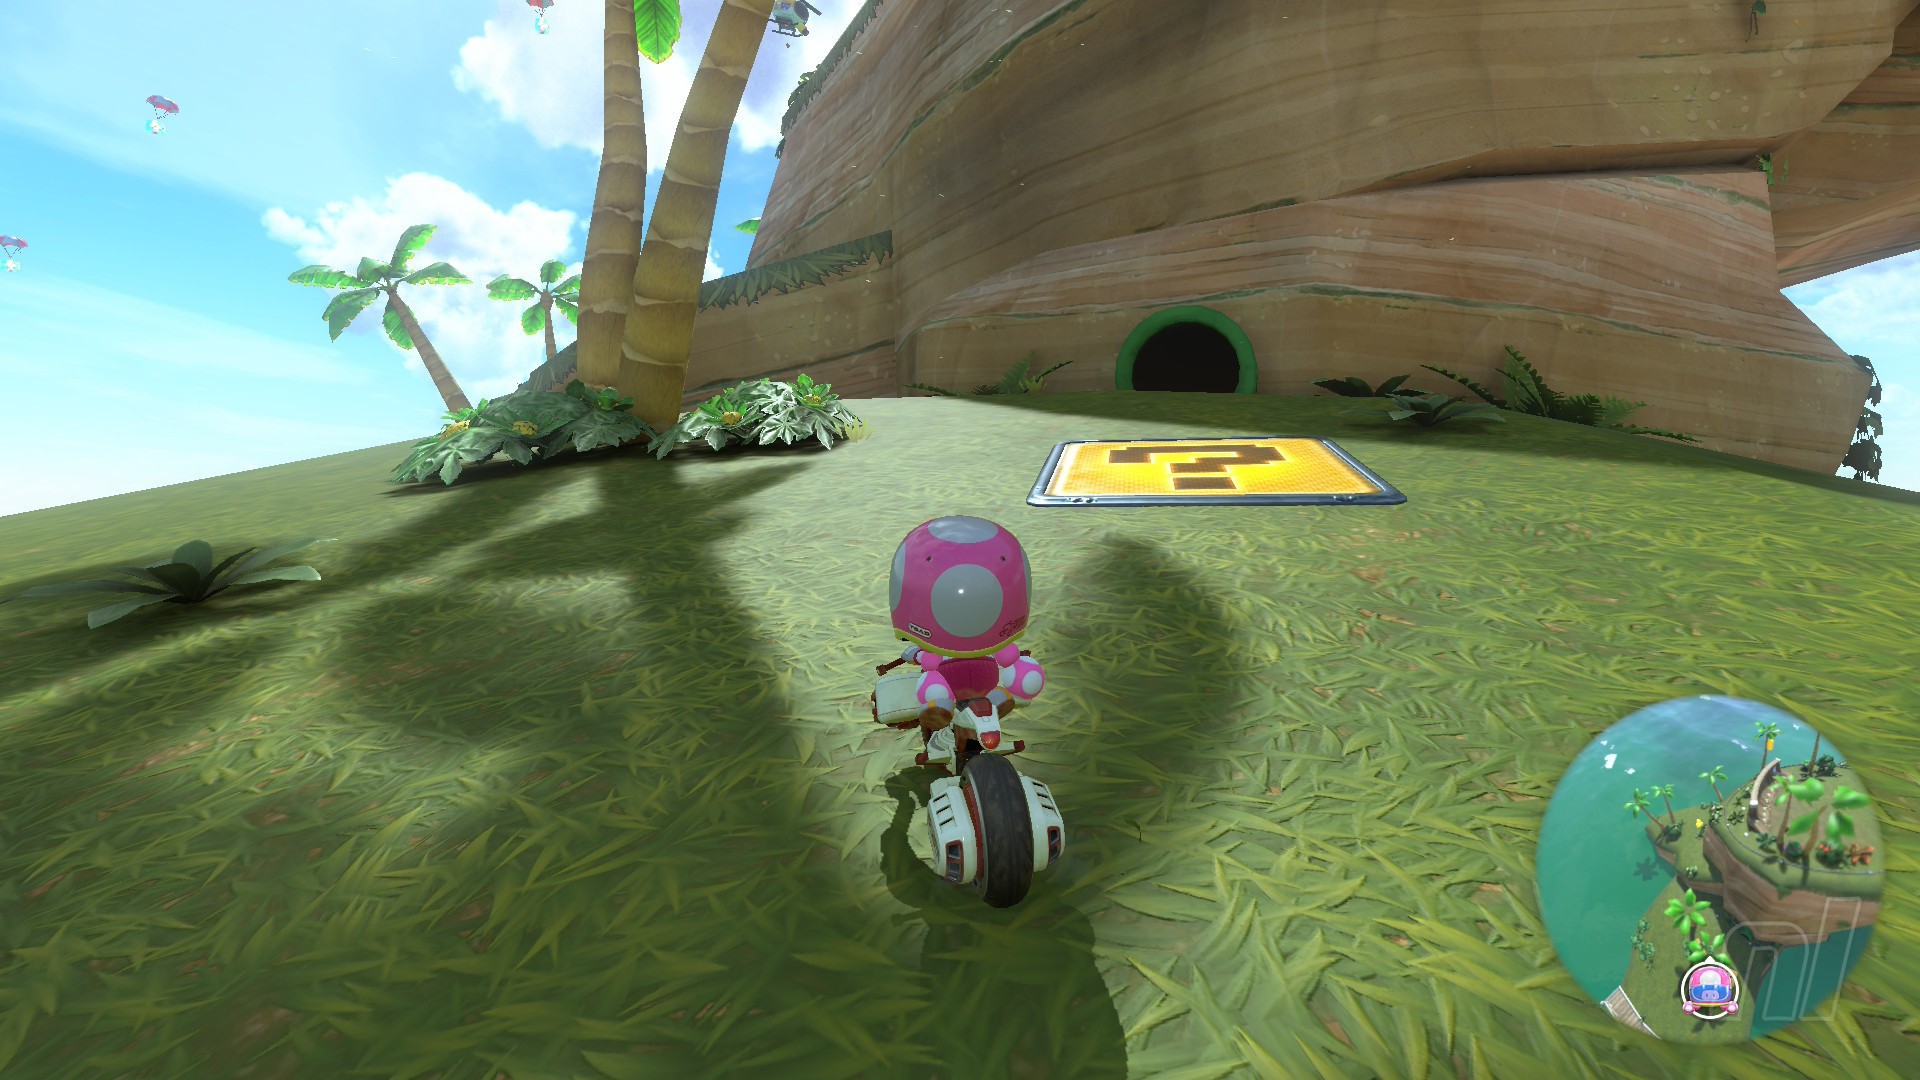
Faraway Oasis Question Panels
Number of panels: 5
Collectibles region: Jungle Safari
Panel 1

Location: You can turn around at the start line and drive through the rapids towards a grassy slope to cut of a section of the course. Then, head left past some buffalo to find the panel on a small wall.
Panel 2
Location: Follow the steps for Panel 1 to reach the other side of the rapids, but go right towards a Yoshi’s drive-thru. Under the archway near it is the next panel.
Panel 3
Location: On the red roof over the start line. Squeeze through the gap right of the line and use the bounce pad to reach the roof.
Panel 4
Location: Take a wider turn on the first bend into the river, missing the main track and taking a thinner wooden path behind it. This panel is just up the ramp.
Panel 5
Location: From the start line, ignore the wooden track in the river, and crossover the water instead towards a Yoshi's on the opposite riverbank. Drive straight past the Yoshi's and use the Warp Pipe in the cliff face nearby to get to this panel.
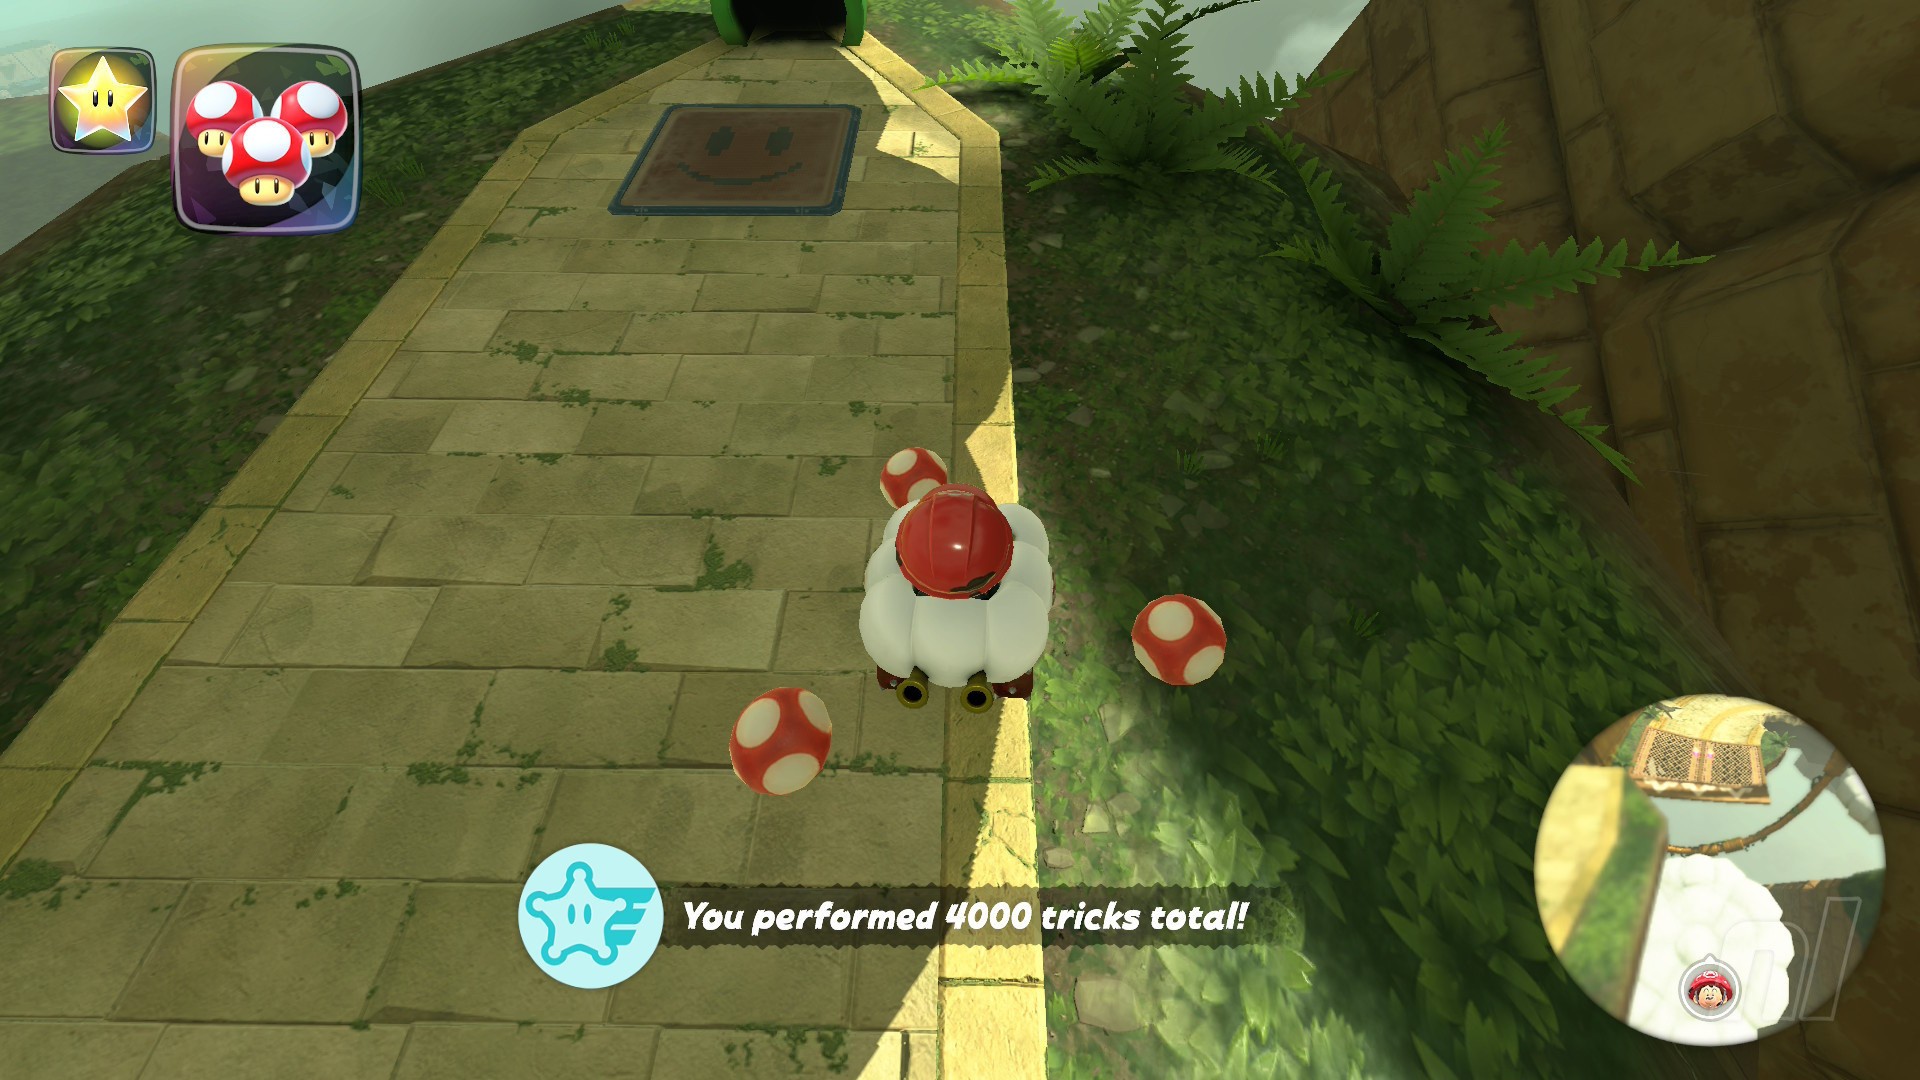
Great ? Block Ruins Question Panels
Number of panels: 5
Collectibles region: Jungle Safari
Panel 1
Location: Underneath the gold blocks near the start of the course. Drive into them to break them.
Panel 2
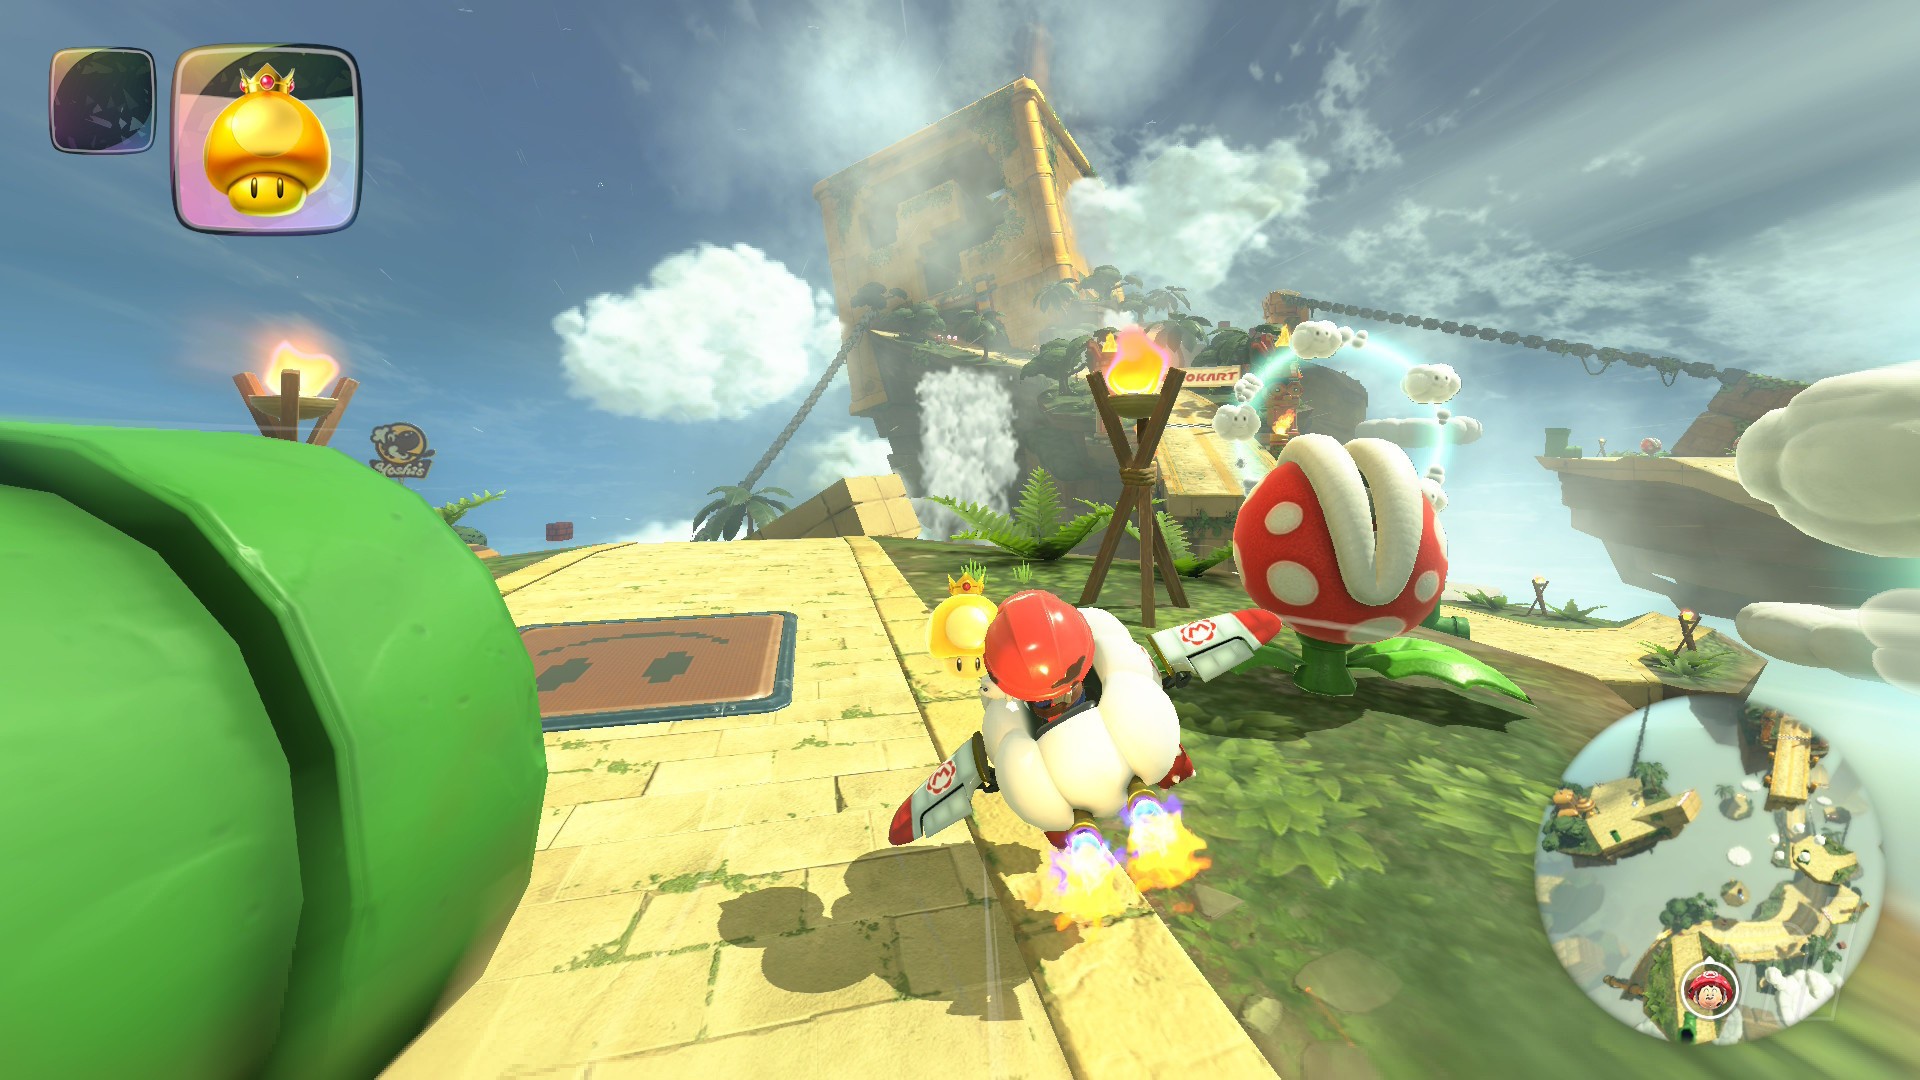
Location: Either use the speed ramps to glide over to the pipe and piranha plant island, behind the start line, or use the pipes dotted around the course to shoot yourself onto the island.
Panel 3
Location: If you drive through the course normally, you’ll eventually reach a hairpin turn with rings surrounding the end of it. There are clouds here. You want to drop between the two clouds to reach the panel on the platform below.
Panel 4
Location: In the Golden Block section of the course, drop down where you see a red plant. You want to land on the spiral grass section next to some Piranha Plants. You'll see the panel on the gold part of the course.
Panel 5
Location: From panel 5, drive and trick over the ramp to return to the main course, and then drive ahead to a torch and a chain above. trick off, jump off the cloud, and you'll see the panel next to a pipe where a Yoshi cart is. You can also reach this just by driving through the course normally.
Koopa Troopa Beach Question Panels
Number of panels: 5
Collectibles region: South Sea
Panel 1
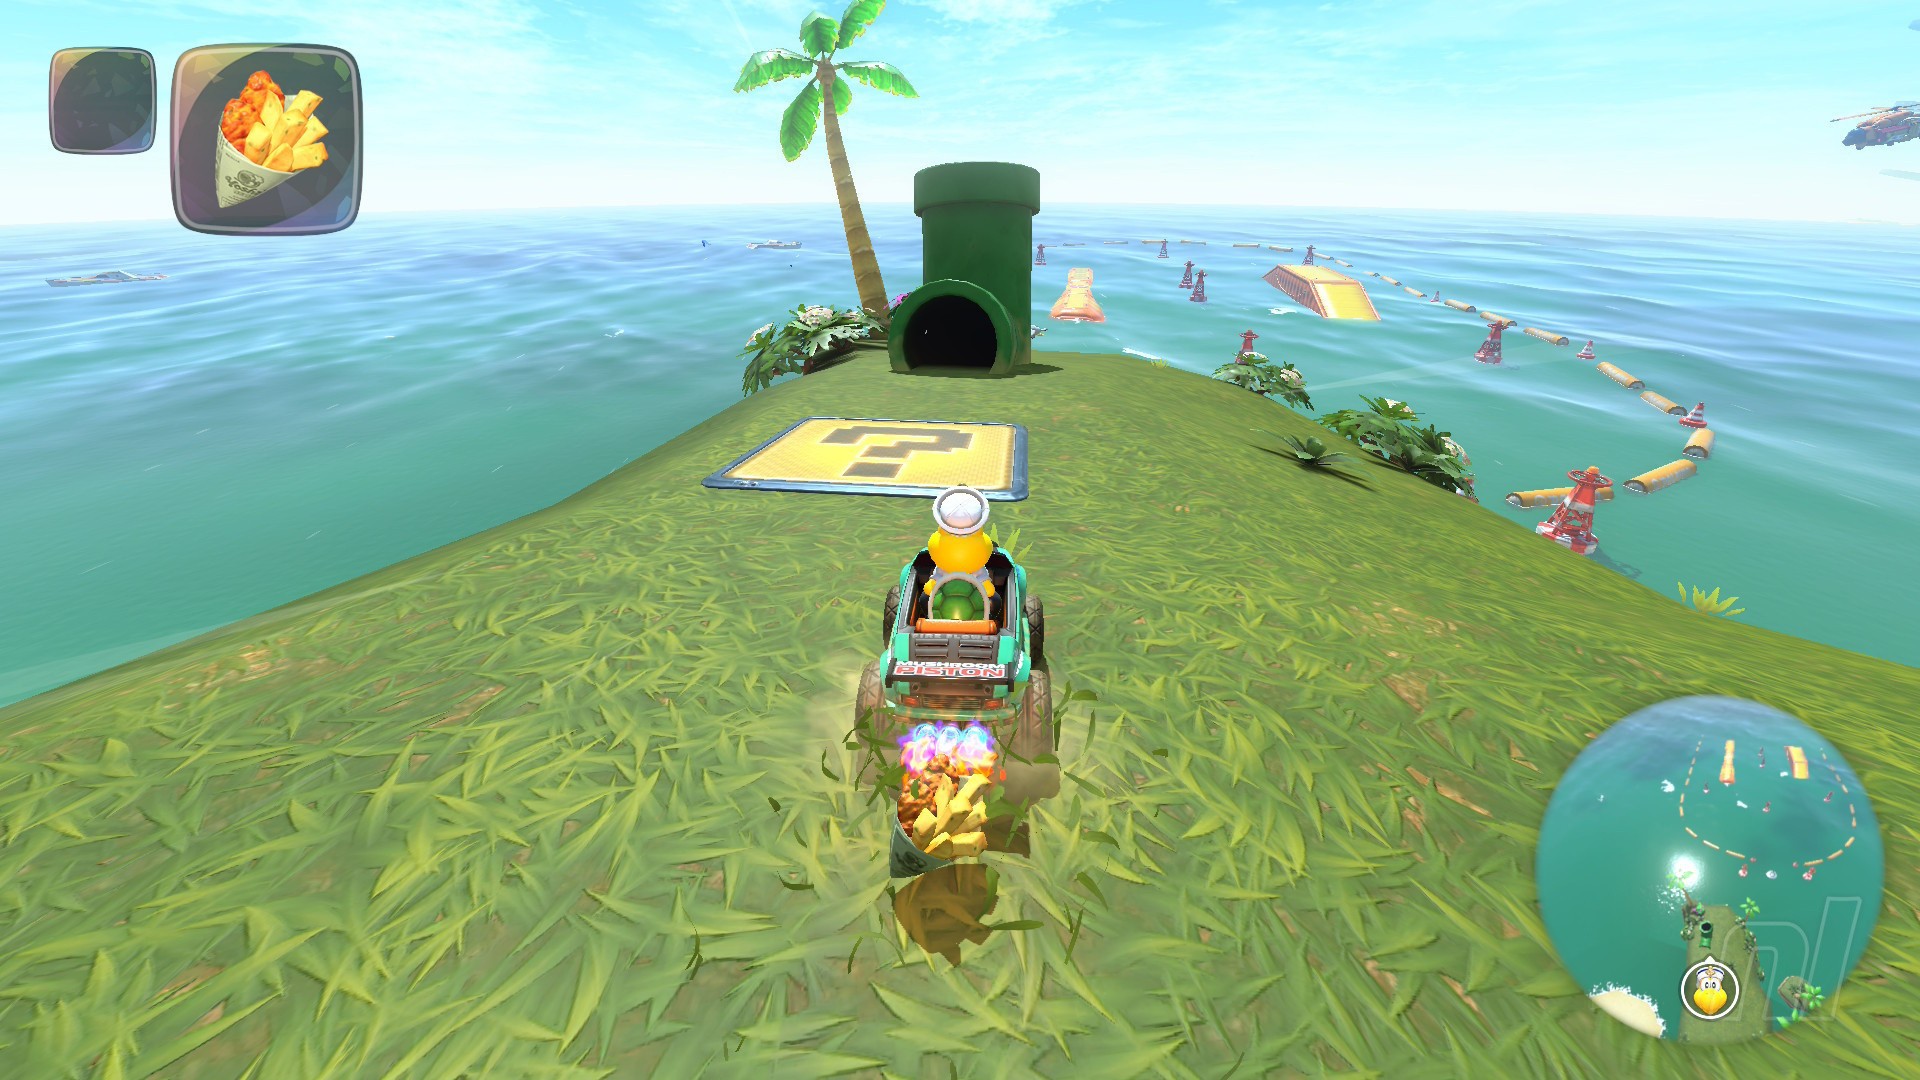
Location: Turn around at the start line and drive directly towards a big pillar in the ocean, In front of the pipe is a panel.
Panel 2
Location: Back up slightly from the start line, then take a left up a sandy slope. The panel will be ahead of you as the slope becomes grassy.
Panel 3
Location: From the panel above, drive up the ramp, turn right, and towards the ramp at the end, except you want to take the ramp on the left to jump over to a small platform with a panel on it
Panel 4
Location: At the starting line, drive up the small slope on the left where there's a little party going on, and turn slightly right to find the panel.
Panel 5
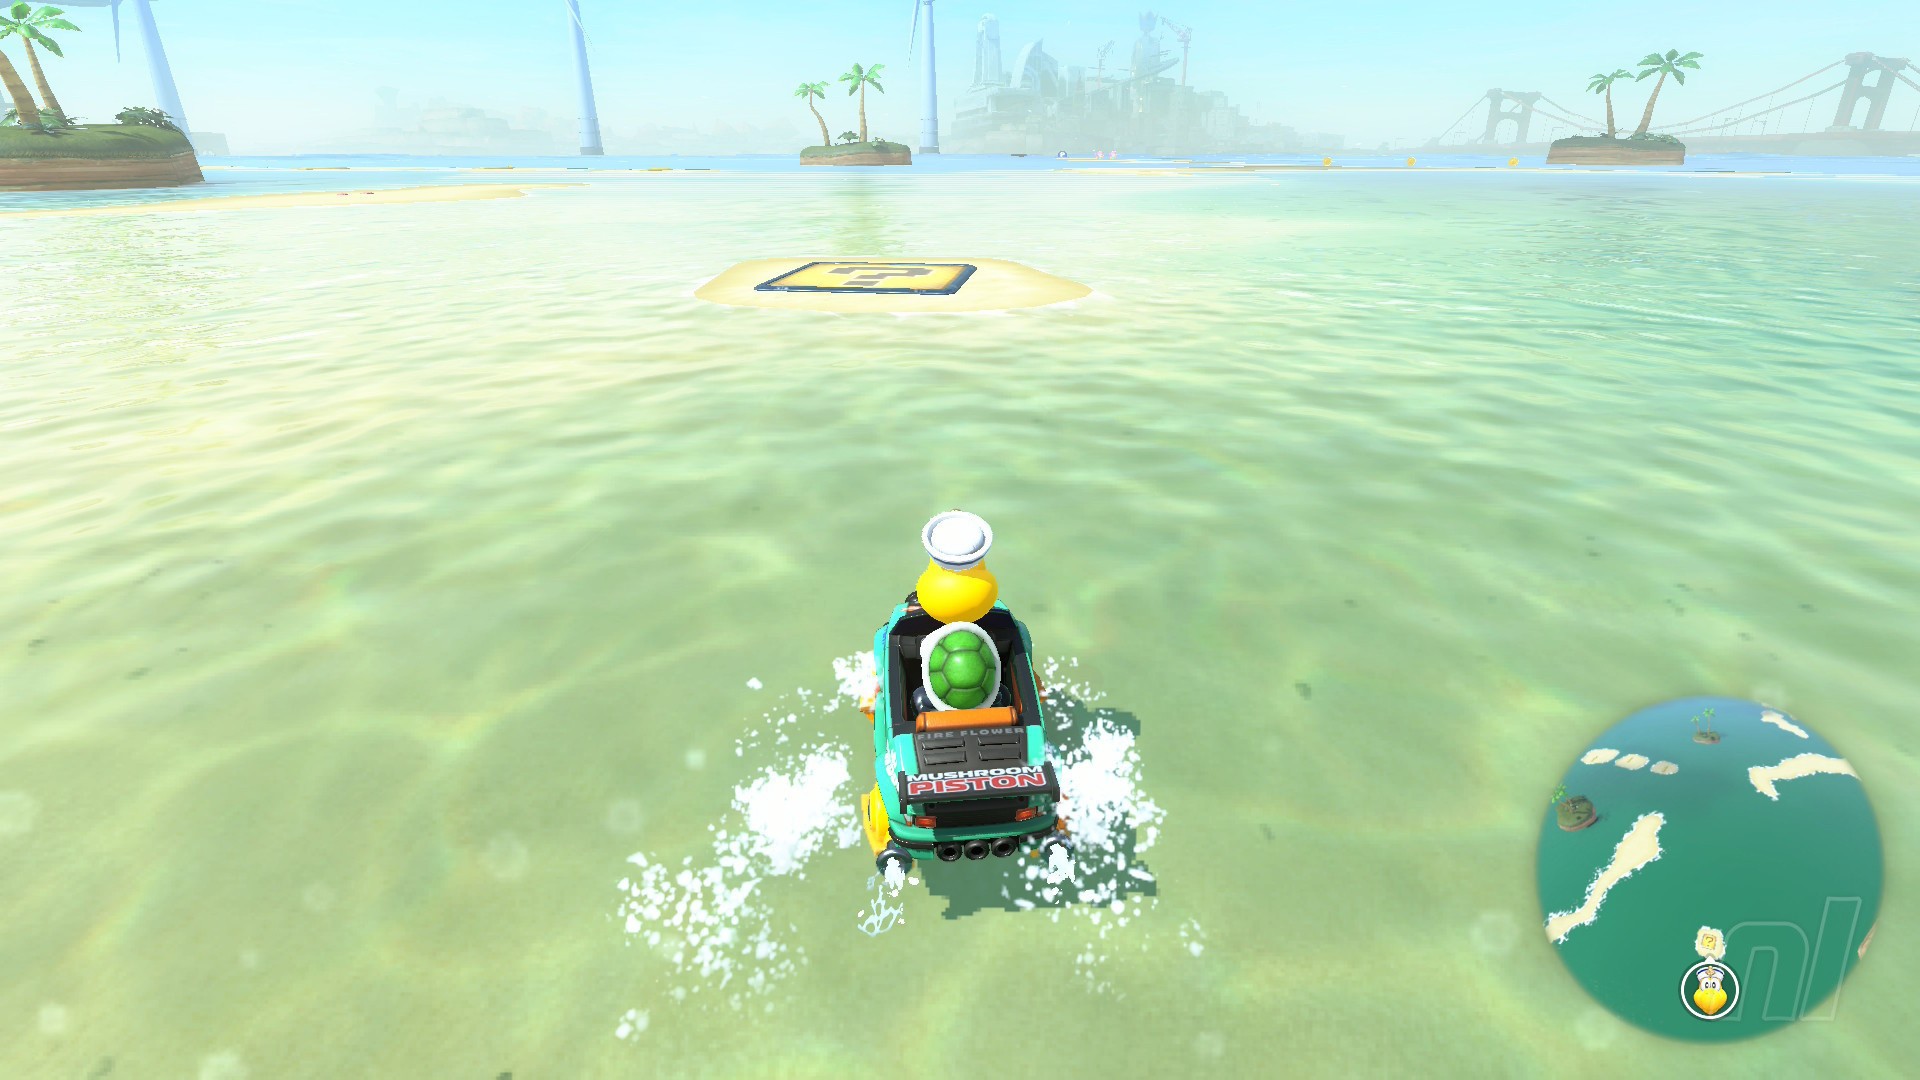
Location: If you drive to the west of the main beach, you'll see a Yoshi's diner in the distance, which is actually part of a Koopa Beach 1 replica. The panel here is in the shallows hiding behind a small archipelago in the centre of the mini course.
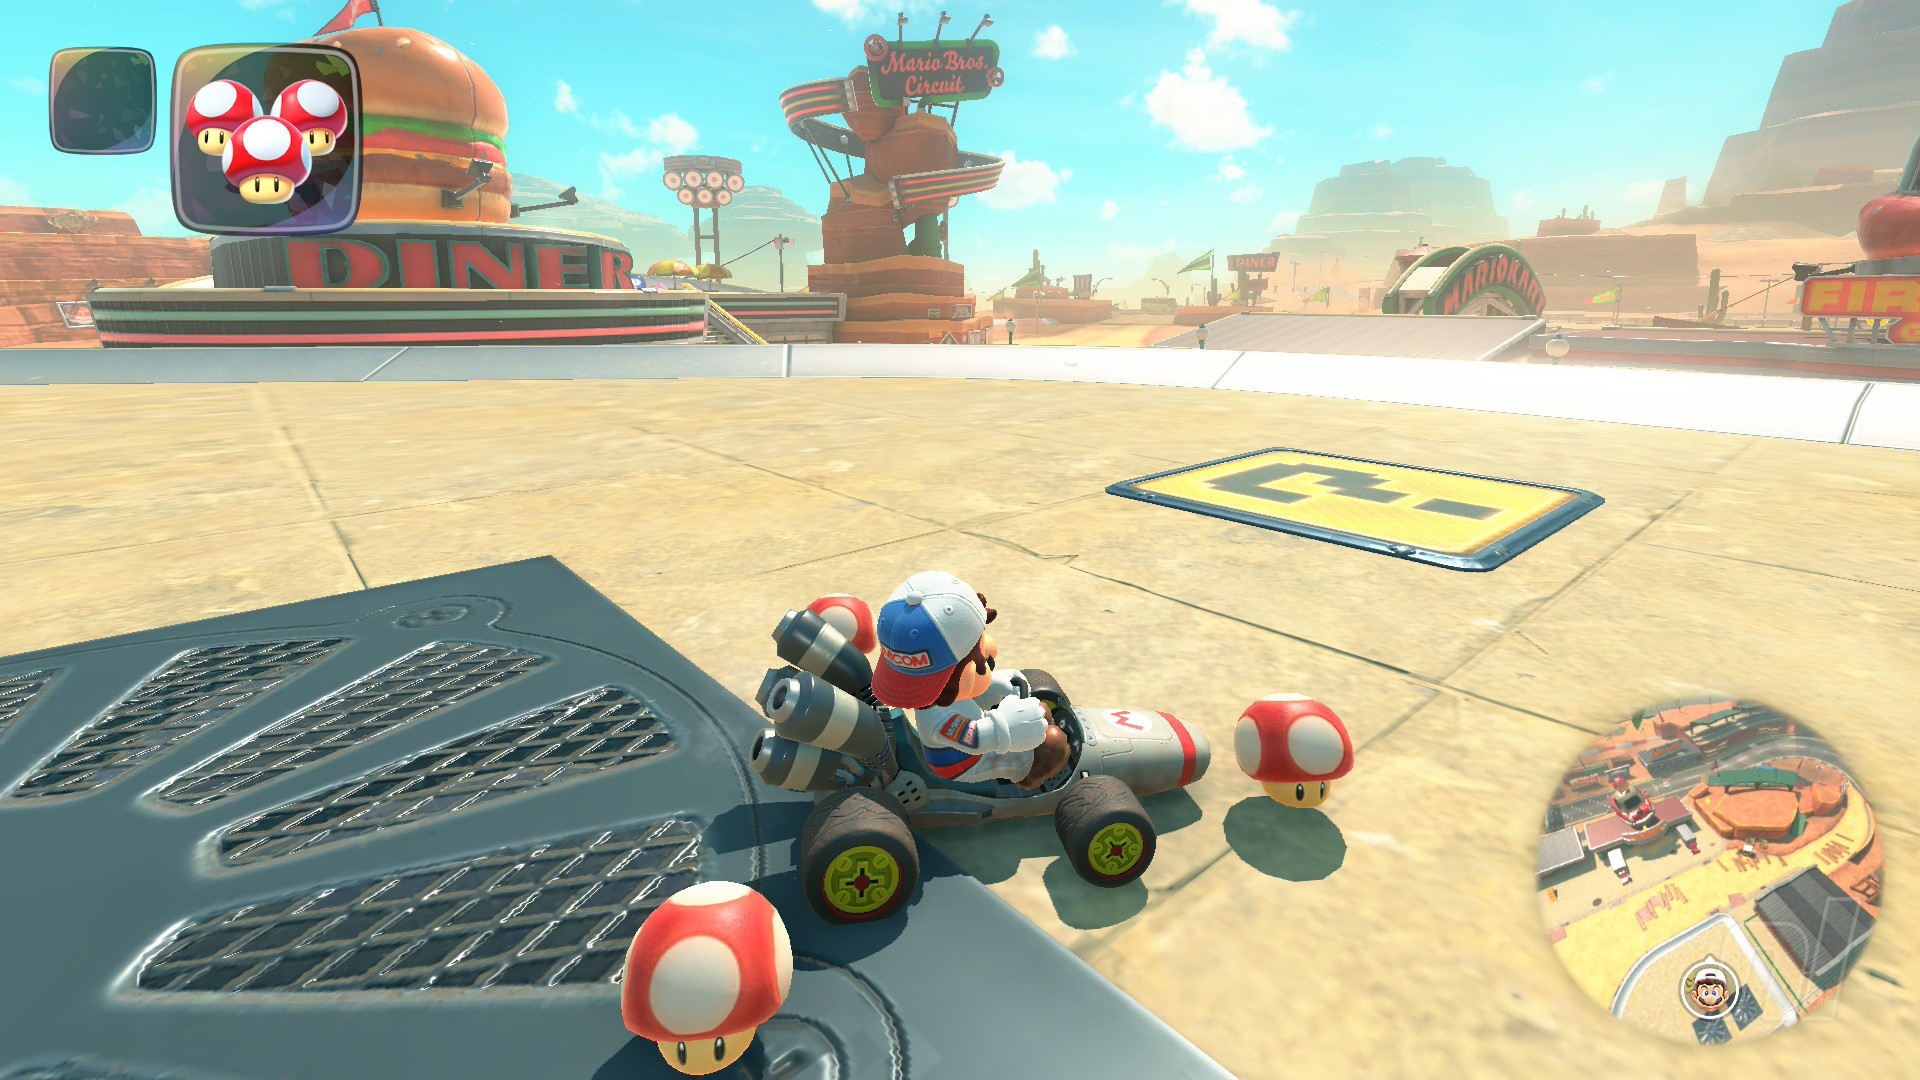
Mario Bros. Circuit Question Panels
Number of panels: 5
Collectibles region: Wild West
Panel 1
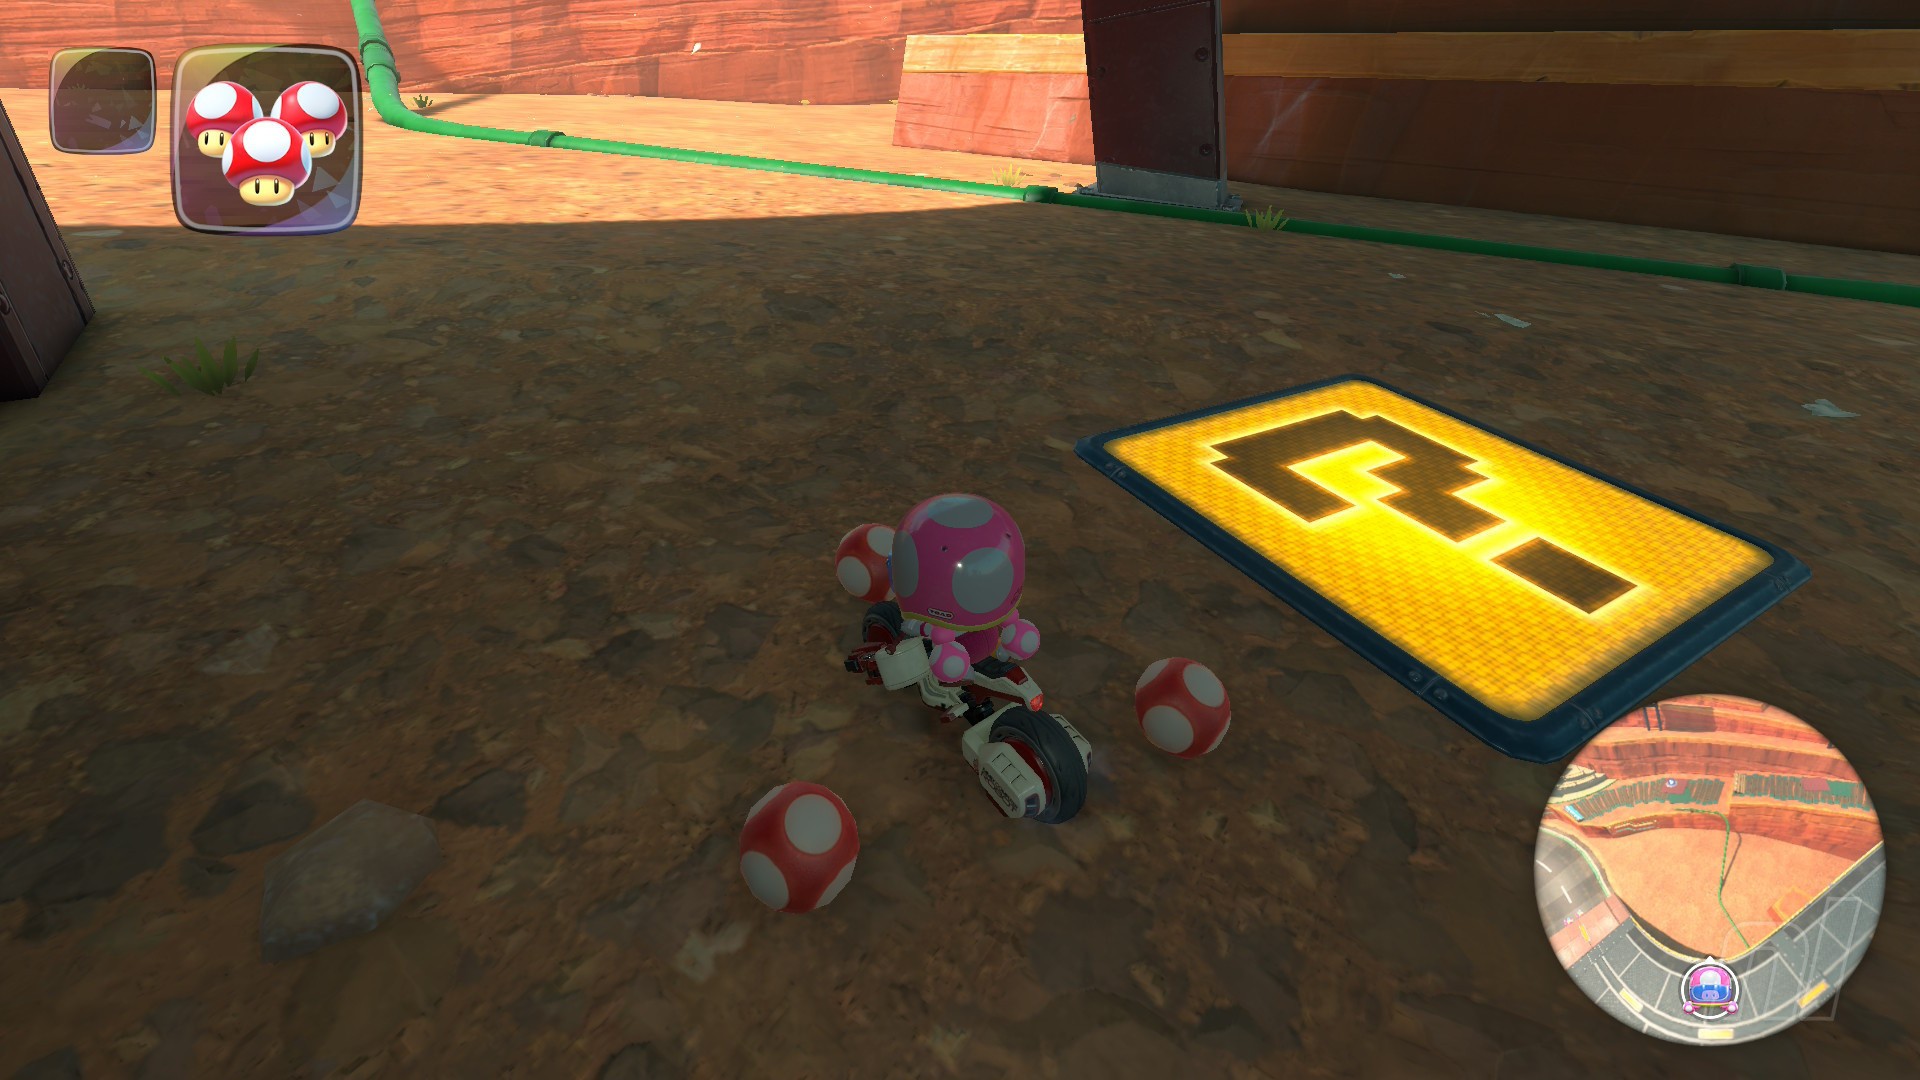
Location: Follow the course as normal, then go off-road when you reach a raised road. Underneath that is the panel, on the dirt path.
Panel 2
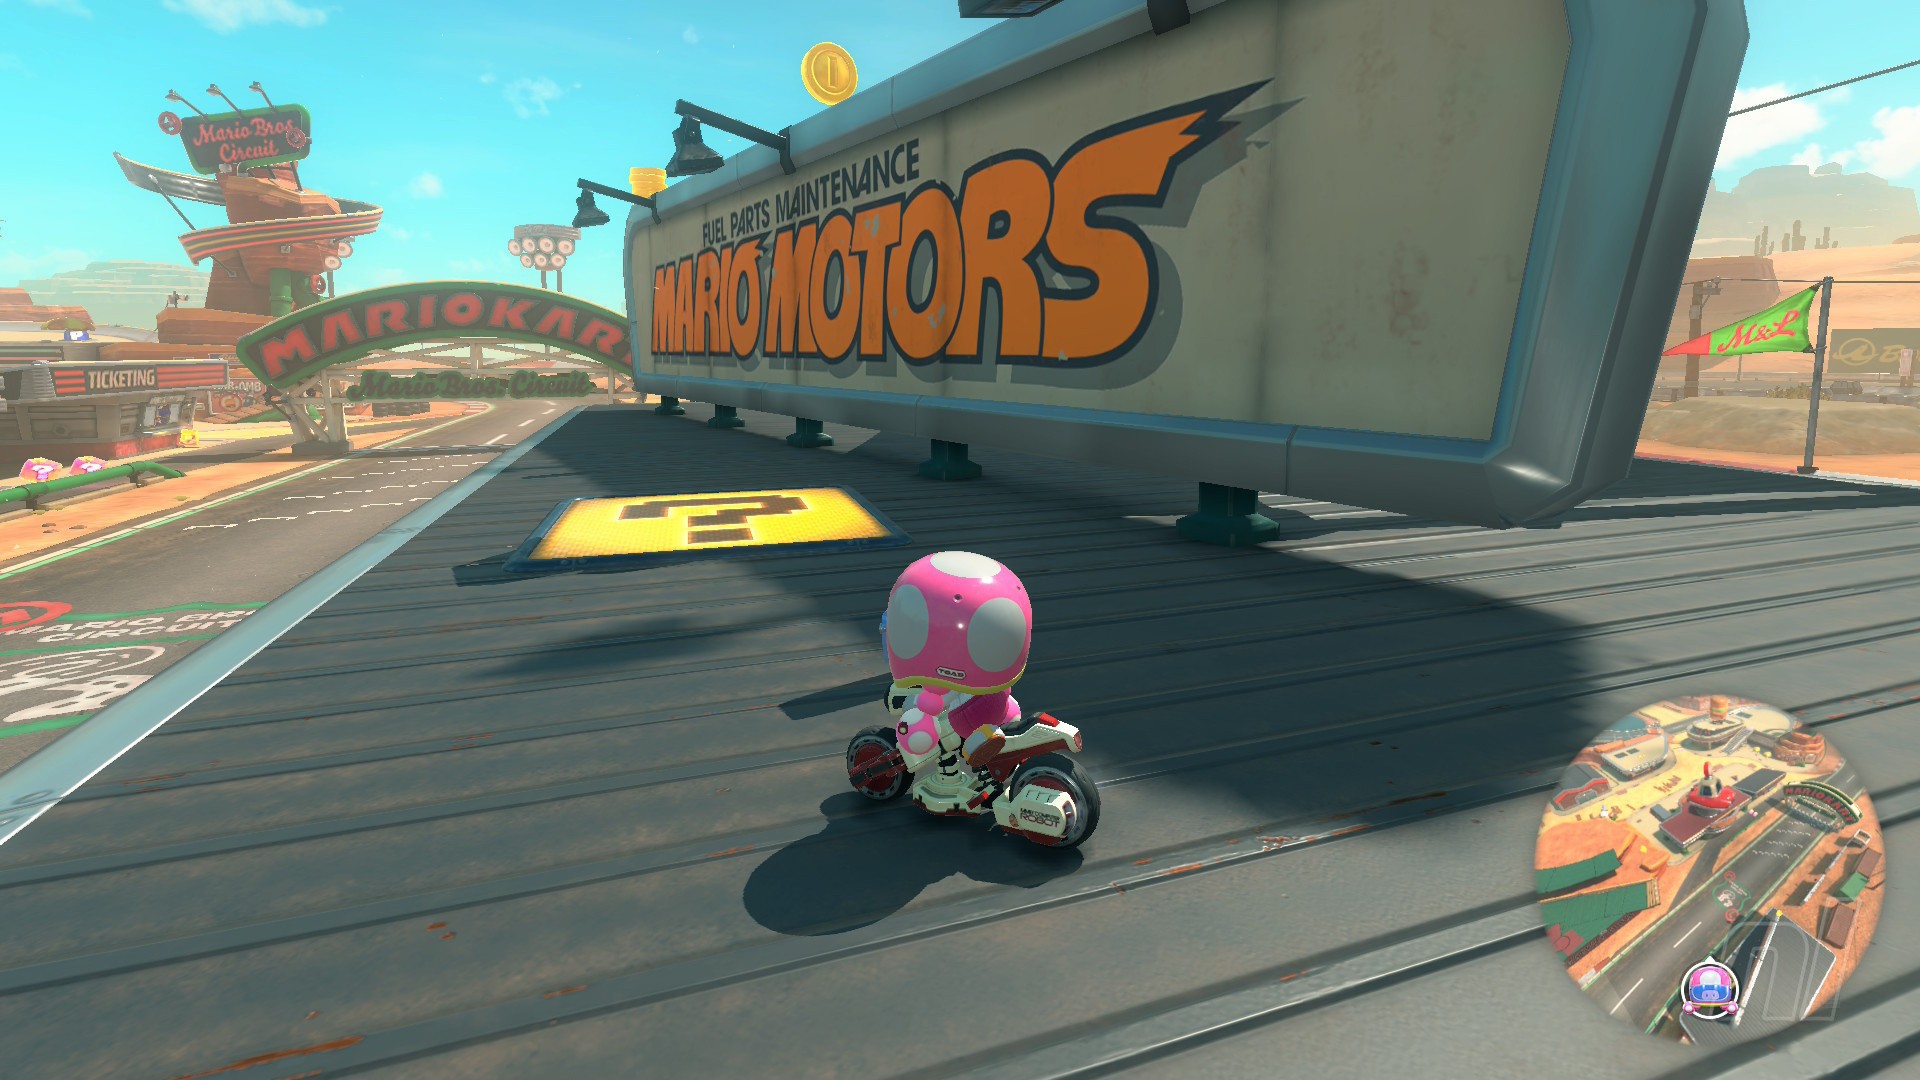
Location: On top of the Mario Motors roof right at the start line.
Panel 3
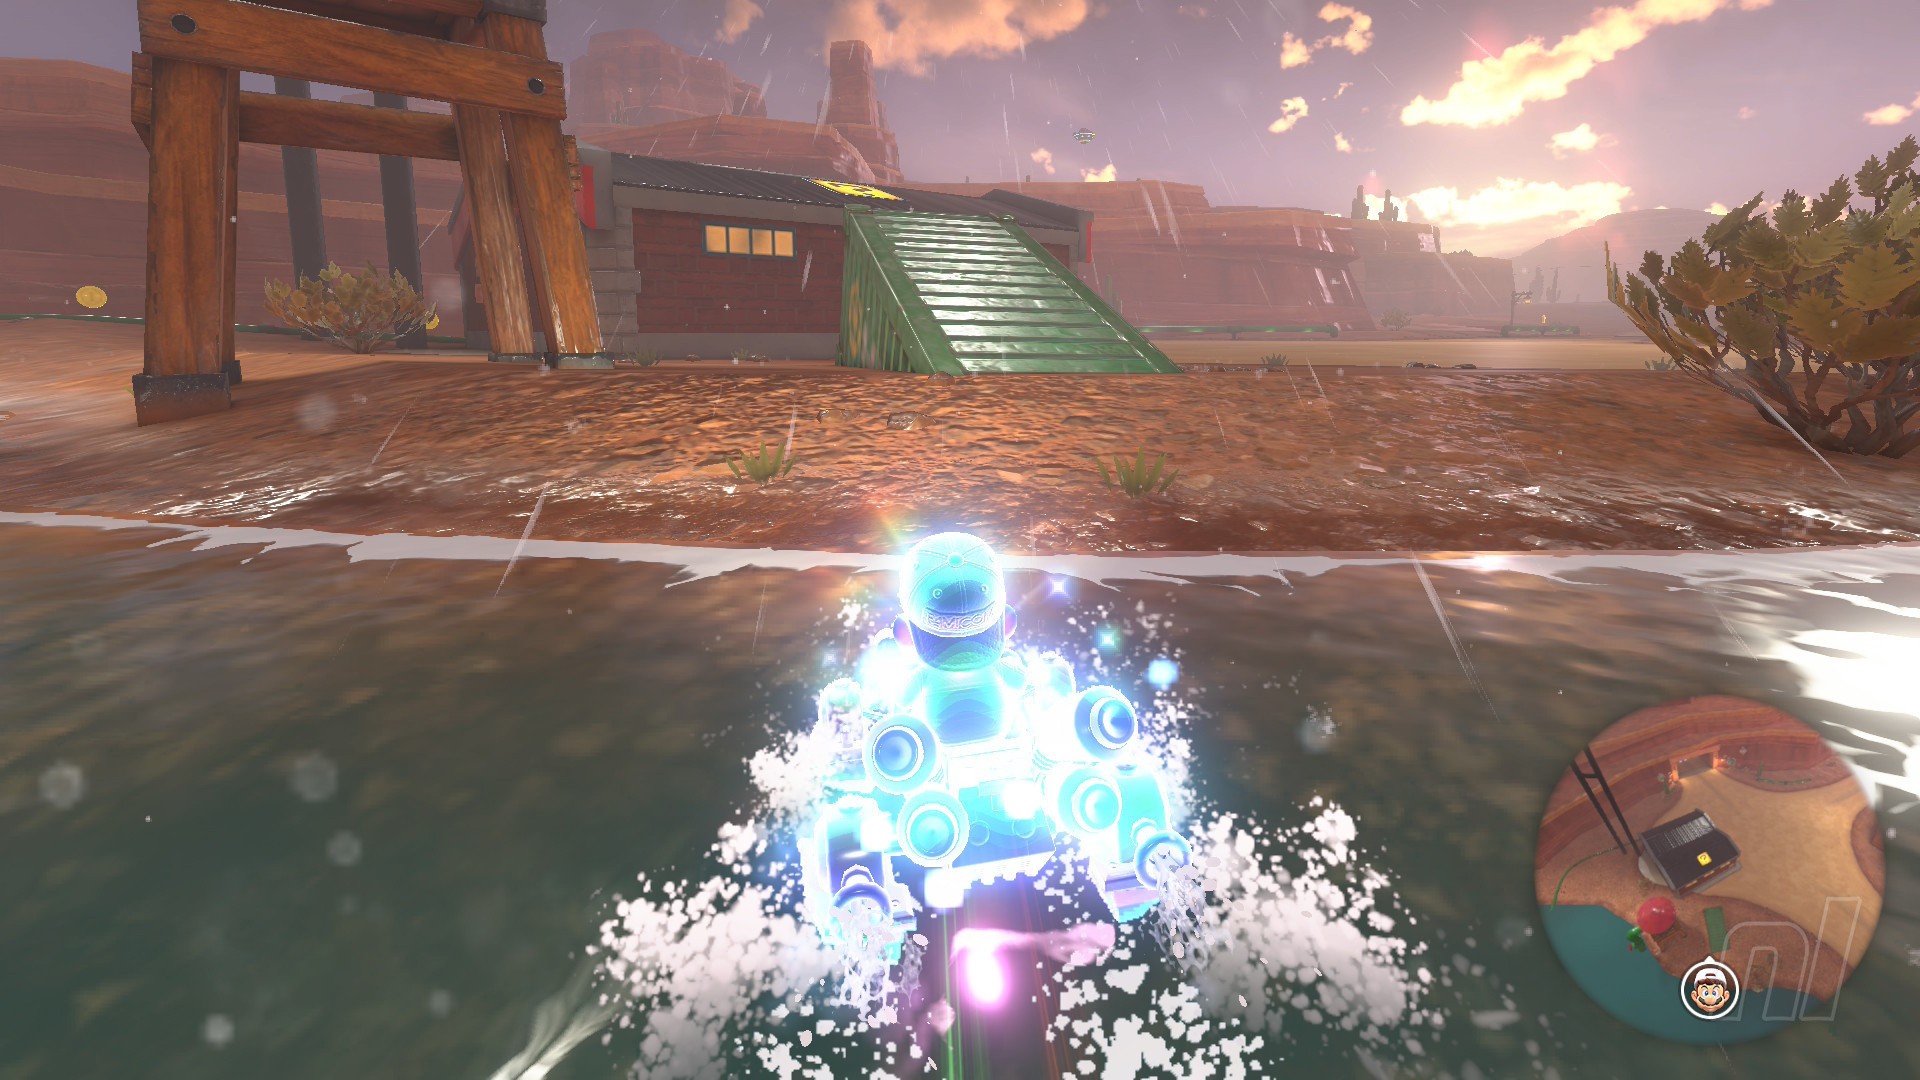
Location: On a small rooftop right next to the water and the curved metal road. Use the green ramp to trick onto the roof nice and smoothly.
Panel 4
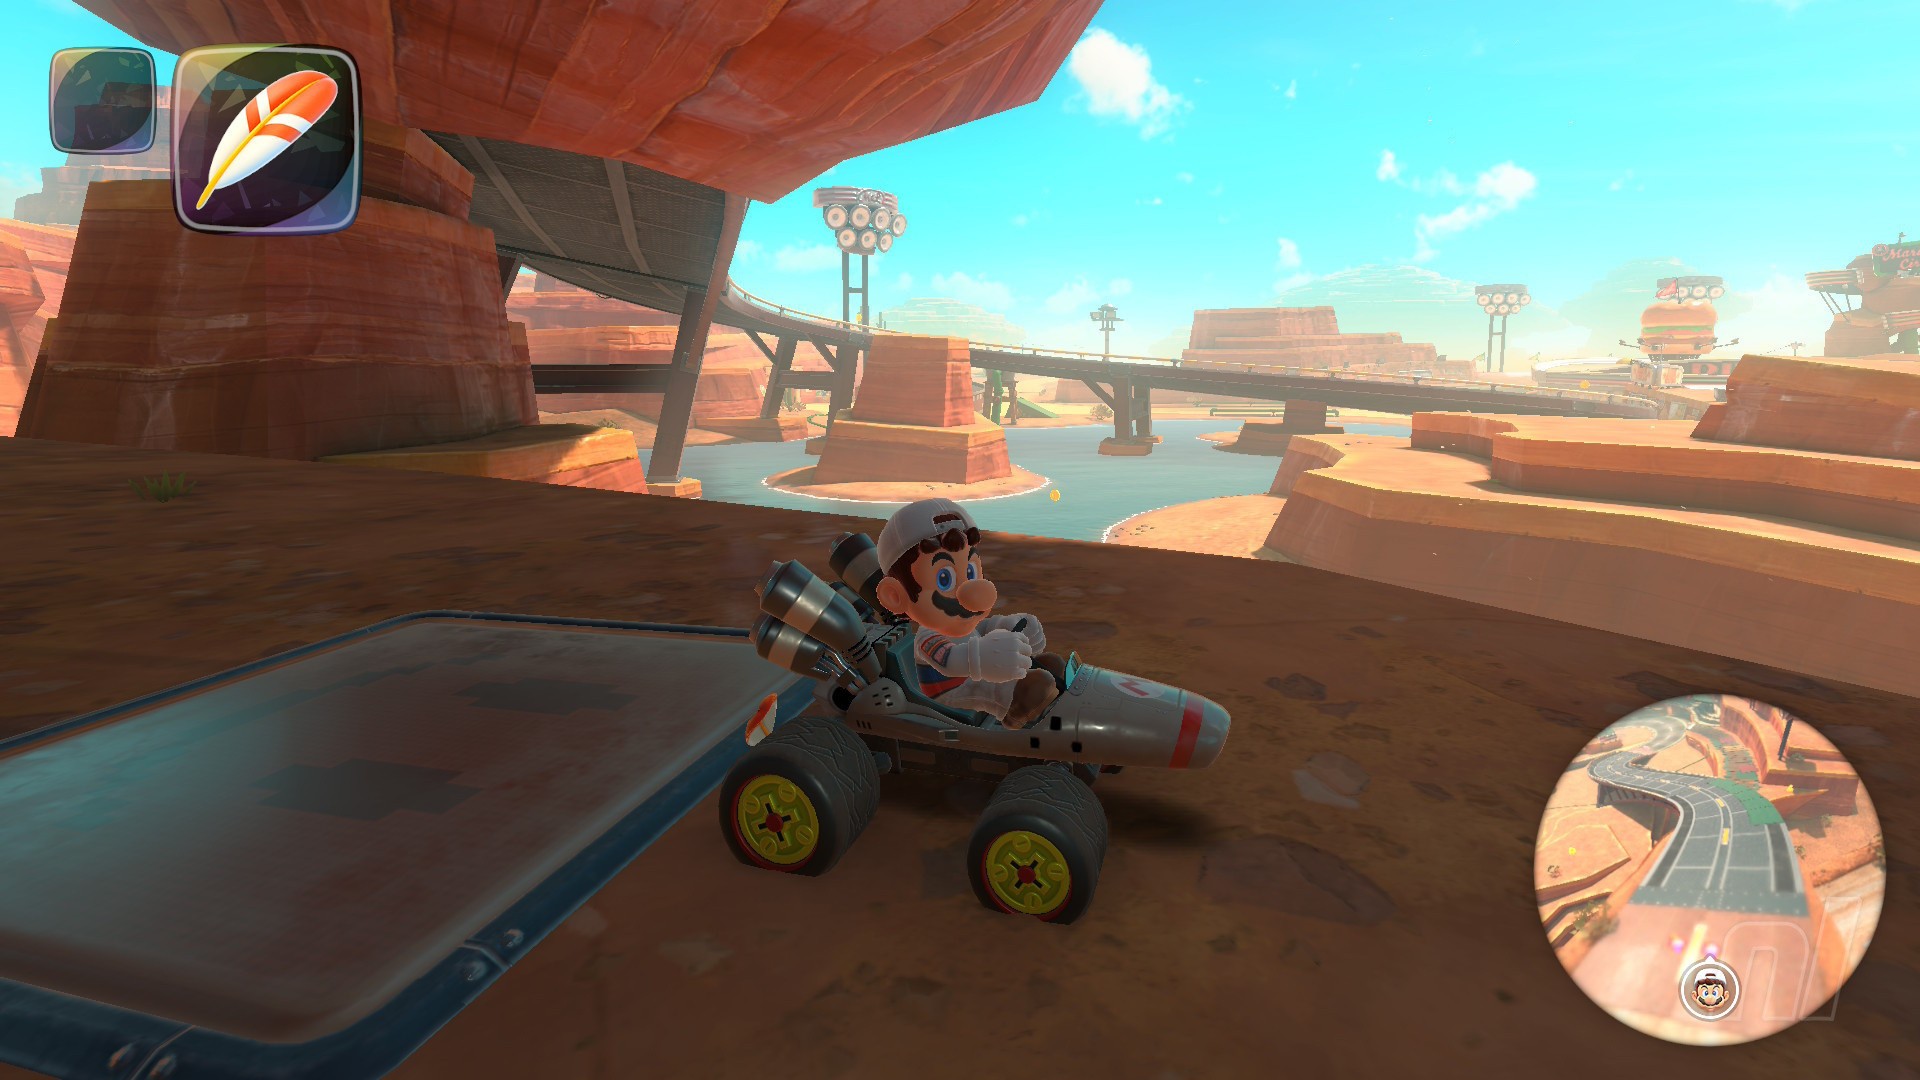
Location: Underneath the huge metal loop. It's also right next to a P Switch!
Panel 5
Location: On the roof of the Luigi Tires/Mario Motors building, which is next to the diner. The easiest way to get here is grinding on the yellow railing on the huge curved metal path, then tricking off it.
Mario Circuit Question Panels
Number of panels: 5
Collectibles region: Forest
Panel 1
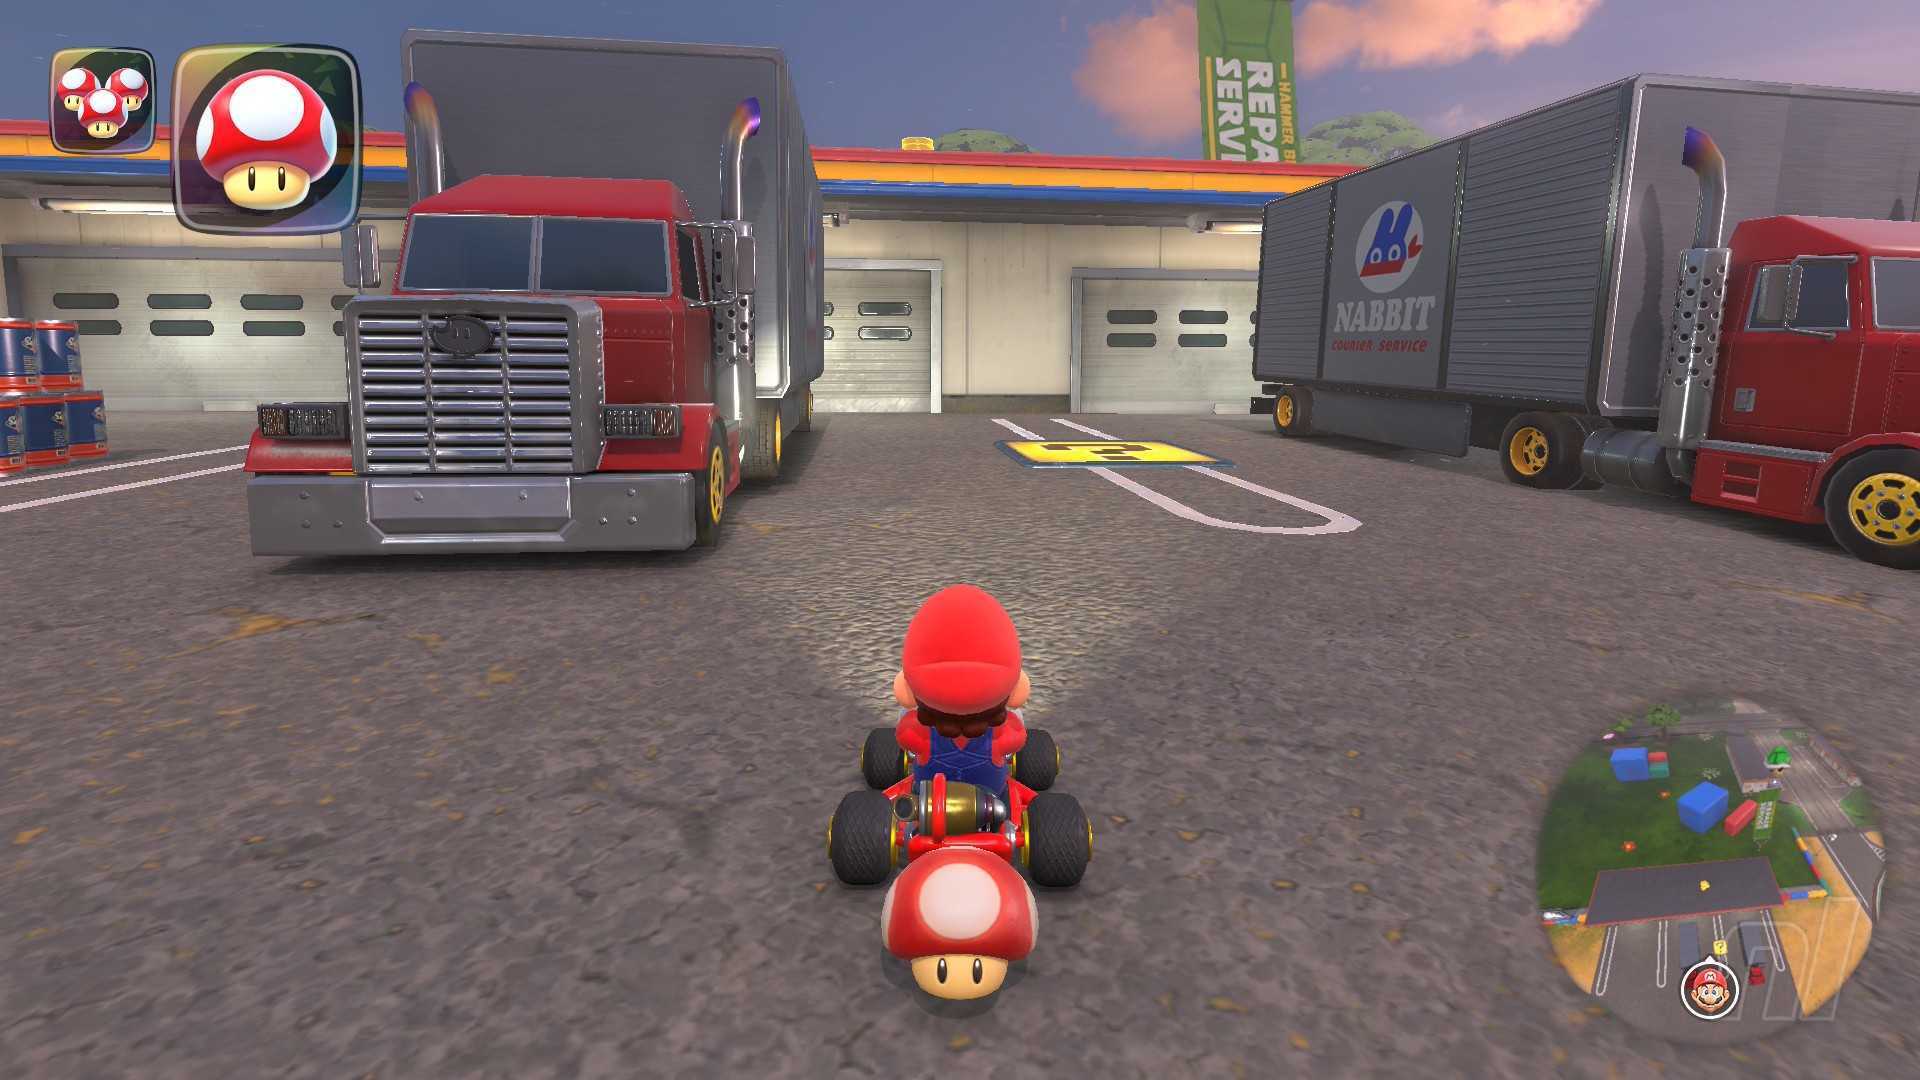
Location: This panel is in between two Nabbit trucks in front of one of the warehouses.
Panel 2
Location: On the roof of the huge building (with Mario in the pipe frame) in the back of the course. You can use the jumping blocks or grind to reach the top.
Panel 3
Location: On the second roof of the huge Mario building in the centre of the course. Use the grind rails on the lower level and aim your trick just right to reach it.
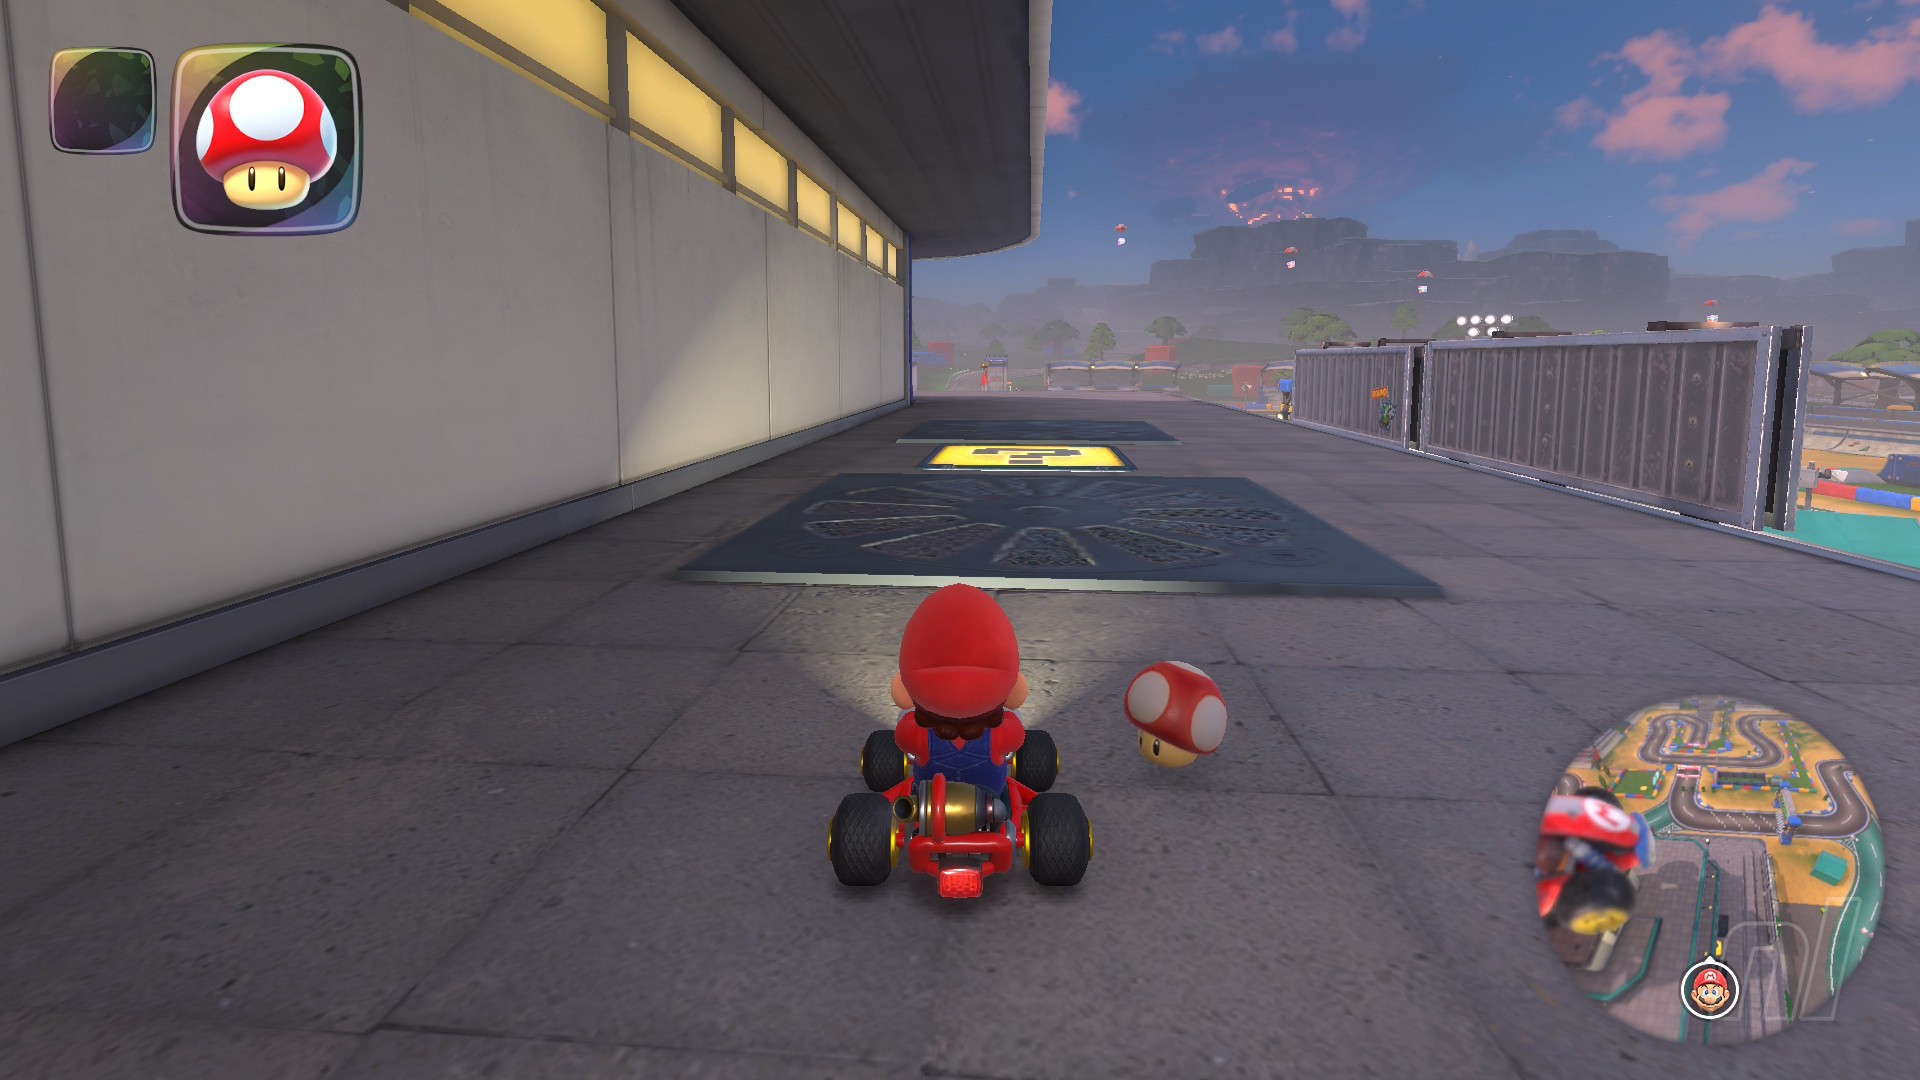
Panel 4
Location: As you race through the course, slow down before you hit a speed ramp on a blue block. Instead, edge off the ramp to the side, then drive across the coloured wall to reach a raised patch of grass with a panel on it.
Panel 5

Location: For this one, you'll want to drace through the course until you see a T-shaped section of grass on the map. Using a Charge Jump, hop up to the grassy section and grab the panel.
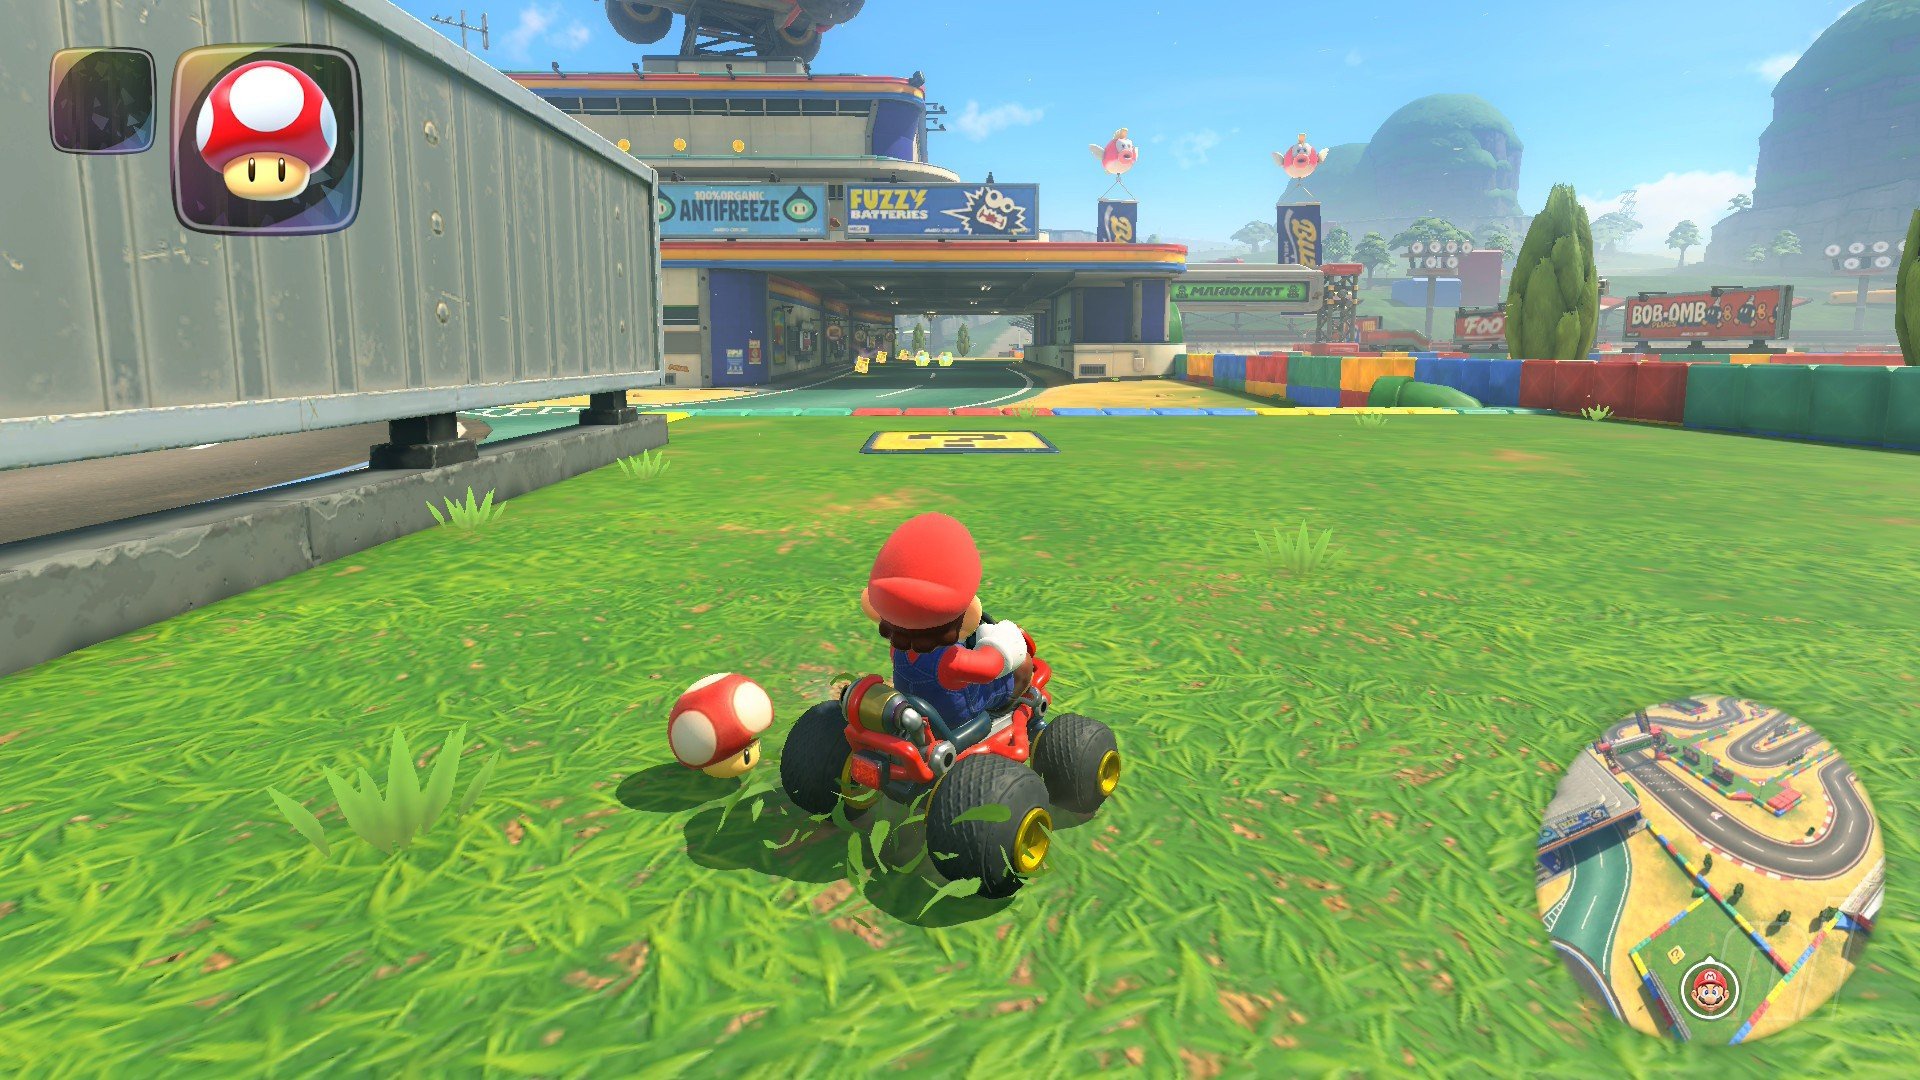
Moo Moo Meadows Question Panels
Number of panels: 5
Collectibles region: Central
Panel 1
Location: In the huge barn to the left of the start line, a panel is hiding underneath a pile of hay.
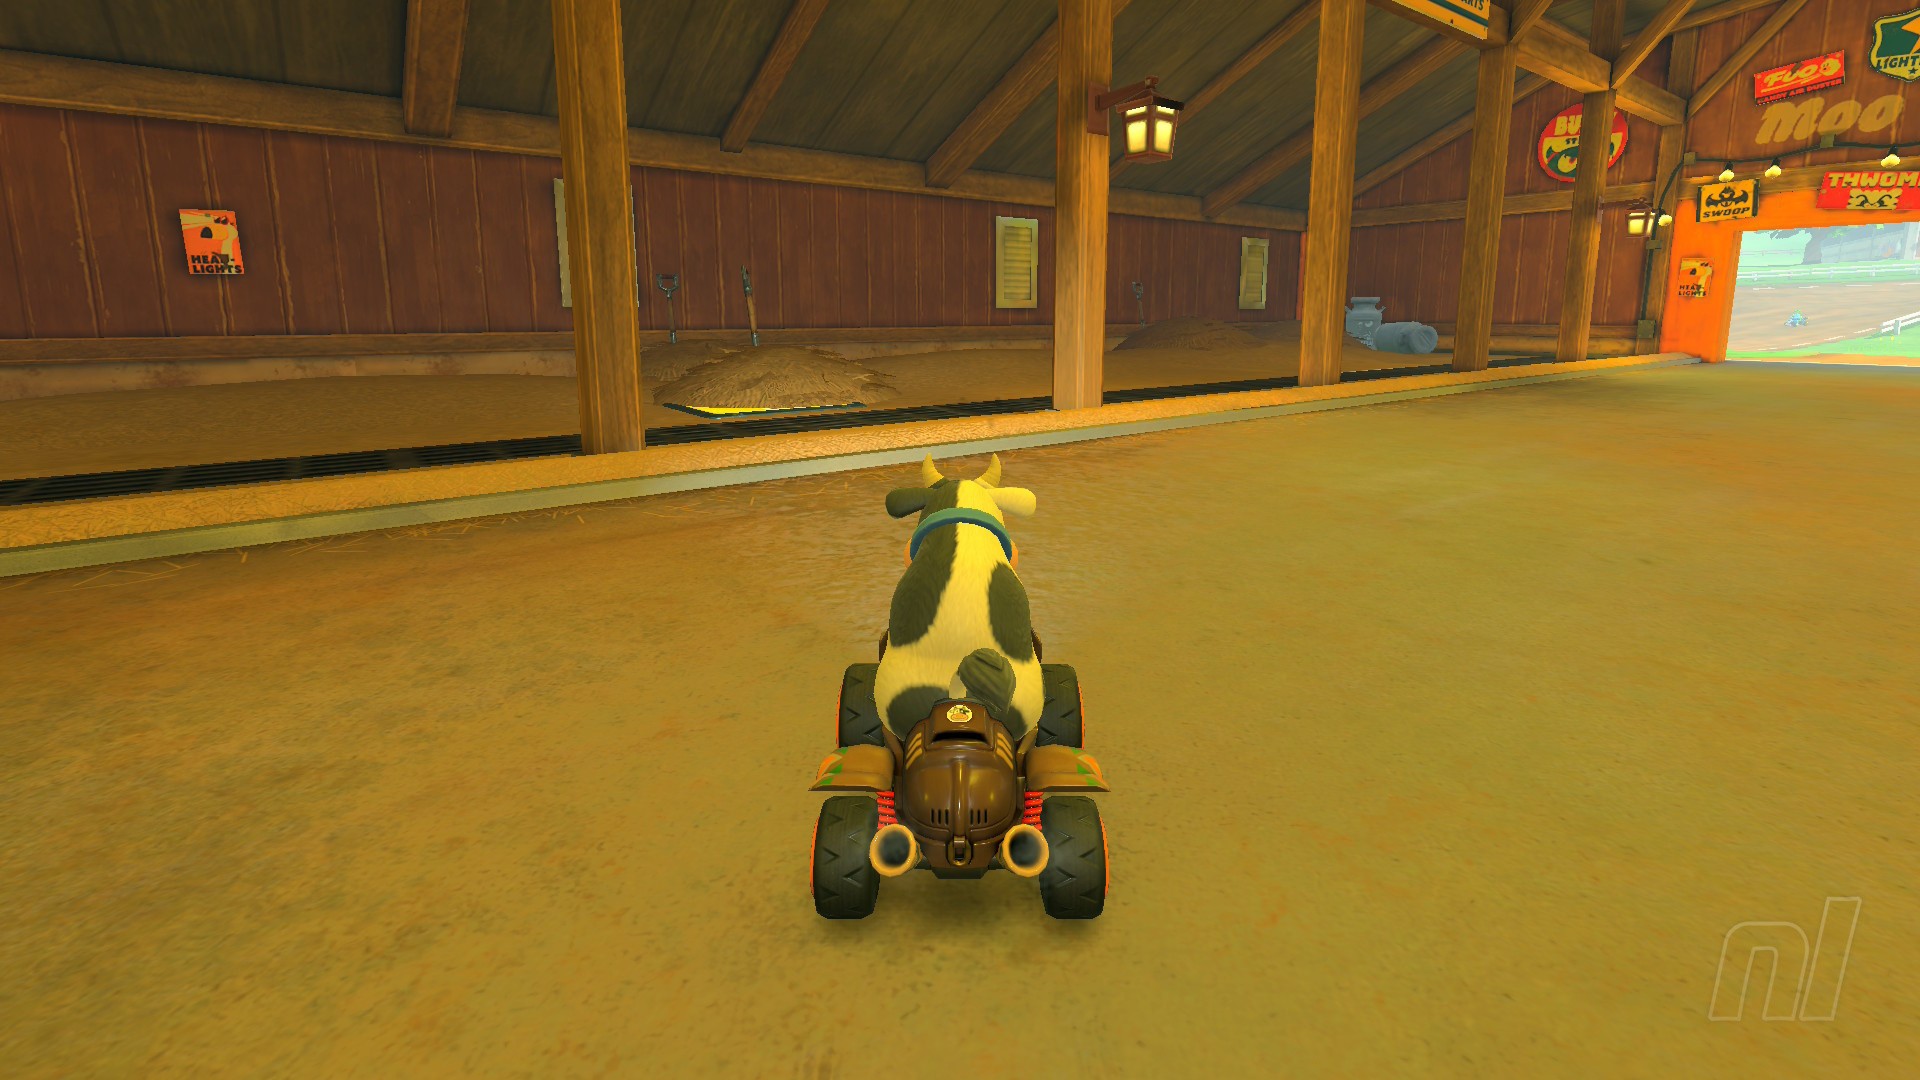
Panel 2
Location: Inside the barn next to the Yoshi's drive-thru, a panel sits close to one of the entrances.
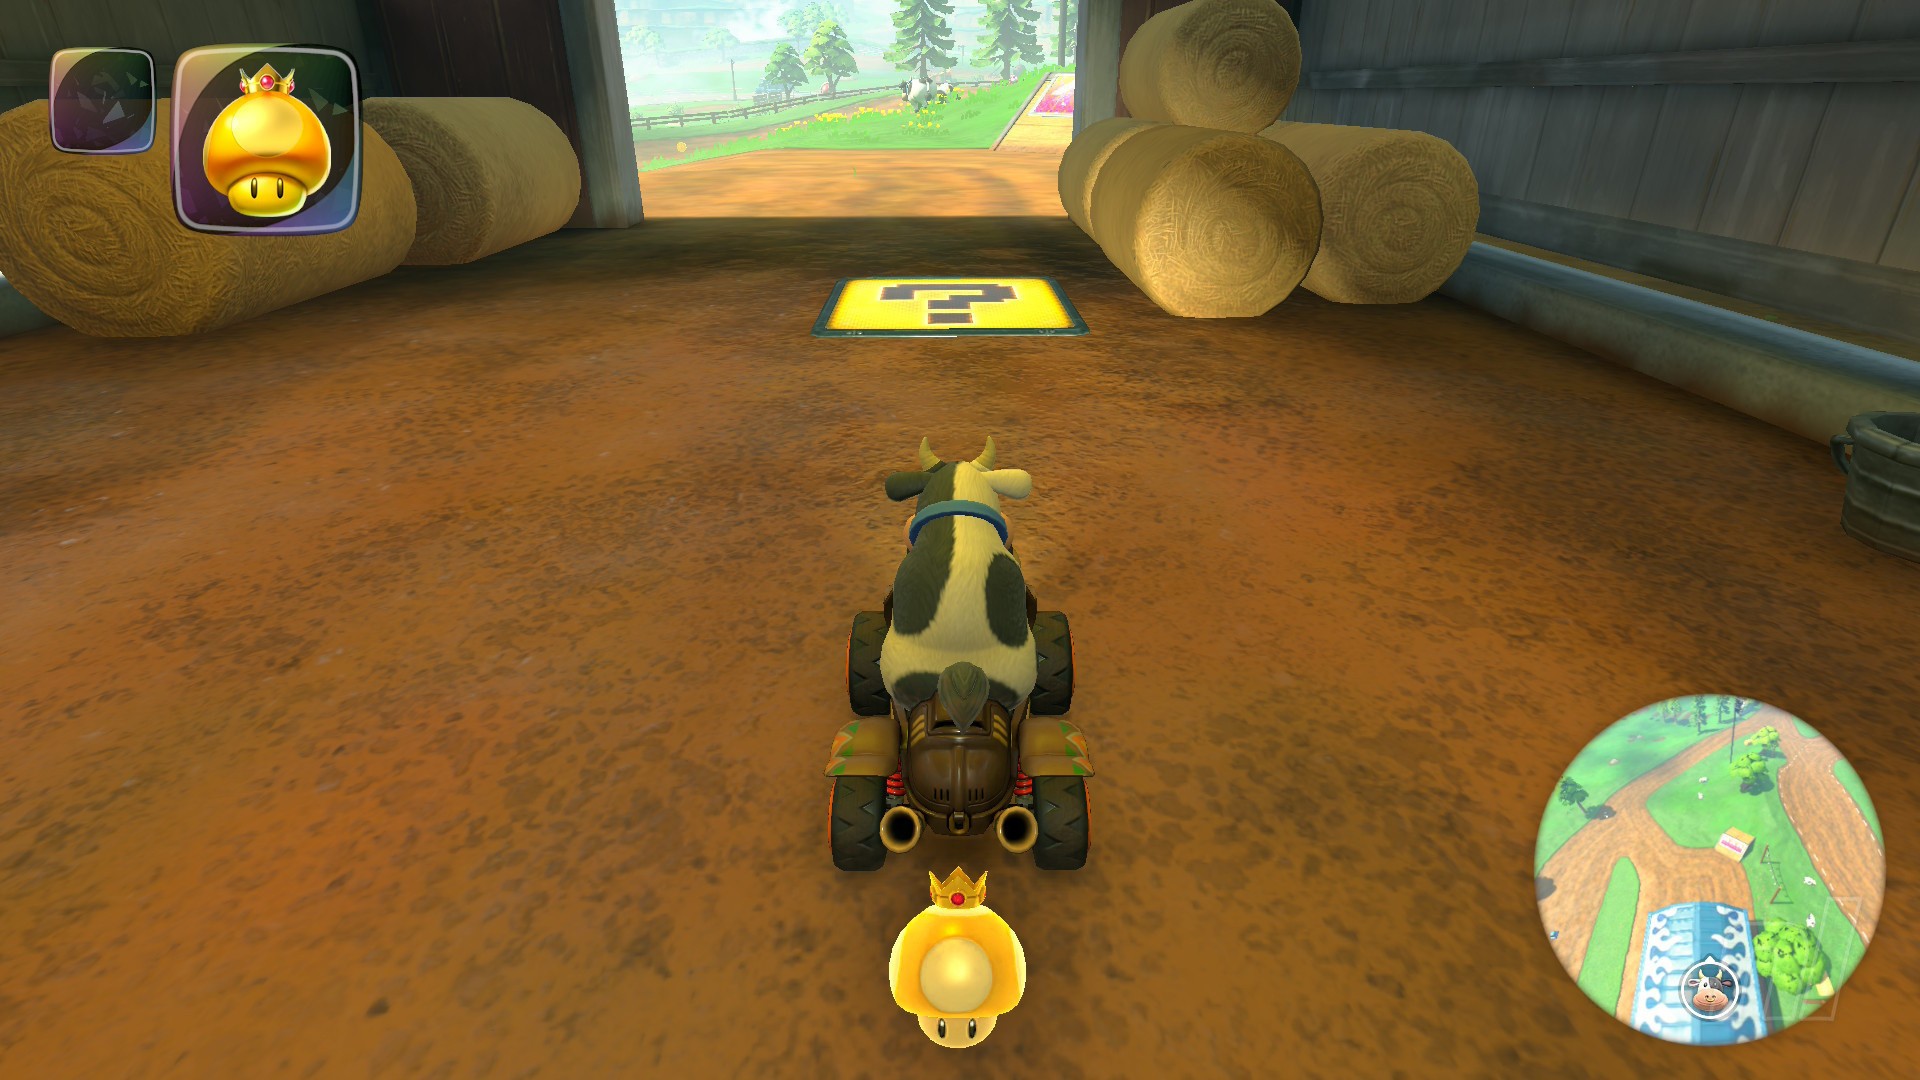
Panel 3
Location: As you drive through one of the many barns on the course, you'll spot a Panel in the middle of the dirt path, right next to some bricks and a wooden pole.
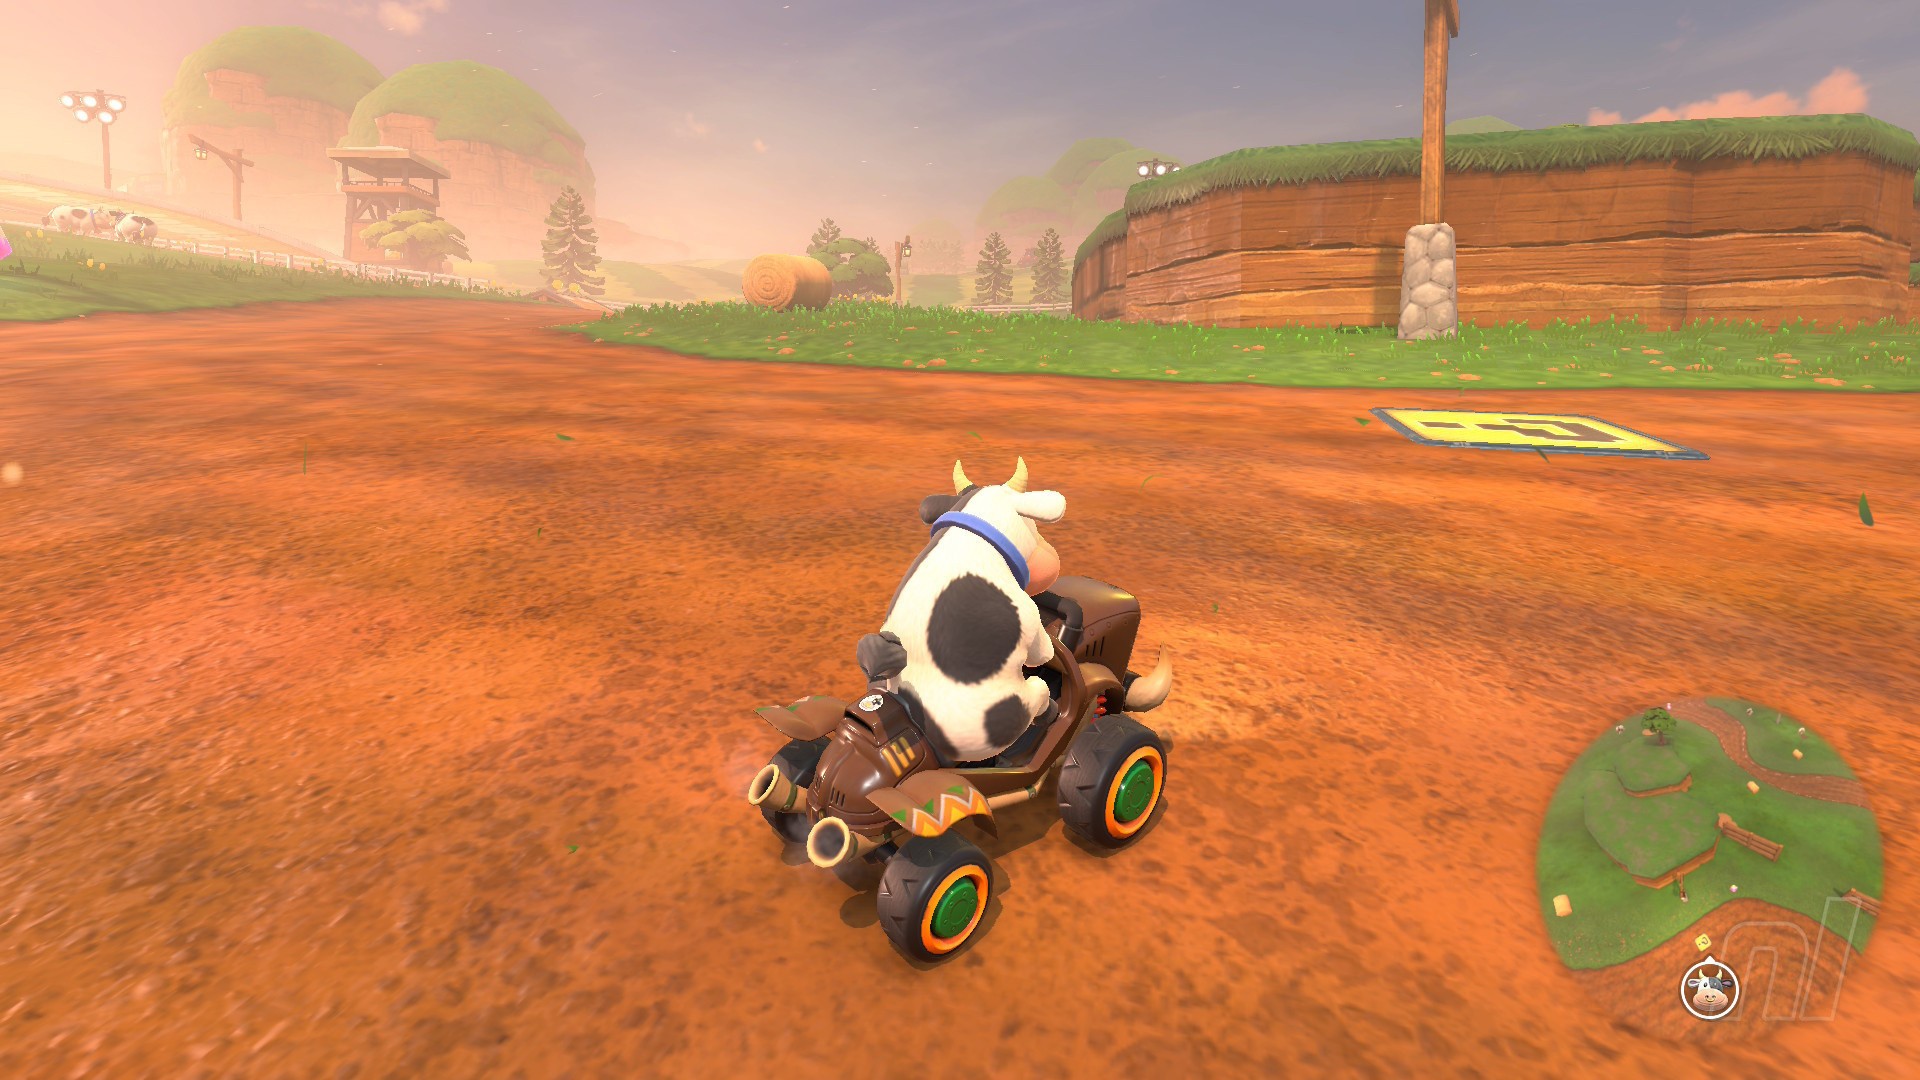
Panel 4
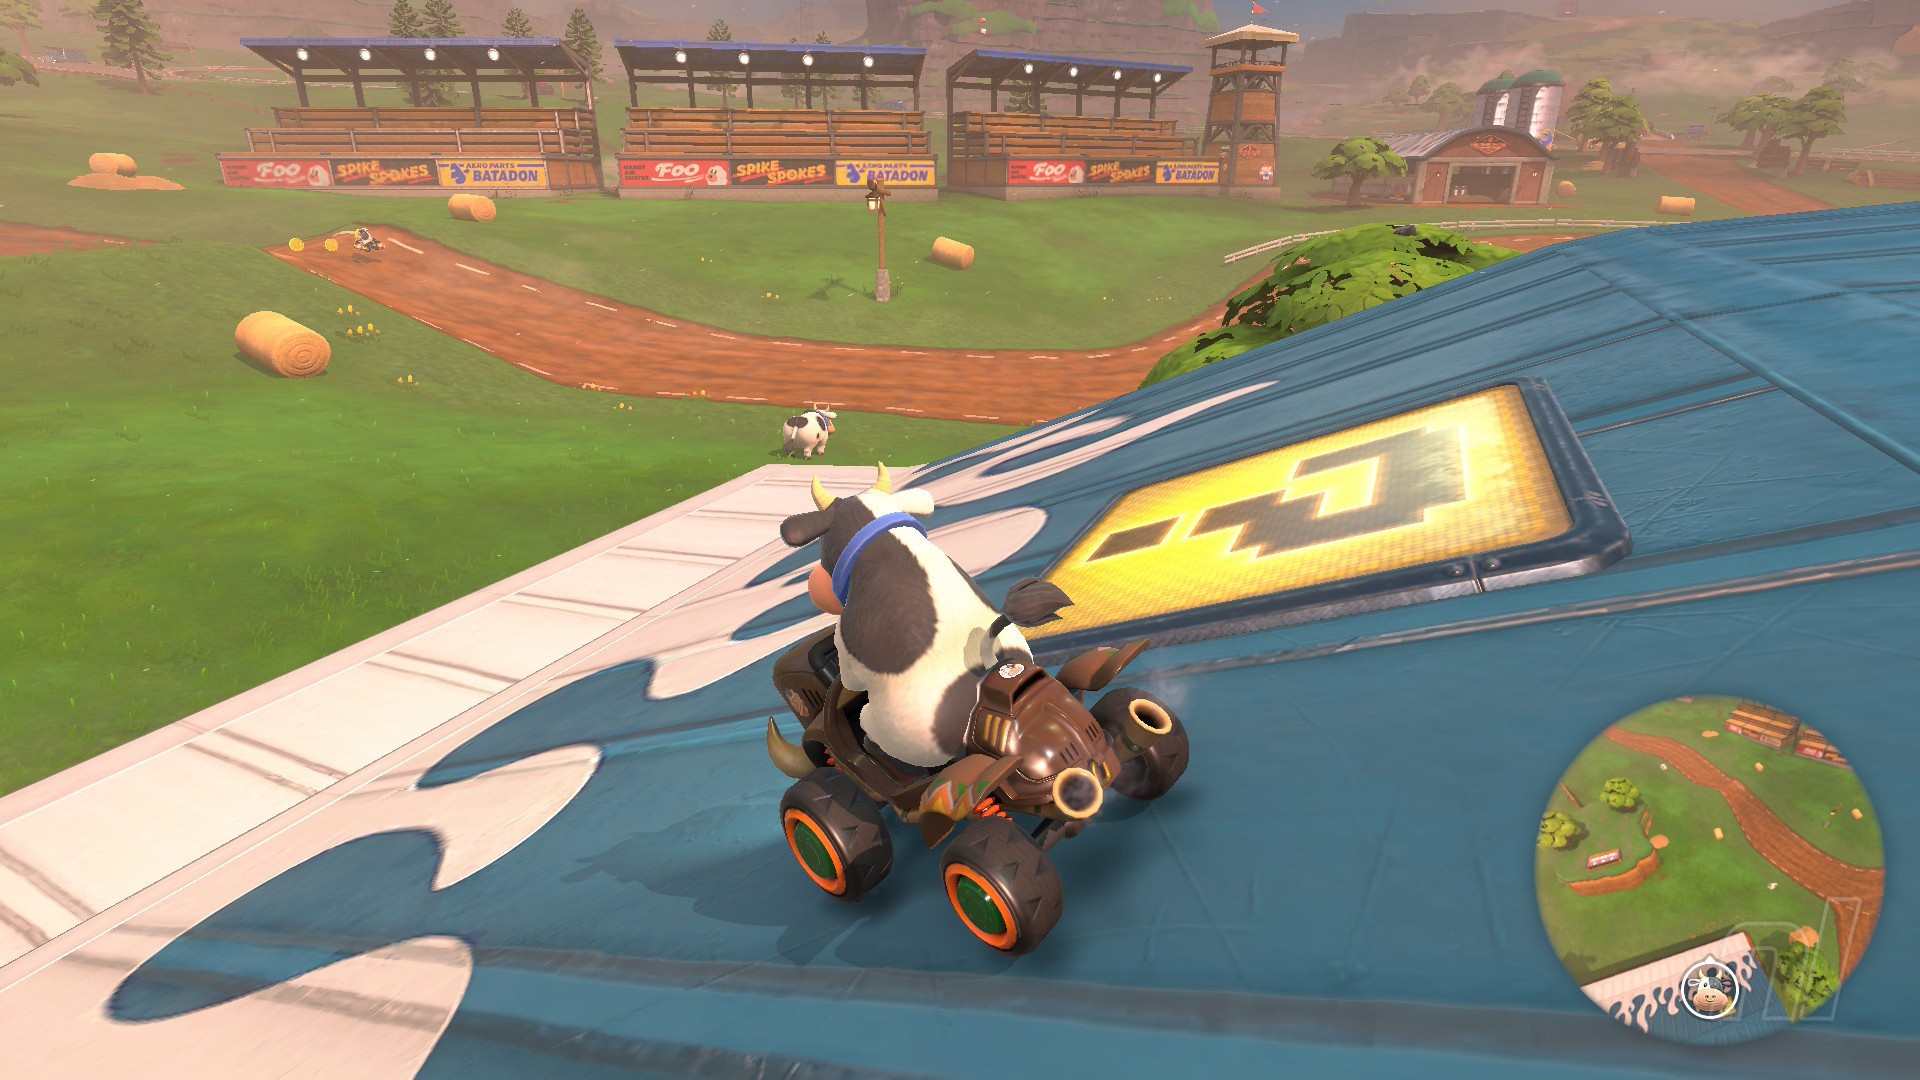
Location: This panel is on top of the blue stable roof, right where you can see the cow holding two flags. Before you spot some hay at the side of the road, head to the grassy mound and drive along until you reach a fence, which you can use to grind and boost up to the roof.
Panel 5
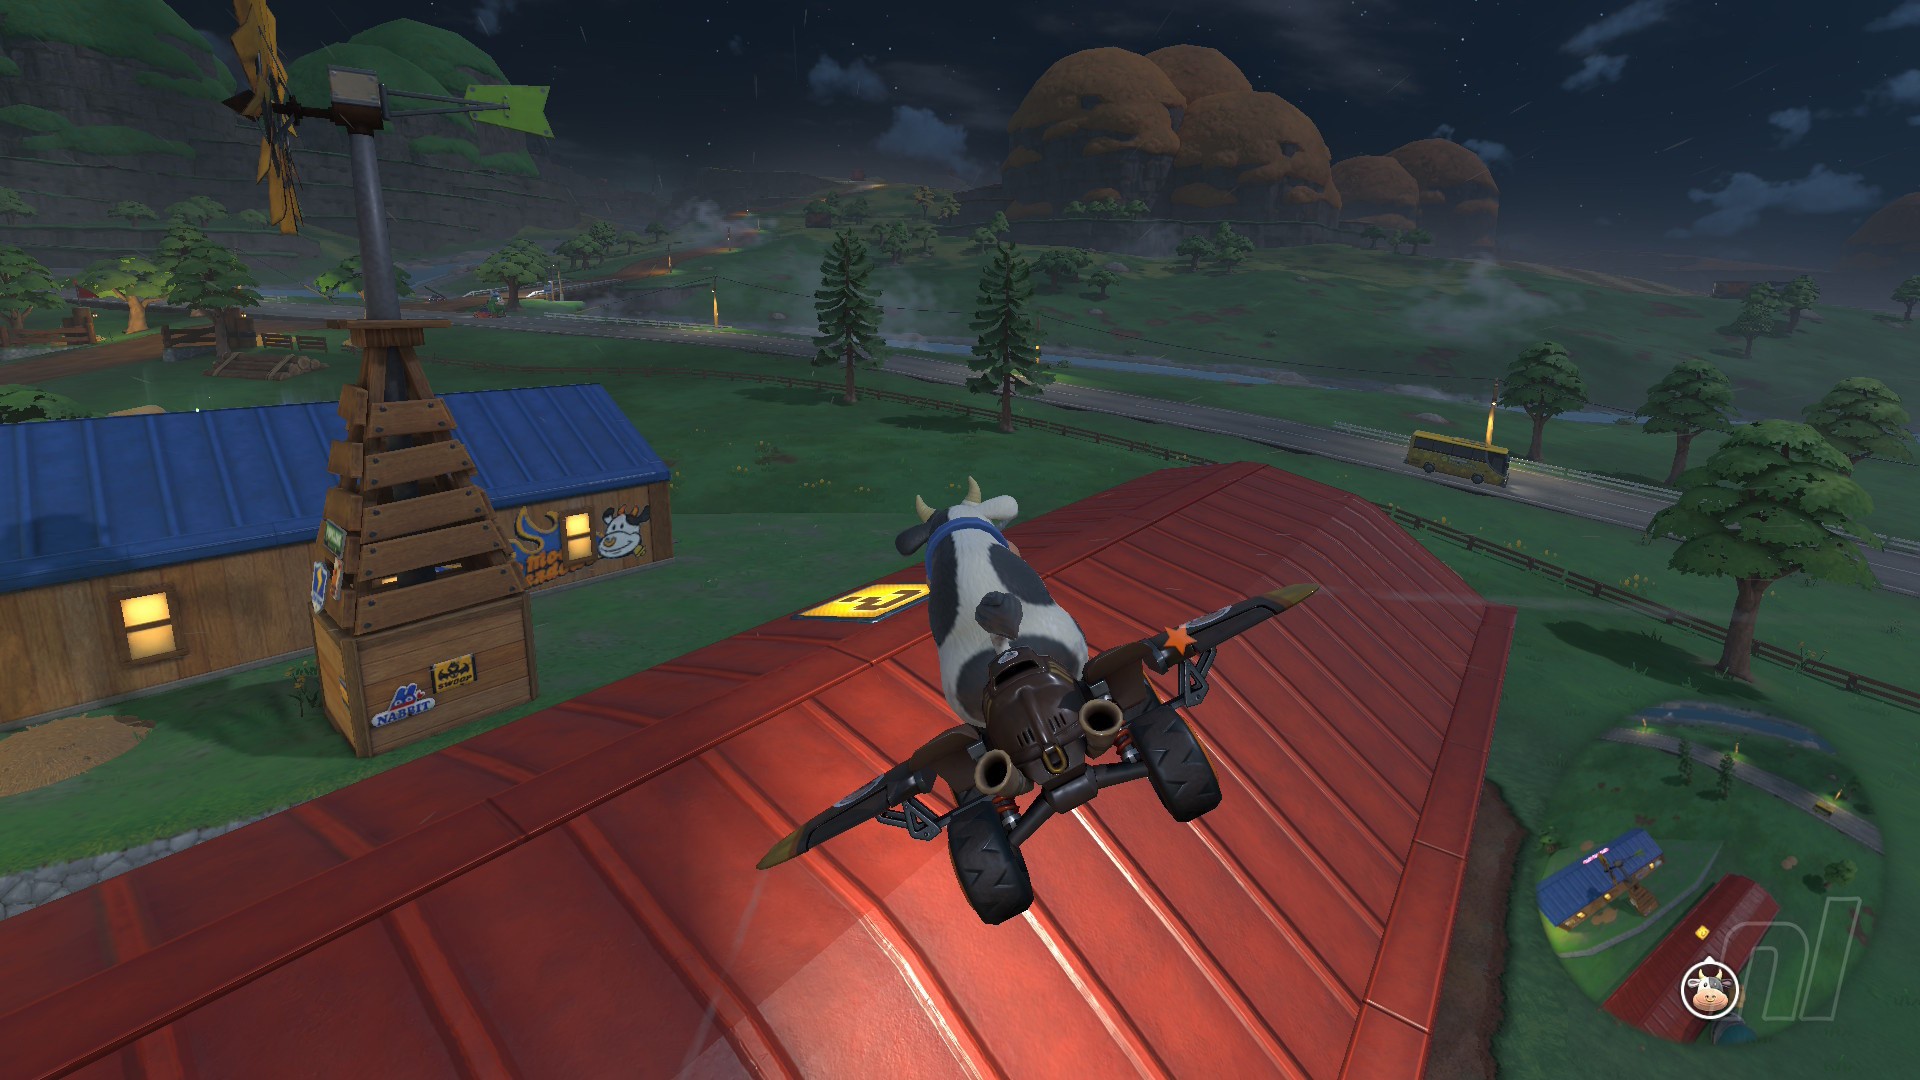
Location: On the roof of a red barn is the final ? Panel, and you'll need a way to either grind or fly up there. Luckily, there's some rope next to a windmill that will take you to the blue roof right in front of it. Then use the boost pad on the roof here to reach the panel on the next one.
Peach Beach Question Panels
Number of panels: 5
Collectibles region: Coastal
Panel 1
Location: Drive very slightly forward from the start line, head right, and this panel is on a small wooden slope.
Panel 2
Location: Right by Panel 1, but reverse from the start line instead of go forward.
Panel 3
Location: About halfway through the course, you'll spot a Yoshi's food stand which looks like a Tiki bar. Head over and under the wooden shades is a panel. (In our screenshot, you'll just about see it on the right)
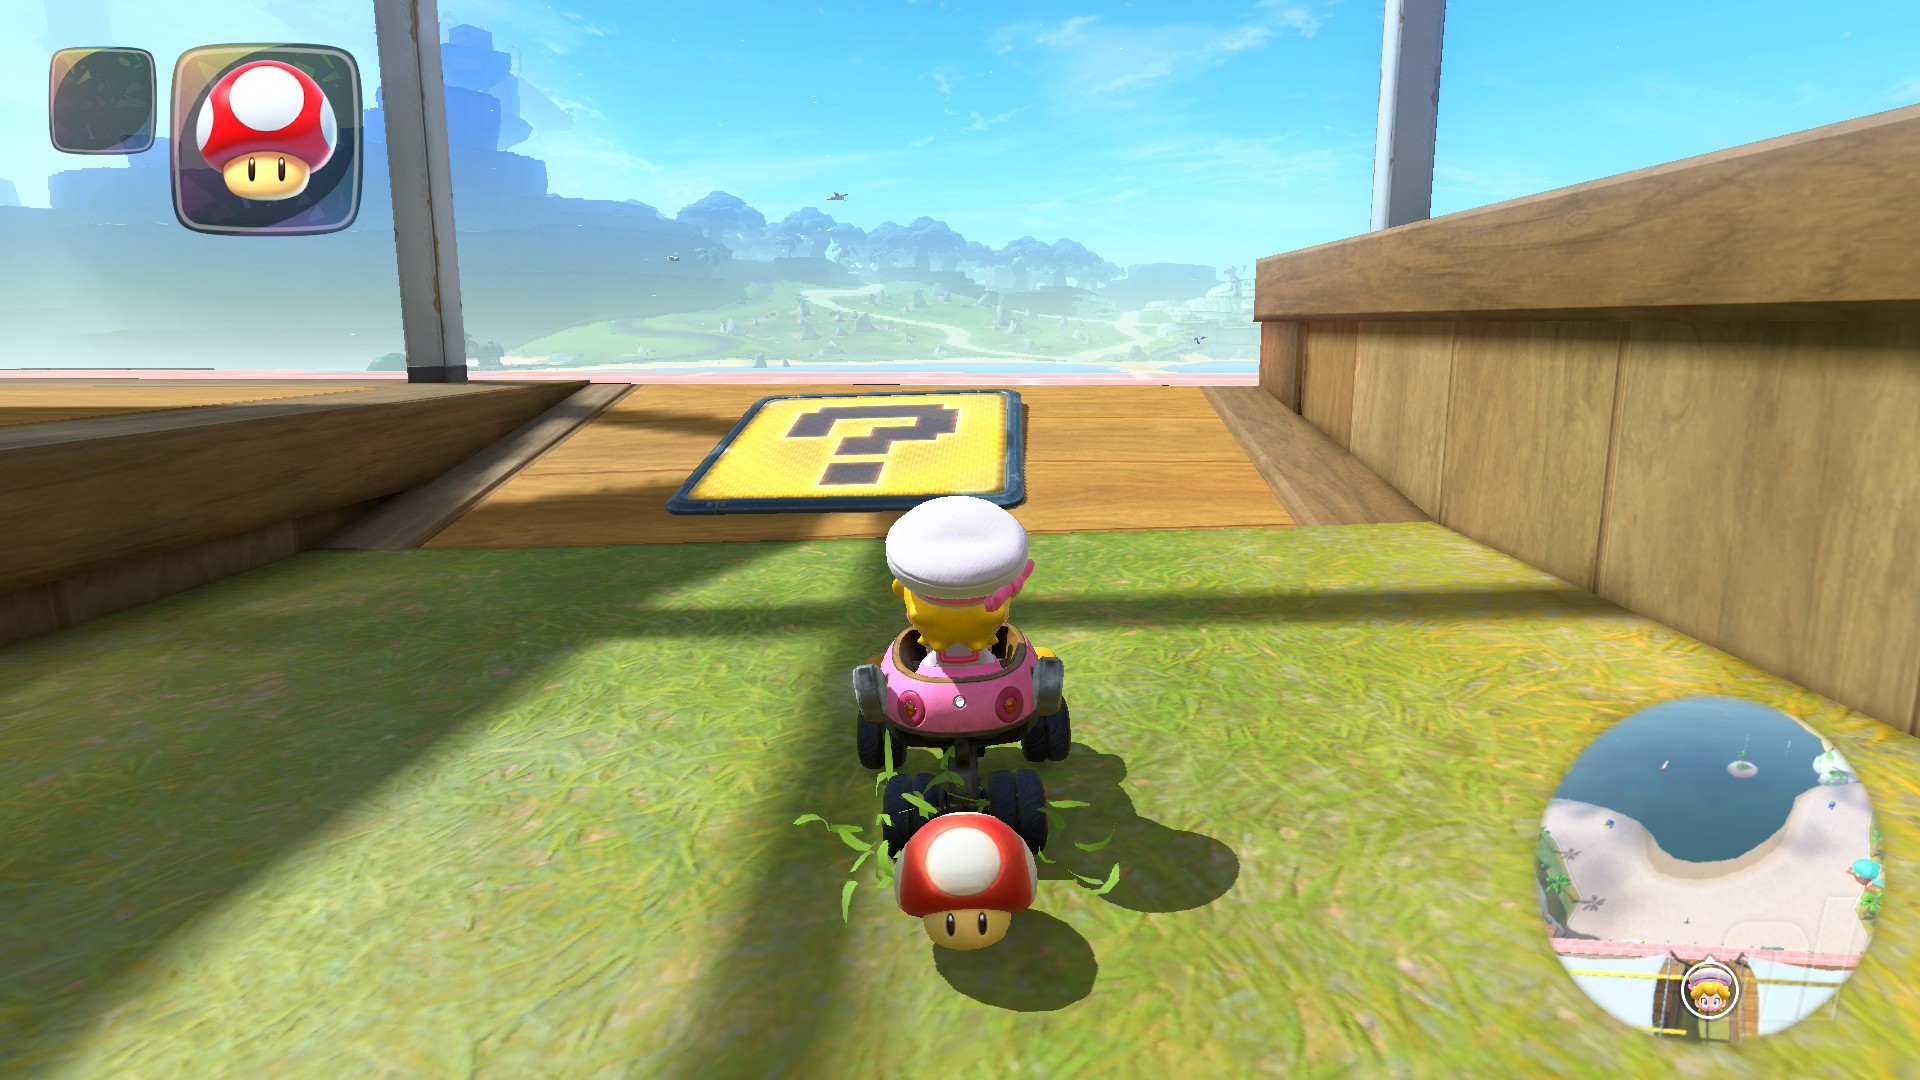
Panel 4
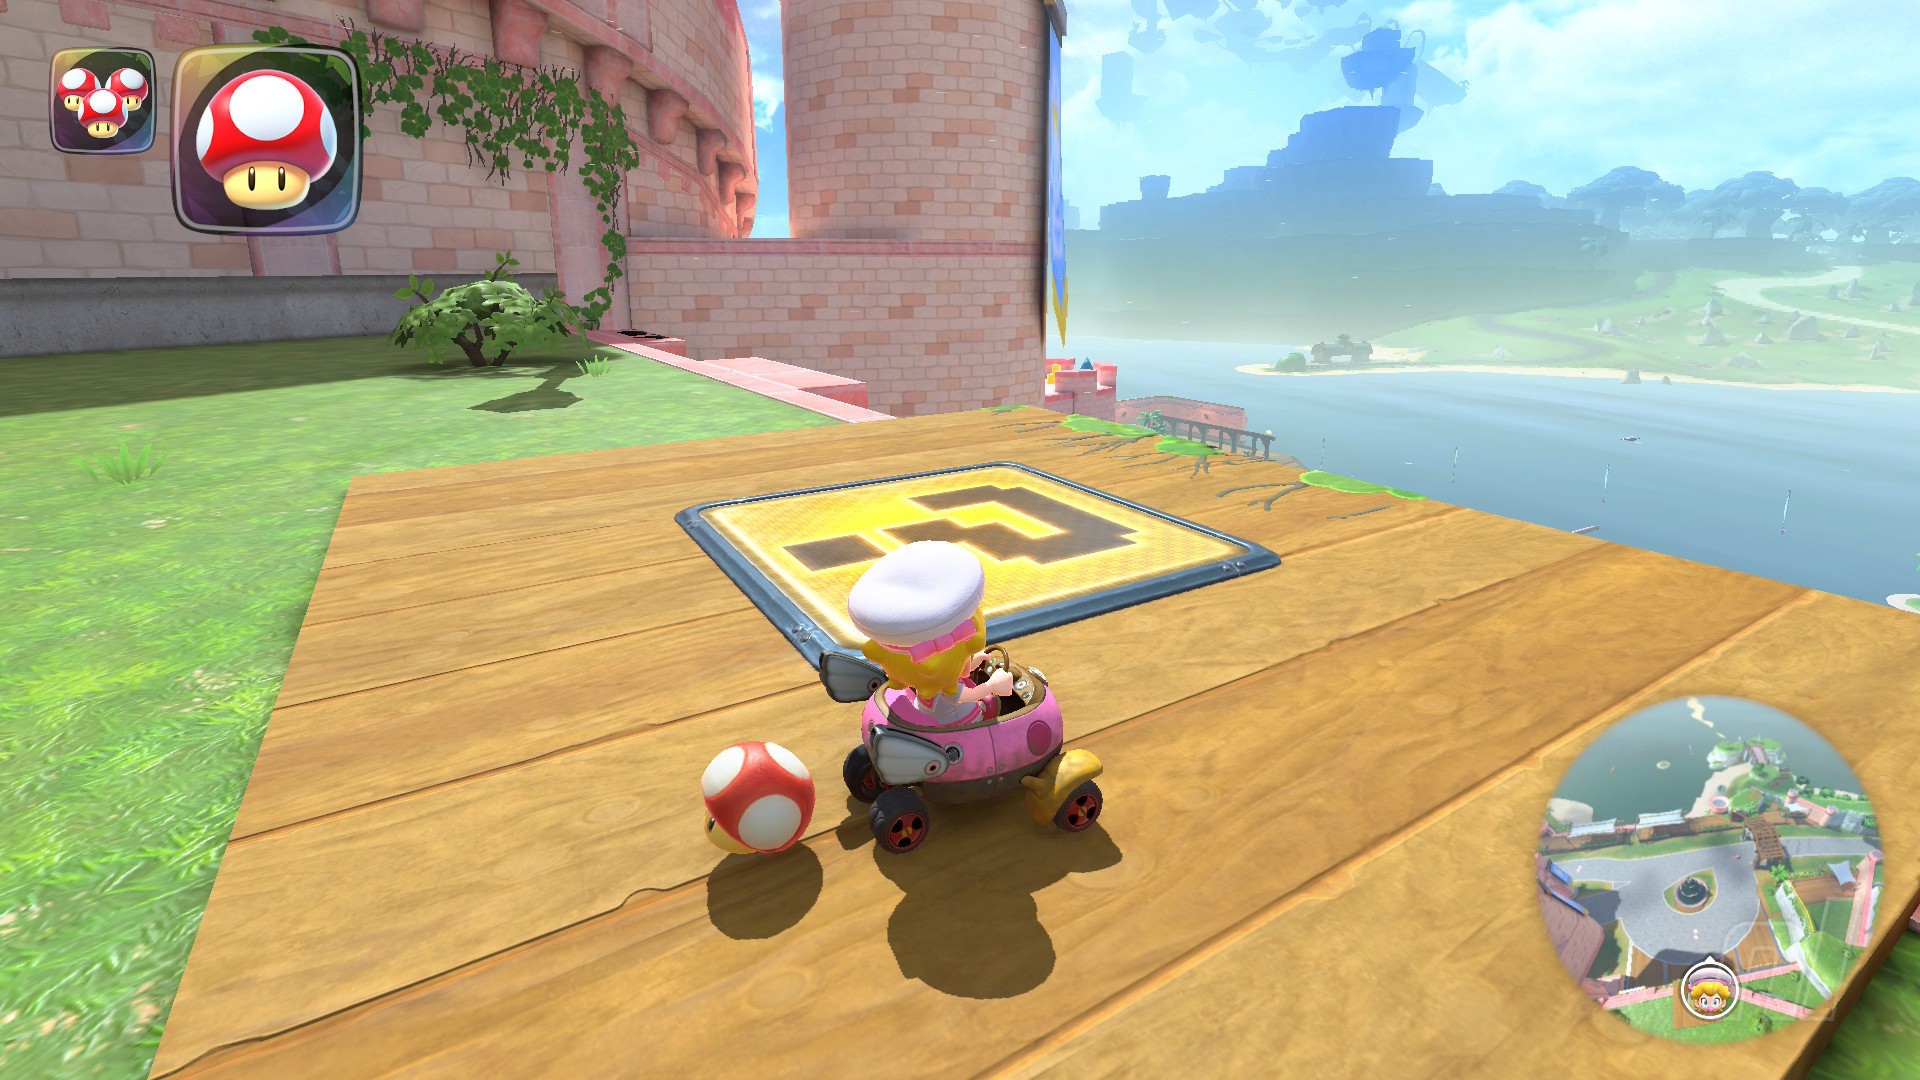
Location: For this panel, you want to race up the castle section to the left of the start line. When you reach a big curve in the road, head towards the star window. Then edge over the side of a grassy cliff to land on a new plateau, where a panel sits on a wooden block.
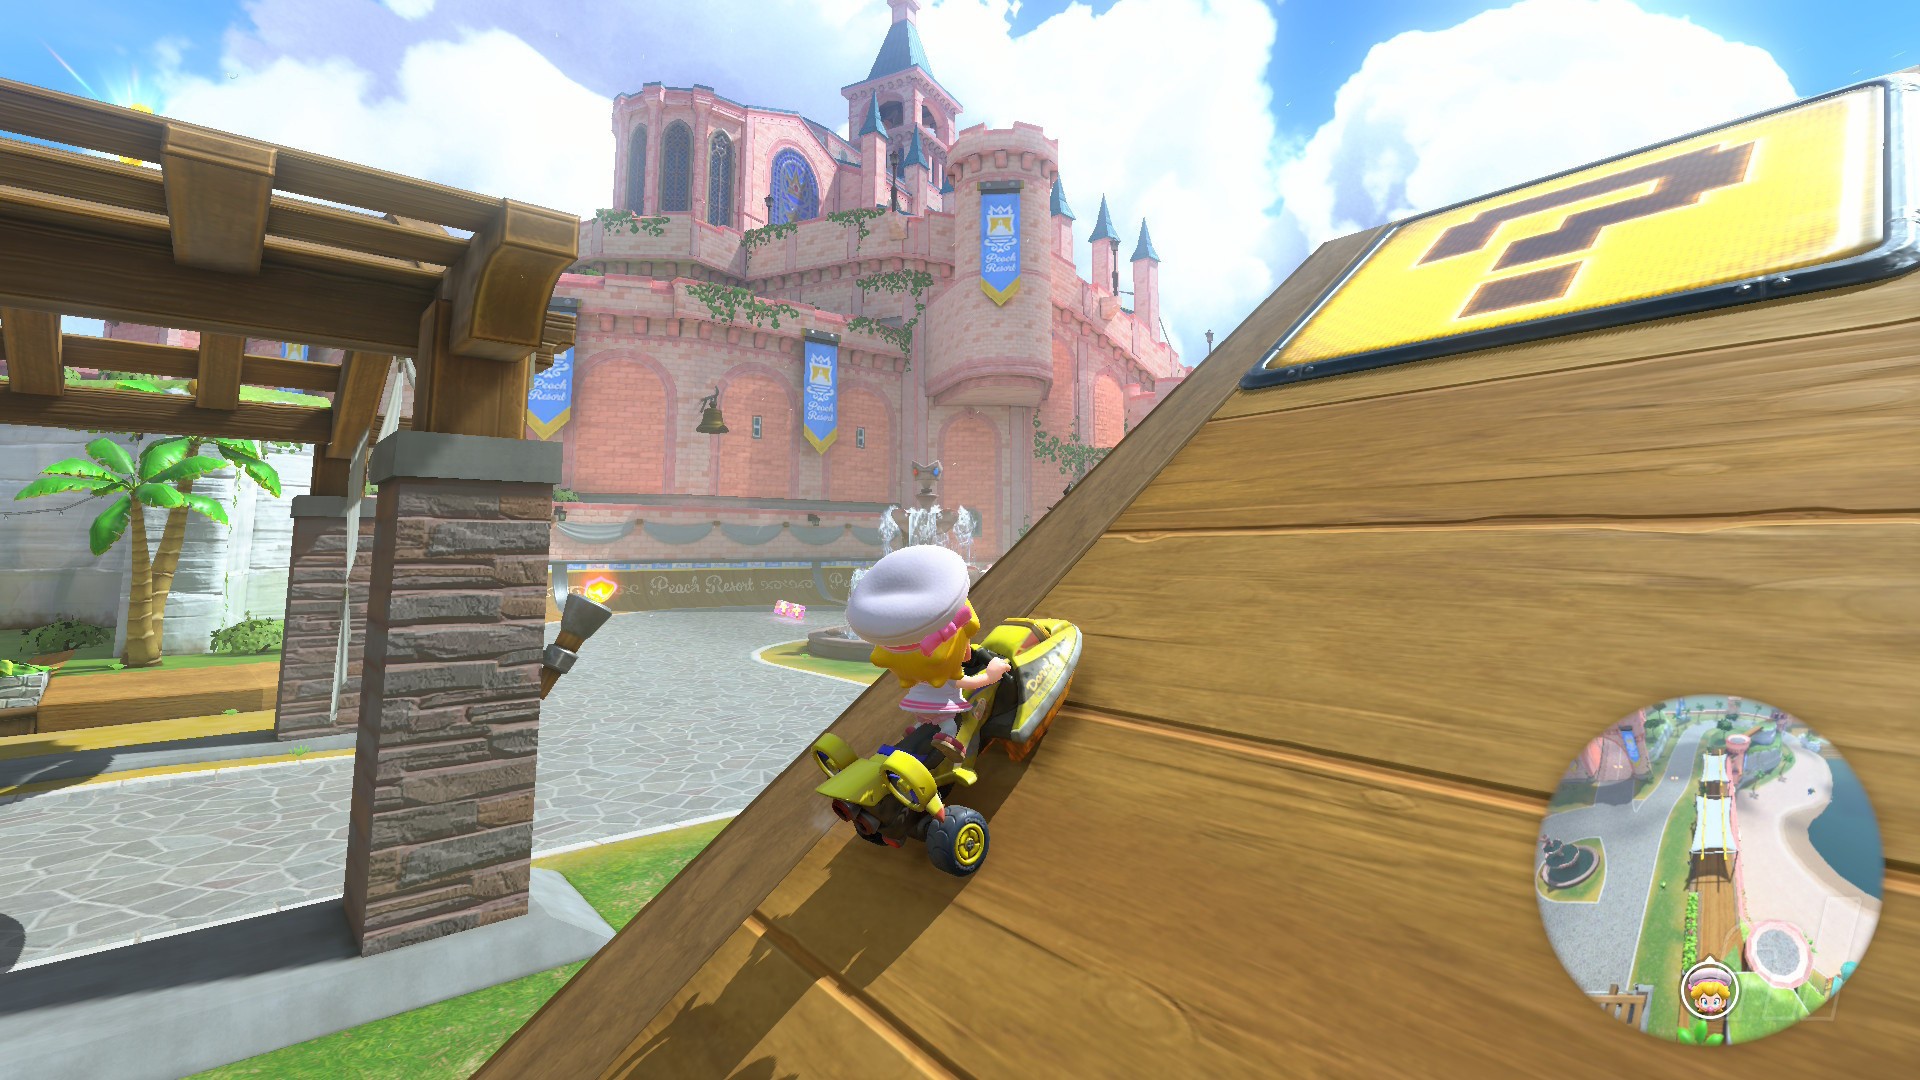
Panel 5
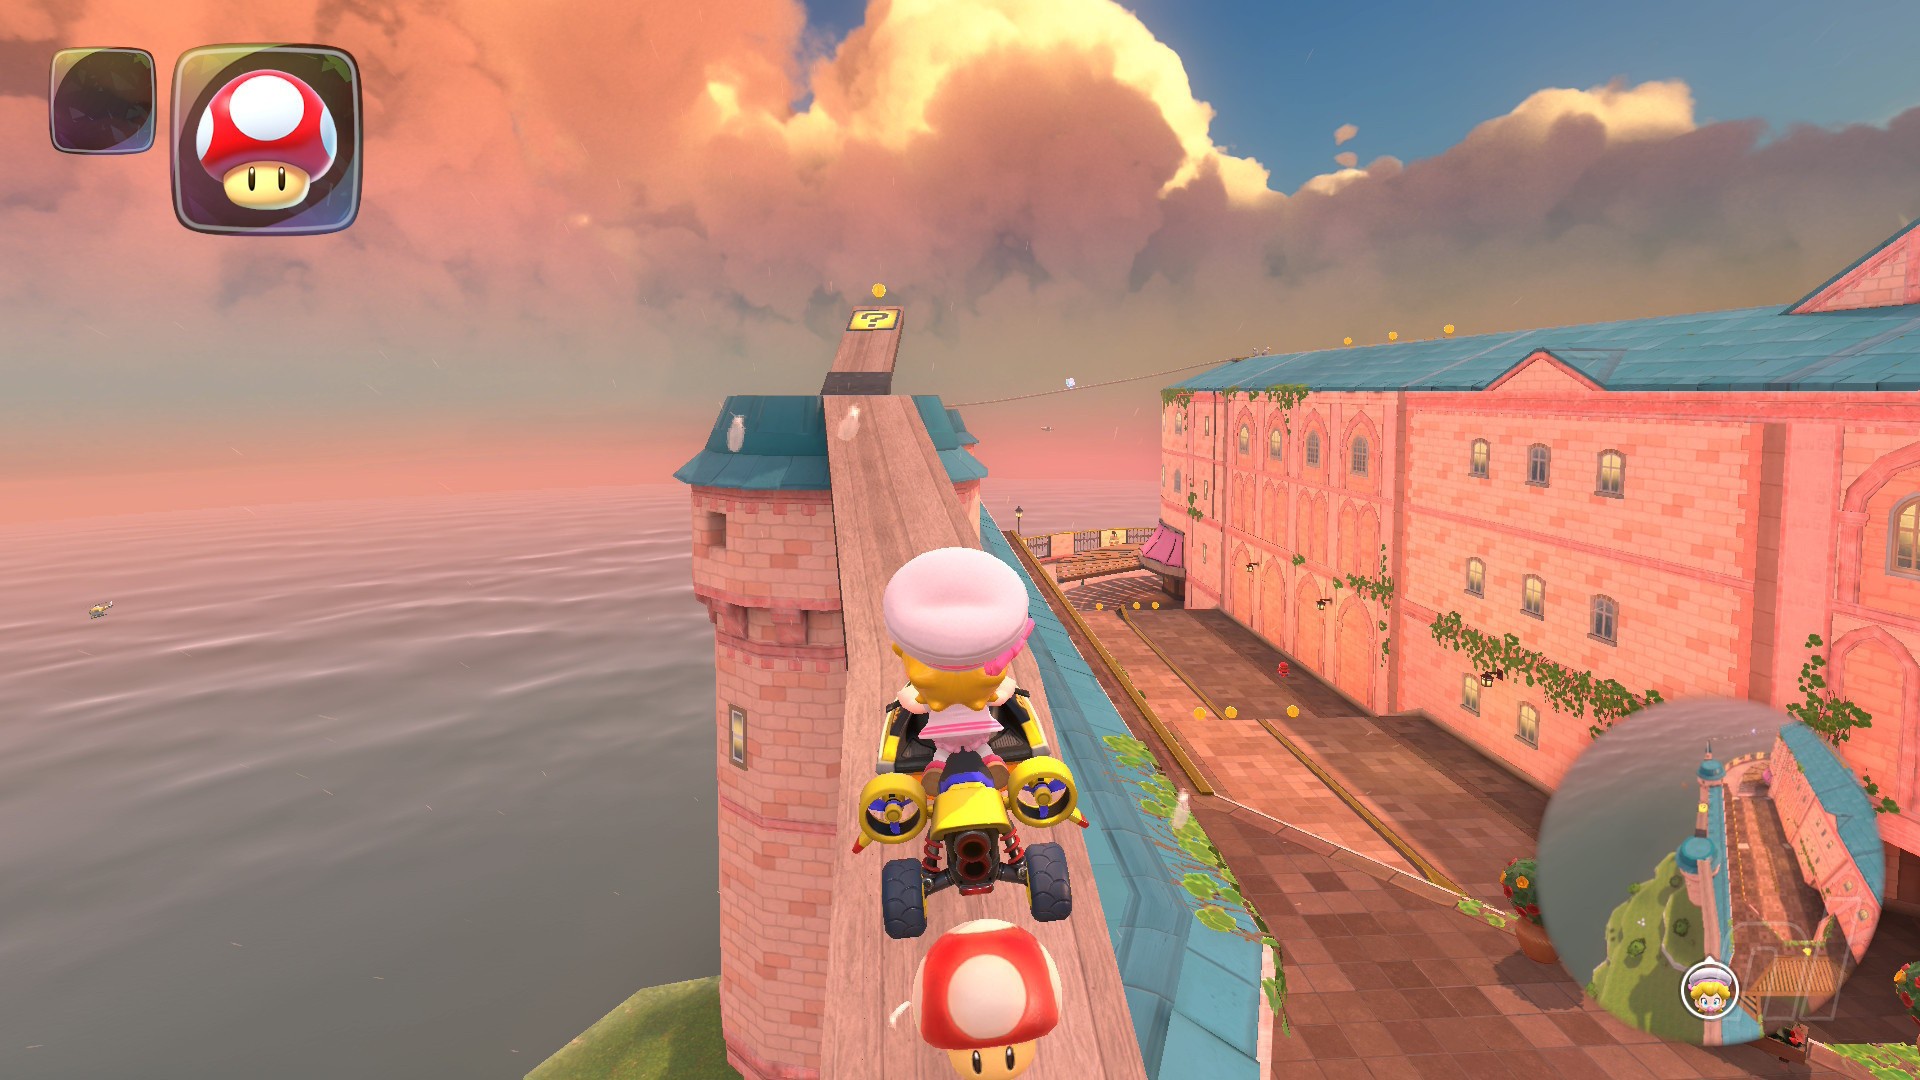
Location: In the town area on the rooftop section on the left as you drive towards the flight section. You need to wall ride up and grind to reach this panel.
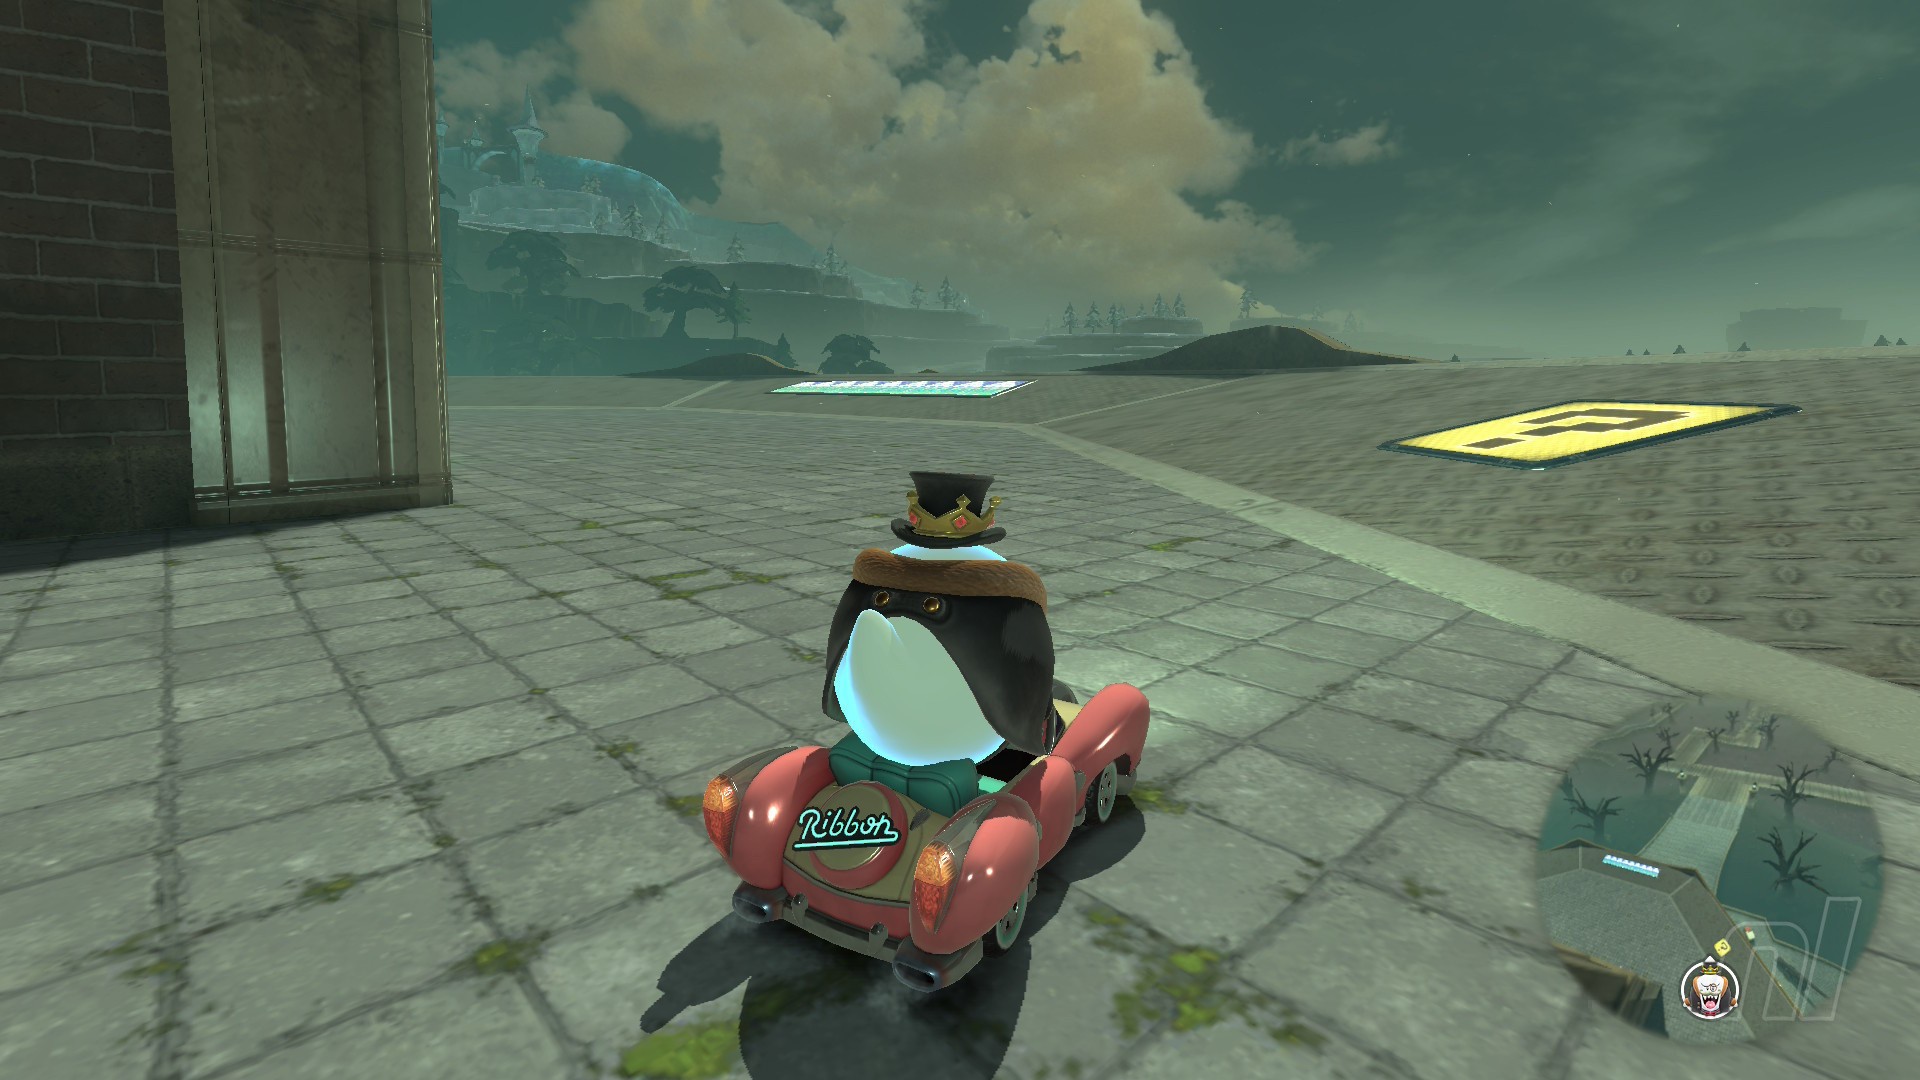
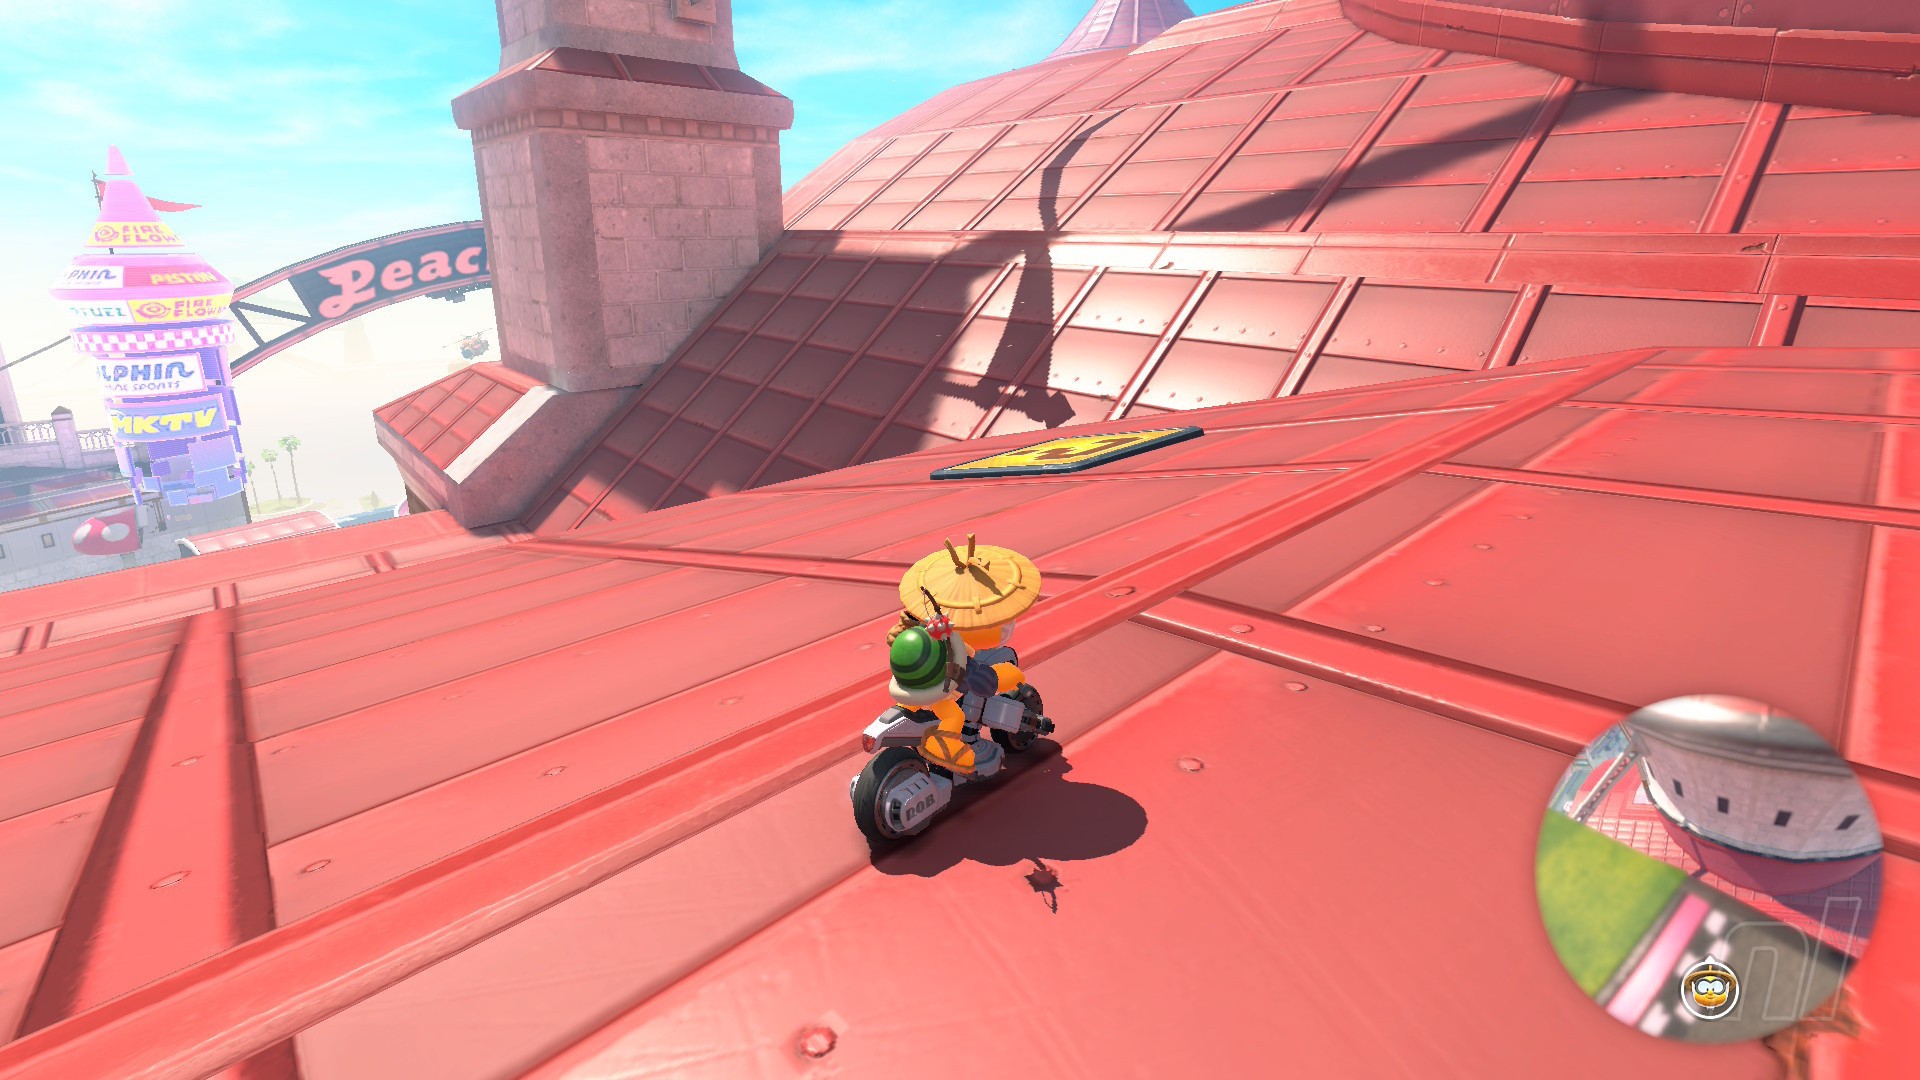
Peach Stadium Question Panels
Number of panels: 5
Collectibles region: Central
Panel 1
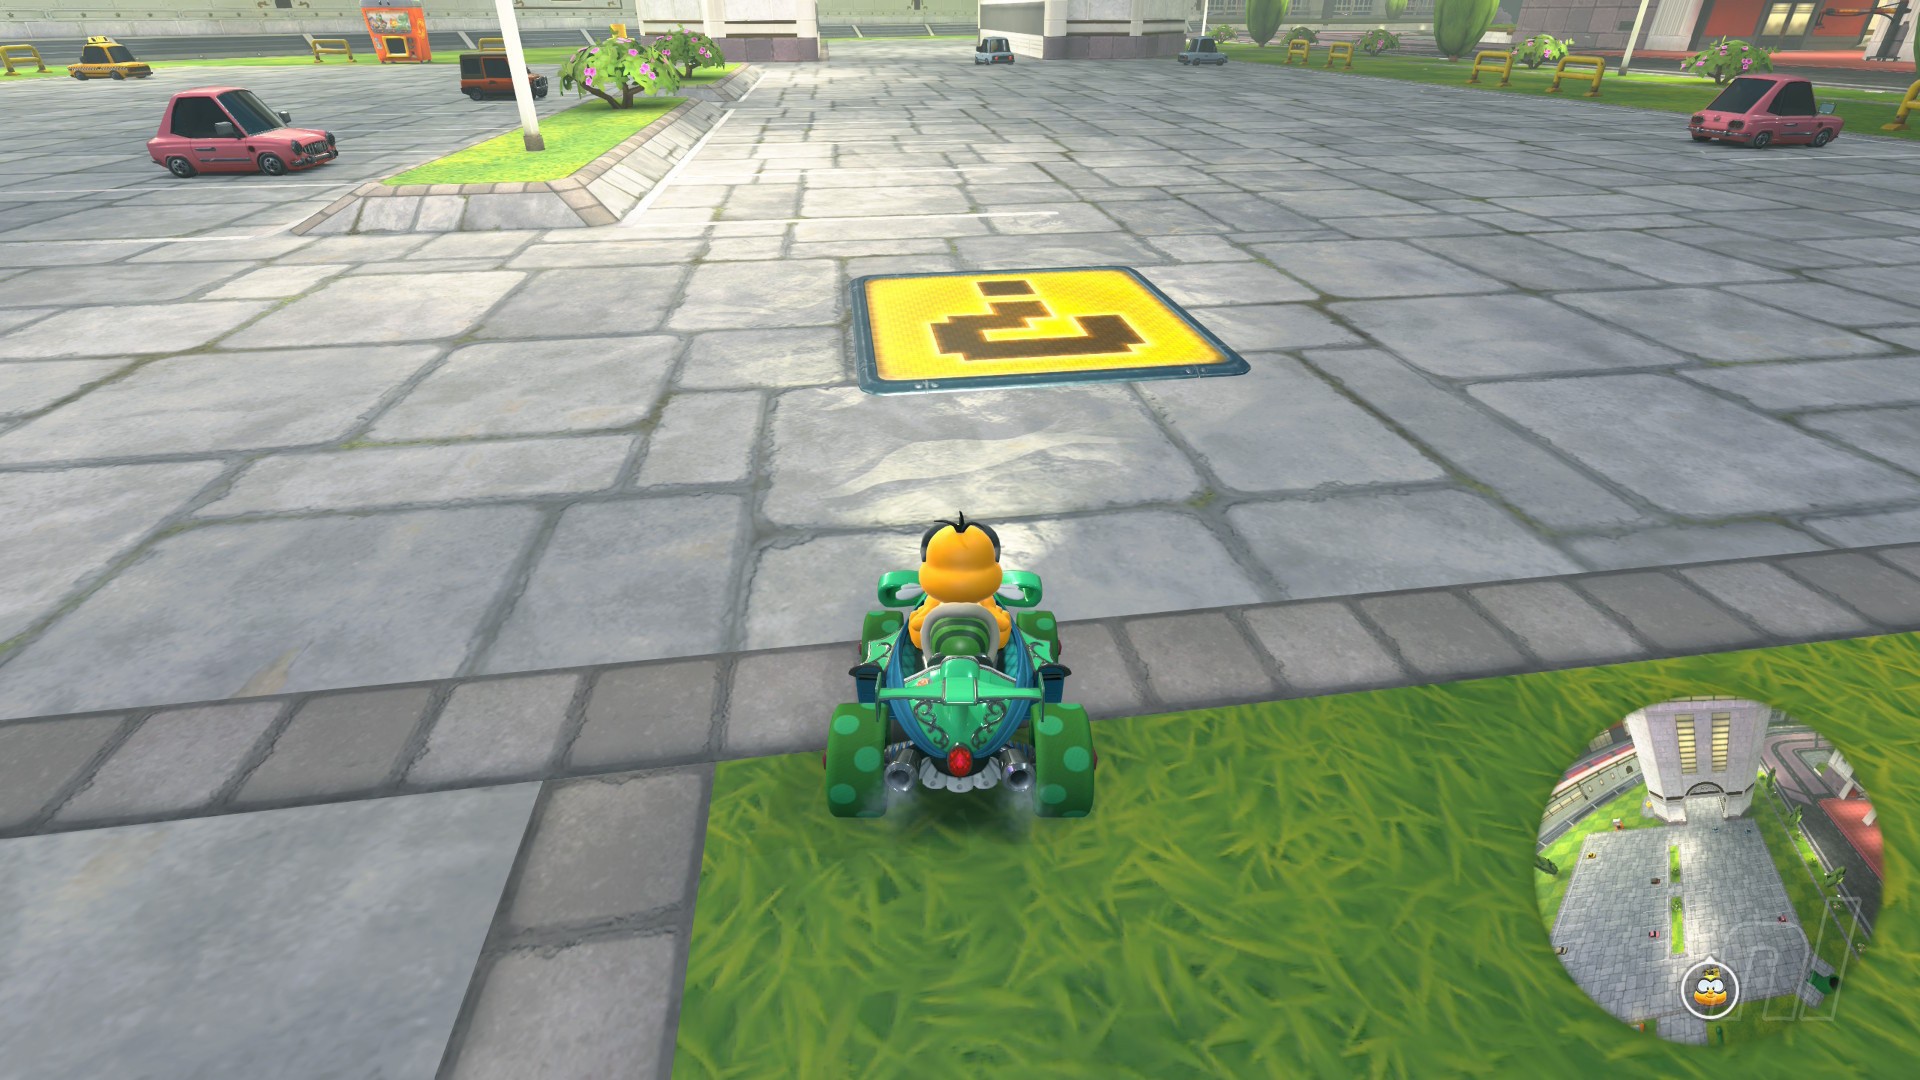
Location: This panel is in the parking lot by the MKTV and Royal Racers shops on the base floor. You can get hereby reversing from the start and dropping off the road to the left, then turning around and driving straight ahead.
Panel 2
Location: On the castle roof, which you can reach by following the course up the winding road. At the second bend after the pipes, you can drop down onto the roof to reach the panel. This is also where you can find a secret Mirror Mode for Free Roam.
Panel 3
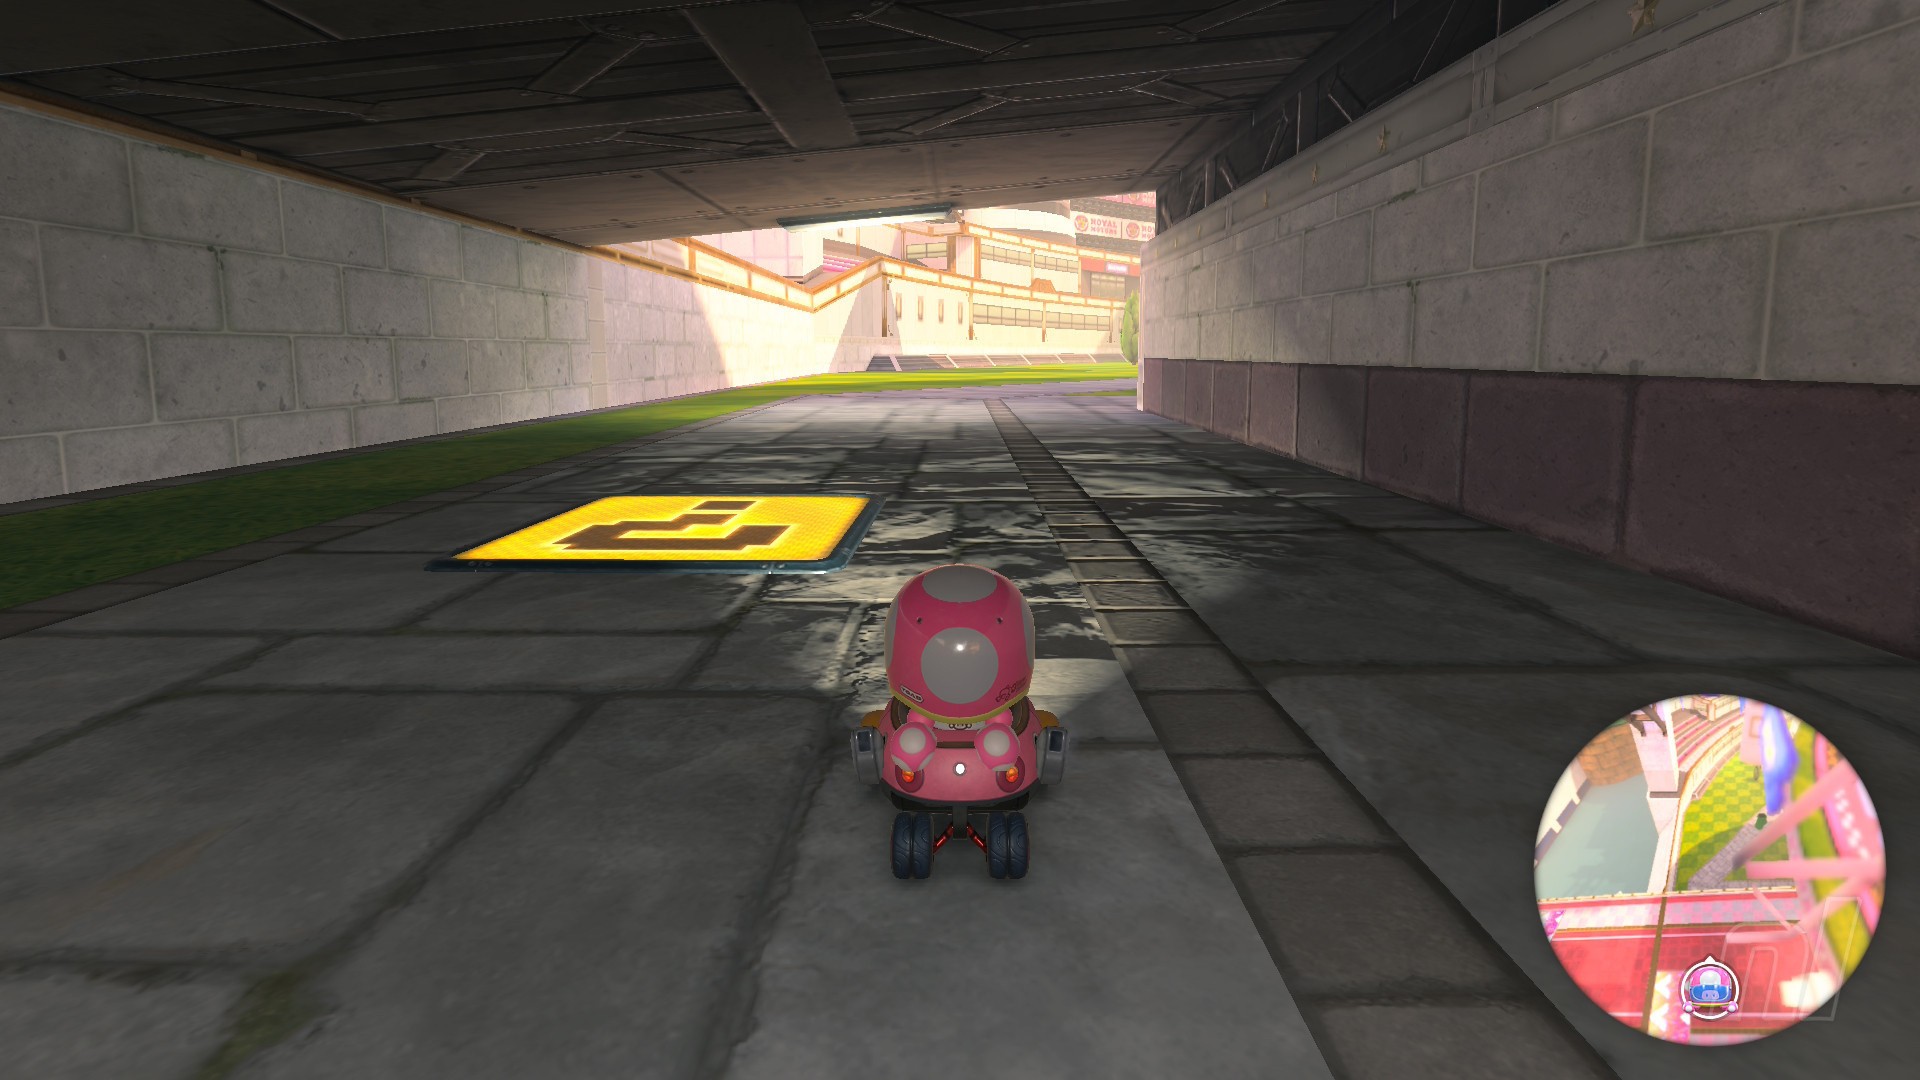
Location: Right by a Yoshi's food stand underneath a bridge in the outer road section of the course.
Panel 4
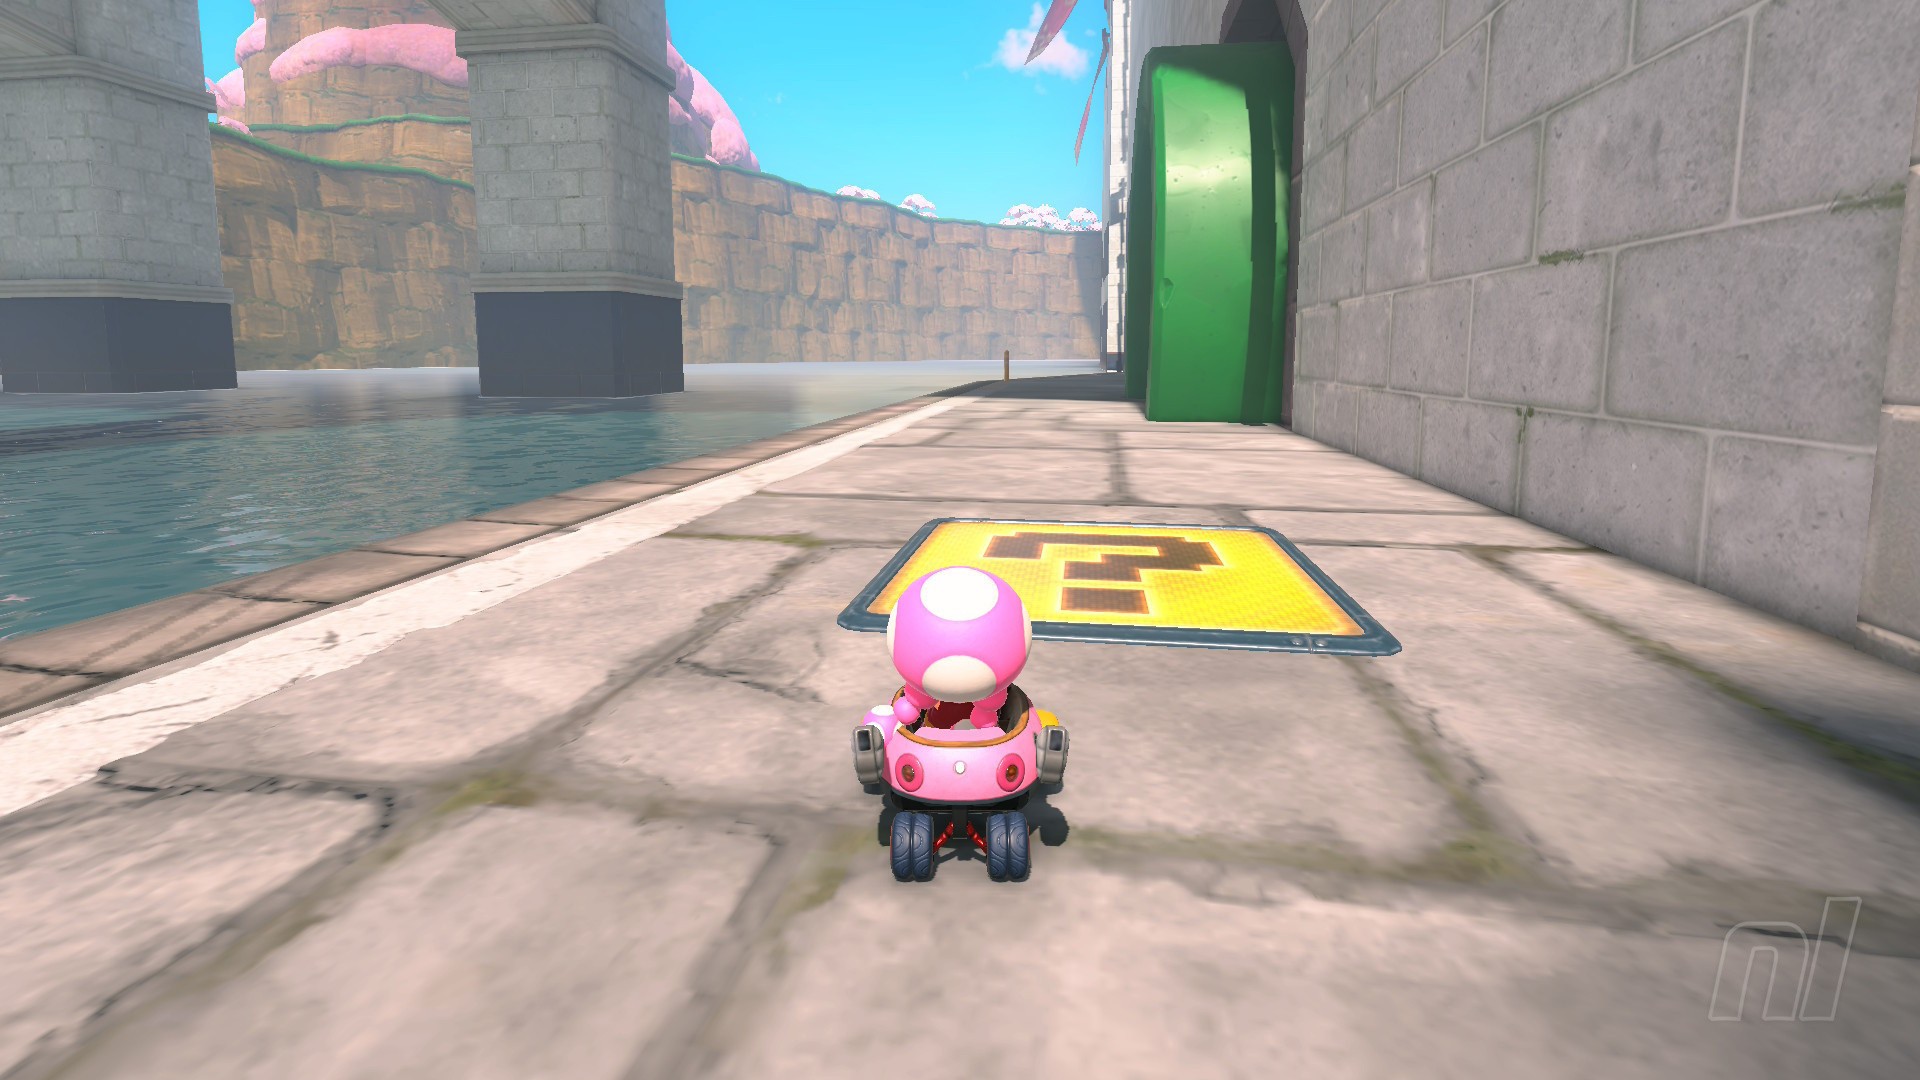
Location: Follow the water to the outskirts of the city, and look for a pipe sticking out of the stadium wall, where you'll also find a panel.
Panel 5
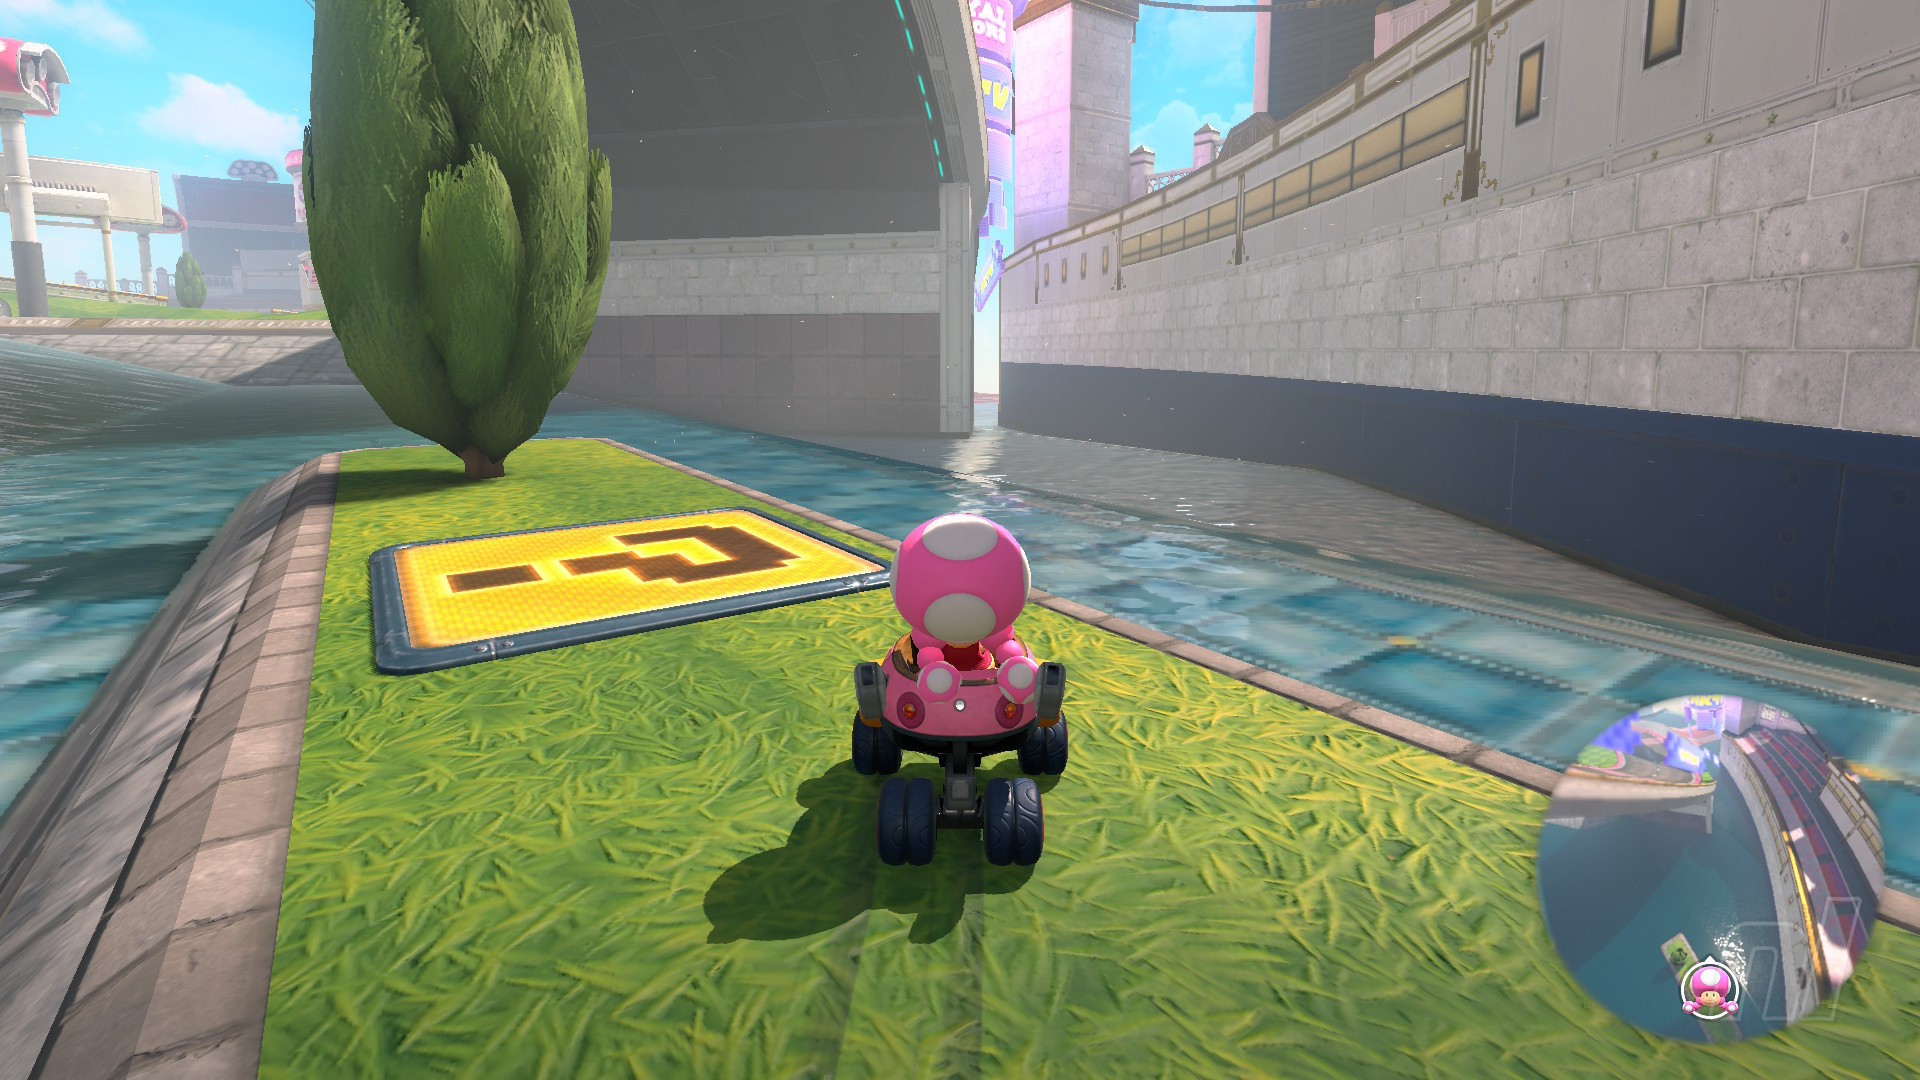
Location: This one's pretty easy. From the start, head left and keep following the red path. Then take a left towards the water and the panel is on a small grassy strip next to a tree.
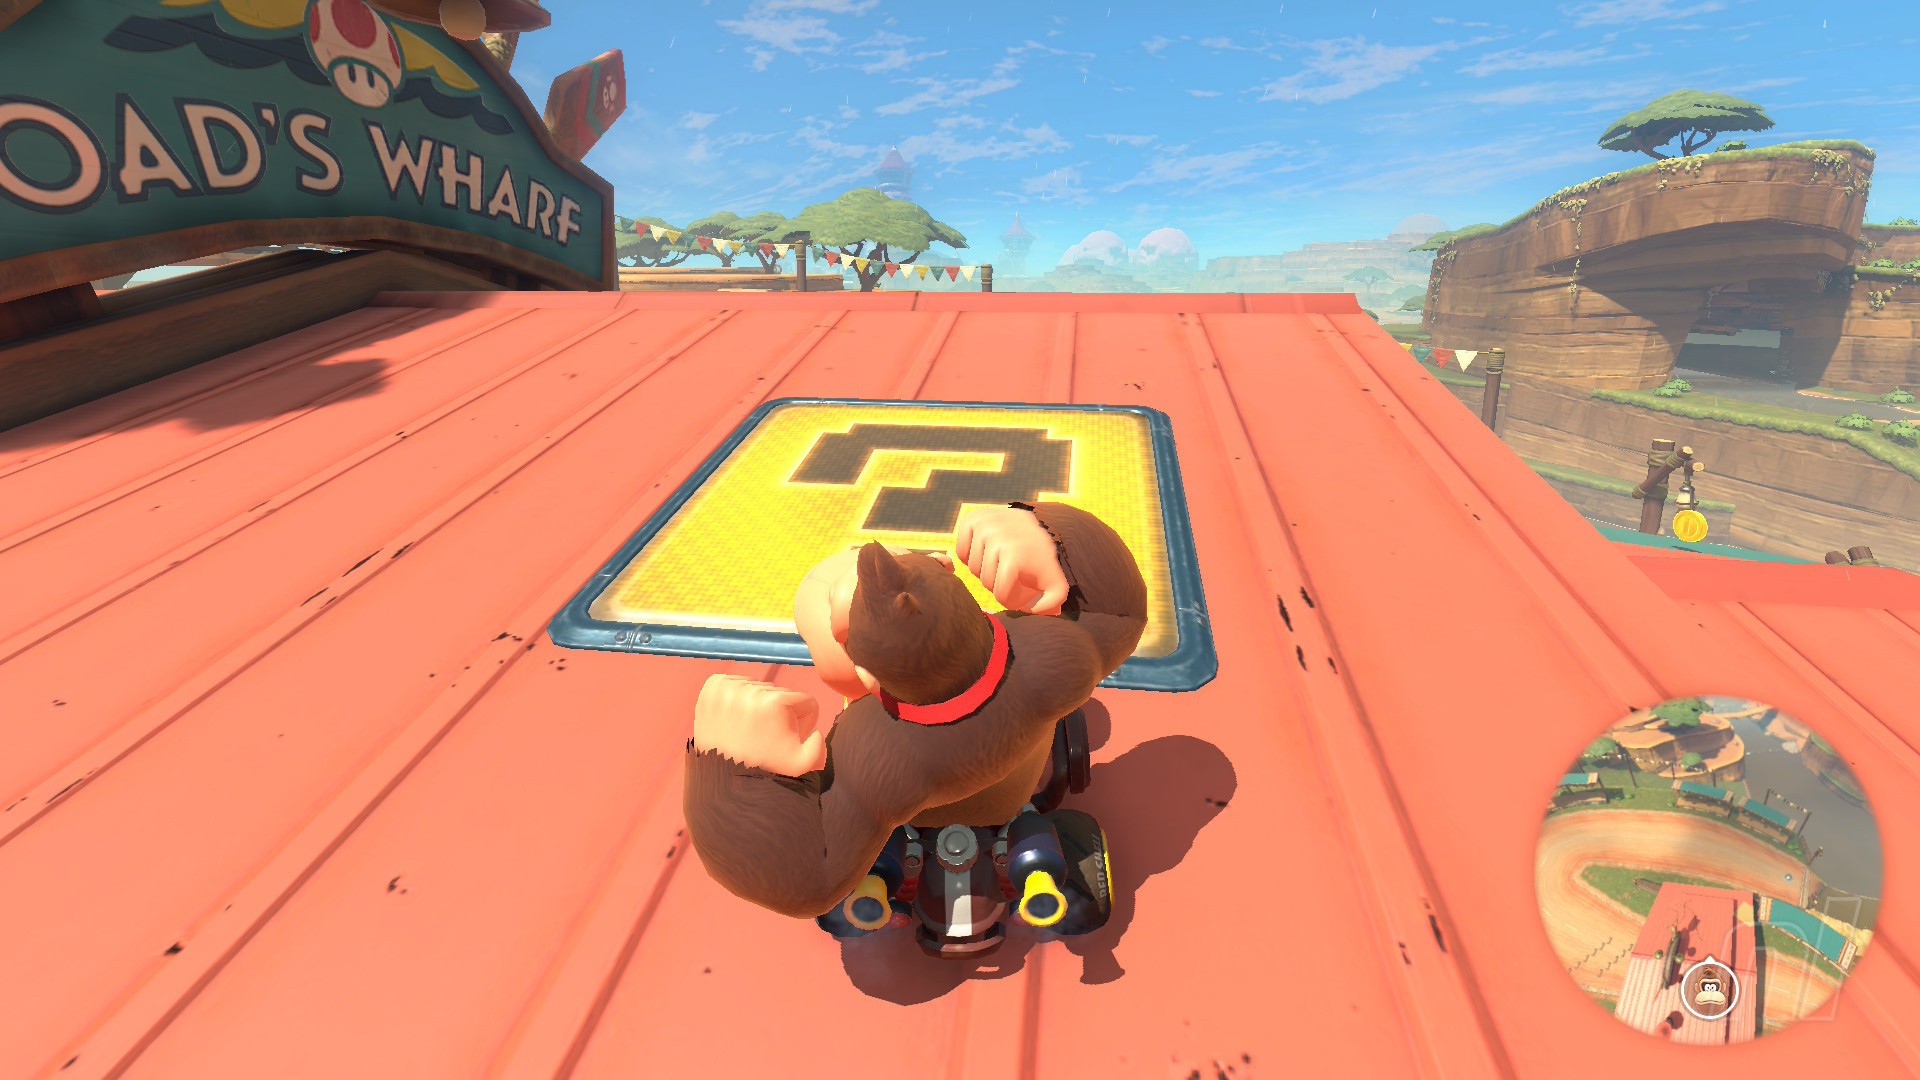
Salty Salty Speedway Question Panels
Number of panels: 5
Collectibles region: Coastal
Panel 1
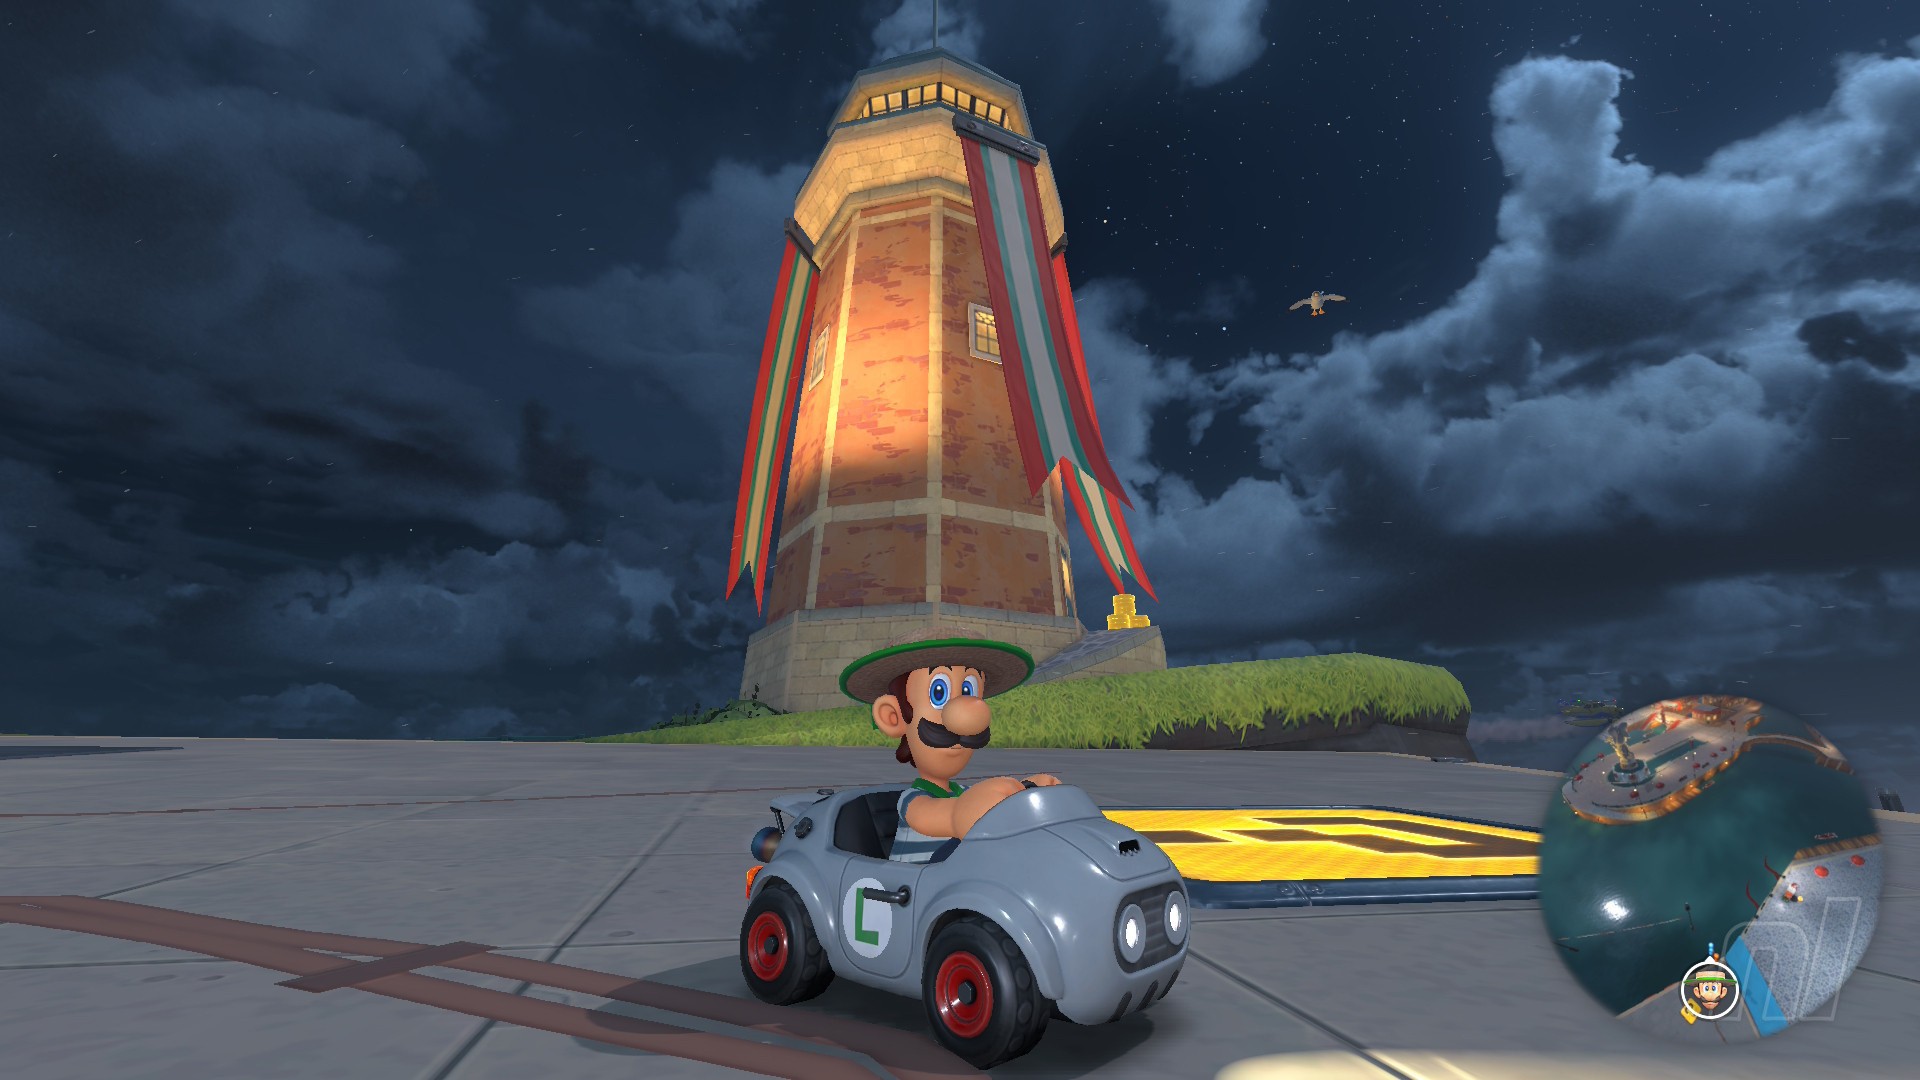
Location: Head to the lighthouse at the eastern tip of the course, and the panel is right next to it. You'll be driving through the fish market to get here.
Panel 2
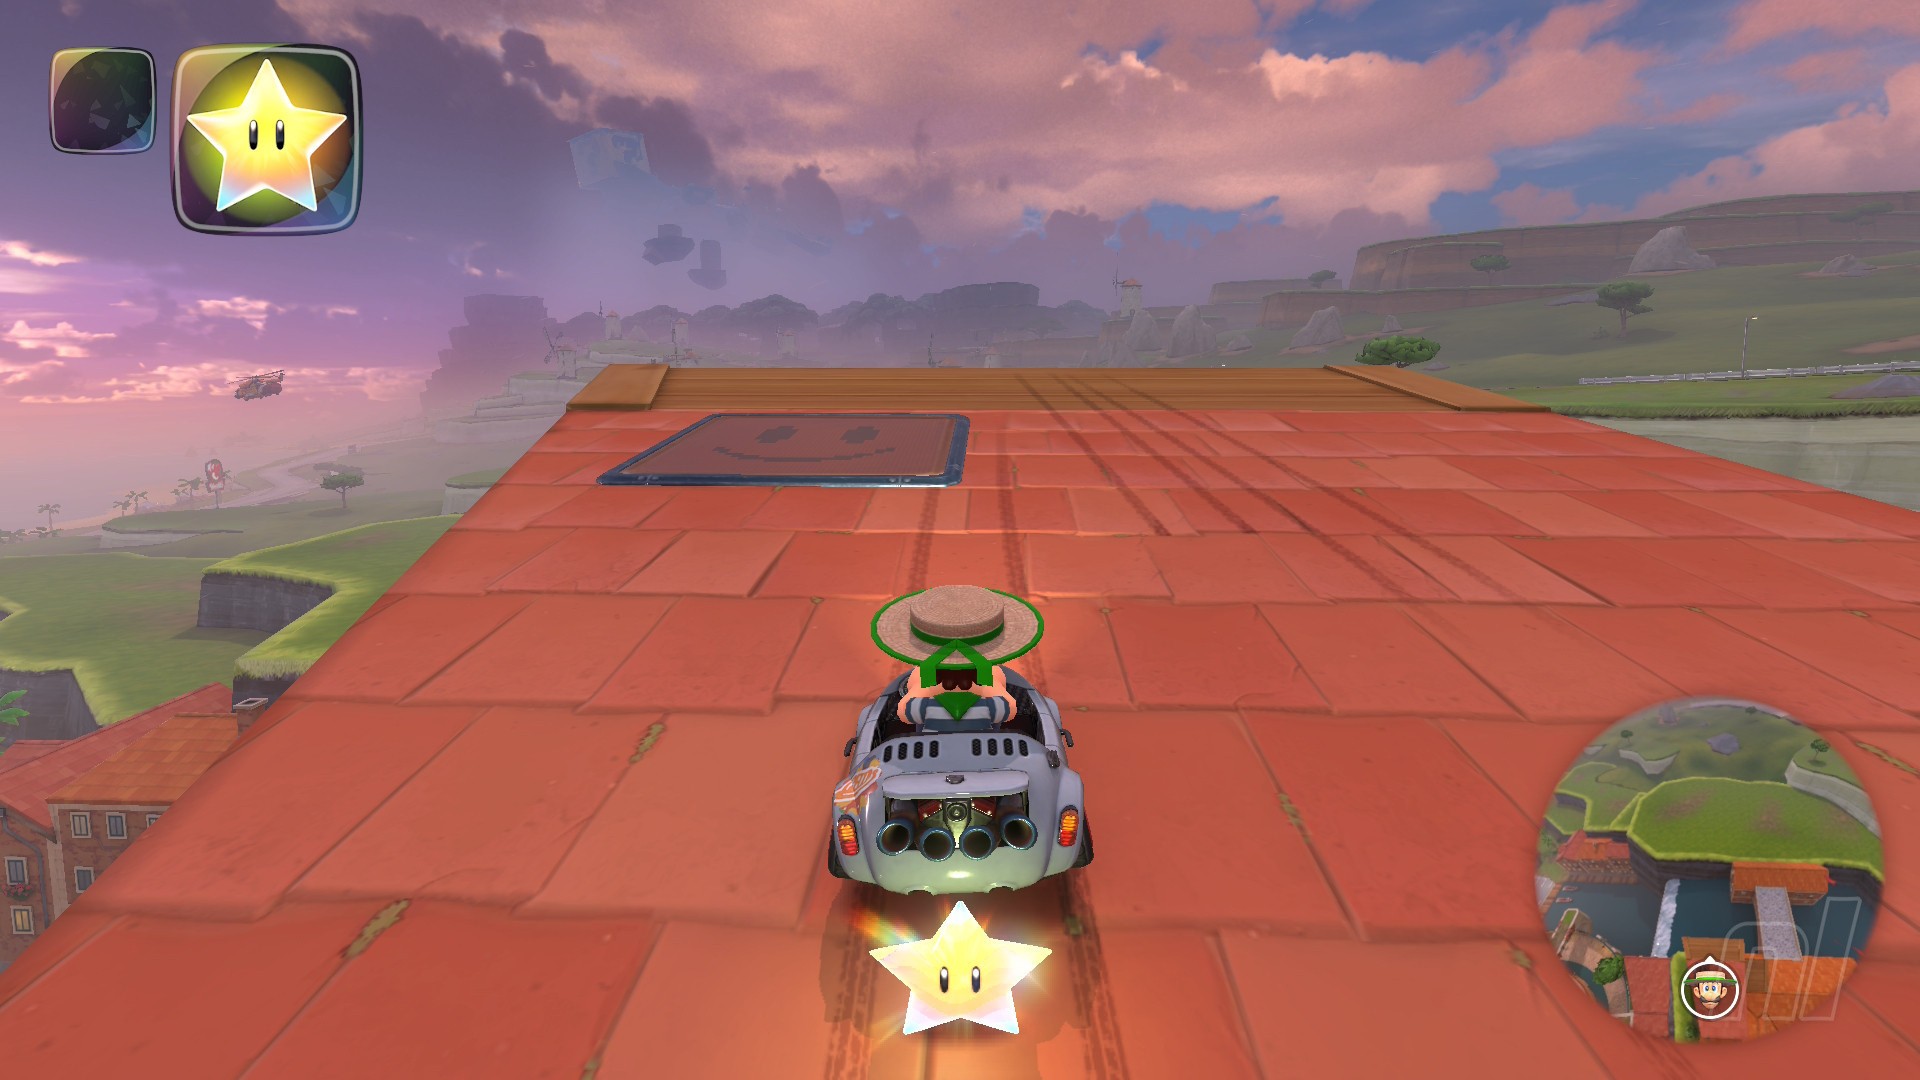
Location: You'll be racing along some red rooftops to reach this panel. From the start, head left and go up the stairs to reach houses that look like ramps. A couple of jumps and tricks and you'll reach the panel.
Panel 3
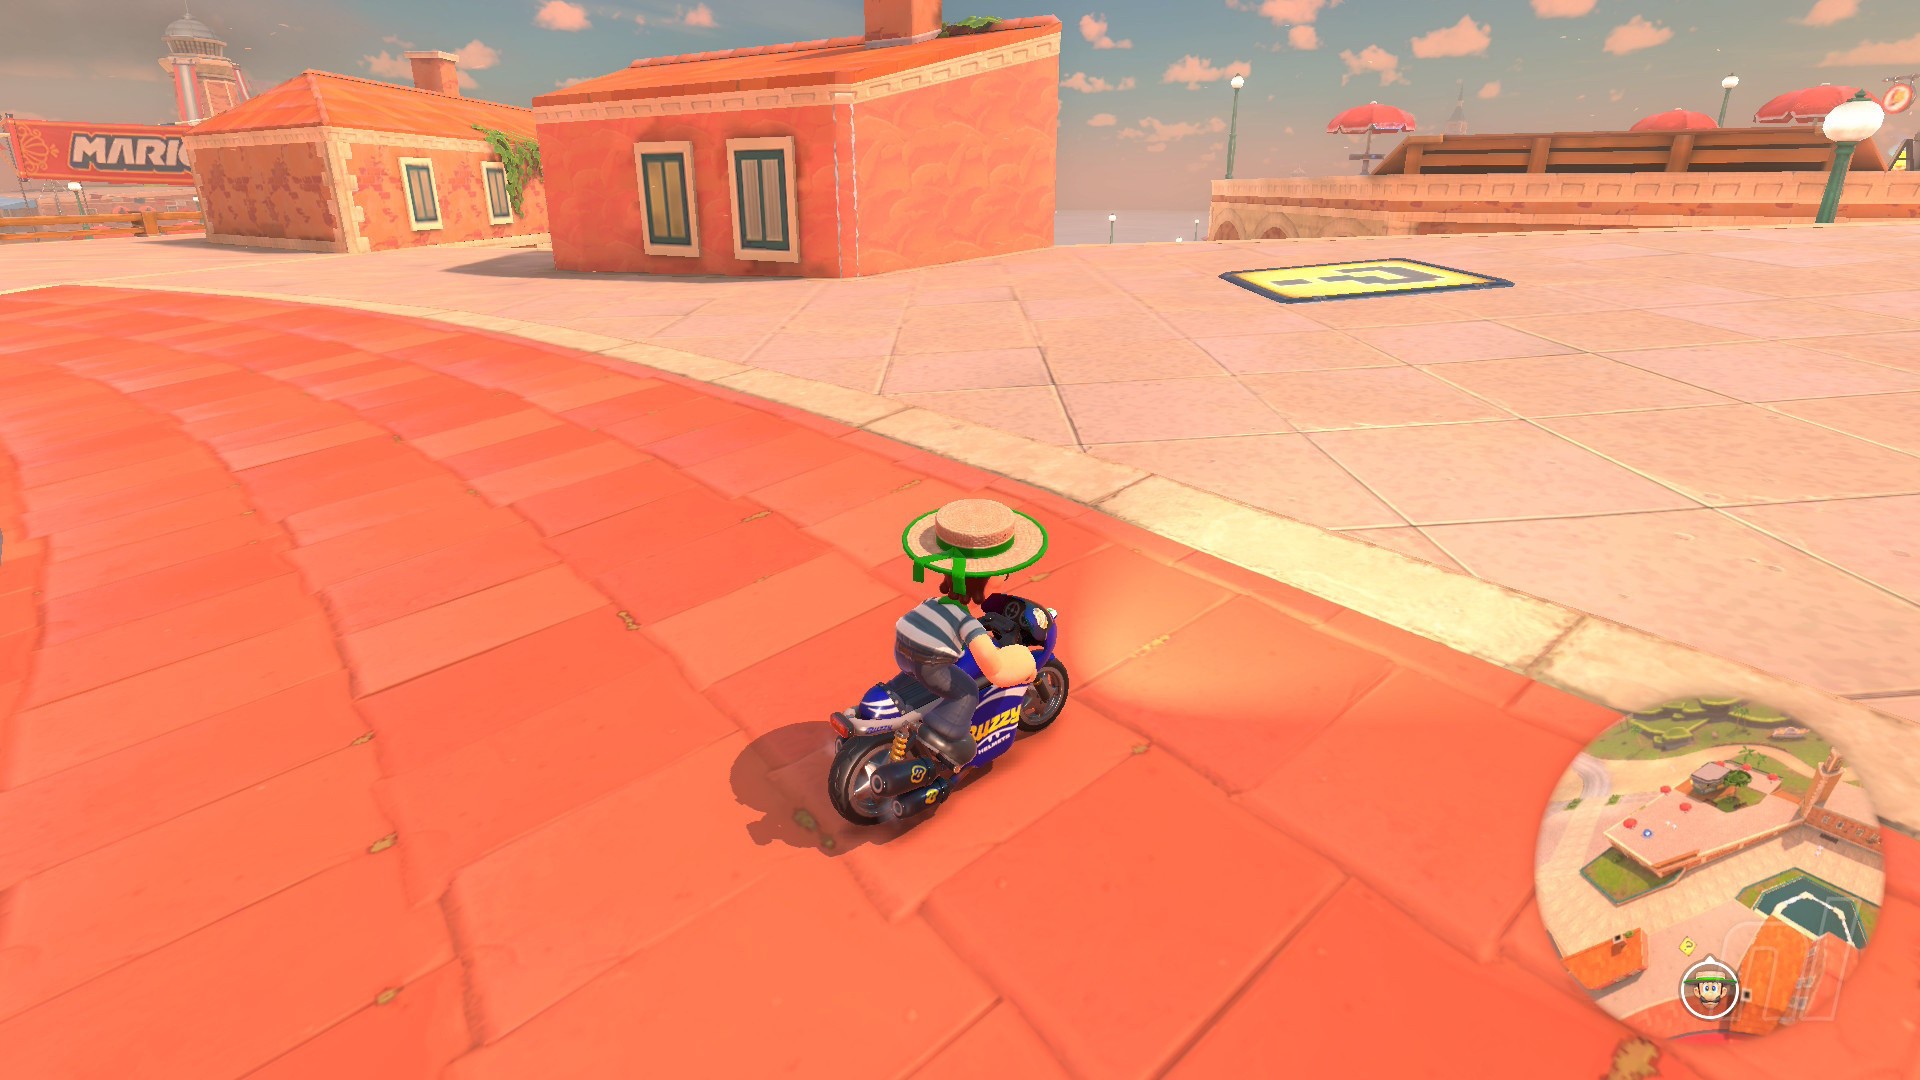
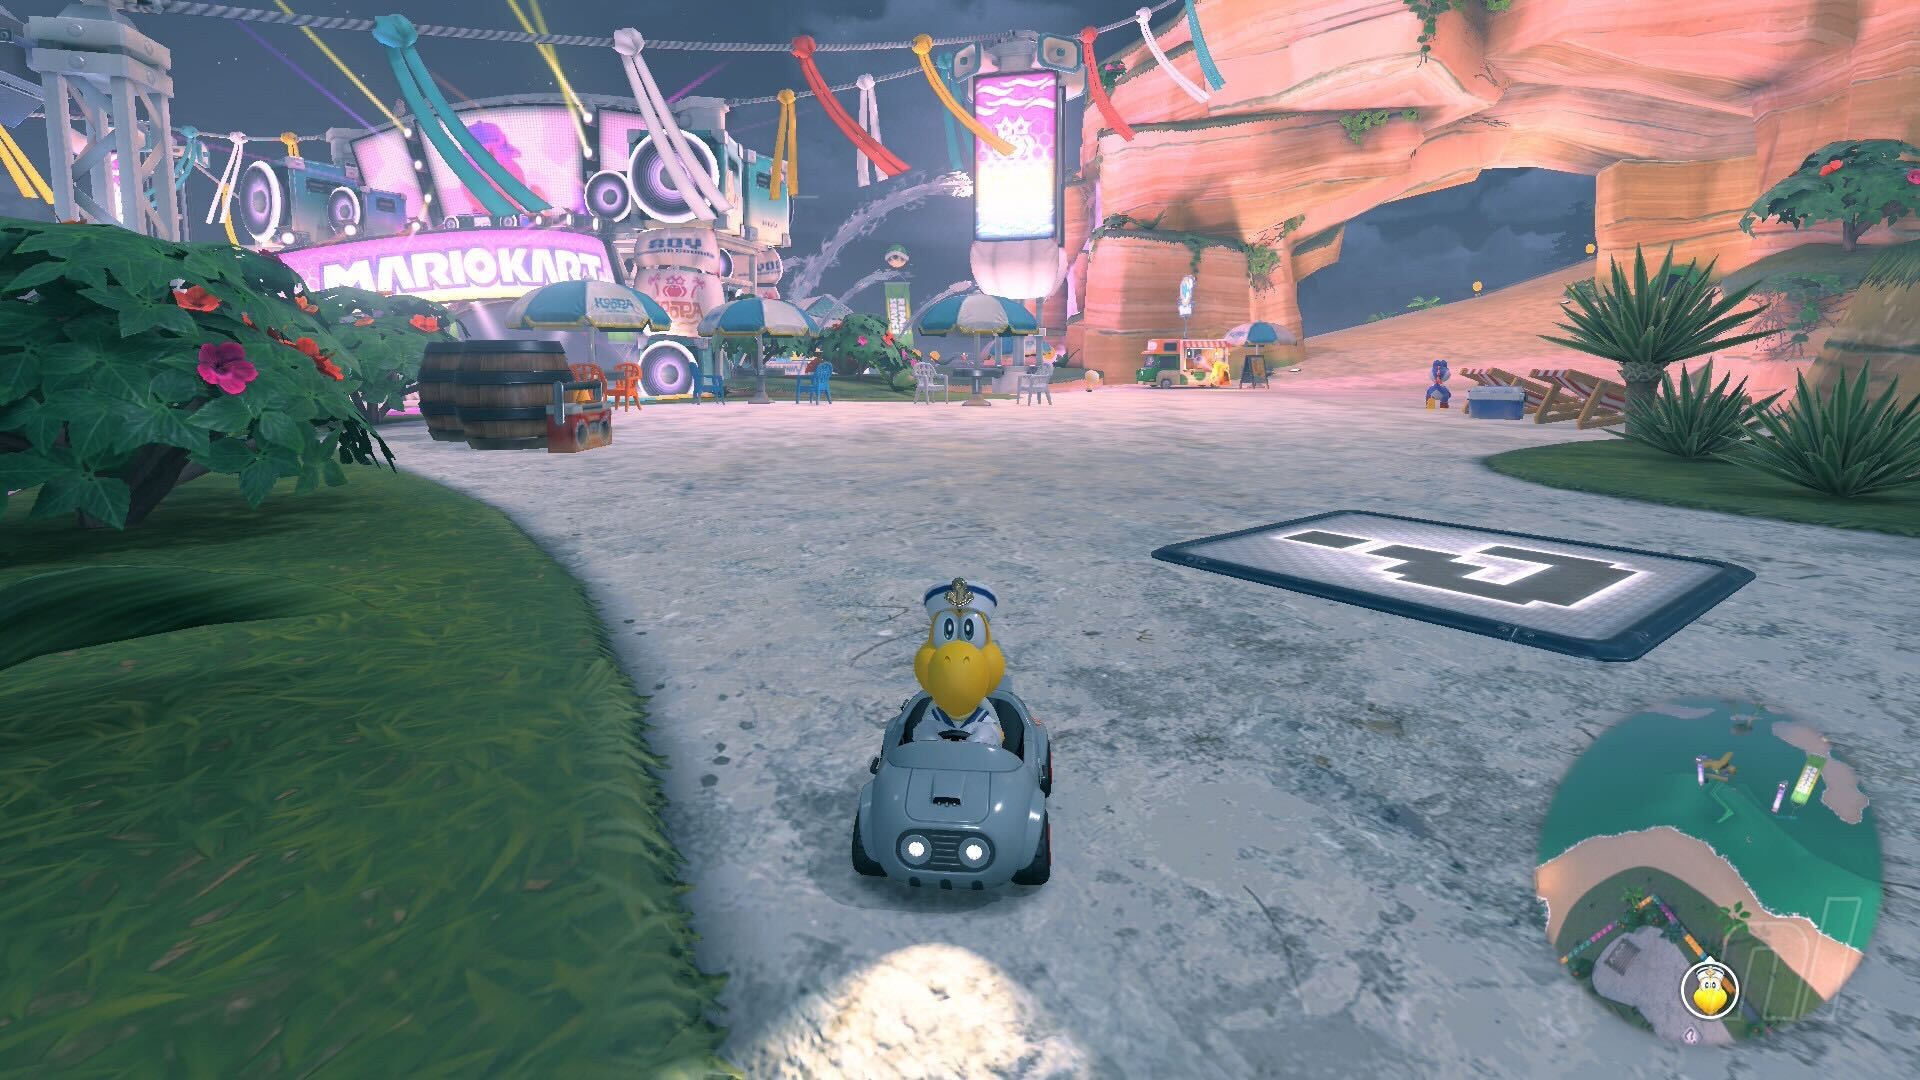
Location: Close to the starting line, this panel is up some stairs on a red and white section of the course.
Panel 4
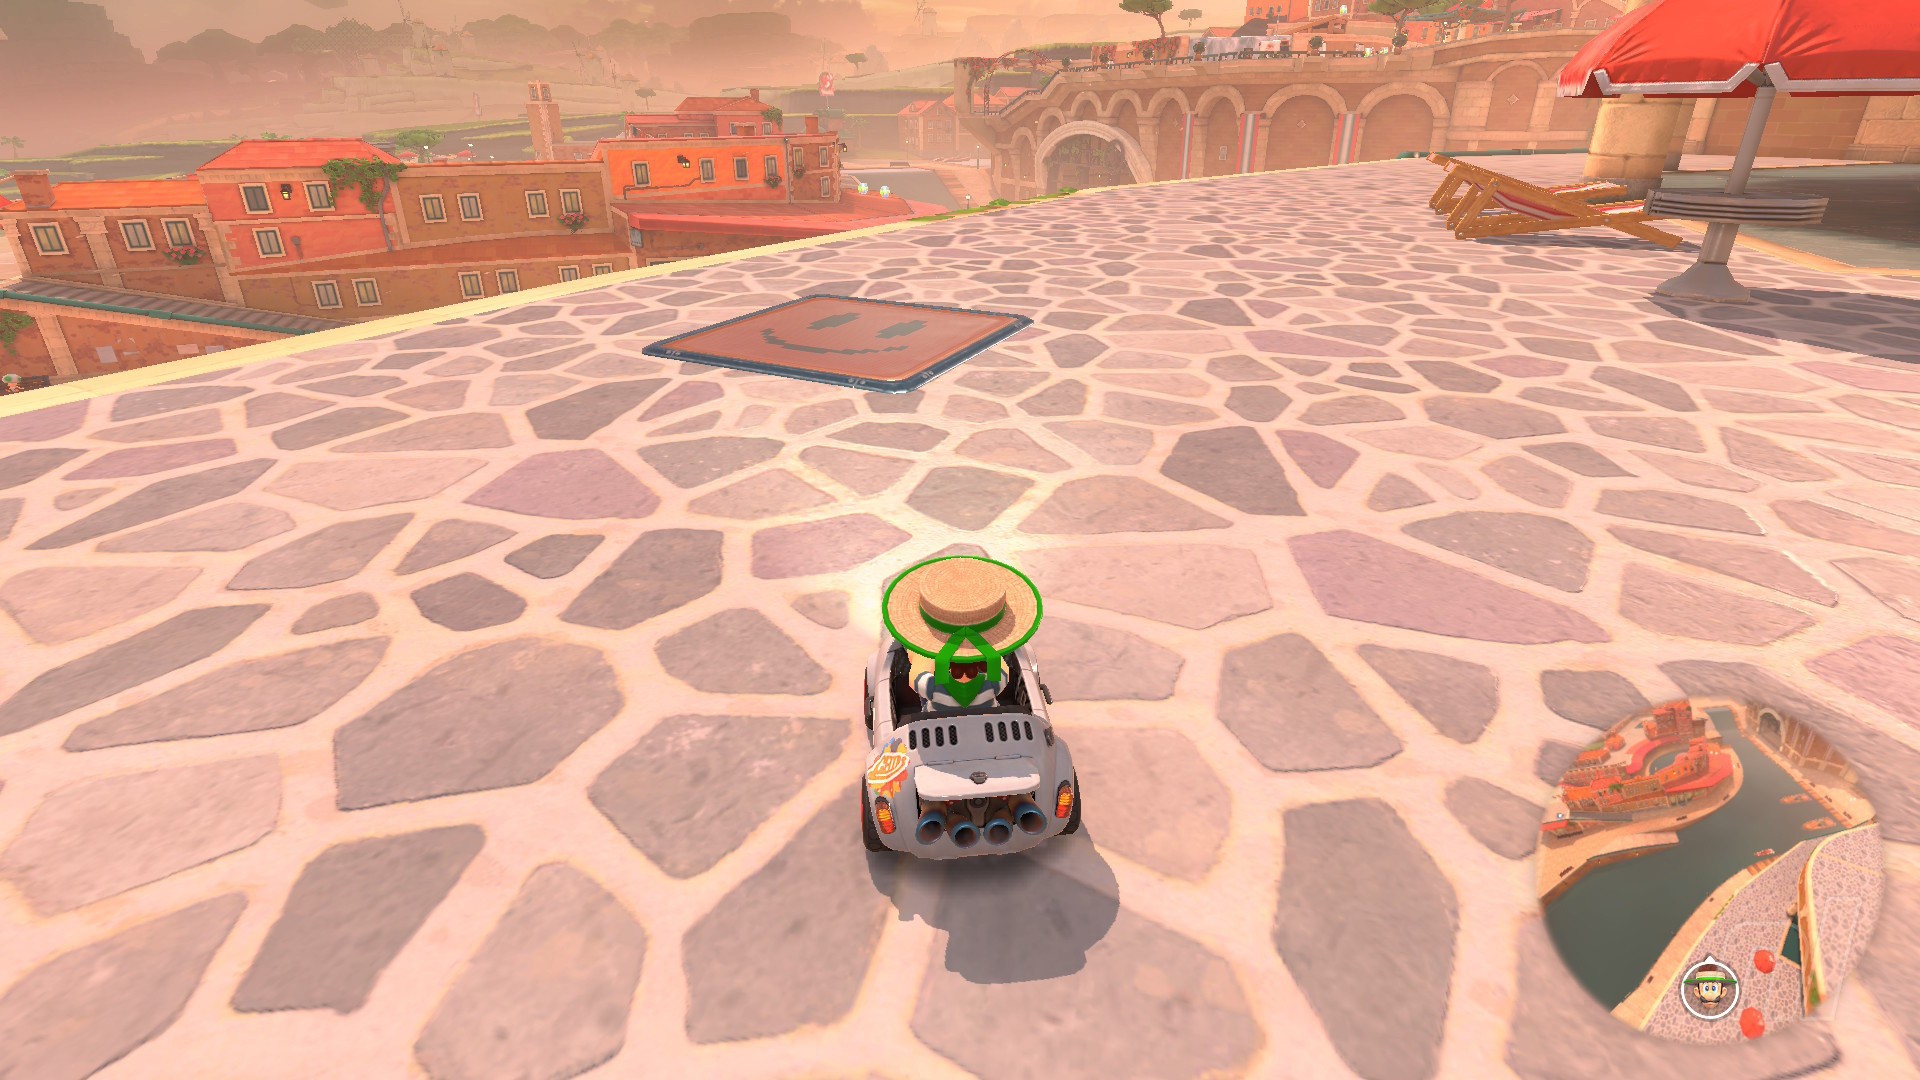
Location: Head up the stairs close to the lighthouse, and then keep driving until you find a grass clearing. Follow it round to the left where you'll come to to a flat roof with some clothes lines hanging from it. Grind along there to reach the next panel.
Panel 5
Location: It's always the waterfalls, isn't it? Anyway, either drive right from Panel 4 and hit the water, or just navigate your way around the course's water routes until you find the waterfall in front of the domed building. Drive through here and you'll see the panel in front of a pipe.
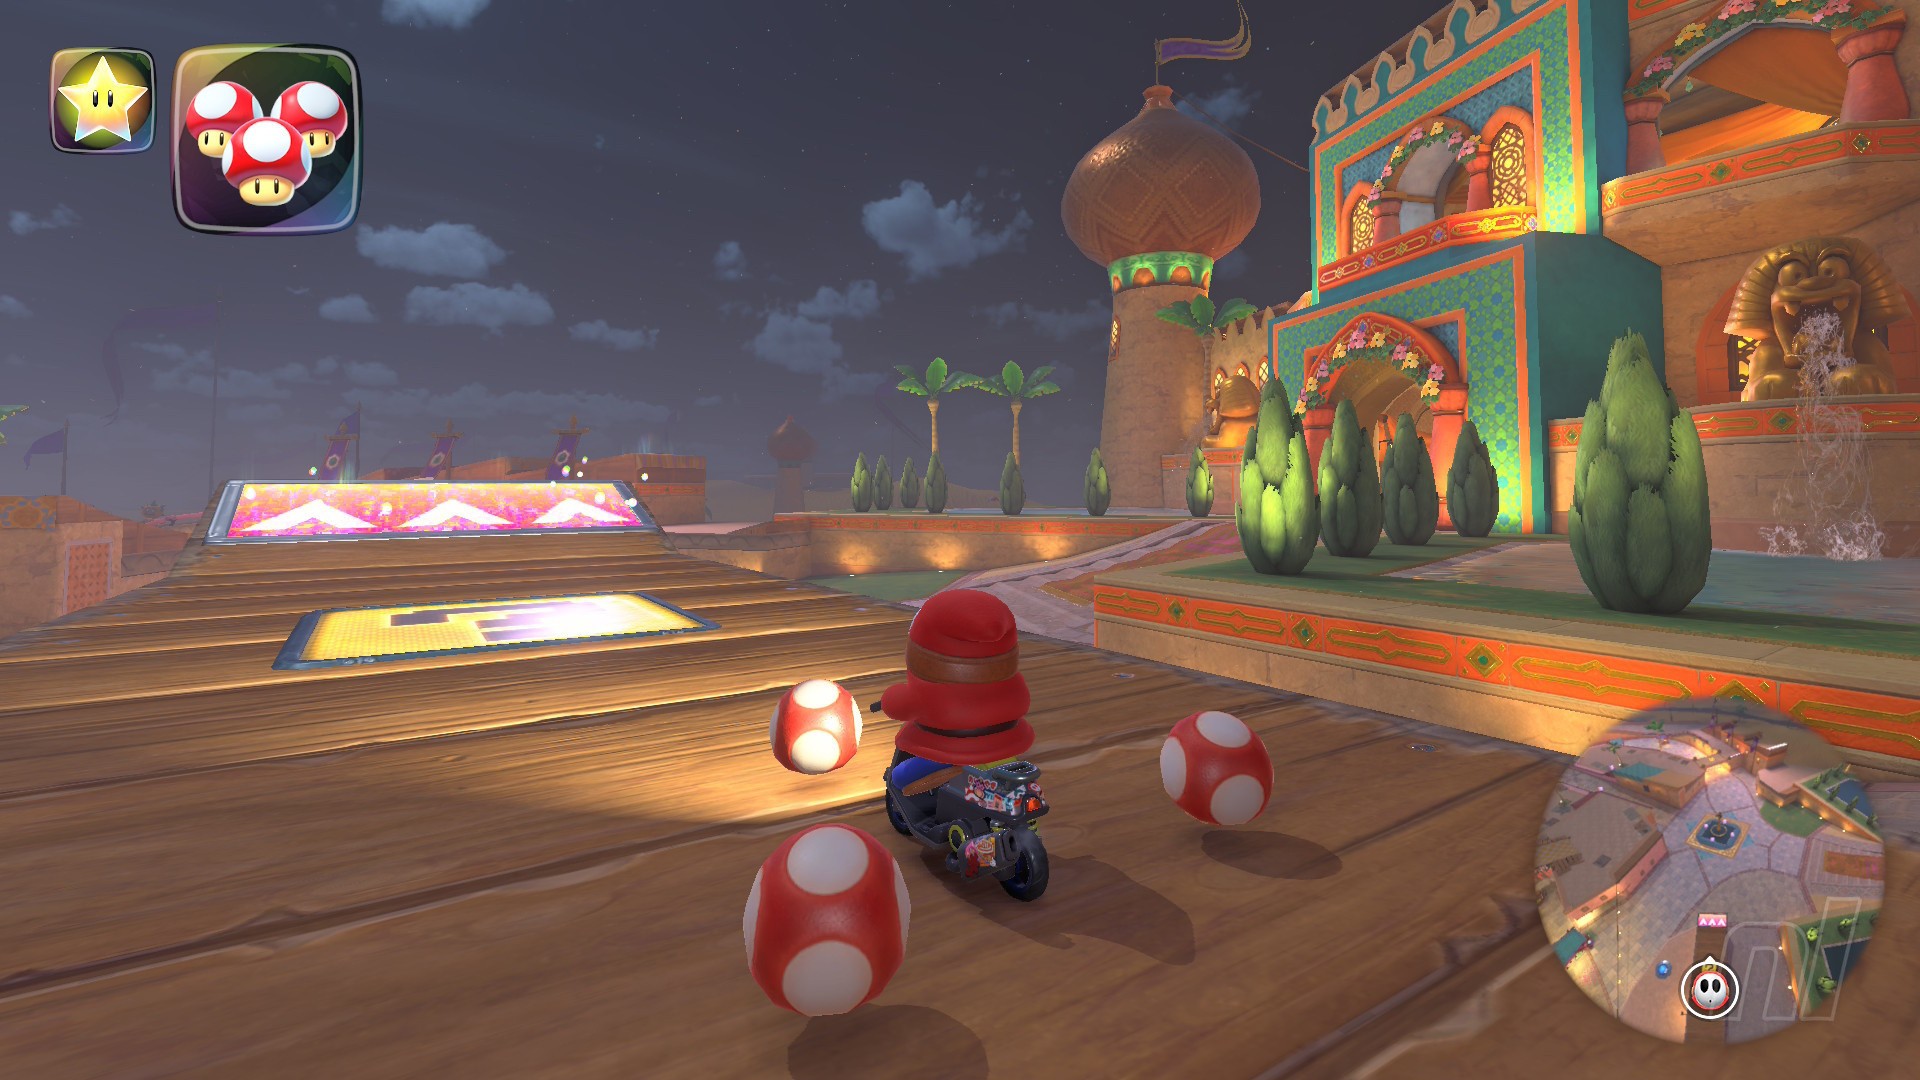
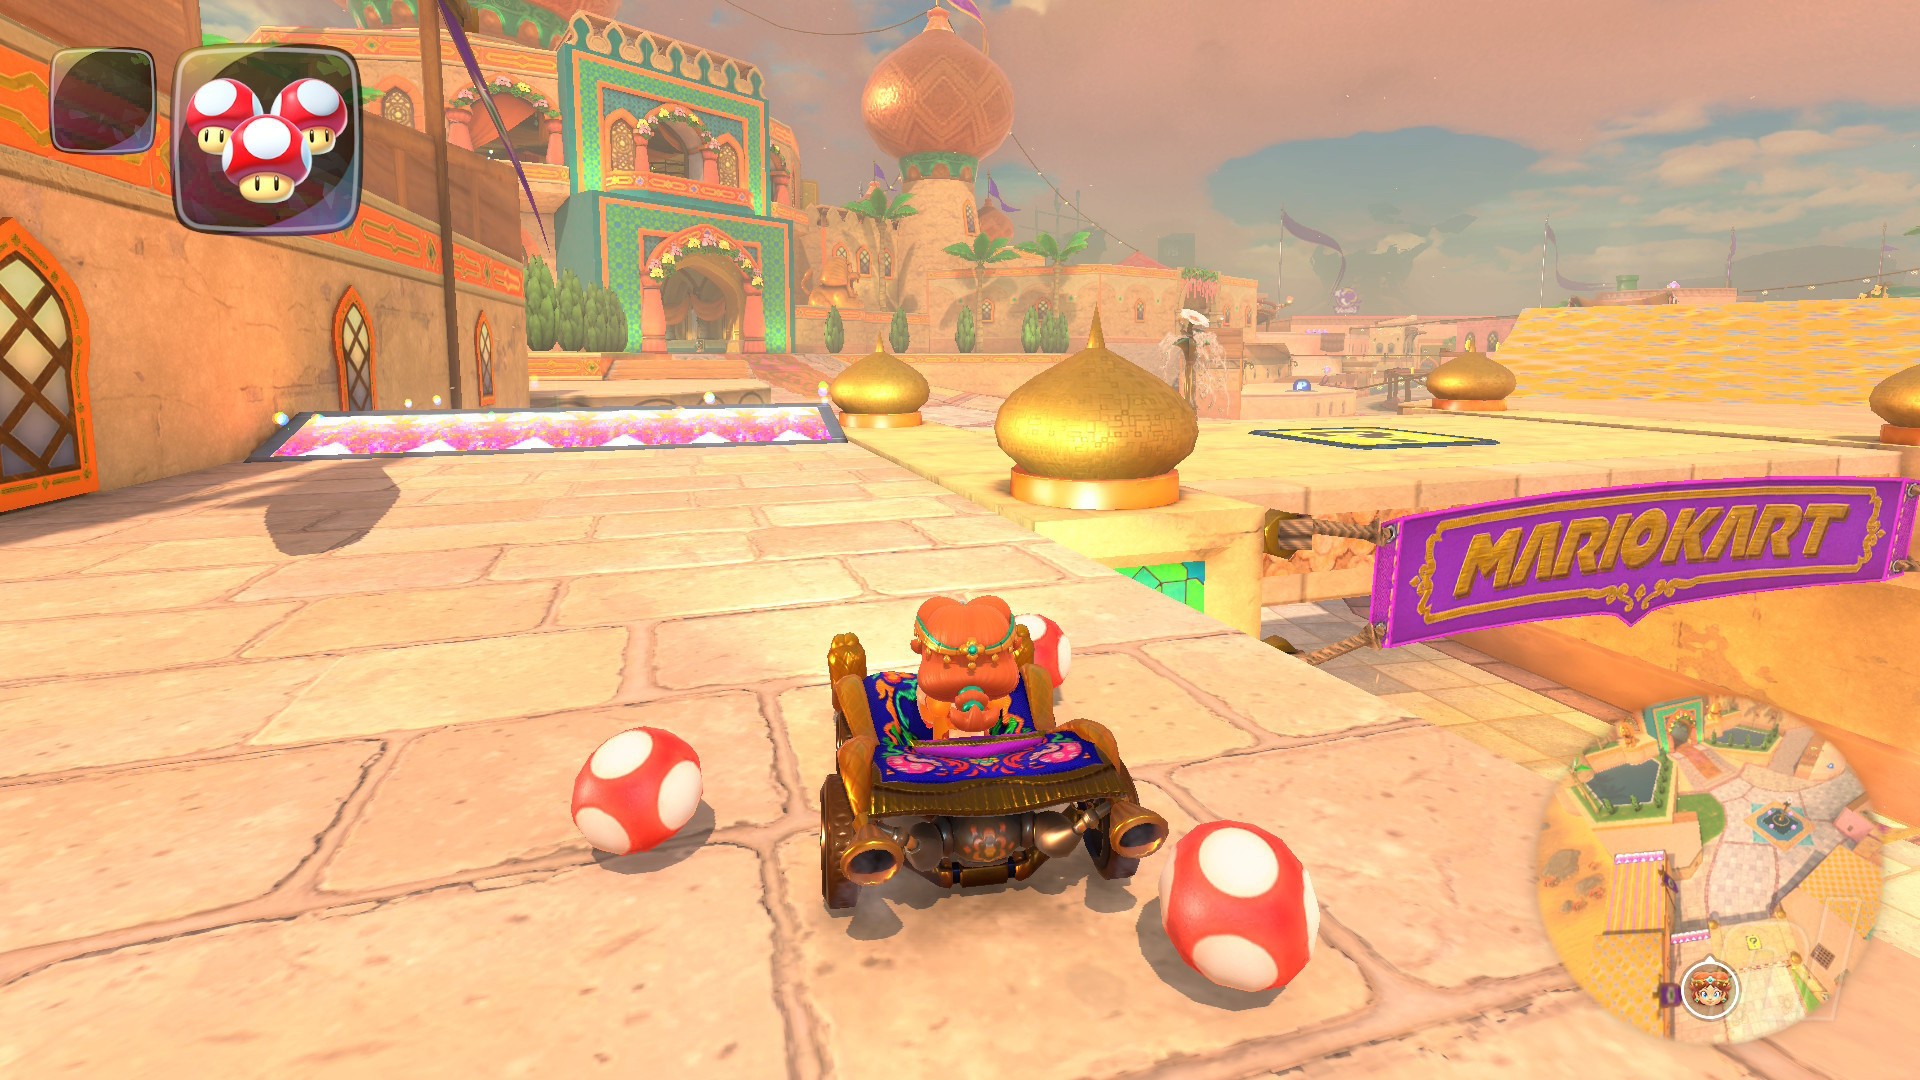
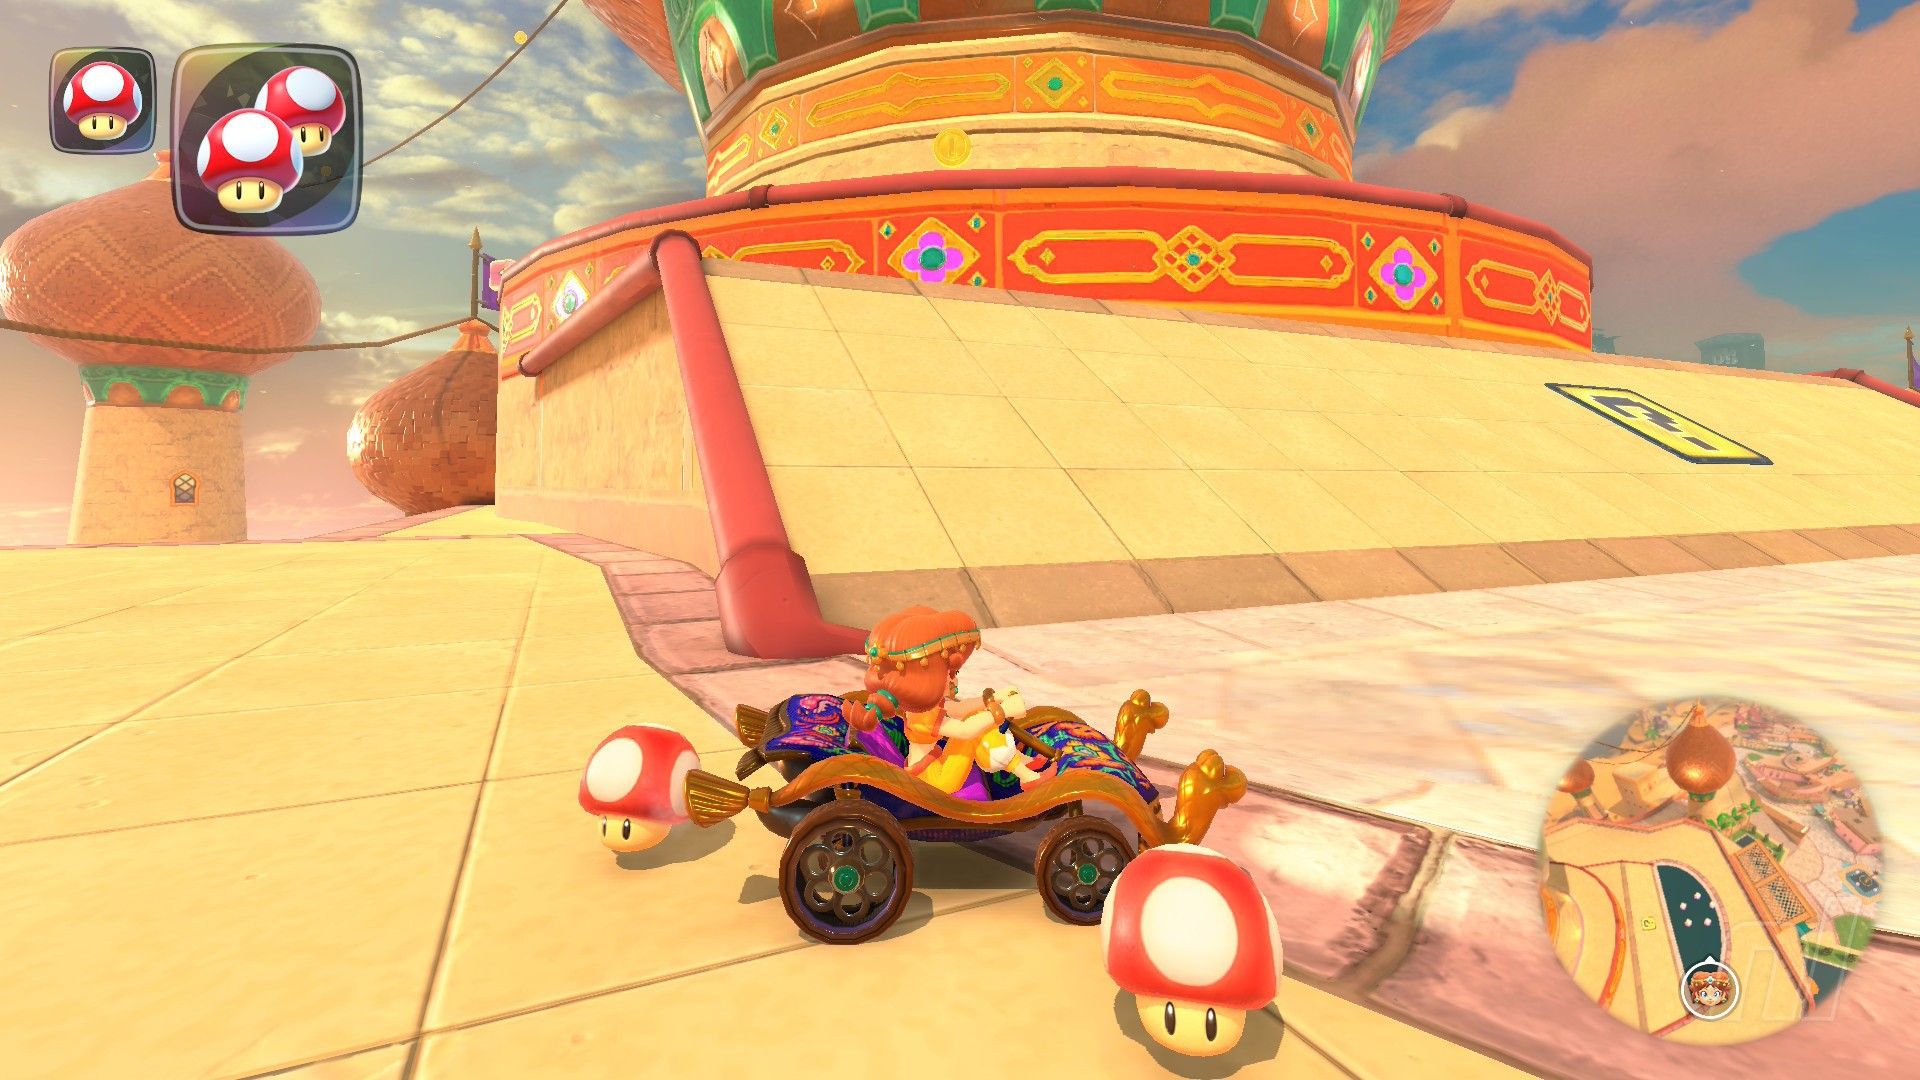
Shy Guy Bazaar Question Panels
Number of panels: 5
Collectibles region: Desert
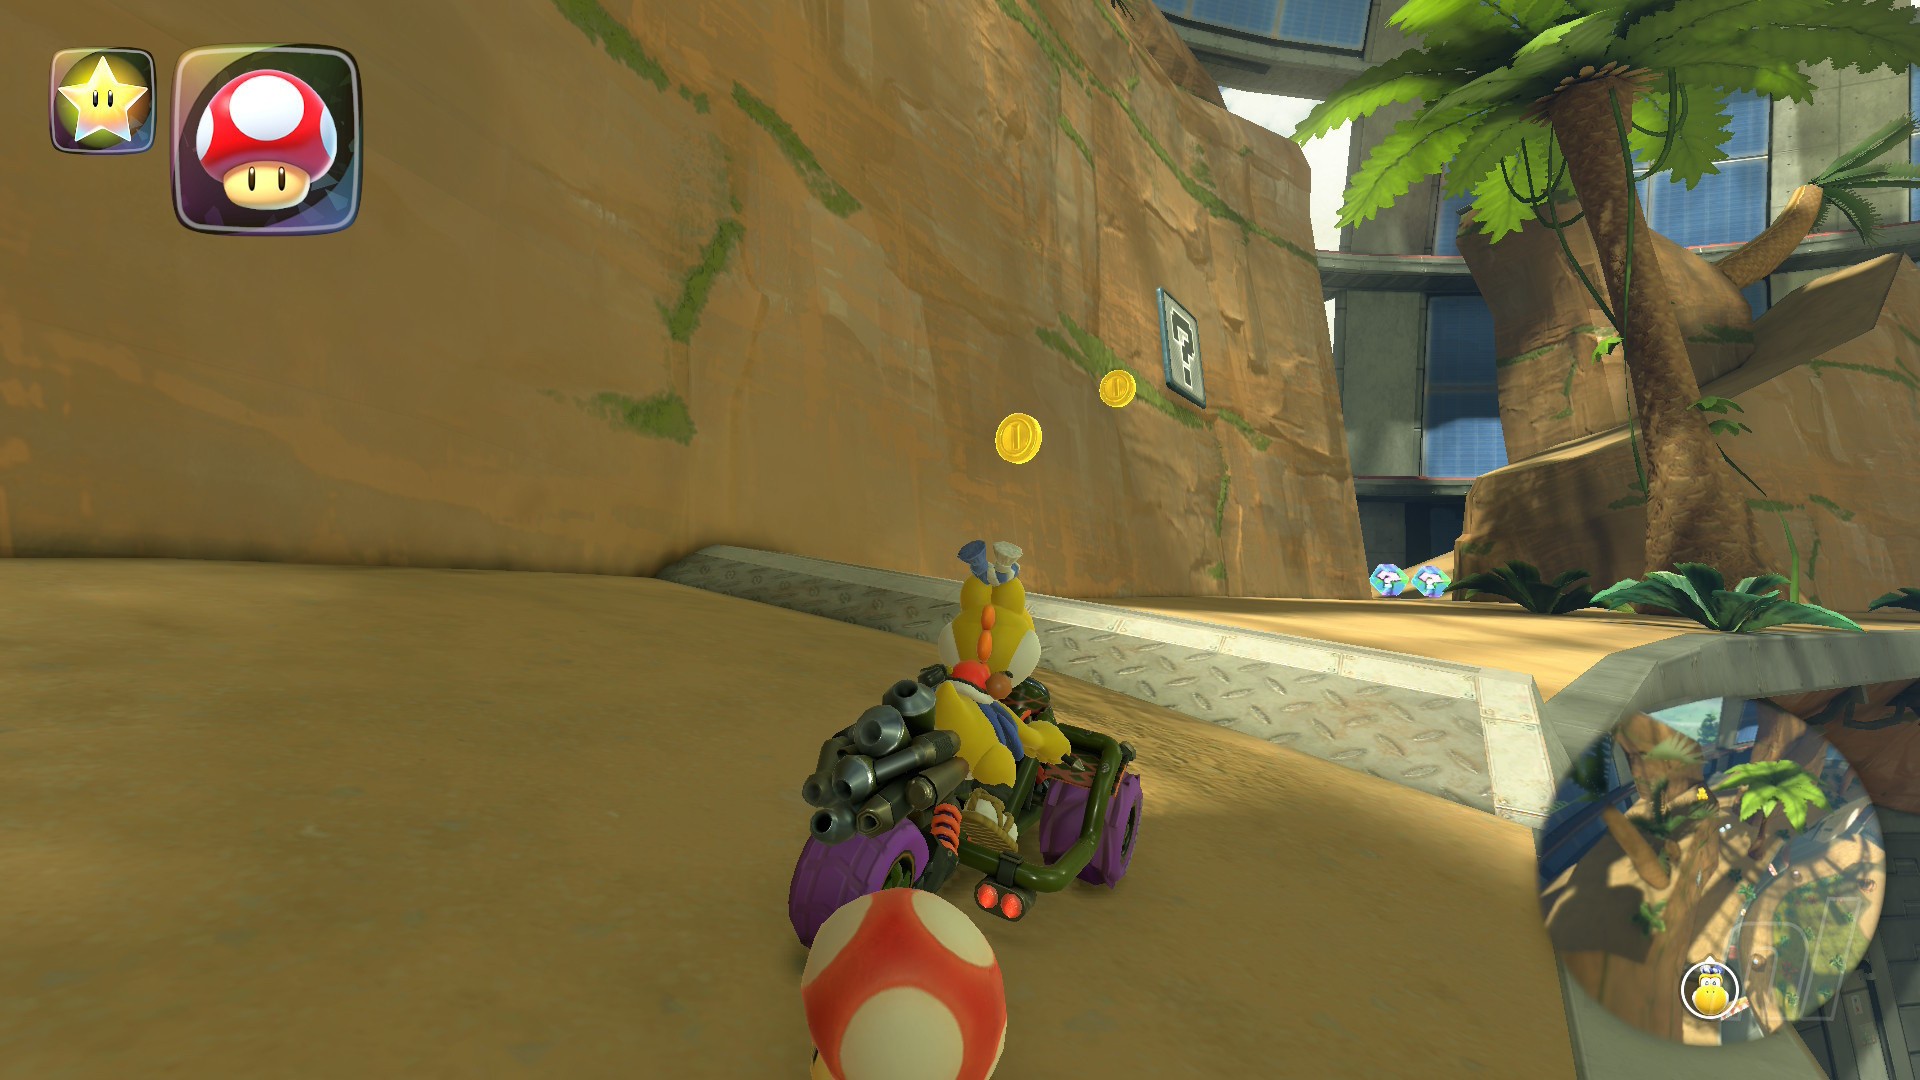
Panel 1
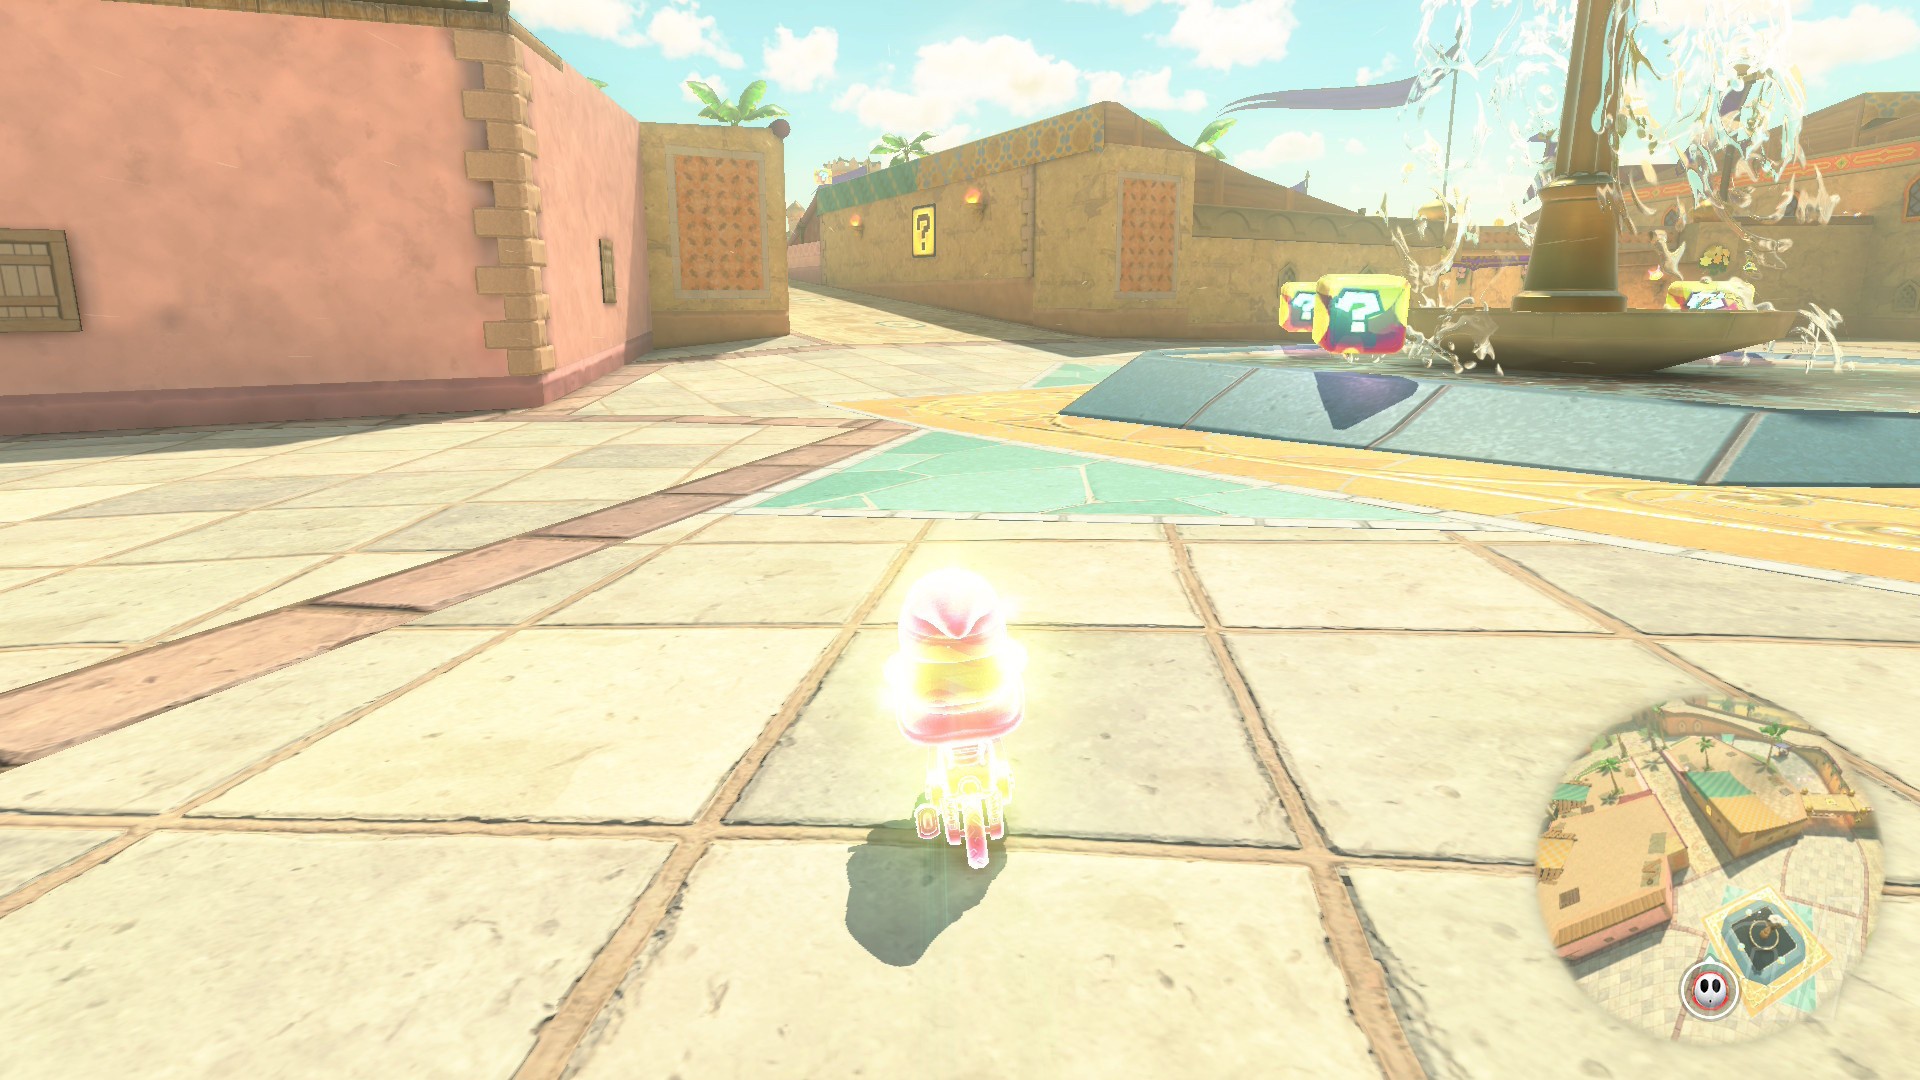
Location: Take the central path towards the palace, and wall ride up the left hand wall to reach this panel. We came from the other side, hence the photo!
Panel 2
Location: Instead of heading inside the palace, drive up the slope to the right of it to find this panel on the sandstone building here.
Panel 3
Location: From the outside section of the course, grind up the ropes to the outside walls, then follow them left. When you reach a Mario Kart banner (with a stone top), you'll see the panel on the flat surface.
Panel 4
Location: In the main bazaar section, head up a small staircase to the right of the water fountain. Follow the road to a pipe, and then grind on the rail and rope to get to a new rooftop section. Here, drop down to a fabric cover and then grind along another rope to the top of an arch and the panel.
Panel 5
Location: Drive through the market plaza and through the main palace until you reach the outside section again. After emerging at the top of a small corkscrew, drive up the staircase on the right and head around to the slope, where the panel is located
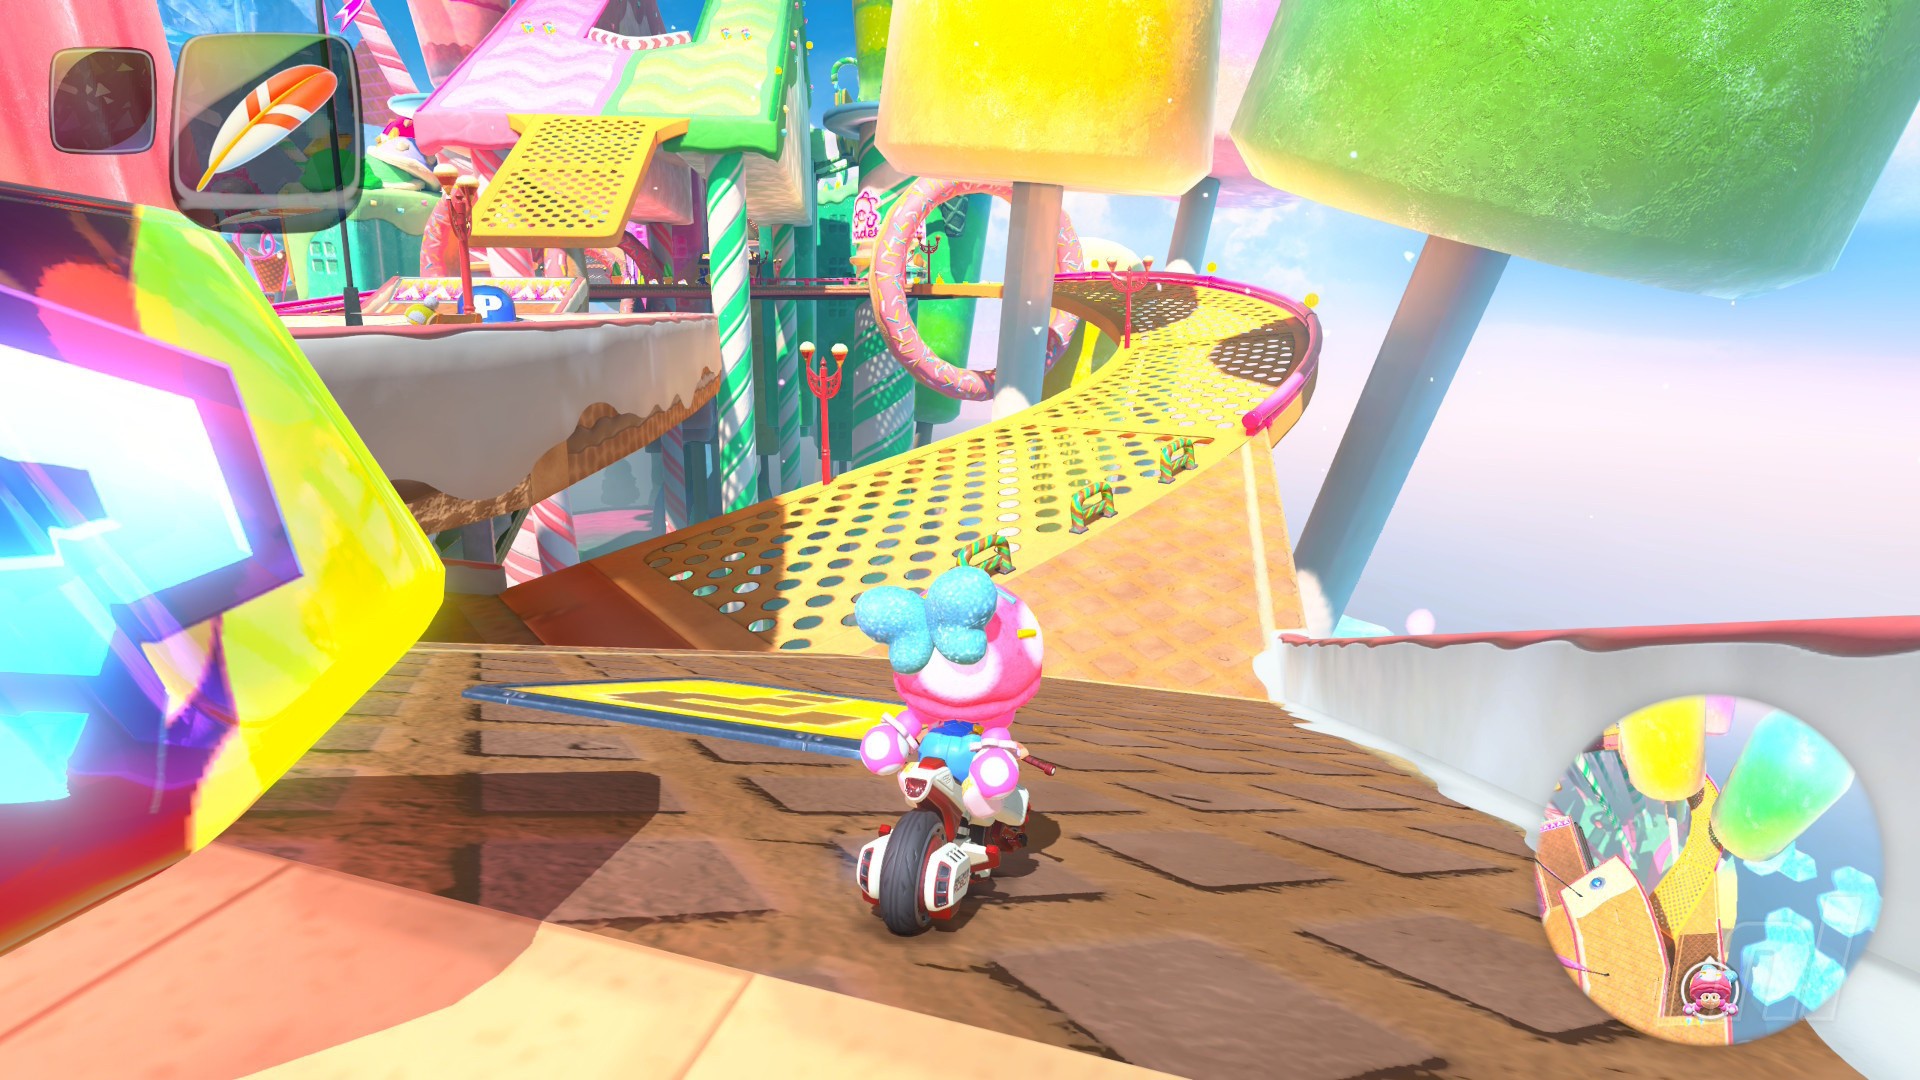
Sky-High Sundae Question Panels
Number of panels: 5
Collectibles region: Snow
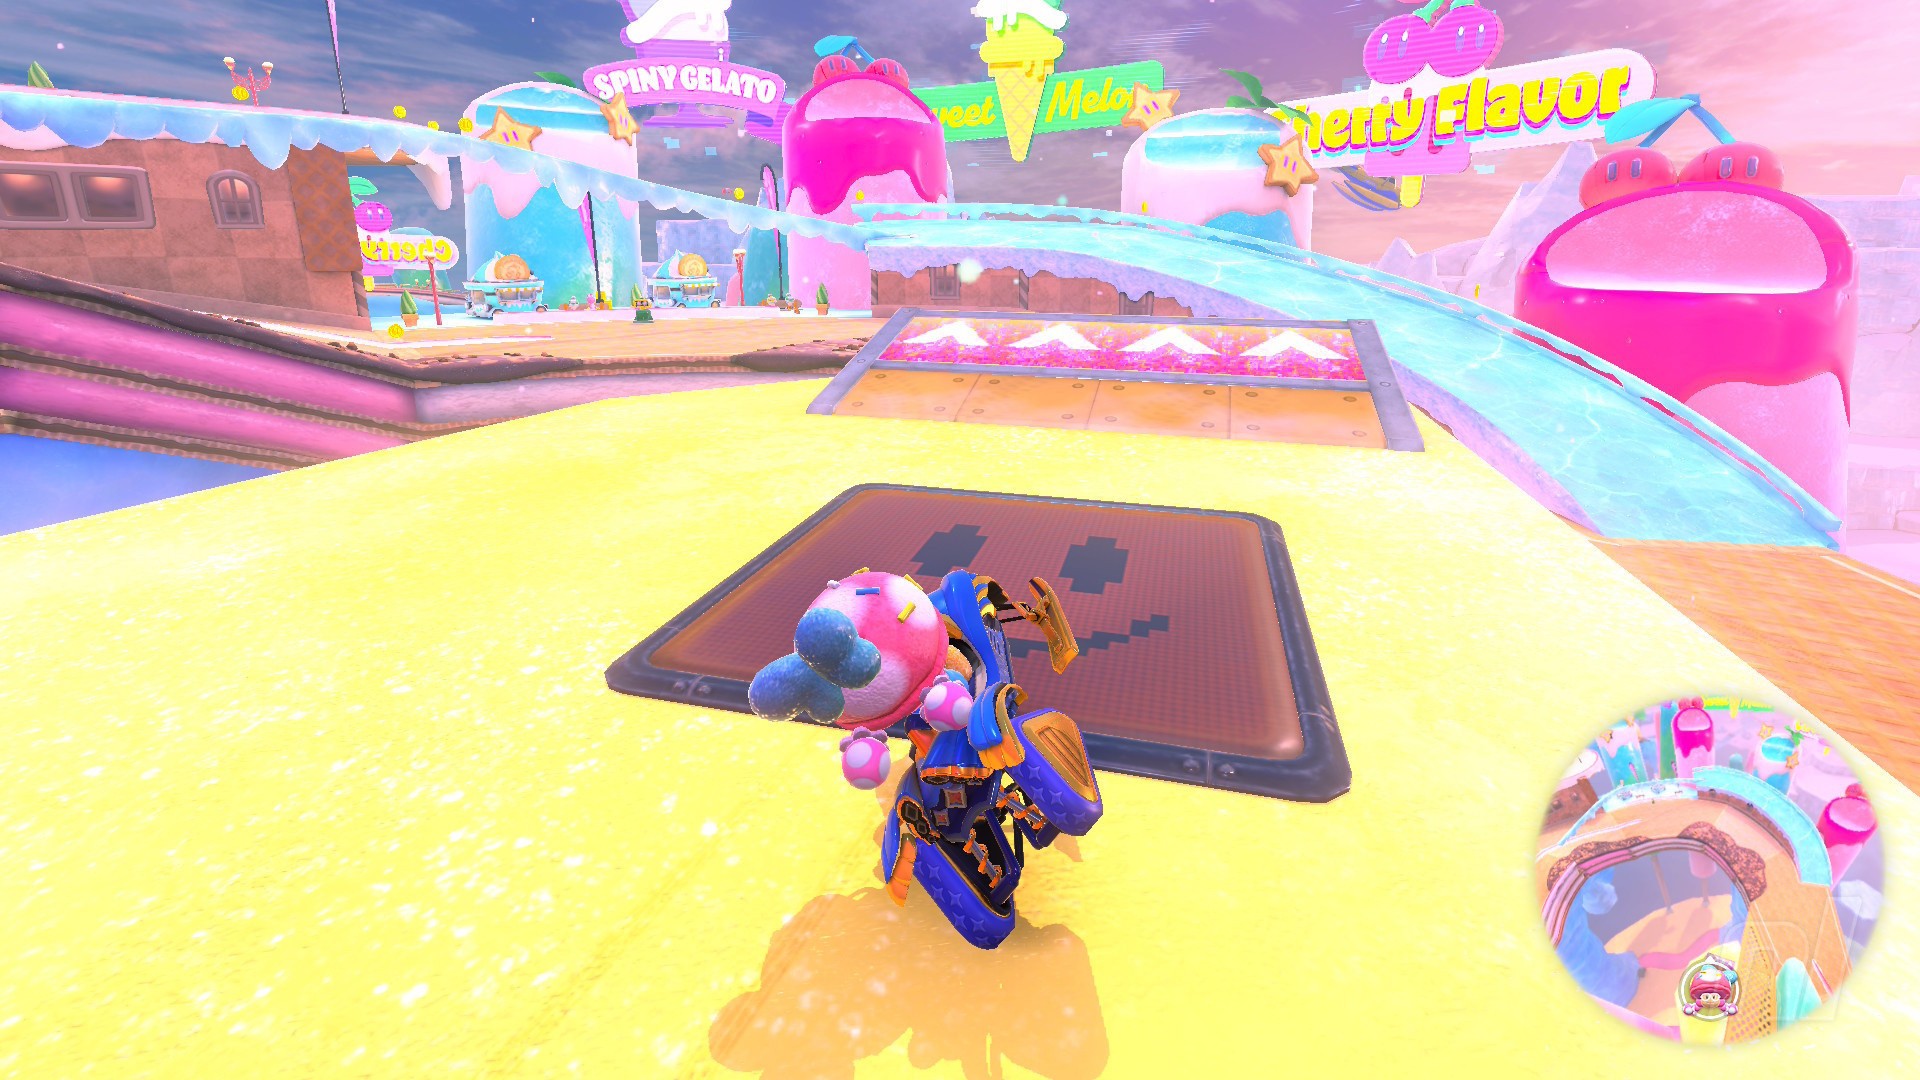
Panel 1
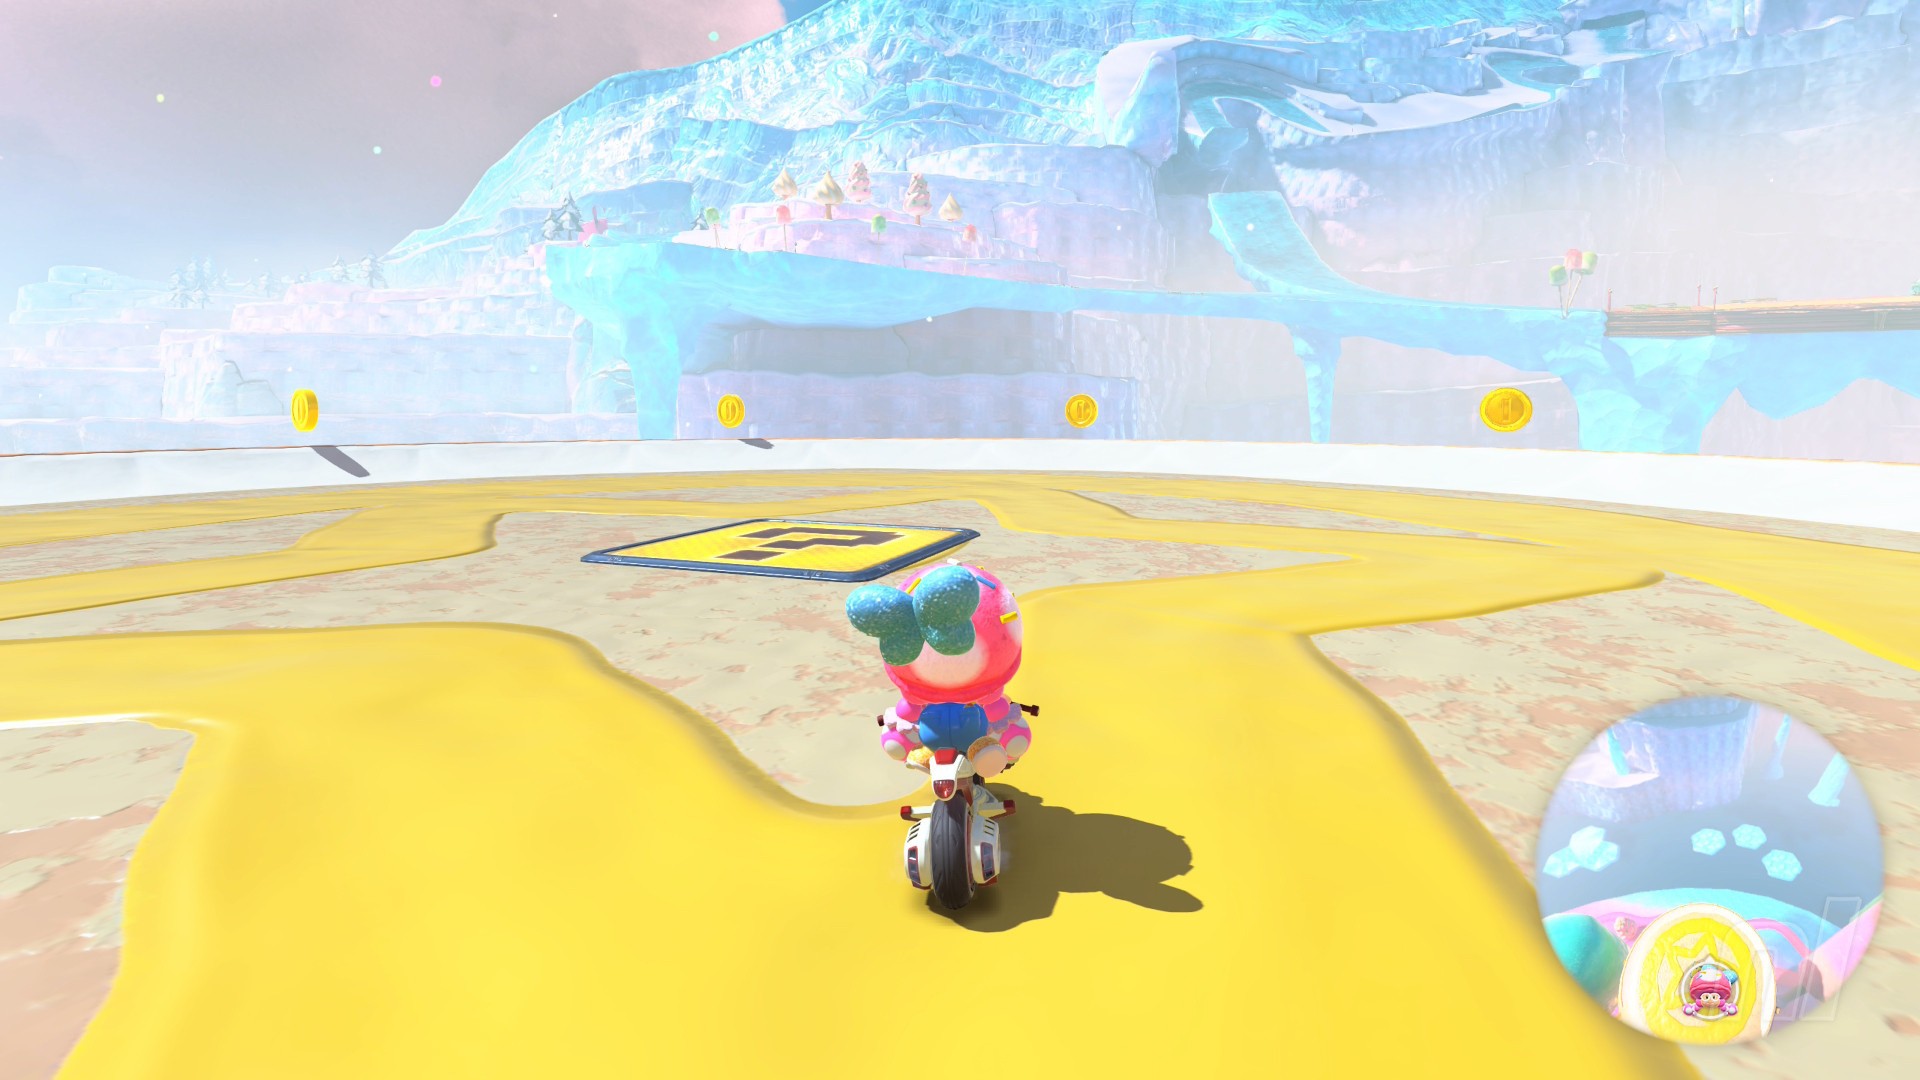
Location: If you drive around the course as normal, as you approach the starting line again, slow down and you'll spot a small yellow stand with a star on it, which is where the panel is located.
Panel 2
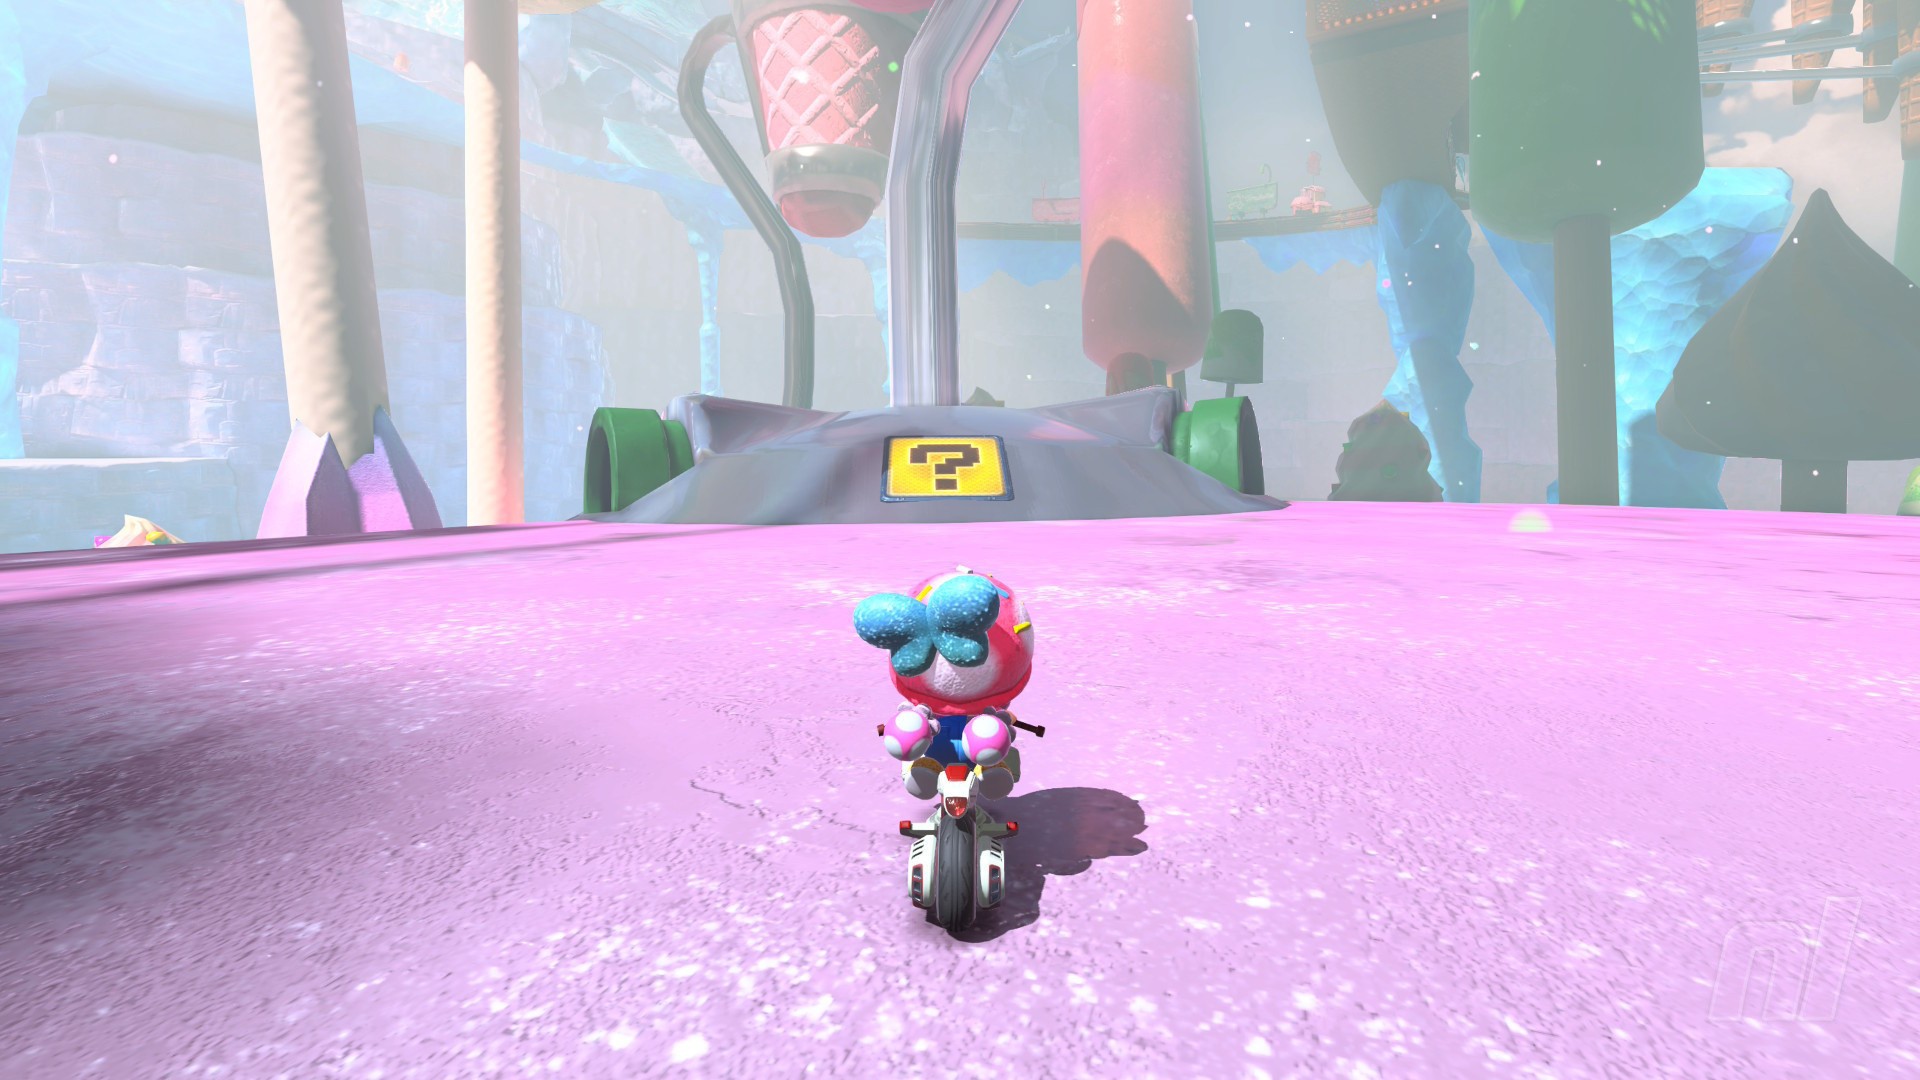
Location: Drop to the bottom of the course and this panel is on a small brown mound among the pink ice cream floor.
Panel 3
Location: Drive around the course normally and you'll reach a branching path where straight ahead is a speed ramp, and right is a waffle road. Take that yellow waffle road but take a sharp right through some striped barriers to go up a chocolate waffle path, which is home to a panel.
Panel 4
Location: Use the jump boost at the start as normal, but instead of going straight ahead, go left behind the Toadette sign. Then use the grind rail to time a jim to the left to a yellow platform where the panel sits.
Panel 5

Location: After the flying section of the course, follow the road until you reach a section that splits into two separate yellow and green roads. Hop onto the rail on the green, then jump to reach a warp pipe. Then you'll be brought to an area with strawberries, and a panel.
Starview Peak Question Panels
Number of panels: 5
Collectibles region: Snow
Panel 1
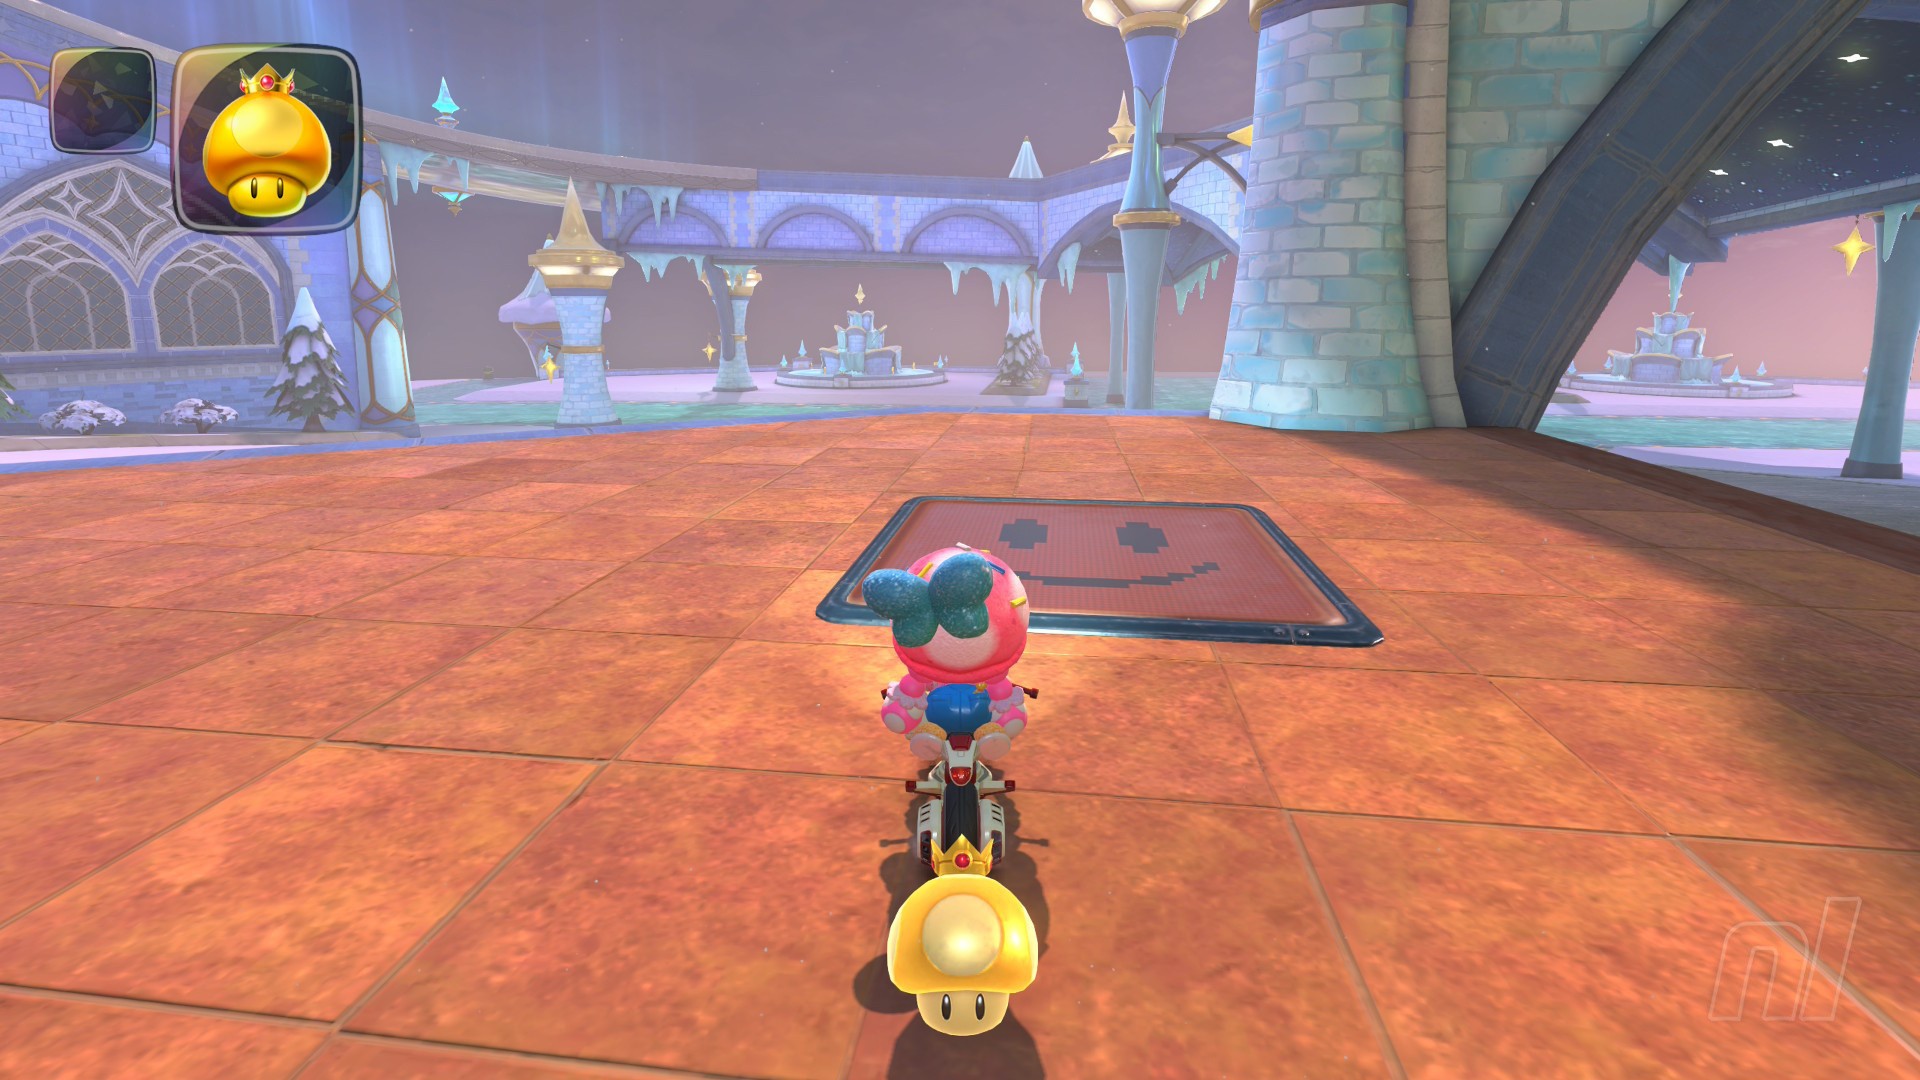
Location: After fast-travelling here, follow the red road and take the right path. As you get to the end of the slope, take a slight left to a flat gold floor to find the panel.
Panel 2
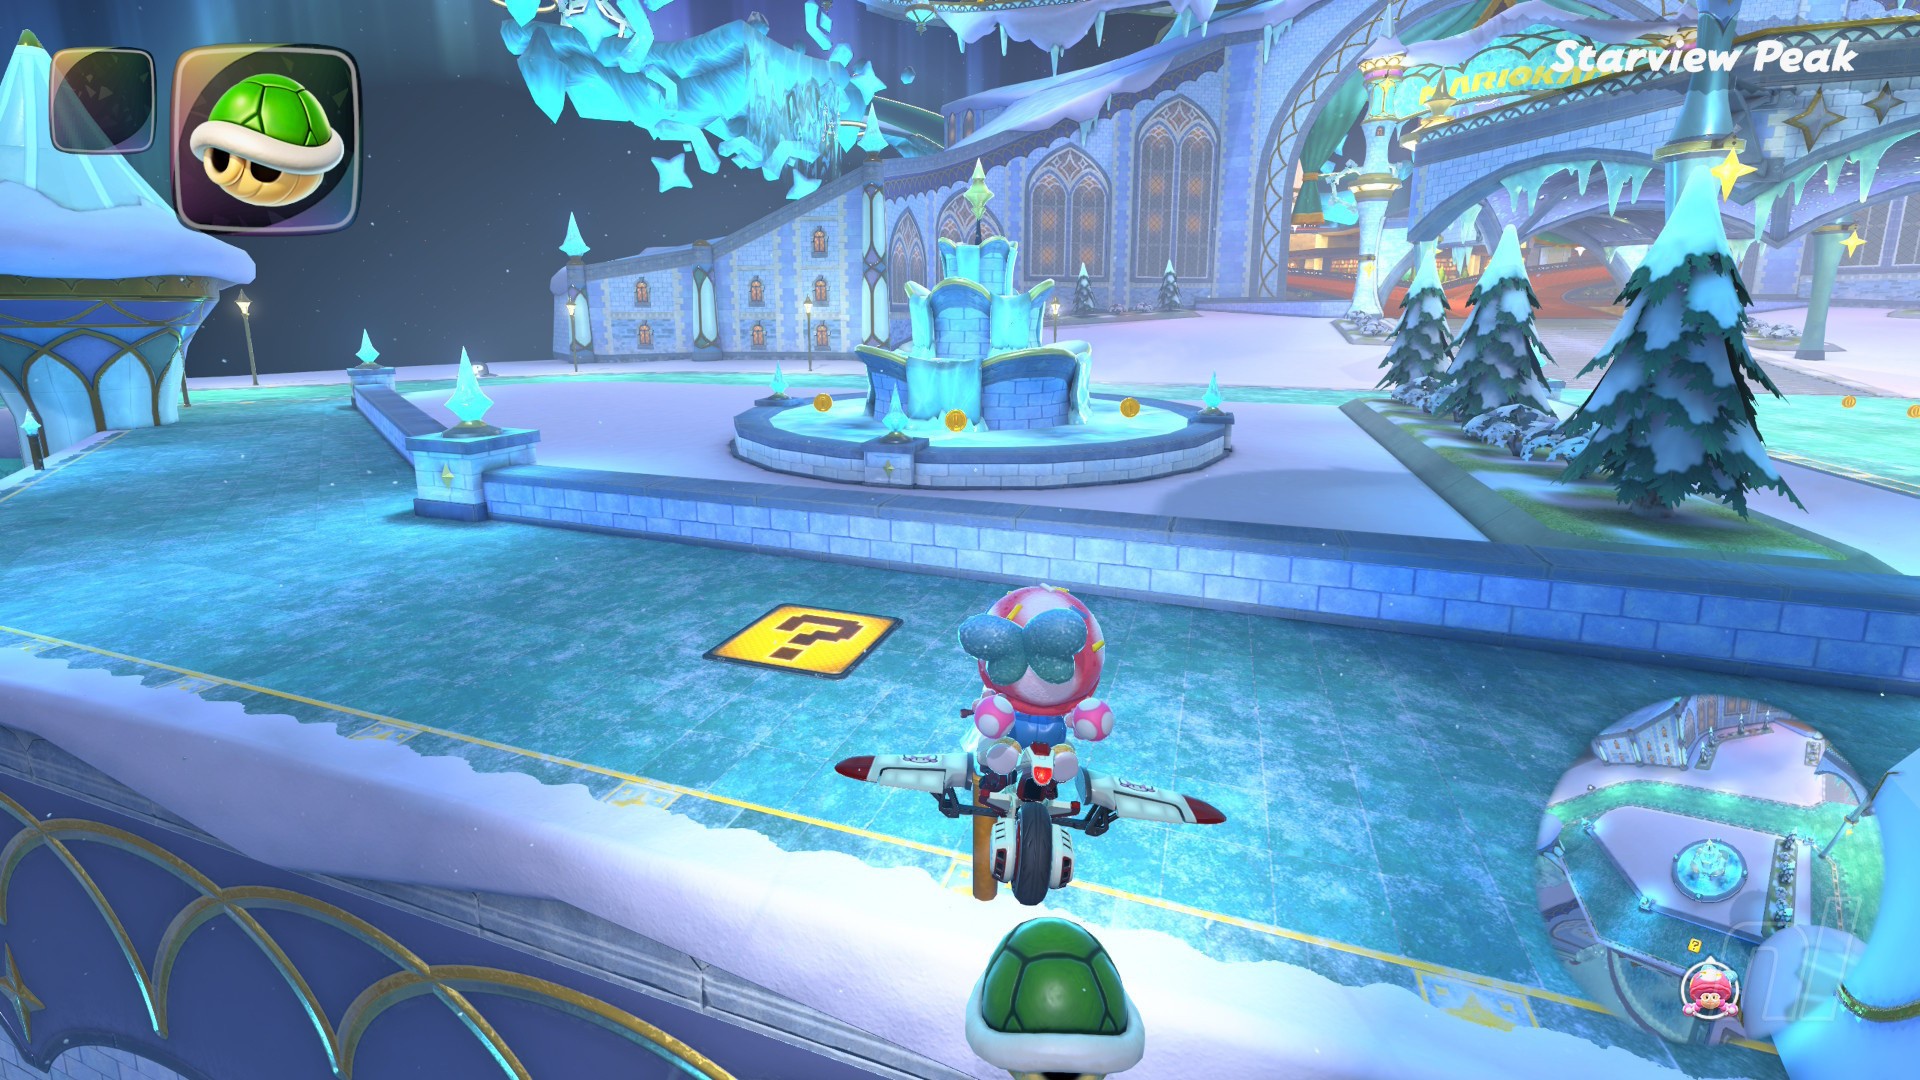
Location: If you're approaching from the outside of the course, then you'll see this as you fly up on the left. If you're coming from the course itself, drive outside and follow the outer icy path on the right to get this panel.
Panel 3
Location: This one is in the downstairs lobby area, where all the tables and bookshelves are. You'll see it hiding behind two benches where there's a relaxing Shy Guy. Good for him!
Panel 4
Location: The final two panels are pretty hidden! You'll want to race through the course as normal, then when you reach the second yellow and blue bend, drop off the left side of the track to a green area with a globe in the centre (and a Peach Medallion on it). The panel is hiding in plain sight here.
Panel 5
Location: If you follow the steps for Panel 4, you're basically already here. All you need to do is go through the pipe on this floor, and you'll be taken to the roof of the observatorium. You'll see some Luma ahead, and in the middle is the final panel.
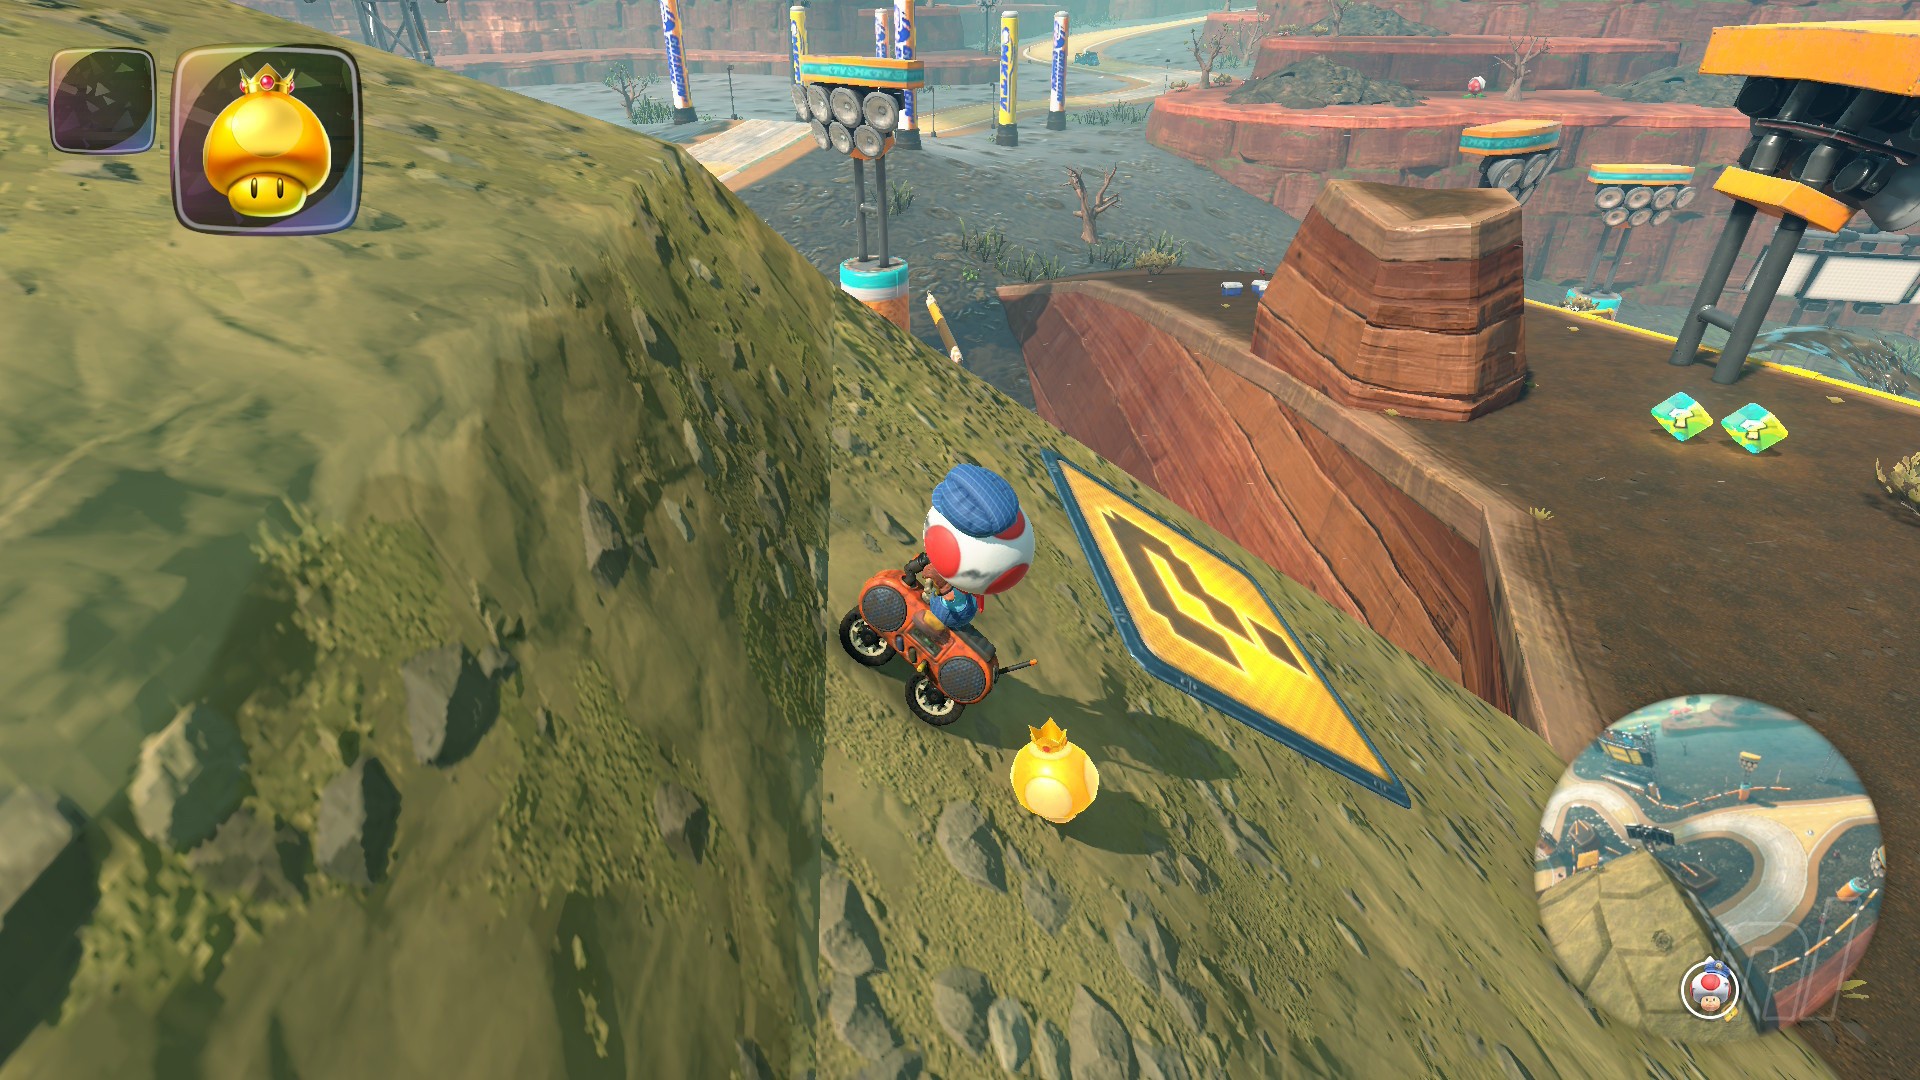
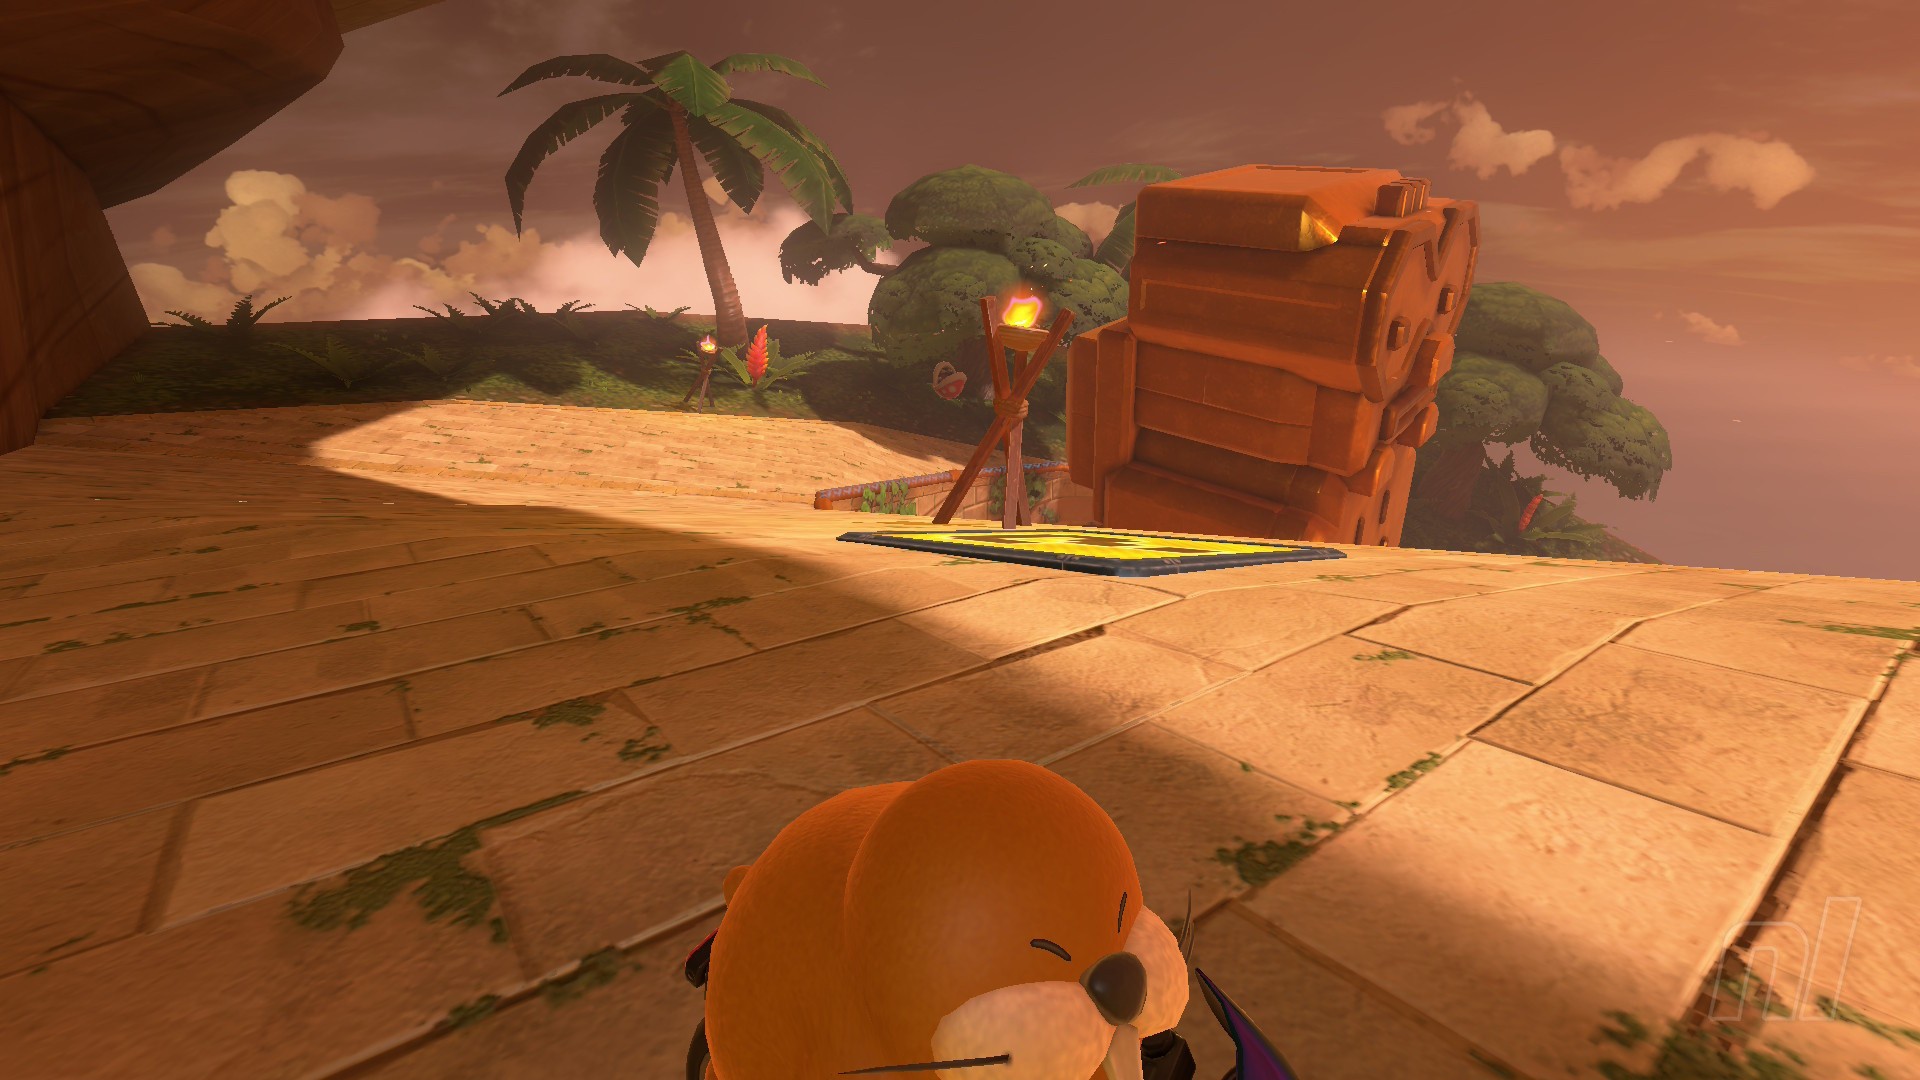
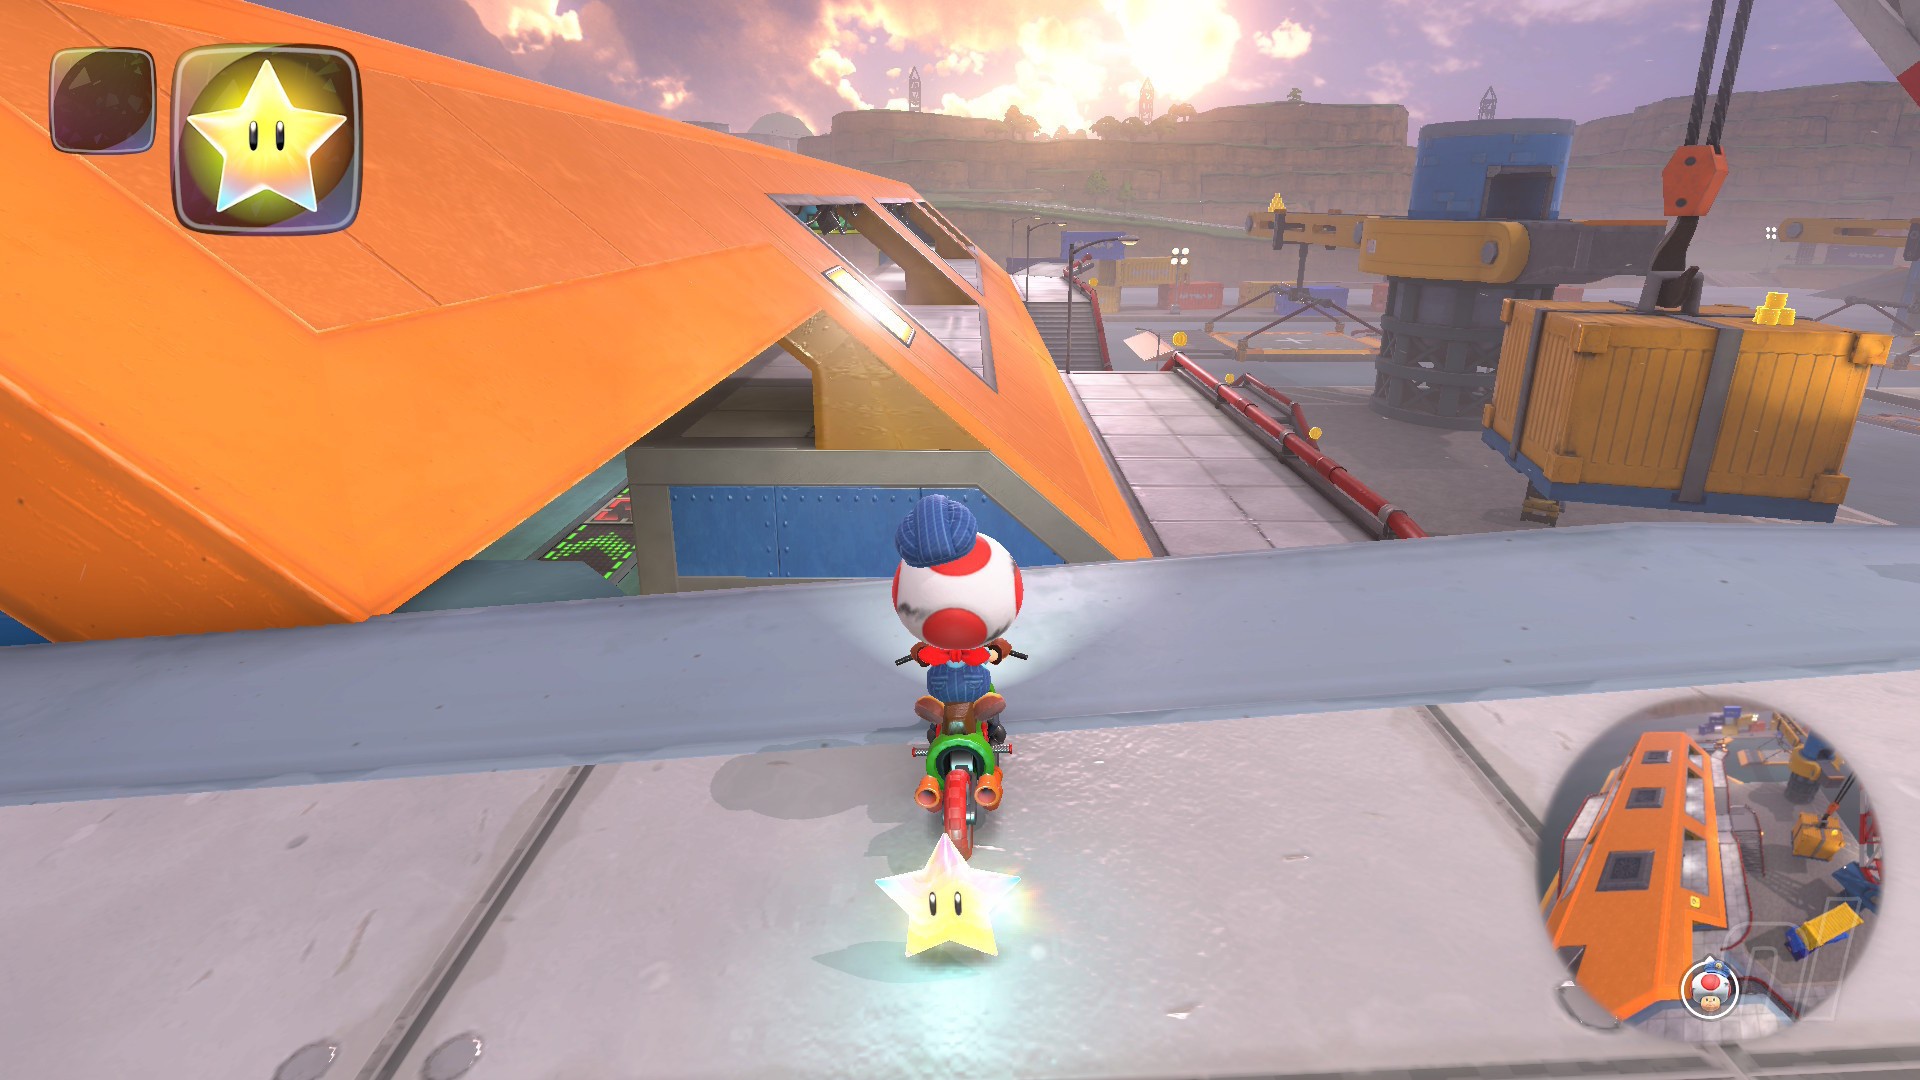
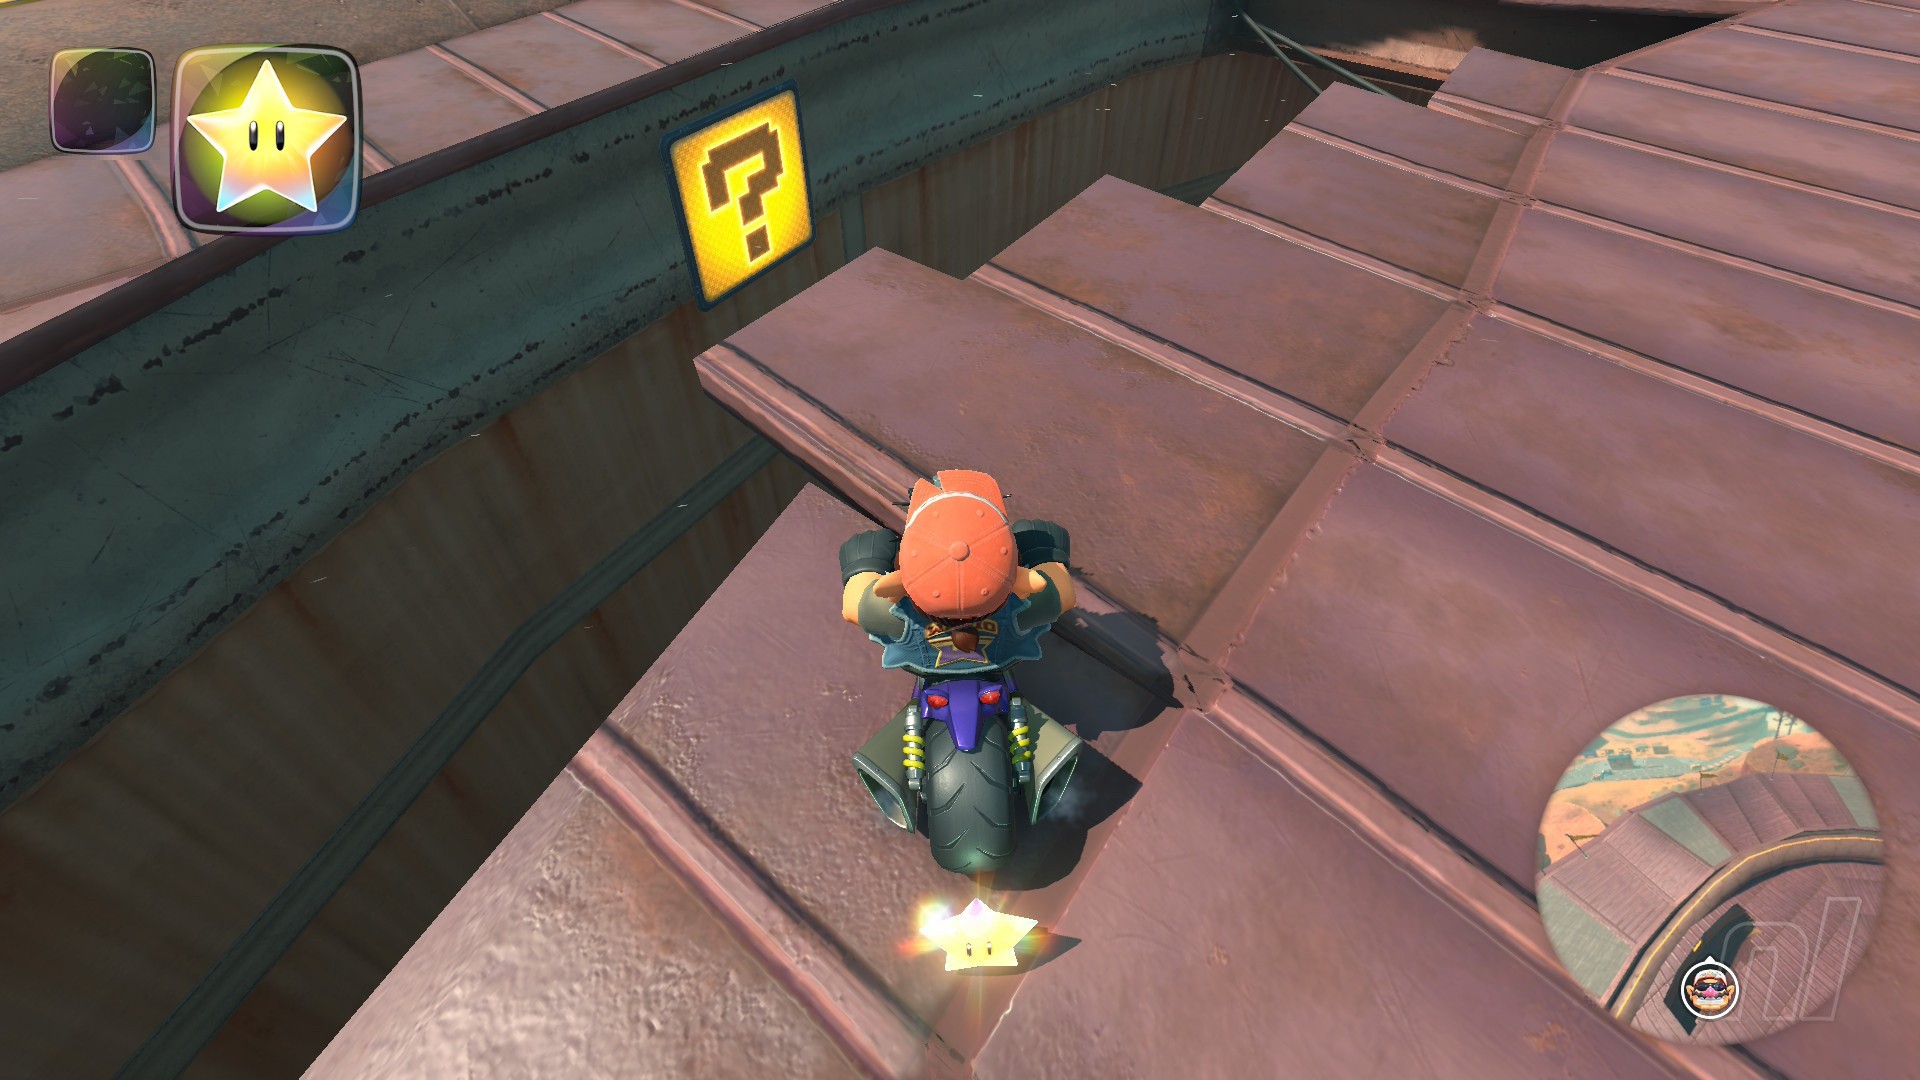
Toad's Factory Question Panels
Number of panels: 5
Collectibles region: Lava
Panel 1

Location: Go left from the starting line towards a Yoshi's drive-thru. Behind the diner is a ramp, but don't go up it. Look at the wall and you'll find a panel just past the drive-thru. Time to wall ride!
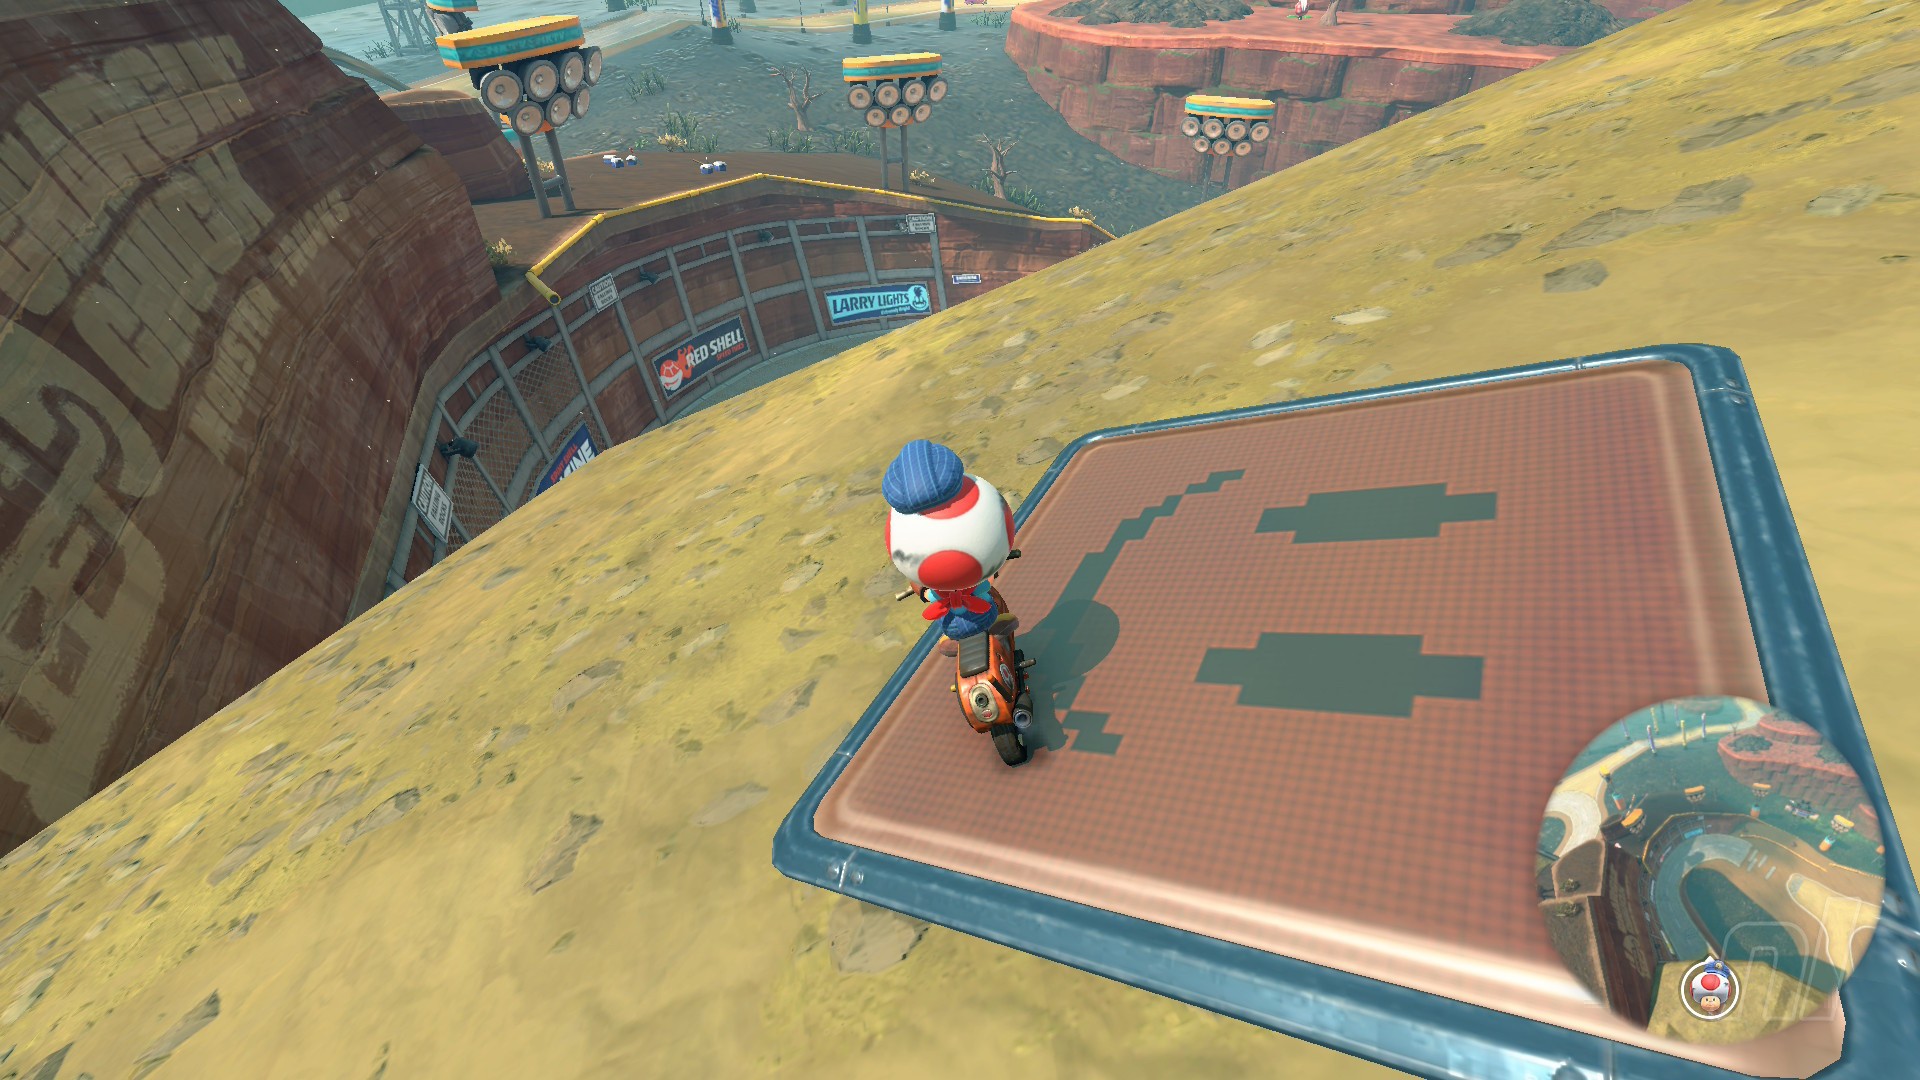
Panel 2
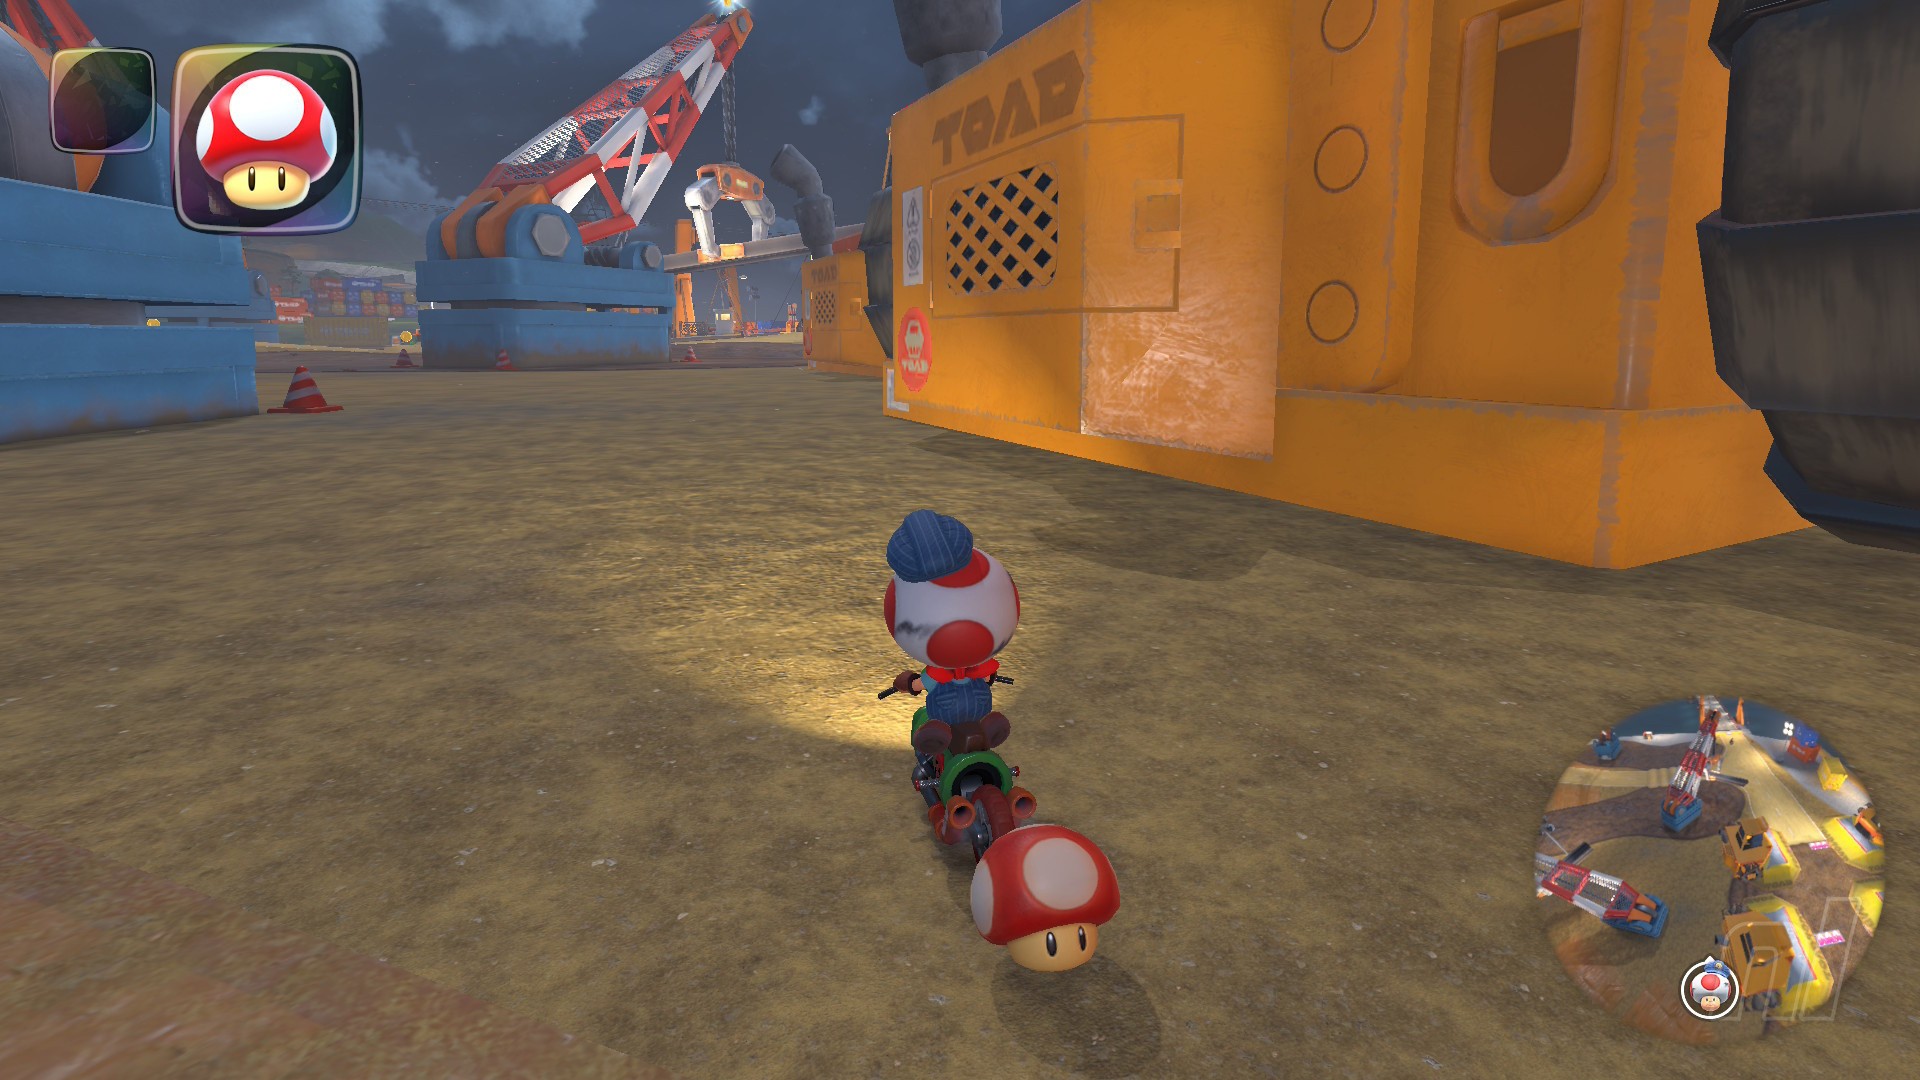
Location: Head towards the yellow bulldozers to the right of the starting line, and drive around to behind the row on the left. Underneath the middle construction vehicle is the next panel.
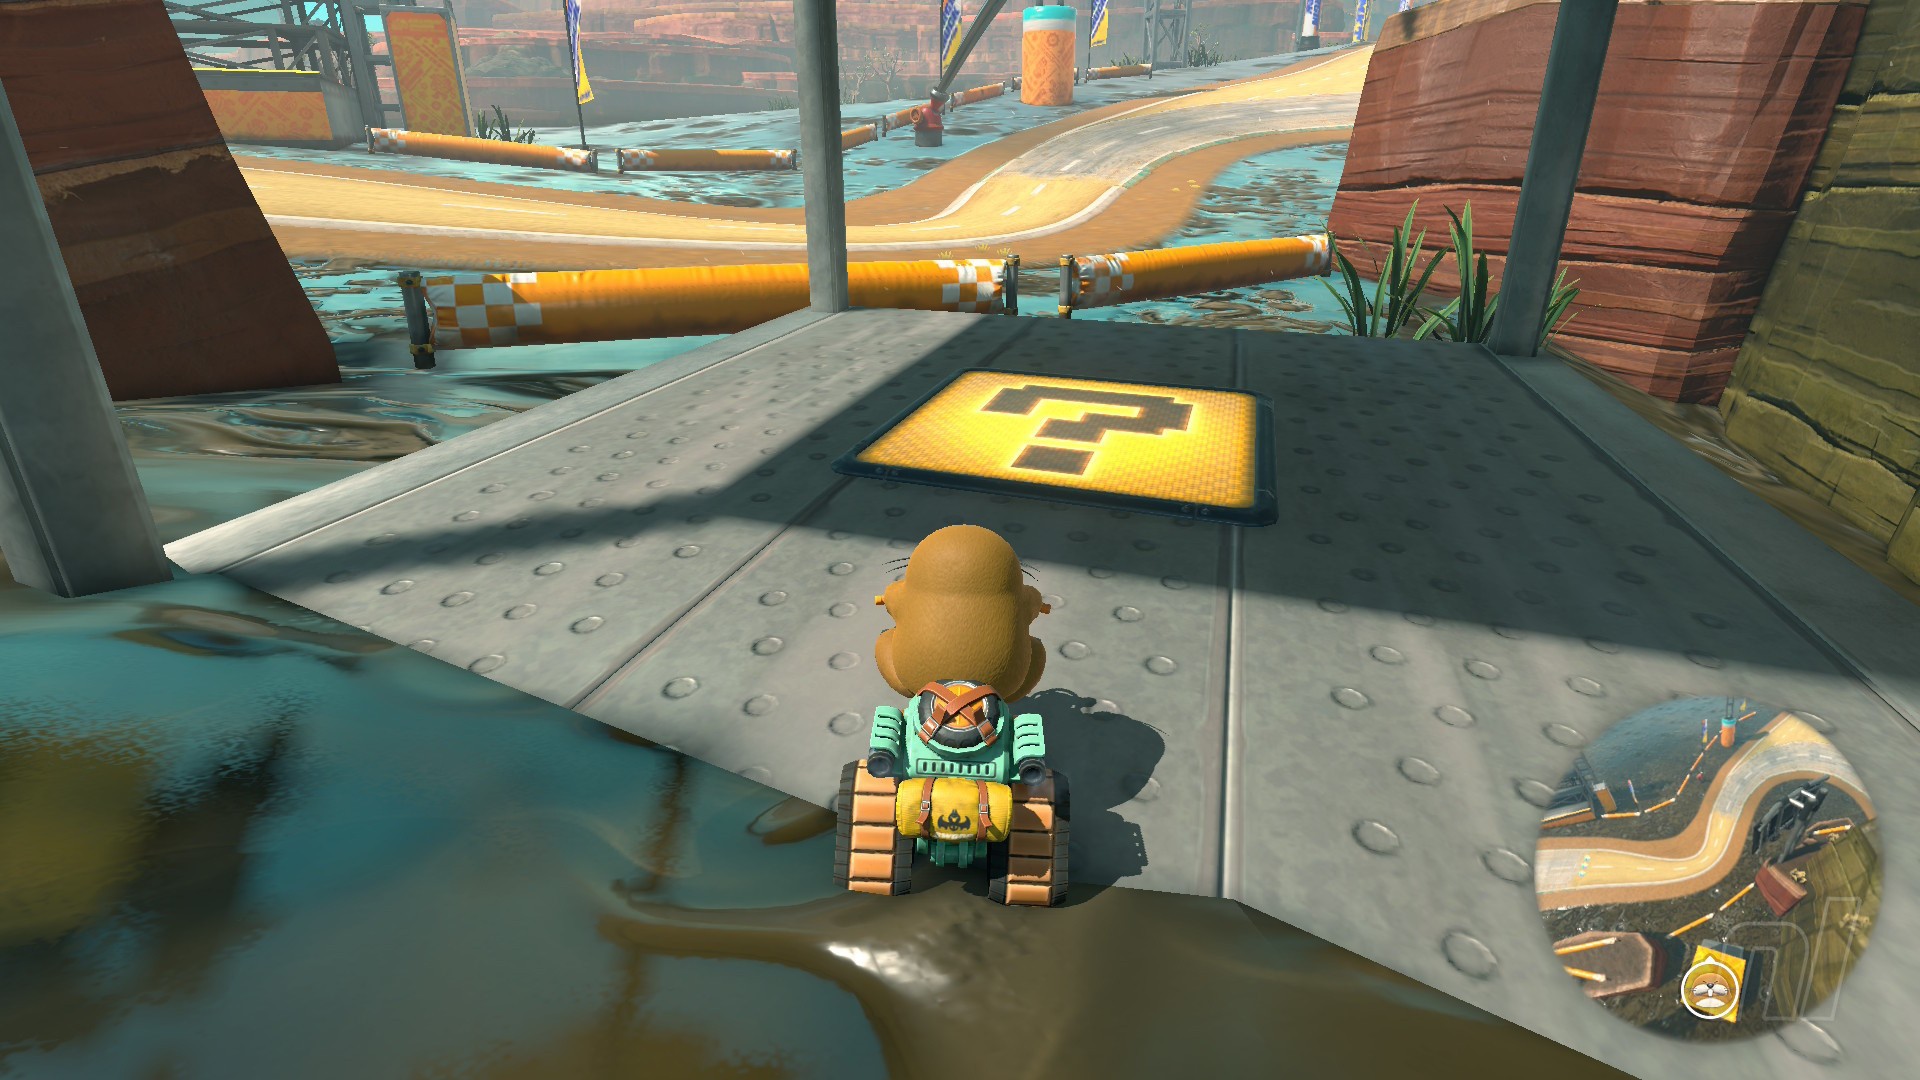
Panel 3

Location: This one's very easy; head up to the metal dome and drive up the stairs. Underneath the dome, you'll find this panel.
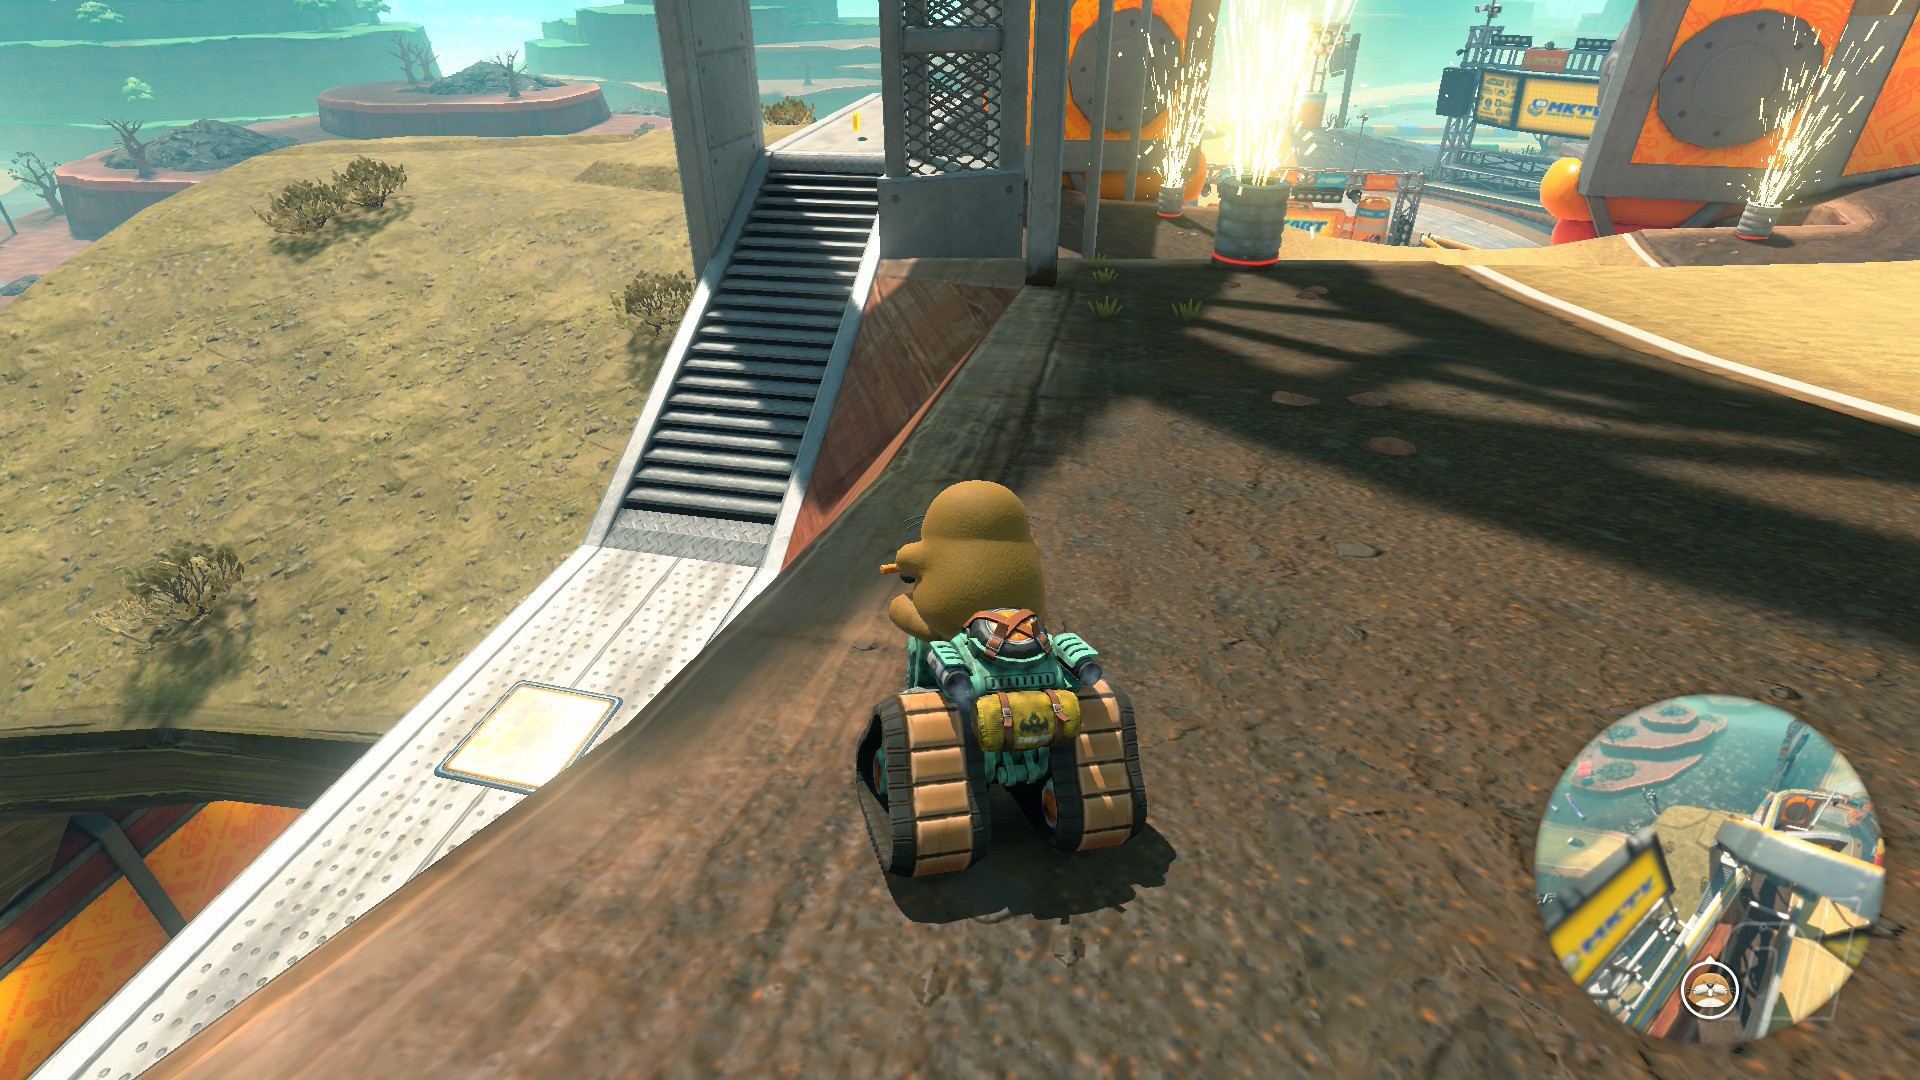
Panel 4
Location: Once again, this one is by the metal dome, but you just need to drive around it to the roof of the neighbouring building.
Panel 5
Location: It's back to the Yoshi's cart again, but you want to head up the stairs behind the blue dinosaur this time, to an orange roof. This panel is right ahead of you.
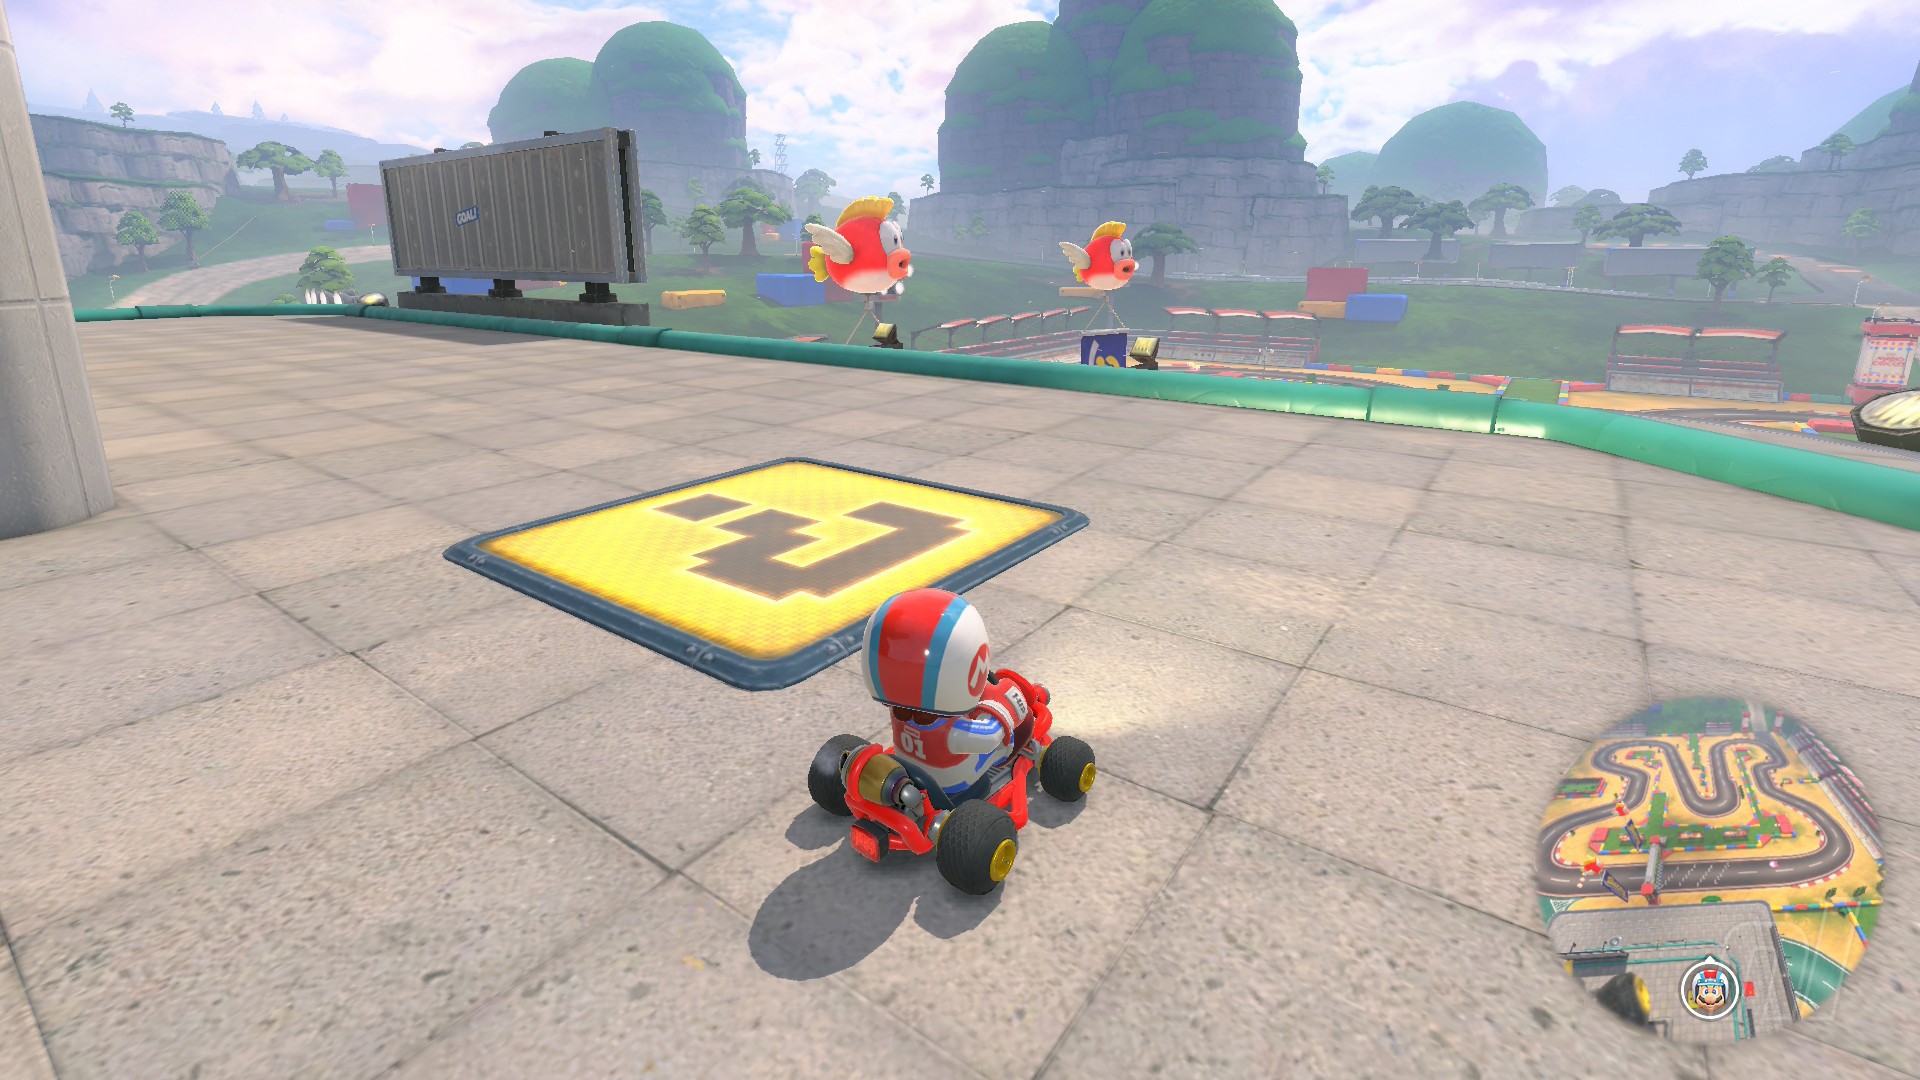
Wario Stadium Question Panels
Number of panels: 5
Collectibles region: Wild West
Panel 1
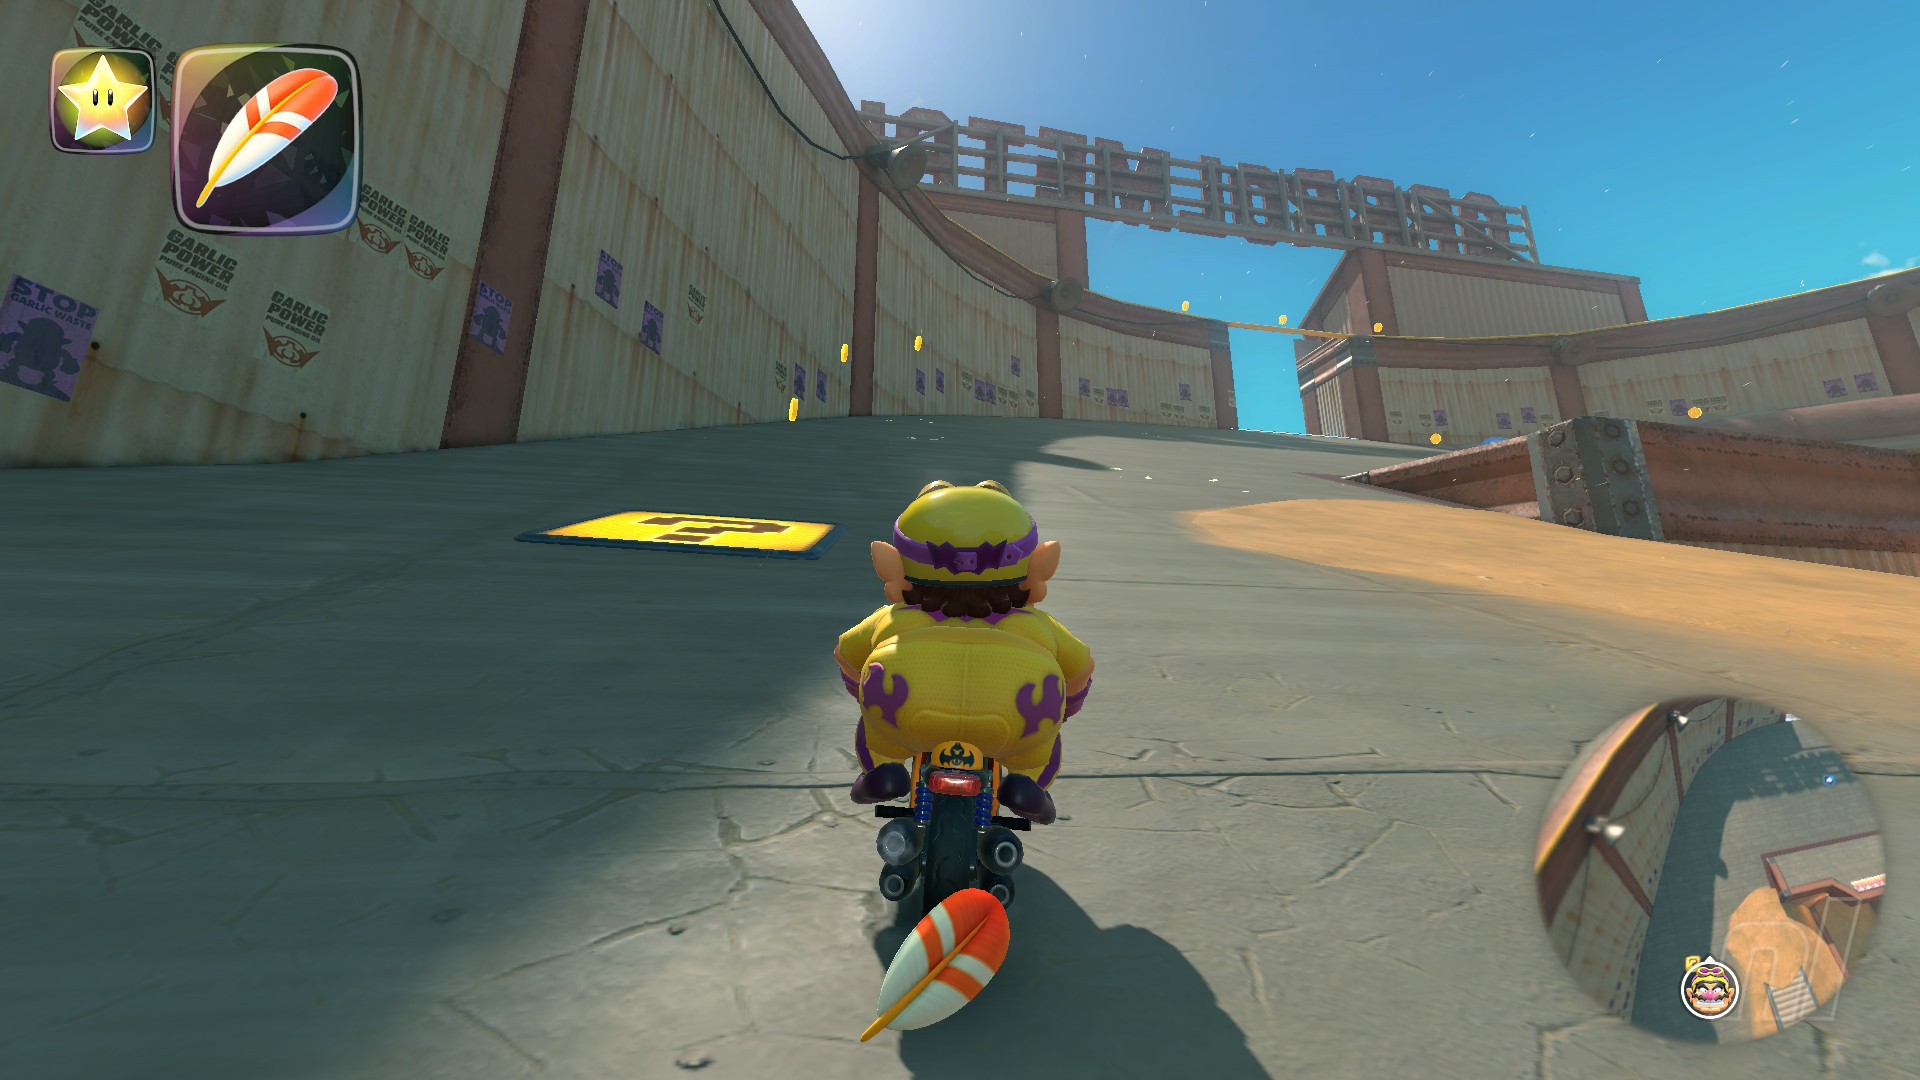
Location: Head to the course's entrance form the start line (you'll need to turn around) but instead of leaving, head up the left ramp to find a panel.
Panel 2
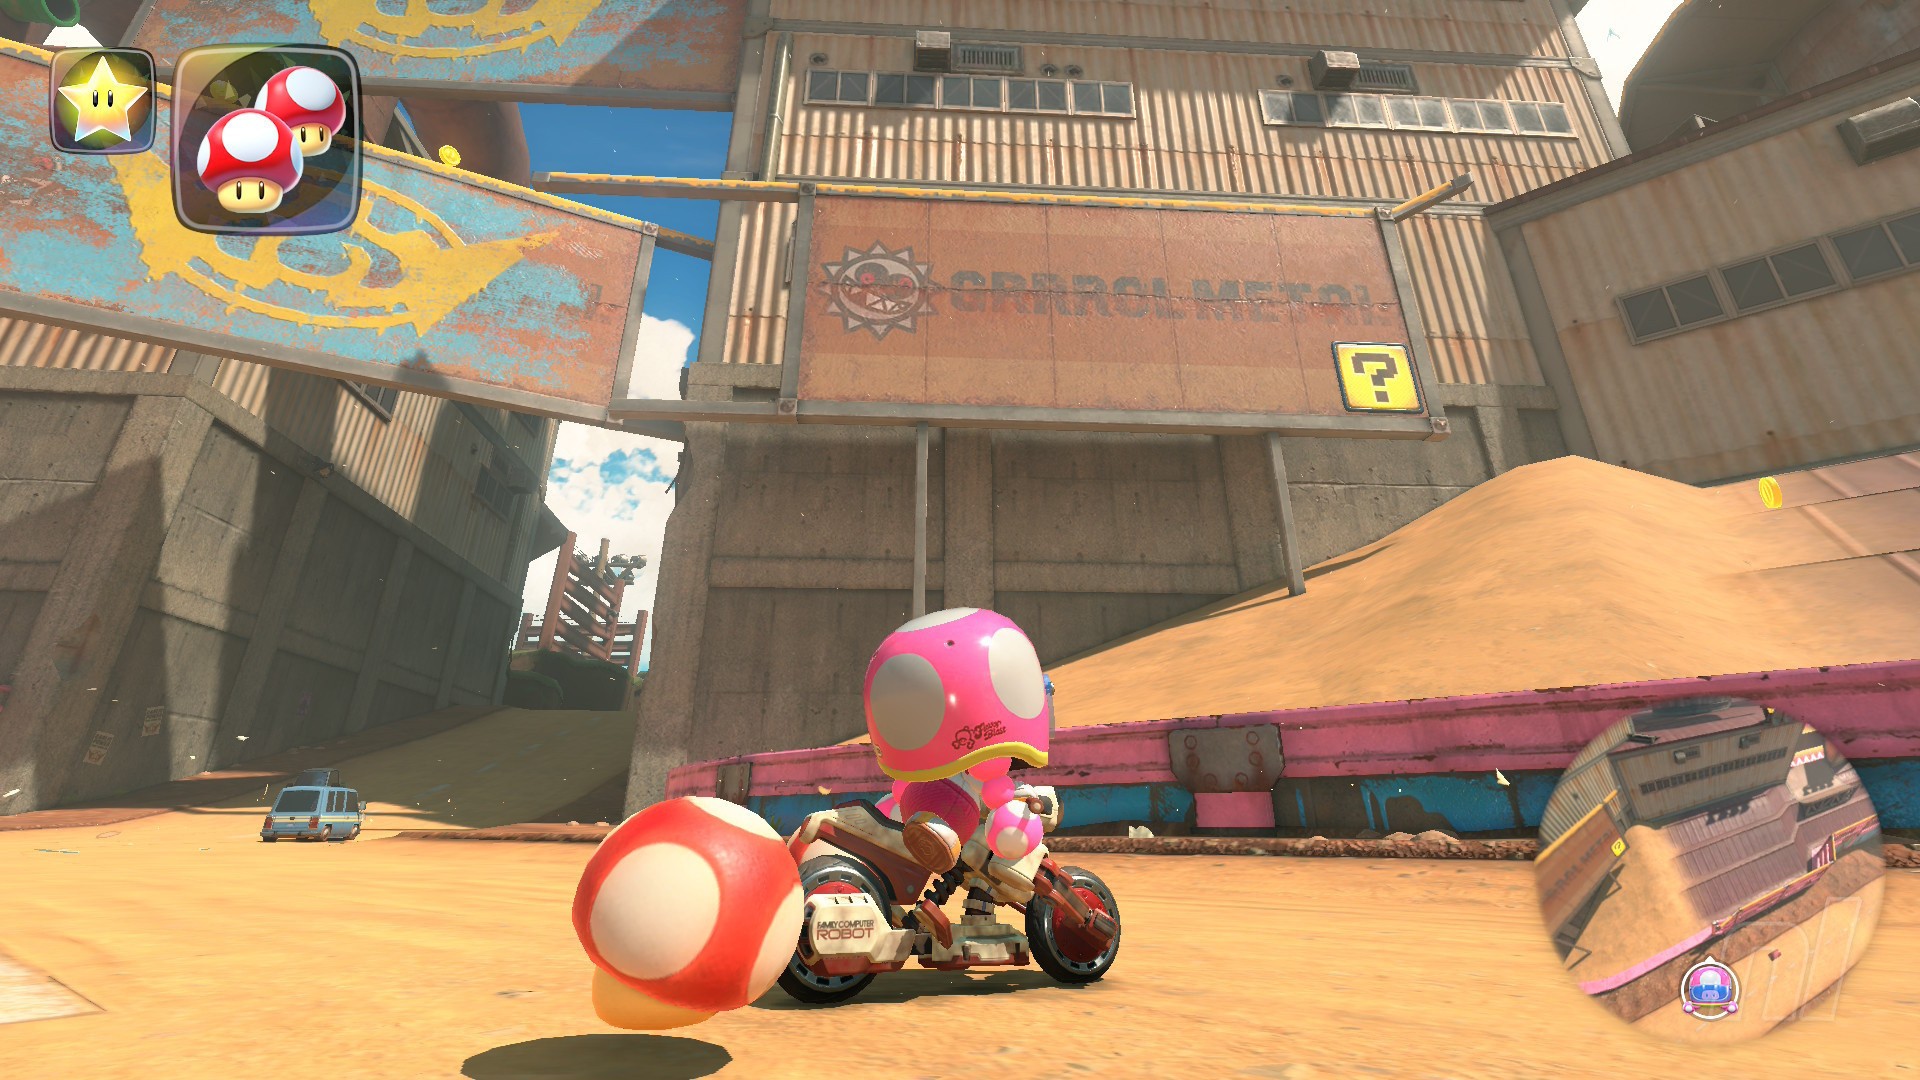
Location: As you drive through the course normally, look to the right where you'll see a faded Grrrol Metal sign and a panel in the bottom-right corner. To get it, you'll want to drive up the right side of the course and trick off of the mound of dirt to wall ride into it.
Panel 3

Location: This is very tricky to get. Basically, you'll want to head to the centre of the course — you can do this by going directly left through a hole in the wall from a start line. You'll see another panel on a Grrrol Metal sign. Use the crane closest it to grind towards it, then trick and wall ride into it. We had to use a feather to get this one!
Panel 4
Location: At the starting line, turn around and race to the giant booster ramp on the course. Use it to land on the platform to the left of the ramp, and then grind up to a higher spot on the roof. Look down the hole here for the panel.
Panel 5
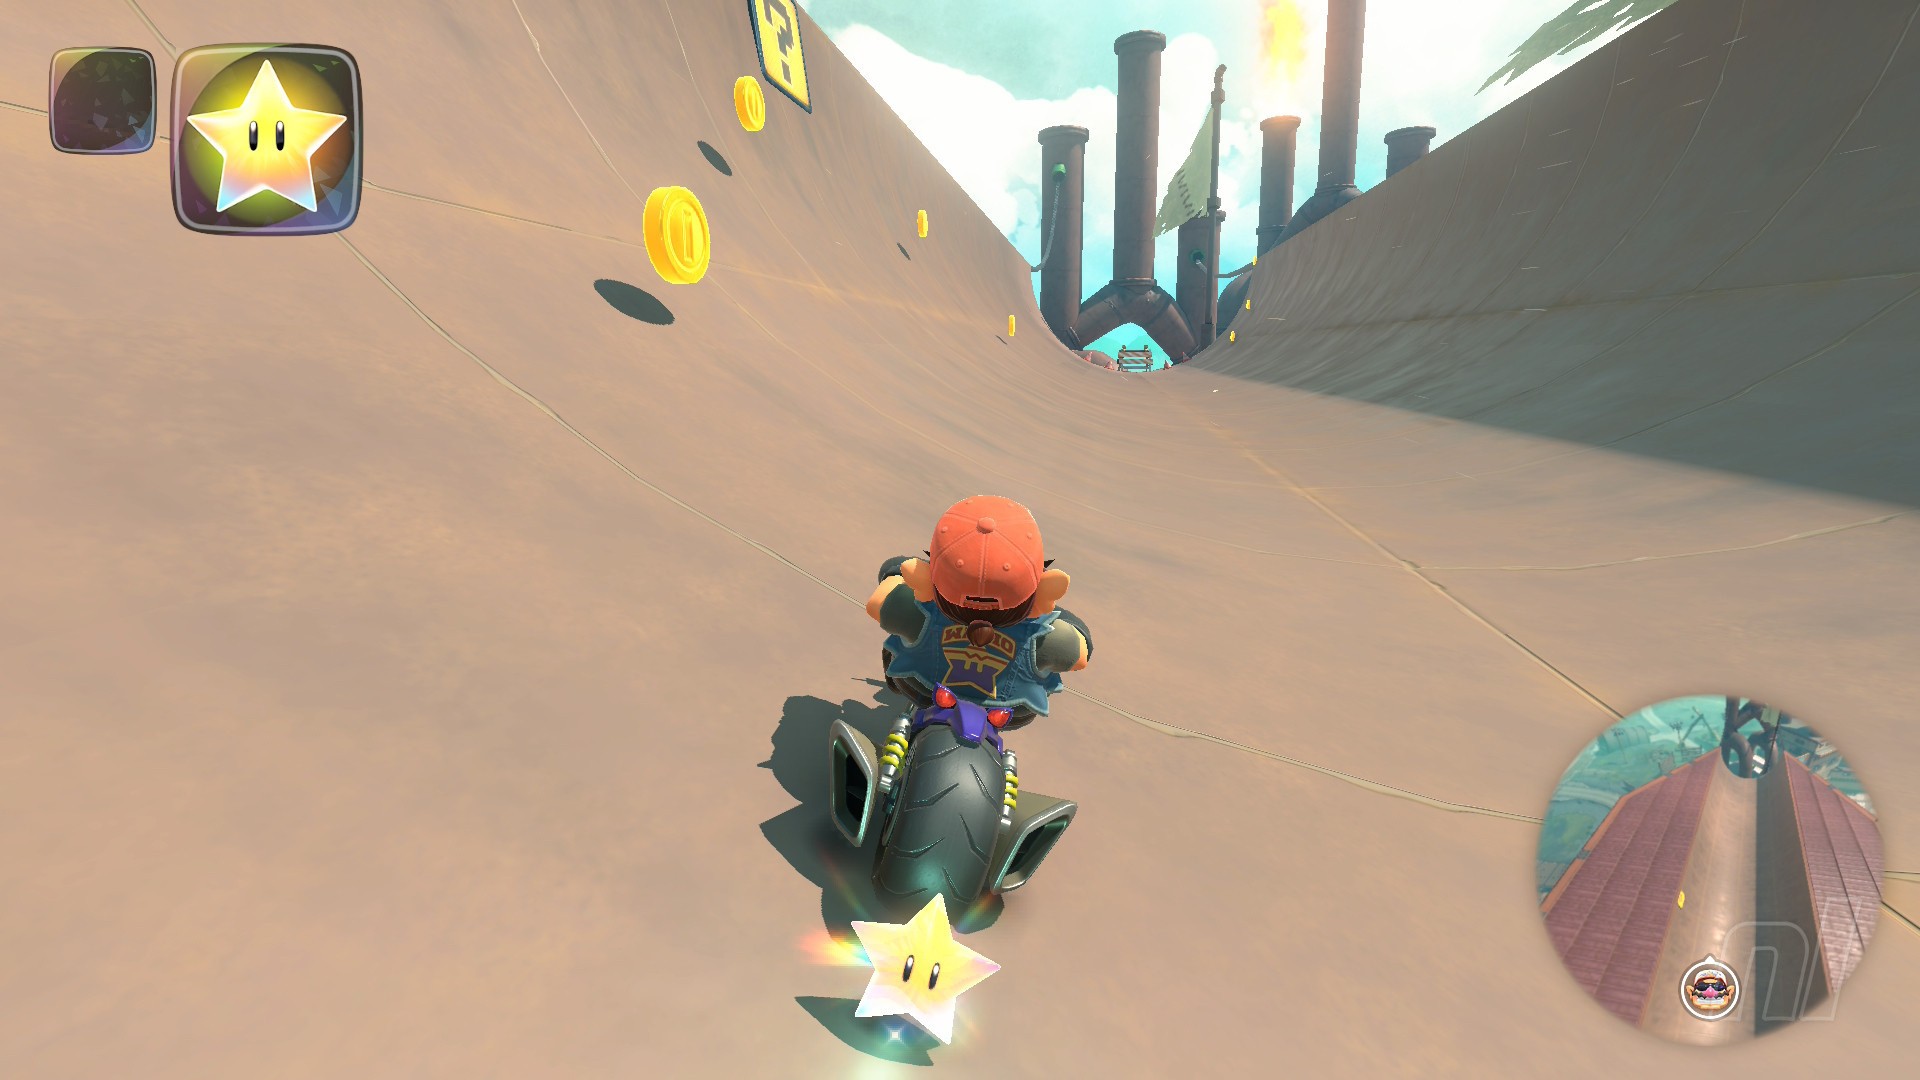
Location: Continue to race along the rooftops of Wario Stadium until you reach a halfpipe at the very top of the course. The Panel is on the left side of the pipe — a nice easy one to end this course on!
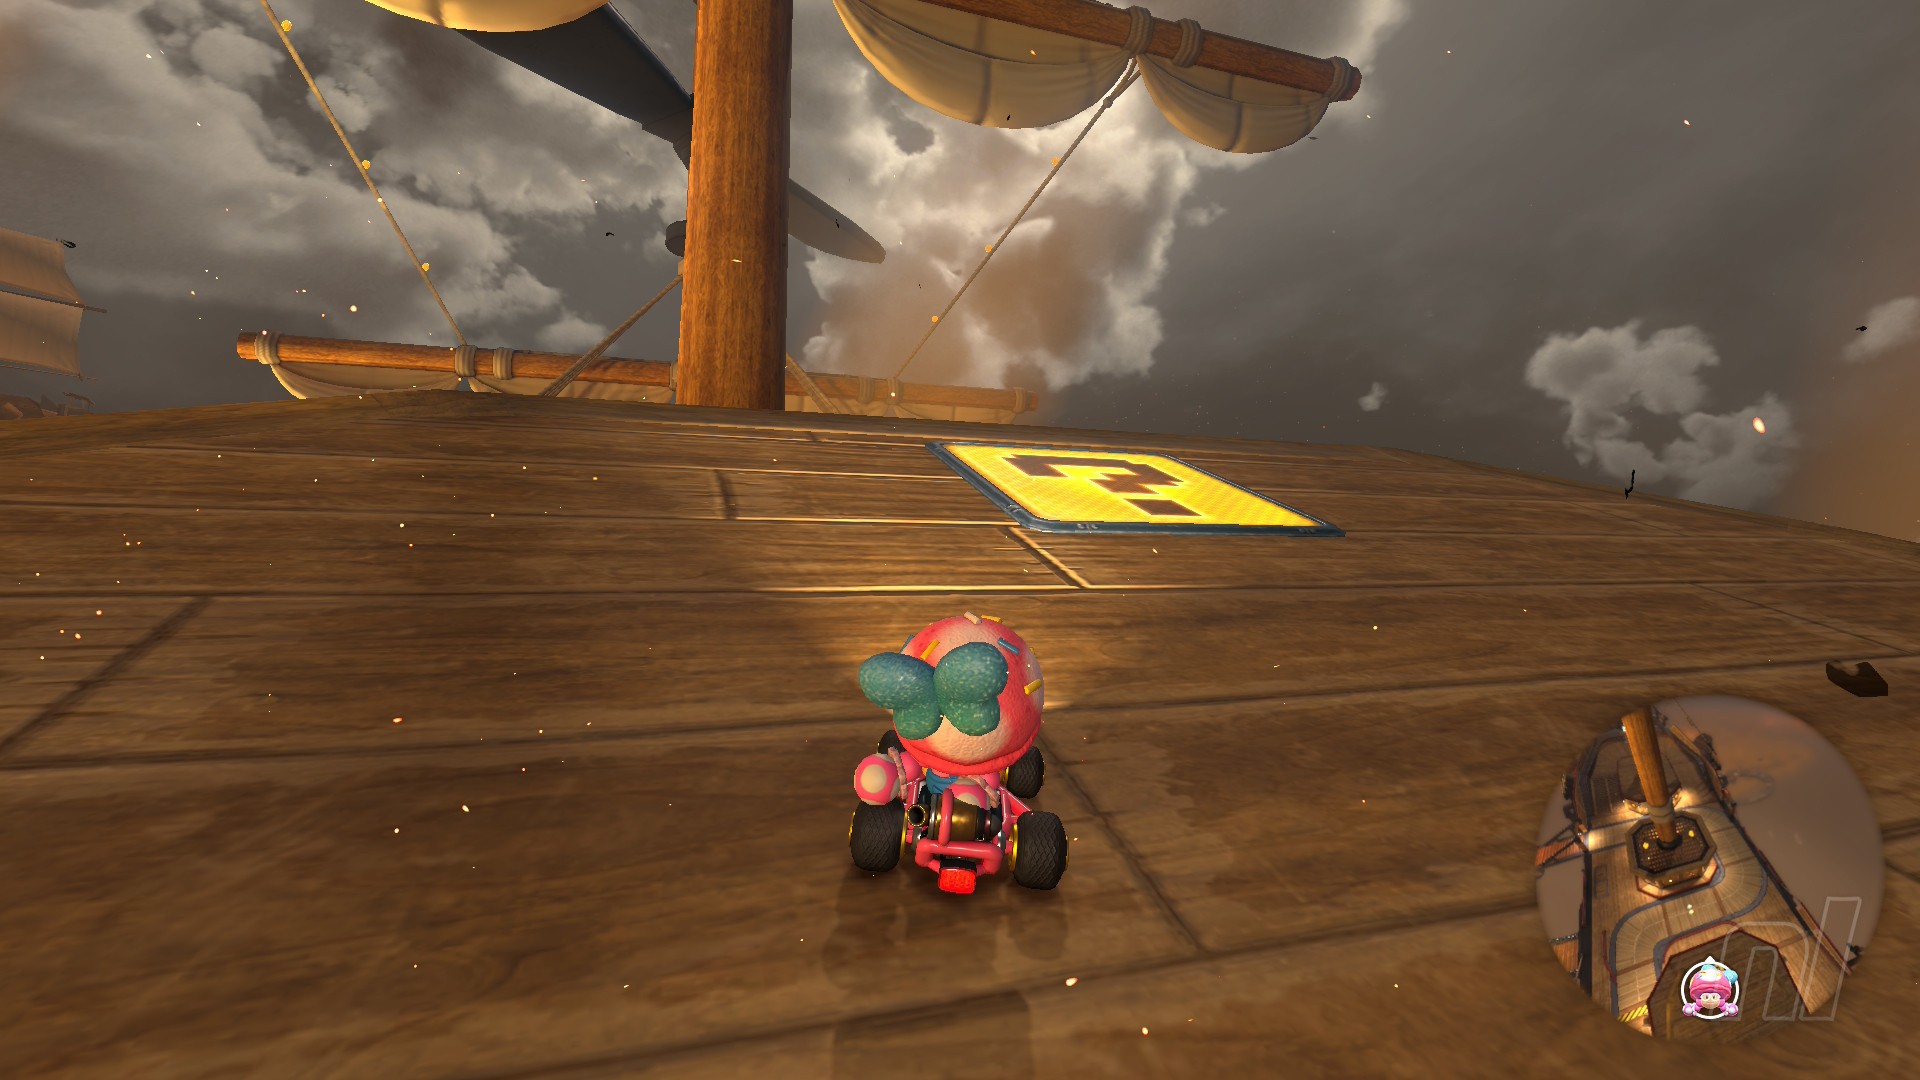
Wario's Shipyard (Galleon) Question Panels
Number of panels: 5
Collectibles region: Coastal
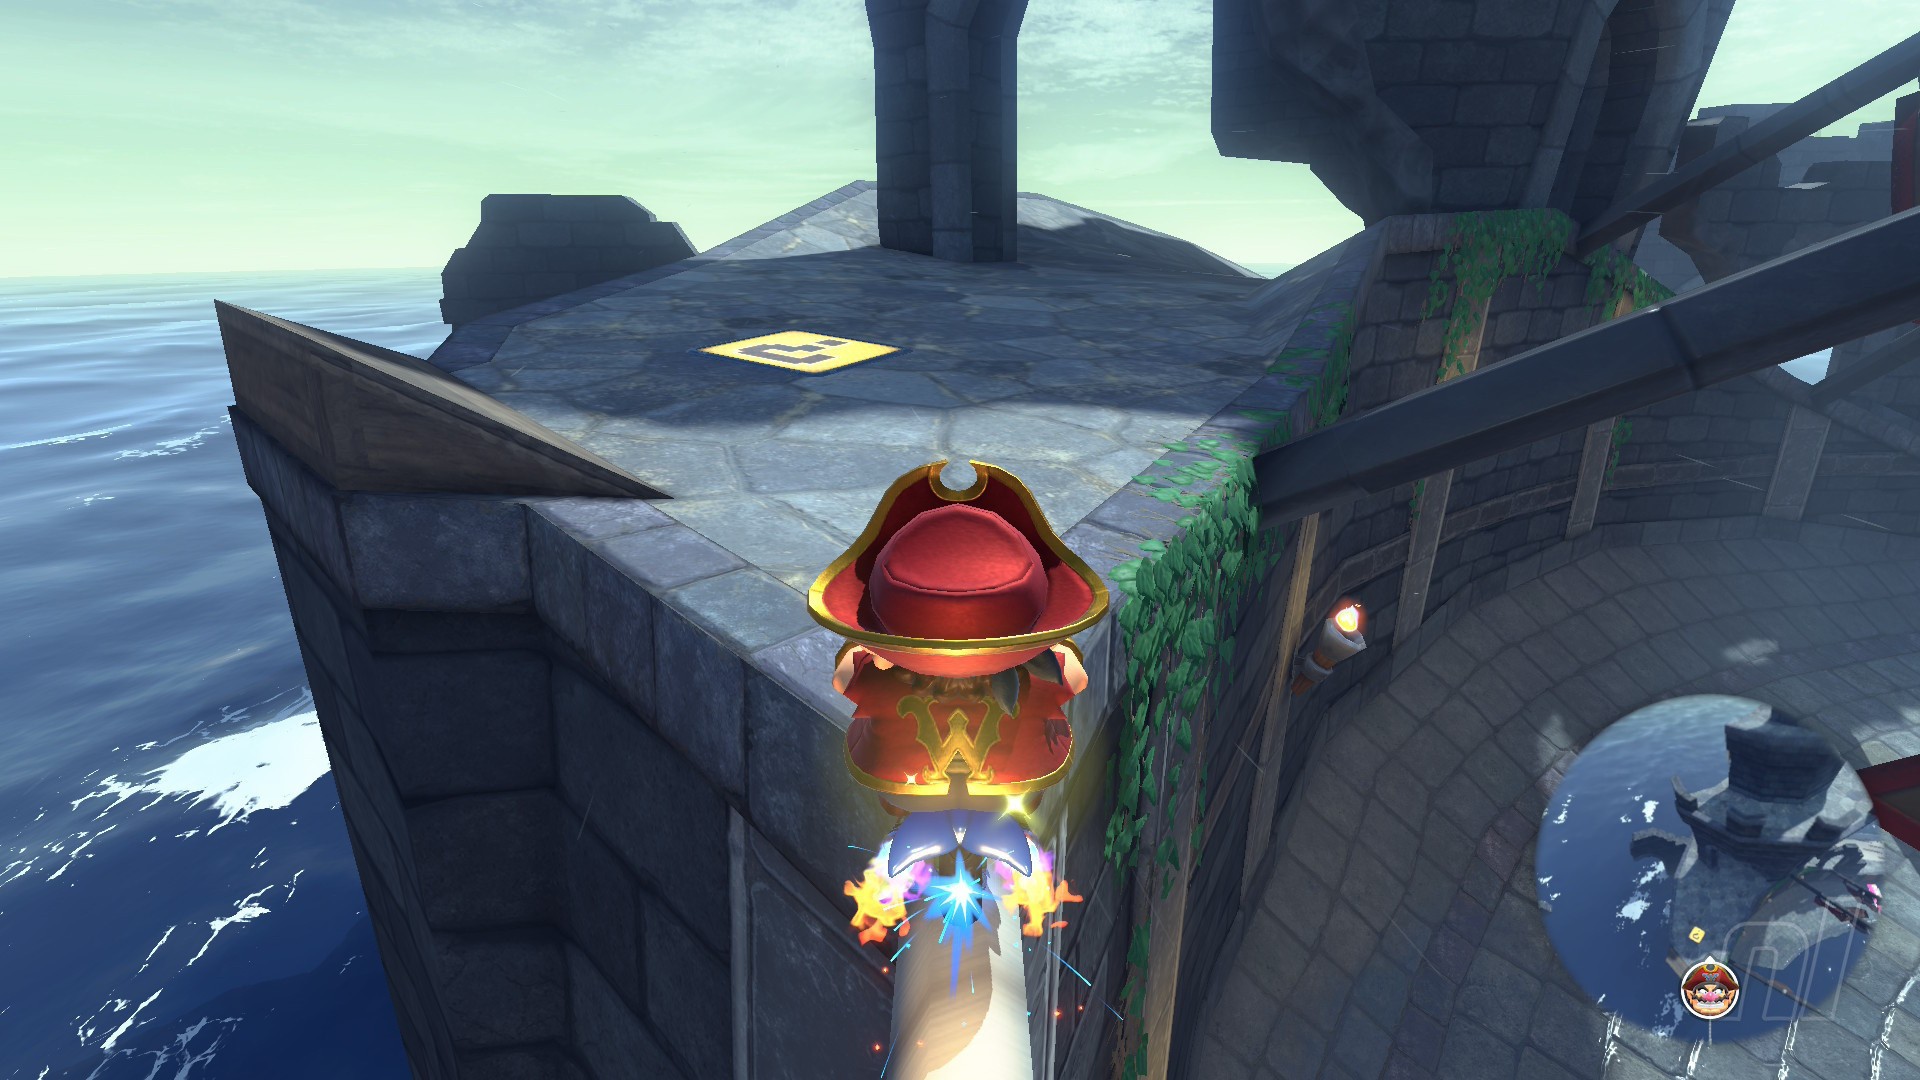
Panel 1
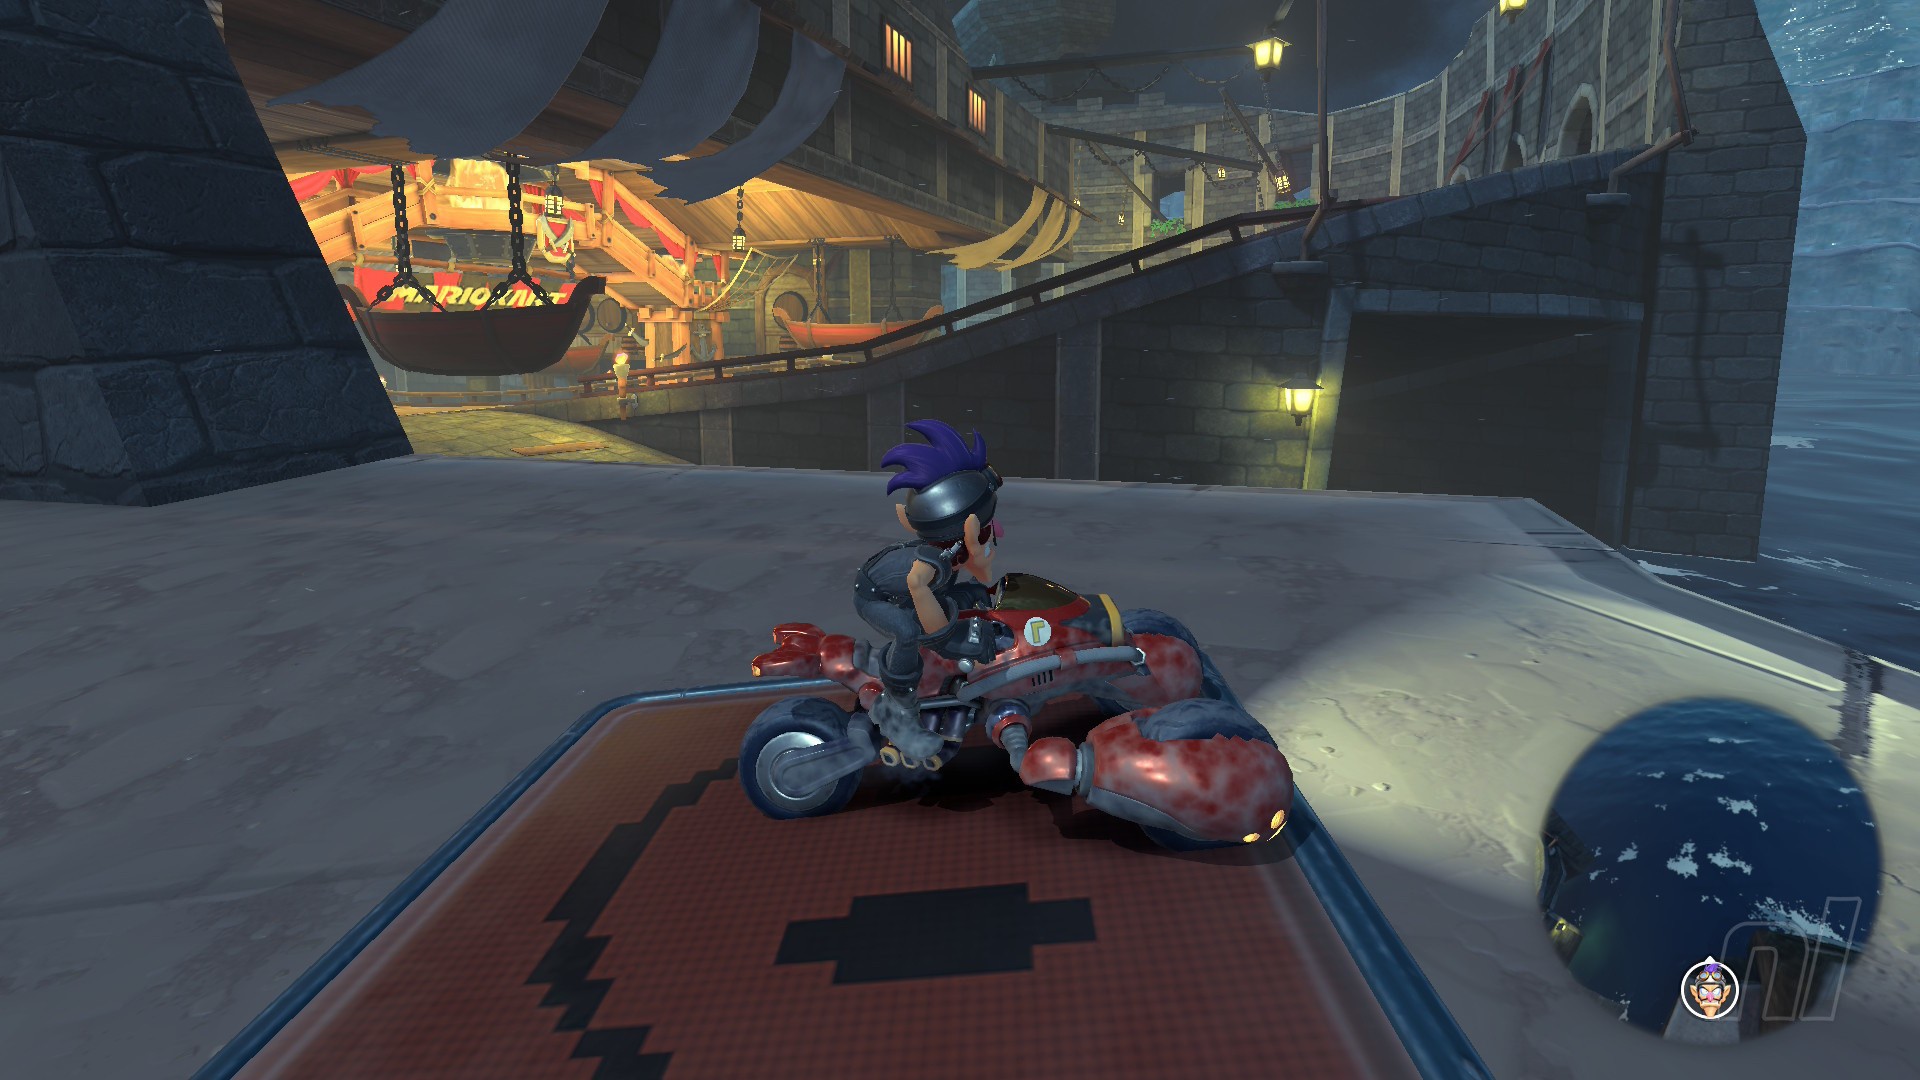
Location: Take a sharp left at the starting line and follow the bend around to reach the panel here.
Panel 2
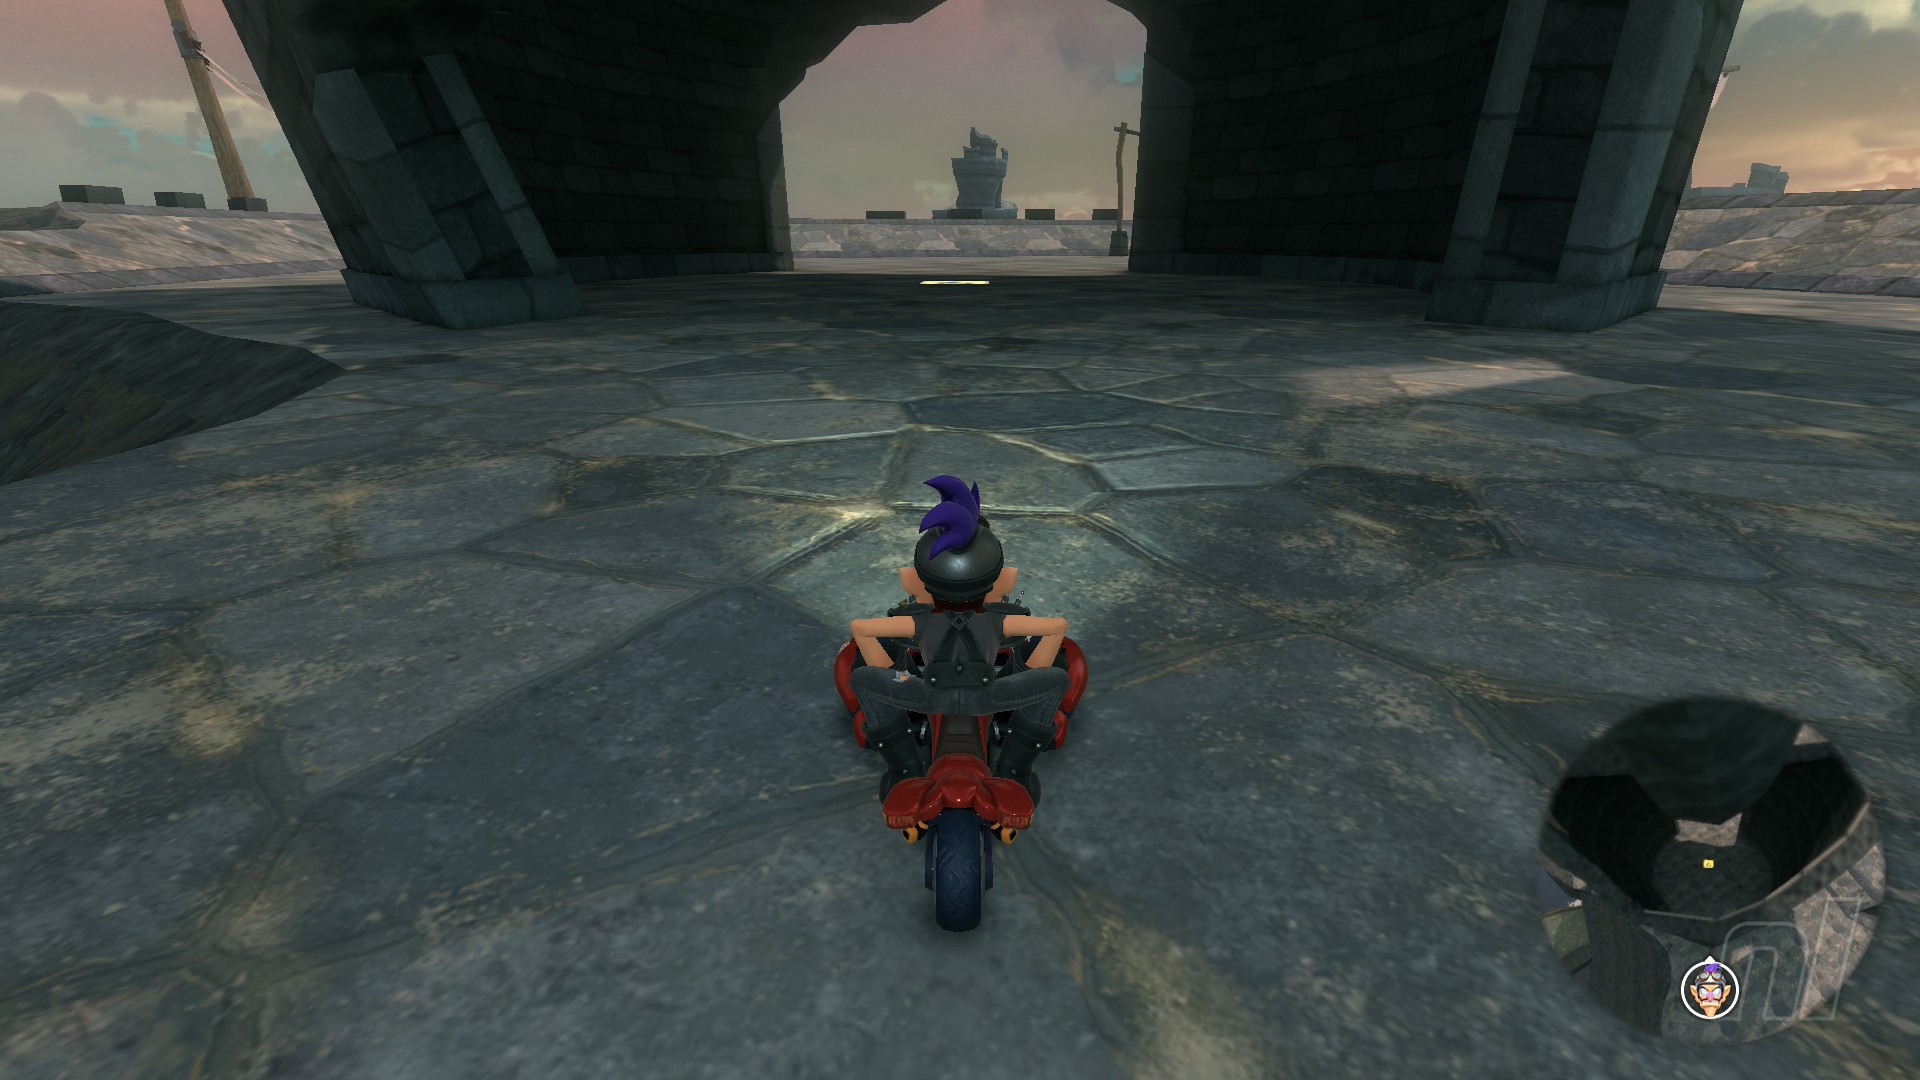
Location: This panel is situated inside a fortress, which you'll either need to use ropes to grind to or approach from the sandbanks at the centre of the course.
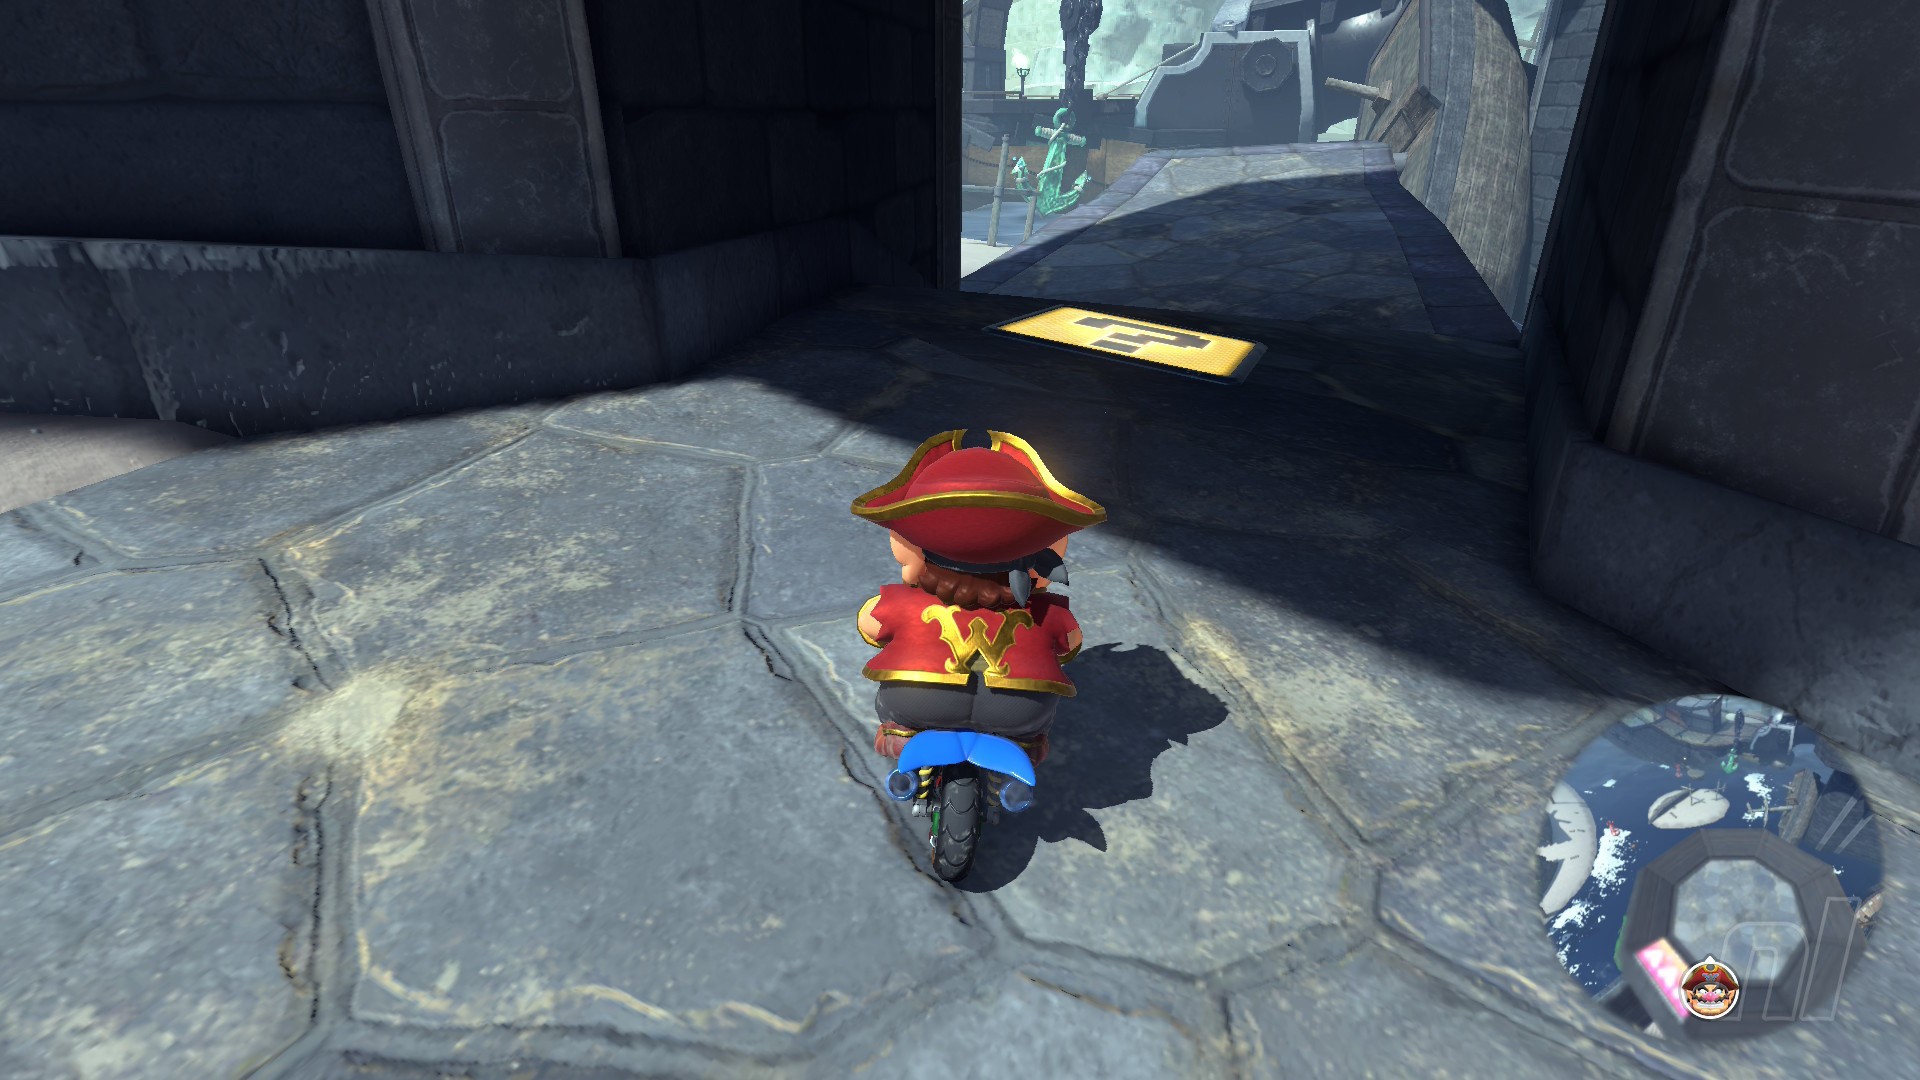
Panel 3
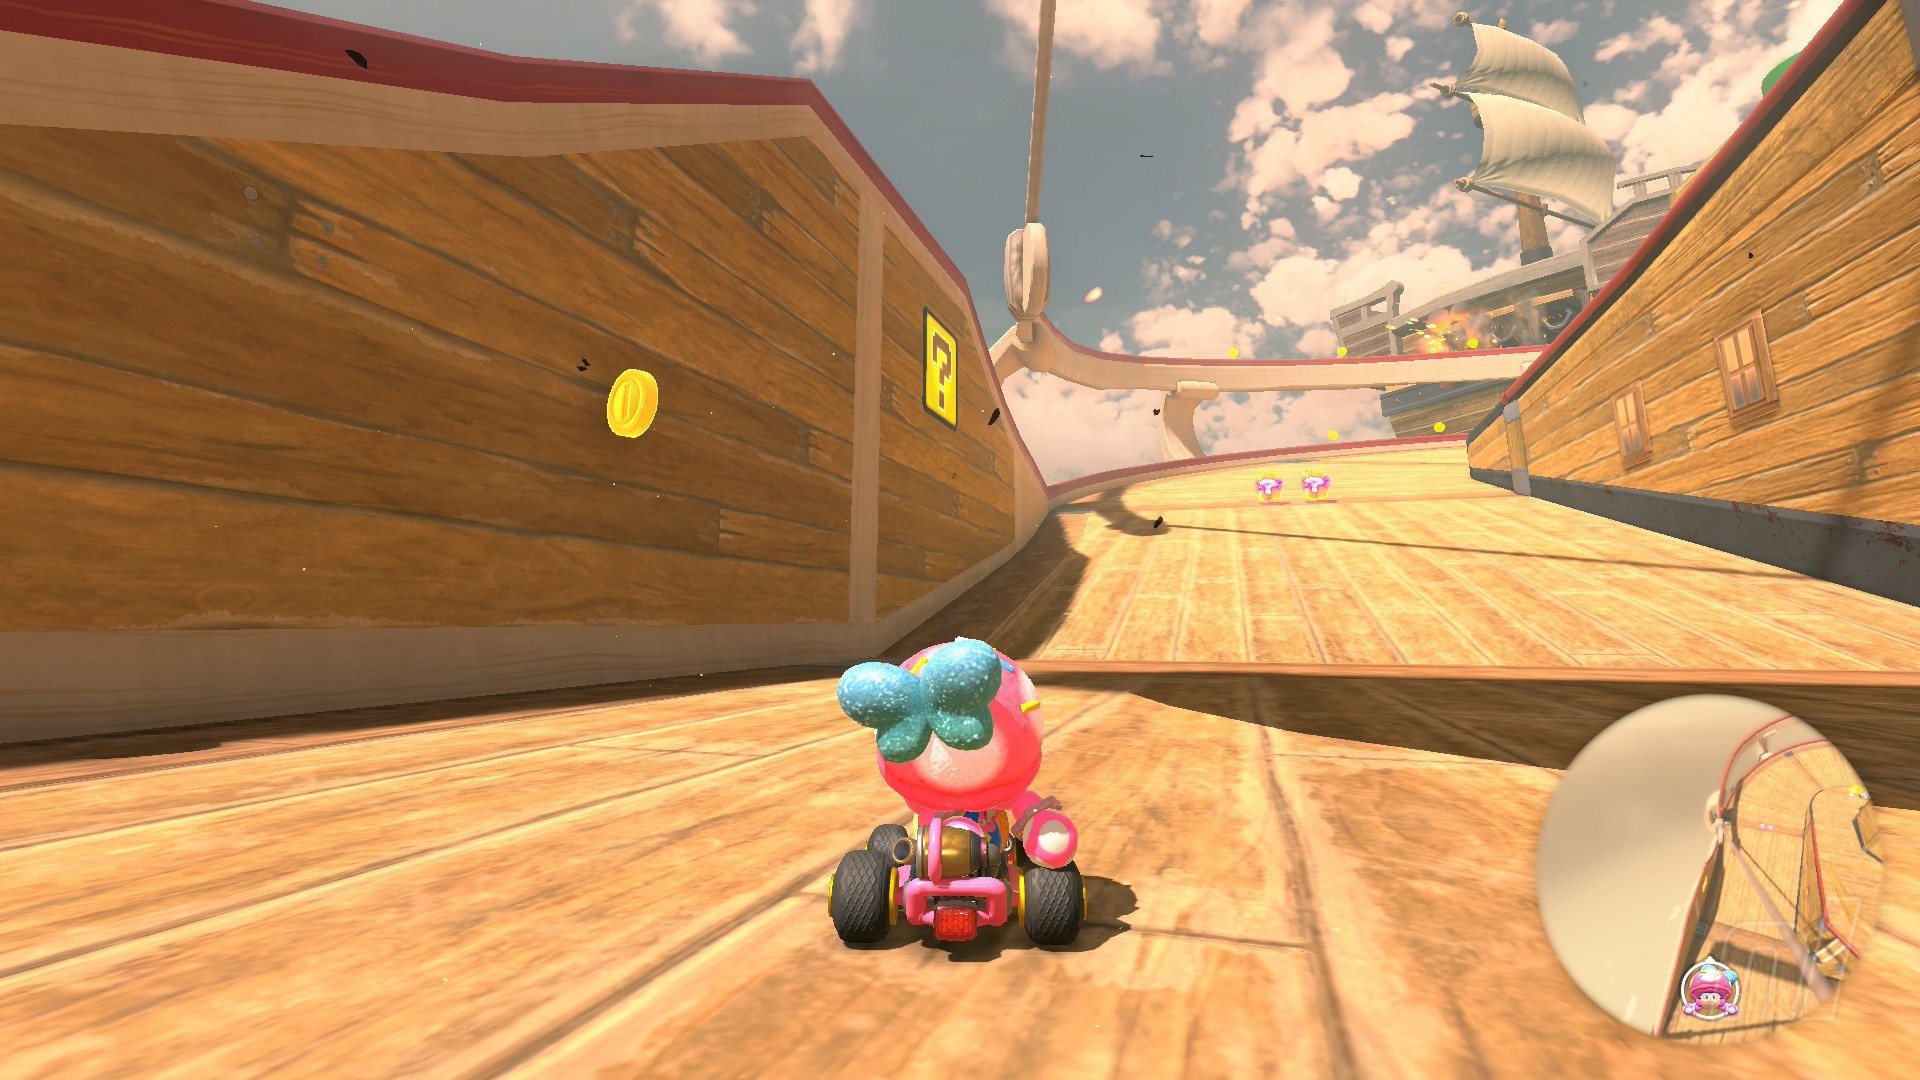
Location: On the ship where the cannon will shoot you out, drive straight past it and continue around the boat to reach the panel.
Panel 4
Location: Use the ropes around the course to grind over to a panel next to a small ramp, just above the quarter-pipe bend.
Panel 5
Location: Close to the Yoshi's food stand off from the left side of the starting line.
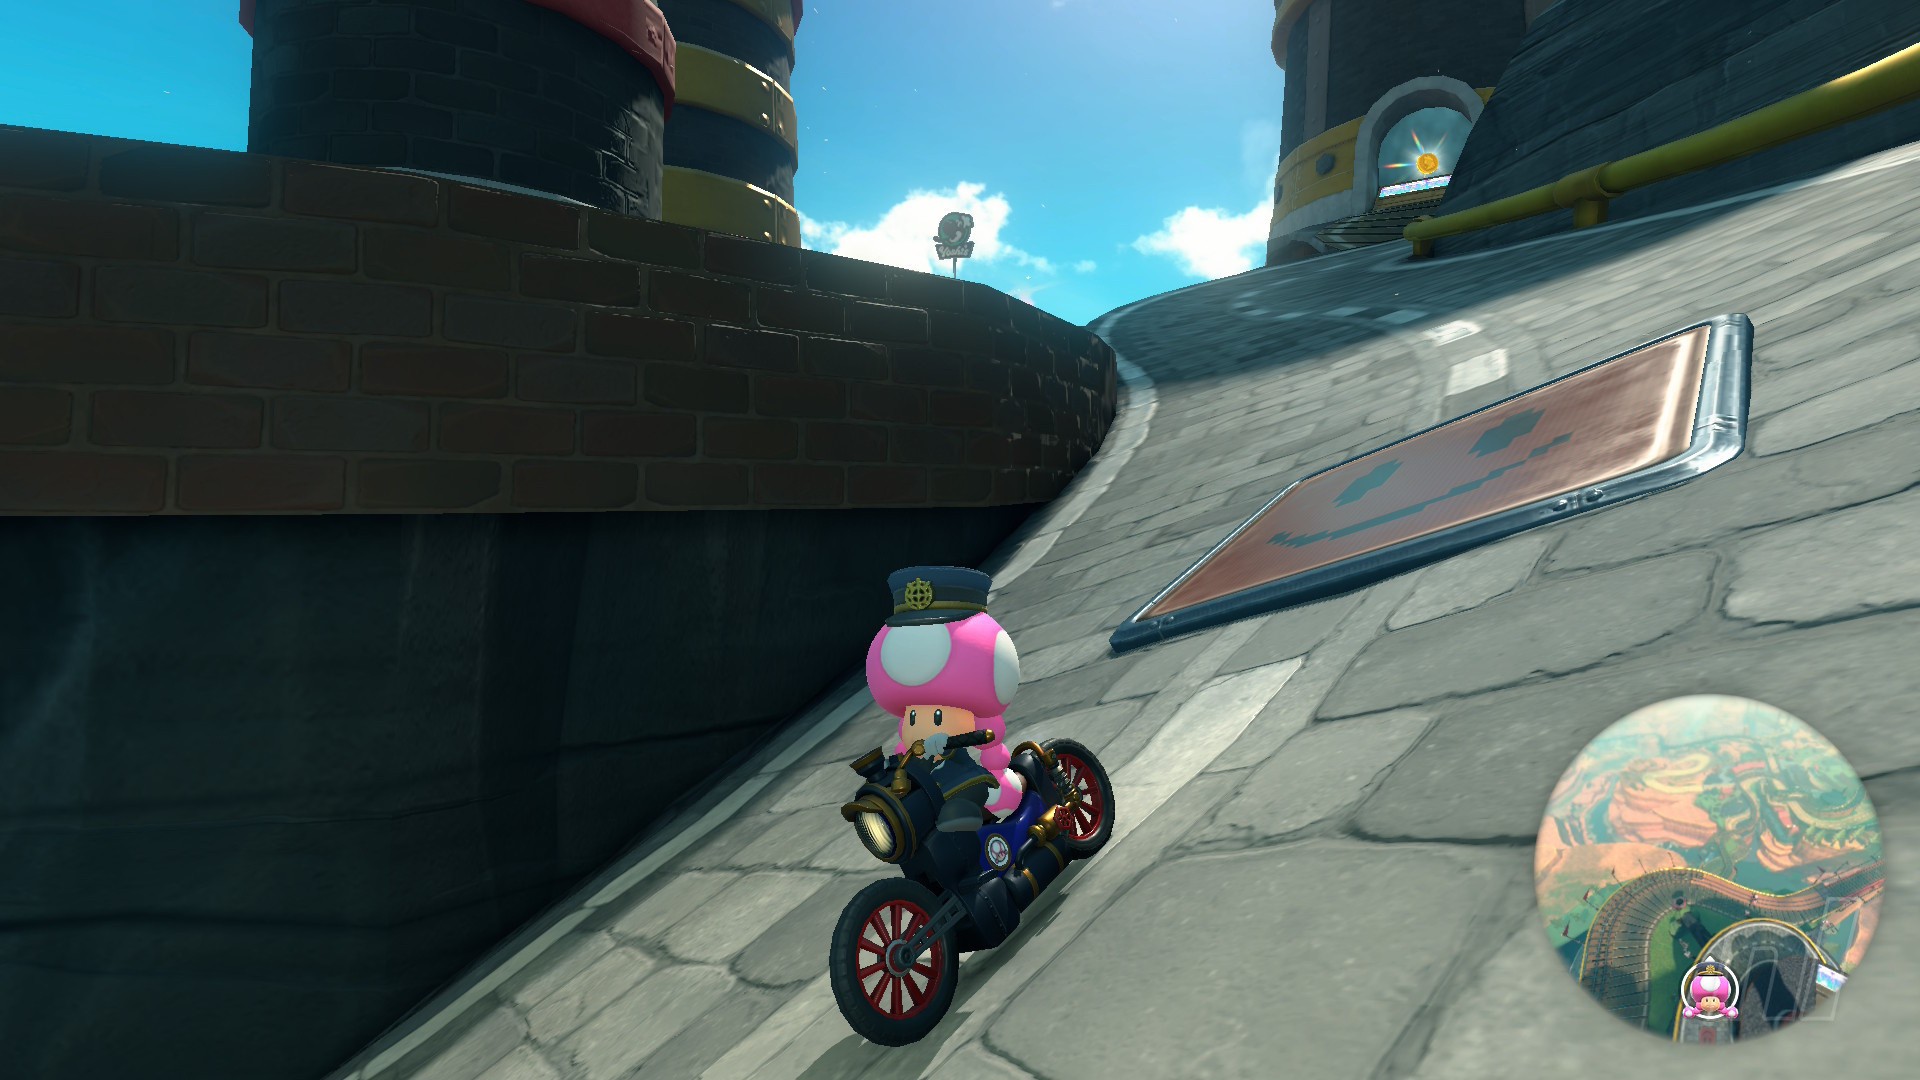
Whistlestop Summit Question Panels
Number of panels: 5
Collectibles region: Wild West
Panel 1
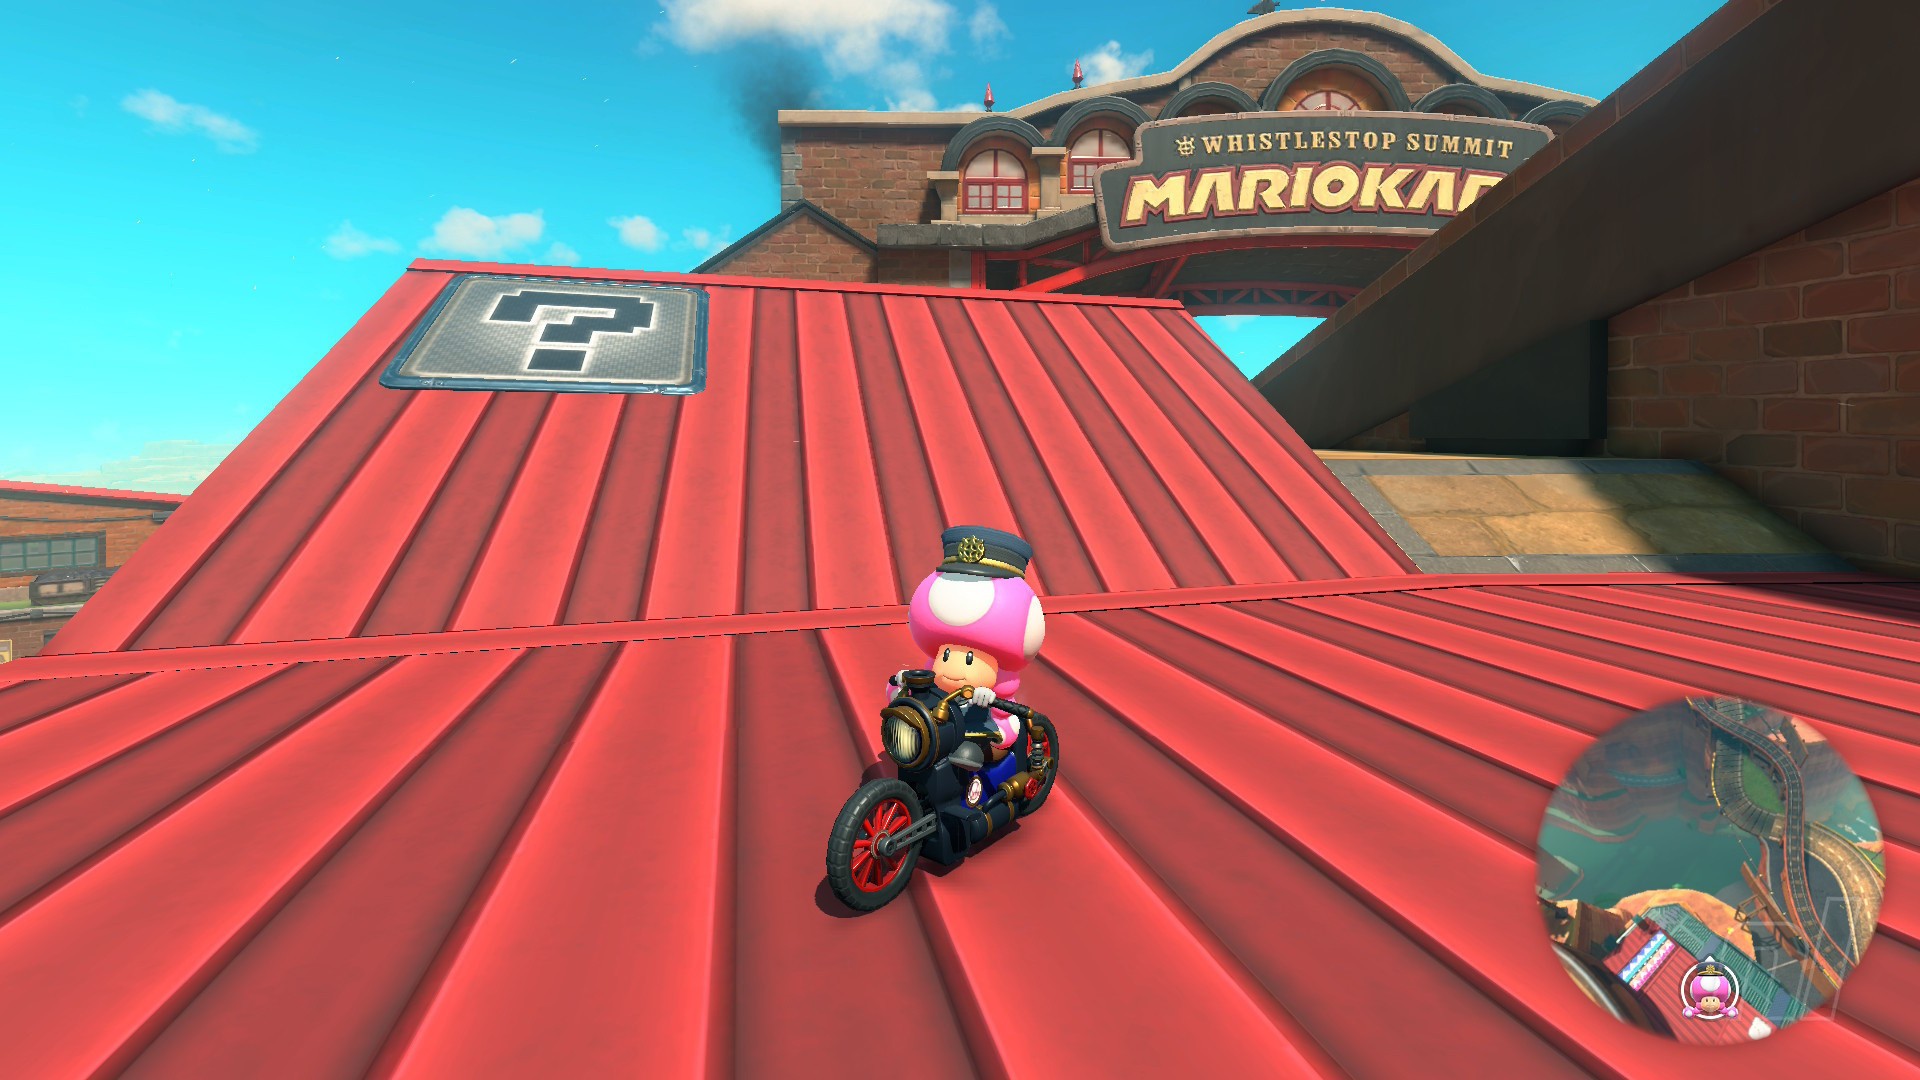
Location: At the very start of the course, head right past the P Switch and over the first red ramp. Stop, turn around, and you'll see the panel.
Panel 2
Location: Take a right at the start line past the P Switch and glide over to the huge mountain on the other side. Follow the road up to the right and keep going to the very top of the summit. The panel will be just past the Yoshi's food stand.
Panel 3
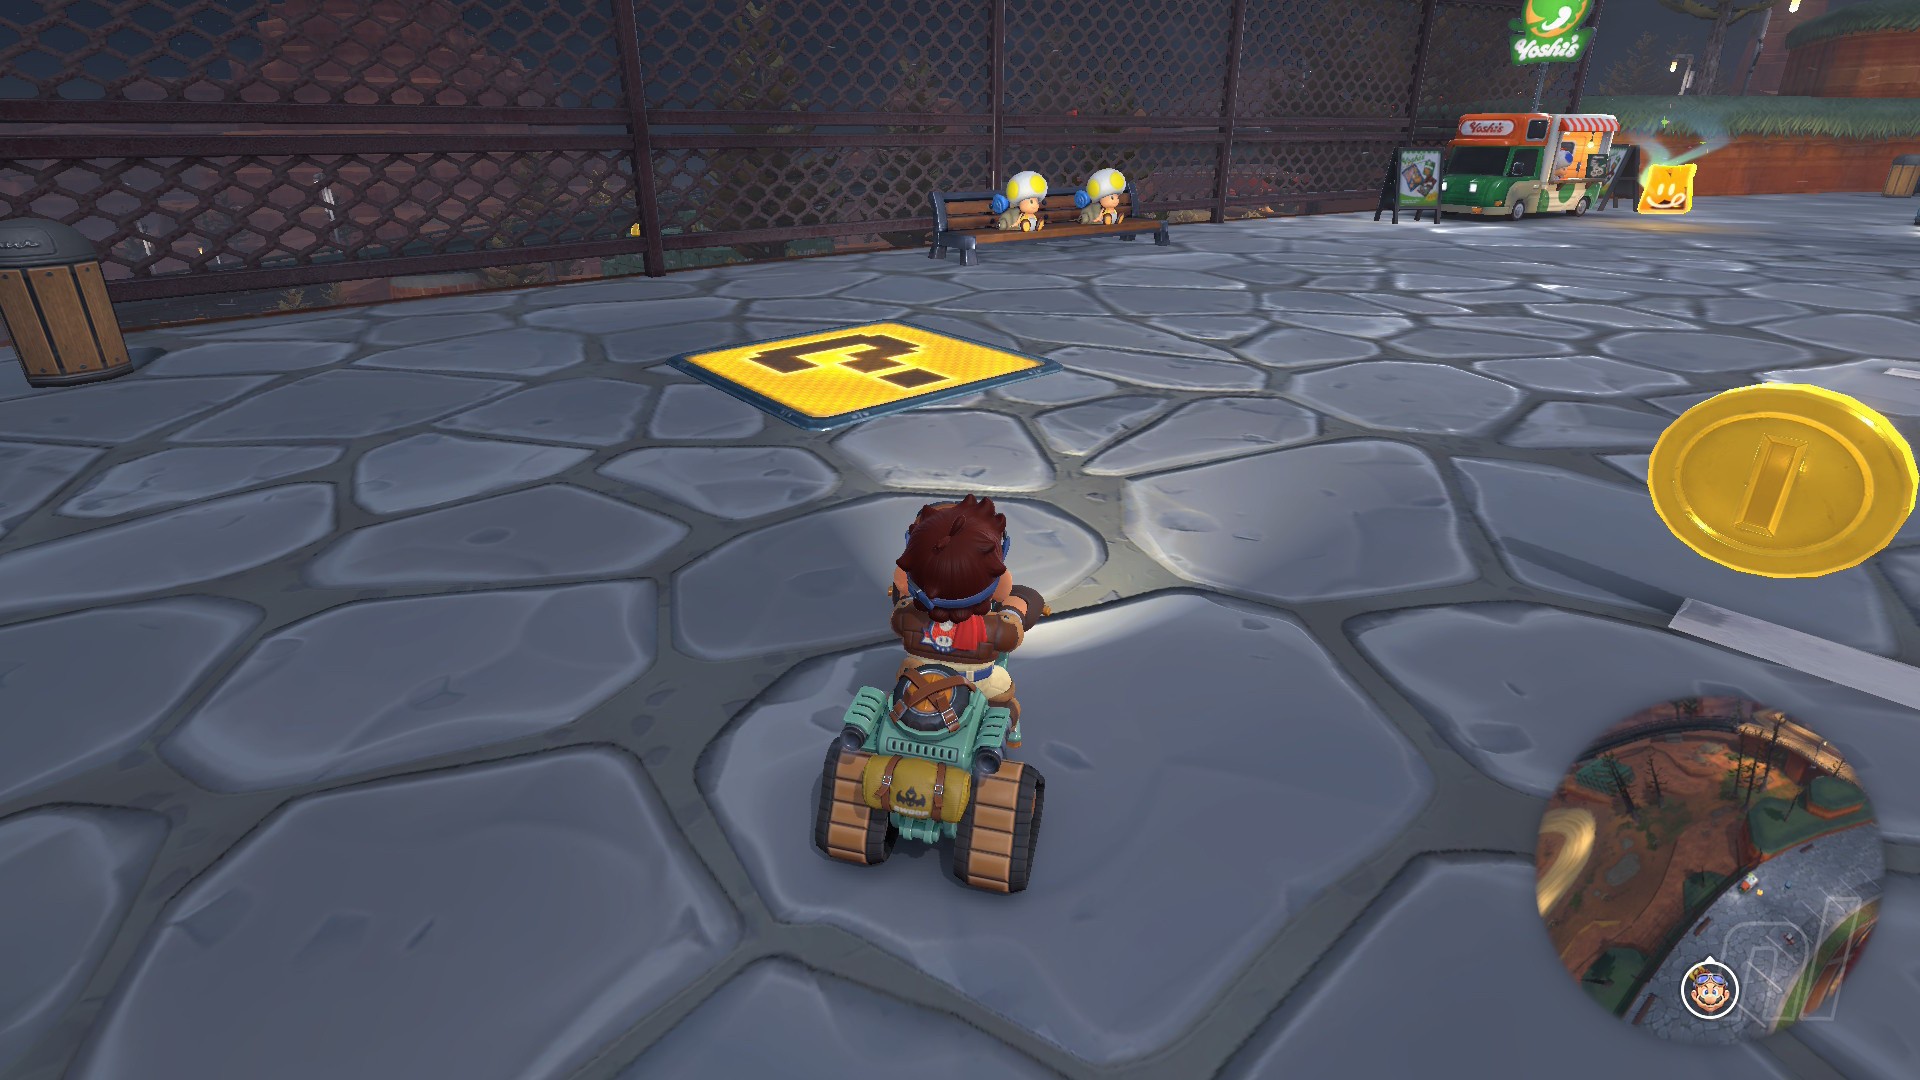
Location: Race through the course normally until you reach the final bend of the track. Here, you want to go behind the building, and you'll see a food cart and some characters taking a little nap on a bench. This panel is right in front of the parking spaces here.
Panel 4
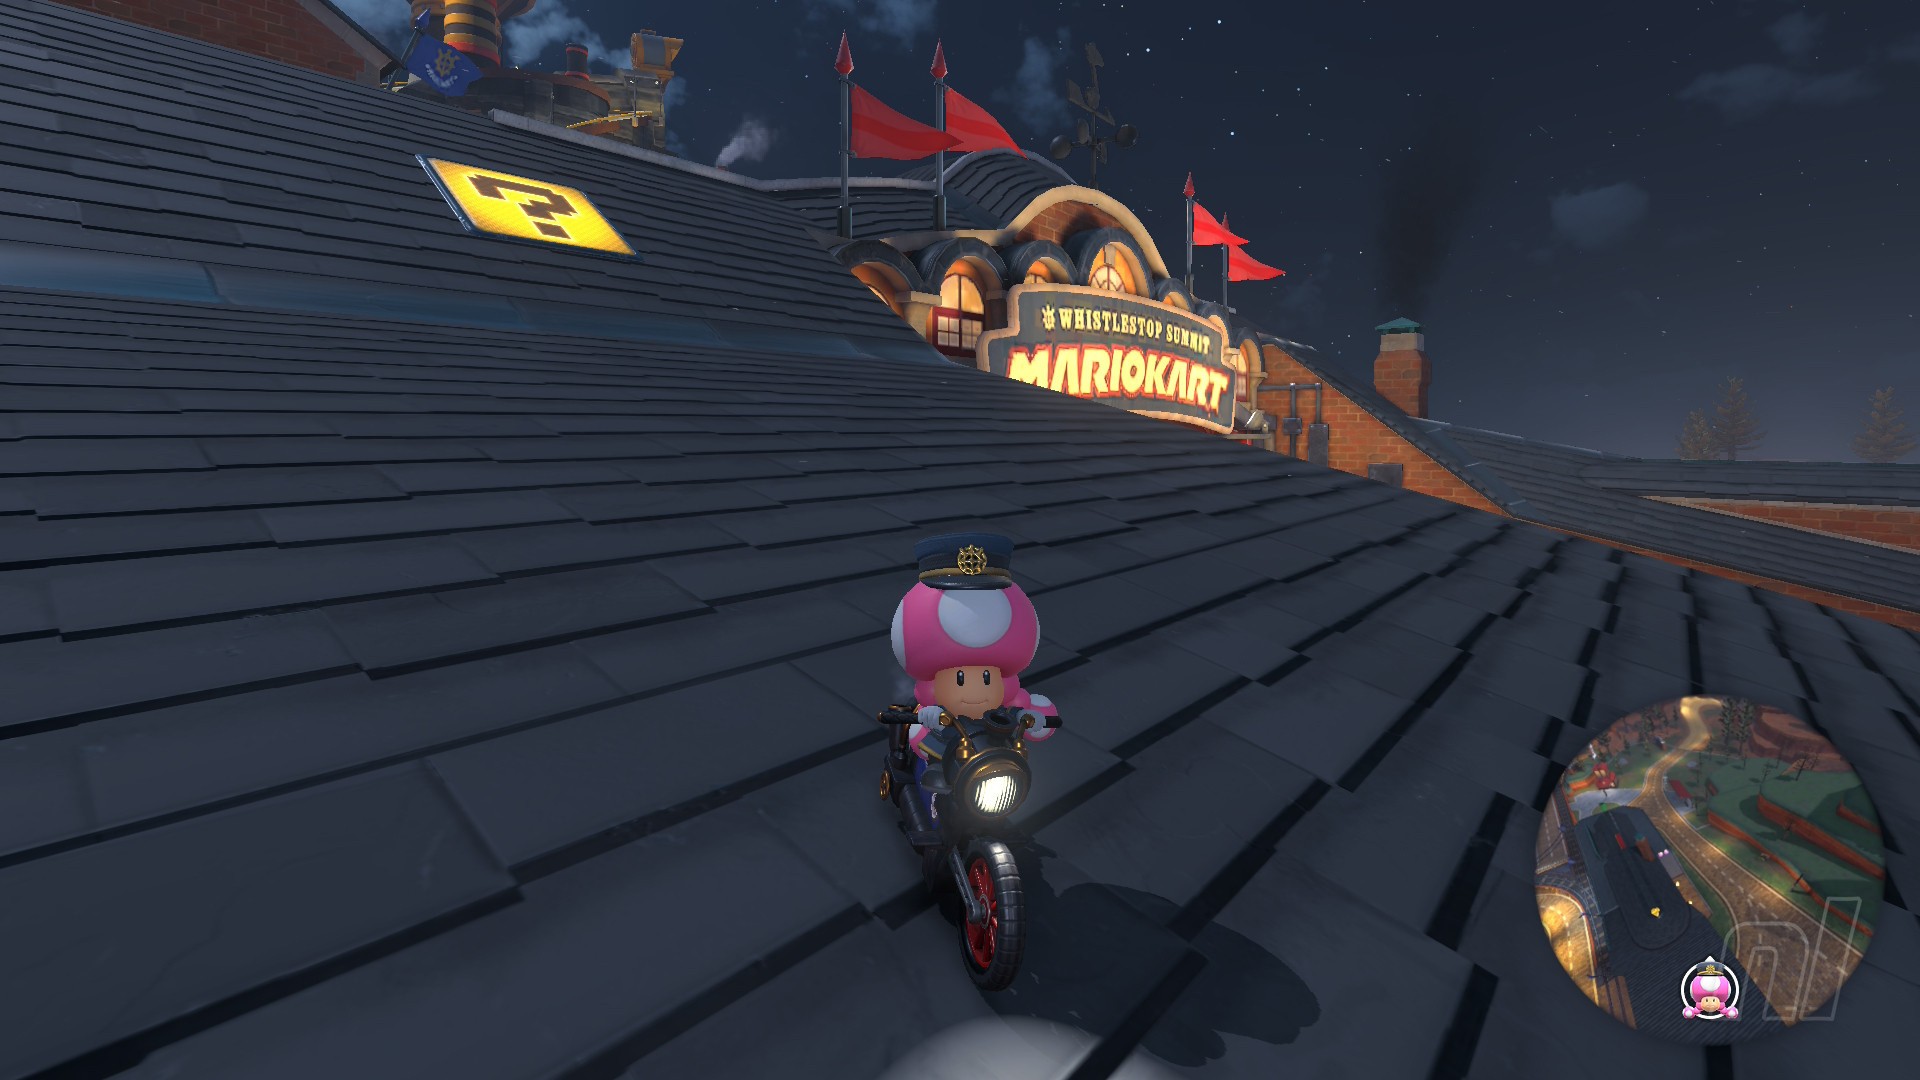
Location: Head to the underpass as you drive through the course normally, and then take a hard right to go up the stairs to reach the roof of the railway station, where you'll find the next panel.
Panel 5
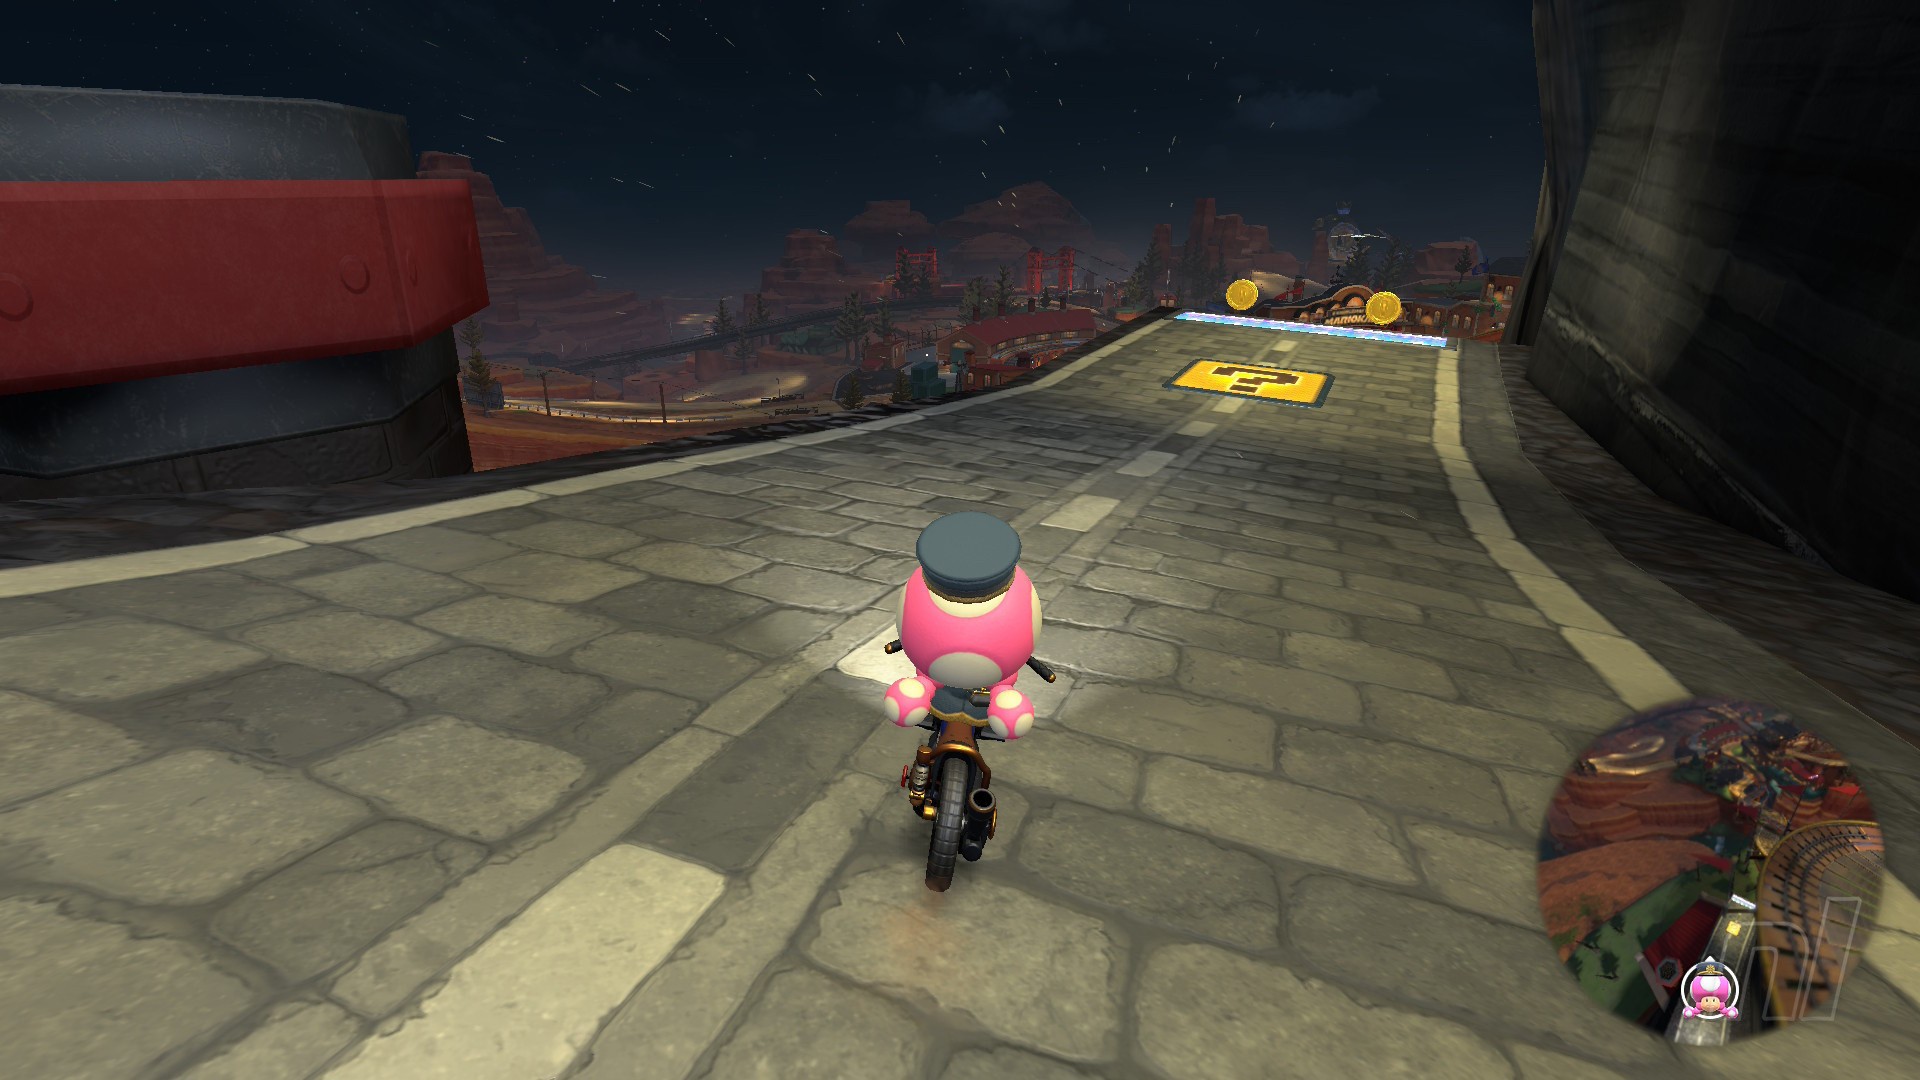
Location: On the huge mountain, drive up the road until you reach a tunnel. Go through that tunnel and, as you emerge from the other side, you'll see a panel right before a booster jump pad.
What are ? Panels for?
? Panels are essentially collectibles like Peach Medallions. They challenge you to make the most of Mario Kart World's new tricks and physics, including Wall Riding, Grinding, and gliding.
You can only collect them in Free Roam mode, just like the other collectibles, but you can team up with a friend and hunt them down together for fun.
What do you unlock for finding them?
Each ? Panel rewards you with a new sticker for your vehicle. Not an amazing reward by any stretch, but there are lots of cute ones!
We don't know whether you get a final reward after getting all 150, so we'll let you know!
? Panels are also required to Mirror Mode. You'll have to hit at least 10 of these, and they're much easier to deal with than Switches and Medallions.
Still have questions about racing? We have a range of Mario Kart World guides for you to browse, covering costumes, characters, courses, and P Switches, among many other tips.


Comments 1
I'm so glad there's one atop the dome in Dino Dino Jungle. It was so hard to get up there, I was hoping there'd be something worth it.
Show Comments
Leave A Comment
Hold on there, you need to login to post a comment...