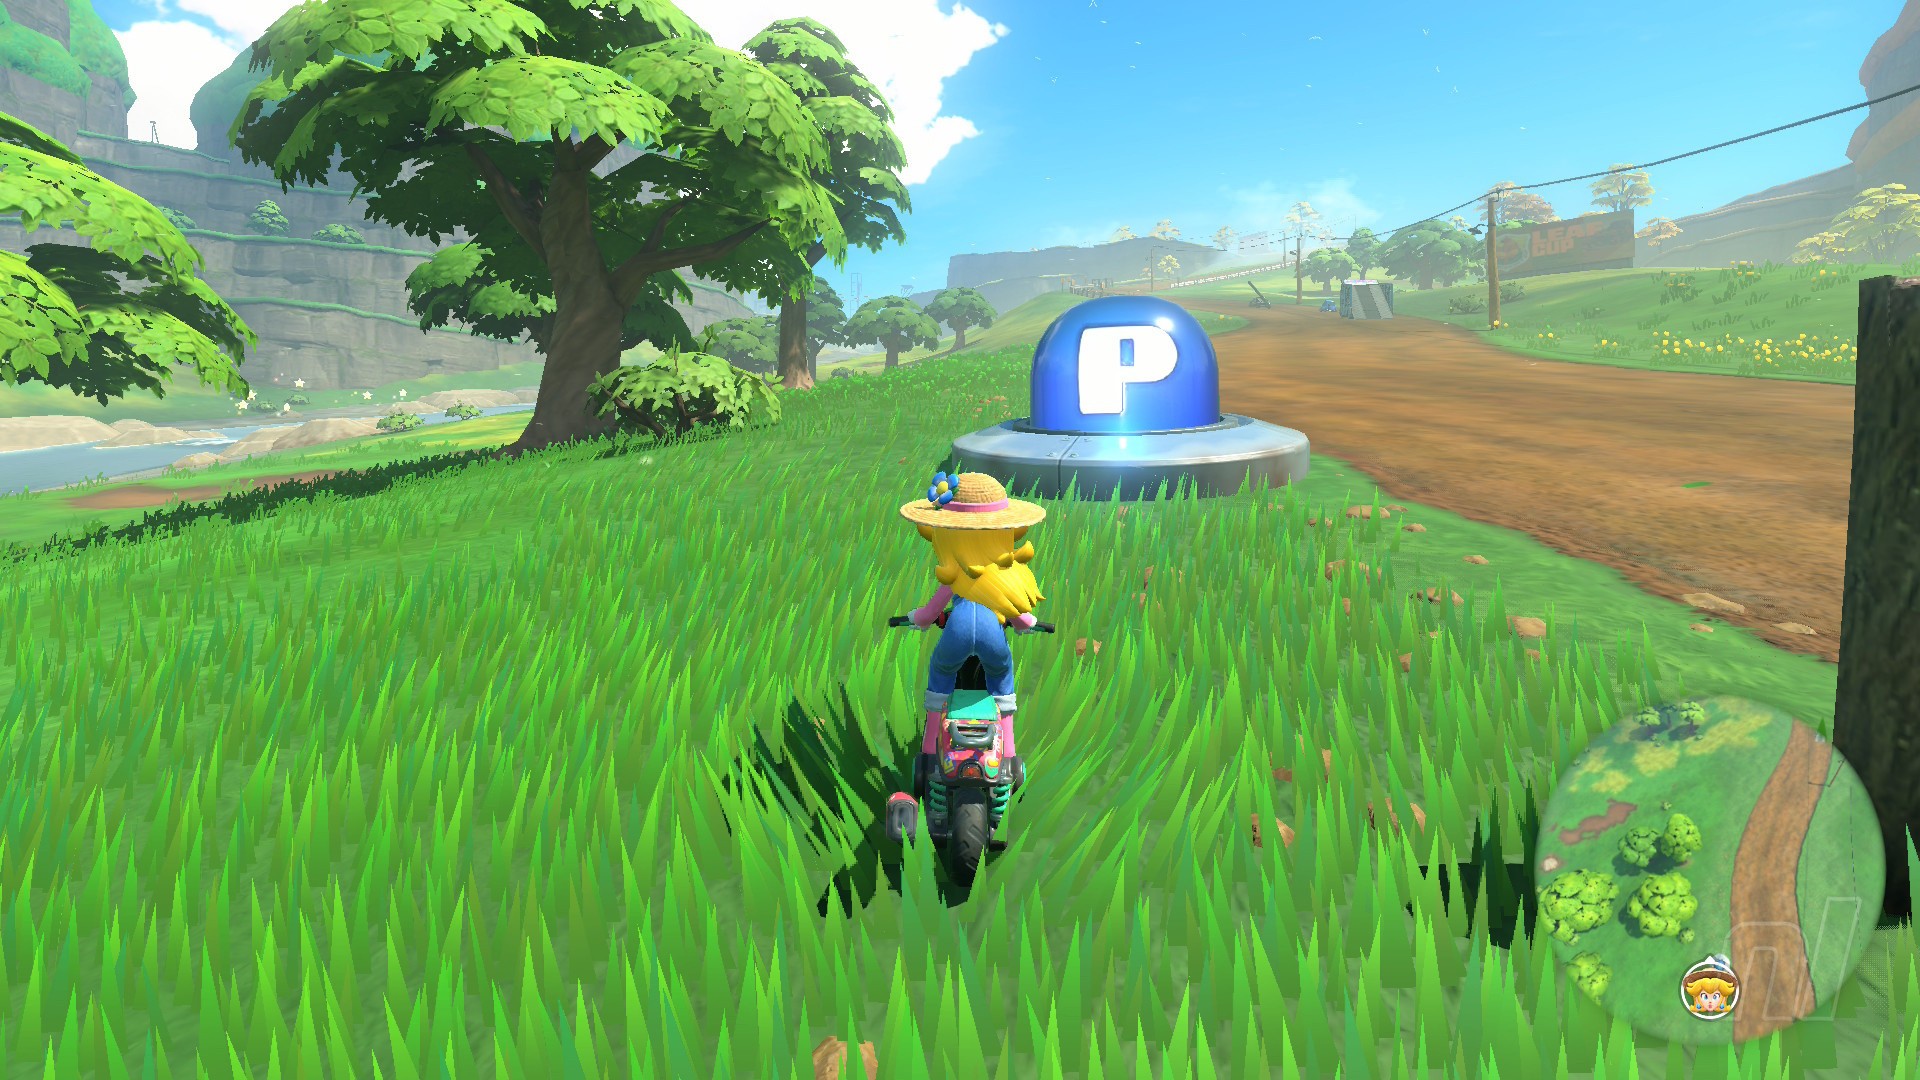
Everywhere you go in Mario Kart World's Free Roam mode, there's something to collect. That's certainly true for the 'Central region', one of the bigger areas on the map, where amidst the cows and cobbles there are plenty of collectibles to discover.
Here, we'll be covering all of the P Switches and Peach Medallions you can find in Choco Mountain, Moo Moo Meadows, and Peach Stadium, as well as the green pastures in-between. To see how we've broken up the map, as well as all the collectibles in every other region, jump into our hub guides for both those big, blue buttons and Peach coins.
P Switch Missions - 'Central Region'
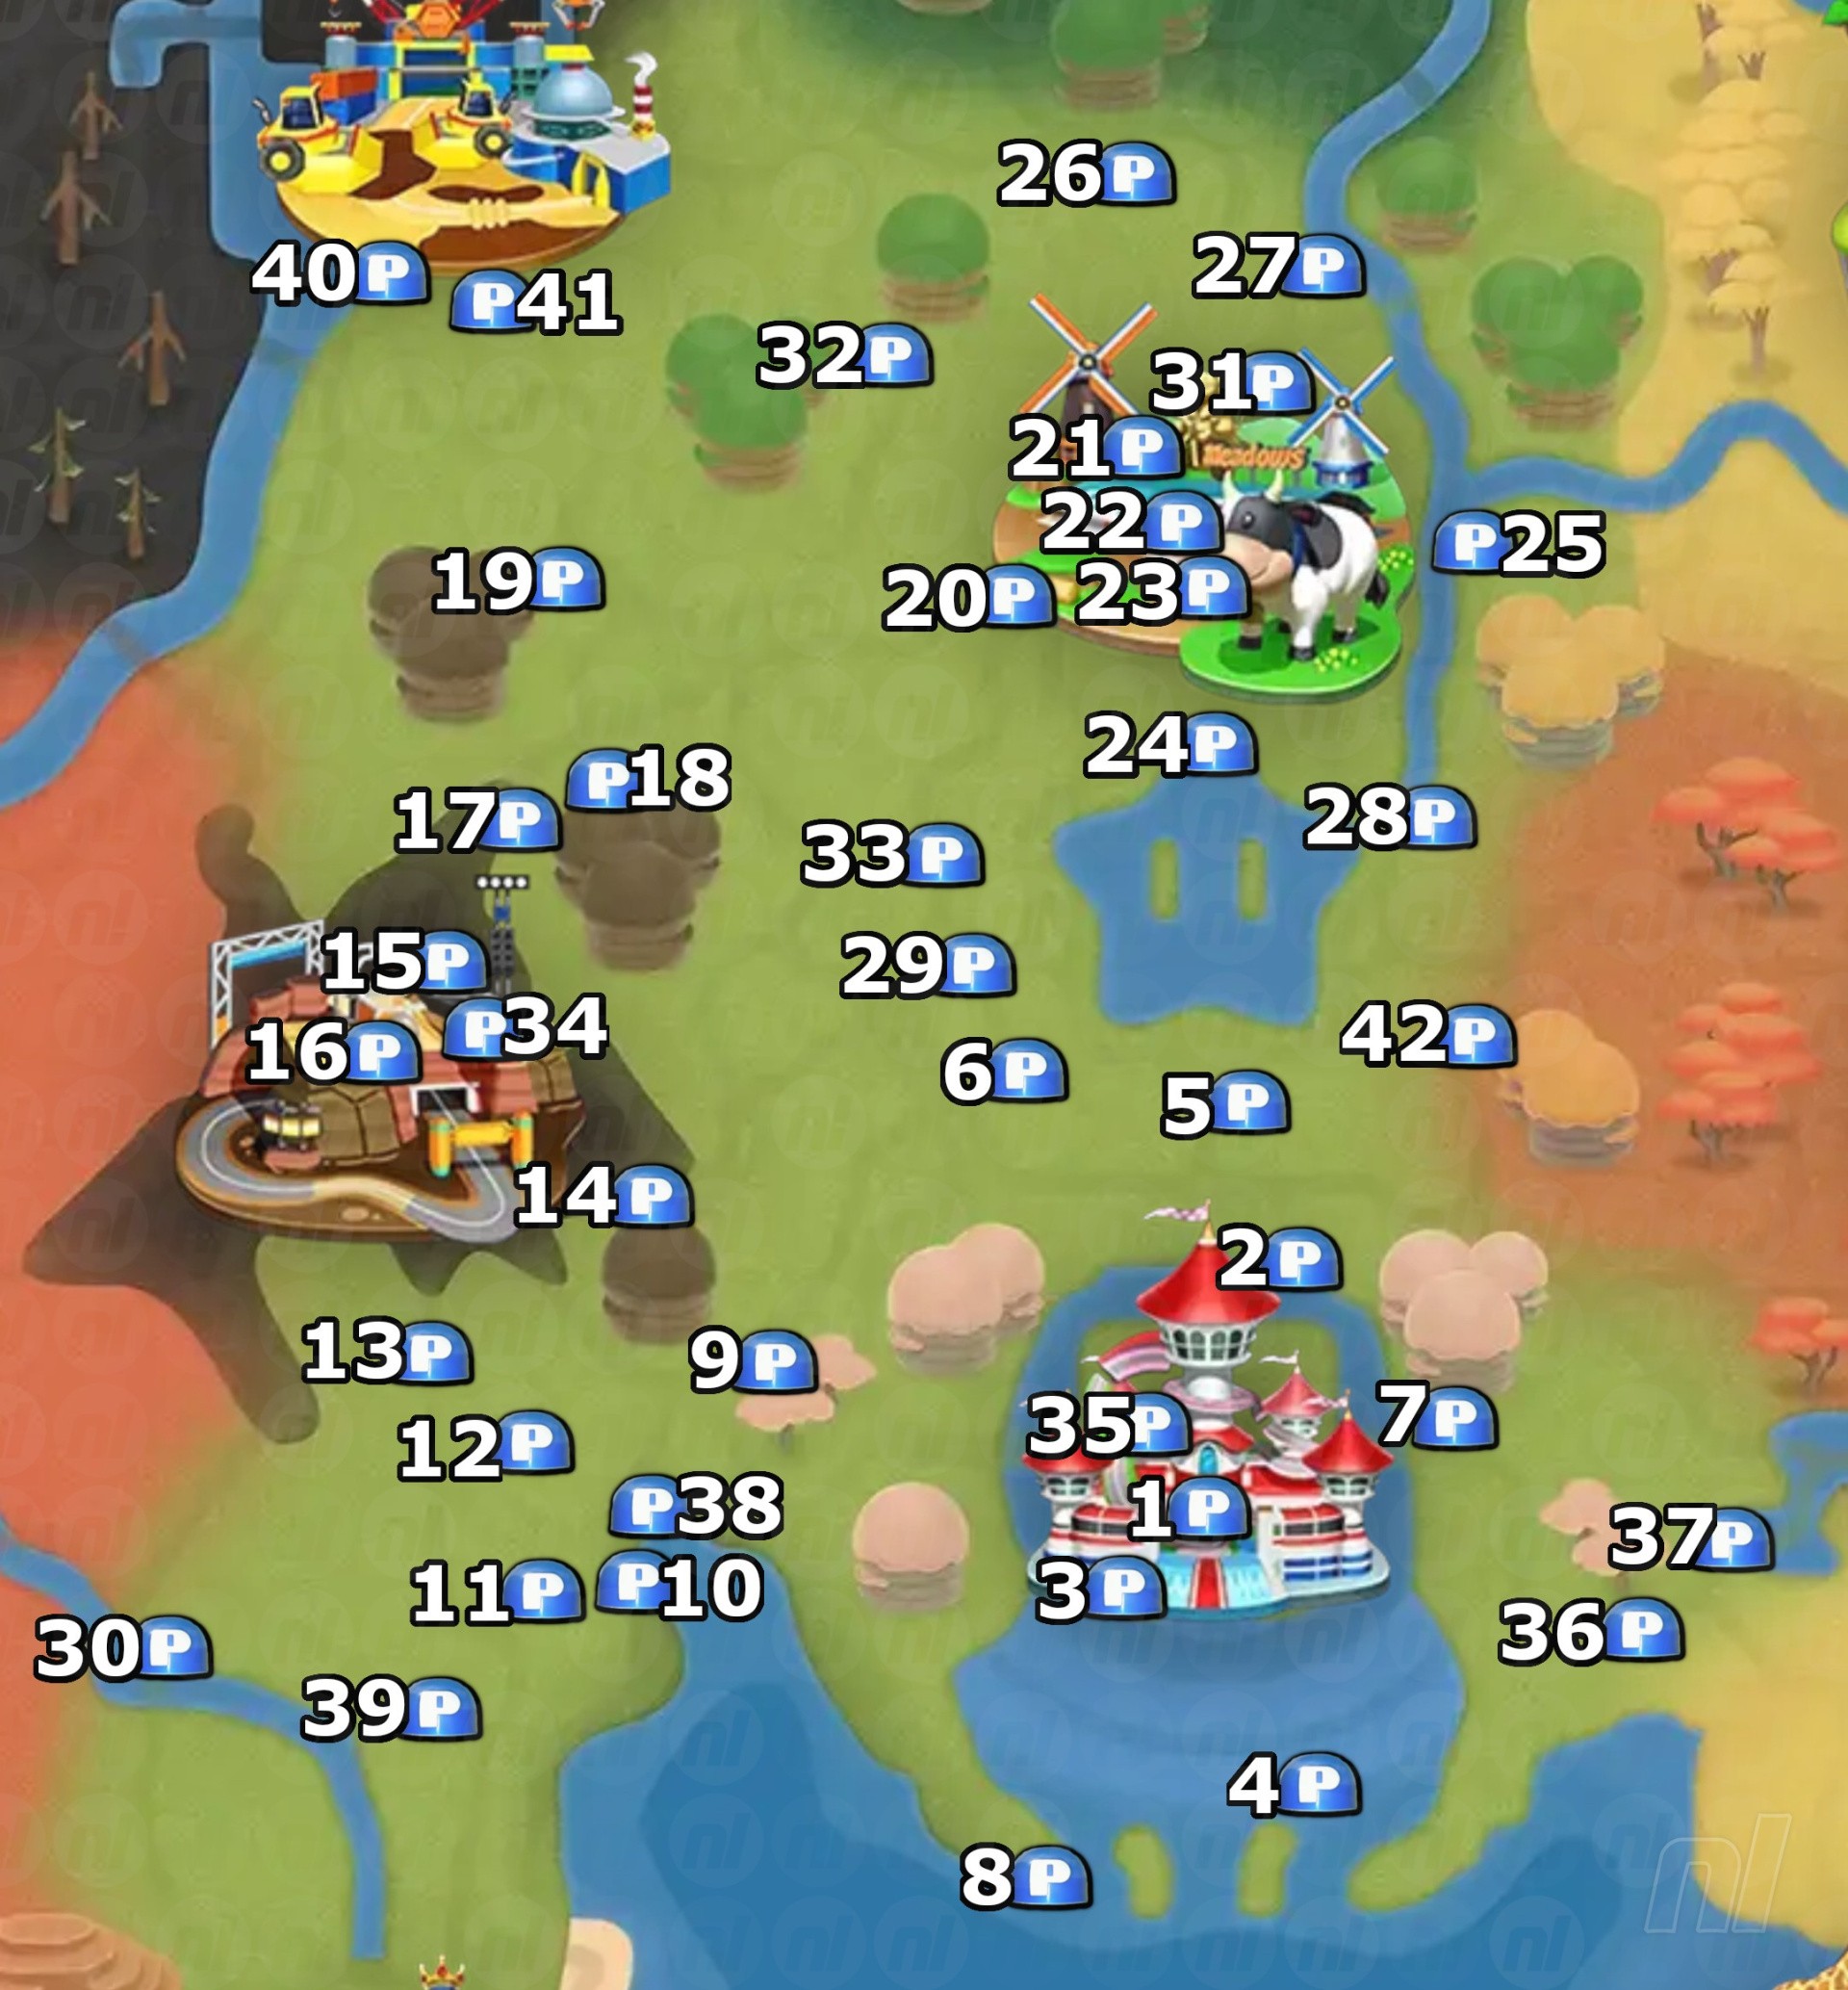
'Central Region' P Switch Map
Image: Nintendo Life
The Central region is a beautiful, grassy landscape with miles of meadows and... moo moos. Situated right in the middle of the map, sandwiched between basically every other region, you can go for a cruise by the adorable little star lake, head to the farms, or look out across the ocean to the south. Perfect for hunting down collectibles then, hey?
You'll see all 42P Switches in the Central region between Choco Mountain, Moo Moo Meadows, and Peach Stadium, which you'll see are nicely numbered in the map above.
All Central Region Mission Locations
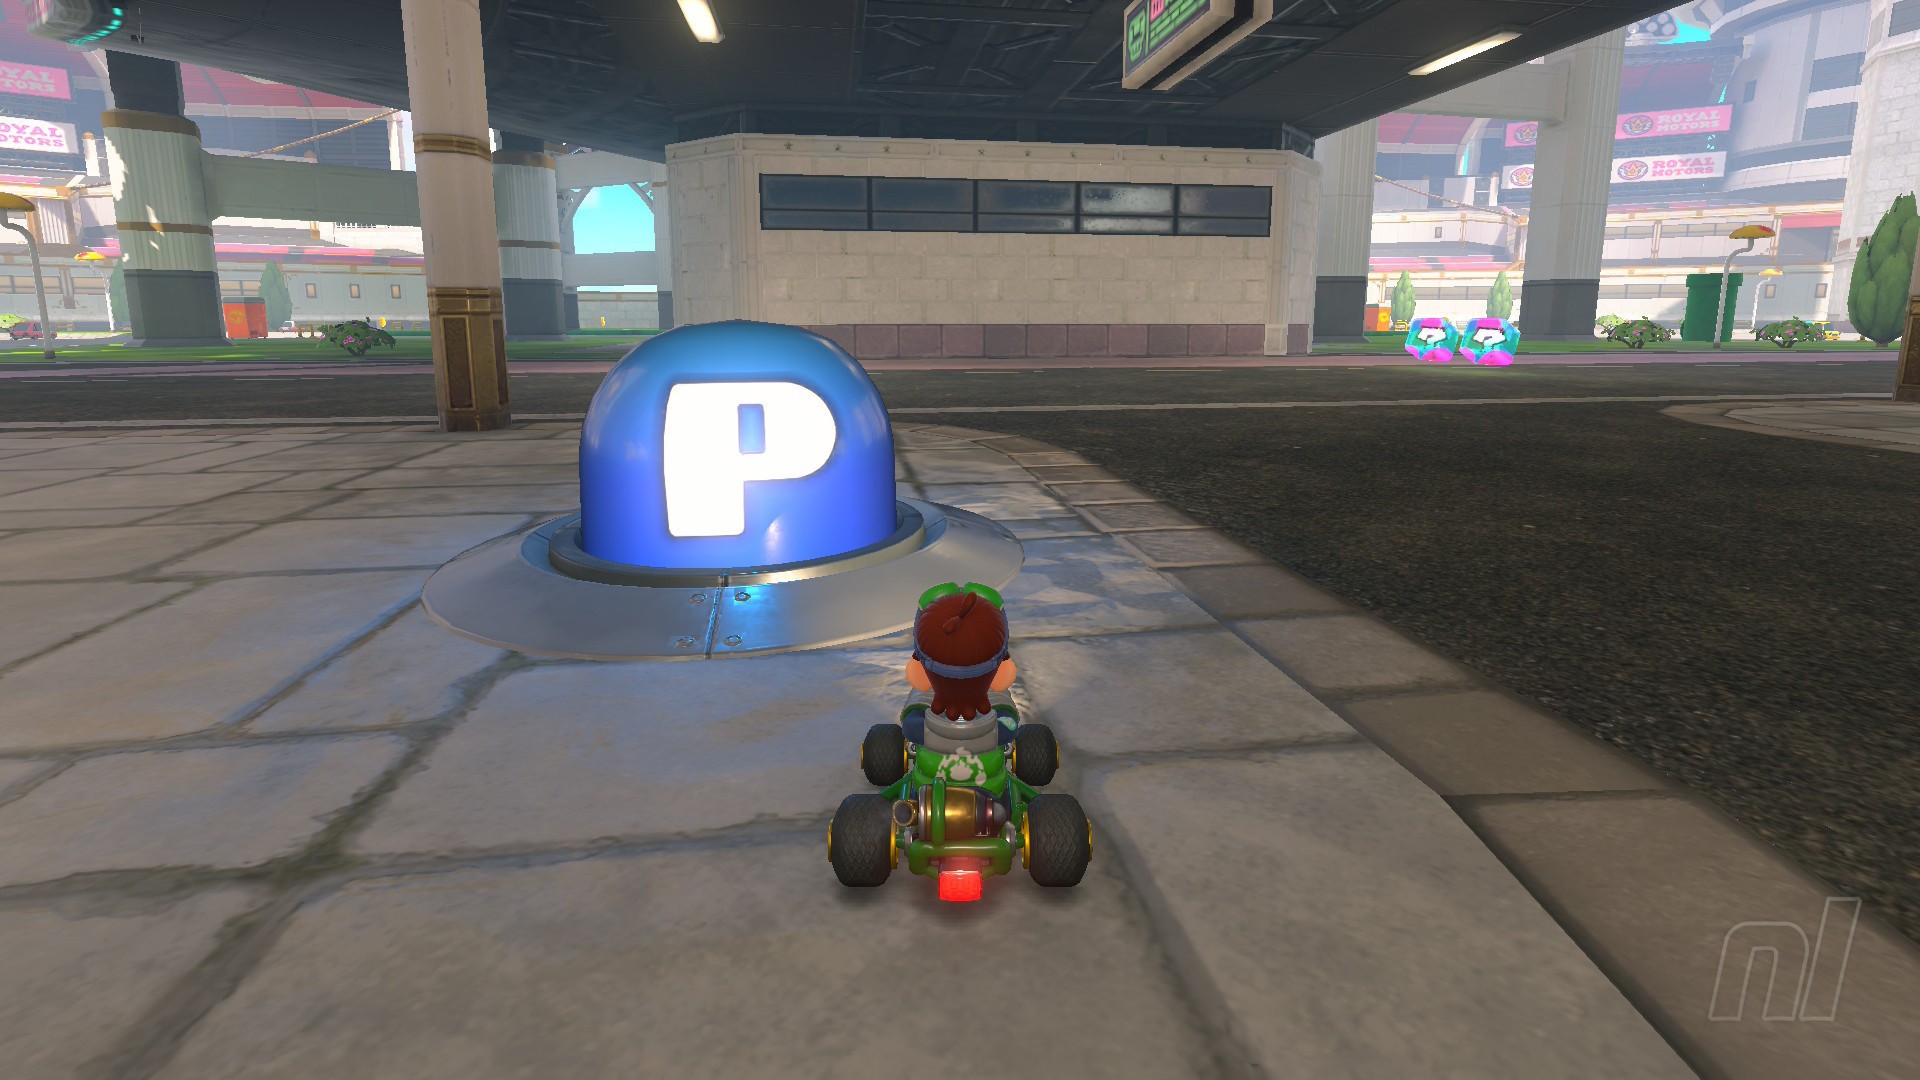
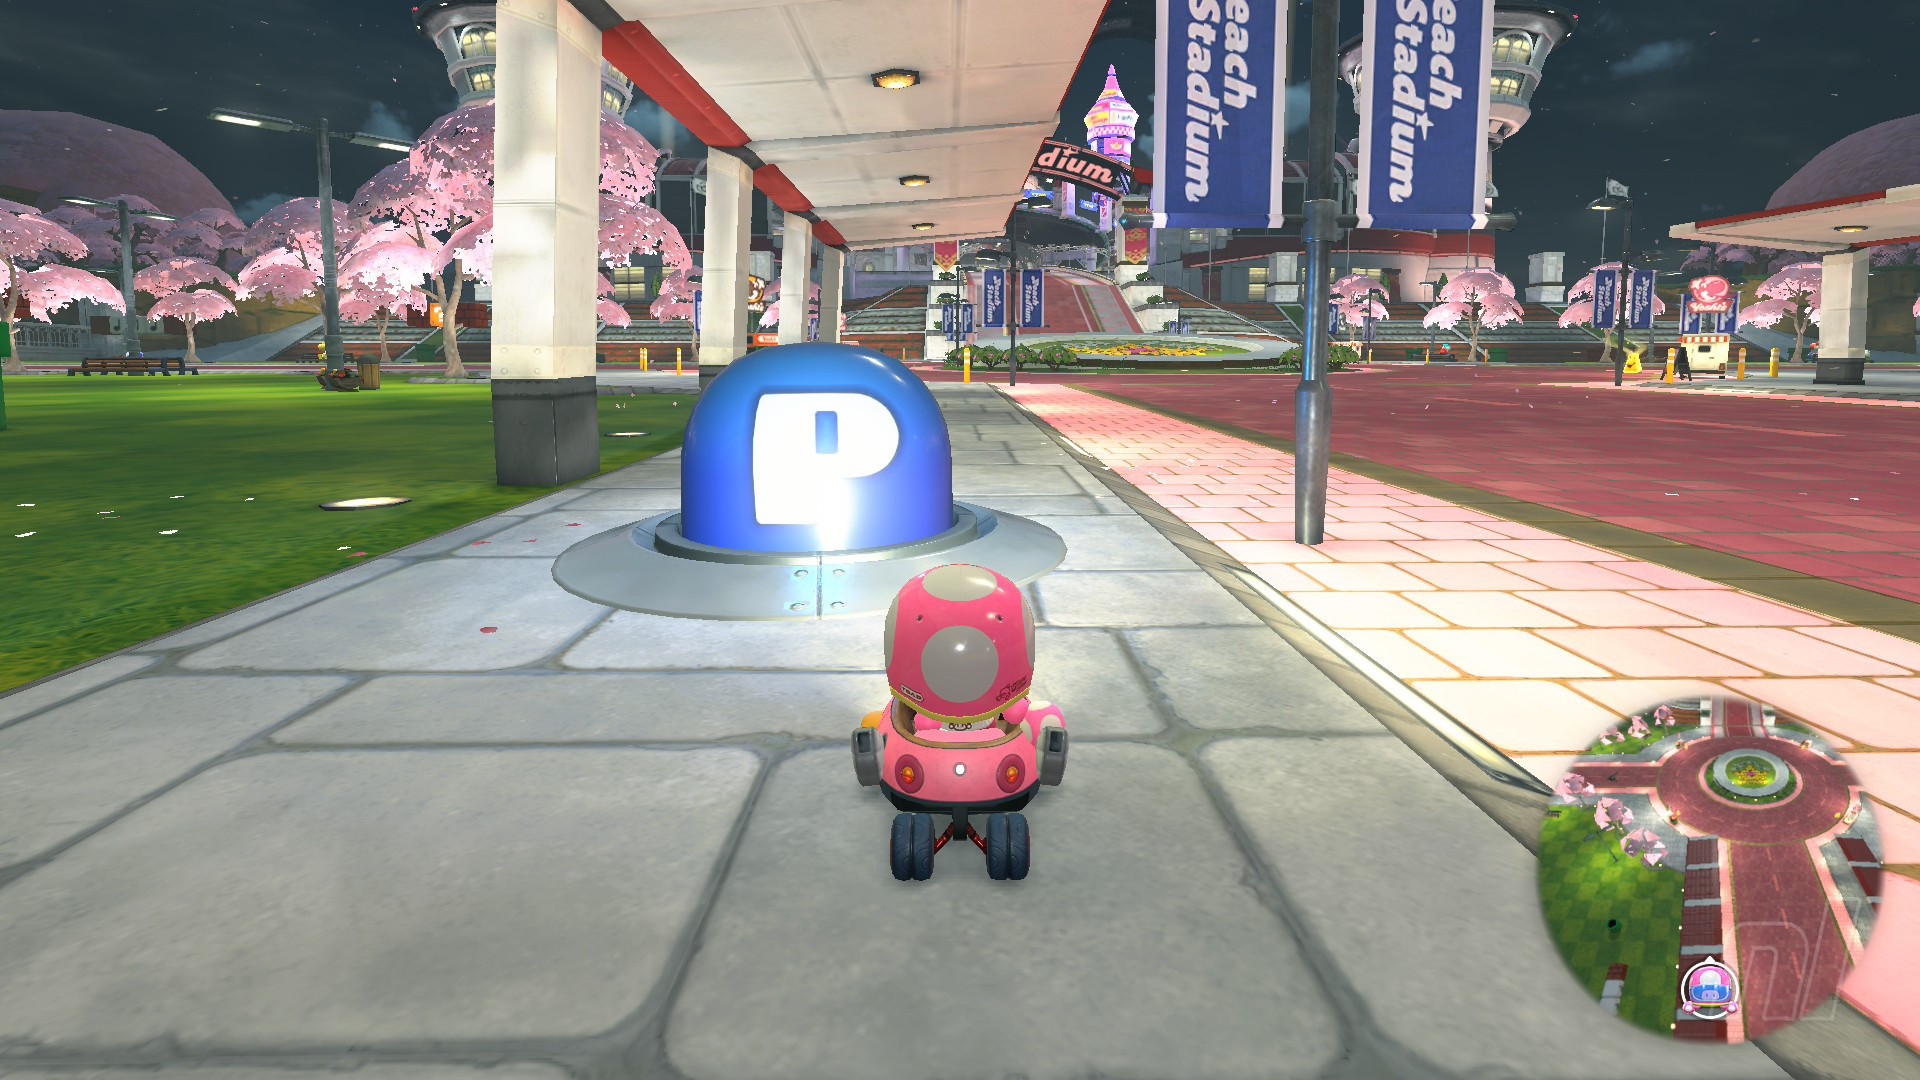
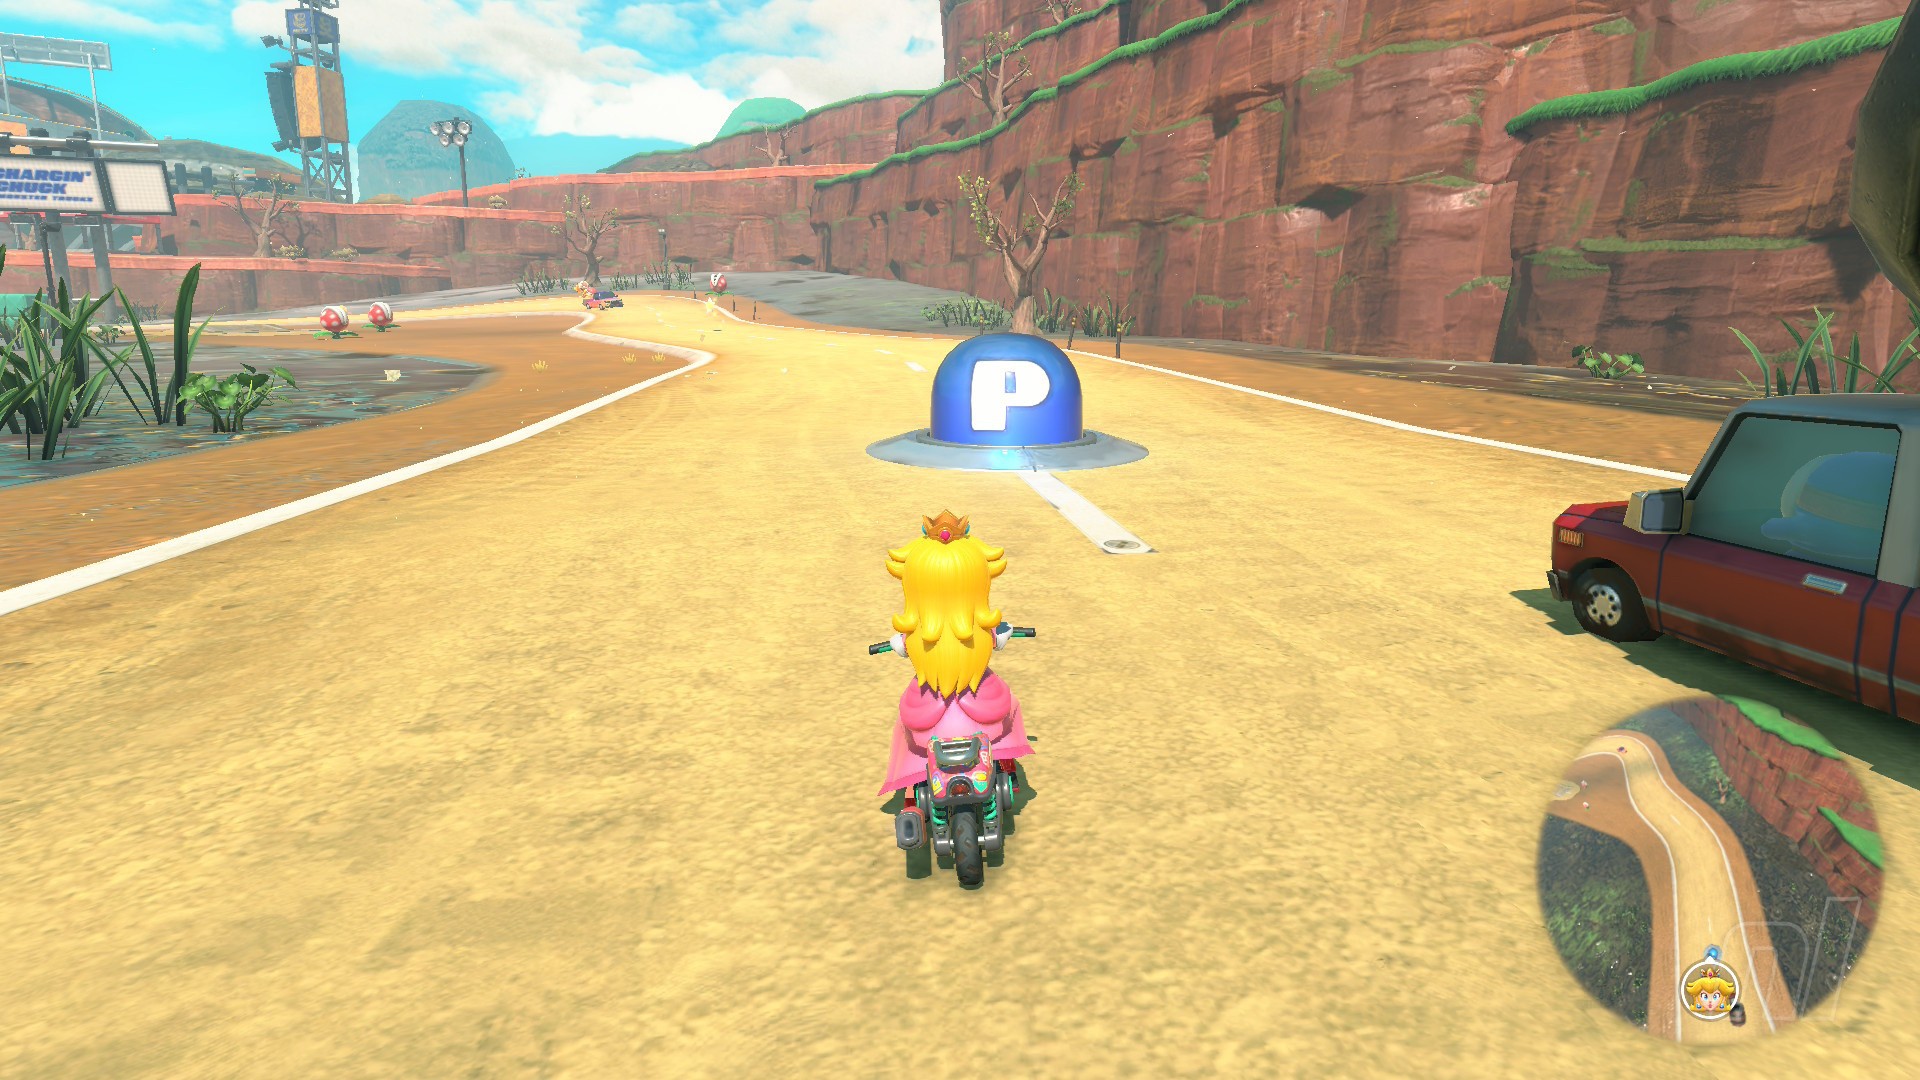
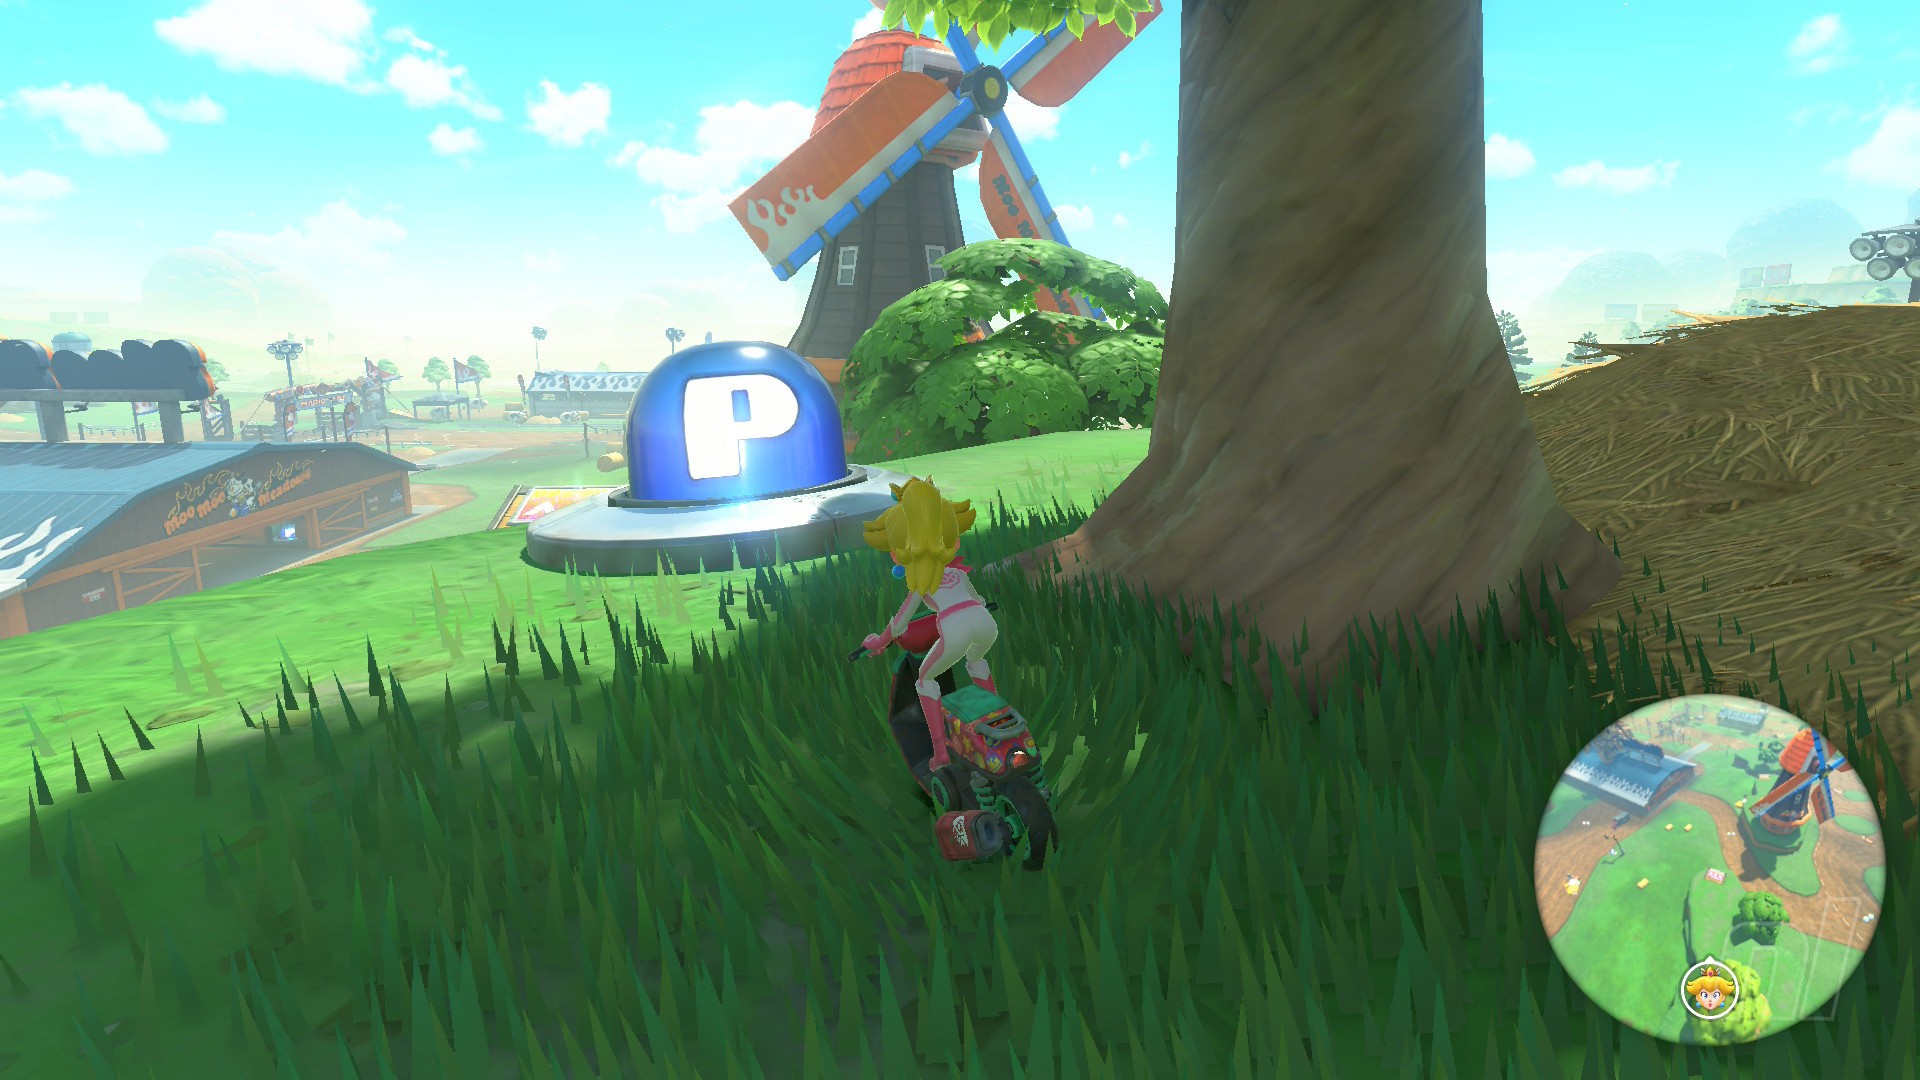
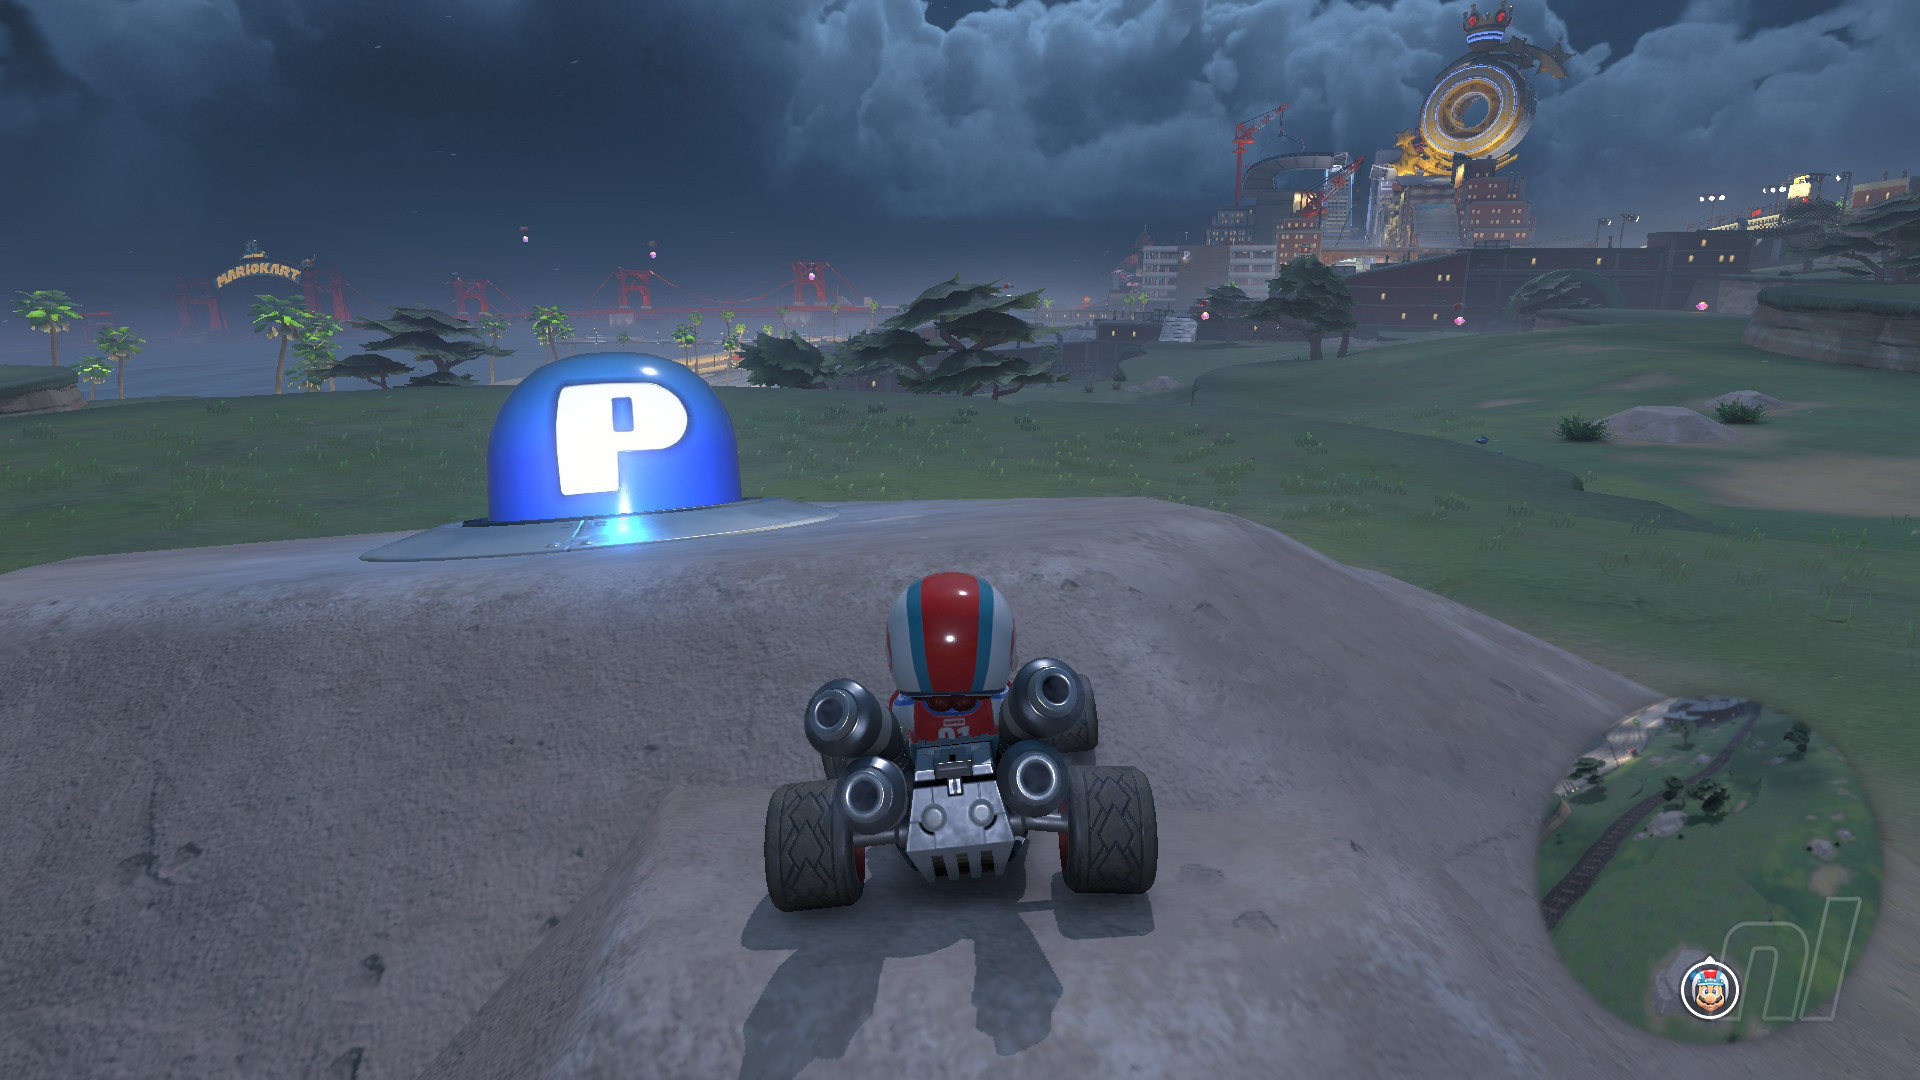
Mission 1 (Peach Stadium)
Image: Nintendo Life
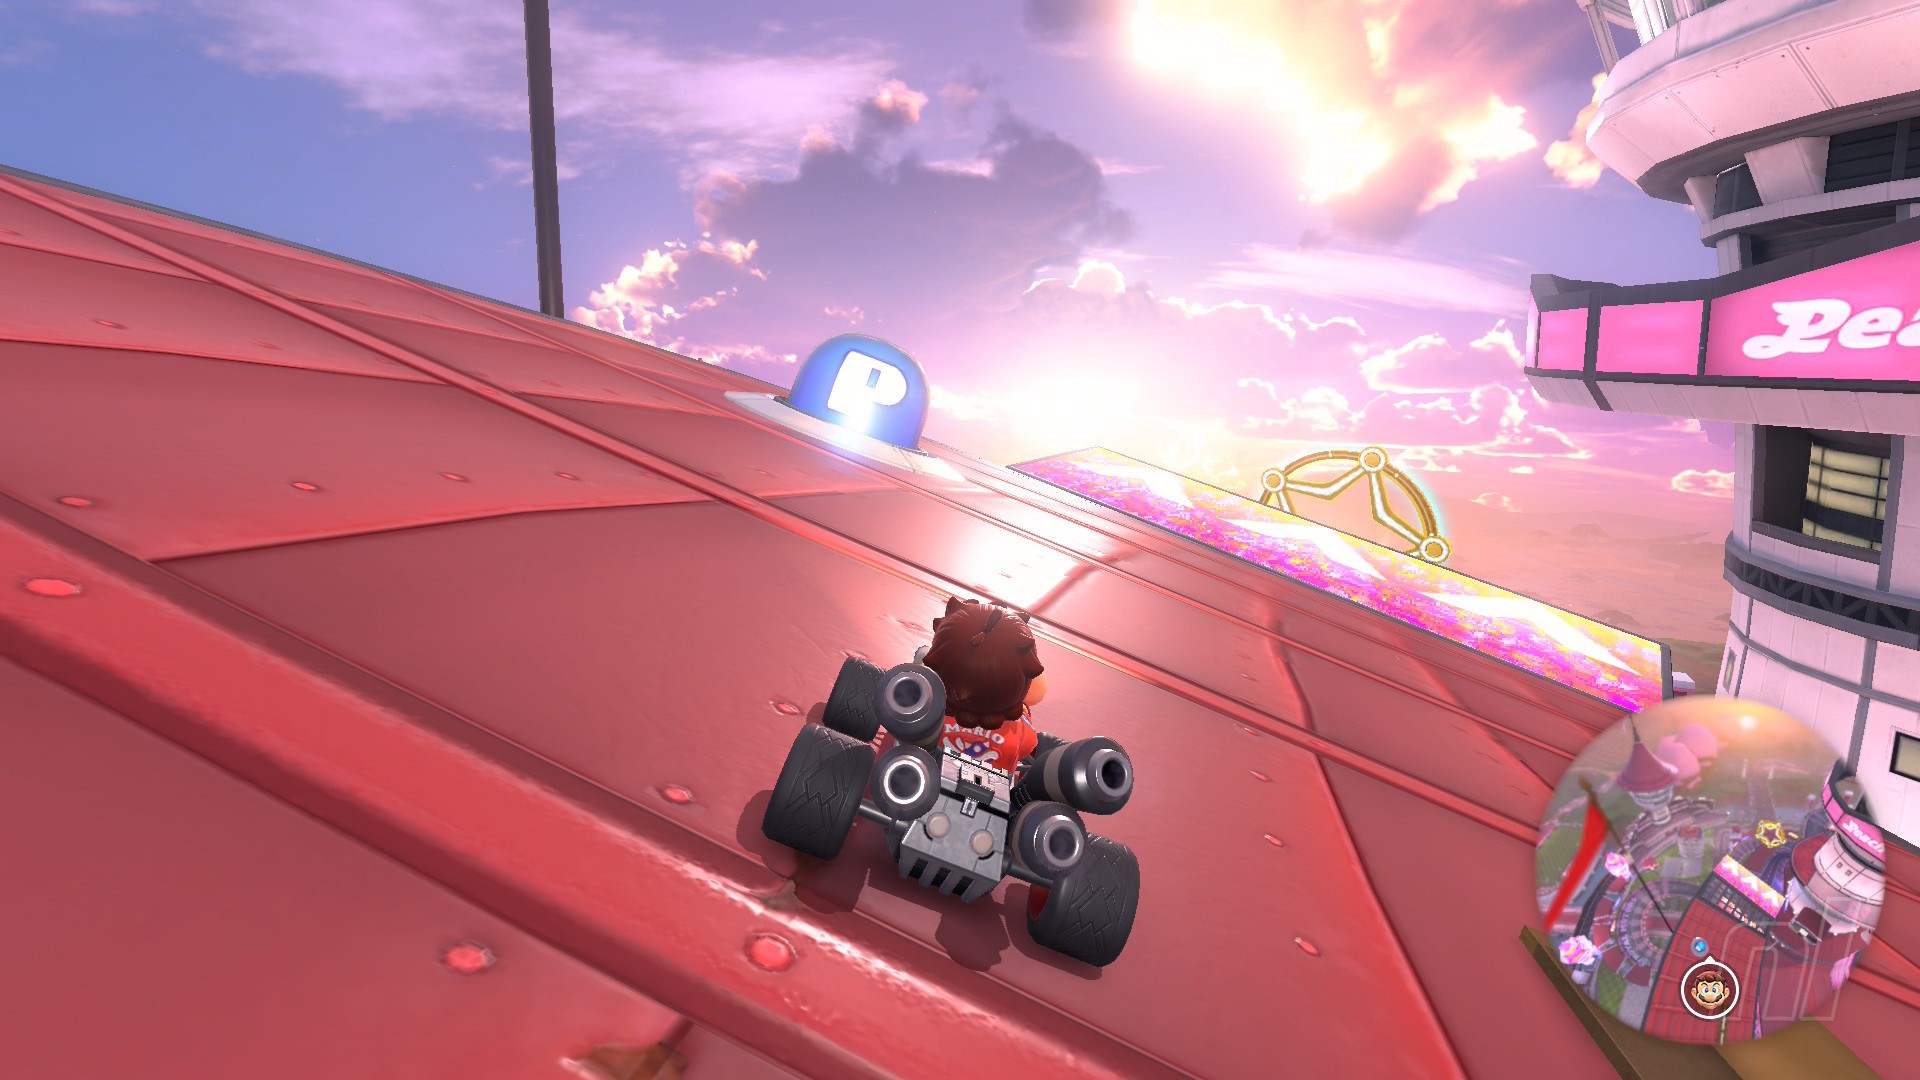
Mission: "Take to the skies high above Peach Stadium!"
Location: Centre of Peach Stadium, under the raised track in the castle
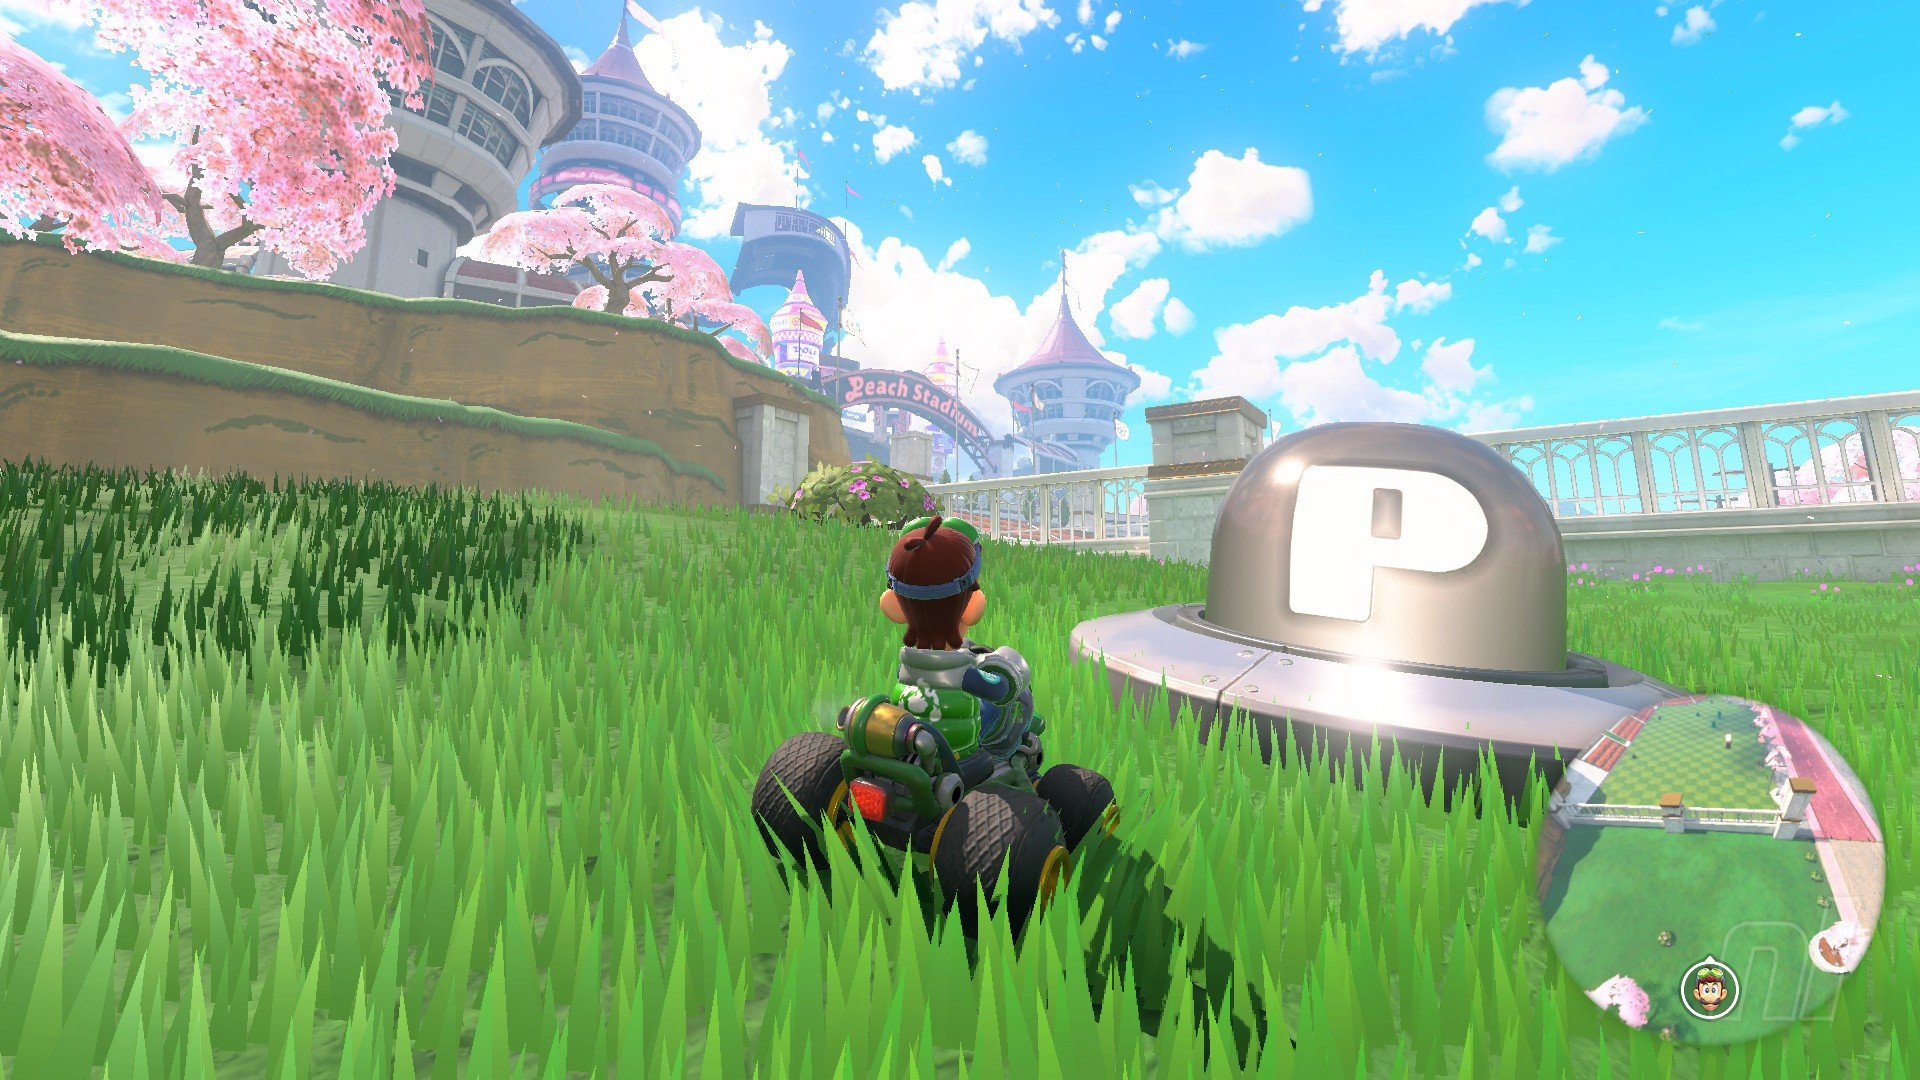
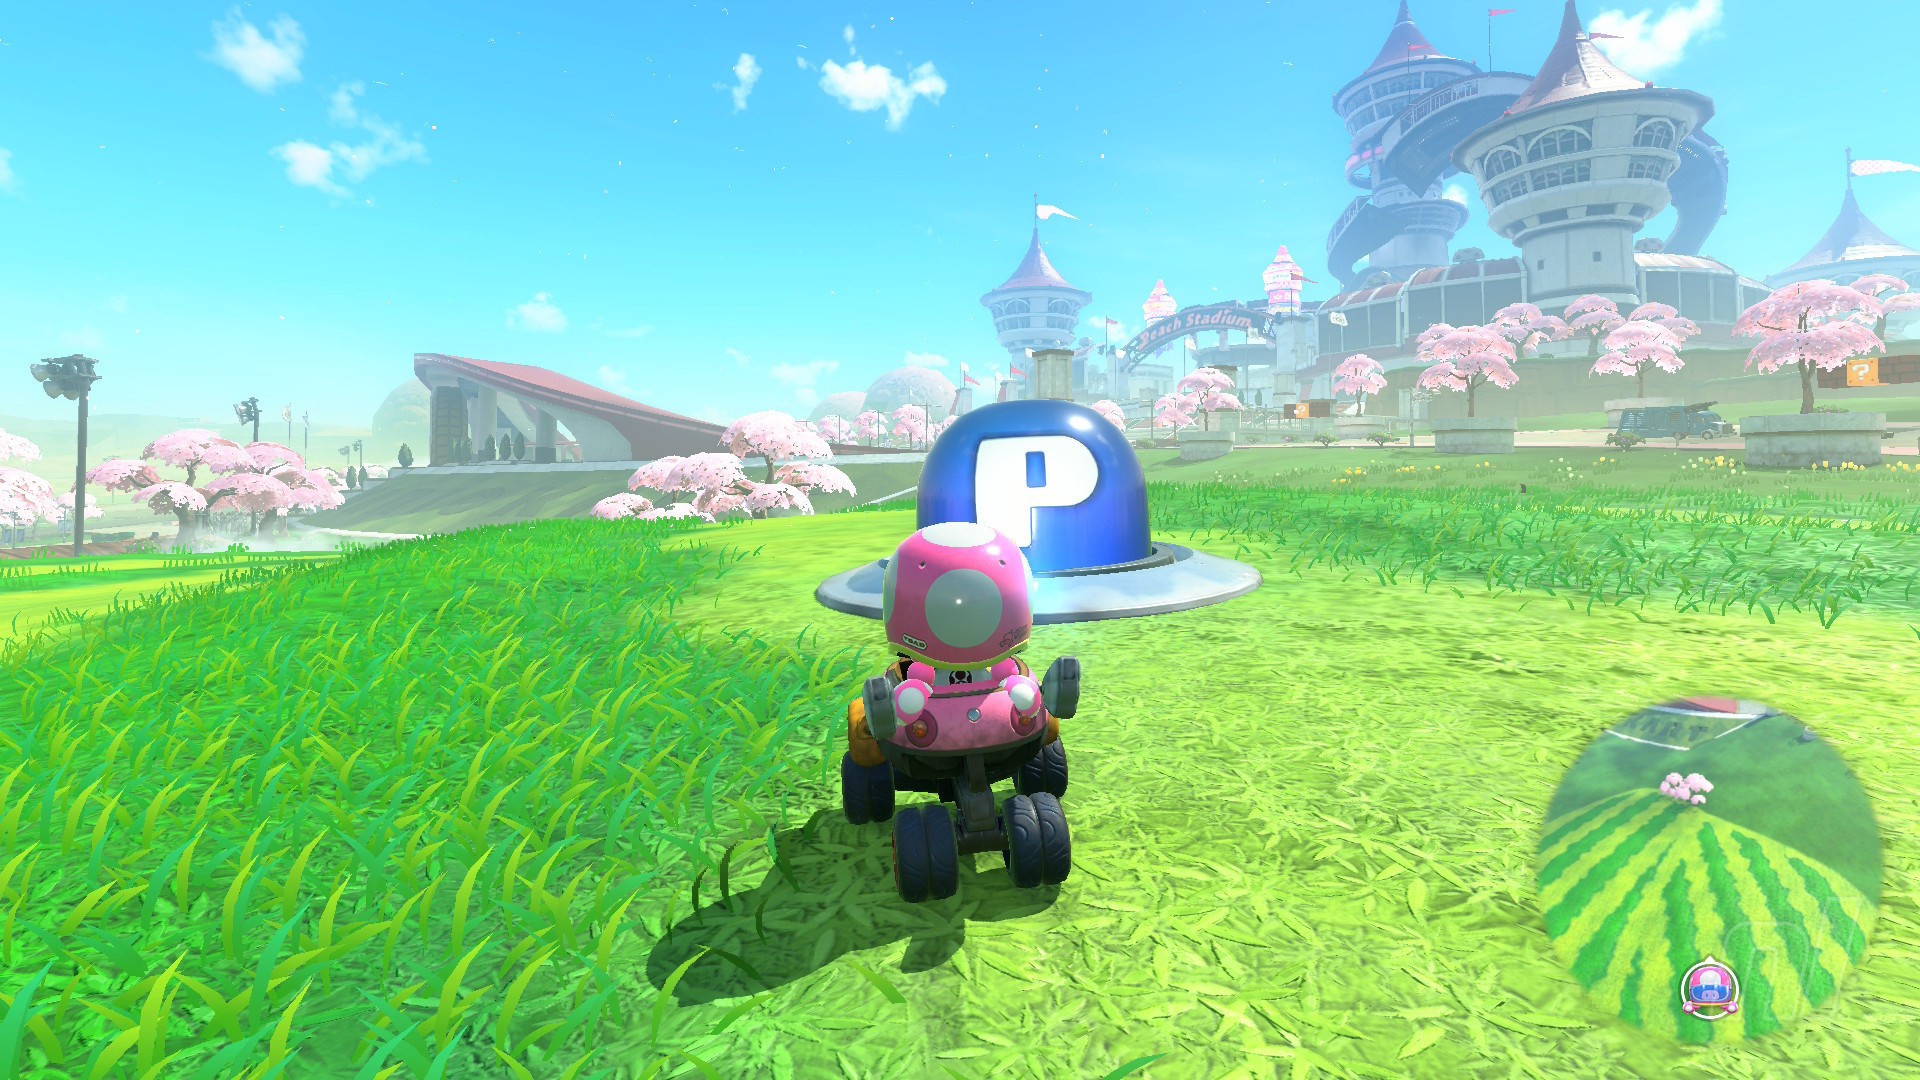
Mission 2 (Peach Stadium)
Image: Nintendo Life
Mission: "Note the shortcut through the stadium's garden!"
Location: Northeast of Peach Stadium, next to a courtyard wall
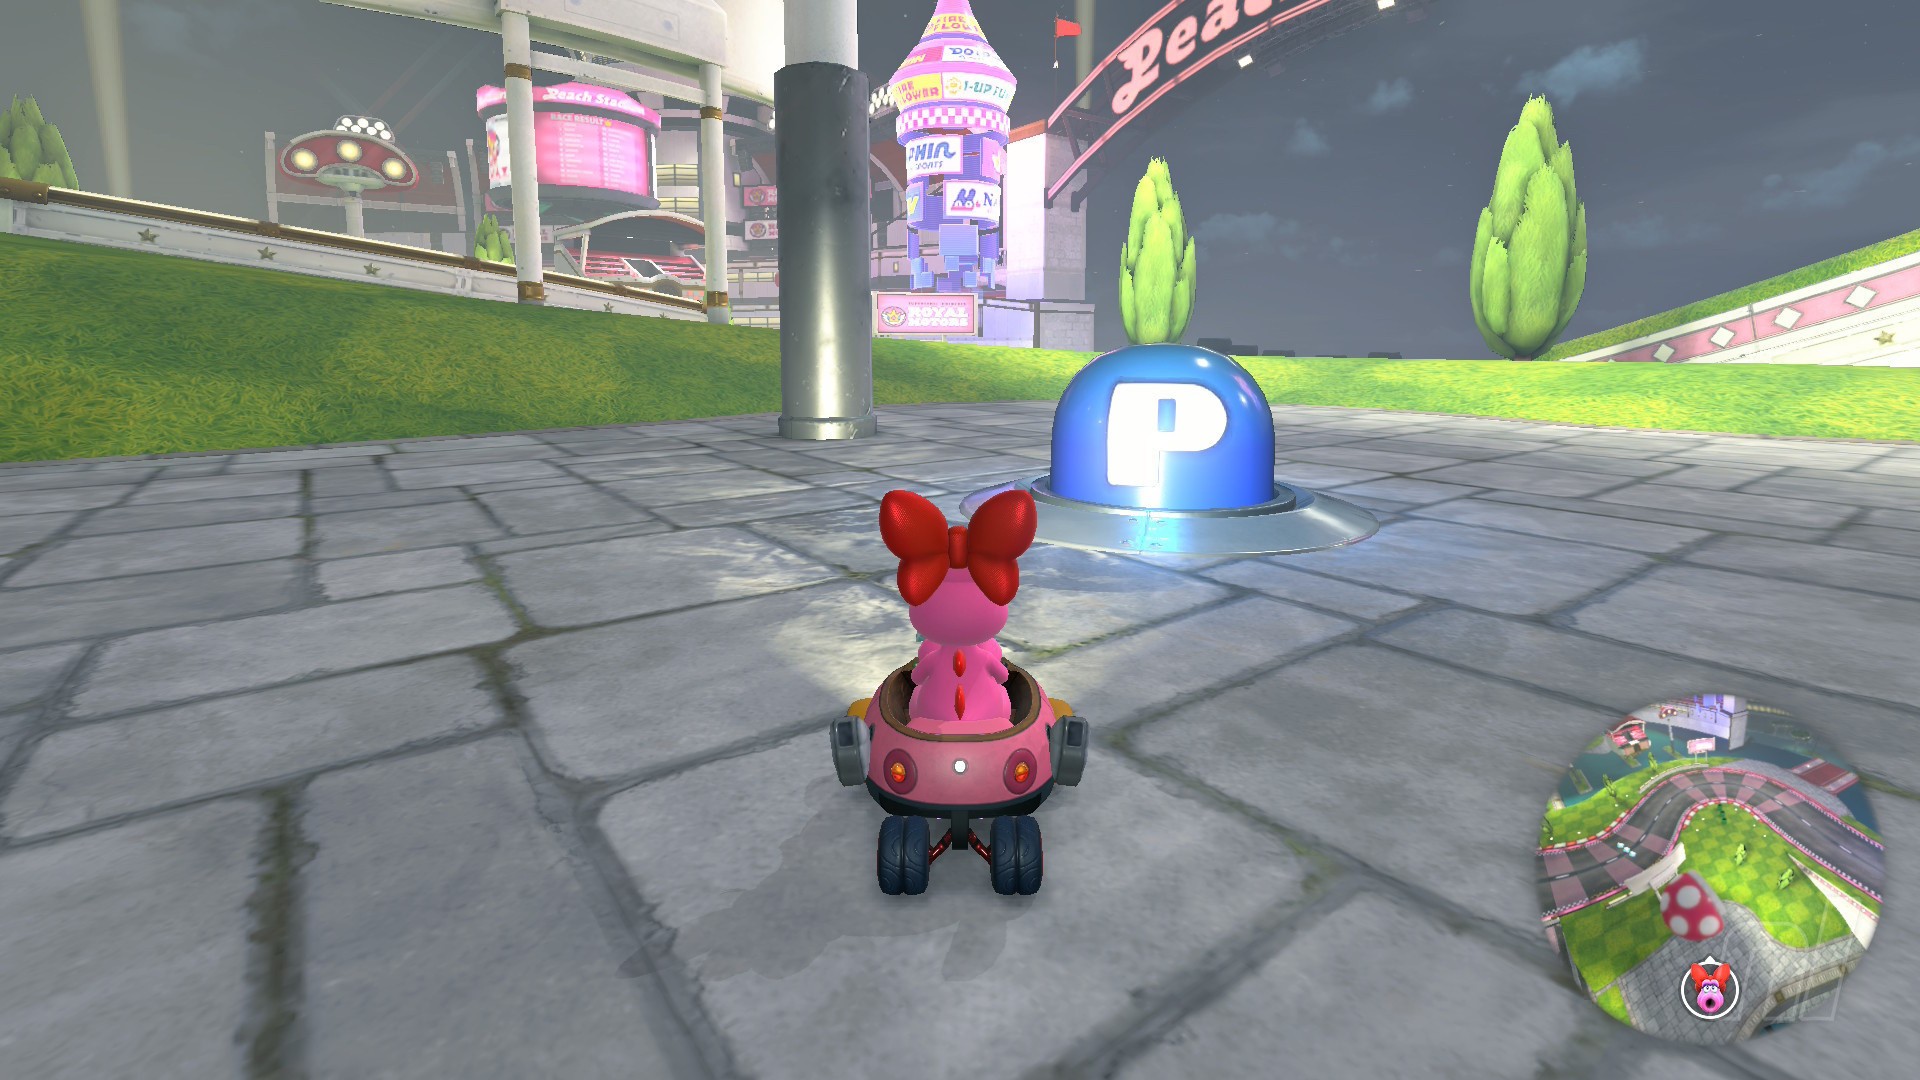
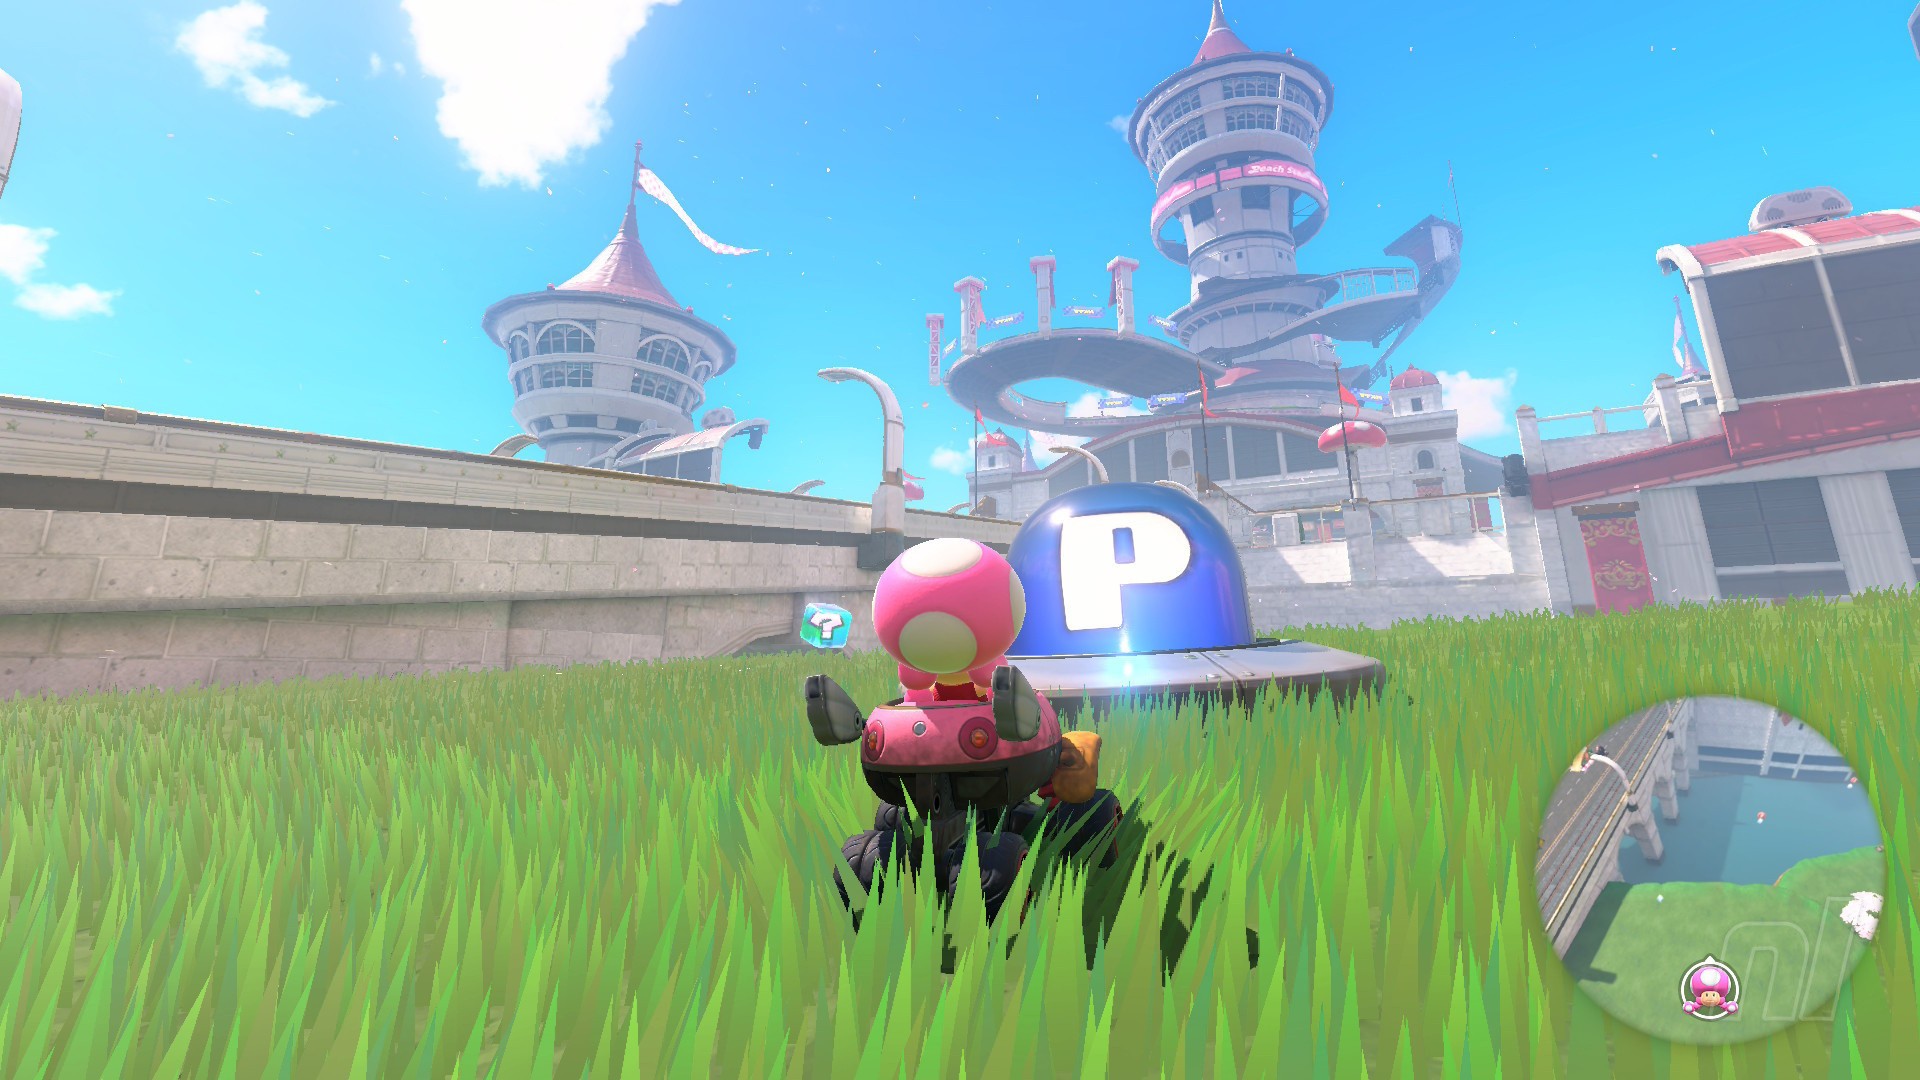
Mission 3 (Peach Stadium)
Image: Nintendo Life
Mission: "Trick your way to the top of the gate!"
Location: Front of the stadium, left of the entrance
Mission 4 (Peach Stadium)
Image: Nintendo Life
Mission: "Race through the figure-eight time trial!"
Location: South of the stadium, on the rock to the right of the entrance
Mission 5 (Peach Stadium)
Image: Nintendo Life
Mission: "Clear the lake! Don't become fish food!"
Location: North of the stadium, under a cover near the roundabout
Mission 6
Image: Nintendo Life
Mission: "Grab blue coins among the Para-Biddybugs!"
Location: Northwest of the stadium, in a stripy field
Mission 7
Image: Nintendo Life
Mission: "Collect blue coins along a scenic back route!"
Location: East of the stadium on a grassy verge, right of the entrance track
Mission 8
Image: Nintendo Life
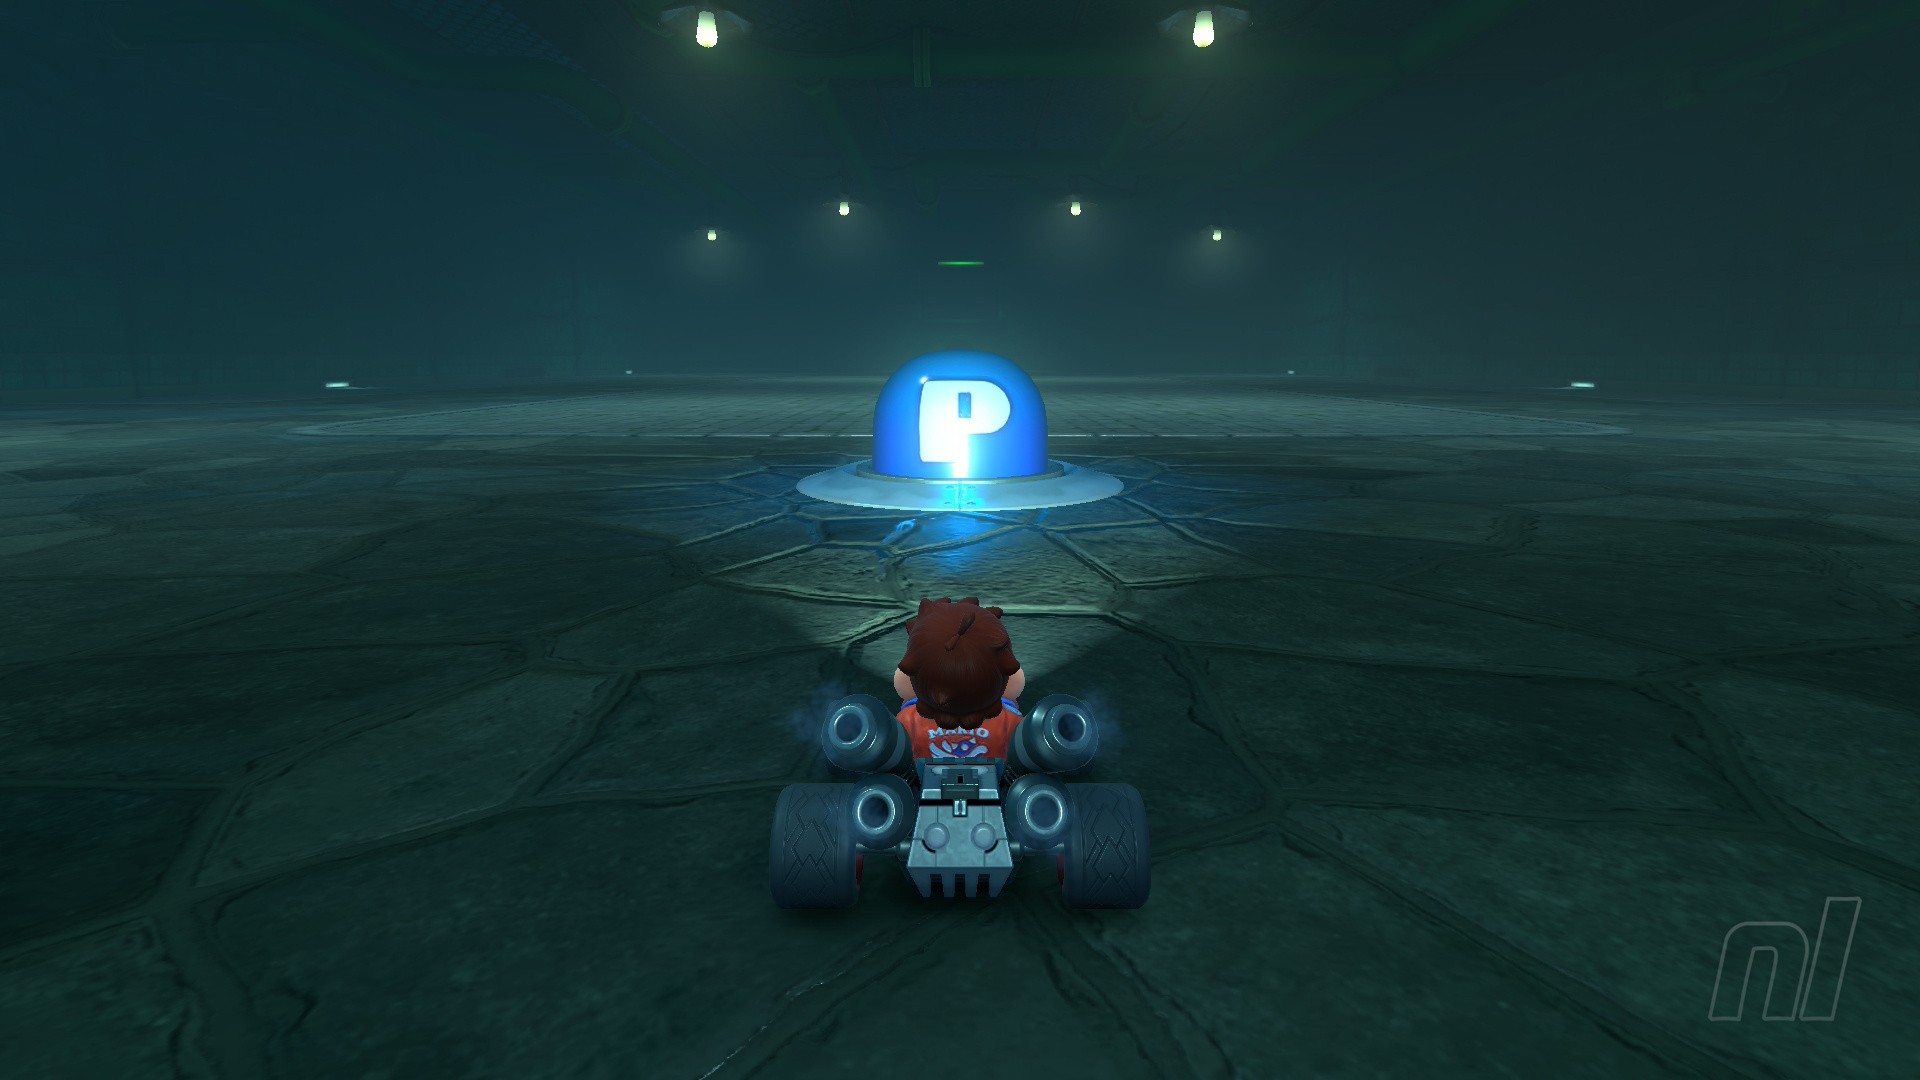
Mission: "Use a delicate touch to reach the Goal Pole!"
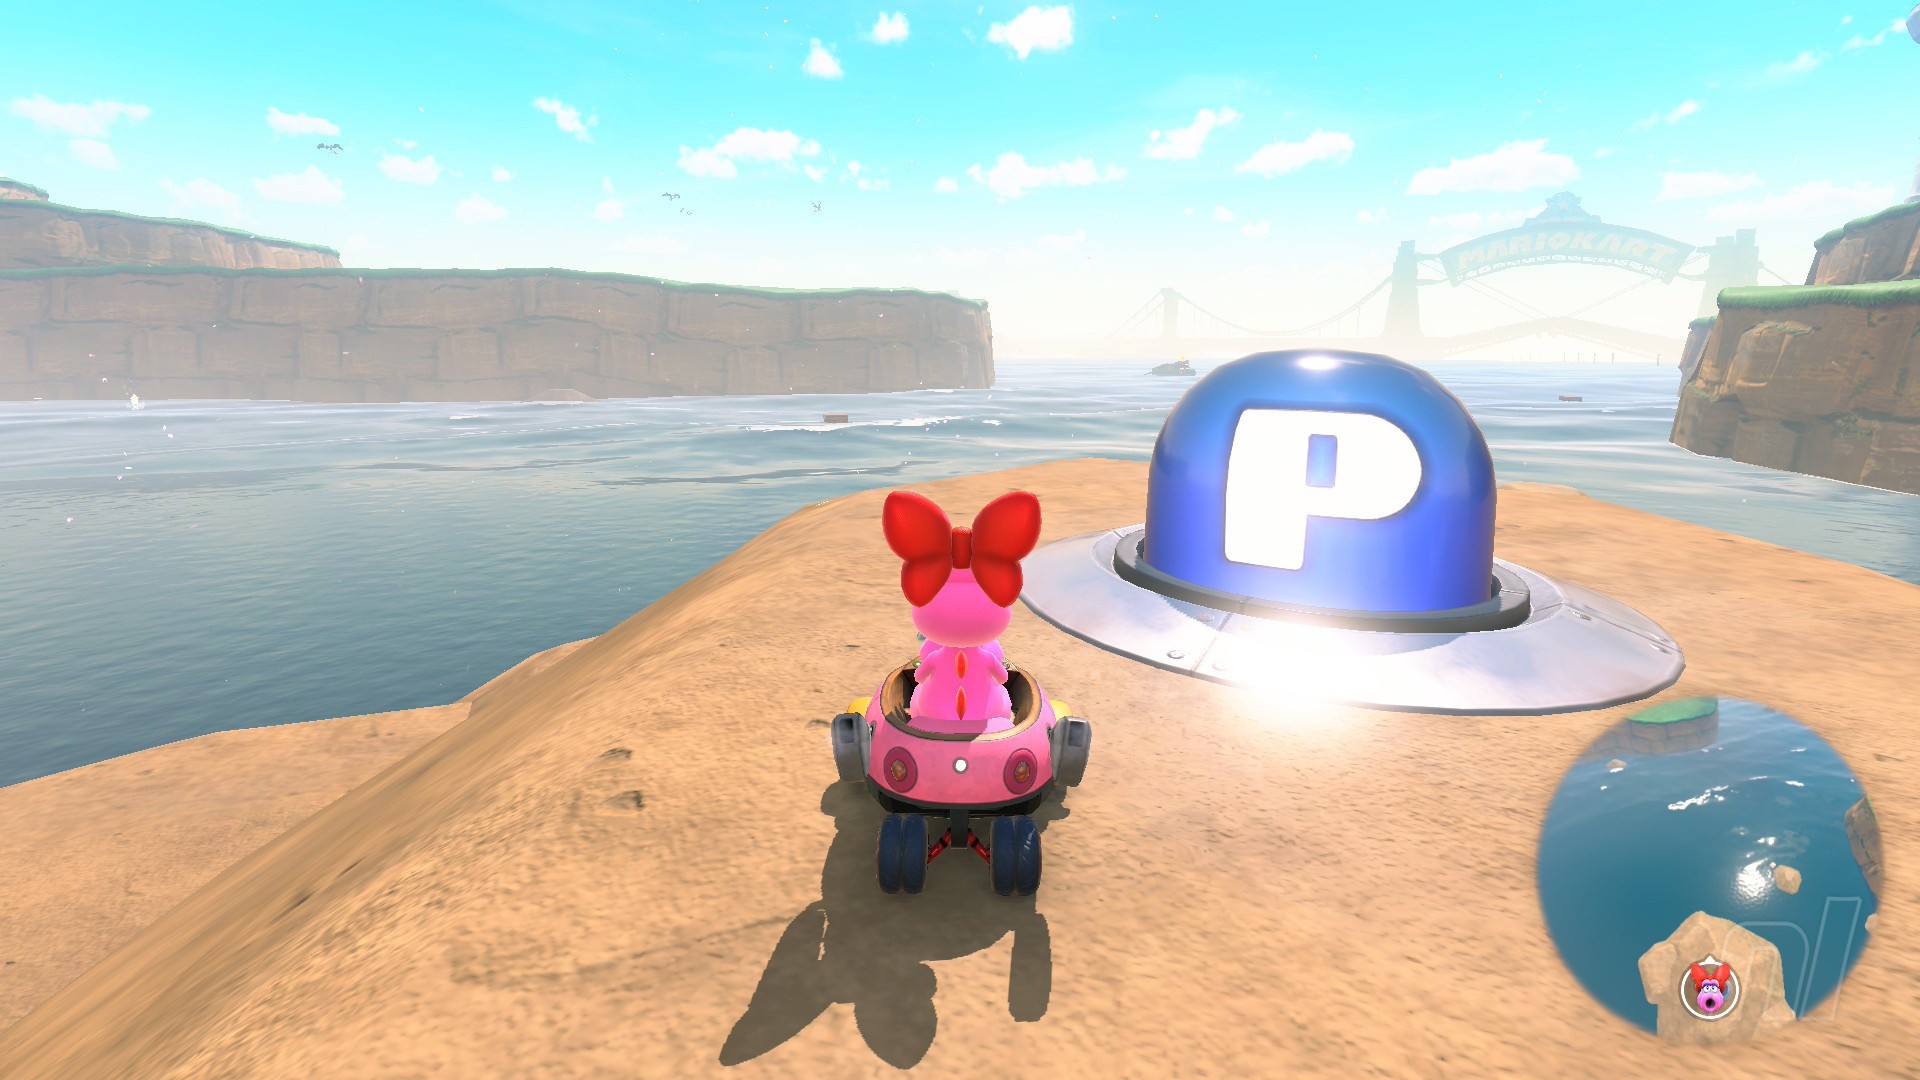
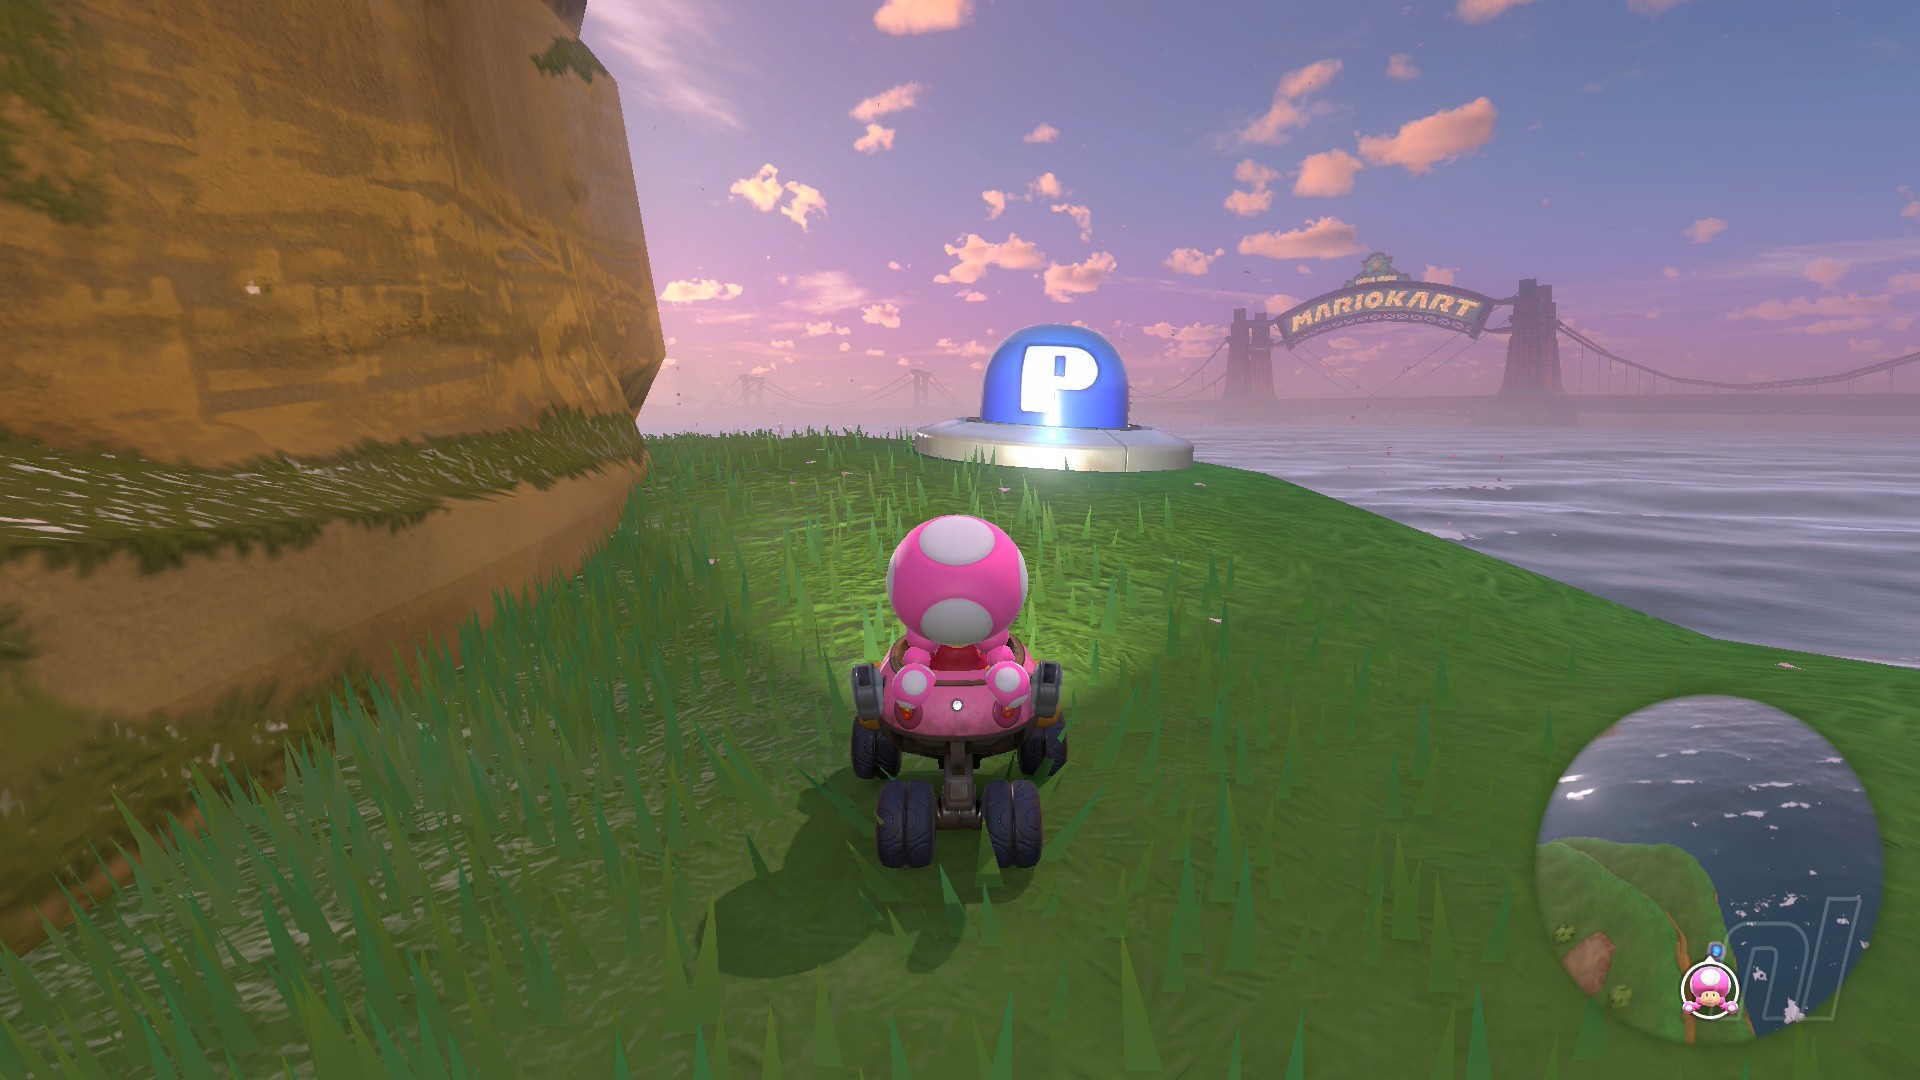
Location: On the left land curve, south of Peach Stadium overlooking the South Sea
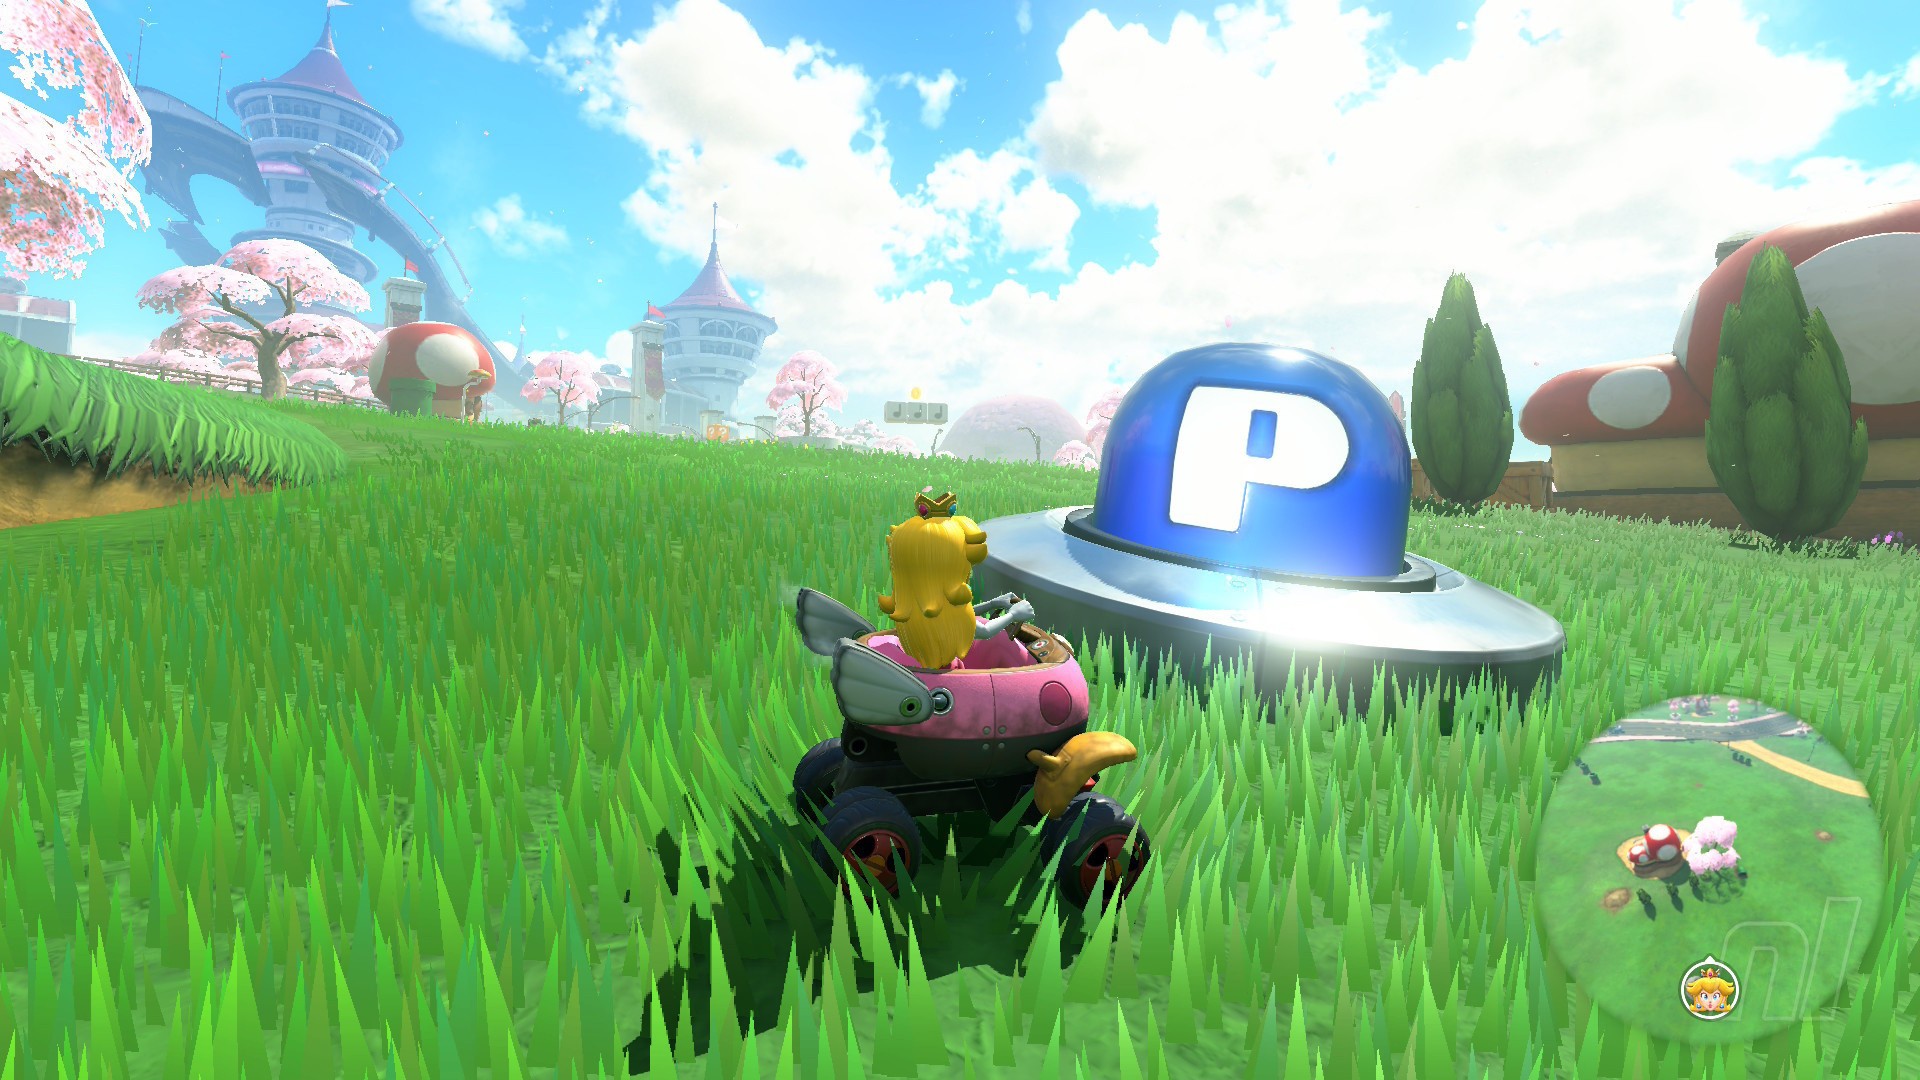
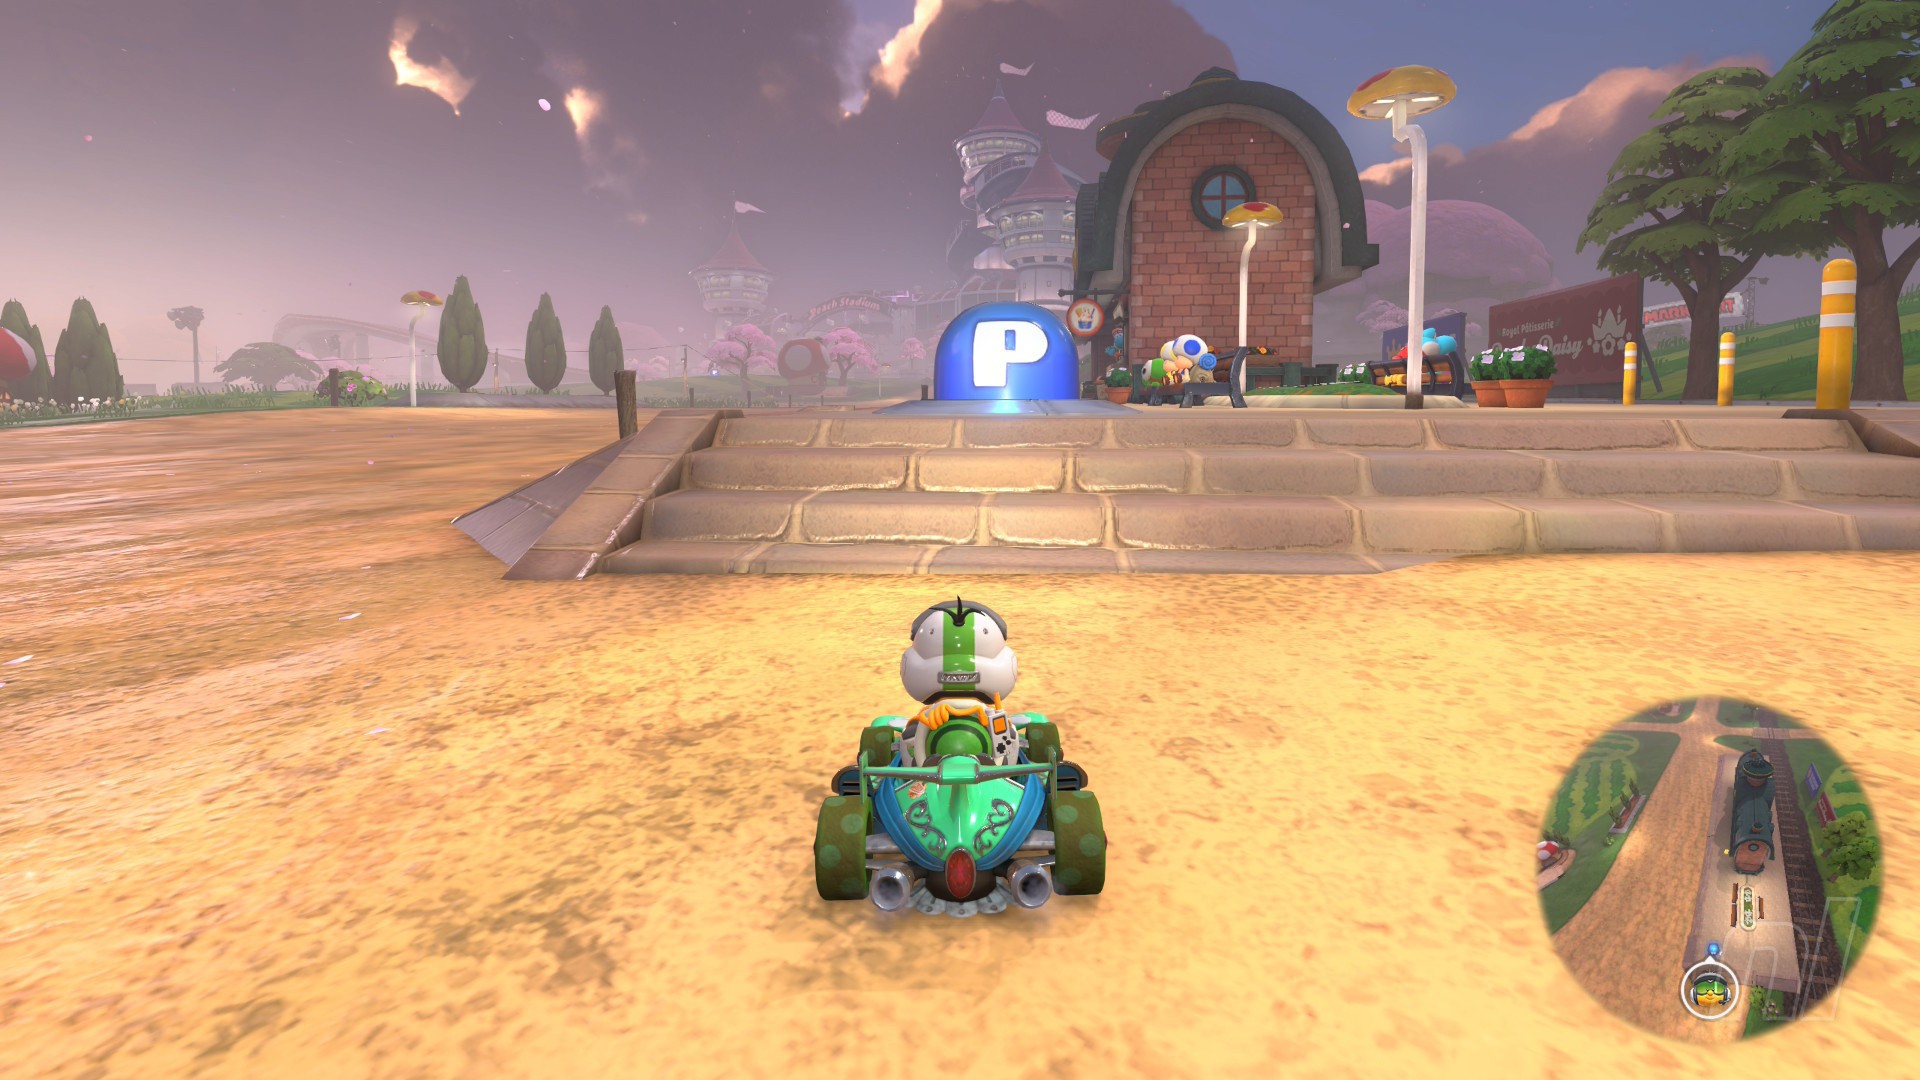
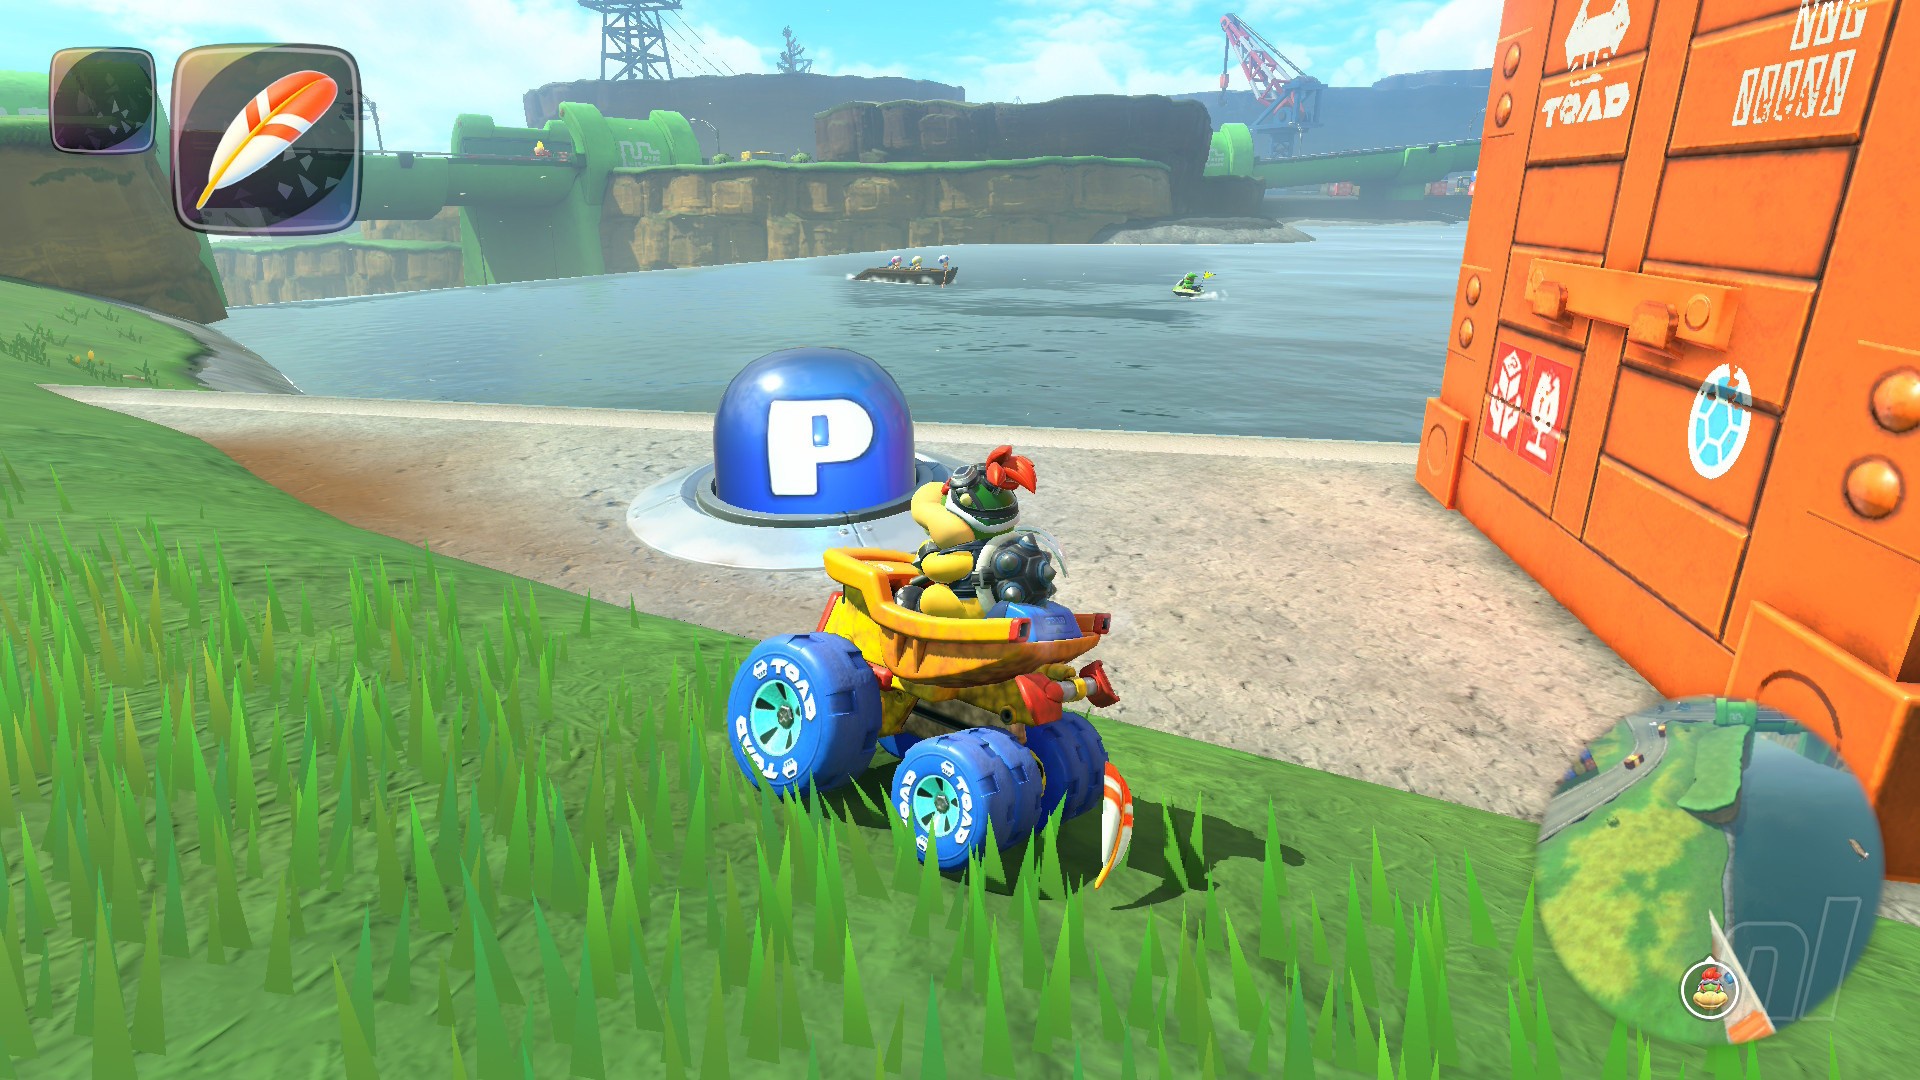
Mission 9
Image: Nintendo Life
Mission: "Play some tunes while gathering blue coins!"
Location: West of the stadium, next to a mushroom-shaped house
Mission 10
Image: Nintendo Life
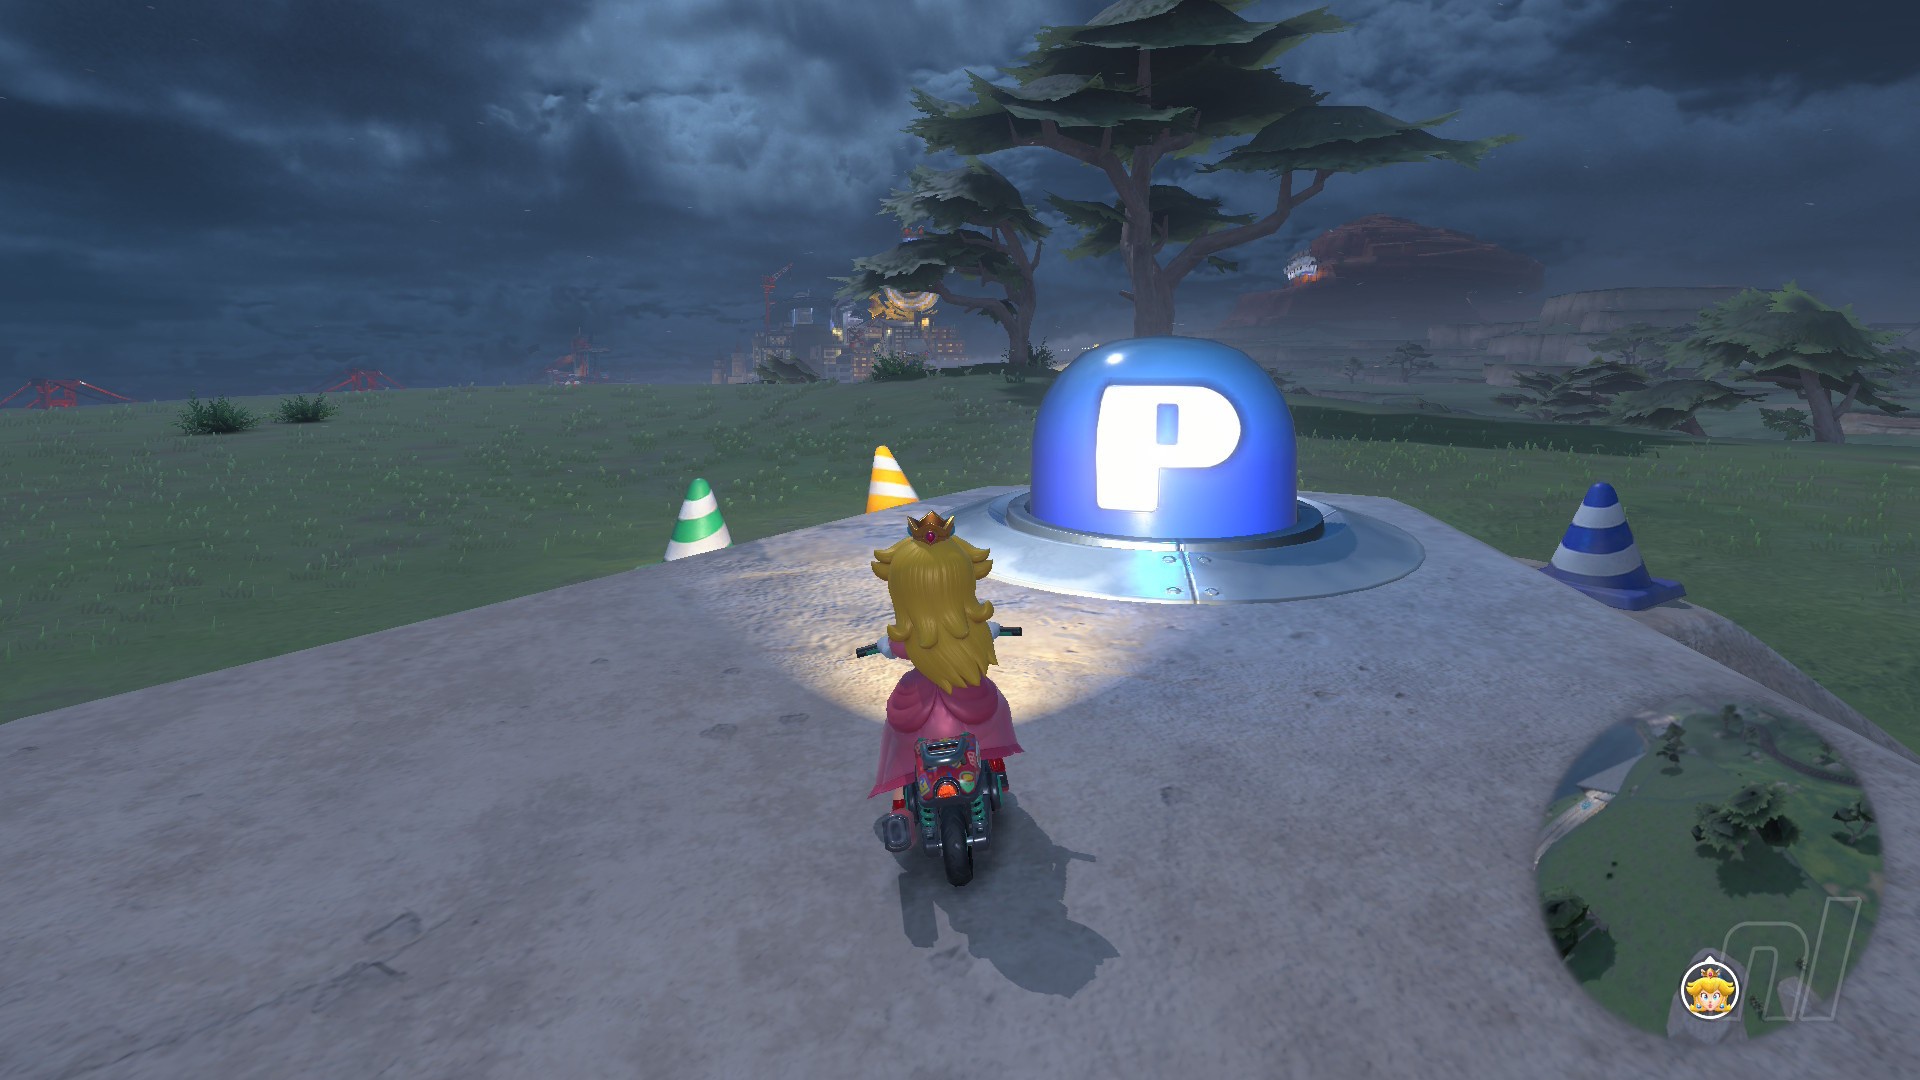
Mission: "Crash through the Hermity Cone hideouts!"
Location: On a rock surrounded by cones in the region's southwestern grassy plain
Mission 11
Image: Nintendo Life
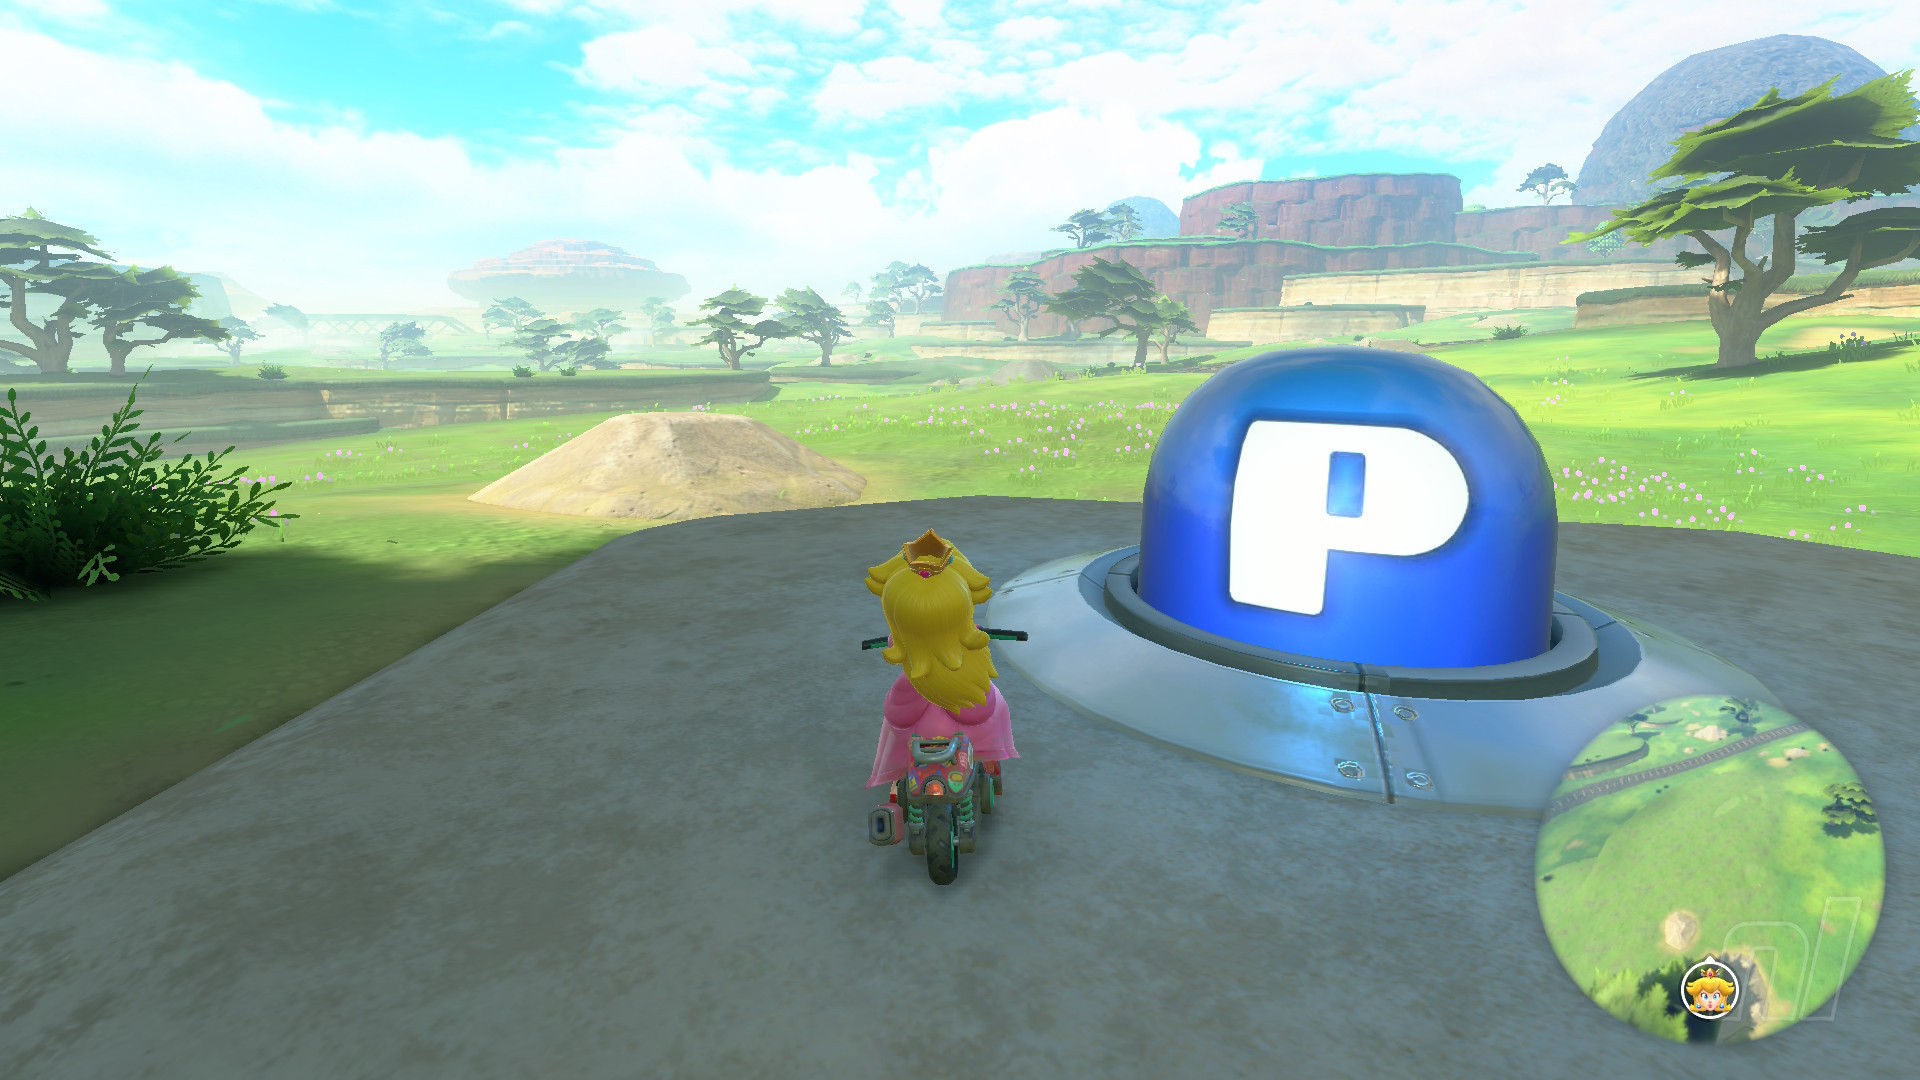
Mission: "Take a somewhat-leisurely path to the goal!"
Location: Head northwest from the mountain that houses P Switch 10 and you'll quickly stumble across this one
Mission 12
Image: Nintendo Life
Mission: "Catch the express train to the city!"
Location: On a southwestern rock, near a field of Sidesteppers
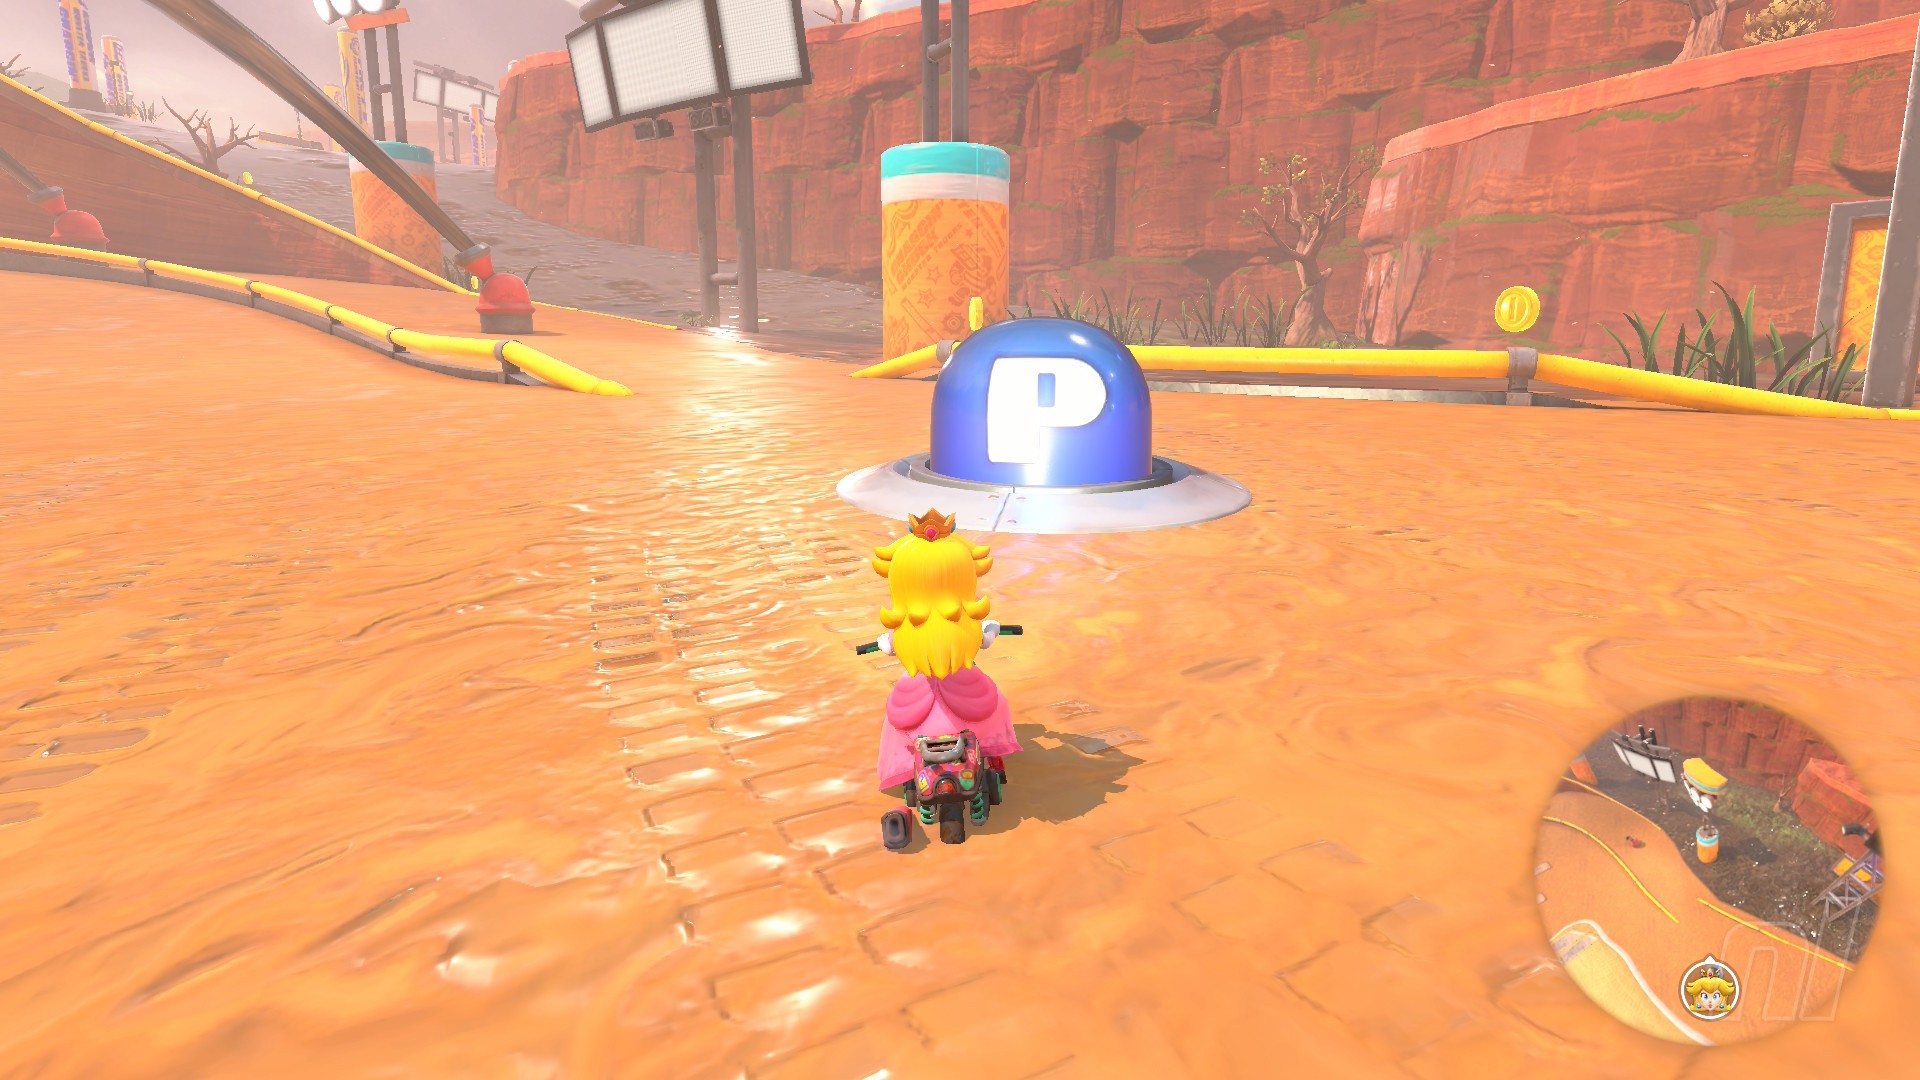
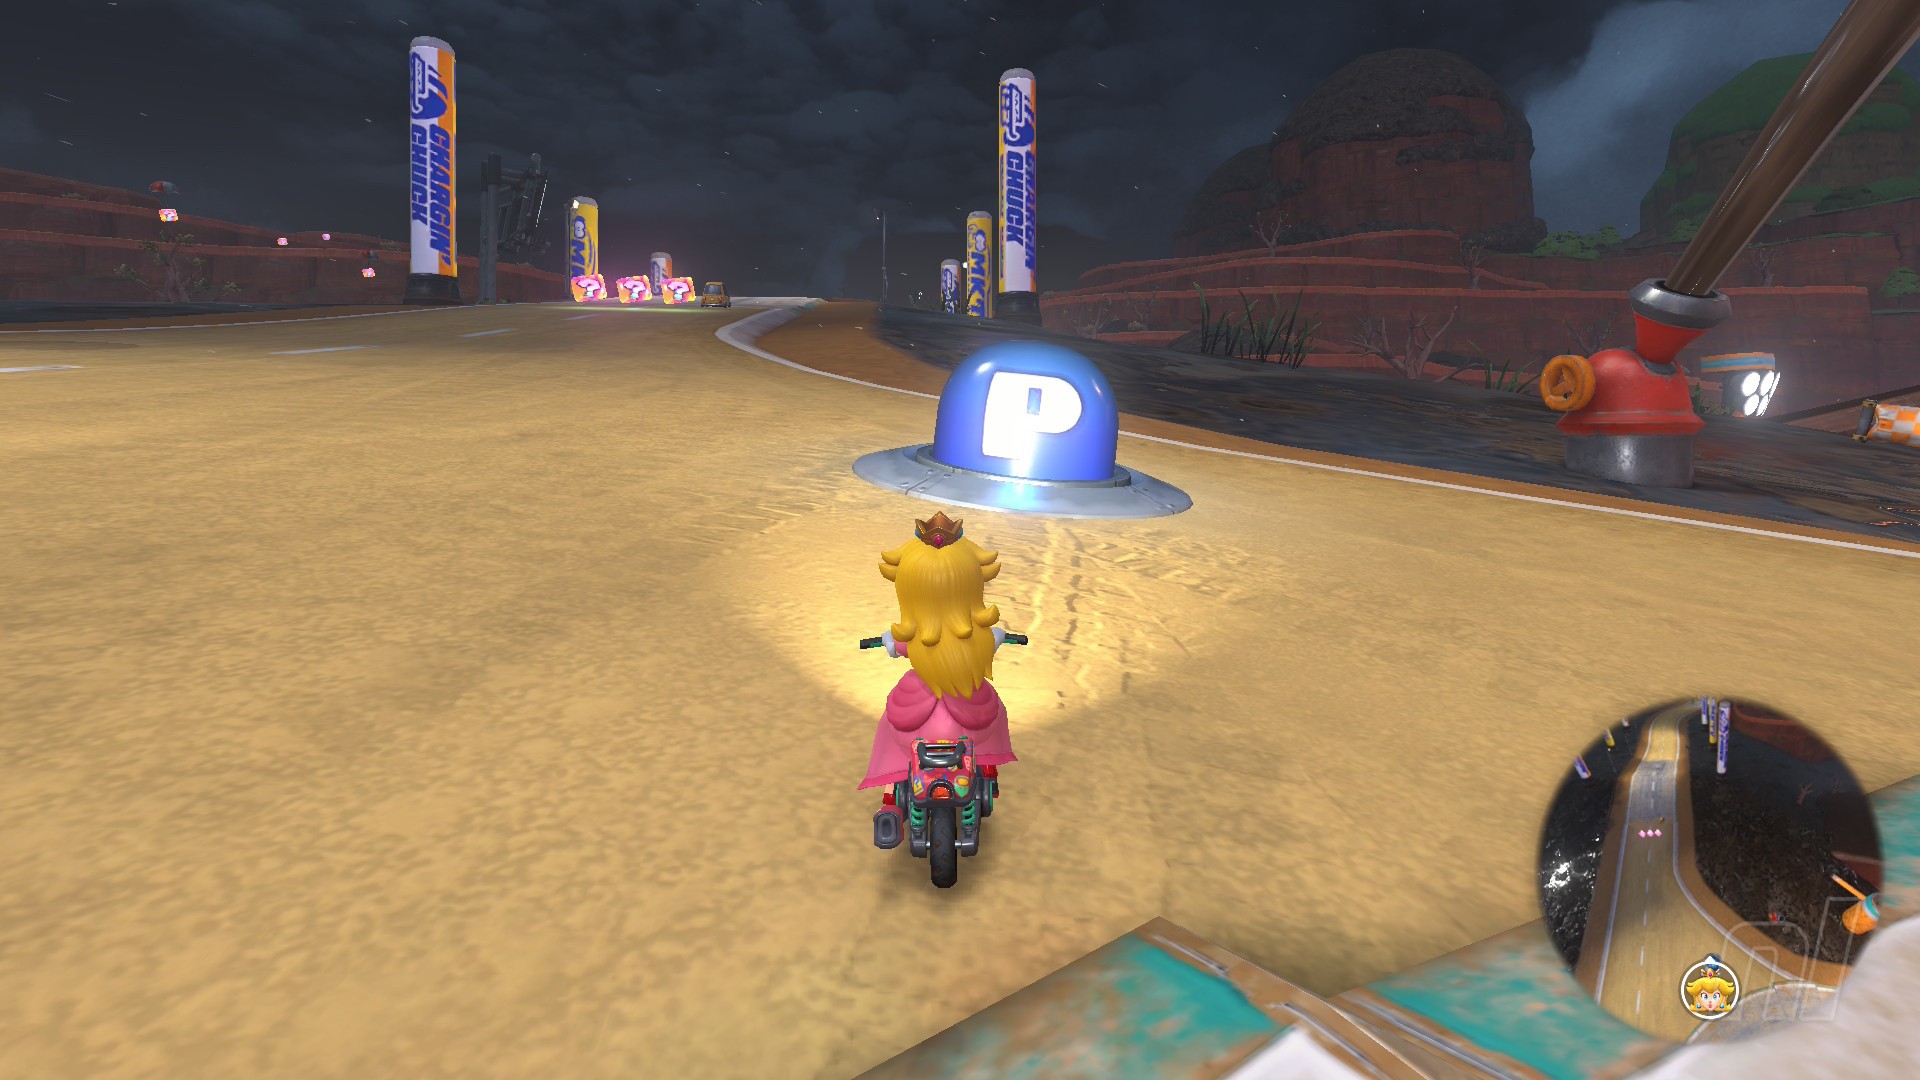
Mission 13 (Choco Mountain)
Image: Nintendo Life
Mission: "Shine bright with Super Star power!"
Location: Next to the train tracks, south of Choco Mountain
Mission 14 (Choco Mountain)
Image: Nintendo Life
Mission: "Race around a tribute to Choco Island 1!"
Location: On the southeastern road into Choco Mountain
Mission 15 (Choco Mountain)
Image: Nintendo Life
Mission: "Watch out for falling chocolate! And rocks!"
Location: In the mud at the bottom of Choco Mountain's big northern ascent
Mission 16 (Choco Mountain)
Image: Nintendo Life
Mission: "Dash, dash, dash through the thick chocolate!"
Location: On a bend on the northern road out of Choco Mountain
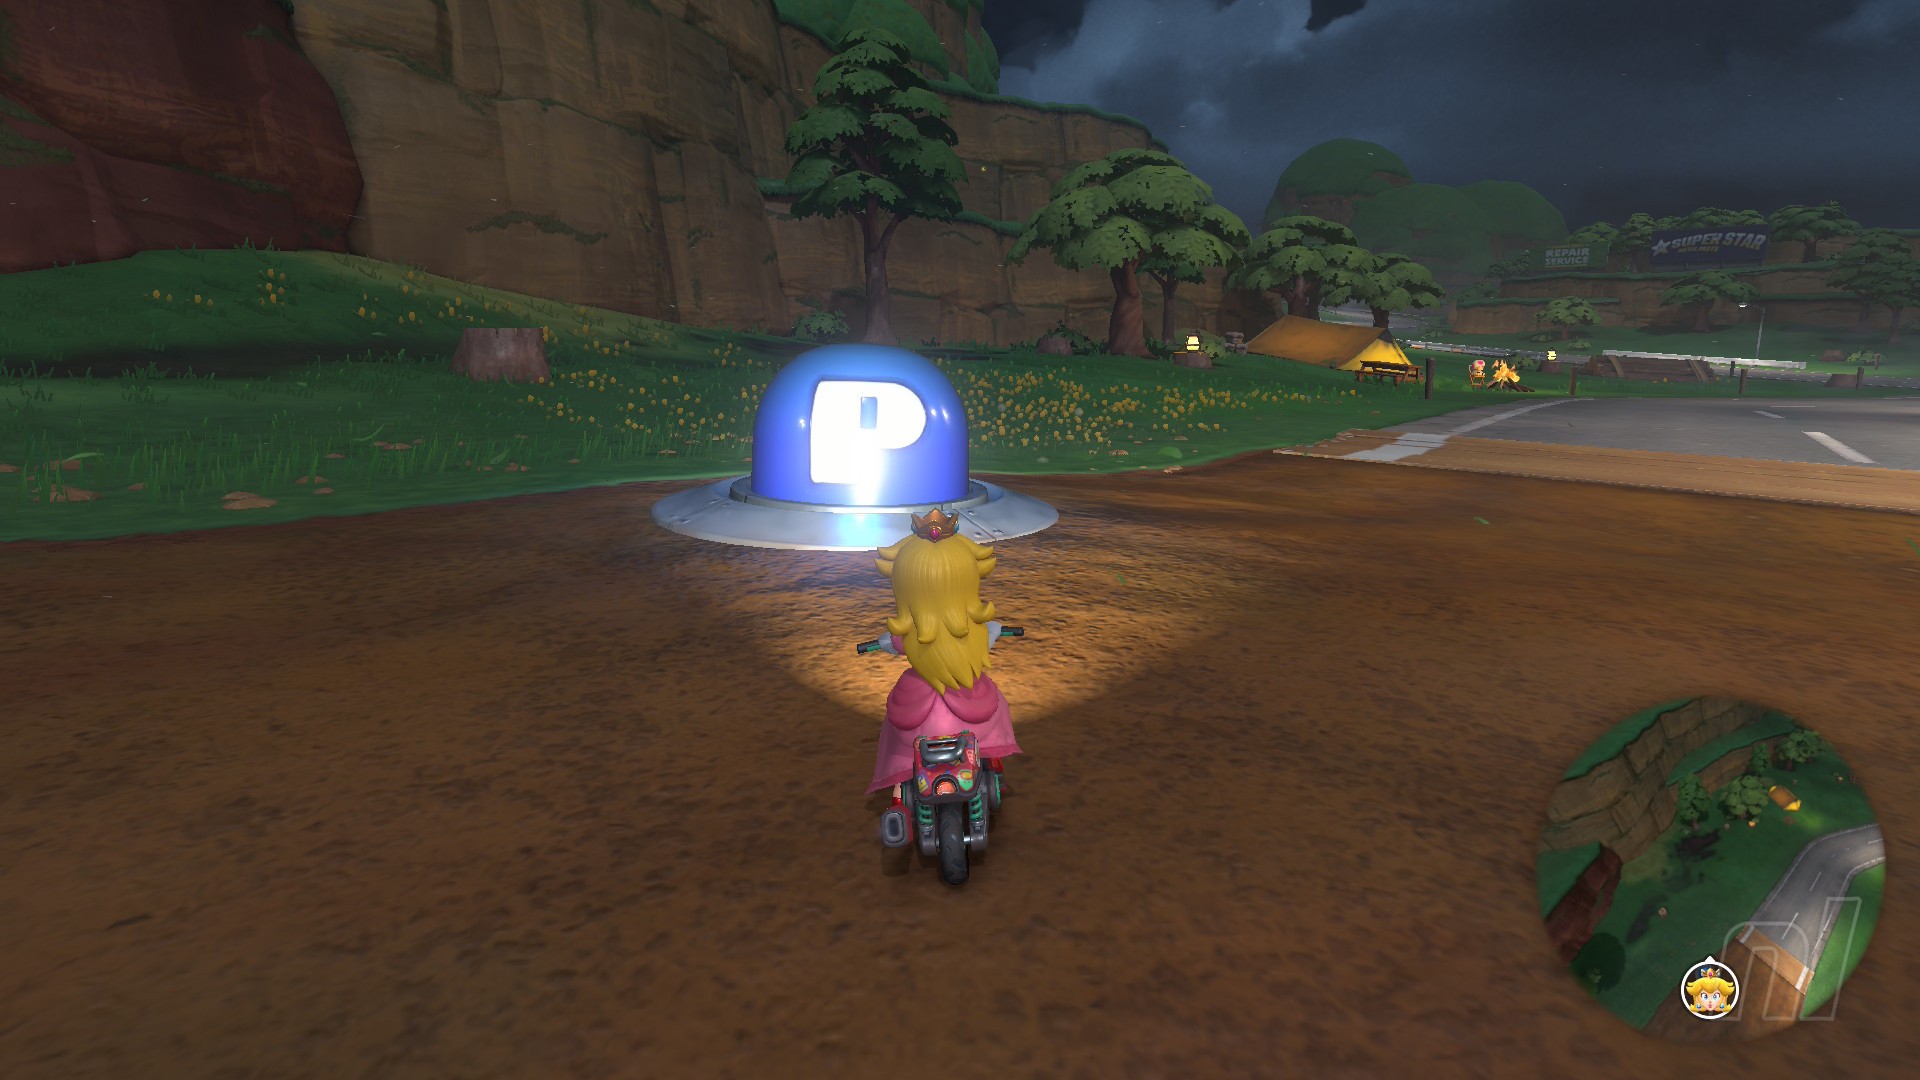
Mission 17
Image: Nintendo Life
Mission: "Race along a risky shortcut!"
Location: On the northern road into Choco Mountain, near the Toad campsite
Mission 18
Image: Nintendo Life
Mission: "Take an off-road route to Choco Mountain!"
Location: Continue north from P Switch 16, you'll find this one on a dirt track straight ahead
Mission 19
Image: Nintendo Life
Mission: "Show everyone the slopes aren't off limits!"
Location: Off a winding road near the northernmost Choco mountain range
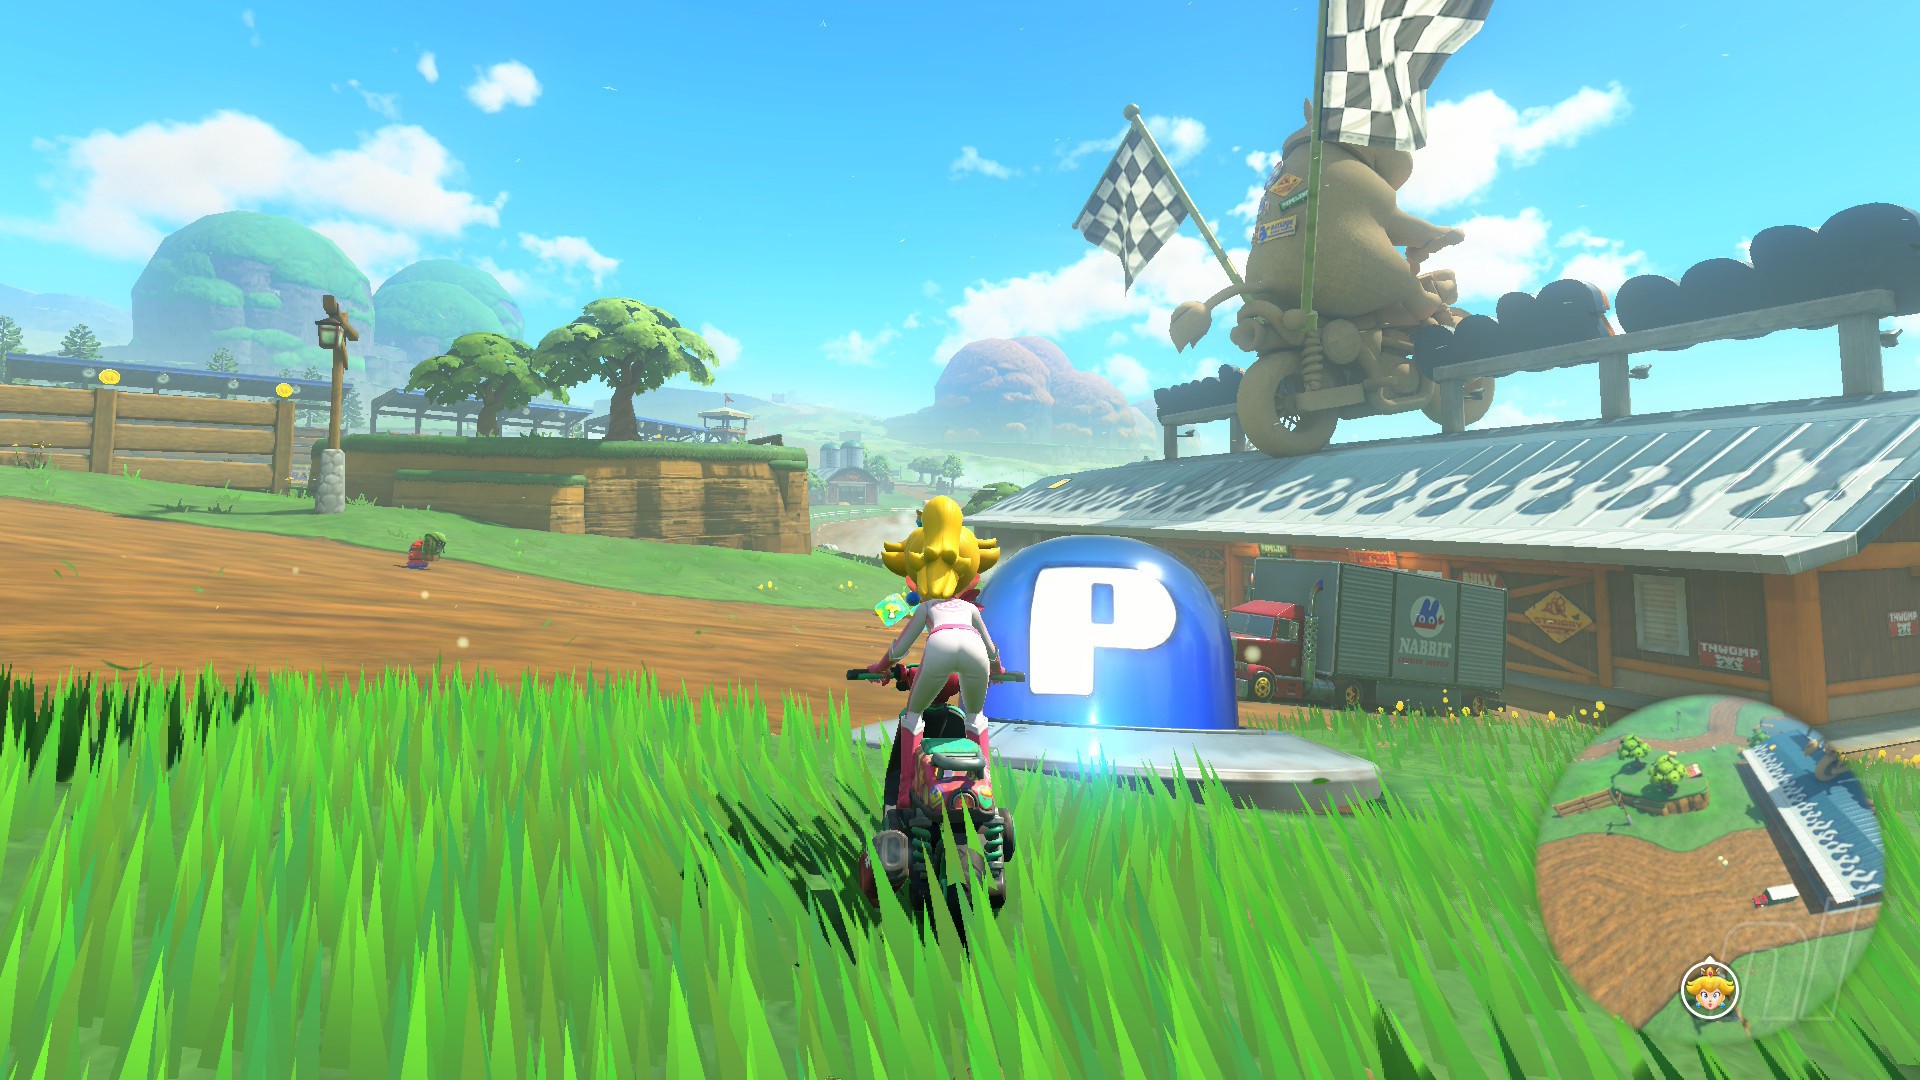
Mission 20 (Moo Moo Meadows)
Image: Nintendo Life
Mission: "Chase whoever is tearing up the yard!"
Location: Near some hay bales, west of Moo Moo Meadows
Mission 21 (Moo Moo Meadows)
Image: Nintendo Life
Mission: "Hop over the meadows and launch to the goal!"
Location: On some raised grass, inside a northern Moo Moo Meadow bend
Mission 22 (Moo Moo Meadows)
Image: Nintendo Life
Mission: "Mooove through the herd of cows!"
Location: Next to a Yoshi van near Moo Moo Meadows' central barn
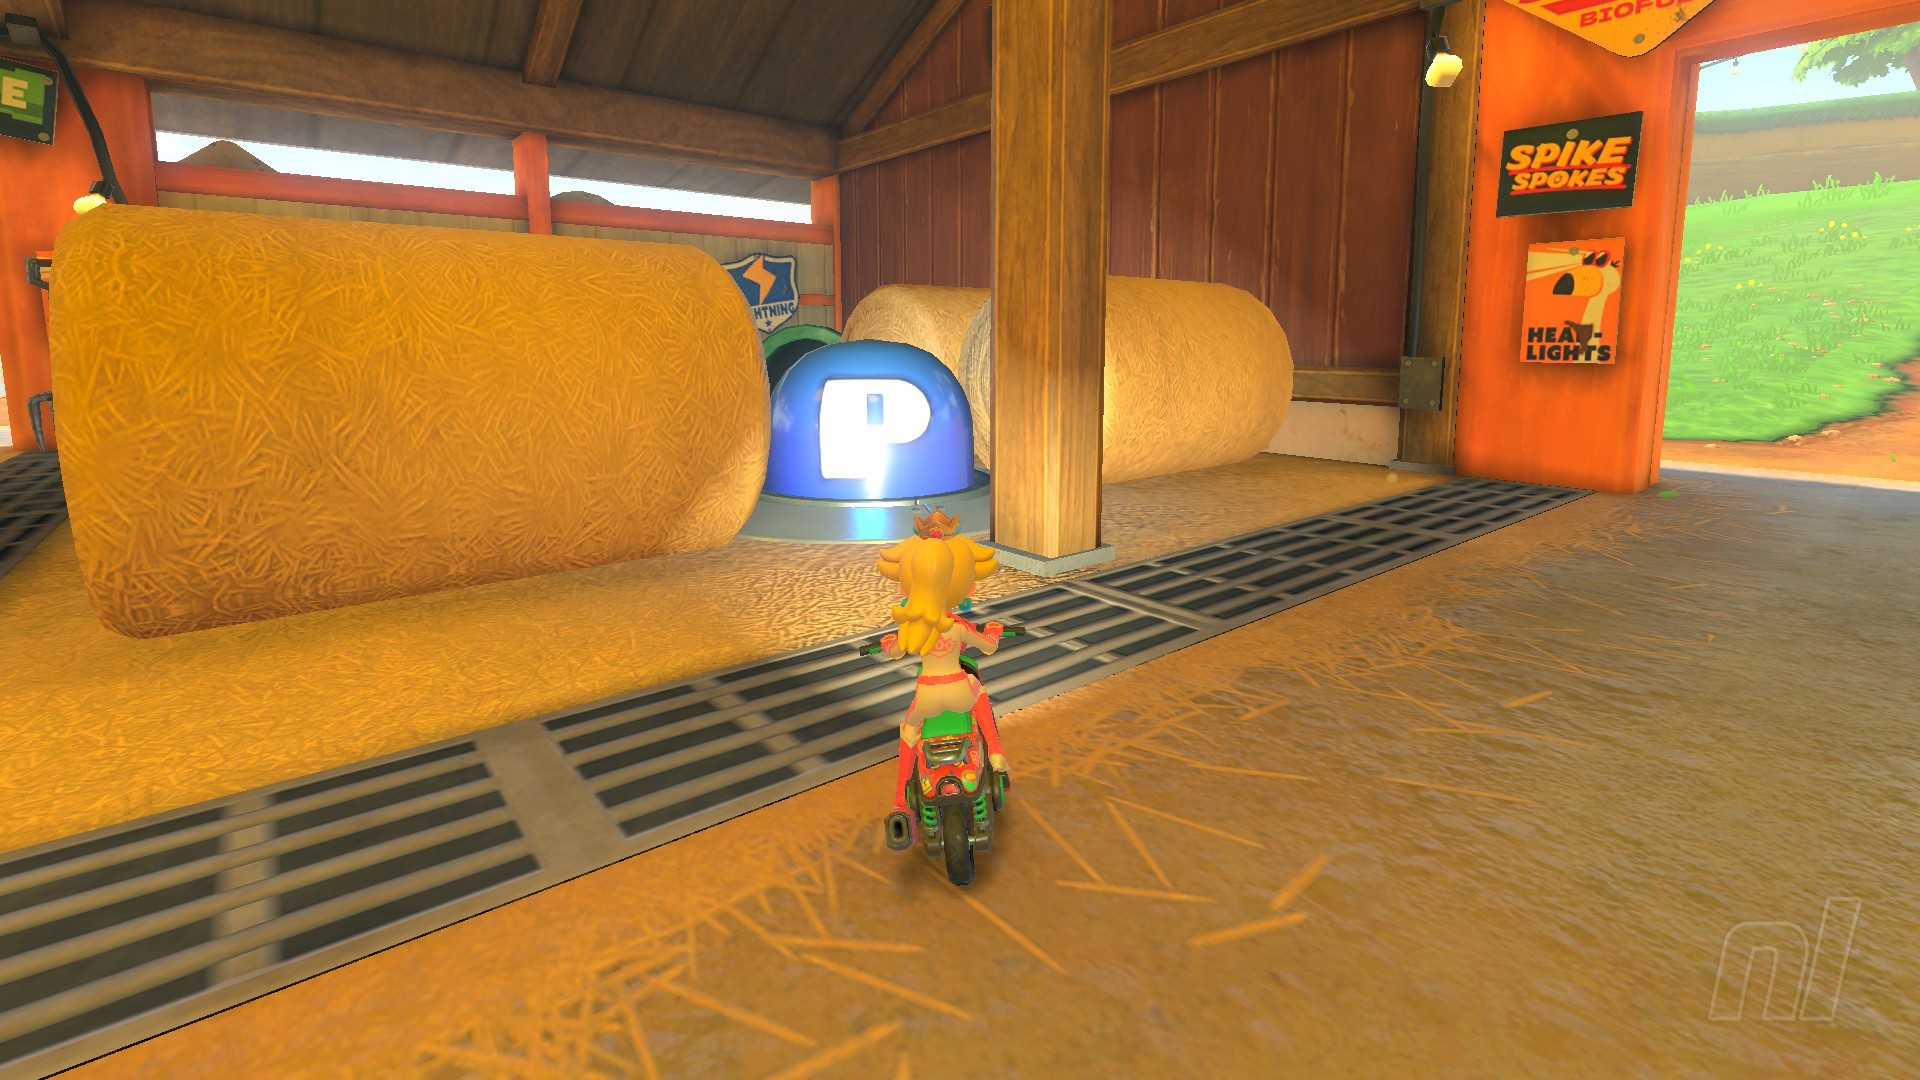
Mission 23 (Moo Moo Meadows)
Image: Nintendo Life
Mission: "Trust that there's a blue-coin reason for the pipe!"
Location: In the Moo Moo Meadows barn, between some hay bales
Mission 24
Image: Nintendo Life
Mission: "Hit the ramps and reach the goal!"
Location: In the top point of the star-shaped lake
Tip: Touching the water is an insta-fail in this one, so make sure to trick boost off every ramp
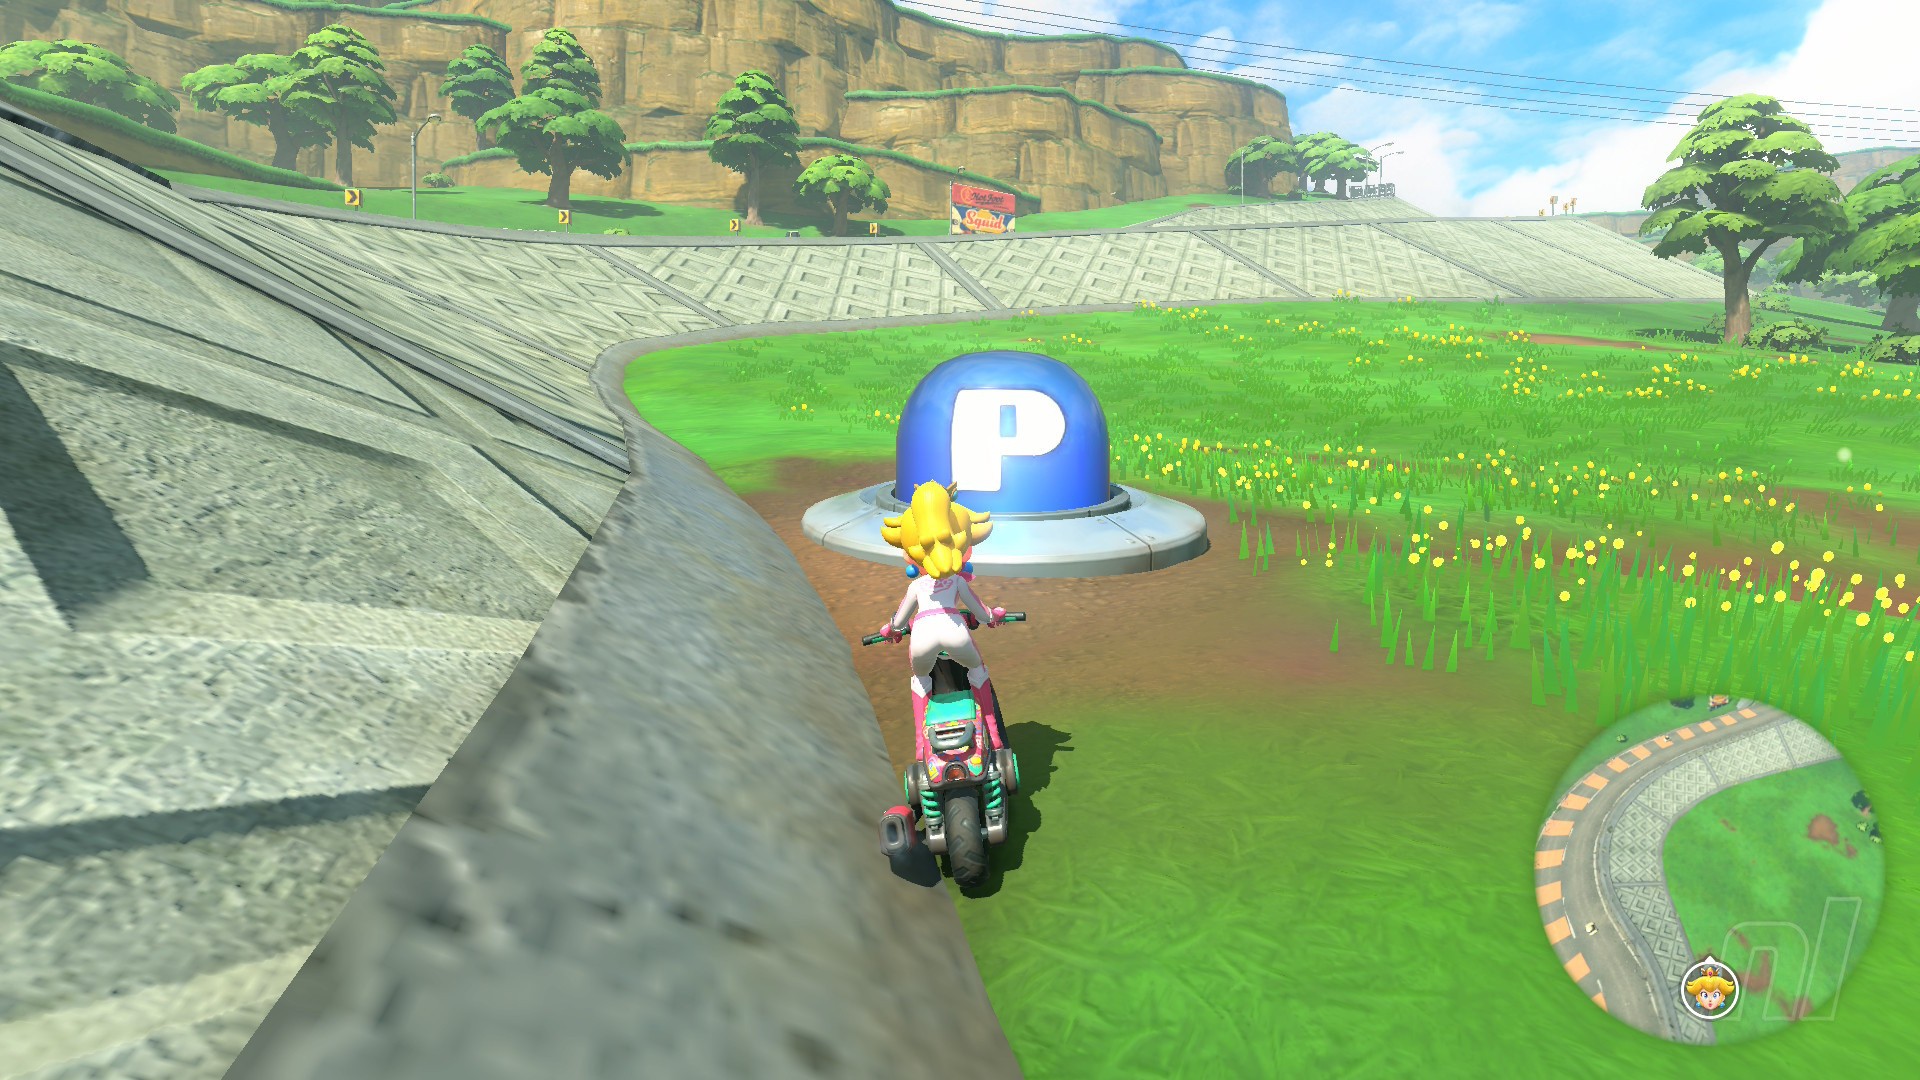
Mission 25
Image: Nintendo Life
Mission: "Tear up the mountain pass before time runs out!"
Location: Across the bridge to the east of Moo Moo Meadows
Mission 26
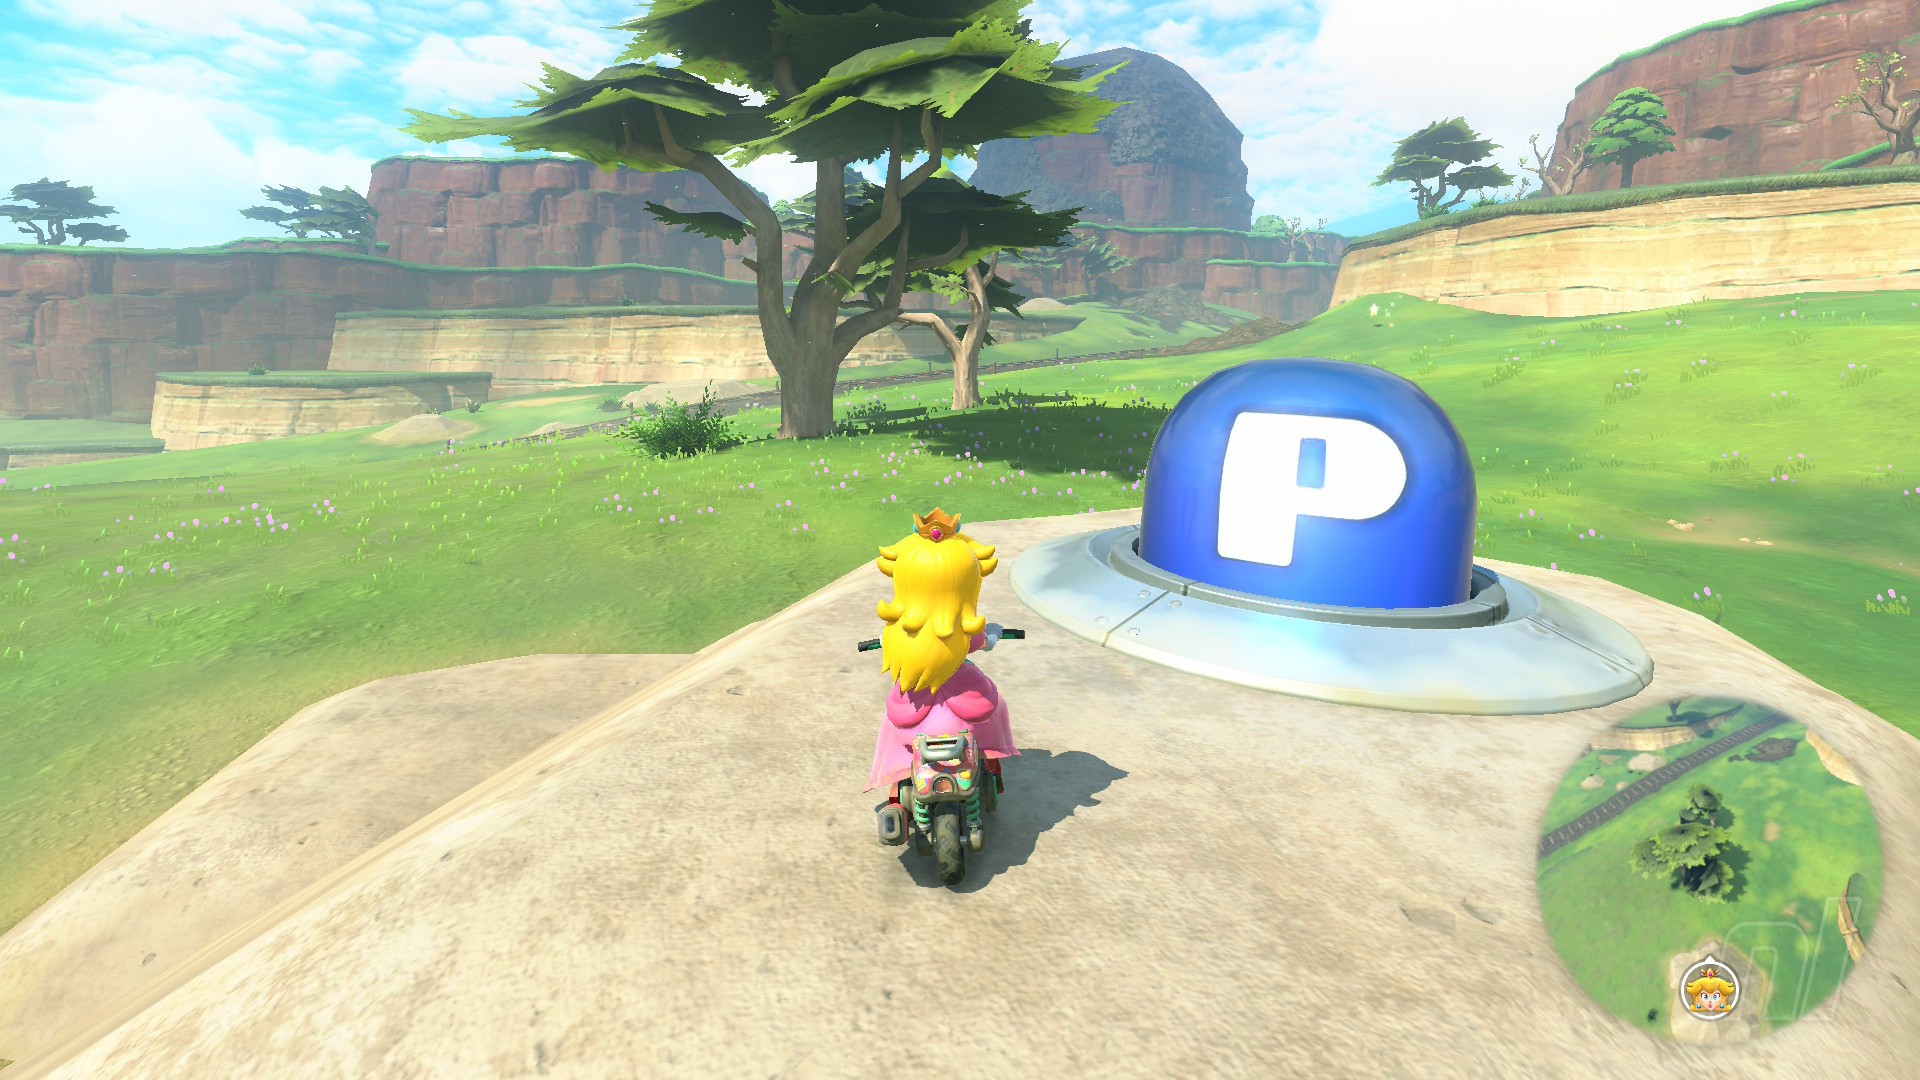
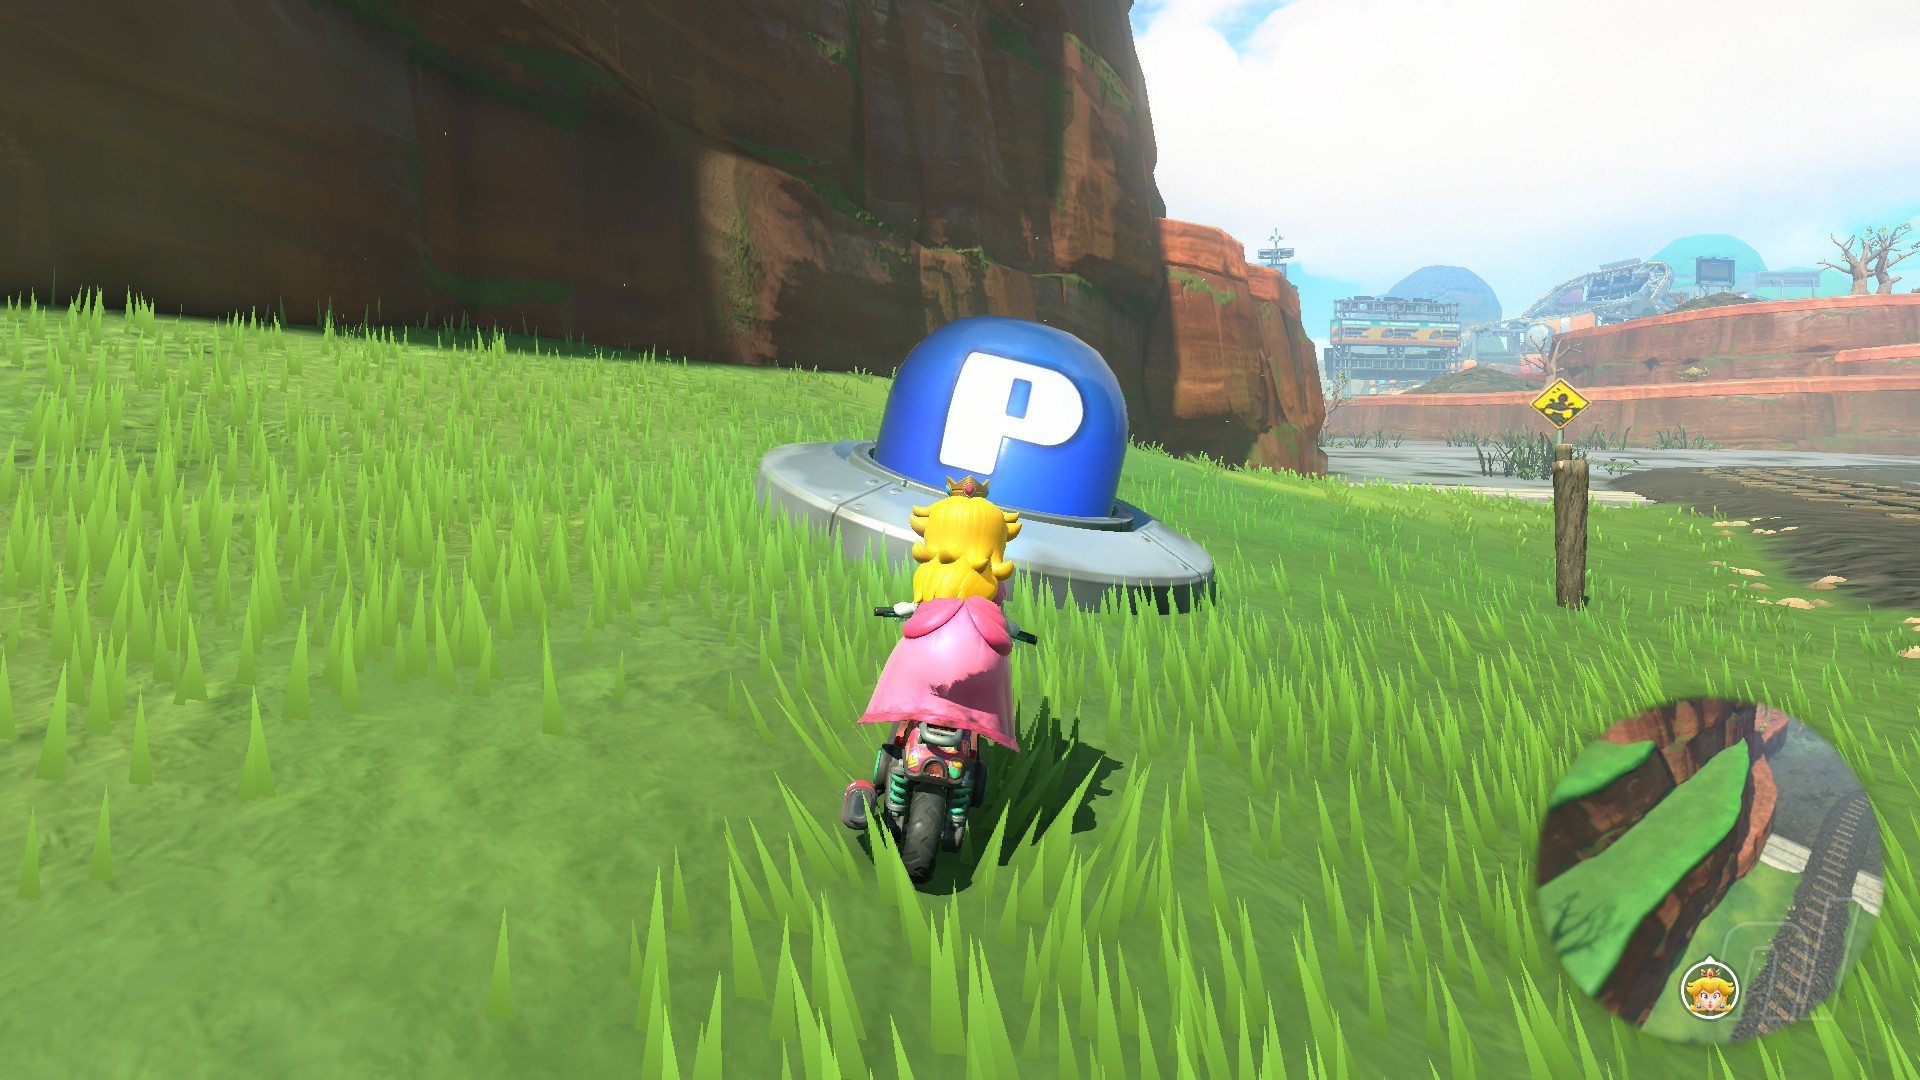
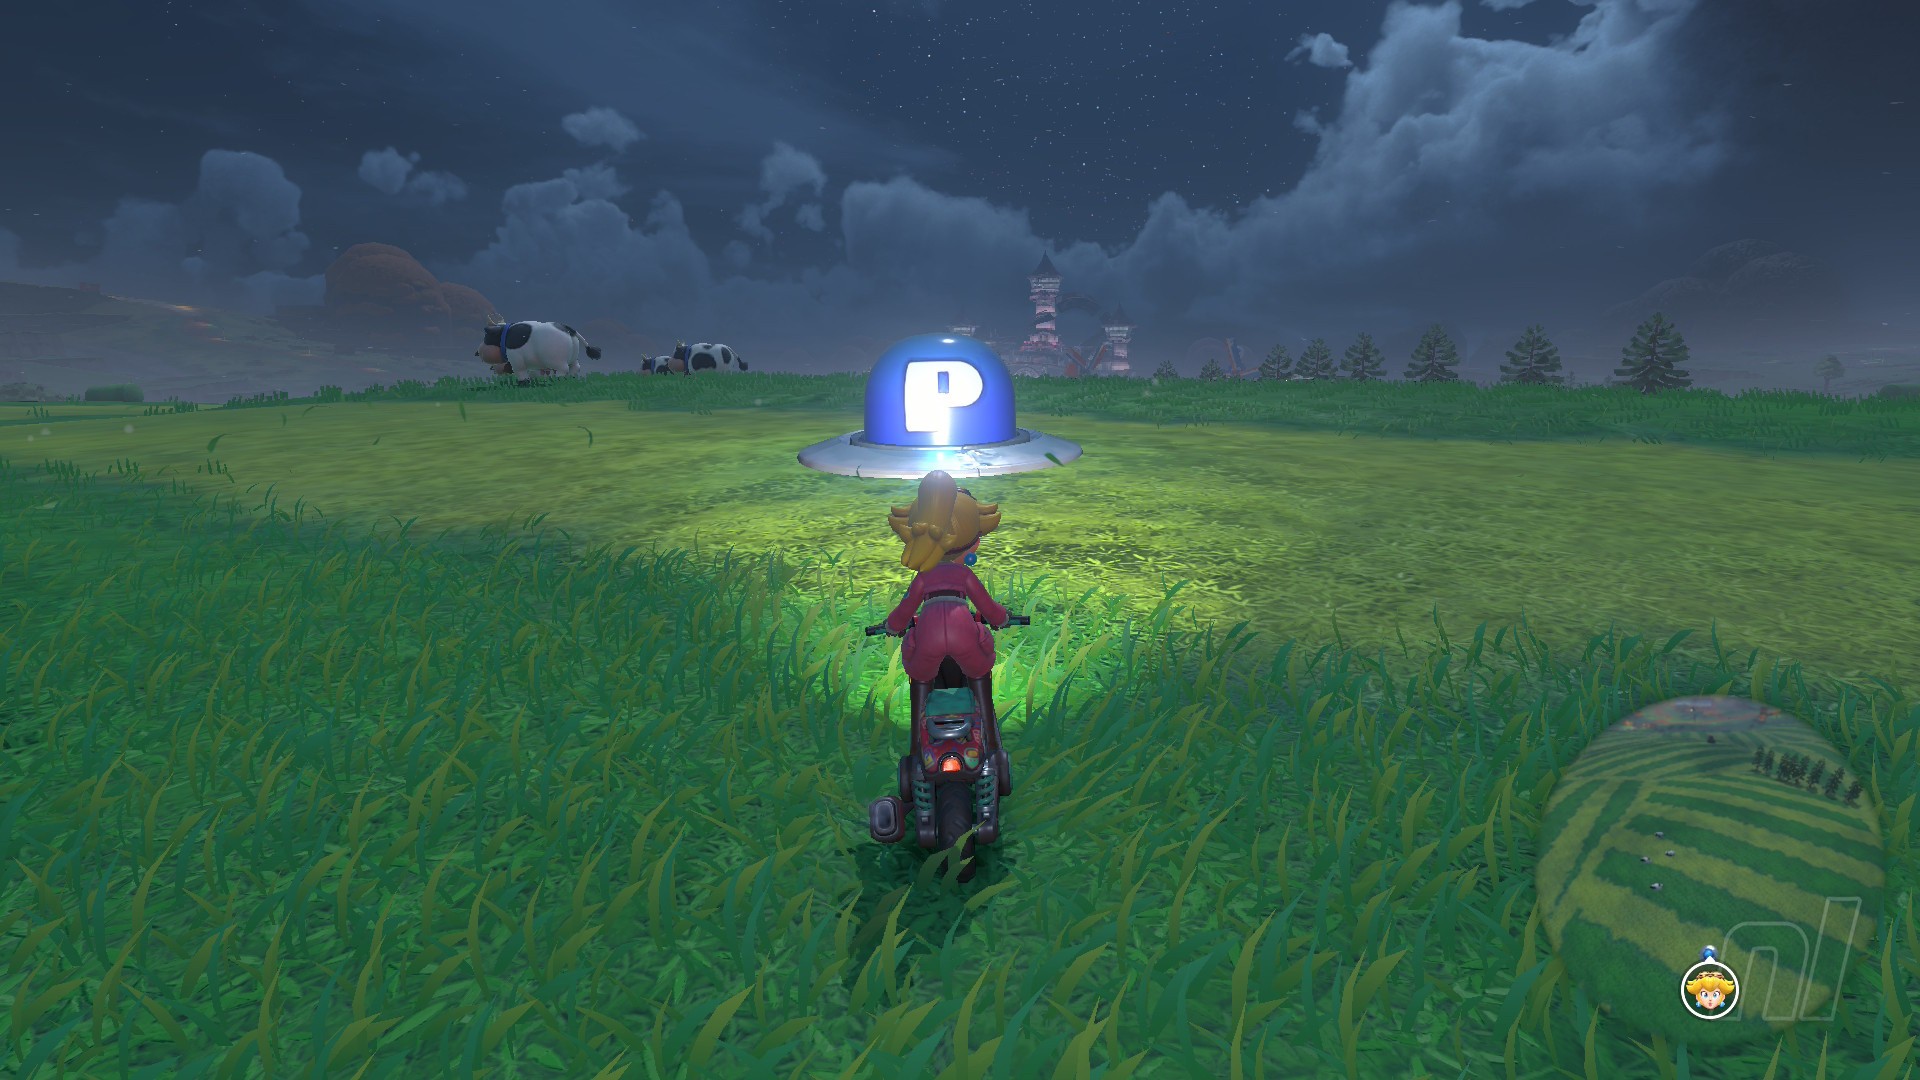
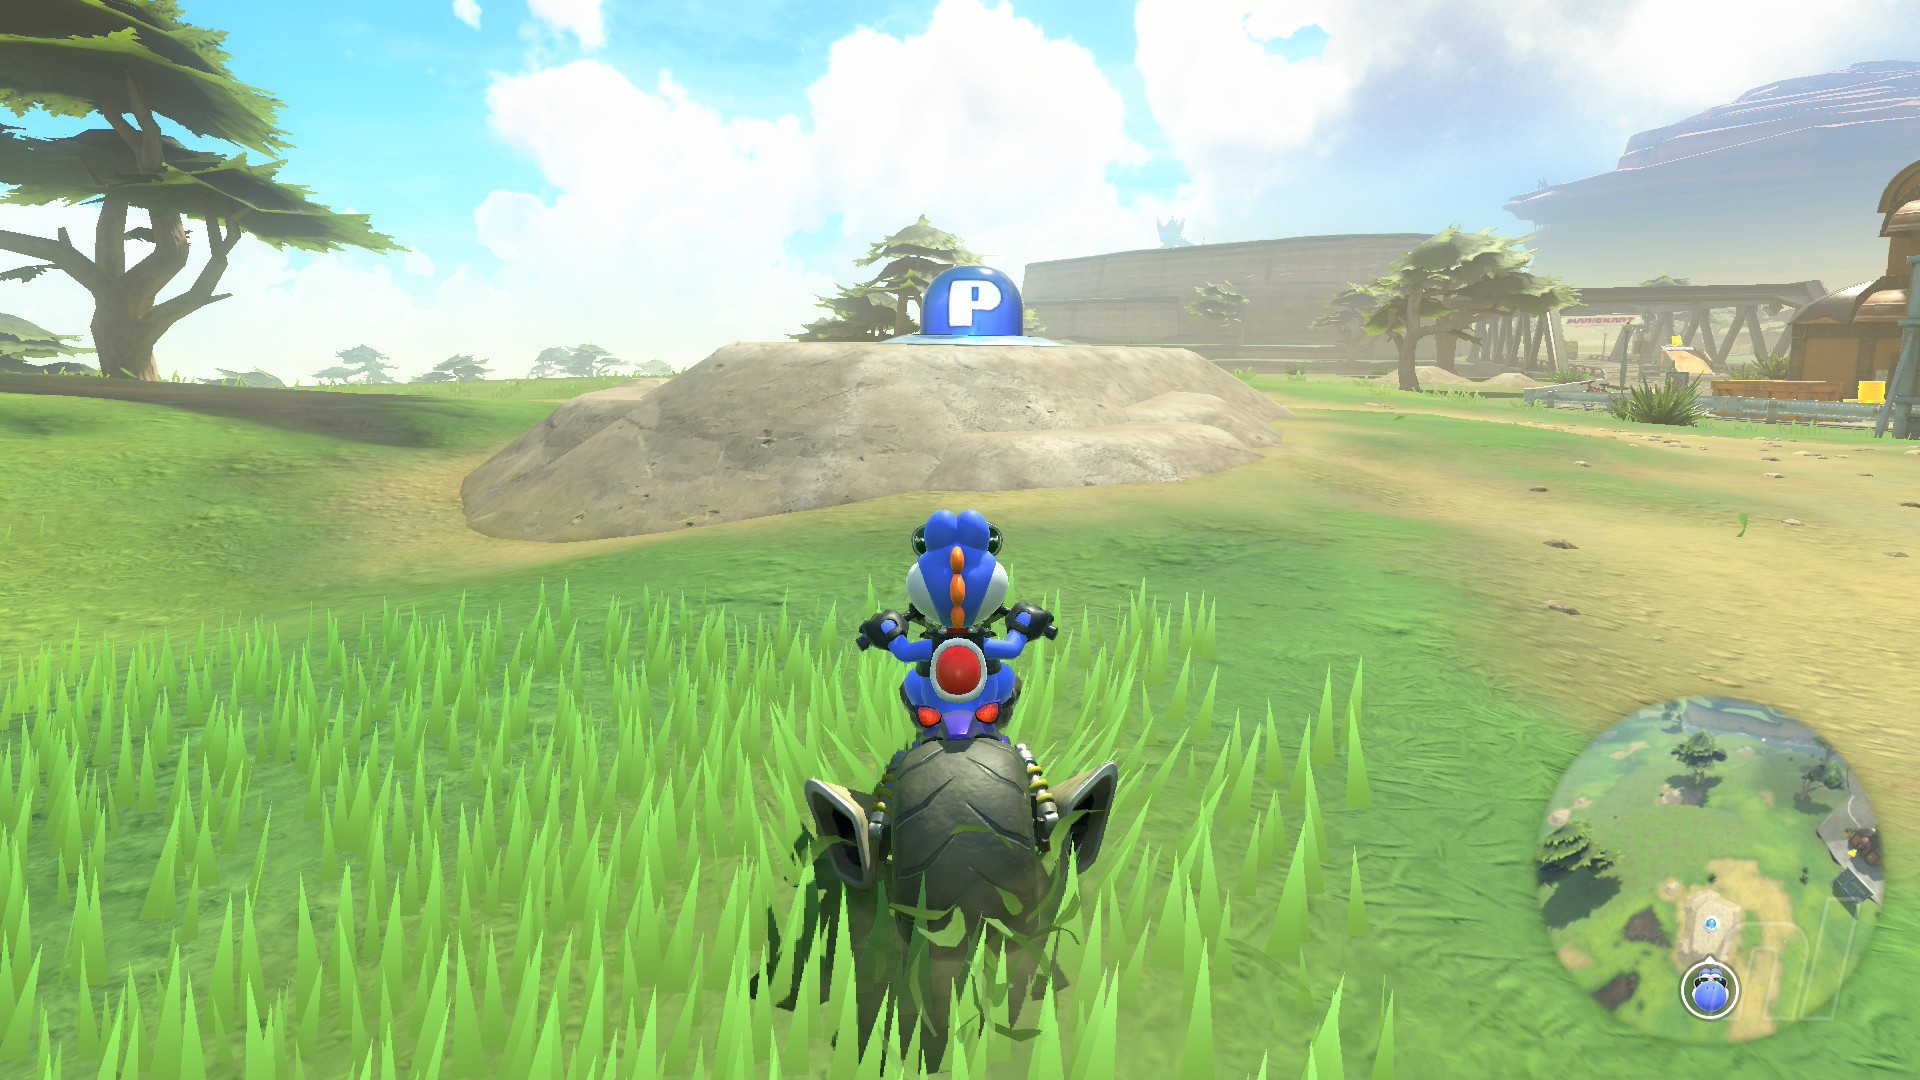
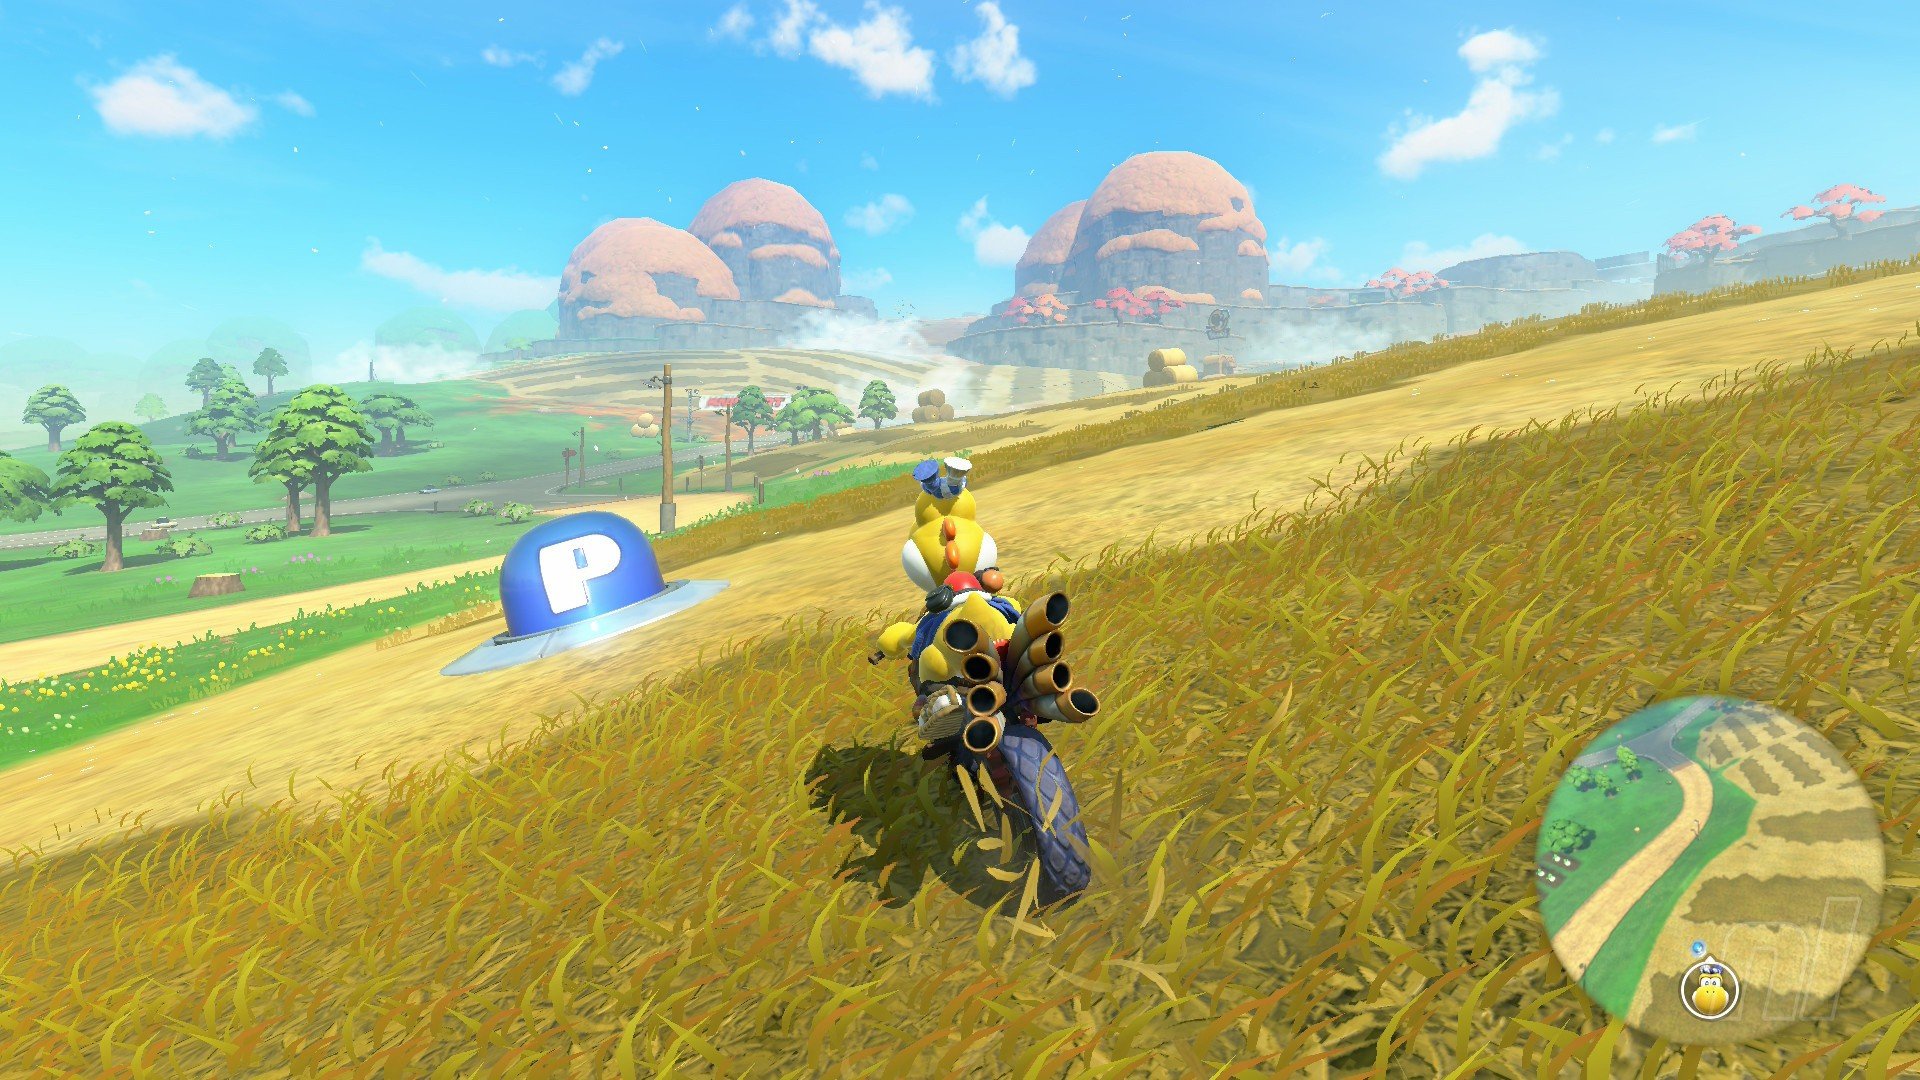
Image: Nintendo Life
Mission: "SEARCH FIELDS. ABDUCT BLUE COINS."
Location: In a stripy field north of Moo Moo Meadows
Tip: Hold 'ZR' to use the UFO's tractor beam
Mission 27
Image: Nintendo Life
Mission: "To the air! To the water!"
Location: Northeast of Moo Moo Meadows, on the riverbank next to a bridge
Mission 28
Image: Nintendo Life
Mission: "Dash up the river and reach the goal!"
Location: Where the river meets the star-shaped lake
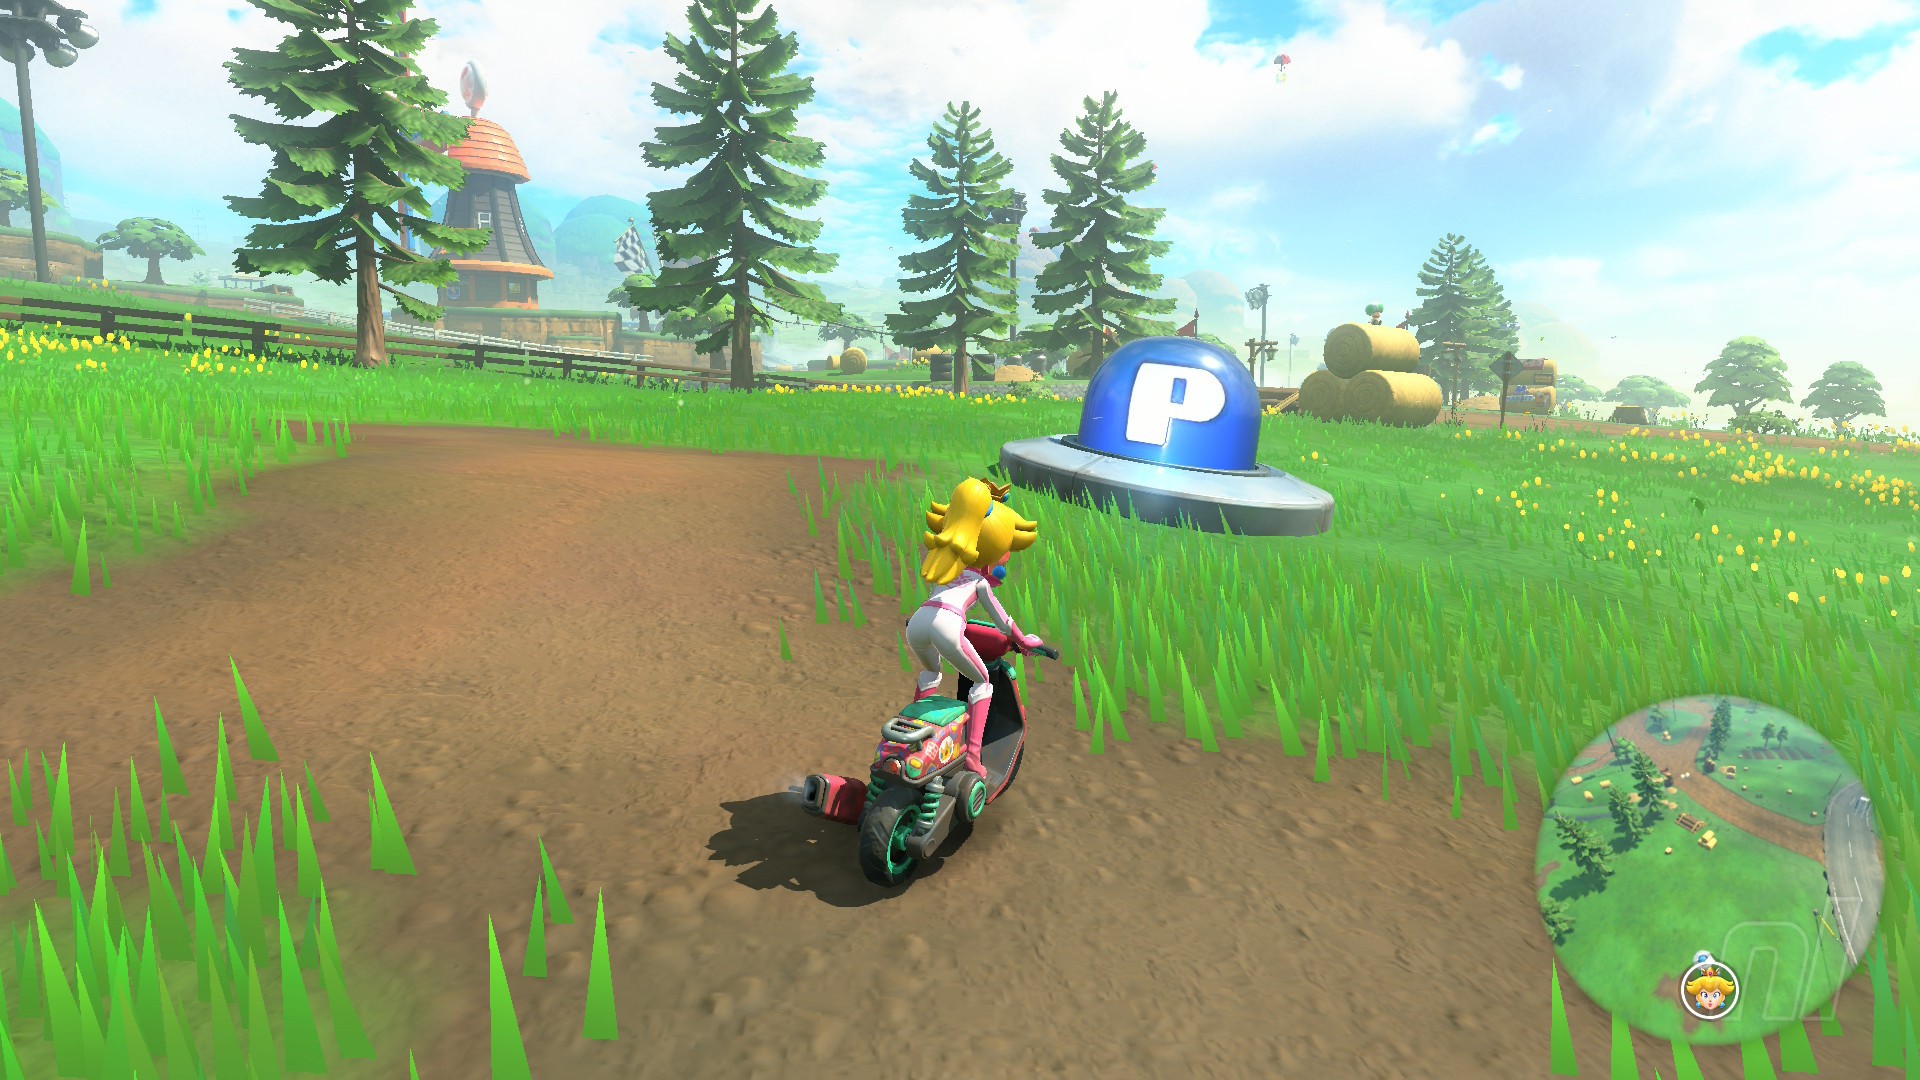
Mission 29
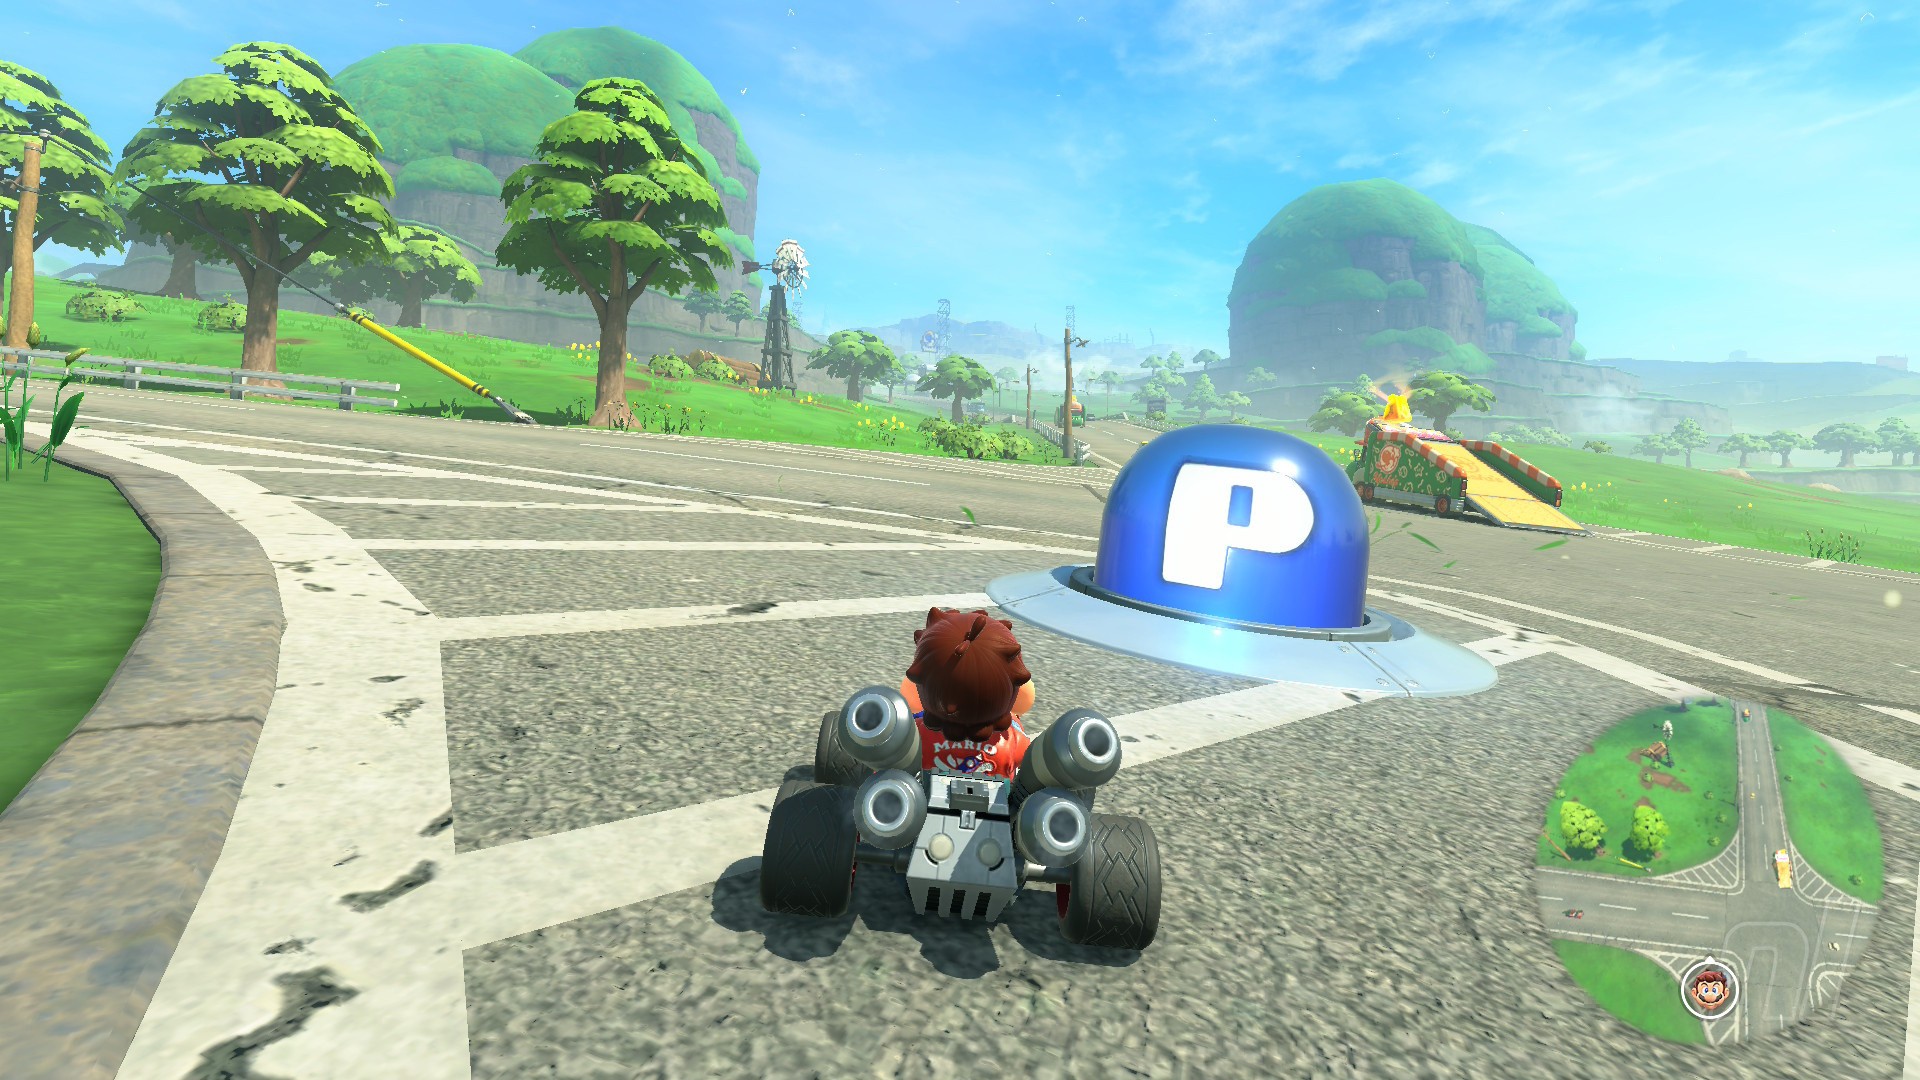
Image: Nintendo Life
Mission: "Jump into a local amateur race!"
Location: Head northwest from Peach Stadium and follow the roads until you reach a small train station.
Mission 30
Image: Nintendo Life
Mission: "Bounce, bounce, bounce to a grand vantage point!"
Location: Directly south of Choco Mountain, on top of a small rock just left of a Yoshi's drive-thru, overlooking a small bridge connecting to the Wild West and South Sea regions
Mission 31 (Moo Moo Meadows)
Image: Nintendo Life
Mission: "Bounce up! Drop Down! Grab blue coins!"
Location: At a road crossing early on the northern pass out of Moo Moo Meadows
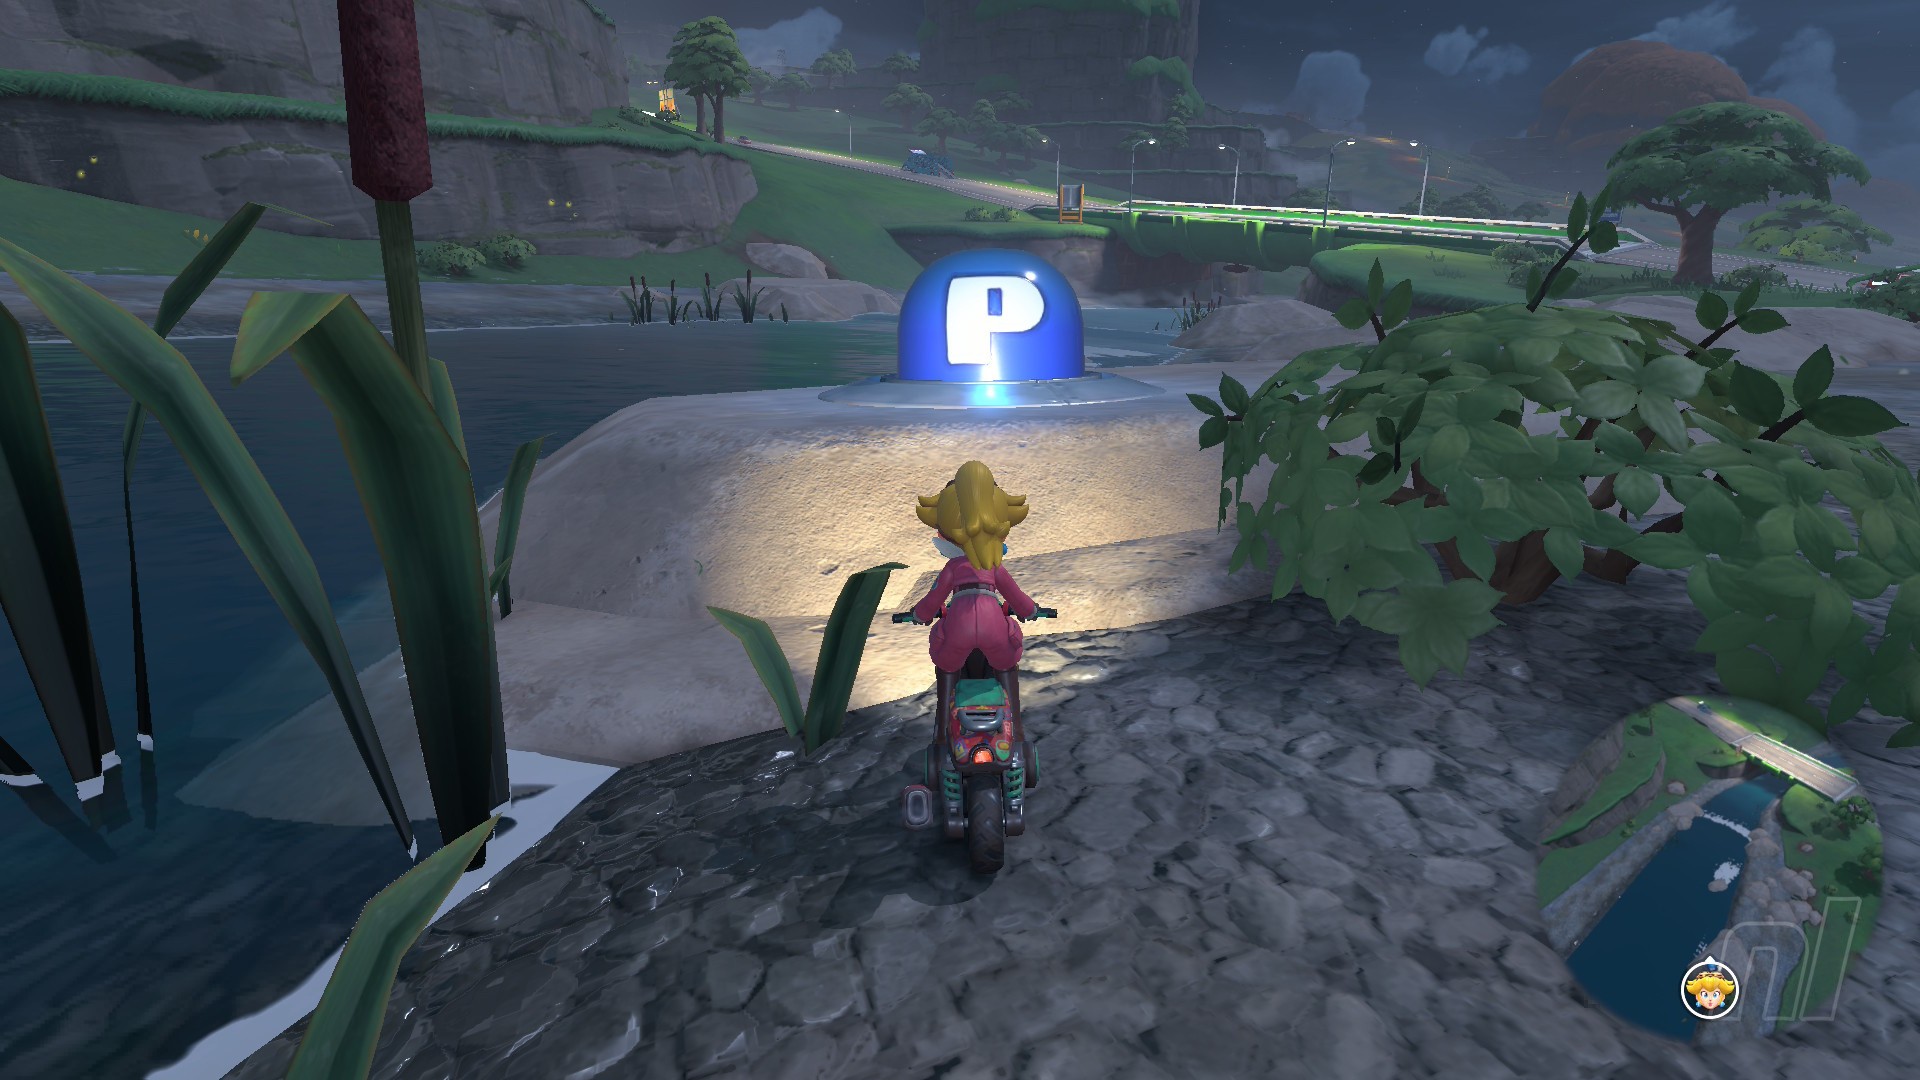
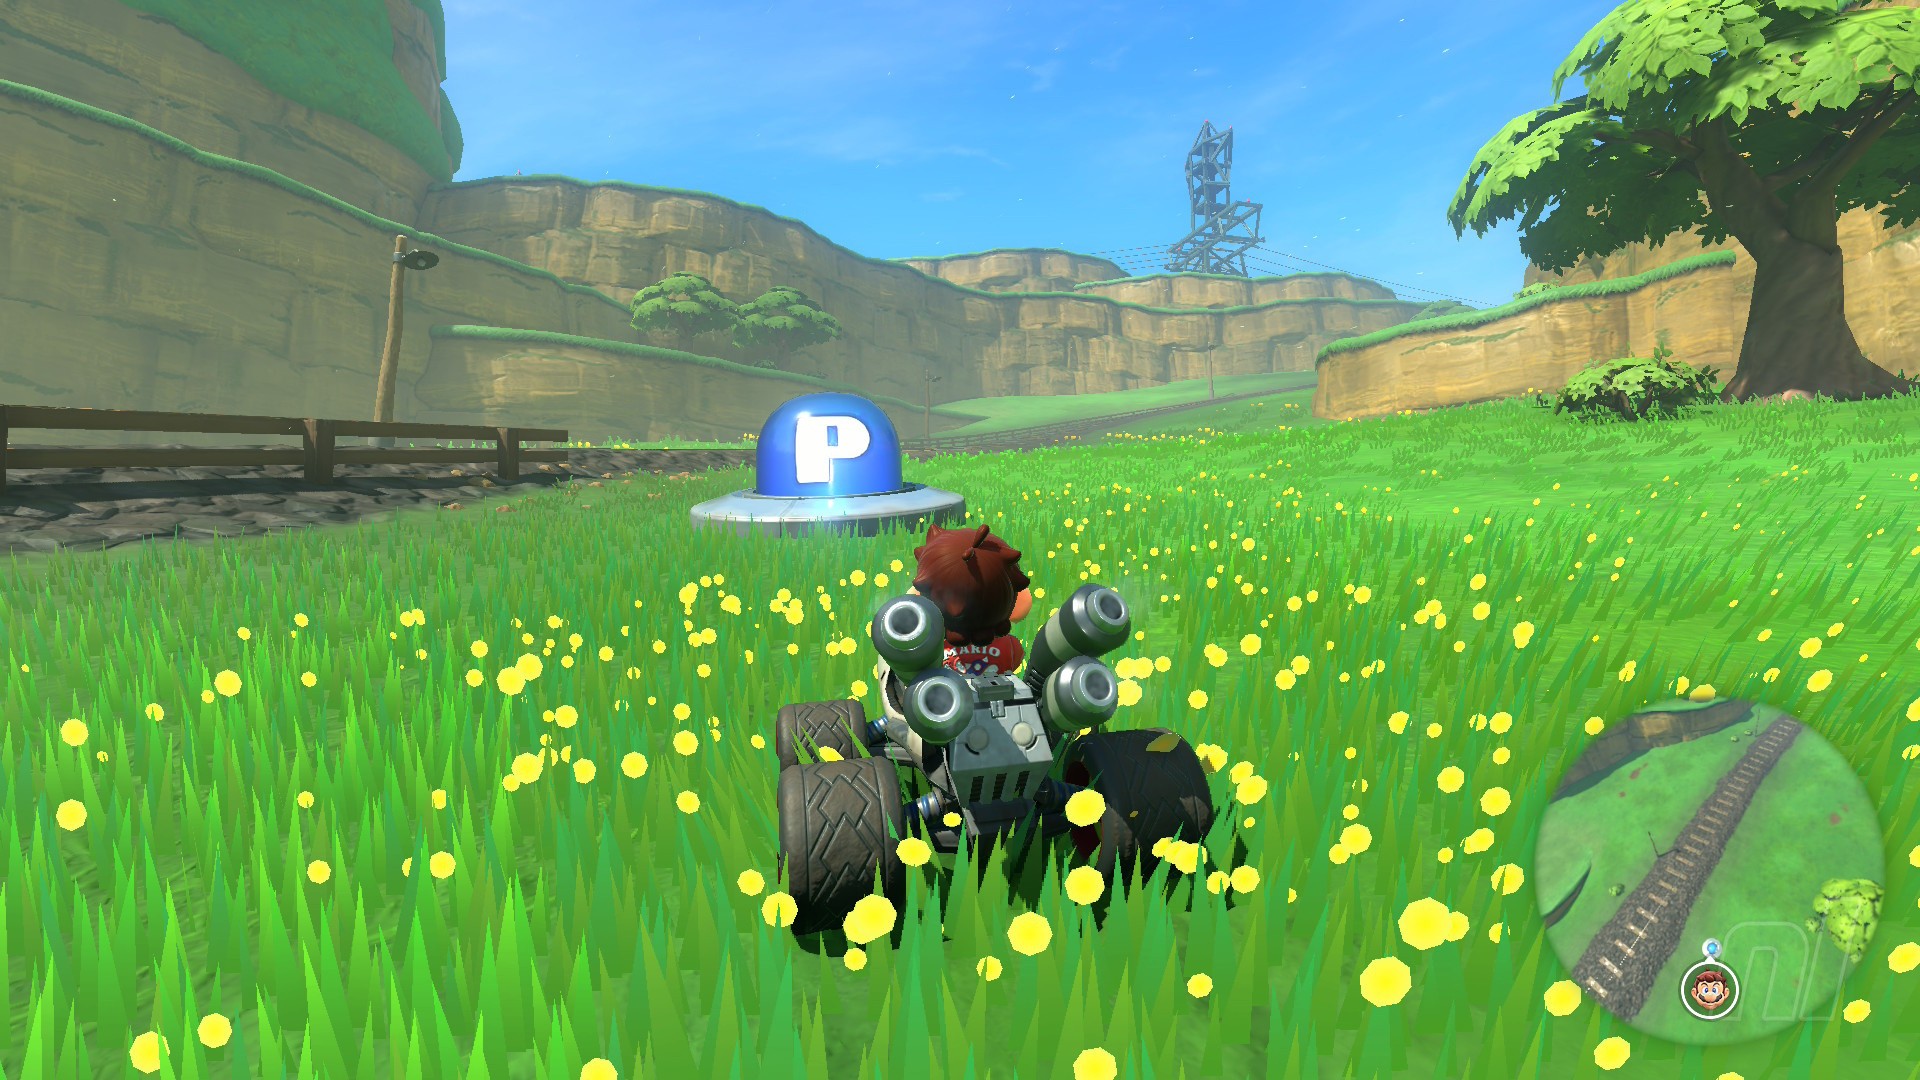
Mission 32
Image: Nintendo Life
Mission: "Race downhill to reach the lake in time!"
Location: Next to the train tracks that run through the middle of the region. On the map, it's next to the three round-topped mountains, northwest of Moo Moo Meadows
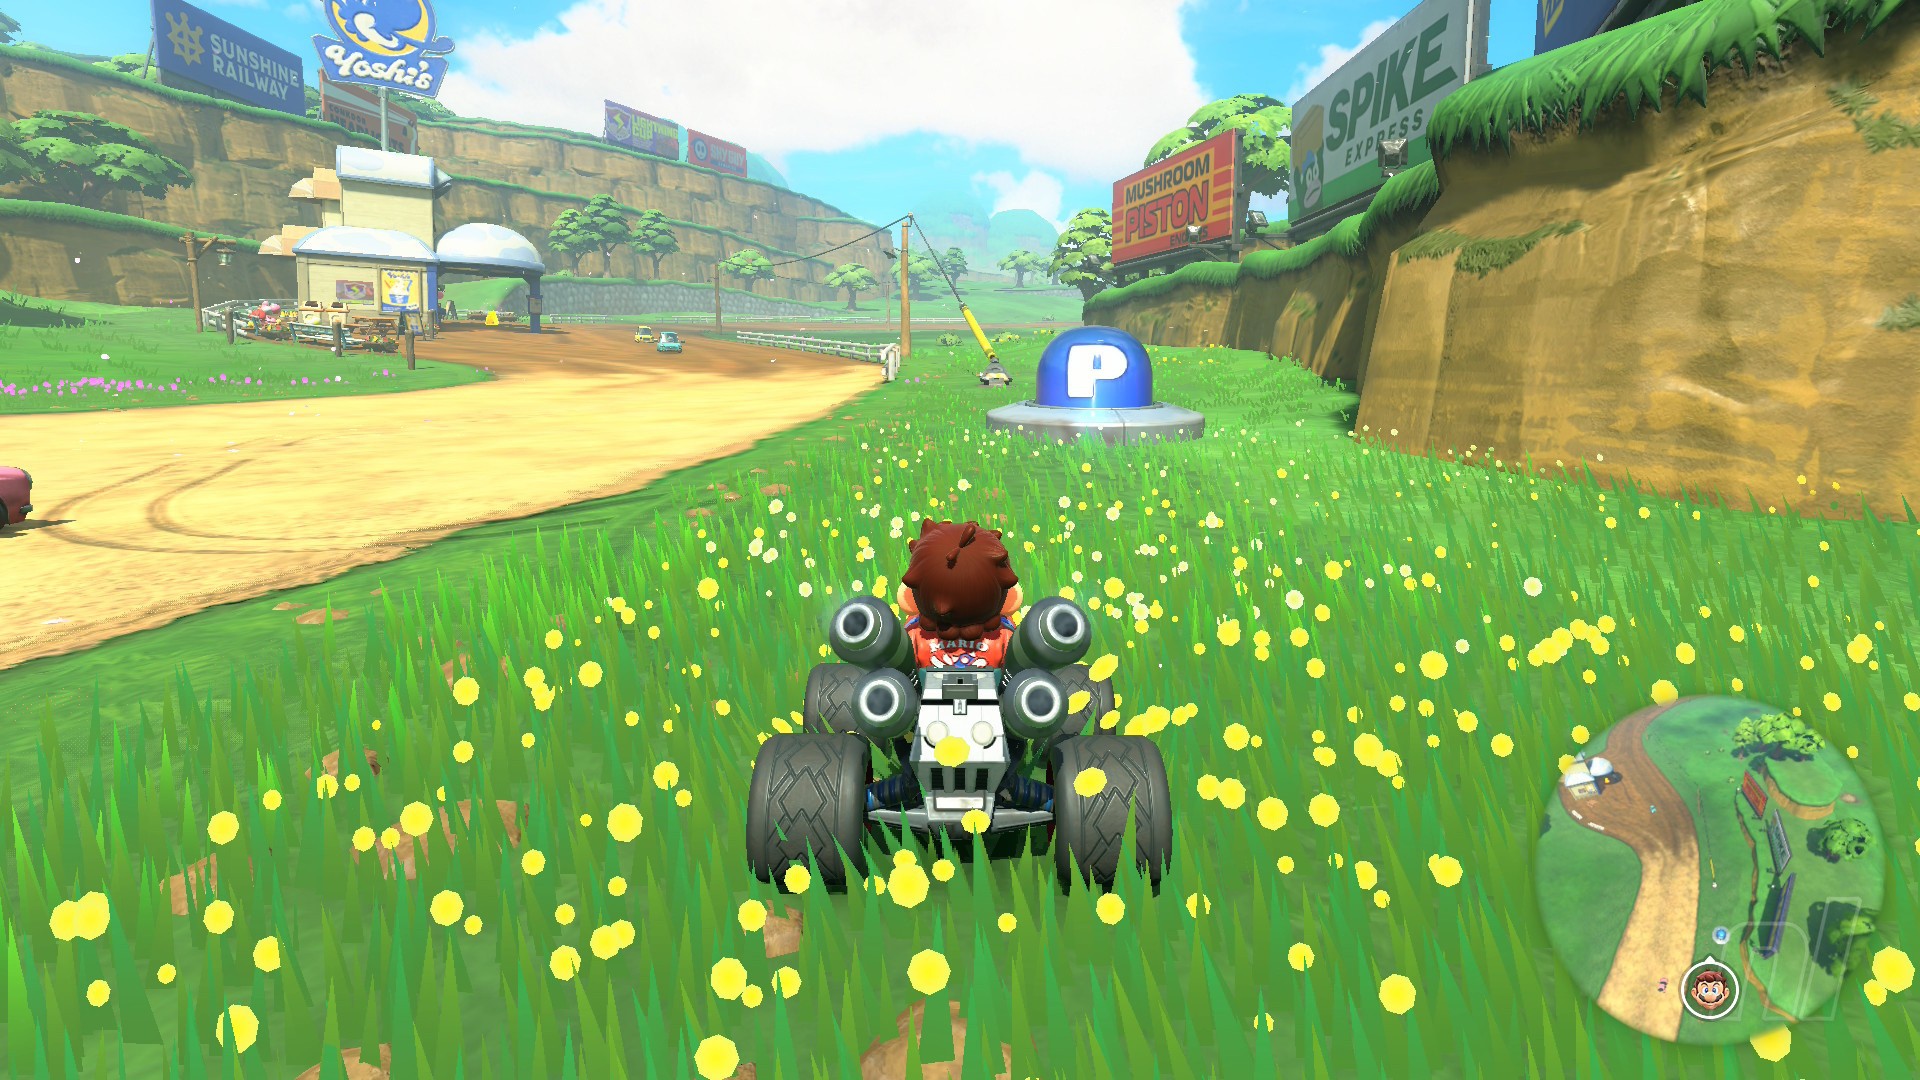
Mission 33
Image: Nintendo Life
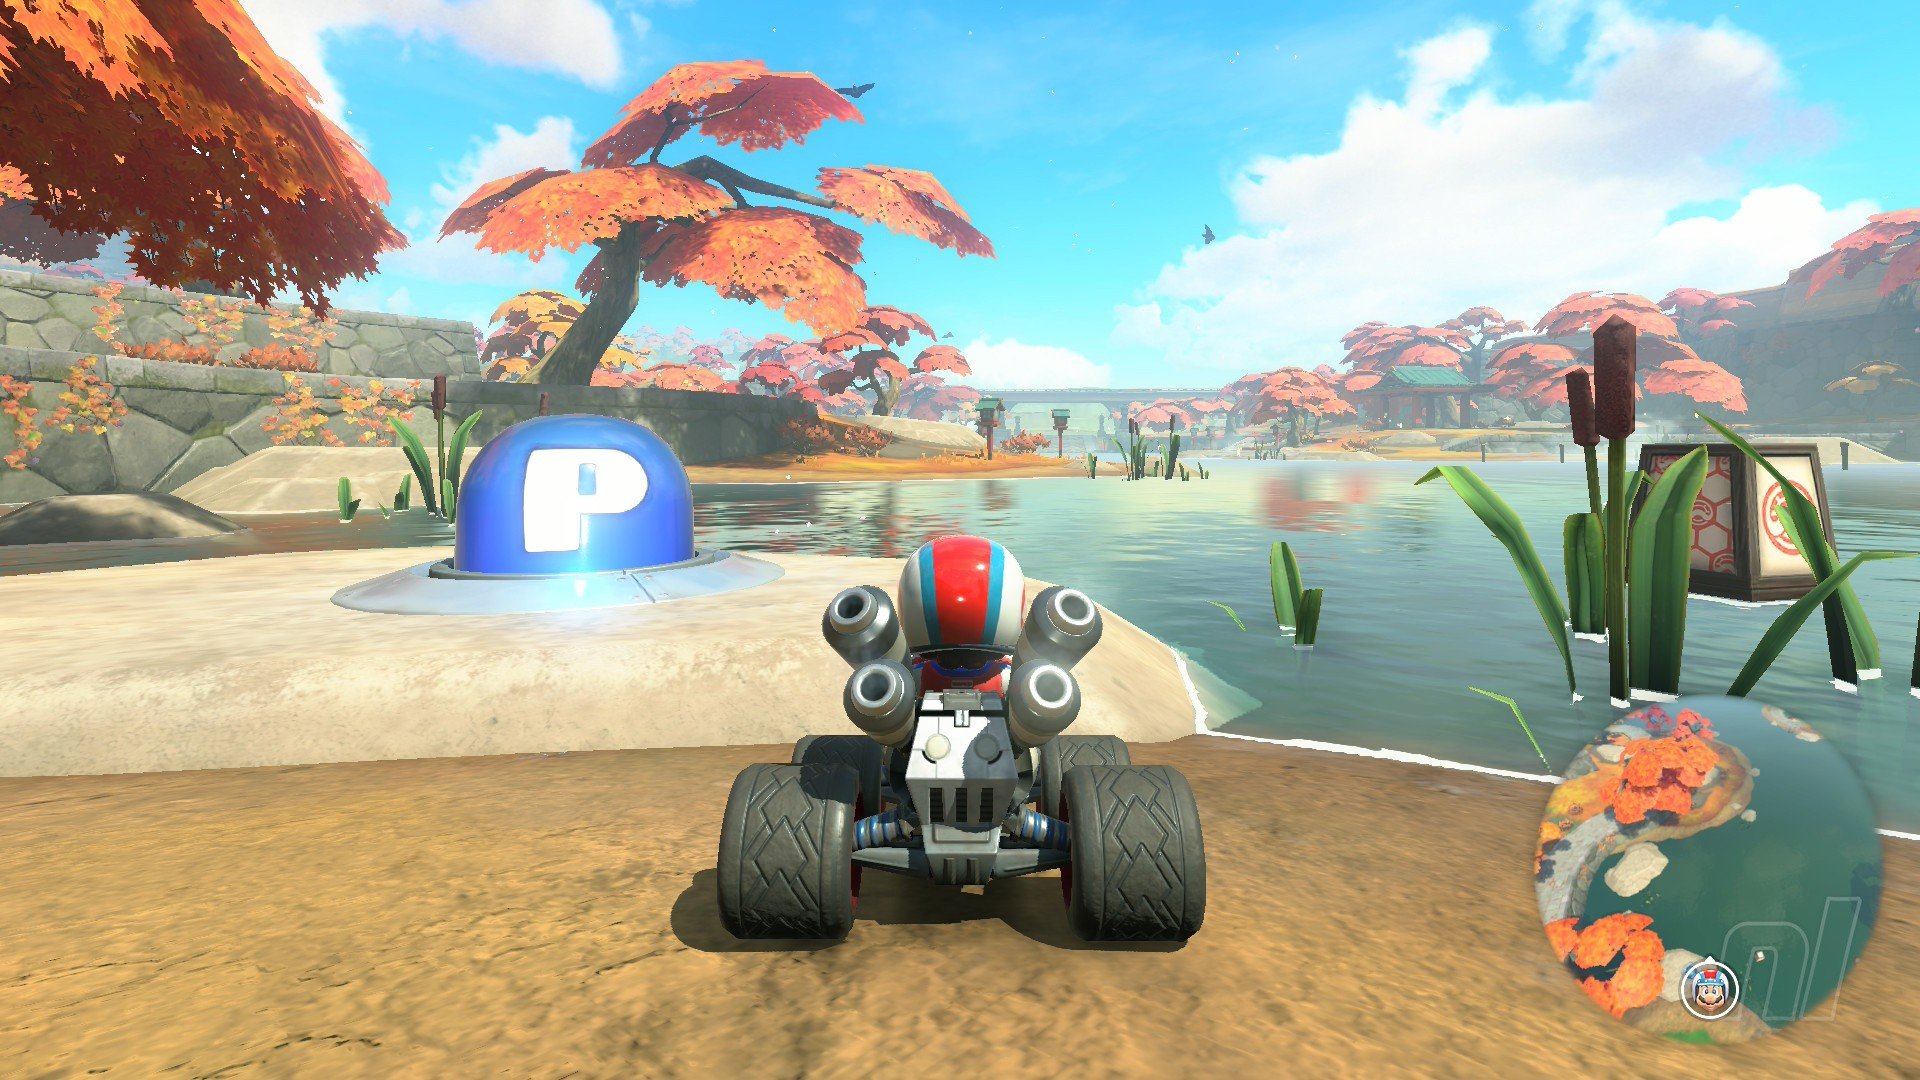
Mission: "Grab some easy blue coins... and one tricky one!"
Location: Near a Yoshi's, next to the western point of the star-shaped lake
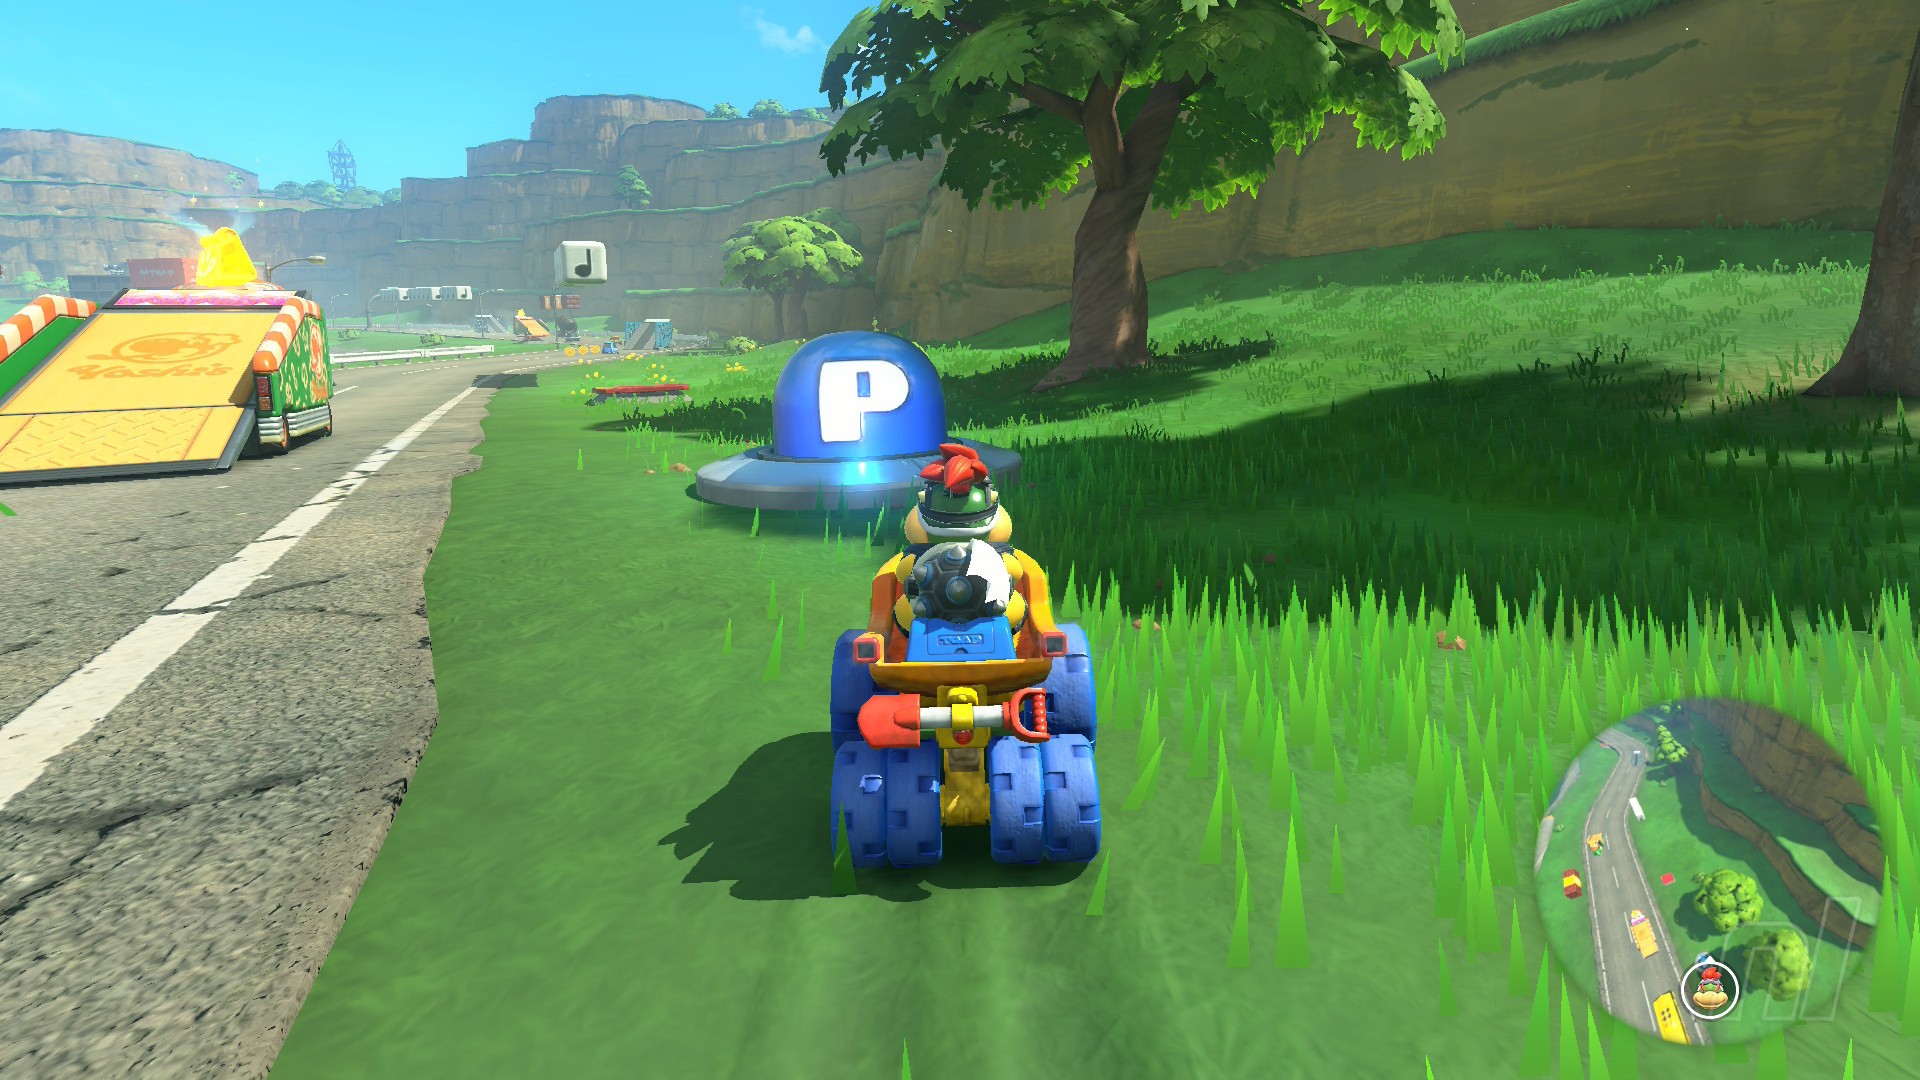
Mission 34 (Choco Mountain)
Image: Nintendo Life
Mission: "Focus on the blue coins in a sea of gold!"
Location: Turn around at the Choco Mountain start line and take the path left, dropping down to a lower level. Follow the track to a muddy area, and use the back grind rail to access a higher part of the mountain. Follow Nabbit's path until you see a small set of stairs on the left. Drive into the Warp Pipe at the top to find this Switch
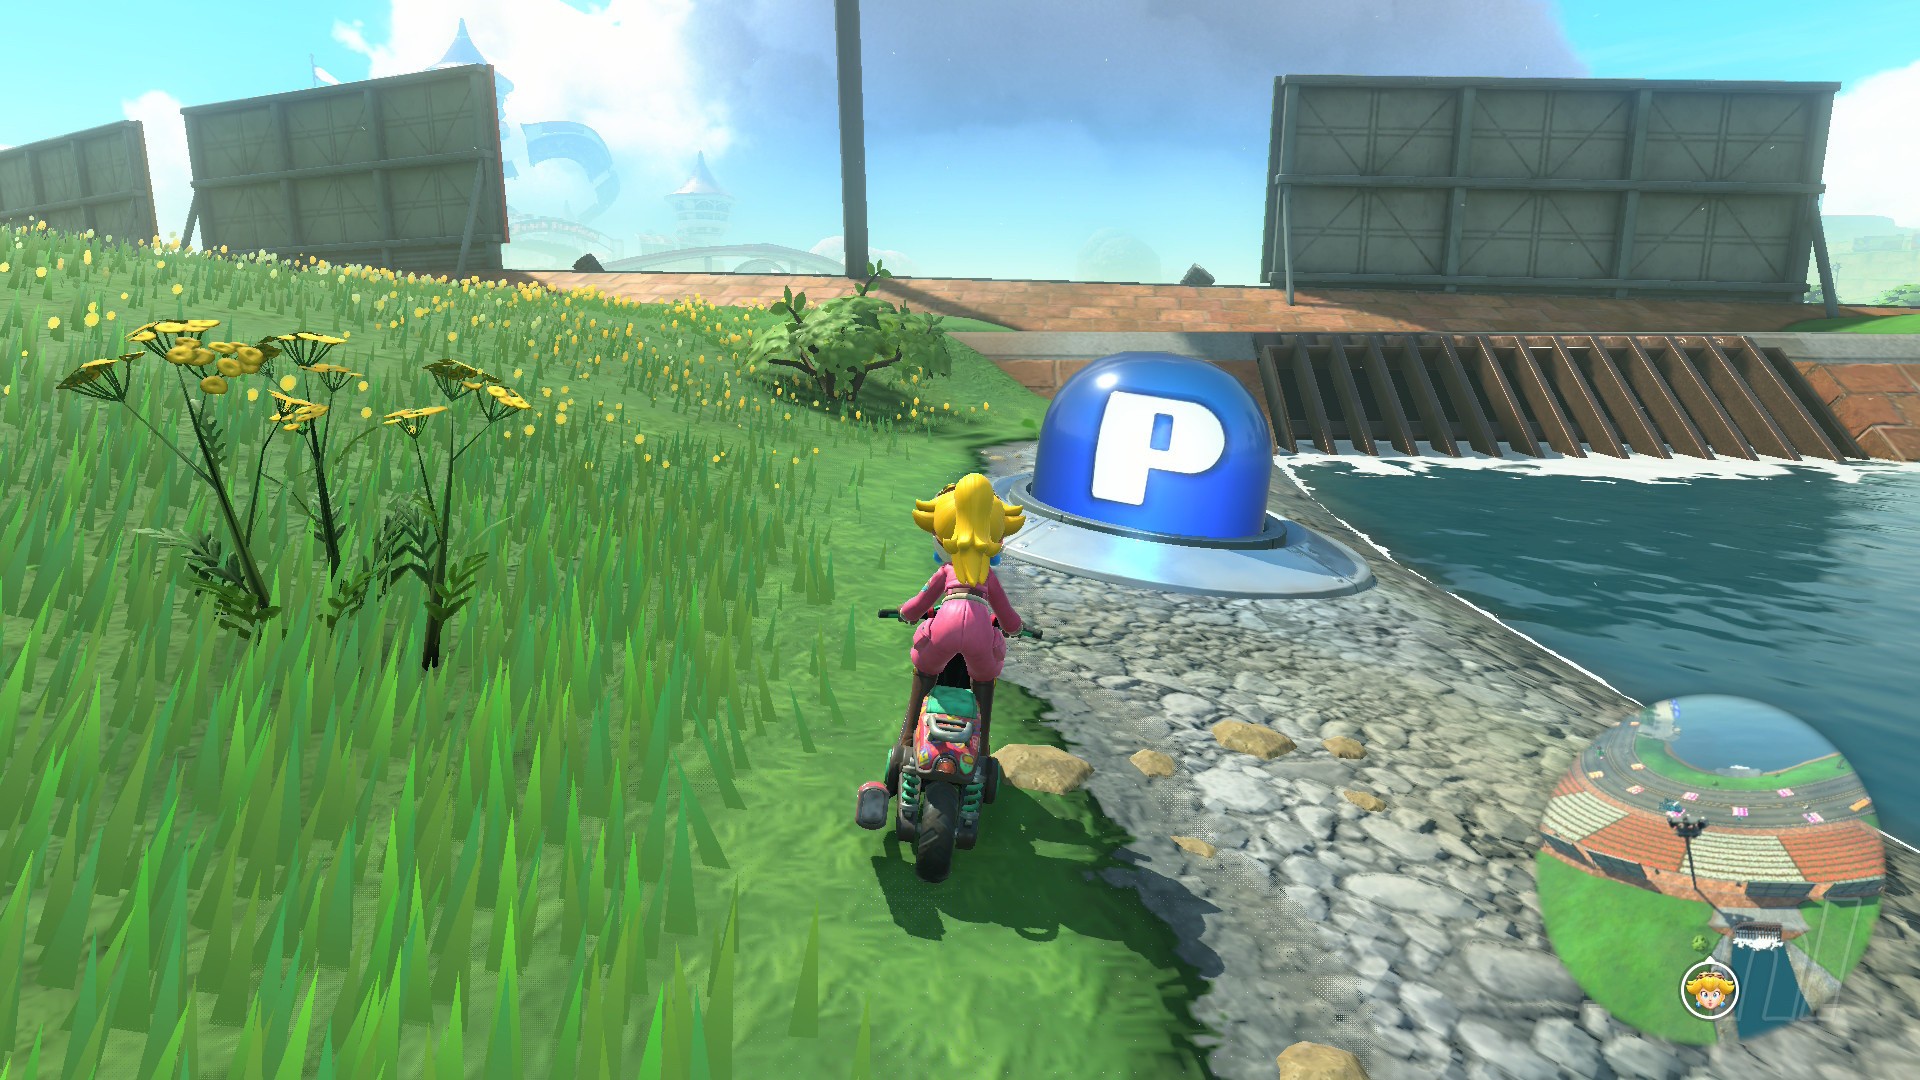
Mission 35 (Peach Stadium)
Image: Nintendo Life
Mission: "Gather the blue coins around the control tower!"
Location: Turn around at the Peach Stadium start line and follow the track. Keep left at the first big jump and use a nearby rail to grind to the P Switch
Mission 36
Image: Nintendo Life
Mission: "Weave a route through a pack of Chain Chomps!"
Location: On the southeastern road into the 'Jungle Safari' region, just below the small hourglass-shaped lake
Mission 37
Image: Nintendo Life
Mission: "Watch for Dragoneels while racing on the lake!"
Location: On the eastern shore of the hourglass-shaped lake, looking into the 'Fall' region
Mission 38
Image: Nintendo Life
Mission: "Prove yourself in a SPECIAL test of skill #1"
Location: Behind one of the pillars holding up a long bridge on the curving shoreline road
Tip: We won't lie, this one is hard. You'll have to trick onto and off of each concrete pillar, adjusting your aim in the air to hit the next one in the right place. Try to stay as high on the pillars as you can and angle your tricks to throw your kart into/away from each pillar as necessary.
Mission 39
Image: Nintendo Life
Mission: "Hit the beach!"
Location: On a rock in a field of Spikes, east of the river's bend
Mission 40
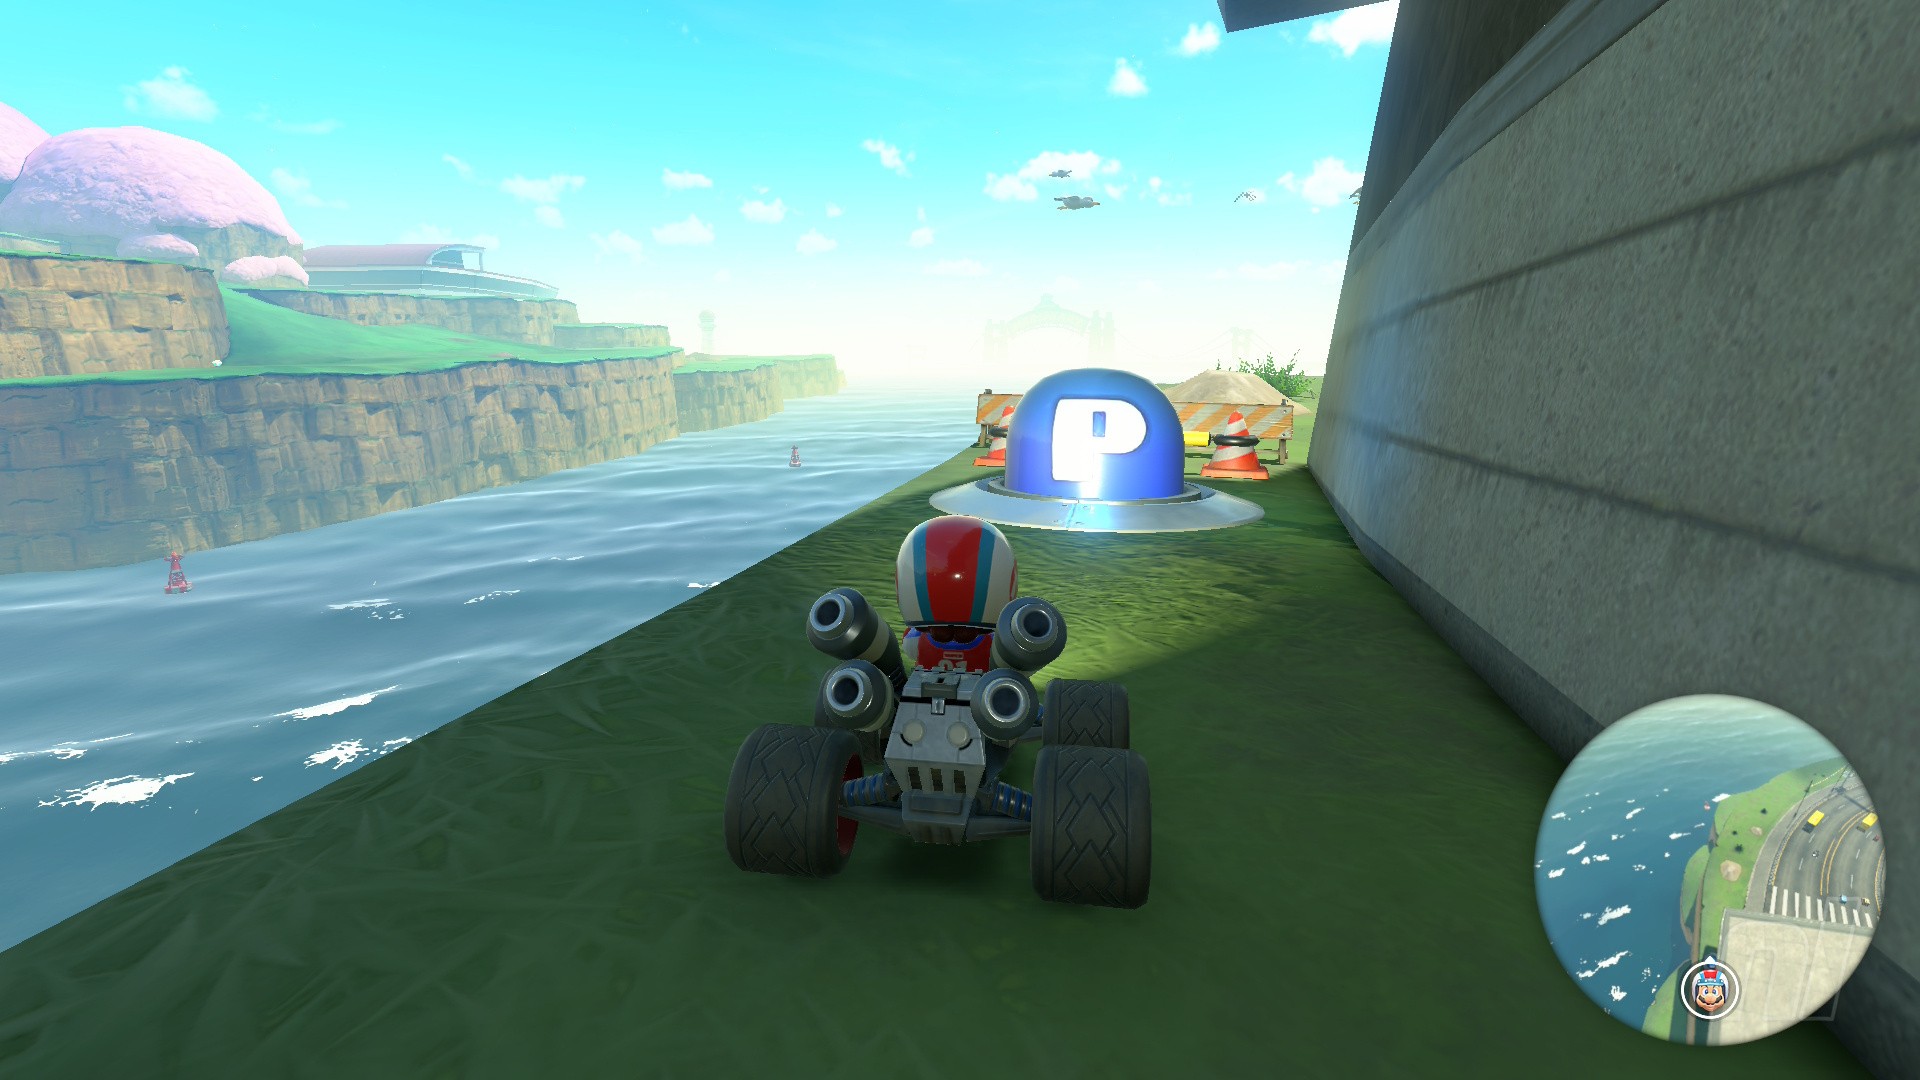
Image: Nintendo Life
Mission: "Borrow a boat and become unstoppable!"
Location: On the other side of the southern bridge leading into Toad's Factory
Mission 41
Image: Nintendo Life
Mission: "Note the timing of your jumps!"
Location: Leave Toad's Factory via the southern bridge and take the road left to find this Switch
Mission 42
Image: Nintendo Life
Mission: "Steer the Ivy Piranha Plant vine toward the goal!"
Location: In the fields at the side of the road leading to the fall region. It's close to a row of Toad houses