Monster Hunter 4 Ultimate is now in stores, bringing the latest entry in the ever-complicated and challenging series to the West. There's little denying that, despite some effort on Capcom's part, the franchise can be daunting and difficult to grasp; even those getting through the early quests may be missing out on some intricacies and techniques that will make life easier.
This guide is designed to highlight key areas unique to the new entry. For an additional introduction you can check out our guide for the demo, while if you're entirely new to the series we suggest checking out our Introduction to Monster Hunter 3 Ultimate, which deals with basic concepts for the series.
This is also a guide that will evolve, as we expect more questions and topics to come up in the comments - with that in mind, let's get to it.

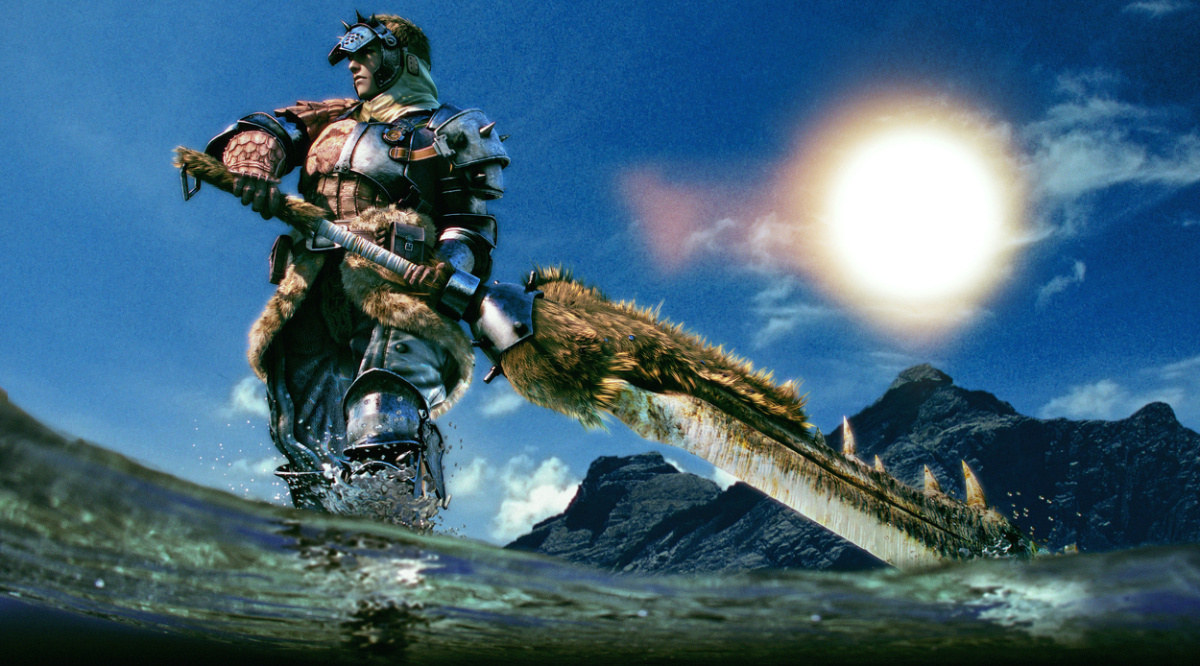
First Things First - Choose Your Weapons
Our first piece of advice relates to an essential early activity in the game. Early on the Guild Quest list in the single player campaign will include training arena missions for each core weapon. There are 14 weapons in total (some are minor variations on others), and we recommend that each and every hunter become skilled users of at least three different options. Depending on target monsters, sub-objectives (which we'll come to later) and more, your favourite weapon may not always be absolutely perfect for the task.
We suggest you complete the training quest for every weapon to help you choose your options, and it's a great way to be introduced to the basic controls, strengths and weaknesses of each. The weapons are listed below, and we've placed them in type categories.
Close range, quick combat: These weapons are used for melee attacks, are lighter and allow more free, quick movement even with the weapon drawn:
Sword & Shield
Long Sword
Dual Blades
Close range, powerful but slow combat: These melee weapons are slower to wield and limit movement more when drawn, but are typically more powerful:
Great Sword
Hammer
Lance
Hunting Horn
Combo weapons: Details for each are below:
Gunlance — This weapon includes a basic gunner ability alongside melee style attacks.
Insect Glaive — Could easily be classed as Close Range, quick combat, the main attacks of this staff weapon are sweeping and quick. It also utilises gunner controls, however, to fire an insect that extracts buffs from monsters to boost your abilities.
Switch Axe — A weapon with an elemental charge and two forms - primarily a quicker Great Sword, it evolves into a powerful axe.
Charge Blade — A weapon with an elemental charge and two forms - primarily a sword and shield, it evolves into a powerful axe.
Ranged, long distance weapons: These "gunner" weapons can be augmented with special ammo that can be crafted or purchased, and require you to keep a distance and aim strategically. In Monster Hunter 3 Ultimate, Bowguns can be light (for better movement) or heavy (for greater power):
Light Bowgun
Heavy Bowgun
Bow
For most the choice will be between various melee weapons or multiple gunning options. These are important choices as they shake up how you accumulate and gather resources, too. With the new Insect Glaive you collect special resources that are fed to the weapon as nectar, with it being a weapon requiring more frequent upgrades. Other melee weapons have more conventional upgrade paths, with each new advancement bringing more power, and with options on which way a crafting path will go. For gunners, however, the concern is also with buying and crafting special ammunition, adding a whole new range of depth and strategy.
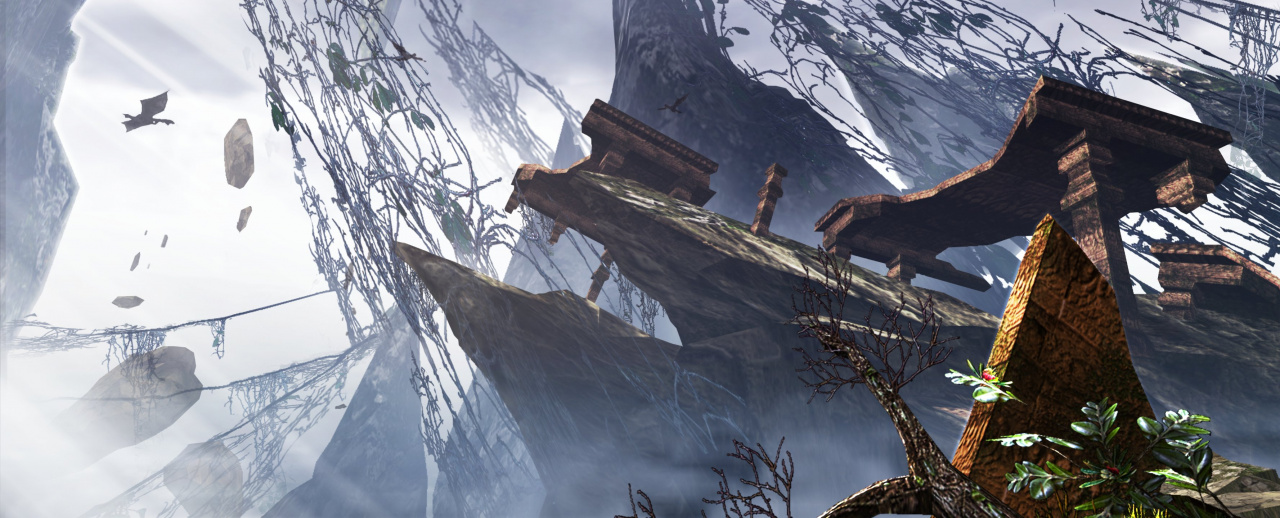
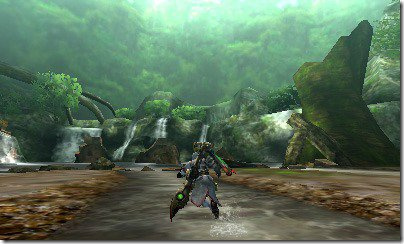
Master The Environment
Throughout the course of the single player campaign, and through online quests, you'll travel to various locations. Many impose no special requirements upon you, but others do. For example, the Volcanic Hollow and Dunes lands (the latter comes later in the game) will necessitate Cool Drinks, while Frozen Seaway requires Hot Drinks. Always check the location before setting out on a quest, as later in the game monsters pop up in unexpected environments, making the relevant drinks a necessity in these cases.
Typically you'll have easy hunts or Harvest Tours when you go to a new land - the latter are excellent for obtaining vital ingredients and resources - so you should use these to familiarise yourself with each territory. We recommend placing the map graphic on the touch screen to clear the top screen, and you should look at each map closely and truly learn each location. The map shows you shortcuts and whether they're one way only, so be sure to follow it and figure out the quickest paths around a land, optimising your routes between areas.
Monster Hunter 4 Ultimate also introduces additional verticality in arena-like areas (of which there are typically 10 in a land). Some are actually on two tiers, but plenty of single-layer areas also have minor rises that prompt you to leap forward when you dash off the edge. These are there to cater for the new mounting mechanic, in which you instigate a quick-time sequence riding upon a monster to dish out more damage. You can only dash (with R) and jump off these - or down from one layer to another - with your weapon sheathed (we cover this mechanic in more detail below); familiarise yourself with these jumping off points, as they can be crucial.
Do Not Rush, Gathering Materials and Customisation is as Important as Slaying Monsters
Monster Hunter is an action game, but only to a point. If your intention is to go far and be well equipped when the challenge ramps up later in the game, then you have a lot of gathering to do. Particularly early on, when the quests are easy, you should prioritise filling up your Item and Field pouch with as many resources as possible. Always have a good supply of Bug Nets and Pickaxes (not 'old' versions, as they're borderline useless) to gather bugs and vital ores. Make sure you explore thoroughly and learn the visual design for resources - plus keep an eye out for the A button prompt - and take time to build up your inventory. When you kill smaller animals and monsters, too, be sure to carve as much as possible (with A, again), as all of these resources matter.
Gathering resources is one thing, but putting them to use is another. Below are key areas where you can make the most of the items, herbs, mushrooms and ores that you've collected.
House - When in your house your item box is hugely useful. In here you can move items to and from your item pouch, but also combine / manage items. As you progress make sure that you buy each Book of Combos from a merchant as they become available, and unlock shortcuts in the Combo List (in Combine / Manage Items). As you learn more combinations you'll instinctively know which items to gather more often, and in the long run can craft items that can't be bought or simply save a lot of money.
In the house you can also establish equipment sets - as you gather more types of armour and weapons, this can be a useful shortcut.
Wycoon - This character joins your caravan early in the game and is an important figure. He will assign Villager Requests (in which you meet criteria to improve aspects of your group) but most importantly he will Multiply Items. There is no Farm in this entry, and Wycoon fulfils that role - you use Resource Points to farm vital items; there's plenty of choice, but we recommend keeping a steady flow of Herbs, Blue Mushrooms and Honey going, as these three ingredients are vital for combining Potions and Mega Potions to heal you in battle.
The Man - Each hub area has an armourer, but beyond the first hour of the game they're an irrelevance. The Man is your caravan's Smithy, and he can craft armour and weapons from scratch or upgrade your existing equipment - he'll also forge decorations, which can be placed in weapon and armour slots for vital ability boosts. This Smithy is a vital figure.
When creating armour or seeking to upgrade your weapons, it pays off to have a plan. Armour is more effective in complete sets, for example, and though it takes a while - like many aspects of this game - and will require multiple hunts, it's worth trying to complete full sets from one monster. Always keep an eye on the requirement for upgrading weapons, too, as this is vital in a quest for success. The Man also forges Palico gear - we'll cover Palico further below.
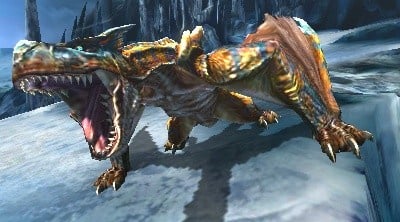
Rules to Remember When Hunting Monsters
Now we get to the real business of hunting monsters. Monsters vary a huge amount, but below are key tips for when you head out on a quest.
- Read the Quest brief carefully and take note of the Sub-Objectives. These return after being omitted from Monster Hunter 3 Ultimate, and bring extra rewards when completed. You can also leave a quest by beating only the sub-objective - bear in mind that while you keep items retrieved to that point if you do this, you do not actually clear the quest.
- Buy all Monster books available from merchants in different hub areas. Then, go to your Start menu, Hunter's Notes and Monster List - these entries provide vital clues on a monster's strengths and weaknesses.
- Before tough quests buy a meal from the Chef, figuring out the best combinations to boost your starting health and stamina.
- Basic rule - always have Paintballs and hit the monster with one right away so that you can track it between areas. If the fight is going on for a long time use a second Paintball when you think the first may be running out. If you lost track of a monster and take a while to engage it again it may recuperate some energy.
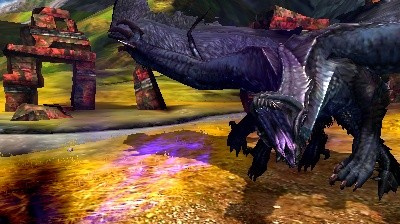
- When you first encounter a monster be cautious and allow a little time to learn its patterns. There's no health bar, so you have to gauge its behaviour. When it rages and behaves erratically with quicker movement it's wise to keep a distance. When it starts to slow down and stumble, attack as much as possible, especially when it's catching its breath. Finally, you know the monster is close to death when it's visibly limping, or if it flies to another area and you find it resting / sleeping.
- If you want to capture the monster - or that's the quest objective - wait until it's close to death as mentioned in the previous point. Lay down a trap - Pitfall or Shock, though some monsters resist specific types - and wait for the monster to hit it, you then throw Tranq Bombs to put it to sleep. Be sure to pack both before a capture quest, as the options given to you in the quest resources (the blue chest in the landing area) may not be enough.
- Always look for mounting opportunities. As highlighted above you jump off a ledge or higher area while dashing with your weapon sheathed - gauge the distance and press your simple attack button (X) while in mid-air and within attacking range. If you make contact you'll trigger the quick-time event - attack when the meter on screen shows green and hold R to cling on when the meter's monster logo is orange or red. If using the Insect Glaive you can attempt to mount more regularly with the Vault move, which you execute with R + B when your weapon's drawn.
- As a follow up on mounting, when playing online, if you see a team-mate mount the monster it's best to take the opportunity to heal, sharpen your weapons and so on. It's arguably best to not attack the monster while it's mounted by someone else, as disrupting the process may deprive the team of damage from the completed sequence; monsters are typically down for a good spell at the end of the mounted attack, too, at which point the team can inflict a lot of damage.
- For every quest make sure you've got a full provision of Potions and Mega Potions - for monsters with poisonous attacks you'll need Antidote, while with others you may need Deodorant or Cleanser; another must-have item is whetstones, used for sharpening your weapon. As the challenge ramps up you can consider buff items like Might or Adamant Seeds, while with progress you'll combine pills and potions that boost stamina, resilience etc.
- When finished, don't forget to carve from the monster for a few extra drops, you only have 60 seconds to do this.
A Hunter's Best Friend - The Palico
The Palico - previous known as Felines - are your companions in this game. You have an Ace Palico that always accompanies you - unless you give it a rest - and then you can take a second. As the game progresses you 'collect' Palico, eventually having a few dozen or more. You can find these in specified areas in each Land and 'recruit' them.
Within your house you have a Palico Board, in which you manage these companions. 1st Stringers are those that you take on quests - you can assign up to five for this purpose, with one going on quests (along with the Ace Palico) at a time. Keep an eye on their Enthusiasm level and give those with low numbers a rest. You can also manage their simplified equipment, and forge more with The Man.
This equipment is made from resources obtained Palico Quests. When you unlock Sunsnug Isle you can sent your secondary / reserve Palico on quests, with a rock-paper-scissors elemental style. It's best to wait for 'Provisions' to be at the max setting of three, and you can watch and manage these puppeteer like quests or automate it through your assistant Palico in your house. In any case these quests retrieve scraps that are then used (with The Man) to forge Palico gear. It's wise to do this, as if your Palico on the hunt are well equipped they'll do more damage to the monster and stay alive longer, which can be vital in distracting the monster's attention and allowing you to attack more freely.
Also on Sunsnug Island you can complete a fishing minigame, which is useful for resources.
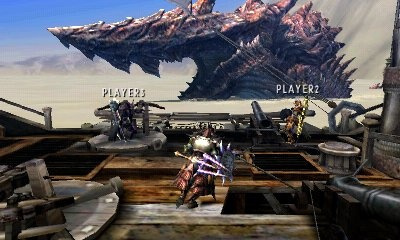
Balancing Online and Offline Play
An important point to note is that the offline campaign and online quests - though similar in levelled structure - are entirely separate. Due to this it's a good idea to alternate, to a degree, though the online quests ramp up in difficulty more quickly than the single player quests. We'd suggest that, for the first dozen hours or so, you devote most of your time to the offline game, progressing the story and building up your resources and capabilities. Online is ideal once you've hit a solid level of ability, especially as a quick way to defeat a lot of monsters and carve off vital drops. Ultimately, we do recommend seeing the campaign to its close, even if you do switch online for some sessions nevertheless.
When playing online it's wise to use the search options to find others at a similar level or with specific objectives, meanwhile, or you can setup your own rooms. Playing with friends is certainly the most fun option, if possible.
The key point is to try and avoid jumping online right away. Build yourself up and really learn how to play first.
Some Final, But Important, Points
So far we haven't mentioned Expeditions. These are new in Monster Hunter 4 Ultimate and replace the Moga Woods of its predecessor. The principal is broadly the same, as it's an area that cycles between hosting different monsters. It's also the most valuable way to accumulate Resource Points - these are used to buy or acquire various things, and can be as important as standard money. Any creatures you kill in this area count for Resource Points, and the area as a whole is also hugely valuable for gathering standard and rare resources; be sure to take Bug Nets and Pickaxes, as always. In fact, you'll need to take plenty of potions, antidotes etc too, as only very limited items are provided in its starting area; you know in advance (mostly) which creatures will appear, so be well prepared to face them.
Next, be sure to complete quests requested by NPCs - when in a hub area there'll be characters with a speech bubble above their heads - speak to them and clear quests that they ask as 'favours'. These are vital for improving areas like Chef meals (for greater boosts), expanding Sunsnug Isle, the options available from Wycoon and more. These quests show in your campaign list with a speech bubble and should be treated as a priority.
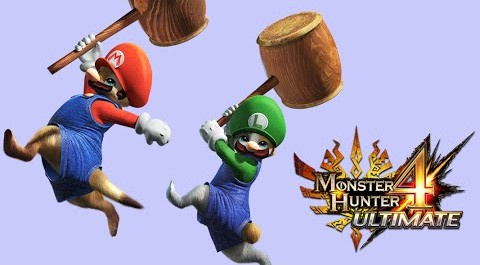
Also, chat with your Housekeeper Palico regularly - it's a useful shortcut to instigate Palico quests, but also for accessing free DLC. At launch there is a hugely welcome 'Starter Pack' in the DLC area, and you can also access special 'Episodes' for extra content. The DLC options in this game are geared up to be substantial and impressive, so keep an eye on it regularly.
Those are some key areas, we feel. We'll have inevitably missed areas, so if you have questions post a comment below; we'll be returning to update and improve this guide in the coming days. In addition, the wiki below is a fantastic resource.
Expansive, detailed wiki — http://monsterhunter.wikia.com/wiki/Monster_Hunter_4_Ultimate


Comments 27
These are some pretty nice tips, especially the online and offline one. You wouldn't want to just do one side of MH4U and ignore the other because it's no fun if you're overpowered for the part ignore(specifically the story).
@KodyDawg The crossover DLC will be released later on, but you can get yourself either the Mario or Luigi costumes for your Palico right now.
So hyped to actually get back into gaming, and this looks like a real feast.
April can't come soon enough.
Great article. Thanks for sharing this. I bought the game yesterday and it's my first time playing a Monster Hunter game. I'm only a few quests in, but I love it and all this info helps.
good read can't wait to use it on Monday!
Do you have to pay for the dlc costumes?
@Danny429
Not at all. Monster Hunter has a long standing tradition of free DLC, and substantial free DLC at that. I wager we'll get somewhere around 50+ quests for free by the time the extra content is said and done, not to mention arena quests, items, palicos, guild card templates, exclusive armor sets, etc.
All compliments of the fine men and women who developed Monster Hunter.
Such a great game. Only thing I wish wasn't there is the time limit for quests.
Thanks for this guide, NL!
@Senario Good call, I'll add that in Typically I've been doing the same, as damage from a successful mount seems pretty significant.
Expeditions are so fun; one time I had to hunt both a Great Jaggi and a Kut-cu at the same time! One thing to note is that by default, only 2 different monsters (large/small) will appear on Expeditions. However, if on the Expeditions menu it says that the environment is 'Unstable', then up to 5 different monster types will spawn. You can also find Rusted equipment by mining (but it is very rare), which could be more or less powerful than the one you make yourself! (e.g. Say Hunter's Boots has 10 defence by default, but you can find Rusted Hunter's Boots on Expeditions which could have 21 defence!) Unlike Quests, you don't have a time limit/death limit before you lose. Also, you won't be given things like First-Aid Meds, so be sure to come prepared!
I've been enjoying the demo for MH4U a lot, previously I tried the demos for MH3, but something never quite clicked. With the new 3DS's C-Stick the camera isn't as much of a fight any more.
That said I seriously wish this game had a proper lock-on system. Like Dark Souls (or Zelda, I suppose...). Its frustrating mashing L and trying to orient yourself constantly (and still have a lot of attacks whiff). And no real way to lock on to the little monsters that might harass you during a fight.
@Jim_Purcell
A lock on system wouldn't work here. Imagine one large monster, you need to break a specific part of the monster. 4 players all lock onto the monster hitting it in the same spot, the dude with the great sword smashes the other 3 player into the next area!
Quick question: How do I access other online rooms when I am currently in a gathering hall online? I have been backing out completely but there must be a faster way to join another lobby. Does my question make sense? If so, please help! Thanks.
Cool! You know what would be cooler? If the game was actually available for purchase at stores. I struck out so many times trying to buy this game at gamestops and best buy. Way to go distributors, I saw about 30 copies of Majoras masks laying in a big pile next to a little empty slot where all 5 copies of MH4U used to be. I'm a little bitter but they loved up the release of this game big time. Promoted games with demos, bundles, critical claim should be available for purchase, no?
@Tsurii897
Pretty much any items in offline mode can be obtained in the online mode- in fact, most hunters do their "rare drop grinding" online because a team of 4 can wreck a monster in no time if everyone is well versed. It's also not uncommon to see online gathering lobbies, where teams of 4 set out just to mine rare ore and crafting materials.
@Jim_Purcell
This game requires a little more skill than your average "hold button to auto target" game. All manual skills in MH. Don't worry, practice makes perfect I assure you. Besides, auto target wouldn't work for this game. Because each section of the monster (head, feet, legs, torso, tail, back, belly, etc...) take different damage, not to mention you have to strategize by attacking certain parts of the monster (break the horns, cut off the tail, etc).
Once you develop the skill set it becomes a ton of fun. You'll get to where you rarely ever miss a swing...
@Tsurii897
Oh ok. Still, I imagine there's some pretty powerful weapons you could craft otherwise- I had some pretty powerful weapons in 3U from ordinary (rare, but ordinary) drops from monsters.
"The key point is to try and avoid jumping online right away. Build yourself up and really learn how to play first."
I'd thought about getting this together with a friend, but if I more or less have to spend a dozen or more others in singleplayer, before coop becomes really viable, I'm not sure I'm interested anymore.
Ralek85, coop from the start is viable indeed, I'm pretty certain that that is there to say 'don't go to randoms as a newbie or veterans will make the game unfun.'
Experienced players tend to not act very nice to random newbies who get into their lobbies, I guess they don't password lock because they want to play with other random, yet experienced, hunters?
I barely played online in MH3U, but message boards across the internet all show that consensus, more or less from what I remember.
That said, even if you primarily play with your buddy, try and take some time for the story to power up the canteen food selection. It will help tremendously in high and G ranks. (some missions need to be done in story, I think anyways, to up the quality of food in the canteen areas, this may have changed in MH4U)
Advice from a pro: unless it's your Palico, if a Felyne is black, it will probably steal from you. Not trying to sound racist, but that's kinda how Capcom made things work. Also: Get Good, Don't Die, keep a good stock of potions, and don't forget to upgrade your armor with spheres and equip talismans that actually go with whatever you want to be. Don't use an auto blocking talisman as a gunner...
@Ralek85 I jumped into co-op with a friend right off the bat (when available) and it was fine. It'd be smart to do some offline grinding though unless you want to force your friend to grind for your personal gear while he wants to grind for something he wants.
Nice guide. I've been with this franchise since I played the first one that came out on PSP. While I love this franchise I never got really far into it. I just love going out there even just to get herbs and mushrooms. I'm just starting with MH4U but I'm already hooked.
I always was perplexed by the series. I bought a used psp for freedom unite 2nd but i couldnt get used to it. Then MH3U , it was ok but felt off i only played around 30 hours. Now MH4U has launched i bought it on day one taking a chance. Love it! I know the Insect Glaive is op but damn pole vaulting and swatting a monster out of the air or webs is satisfying!
Everyone considers the Hammer to be a slow weapon. You all know nothing.
Alright, played MH for years. Here we go:
Those new to the franchise, do NOT touch multiplayer until you've familiarized yourself with the game: I.E, learn the basic terms, weapon types, basic monster weaknesses (checking armor element resistances is a fantastic way to do this), basic tactics, a way to supply yourself, AND you've gone through the tutorial.
Seriously, yesterday a guy was HR 3 and asked what I meant by "capturing the monster". No. Just no. Single player WILL TEACH YOU.
When online, do not attempt to use a tool or object you don't know how to use. Watch for a more experienced player and see how he/she uses it. Also, watch other expert players for good tactic ideas. Listen to them, we know what we're doing unless we state otherwise.
Use something other than Insect Glaive or Charge Blade. Variety is the spice of life and every weapon is actually balanced in utility, don't just run off of pure damage output, since Dual Blades and Light bowgun deal the most damage for melee and ranged anyway
Alright, and you're gonna get the crap kicked outta ya too. It's gonna happen. Especially in G-Rank, Gunners can get taken down one shot. This isn't CoD, you have to work at this. You will get frustrated that you can't get that one... Single... Monster part you need for a weapon or armor piece. Makes getting it all the more rewarding. You feel awesome getting an armor set, making and upgrading weapons. When you and your team really sync up and whup a monster. THAT is what Monster Hunter is. Work and Satisfaction.
Wow, I'm a fanboy.
Nice guide, but I have to clarify a mistake I saw about ledges in here. You said that you can not jump off ledges or such with your weapon drawn, but this is actually wrong. When you press the dodge button and roll if you go off a ledge you will jump and can then use a leaping attack to try and mount, but this also makes ledges a danger. I can't even count the number of times I've rolled to try and dodge an attack just to hit a ledge and be forced to hang in the air for a few seconds hoping I don't get pounded (happened against an enraged deviljho using dragon breath while I was in gunner armor, not fun). Just needed to clarify that since it can really be a problem in High and G rank battles if you don't learn early.
@KodyDawg all crossovers will be free DLC starting in March. Note: the transactions are through the game itself, and you must own the game in order to gain any DLC
Show Comments
Leave A Comment
Hold on there, you need to login to post a comment...