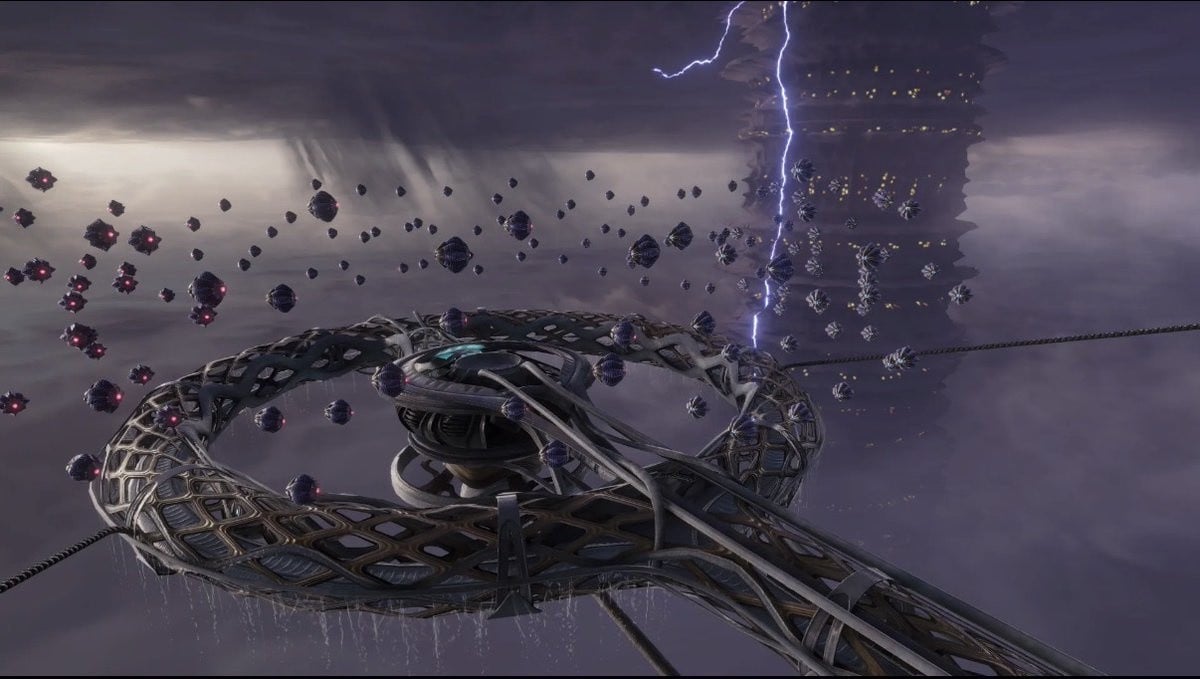
Hello! Welcome to the next part in our Metroid Prime 4: Beyond walkthrough, in which we'll be diving headfirst into Volt Forge, the electrically-charged fortress housing a boatload of mechs and, more importantly, the motorbike Vi-O-La.
Lots more scans and items to get through again here, so if you're looking to achieve 100% completion, then you've come to the right place.
Let's begin!
Volt Forge Walkthrough
Upon entering Volt Forge via the morph ball slot detailed in our Fury Green guide, you need to walk down a short corridor, then fire a missile at a window to burst it open and jump through.
From here, you'll see another morph ball slot, so head down. Now, walk down the corridor again and you see another morph ball slot to the left. Get down there.
You'll exit at the end of the Tunnel Entrance, at which point you can head into the Facility Approach and enjoy a brief cutscene introducing you to Volt Forge.
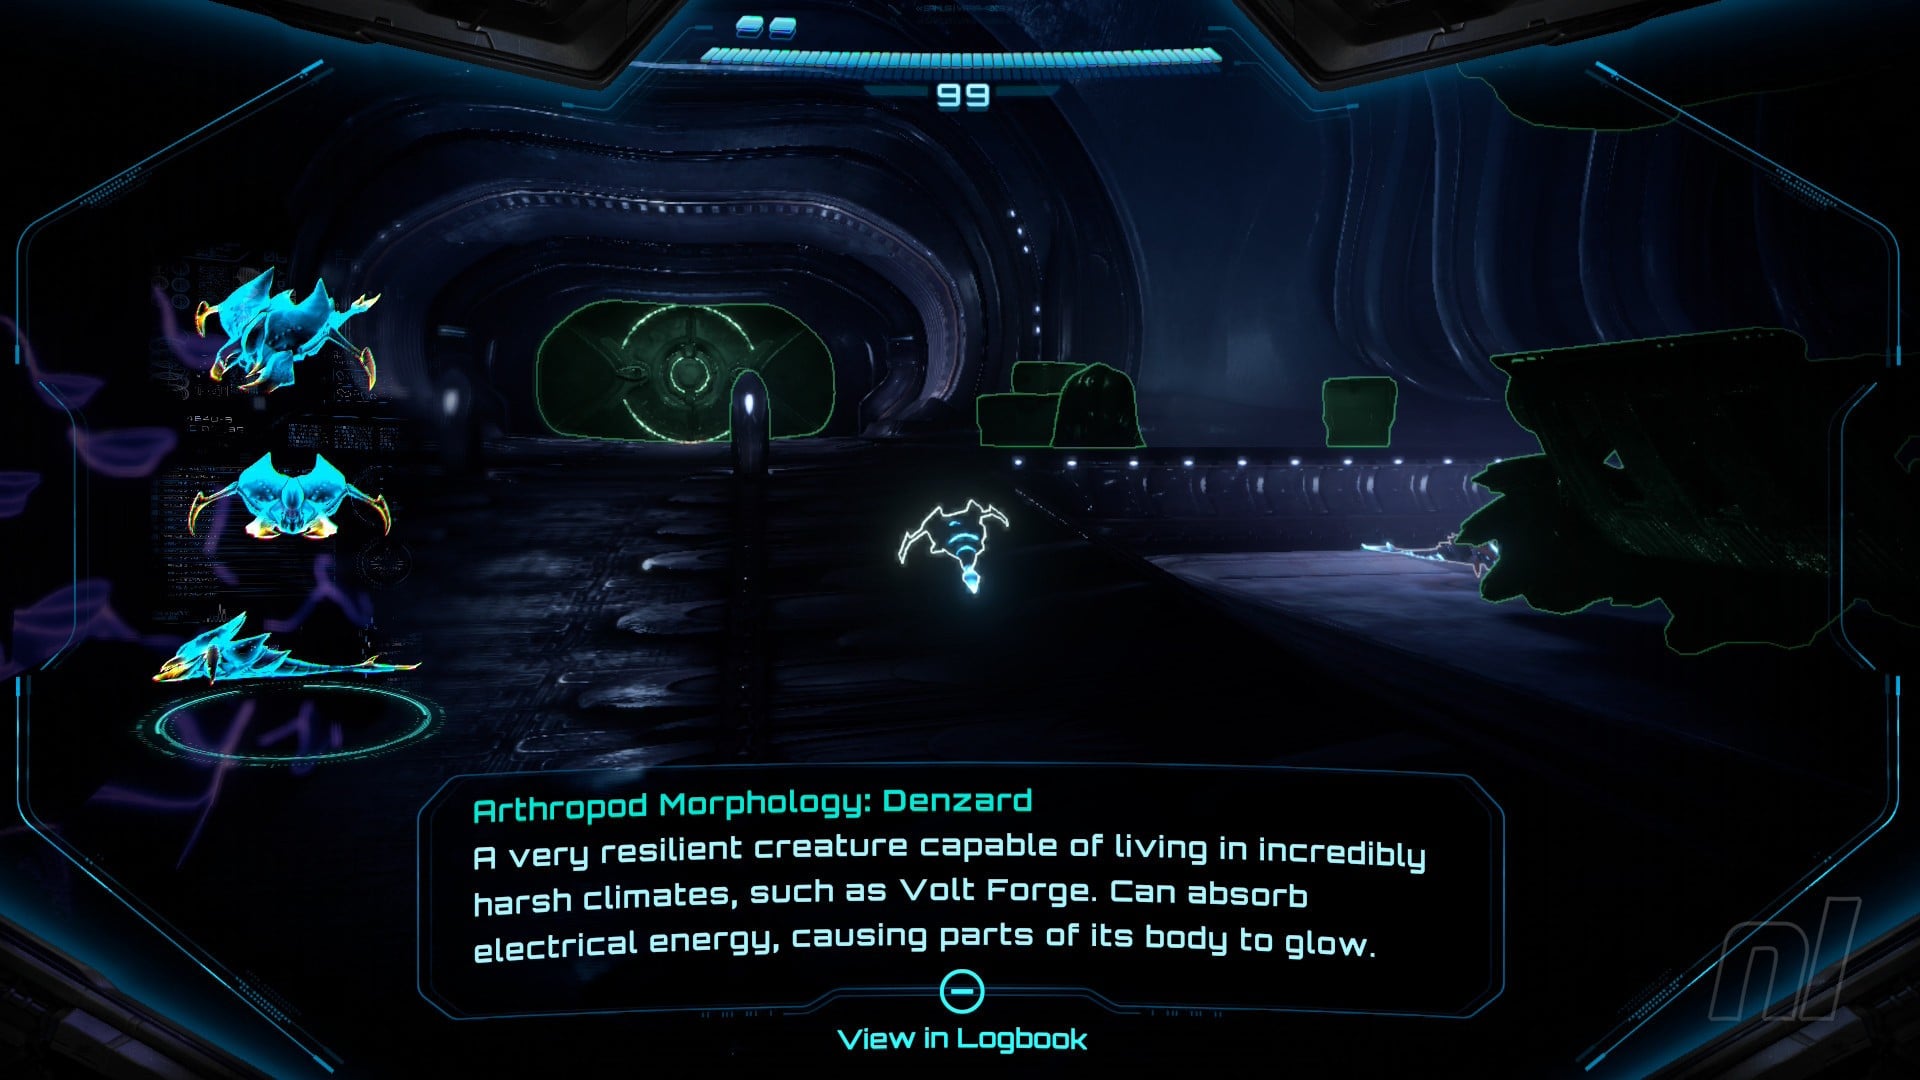
Scan Entry: Denzard
Move into the Loading Airlock. Here, you'll see little creatures scurrying around call Denzards. Scan one of them, but don't worry about shooting them; they won't both you.
Now move through into the Showroom.
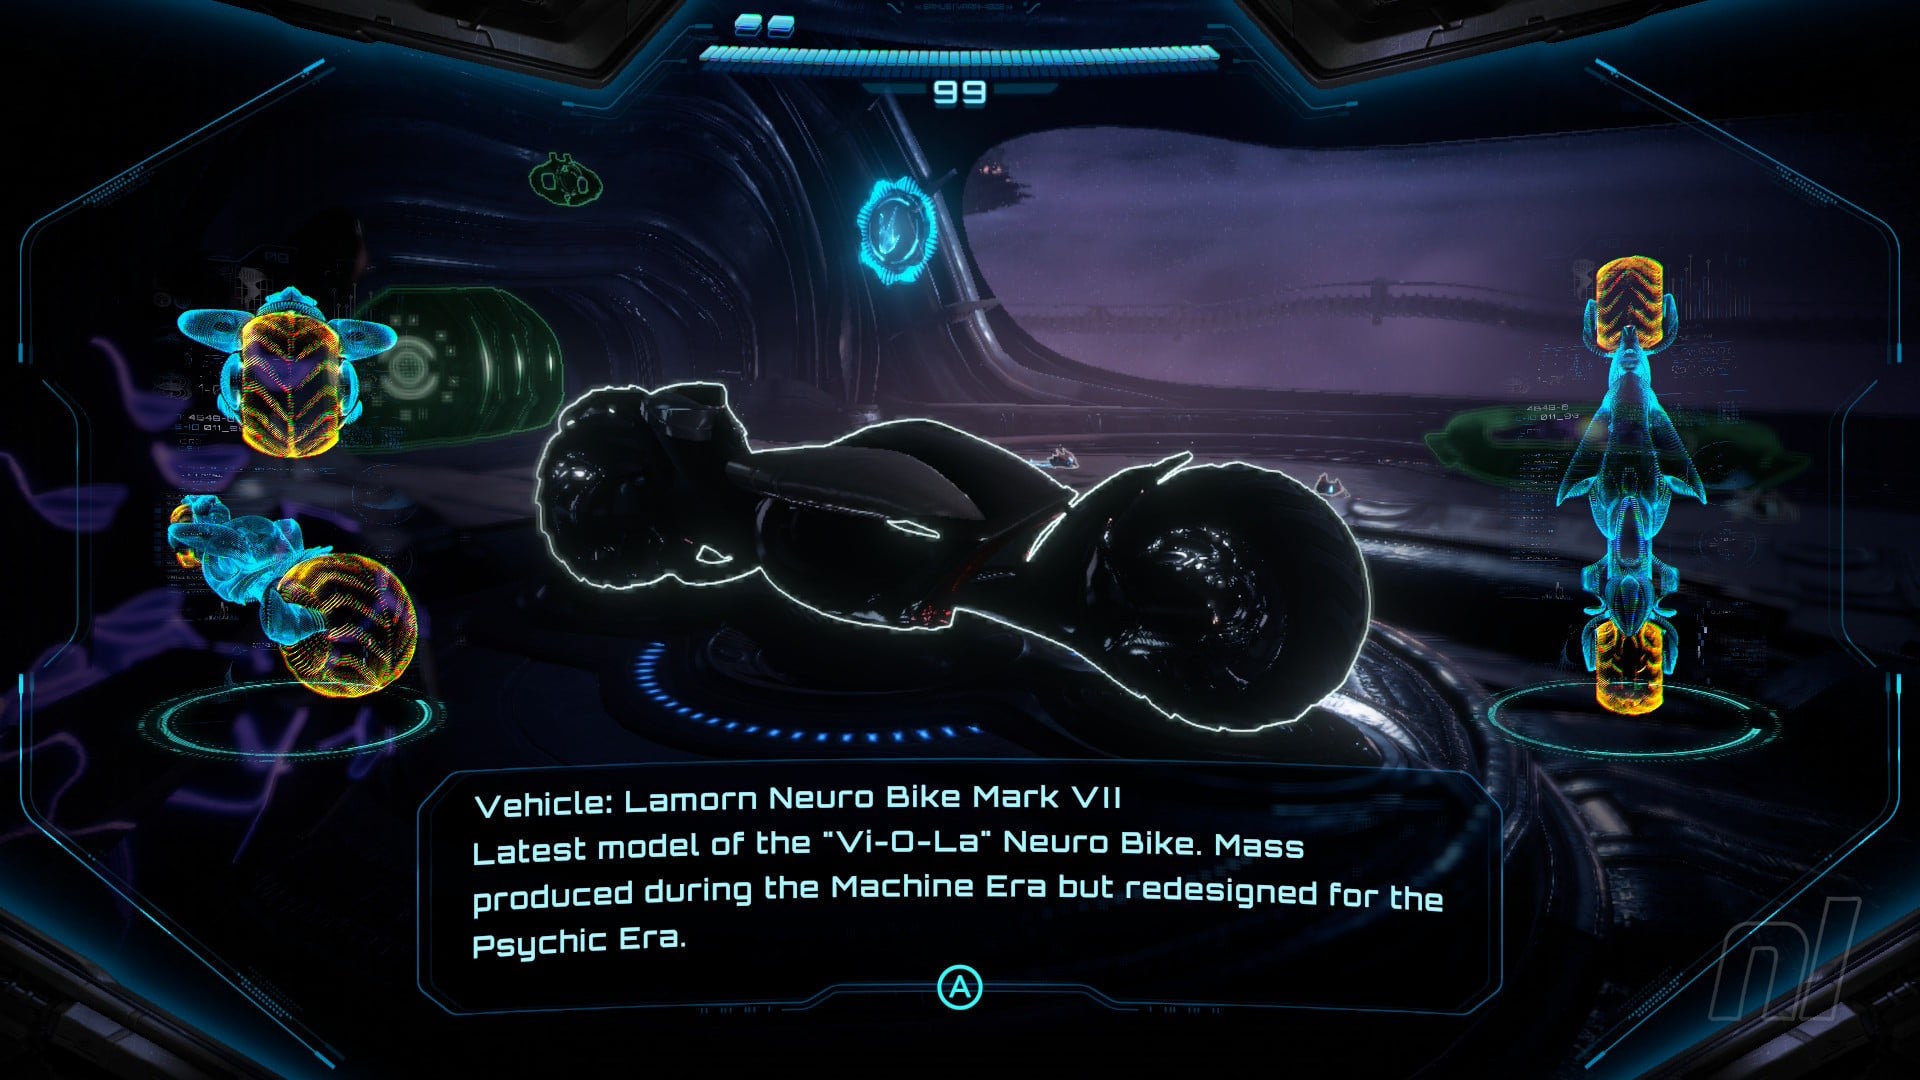
Scan Entry: Vi-O-La
Straight ahead, you'll see Vi-O-La taking pride a place atop a podium. Scan it to add it to your logbook.
Now scan the terminal at the end of the room by the large window to trigger a cutscene. You'll gain the Area Map in doing so.
Two doors are available to you from here: to the right is the Save Room, and to the left is your critical path. Save if you wish, then head to the left.
Move into Tower 1: Elevator 1 and scan the terminal to activate the elevator. Head down.
As you enter the Irradiation Floor, you'll see a Missile Expansion in the centre; don't worry, we'll come back for it later. Instead, jump on the platforms protruding from the centre. They'll each drop slightly as you land on them.
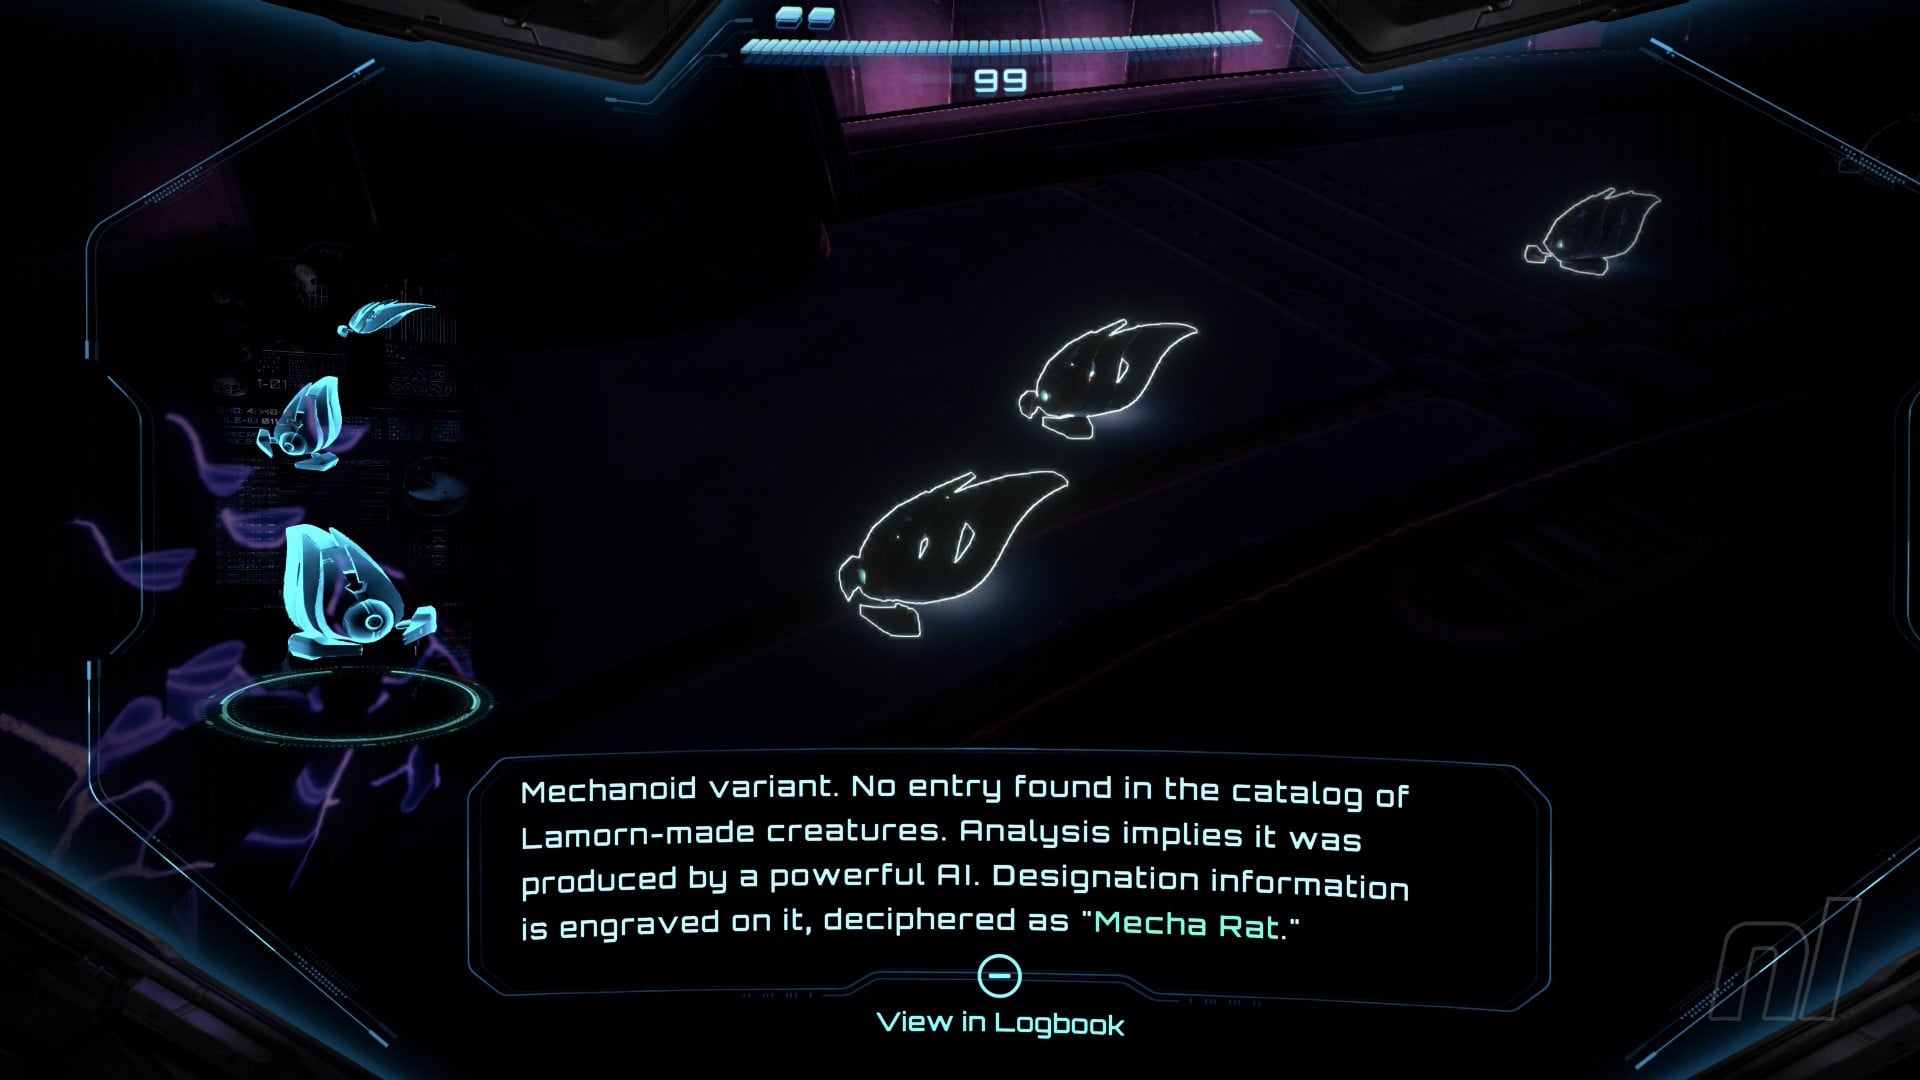
Scan Entry: Mecha Rat
At the bottom, you'll see a bunch of small rat-like mechs moving across the ground, appropriately called Mecha Rats. Scan one of them.
Shooting a switch on the wall will cause the platforms to rise slightly and allow for access to the upper floor, but they'll almost immediately fall back down. So, head onto the platform right next to the upper floor, then use your Control Beam to guide your shot to the switch. Immediately jump from the platform after it rises up.
Head through to Tower 1: Elevator 2 and scan the terminal. Take the elevator down.
On your left, blow the lock off the door with a missile and move through. Walk around the corridor; you'll see more Mecha Rats if you happened to miss these earlier.
Jump down into the main Assembly Floor and clear out some of the rats to allow access to the door.
Scan the terminal in Tower 1: Elevator 3 and take it down. Watch the floor here; it'll periodically burst with electricity, so just run into the elevator when it's all clear.
Move down into the main chamber of the Manufacturing Floor.
Scan Entry: Lamorn Magnetic Rail
Up above, you'll see what looks like a familiar Spider Rail from the rest of the Metroid series. Scan it!

Now blow the lock off the door with a missile and head into the Collapsed Catwalk.
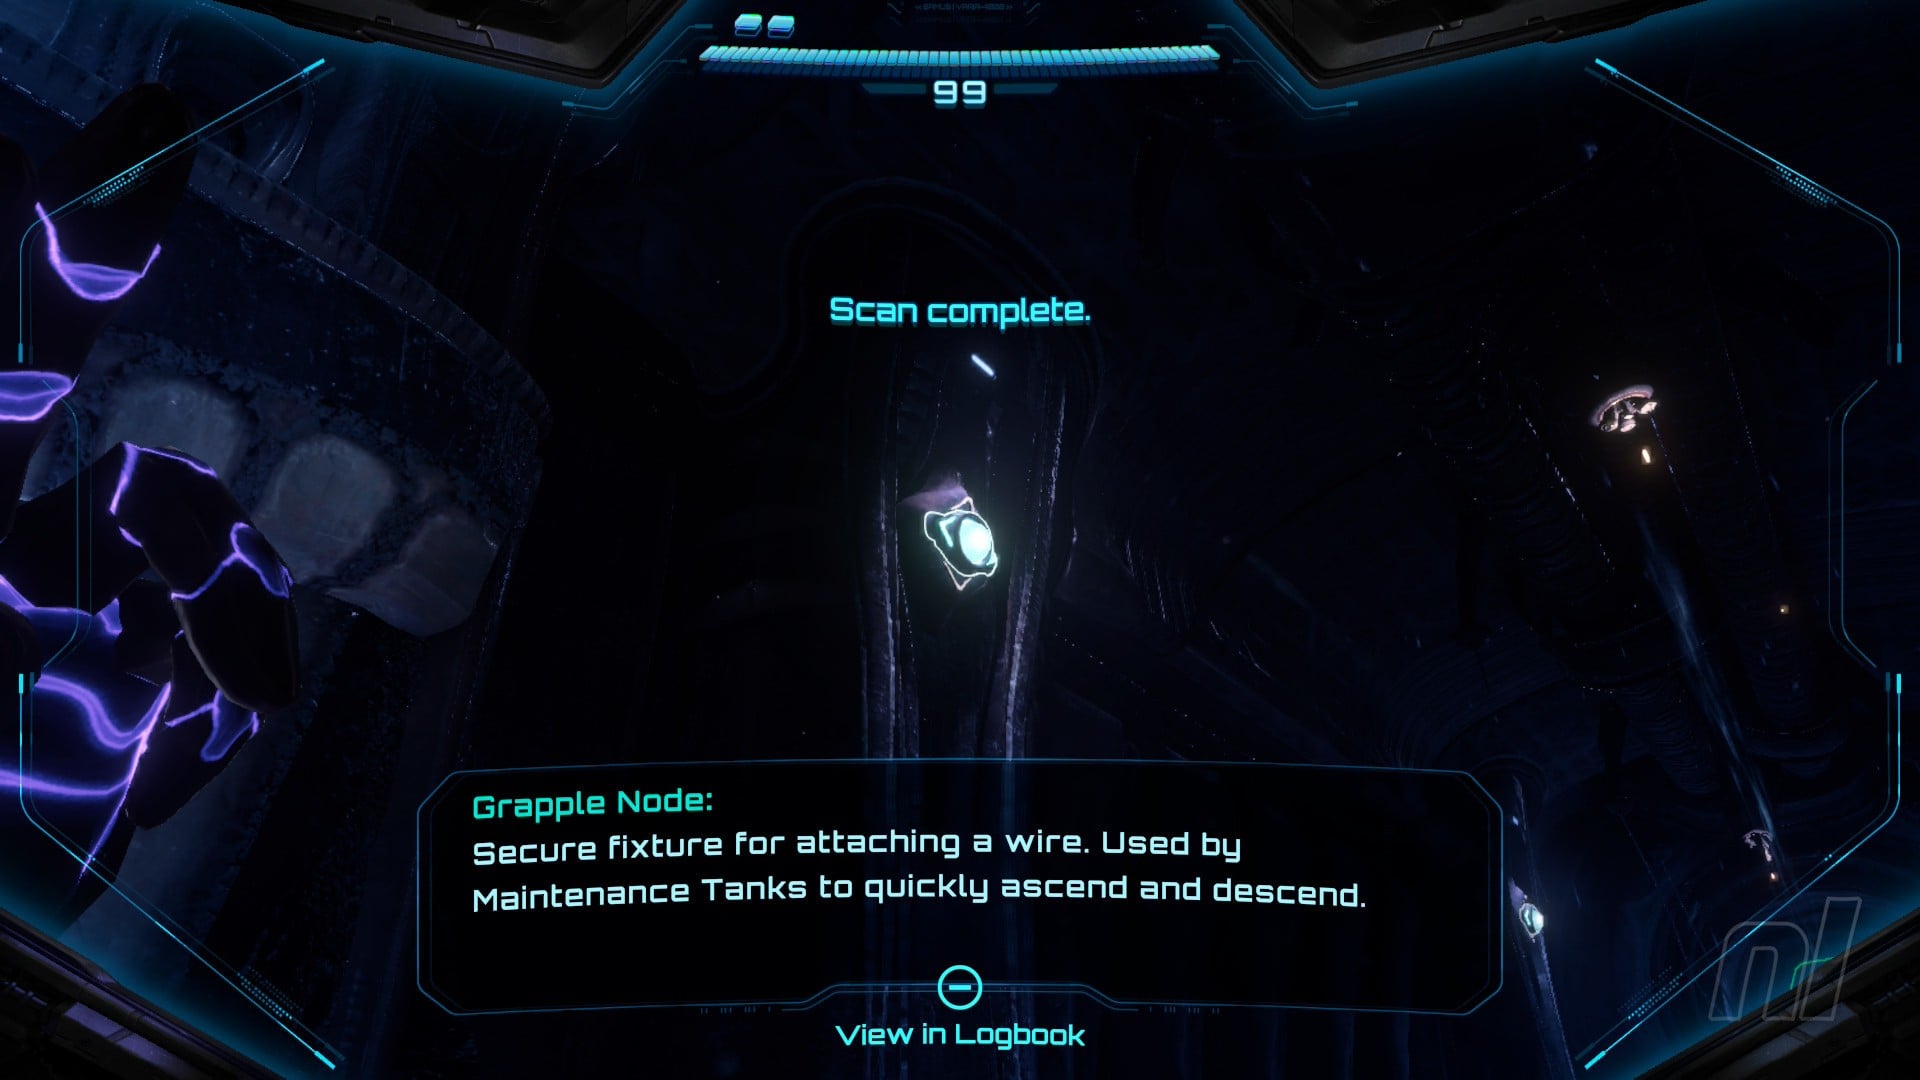
Scan Entry: Grapple Node
You'll see three lights on the walls; two on the left and one on the right. These are Grapple Nodes, and we'll be coming back later to use these. For now, scan the closest one.
For now, go back into the Manufacturing Floor and drop down into the morph ball hatch on the opposite side.
Move through until you reach Tower 1 Generator. Before you do anything else, head to the left.
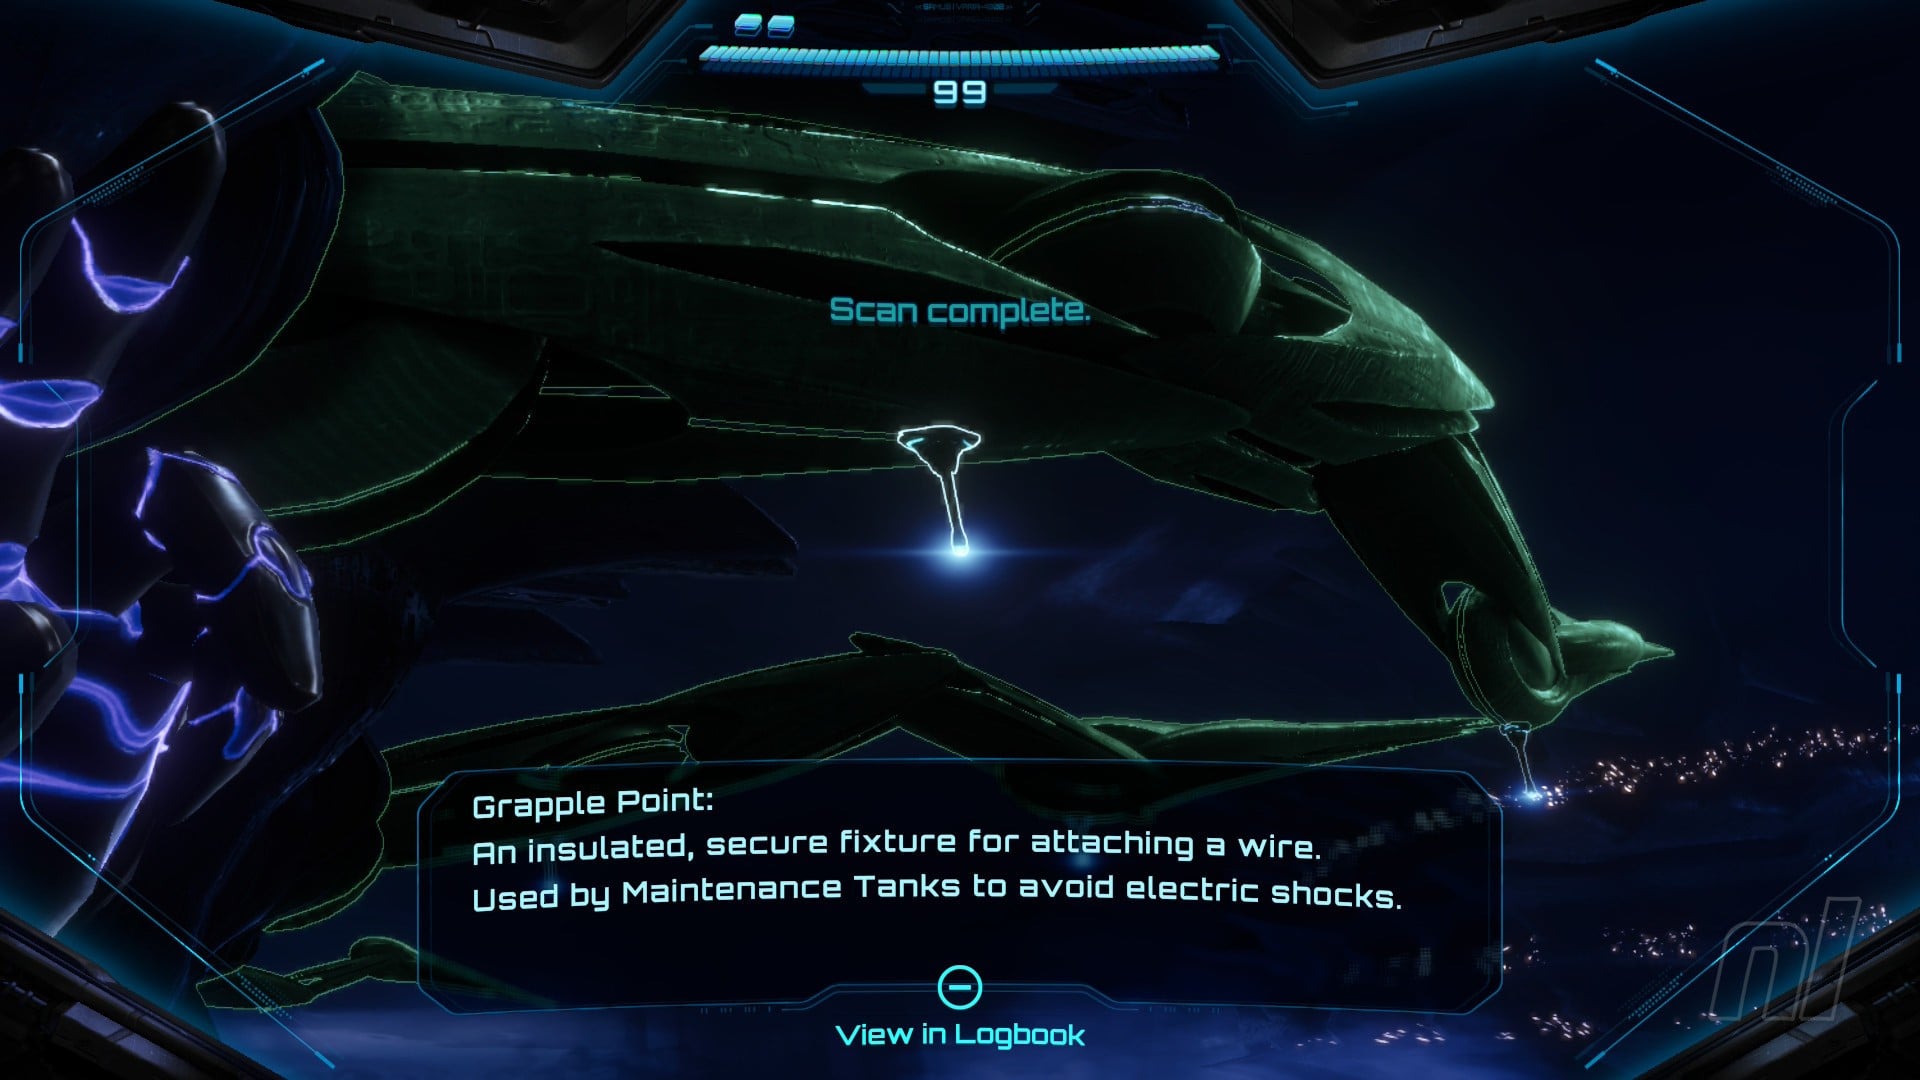
Scan Entry: Grapple Point
You can't use them yet, but you'll see Grapple Points dangling from the lightning rods above. Scan one of them.
Now go back and jump into the bomb slots either side of the lightning antenna. Drop bombs to activate them.
Now drop into the morph ball hologram to start making your way up the antenna. At the end, circle around and drop a bomb into the slot. Well done, you've now powered up Tower 1. Move back up the antenna, but slot yourself into the platforms on either side to temporarily avoid the lightning strikes.
Move back into the morph ball slot to start heading back up to the Showroom. Watch the electricity in Maintenance Shaft 1.
In the Manufacturing Floor, touch the central terminal with 'A' to activate the assembly line.
To reach the upper floor, you'll need to drop into morph ball mode and fool one of the machines into thinking you're the wheel of a Vi-O-La. The machine will pick you up and place you onto the upper floor.
Move through the space and avoid the cylinders of electricity. Move into the door on the right and back up the elevator.
Scan Entry: Maintenance Tank
In the Assembly Floor, reawakened Maintenance Tanks will attack you. Scan them, then dispatch them with charged shots and missiles.

There's a bomb slot up high here, so you'll need to drop a bomb, then psychically throw it into the slot. Now morph ball into the central mechanism. The machine will designate you as 'trash' and throw you into the upper floor. Move around the corridor, using the machines on the assembly line as cover from the laser beams.
More Maintenance Tanks will greet you in the next room, so get rid of them. Before moving back into the elevator, touch the panel on the wall with 'A' to release the gate.
Now head back up the elevator.
In the Irradiation floor, use the platforms in the middle to work your way up the room, but watch out, as they'll periodically get electrified.
At the top, touch another panel to release a gate, then go back up the final elevator.
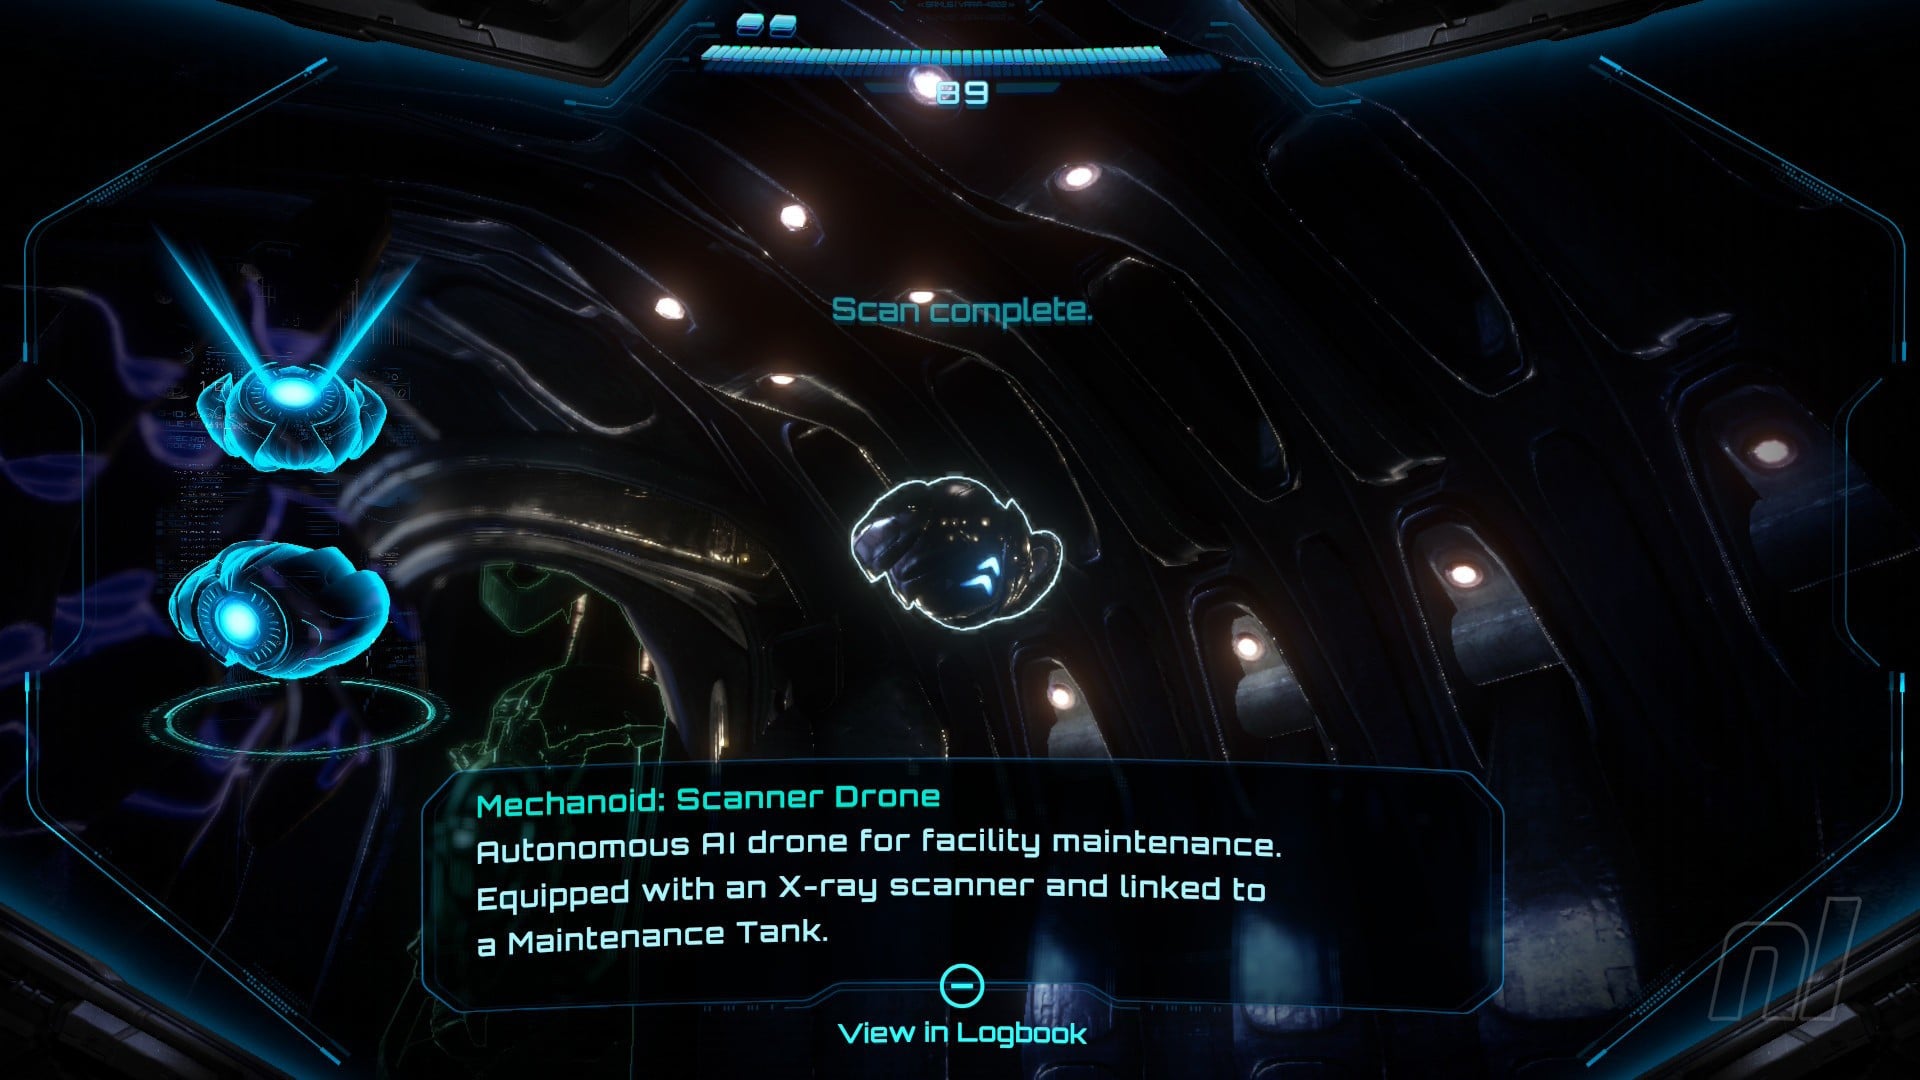
Scan Entry: Scanner Drone
At the top of the elevator, you'll immediately see a Scanner Drone. Scan it back.
Now that you're back in the Showroom, head to the terminal in front of Vi-O-La and touch it with 'A'.
Power Suit Upgrade - Vi-O-La Suit
Boom! You've got the Vi-O-La Suit. Looks cool, huh?

You can now ride the Vi-O-La bike, so hop onto it and use the Vi-O-La Spinner to launch yourself through the door and across the access tunnel. As an aside, if you thought Volt Forge's theme tune was a bit lacking up to this point, this is where the real theme kicks in, and it's a banger.
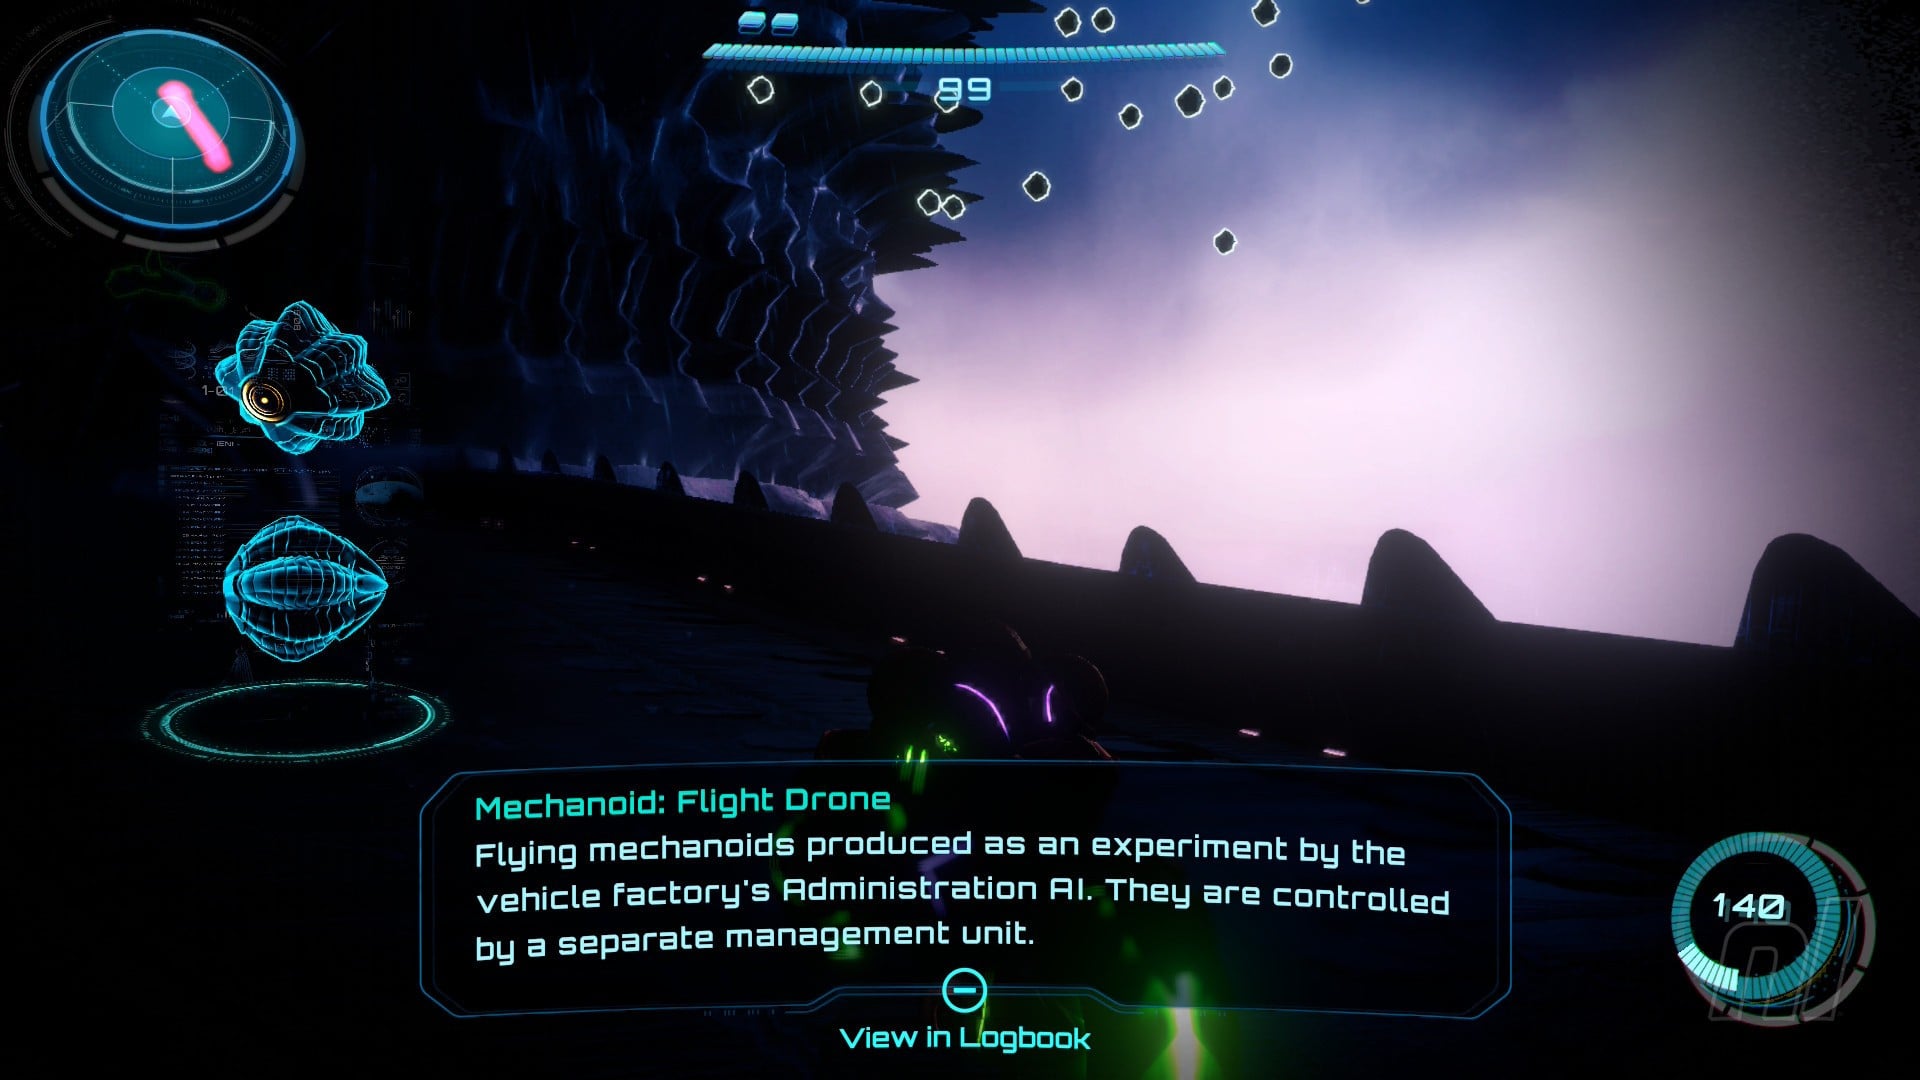
Scan Entry: Flight Drone
Did you think there was nothing to scan across this tunnel? Think again. You'll see a bunch of Flight Drones zooming through the sky, so break out your scan visor whilst on Vi-O-La and you can scan them.
When you reach the Receiving Lobby, hop off Vi-O-La and scan the terminal by the window to get the next Area Map.
Now head to the back of the room. To the right is another Save Room, so stop by there if you wish.
Scan the terminal and head down the elevator.
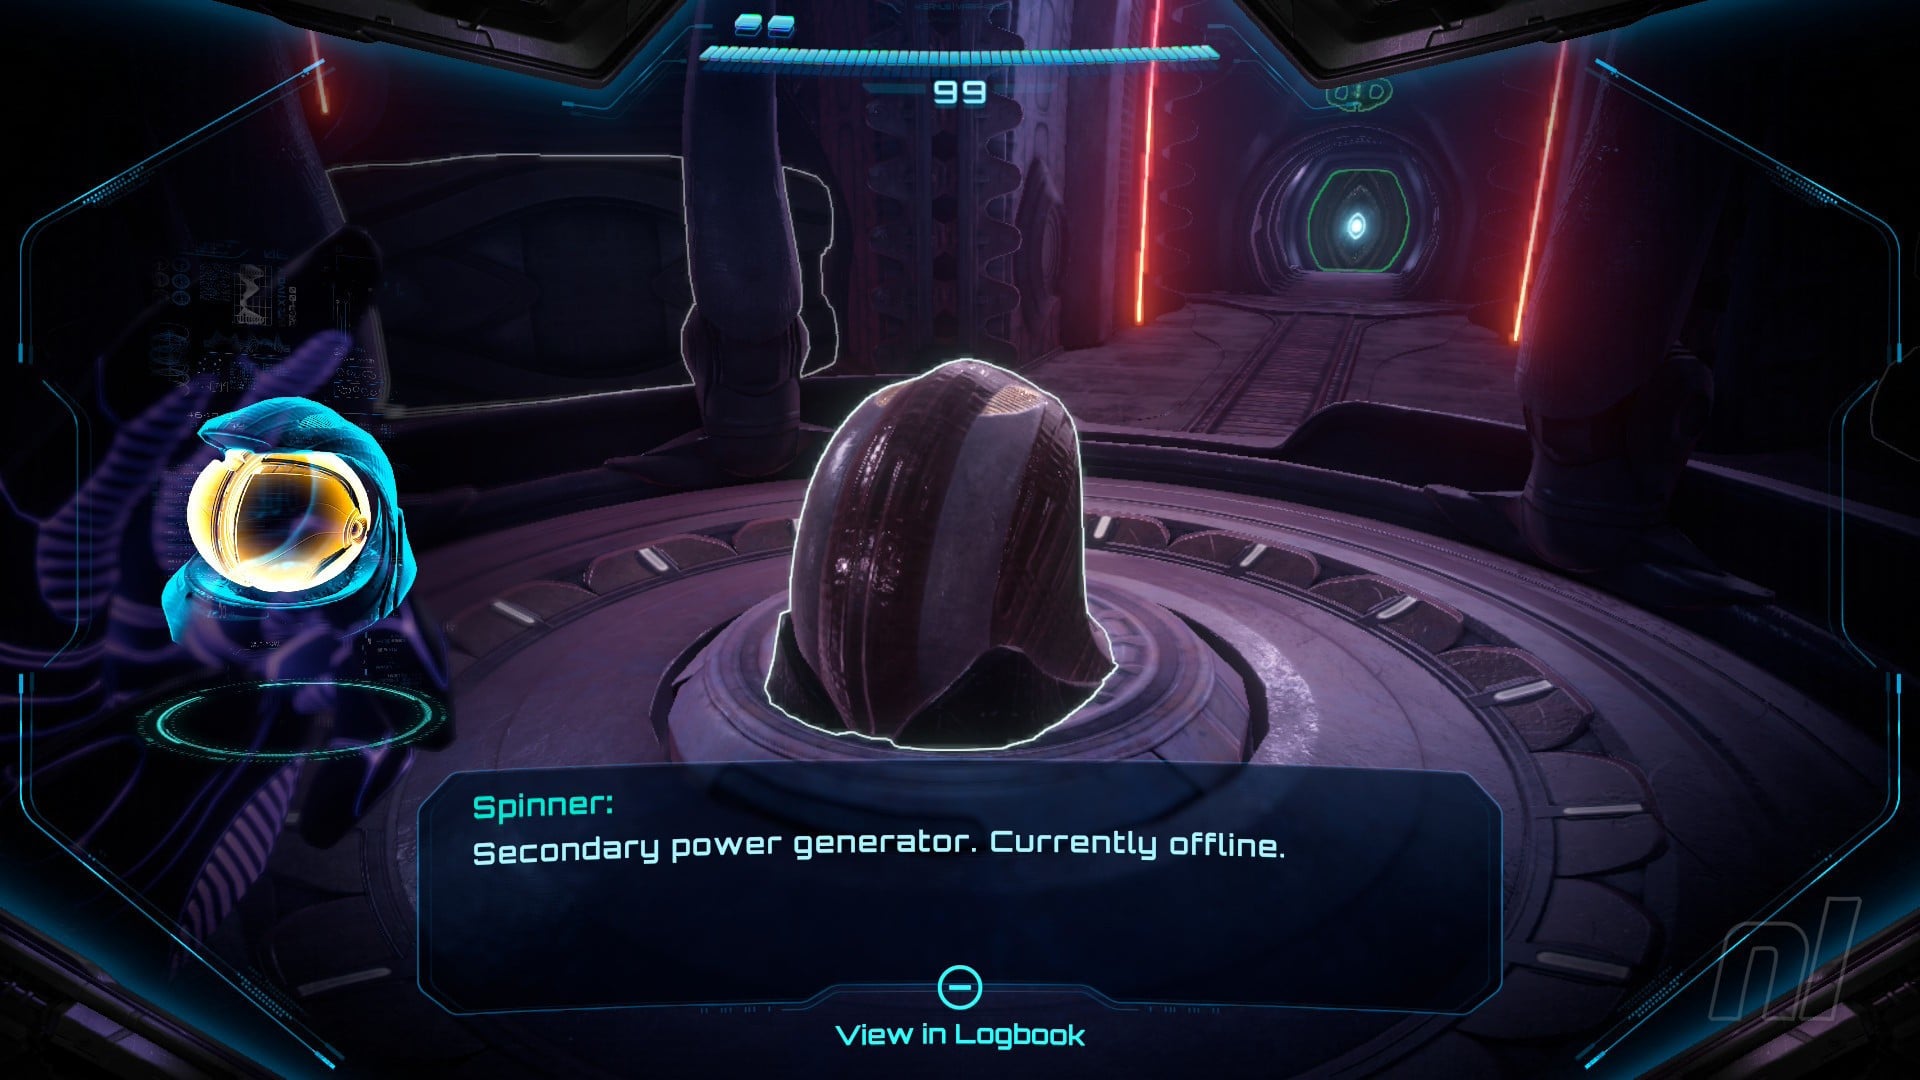
Scan Entry: Spinner
Scan the Spinner in the centre of Processing. It's offline for now, but it'll still count toward your logbook.
You'll be stopped from going any further by a few Psy-Bot Soldiers. Once you've defeated two waves of three bots, head through the next door and take the elevator down.
In the Storage room, you'll be stopped again, but this time by a different type of Psy-Bot...
Scan Entry: Psy-Bot Teleporter
Yes, the Psy-Bot Teleporter is a tricky little fiend. You might need to lock on a few times to complete the scan, as it'll teleport away before you finish.
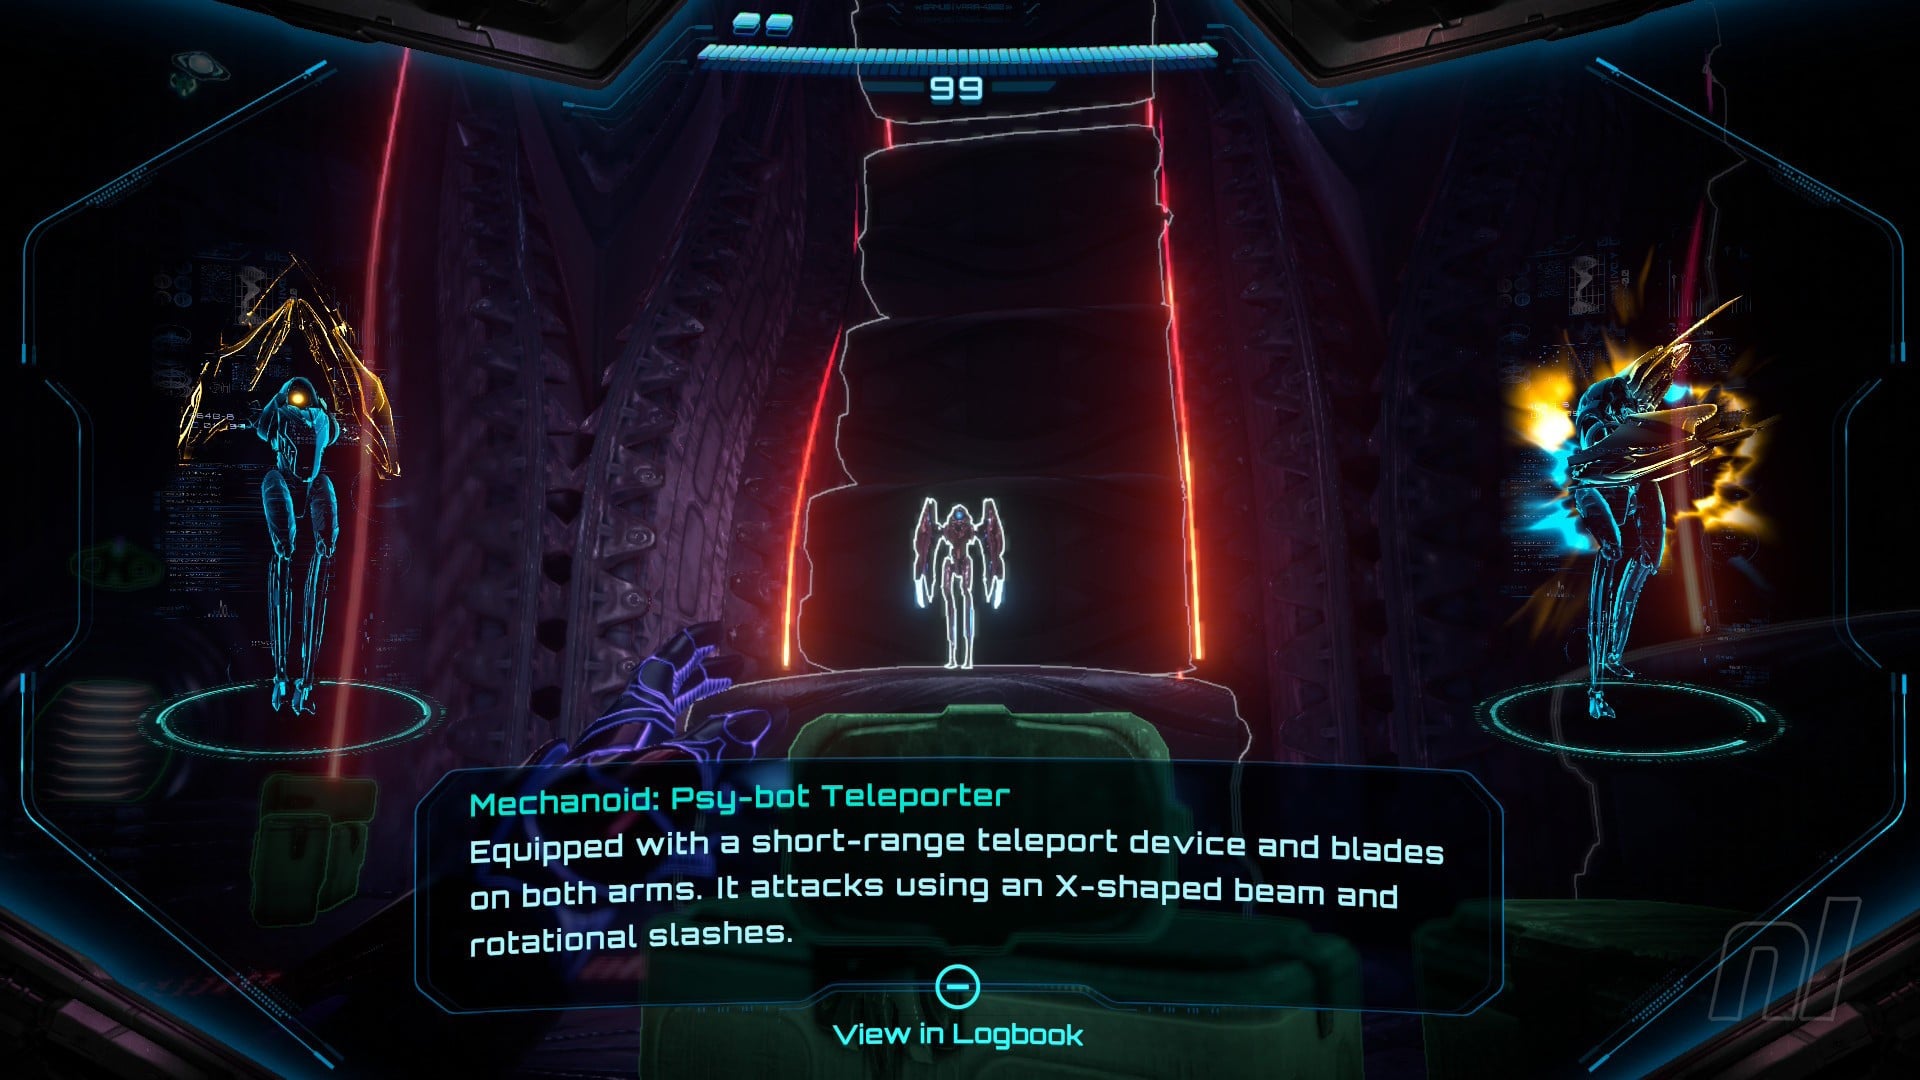
As for defeating this thing, just hit it with a charge shot as soon as it reappears. Missiles are also valid, but they're a little slower, so you might lose the Psy-Bot before you land a hit. Maintenance Tanks will also show up, so get rid of these things first to make life a bit easier.
When you're done, take the next elevator down.
Head through the Morph Ball slot at the end of the Archives room. After a bit of zig-zagging around, you'll emerge in the Tower 2 Generator.
Head left immediately and you'll spot another Scout Bot on the floor. You don't need to scan this if you've already got the one from Fury Green, but take note of its location regardless.
Now use the two bomb slots like you did in Tower 1. You can use the one on the right like normal, but the left slot is inaccessible. Throw a bomb in there using your psychic powers.
Head down the morph ball slot and drop a bomb at the end. Head on back and avoid the lightning strikes by moving into the side platforms. When you get back, you'll be greeted by a new enemy.
Scan Entry: Flight Drone MCU
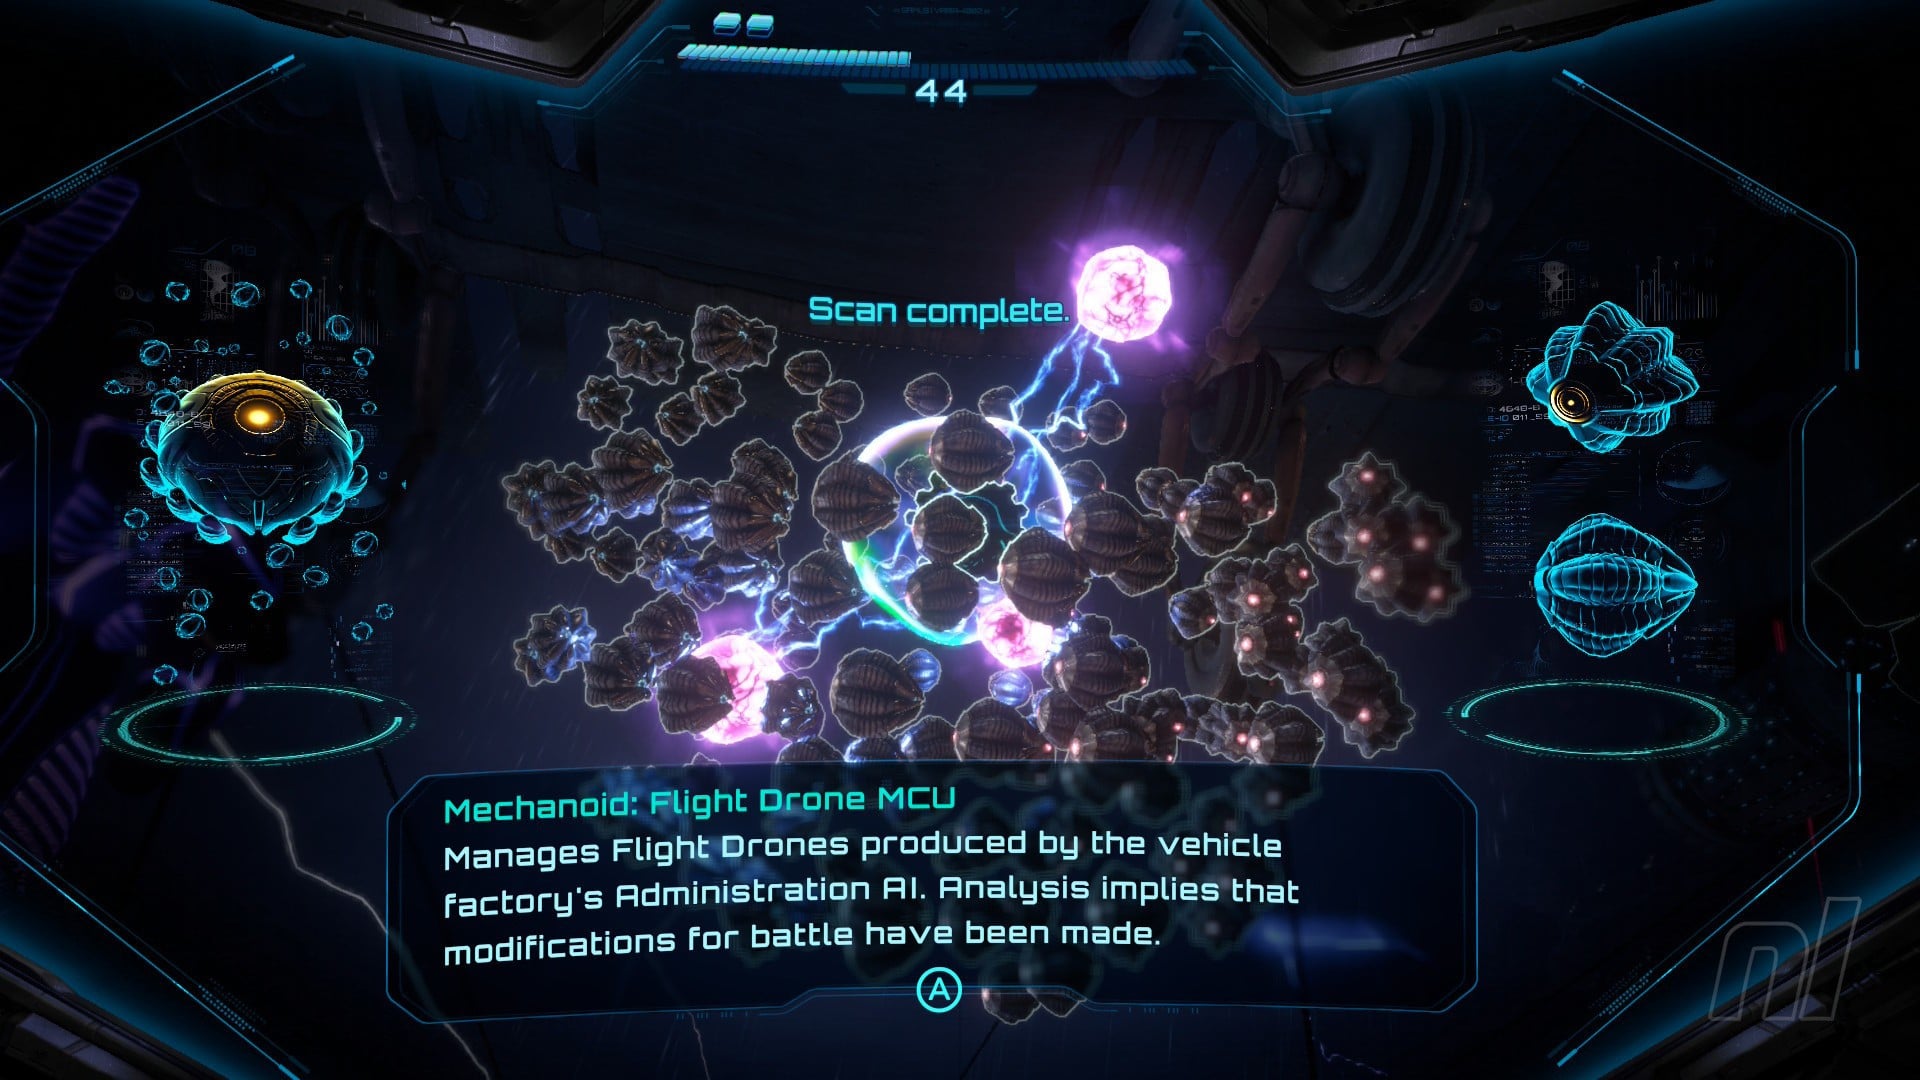
Scan the Flight Drone MCU. Now get ready to fight. You'll want to use the Control Beam to hit the three nodes surrounding the MCU. Ideally, get rid of a few of the smaller Flight Drones flying about to make this easier.
Once these are gone, the MCU's shield will drop, so shoot it to deal damage. You'll need to repeat this process one more time to beat it.
Head back through Maintenance Shaft 2, being careful to avoid the electricity as you go.
When you emerge back into Archives, you'll be greeted by a familiar face.
You can't scan Sylux at this time, so you'll just need to beat him instead. If you need assistance with this, then check out our guide on How to Beat Sylux (01).