
While Super Mario 3D World is most definitely a good time, those of you who have already experienced the game on Wii U will be most interested in the excellent Bowser's Fury expansion, which offers an open-world setting with Cat Shines to collect.
In this guide, we'll be showing you all of the Cat Shine locations in Bowser's Fury.
Subscribe to Nintendo Life on YouTube849k
Crisp Castle Climb Shine Locations
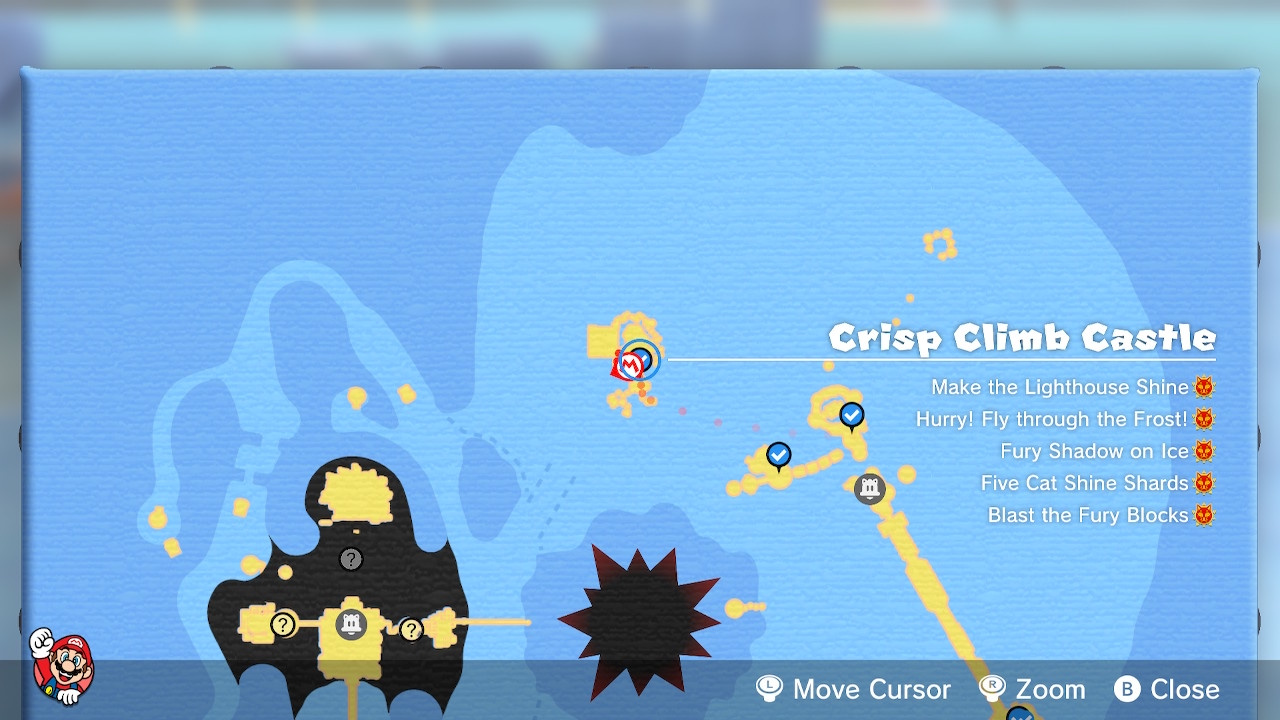
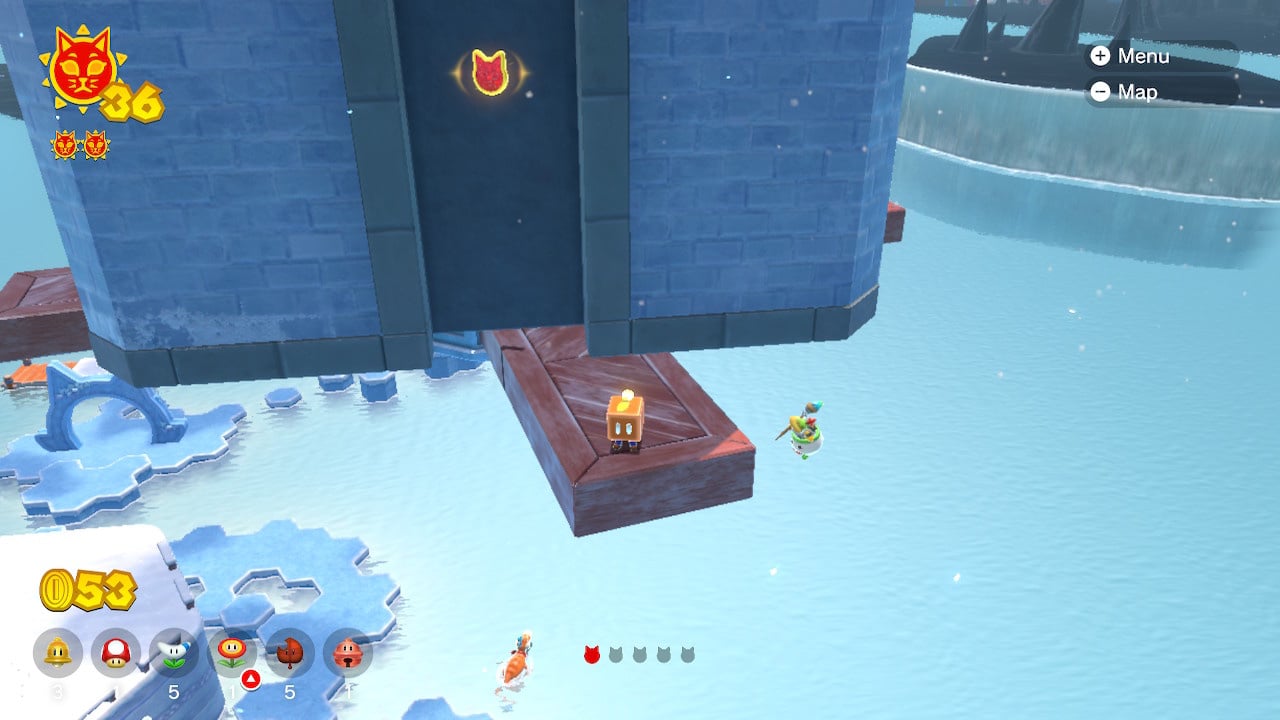
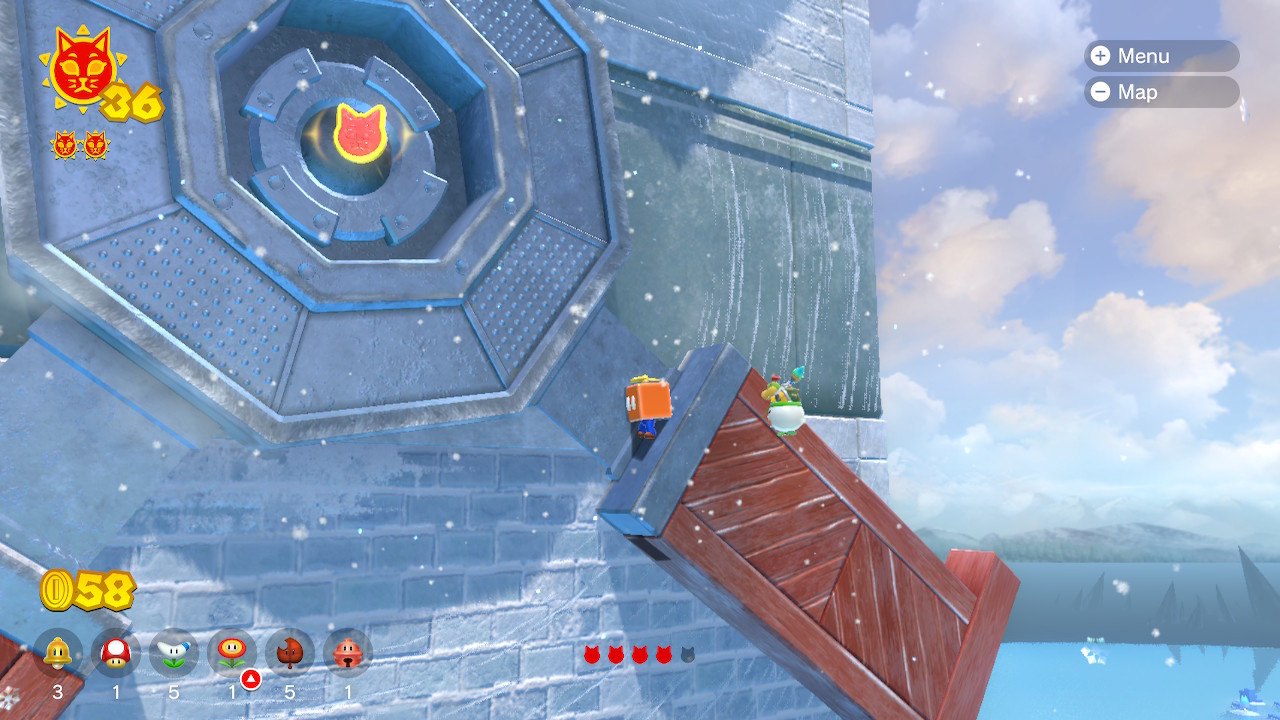
Crisp Castle Climb Shine "Make The Lighthouse Shine"
Use Plessie to make your way from Trickity Tower to Crisp Castle Climb. Enter the archway and you'll see two huge towers in front of you. The Cat Shine is at the top. Grab one of the Propeller Boxes as this is essential for getting to the summit. While this takes time to do, it's not actually too hard; just remember to hold 'B' to float upwards and then use the analogue stick to change direction.
Crisp Castle Climb Shine "Hurry! Fly Through The Frost!"
Leave the area and return. You'll find a big button at the base of the first tower. Ground-pound it and a set of windmills will appear. The objective is to use these to reach the top of the first tower in 20 seconds, where you'll find the Cat Shine. On the top of the third windmill, you can jump onto the windmill that's turning at the base of the second tower and use that as a platform to jump off to reach the smaller tower.
Crisp Castle Climb Shine "Fury Shadow On Ice"
Leave the area and return (again). Dark Luigi will return, but if you catch him enough times he'll admit defeat and offer up a Cat Shine.

Crisp Castle Climb Shine "Cat Shine Shards"
You can't really miss the first shard – it's at the top of the first (smaller) tower you climbed up to get the first Cat Shine.

The second shard is found on the second tower. Float from the first tower and land on one of the propellers which are rotating at the base of the second tower. However, stay on the propeller until it passes around the back of the tower, and you'll spot the shard in a narrow passage.
For the next shard, make your way up the second tower until you come to a point where there's a signpost pointing to the right, with an apparently empty platform on the left. Land on the left-hand platform and flora up, and you'll enter a hidden room that contains the shard.
The next shard you'll probably have picked up already, when you climbed the tower for the very first Cat Shine in this area. As you drop down you'll see it, before floating up the other side of the wall. You might find that, upon collecting the shard, you struggle to get onto the rotating platform, but don't worry – you can drop down to the level below and pick up from there.

The fifth and final shard is located in the massive windmill, right in the middle.
Crisp Castle Climb Shine "Blast The Fury Blocks"
See those hexagonal ice columns to the right of the main island? Head there and you'll spot some Bowser Blocks in the base of one of the towers. When Fury Bowsers uses his attack, the Shine will be revealed.
That's another island down! Now head towards the area around the Ruins Giga Bell.
- Fur Step Island Cat Shine locations
- Scamper Shores Cat Shine locations
- Fort Flaptrap Cat Shine locations
- Pounce Bounce Isle Cat Shine locations
- Lakeside Giga Bell Cat Shine locations
- Slipstake Slope Cat Shine locations
- Clawswipe Colosseum Cat Shine locations
- Trickity Tower Cat Shine locations
- Crisp Castle Climb Cat Shine locations
- Ruins Giga Bell Cat Shine locations
- Risky Whisker Island Cat Shine locations
- Pipe Path Tower Cat Shine locations
- Mount Magmeow Cat Shine locations
- Roiling Roller Isle Cat Shine locations
- Wasteland Giga Bell Cat Shine locations


Comments 0
Wow, no comments yet... why not be the first?
Leave A Comment
Hold on there, you need to login to post a comment...