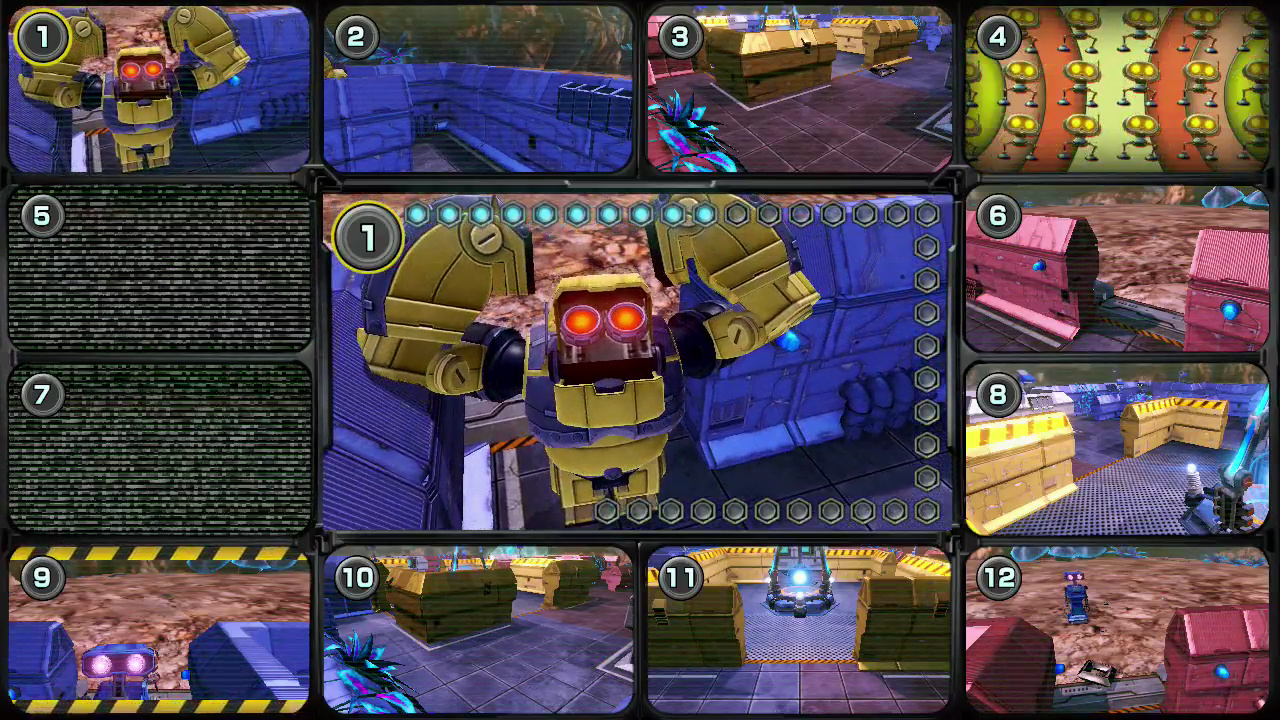
We don't know why or from where these bots are all coming from, but we will not let our guard down, no matter how many they send our way. This handy section of our Star Fox Guard guide will tell you how to handle each of the two types of bots. We've broken it down to their model name, HP rating, Speed rating, Threat level, how many hits it takes to take them down with the basic AegisCam turret, where they show up for the first time and some information on their AI behavior.
Chaos Class
Chaos attack bots are not a danger to the base itself; they are a danger to your AegisCam defense system. They plow away and try to distract you from the other bots, so keep your wits sharp.
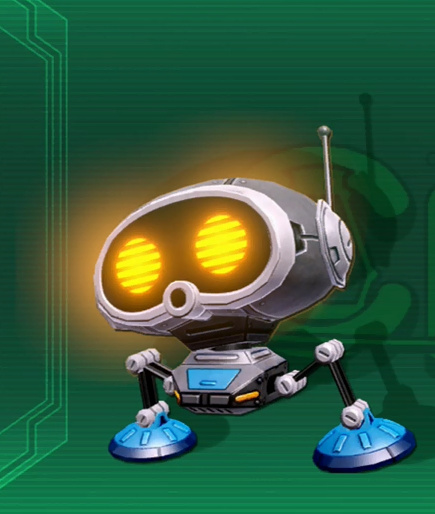
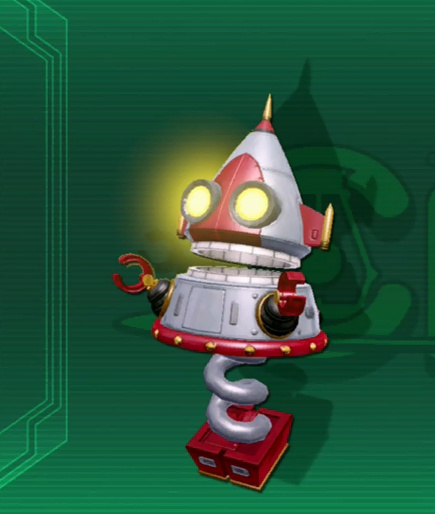
Hi Ho
First Reported Sighting: Corneria A - No.01
HP: 1
Speed: 1
Threat Level: Very Low
Hits: 1
The Hi Ho model must be cheap to produce because the enemy uses them in large numbers in a blatant attempt to confuse AegisCam operators. They are slow and pose hardly a threat, but never let them reach the core of your base: they will detonate and take out all the inner defense cameras near the base's core. Just make sure you don't prioritize them over anything else that shows up uninvited to the party.
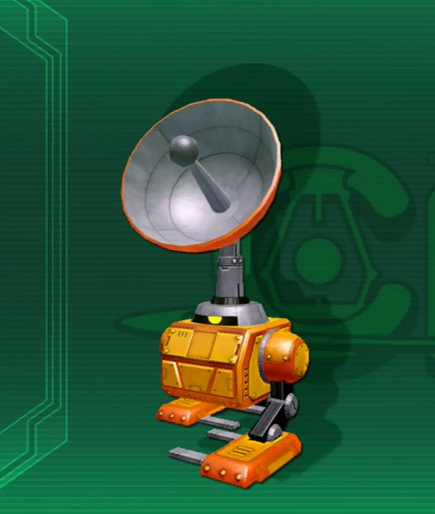
Dishruptor
First Reported Sighting: Corneria A - No.03
HP: 5
Speed: 2
Threat Level: Low
Hits: 5
Dishruptor models are slow but if you let them get in range of one of our AegisCams, they will lock it in position, possibly rendering them useless until you switch to a nearby camera to take them out (which, depending on view angle, might just be impossible). Take them out before they reach any of your turret cameras and they will be little trouble.
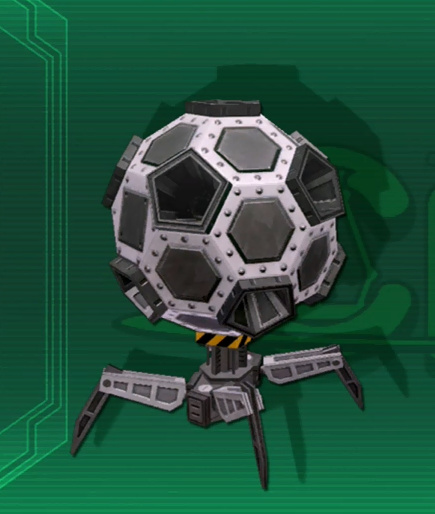
K.O.F. Unit
First Reported Sighting: Corneria B - No.05
HP: 1
Speed: 1
Threat Level: Low
Hits: 1
K.O.F. Units aren't armed, they are instead walking smoke screens. Once you hit them, their legs retract and after a 4 second detonation fuse expires, they explode in a burst of pink smoke. They aren't dangerous if you shoot them well outside the base perimeter, but if they get inside or even reach the core, they will allow other bots to move freely inside the smoke screen. Make sure you don't let that happen.
Tip: since they retract their legs and become sphere, shoot them repeatedly to roll them as further as possible form your base perimeter.
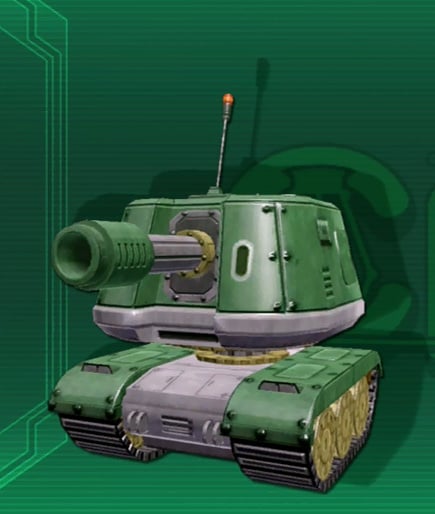
Green Tank
First Reported Sighting: Corneria B - No.06
HP: 3
Speed: 3
Threat Level: Medium
Hits: 3
Green Tanks will slowly and surely reach your camera turrets eventually. When they do, they take a few seconds to charge up a shot that once fired will take out the turret. Make sure you don't let that happen by shooting them three times whenever you spot them outside the base. Should you miss their approach, the camera will glow red when they are charging their attack. That is your cue to take them out.
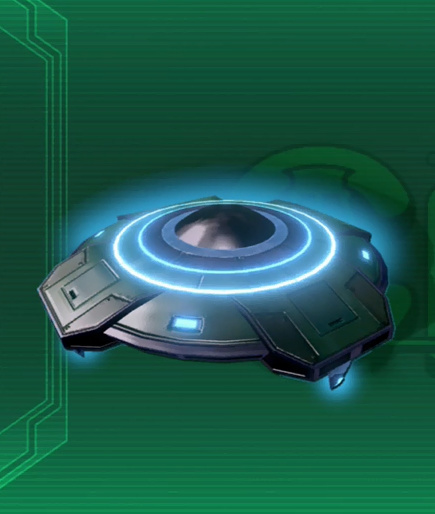
Abductron
First Reported Sighting: Titania A - No.13
HP: 1
Speed: 5
Threat Level: High
Hits: 1
Abductrons are game changers. While up to this point you only had to deal with land threats, from now on you must also keep a watchful eye in the skies above. You will get a visual cue when they appear in the airspace and two arrows flashing upwards from the turret camera they are attacking. Once they begin their attack, they will lock on a tractor beam to their target and if left unattended for five seconds, they will rip the turret camera from its position and fly away with it. Make sure you don't let this happen too often (those AegisCams are expensive), else your base will be defenseless before you even knew what hit it.
Pausemo
First Reported Sighting: Titania C - No.17
HP: 3
Speed: 2
Threat Level: Medium
Hits: 3
Pausemos will feed you with false camera footage on your cam, allowing other bots to happily sneak by your deluded self. They are tricky to catch in the act too, since they fly rapidly and attach to your turret cams. If you do spot one flying towards one of your cams, quickly switch to it and start firing. Most often than not that will not be the case so just spot which camera was hit, switch to the nearest turret camera and move the view to the affected camera. They are rather bulky so make easy targets when deployed.

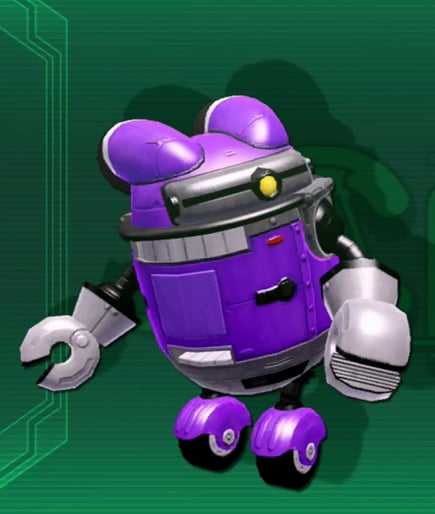
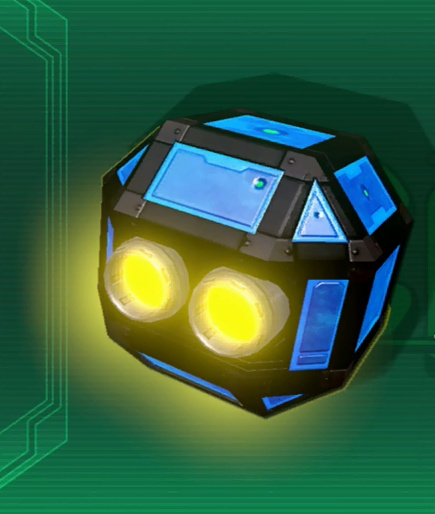
Clucktron
First Reported Sighting: Zoness A – No. 21
HP: 4
Speed: 4
Threat Level: Medium
Hits: 4
Clucktrons have the habit of falling in love with your AegisCams, chipping away at their supports and then merrily carrying them away. No insurance agency would ever cover that as the cause of destruction, so make sure you start shooting these as soon as they show up. There is no place for bot romance in Corneria Precious Metals Ltd.

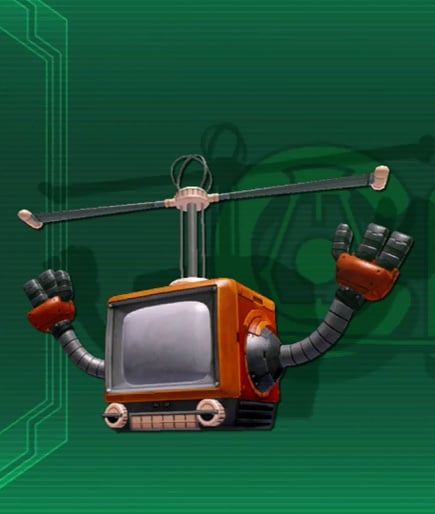
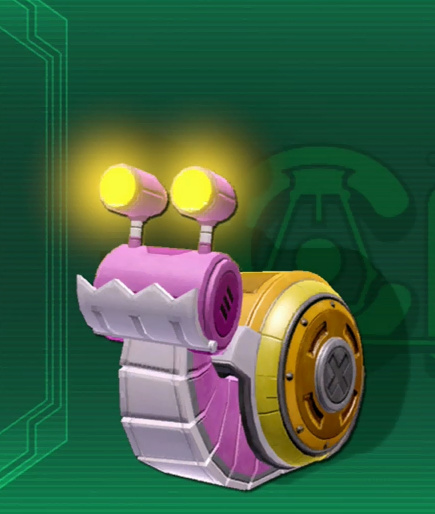
F.A.N. Unit
First Reported Sighting: Zoness B – No. 26
HP: 3
Speed: 4
Threat Level: Low
Hits: 3
F.A.N. Units are always nice in those hot Cornerian long Summer days but these reprogrammed units are not at all welcome in our bases. They make their way swiftly to your turrets and once they are in reach, they spin up their fans produce strong gusts of wind, throwing off any sort of hope you might have for accuracy. If this happens to you in the field, try to switch to a nearby camera and hope you have an angle at them.
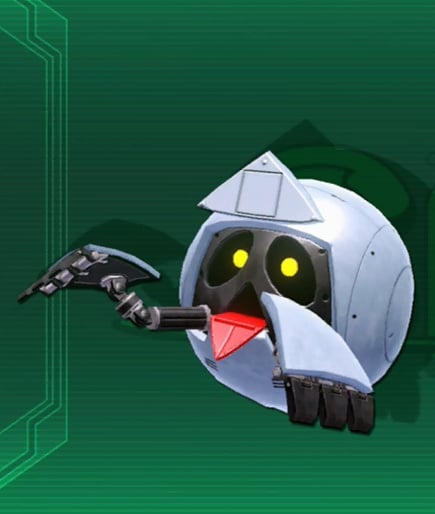
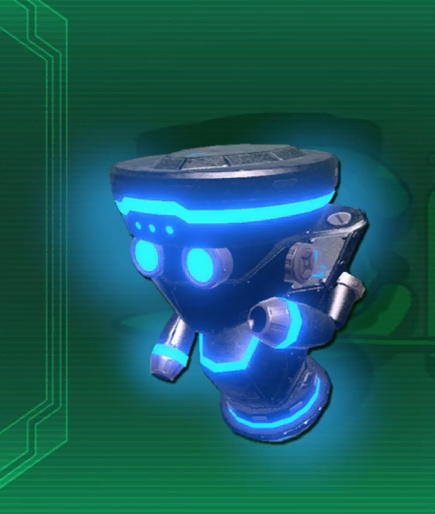
B.O.O. Unit
First Reported Sighting: Zoness C – No. 29
HP: 2
Speed: 5
Threat Level: High
Hits: 2
Here is the ultimate test of your reflexes. B.O.O. Units teleport straight in front of one of your AegisCameras. Leave them alone for four seconds and they will take that camera out. Rebooting an AegisCam takes 30 seconds, so make sure you prioritize these when they show up or you will end up blinded in no time. If you see one, just switch to that camera and start shooting immediately since for their attack to succeed they must be face to face with their target… and the barrel of your laser gun. But you're not in the clear yet, because each unit needs two shots to take down, so ready yourself for a second close encounter.
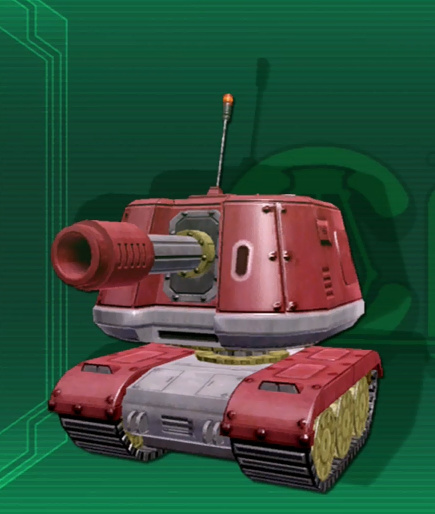
Red Tank
First Reported Sighting: Fortuna A – No. 31
HP: 5
Speed: 3
Threat Level: High
Hits: 6
If the Green Tanks were just a moderate nuisance, these upgraded Red Tanks are far more capable. Shoot them three time and they will stop and deploy an impenetrable force shield. They will remain invincible for 30 seconds so during this time there is nothing you can do but to go seek other targets. Make sure you keep a reminder in the back of your head that there is still a Red Tank that needs three more shots to become scrap metal.
B.I.O. Unit
First Reported Sighting: Fortuna A – No. 33
HP: 3
Speed: 1
Threat Level: Low
Hits: 3
The slow flying B.I.O. Units are not a danger by themselves but since they constantly keep spreading chaff around them, you will soon find you GamePad radar unit flooded with false signatures and this is how a proper target will make your way to your base undetected. So don't let them go around flying for long - three shoots will do them in but they release more chaff once they explode. If you've got a freeze turret, use it and let the gravity of whatever planet your base is on take care of the rest.
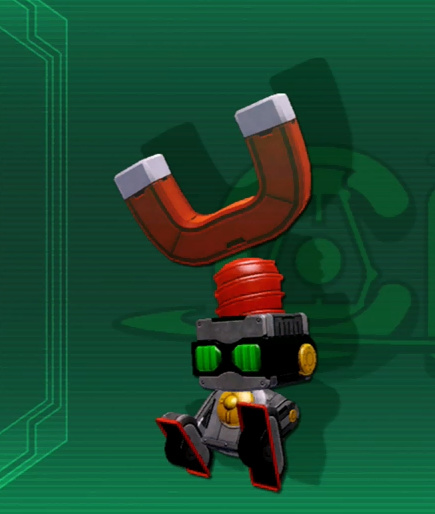
B.A.M. Unit
First Reported Sighting: Fortuna B – No. 34
HP: 1
Speed: 1
Threat Level: Medium
Hits: 1
Someone replaced the K.O.F. Units with an explosive payload so now we've got B.A.M. Units to deal with. Much like the less threatening previous smoke screen model, at the slightest damage they retract their legs and prime a four second fuse before detonation. The explosive has an effective area effect that will take out your cameras, so try to detonate these outside your base perimeter and if possible, keep shooting to roll them as far away as possible from your AegisCams.
Good news: The explosion will also damage and even destroy nearby attack bots. Bad News: We have employee reports of Big-G Units picking up primed B.A.M. Units and throwing them inside our bases like grenades! Do not let that happen to you!
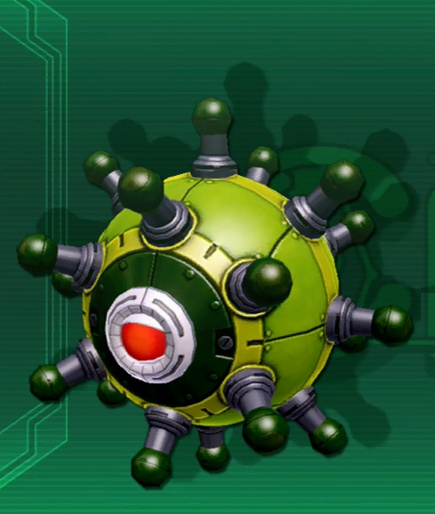
M.A.G. Unit
First Reported Sighting: Fortuna Boss
HP: 4
Speed: 2
Threat Level: High
Hits: 4
The ultimate anti-AegisCam warfare unit! M.A.G. Units are slow but their area of effect is so huge you will probably see their scrambling long before they are within visual range of your cameras. Once inside the scramble perimeter, any AegisCam will become incredibly unstable and accurate targeting will be impossible, so make sure you prioritize these units as soon as you spot them. Do NOT let them inside your base perimeter!
Nabbot
First Reported Sighting: Grippia A - No. 42
HP: 2
Speed: 4
Threat Level: Low
Hits: 2
Unlike most Chaos Units, Nabbots won't attack your AegisCams in any way. They go after the precious metal from destroyed bots lying around the base, so don't let them! Shoot them twice to make sure we keep our profits high. Rumours among employees suggest that sometimes a Golden Nabbot randomly appears in the mist of battle. These units take a lot more shots to take down and are even faster than regular Nabbots but drop precious metals instead of stealing them, so keep an eye out!

Green Clucktron
First Reported Sighting: Zoness Boss
HP: 5
Speed: 5
Threat Level: Very High
Hits: 8
If you disliked those Clucktrons from before, get ready for some bad news. Green Clucktrons operate much in the same manner as their regular models but with added speed and armor. Plus they are easy to mistake for the original, less aggressive models in the heat of combat, so make sure you keep that trigger finger working until you see that lovely final explosion. Ignore them for long and we will be short on several AegisCameras in no time.
Combat Class
Combat attacks bots are the real danger to our bases. If a single one of them attacks your core, the base is done for. Some of these models are really sneaky too, so keep a head cool when dealing with them.
A.T.K. Unit
First Reported Sighting: Corneria A - No.01
HP: 2
Speed: 4
Threat Level: Medium
Hits: 2
A.T.K. Unit models are the default Combat Class grunts. Somewhat slow, but once you shoot them they will discard their bottom tracks and the top half will move a lot faster, so make sure you double tap that trigger button. Also be warned that the top half is half the size of a complete unit and as such might pass undetected moving along base walls. Make sure you keep an eye on your GamePad radar unit so as not to miss any rogue top halves in the heat of combat.
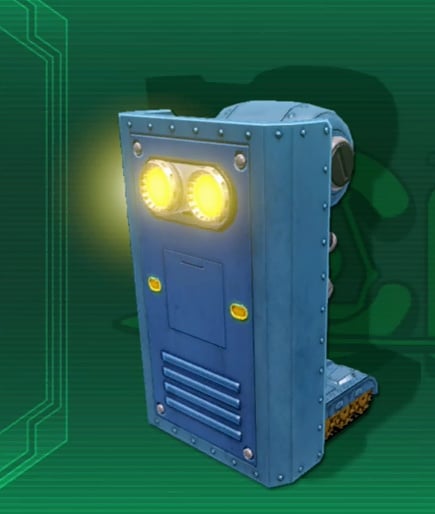
Shieldtron
First Reported Sighting: Corneria C - No.09
HP: 2
Speed: 3
Threat Level: Medium
Hits: 2
Shieldtrons will give you a lot of headaches. Not only because they hide behind an impenetrable alloy shield, but because that more often than not - and true to their name - they hide behind them all other sorts of nasty bot surprises. You need to be patient and trick them, by taking a few shots at them and quickly changing to another camera that as an angle on their exposed body. They sometimes take sneak peeks with their optic parts above the shield - make sure you take advantage of this and hit them square in the eyes. If everything fails and they do make it to the base's Core, you will have just a few seconds to take them down as they celebrate by raising their shield before attacking. If you find these giving you trouble, know that their shield is useless against our Lock-on camera turret since its shots rain from above. Use that knowledge to your advantage.
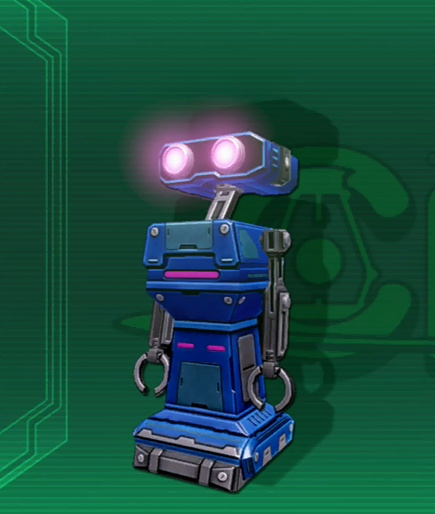
Cloack-R
First Reported Sighting: Titania C - No.18
HP: 1
Speed: 3
Threat Level: High
Hits: 1
Most employees are not even aware of a Cloack-R unit inside their base until they blow up your core. These discreet bots use some sort of advanced stealth technology our sensors aren't able to register on radar and as such unless their position is visually confirmed, they can sneakily walk around your base undetected until it is too late. If you see them, shoot them first and foremost. A clever tactic is to cause a big distraction on one side of the base and sneak in a few of these from the quieter side. Surely you wouldn't use this tactic on other fellow Corneria Precious Metals Ltd. employees, would you?
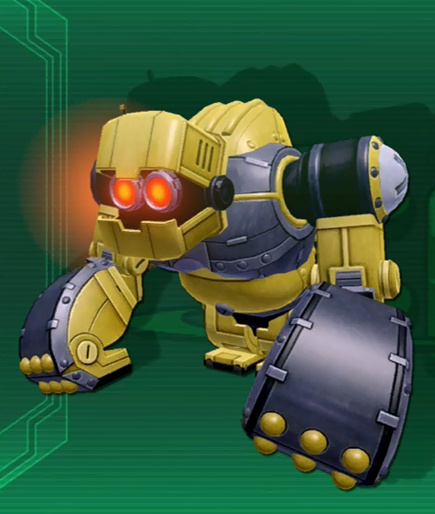
Big-G
First Reported Sighting: Titania Boss
HP: 5
Speed: 2
Threat Level: High
Hits: 20
If you see them in the horizon, you know you're in for a fight. The Big-G units are slow but heavily armored which means you will have to spend a lot of time shooting to bring them down, time that other smaller Combat Class units will take to move towards your core. You will have to prioritize between taking shots at these metallic apes and other units. Since each takes 20 regular shots to bring down, I hope you bought your Takahashi Meijin 16 shots-per-second skills with you because you will need them.
Cloack-I
First Reported Sighting: Zoness C – No. 23
HP: 2
Speed: 3
Threat Level: High
Hits: 2
You won't be able to see a Cloack-I unit but your radar can and will detect them. These units manage to be even sneakier than the Cloack-R and need an extra hit to take out. However, their optical camouflage isn't perfect so if pay close attention to your view screen, if you see a distortion, almost as if light was bending around the surroundings, that is one of them! Hit them once to disable their cloak and shoot them again to take then out of the field. Don't leave any of these running around freely. It would be really useful if you had a third eye to keep a lookout in your GamePad radar unit should these show up.
Jumprella
First Reported Sighting: Zoness B – No. 25
HP: 3
Speed: 5
Threat Level: Medium
Hits: 3
Jumprella might not look too dangerous and be a bit sluggish on the move, but the fact that they can clear all your base walls with just a few jumps makes them rather more dangerous one might assume. So don't let them! Shoot them in midair to make them fall inside your base corridors or even better, shoot them with the freeze gun midair and let gravity do the rest. But do try not to let any other bots sneak by you while you're aiming high at them.

F.L.I. Unit
First Reported Sighting: Zoness C – No. 27
HP: 2
Speed: 5
Threat Level: High
Hits: 2
Originally designed as racing bots, these modified F.L.I. Units will rocket past your turret cams at blazing speed, making them rather hard to track manually. If you do manage to spot them before they enter your base, double tap that trigger finger to turn them into scrap metal. If they get inside your base, then you will have to be extra careful: when you hit them once, they will immediately change direction and try to evade the camera they were shot from. Don't get caught off guard - despite not having very developed AI, the fact that they more often than not do not follow a straight path to your core actually makes them harder to track. And speaking of tracking, they can't out-fly a lock-on laser from your auto turret… or perhaps making them a nice stationary target with your freeze gun is a safer bet. We leave up to you how to best deal with them.
Snailblazer
First Reported Sighting: Fortuna B – No. 36
HP: 2
Speed: 1
Threat Level: High
Hits: 2
More often than not, you will hear a Snailblazer teleport in but you won't see them. That is because they like to show up behind walls… which they proceed to climb, slowly but surely. As such, these units will always take the shortest path to your Base Core and are extremely dangerous because the AegisCam operator are too busy dealing with other, more eminent threats to notice a Snailblazer until it's too late. Try to spot them on the GamePad radar or on the top of walls.
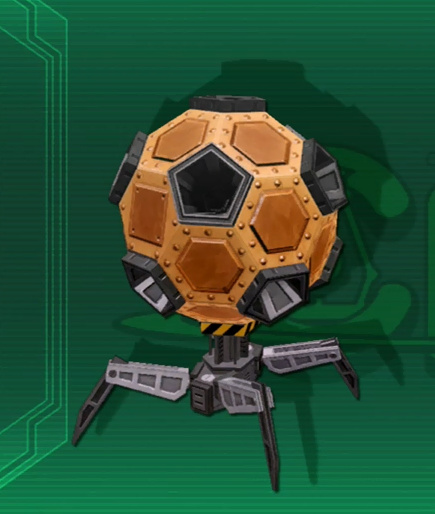
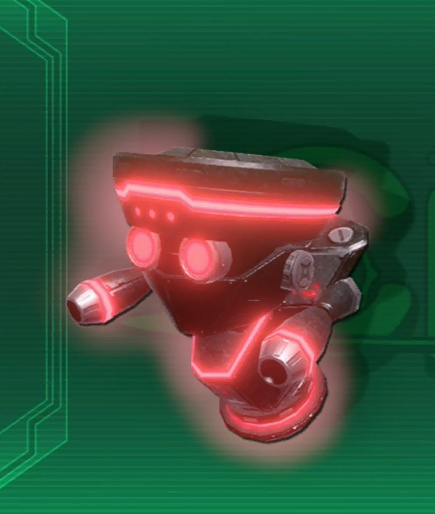
P.O.P. Unit
First Reported Sighting: Fortuna C – No. 38
HP: 3
Speed: 3
Threat Level: High
Hits: 3
No fancy pop music here, these P.O.P. Units are like Matryoshka Doll bots build with the single purpose to take out your central core! These square units will roll into your bases slowly… at first! Shoot them once and they release the outer shell revealing a smaller, faster unit. But that is not even their final form! Shoot them again and their will unleash an even smaller, red cube form. These jump around, are very fast and very hard to hit, so make those shoots count. Have more than a couple of these running around in your base and most employees panic, making an already hard target even harder to hit. So do try to remain calm and line them up so that they are coming at you on a straight line. Or just use any of the special AegisCameras to take them out. A fully charged shot form the Charge Cam destroys all three of them in a single hit.
Special Note: There are employee reports of at least two more Attack Class units out there in the wild. We will update this intel when we have clear confirmation on what those might be.
Boss Class
On some bases you will face a one of a kind prototype boss that is so far evolved from regular bots that they stand on the class of their own. We call these "Boss Class" type in honor of old video games that had end of level bosses standing between the player progression towards the next level.

Hi-Ho King
Deployment: Corneria Boss Mission
HP: ?
Speed: ?
Threat Level: High
Hits: Way too many!
We already established Hi-Hos pose little threat to your installations but the same can't be said about their king. This one of a kind, 100x times bigger Hi-Ho is a real nuisance. Make sure you take down any projectile you see him hurl towards your AegisCameras else he will quickly disable all twelve of them, leaving a clear run at the core. His weak spot is the optical sensors so keep shooting those every chance you get. He often likes to headbutt your turrets and even summons Hi-Hos that, if ignored, will take out your inner perimeter defense turrets. From time to time he deploys a huge drill hidden inside his main body. This is his attack on the core, so make sure you shoot his main body with everything you got when you see him prime that drill!
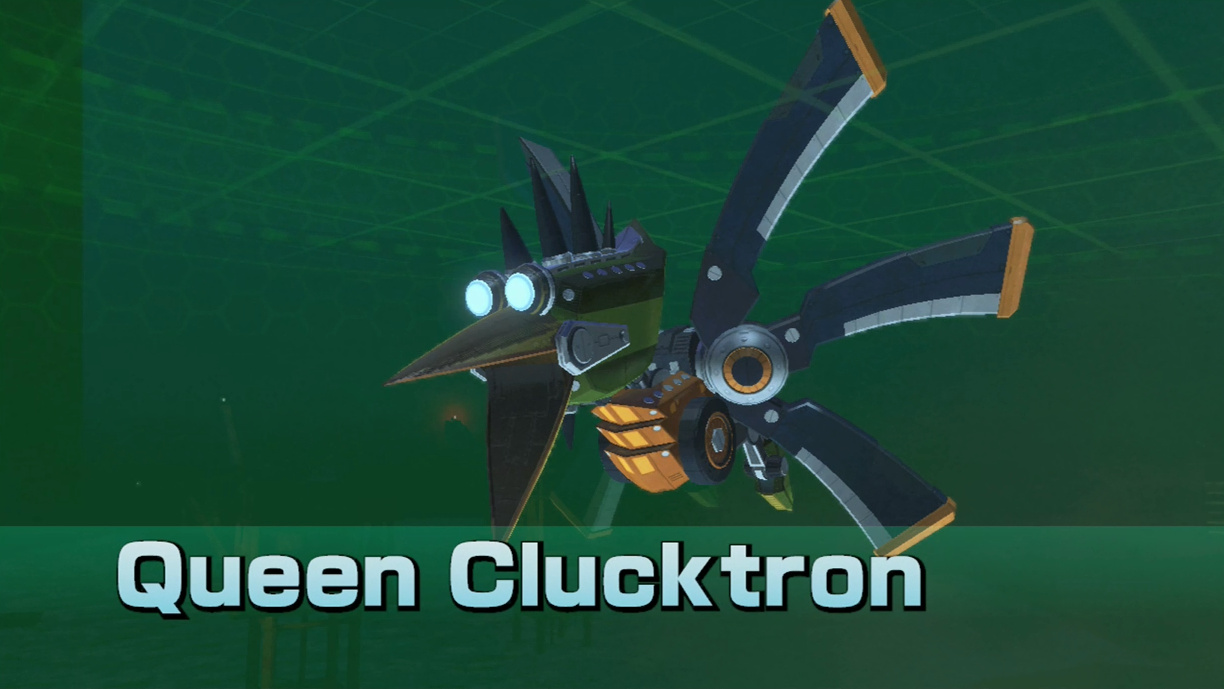
Queen Clucktron
Deployment: Zoness Boss Mission
HP: ?
Speed: ?
Threat Level: High
Hits: Still way too many!
Well, all those Clucktron chicks had to come from somewhere, so meet their not-so-nice mother. Queen Clucktron not only uses her wings to fly freely above you base, she will also use them to blow away your turrets, making accurate shooting a daunting task. Not only that, but while you're distracted looking up, she will deploy bunch of regular Clucktrons (and sometimes Green Clucktrons) that will start running wild inside your base, stealing AegisCams as they go. If you see her stop and open her beak, she is either preparing a sonic attack to take out your cameras or worse, charging up to ram the core, so stop whatever else you're doing and shoot at her beak when you see this happen until the charging sequence is interrupted.
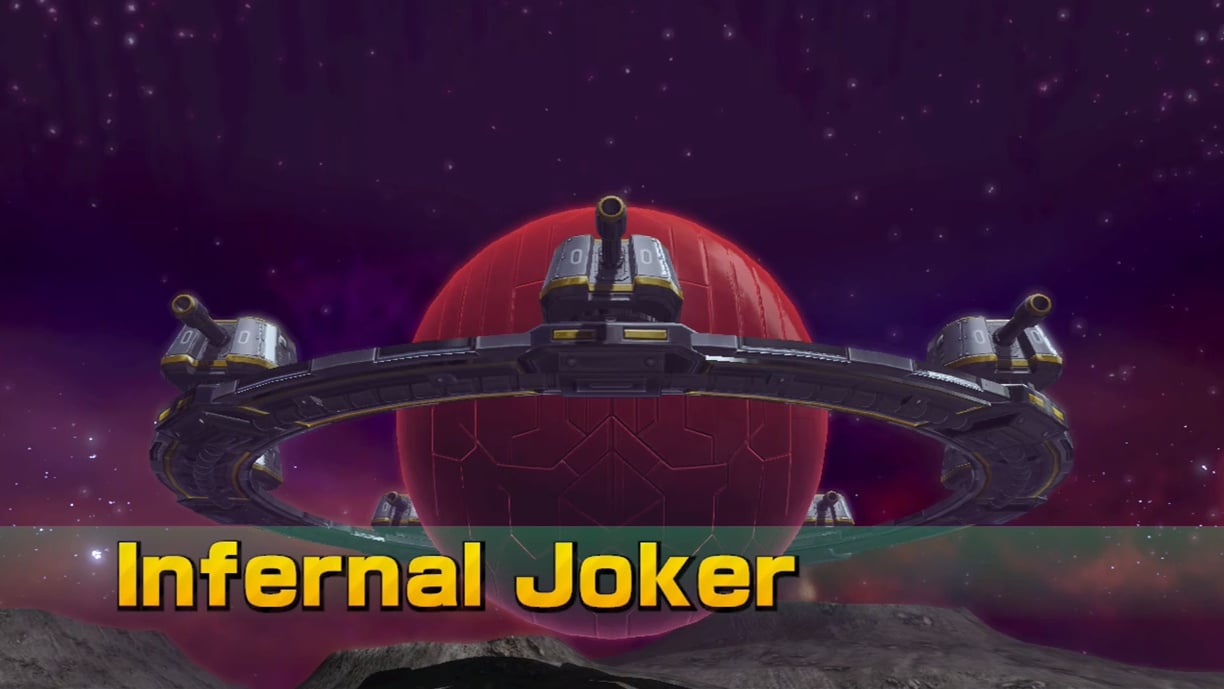
Infernal Joker
Deployment: Grippia Boss Mission
HP: Too Much
Speed: Too Many
Threat Level: Extremely High
Hits: Don't even ask!
Hope you are prepared for the toughest challenge yet. By the time you face off against the Infernal Joker you should already be an extremely able AegisCamera operator… if you're not, you better become one on the spot.
Phase I
This infernal machine will start by attacking the core with charged shots from its ring of turrets. If you let even a single one complete the charging sequence and fire, it's instant game over. This would be easy if it were not for the fact that the Infernal Joker randomly pops up countermeasures that range from fans to much more troublesome magnetic waves. Make sure you hit those countermeasures between its turret charges and don't be mislead by its regular teleporting around your base perimeter.
Phase II
No, not done yet. After you destroy its last turret, the rings falls and a Red A.T.K. Unit will emerge from the top of the sphere. This is your new target, so make sure you put as many shots in it for as long as you can. At first the Infernal Joker will summon other A.T.K. Units. Make the most of this because the first four are slow, so ignore them until you see them get close to the core and only deal with them there. Why? Because you can use that time to put huge damage on it and the second wave of summons will bring out much trickier opponents. Destroy him on this first wave if you don't want to get swarmed by Jumperellas, Snailtrons and even Big-G units.
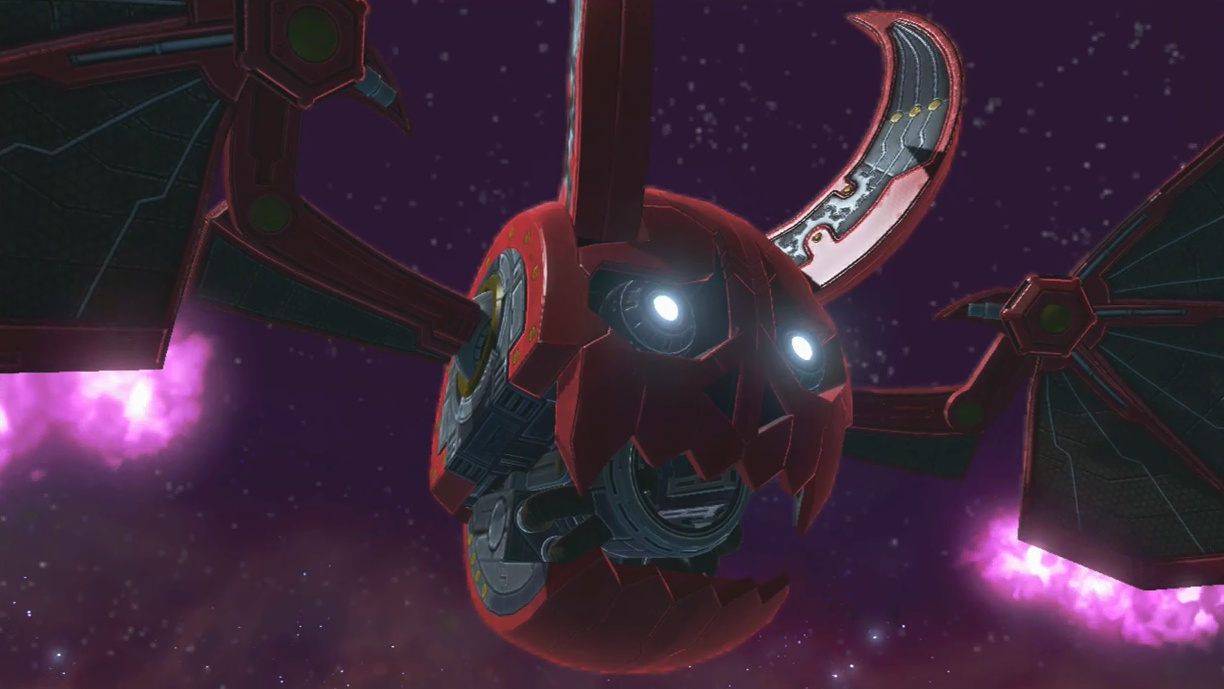
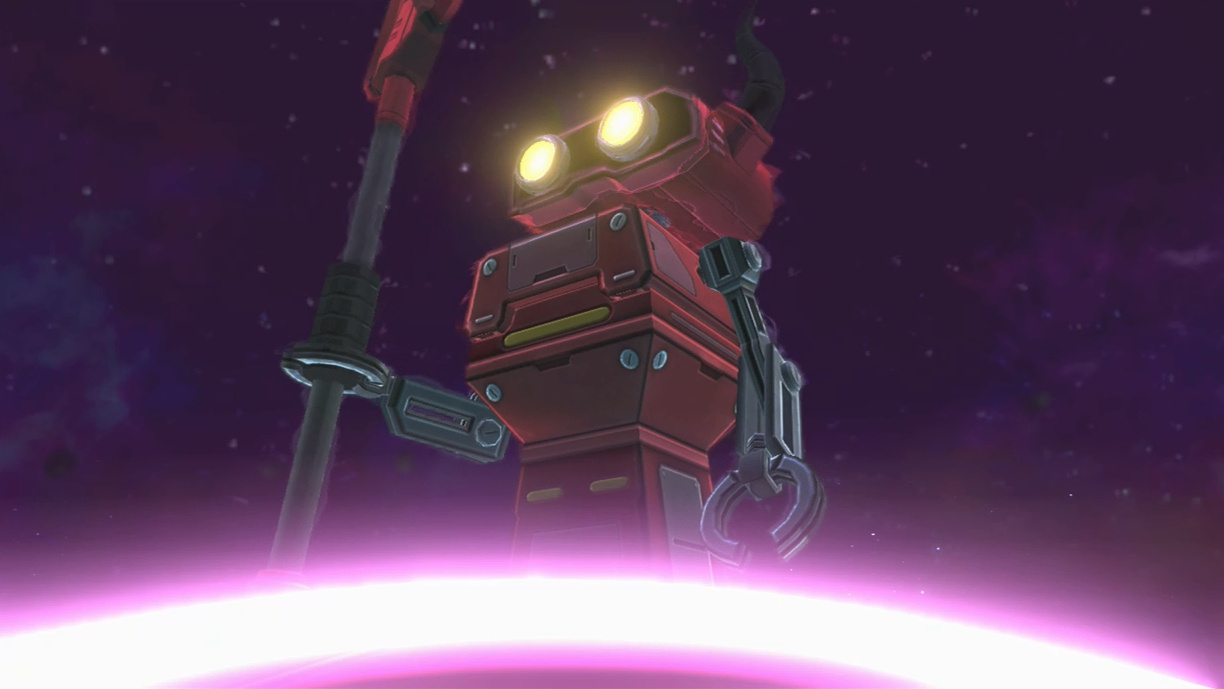
Phase III
Sorry, those prior phases were just a warm up. This is the real deal now. The true form the Infernal Joker is this winged, horned metal skull that is straight out of any engineer nightmare. He flies around your base perimeter and will stop to use its wings to make gusts that will disrupt your cameras. Interrupt this by hitting him in his optic sensors. When you see him turn blue, he is about to teleport somewhere around your base. Be ready for this because when he stops flying, he will attack your core by charging up a hidden cannon from his mouth. Shoot everything you got into this cannon until it explodes and leave the Infernal Joker stunned. Take this window of opportunity to hit him hard (remember: the Slow Camera is your best friend!) and make some big dents. In desperation, the Infernal Joker will try to ram your core! If you see him begin to be covered in flames, this is your cue to shoot everything you got at him. If you do enough damage, it will explode and fall on the ground.
Congratulations, you are the number one AegisCamera employee on Lylat! That was a long battle, but… I hope you have played Donkey Kong Country 1 & 2. Do you remember King K. Rool's last trick? You will after this battle...
Check out our other Star Fox Guide content:


Comments 15
Why isn't that gold robot included, I keep shooting but I don't think it can be dextroyed and it didn't come up in the in game bot guide.
Wow, this is a thorough list!
This game rocks- best new IP from Nintendo all generation aside from Splatoon, and best new IP from Miamoto since the Pikmin series. Just excellent.
@arronishere Please read the Nabbot description and yes, they can be destroyed, I have done so on occasion.
@JaxonH Thanks, I did my best.
@Shiryu
I had my suspicions you were secretly Miamoto, parading around as a fan site gamer
@Shiryu
Lol doh...
You must have been referring to the list, not making the game lol
@JaxonH Yes, I was referring to the 2 part Game Guide I've worked on for the past 3 weeks. As for Miyamoto-san ... he is a tough act to follow.
@Shiryu
3 weeks... Wow.
The game has a lot of content to cover. More than you'd expect.
@JaxonH Those were my exact same words to @Damo after my first week with the game. Stay tuned, were not done yet...
Do the amiibo air strikes help against that last boss at all?
@Shiryu I haven't played Guard yet but this guide you have compiled is really well done. I'll be looking forward to more of your contributions to this site.
@Jimmy_G_Buckets And I'm just happy to go back to Super Famicom reviews for now. Thanks!
@ElkinFencer10 Sorry, you can't call them on boss missions.
Make sure you don't let this happen to <[Word error, should be too] often (those AegisCams are expensive), else your base will be defenseless before you even knew what hit it.
@BMORRI I can't edit the post, so hopefully @Damo catches on that one.
So fun. Love this game and a great guide.
Show Comments
Leave A Comment
Hold on there, you need to login to post a comment...