Welcome to Nintendo Life's Pikmin 4 Hero's Hideaway walkthrough. In our Pikmin 4 guide series, we'll be showing you All Treasure Locations, all Gear and Item Upgrades, all Oatchi Abilities, all Pikmin Type Locations, all Onion Upgrade and Flarlic locations, All Region Walkthroughs, All Dungeon Walkthroughs and more besides!
We're on to the game's fourth main region now, Hero's Hideaway. Let's get stuck in!
[note: this walkthrough is still a work in progress so make sure to check back with us as we complete the entries for Hero's Hideaway]
Subscribe to Nintendo Life on YouTube844k
Pikmin 4: Hero's Hideaway 100% Completion Guide
All Dungeon Walkthroughs
- Doppelganger's Den
- Frozen Inferno
- Plunder Palace - Coming Soon
- Leafy Showdown - Coming Soon
Main Area Walkthrough & All Treasure Locations
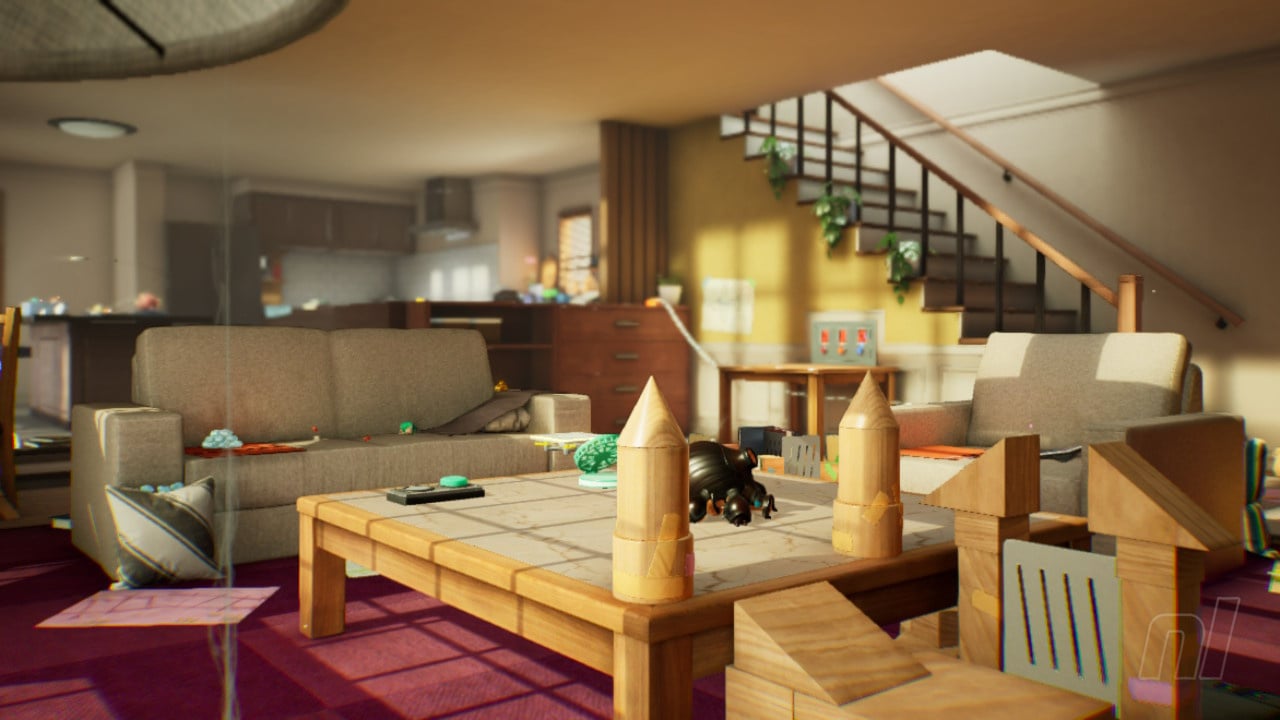
The fourth main mission area in the game and we're right on Captain Olimar's trail now as Oatchi and the Rescue Corps land in a very earth-like sitting room for their next set of challenges.
Wisdom Emblem
From your starting point here, let's get busy marching straight forward to take out a few small insects, then have Oatchi rush the board ahead to knock down a WISDOM EMBLEM.
Relentless Spear
You can also find the RELENTLESS SPEAR pinned to this very same board! Now drop down the tunnel right beside you to reach the floor area.

As soon as you touch down on the floor you're gonna arouse the suspicions of Moss, who's guarding the area, so our objective now is to gather treasures and explore for dungeons whilst keeping Moss at bay.
You can use your Pikmin to batter the doggo into submission, which will give you a nice long window where it runs off to cower in a corner, or use PikPik Carrots from your inventory to distract it for a while as you dodge past. The choice is yours!
When tackling Moss you need to watch out for its whistle which is shown as a pink radius circle, as any of your Pikmin caught in this will join Moss. Don't panic here, you can get them back by simply timing your attacks to avoid the whistle and Moss will eventually give up and flee, dropping the Pikmin as it goes. We recommend freezing Moss as much as possible when attacking to slow the doggy right down and make things easier.
Trap Lid
Let's move around the floor area now and take out the armoured enemies ahead by using Oatchi. Now make sure the coast is clear and rebuild the clay climbing structure here. There's a sneaky TRAP LID hidden in the grass patch here too!
Peacemaker Combobot
While we wait for the clay climbing section to get mended, let's clear out the enemies under the central coffee table and collect a bunch of raw materials then grab the PEACEMAKER COMBOBOT from underneath the nearby dresser before charging at the grate here to head upwards onto the coffee table where a beast awaits.
To take this big boy out, wait until it's sucking in air as it winds up its rock attack. As it sucks, fire a Pikmin up to its face to have it stick in the hole here and block the airway. Now dash around to the back of the creature to smash its exposed weak spot. We recommend using ice Pikmin to freeze it up while doing this as it gives you a bigger window to get hits in.
Divine Balloon
Once you've won the scrap, grab the carcass and the DIVINE BALLOON and hit the button to start the fan. You can now jump into the fan's airstream to blast across to the couch for some raw materials and some GOLDEN NUGGETS.
Priceless Bird
Now let's ride one of the circling platforms around a full rotation of the table, as we go we can use yellow Pikmin to grab the suspended PRICELESS BIRD.
Number Jumper
Then hop off at the next couch to grab ourselves a NUMBER JUMPER. Phew!

Shooting-Star Shield
Also, if you've got time before sundown, you can drop down off the couch and smash into the bag here to grab the SHOOTING-STAR SHIELD.

Now use rock Pikmin to attack the nearby bugs and smash up their valuables to retrieve some raw materials.
Let's continue around the couch down here to take out any raw material-carrying enemies then set up base at the back of the couch itself. You'll need to take out two electrified enemies before you can call in the Beagle.
Now smash up the pots in the corner to reveal a secret entrance and a nugget-bearing baddie. Use your rock Pikmin to nab the nugget and finish the enemy off. Now dig out the entrance here and head in here to grab some spicy spray ingredients off the stair.
Spinning Memories Plank
Jump down off the stairs and we'll head straight over to the nearby orange luggage, go underneath and find a hidden area with a bunch of raw materials and a SPINNING MEMORIES PLANK.
Unbreakable Promise
Now, move along the floor to the other side of the room, taking out any raw material enemies and then jumping on the rising platform to ride up the bookshelf to grab a UNBREAKABLE PROMISE and then upwards to the kitchen work surface area.
As soon as you get up here there are two small green foes who need to be flipped on their backs by Oatchi before you can do any damage. Now dig out the tunnel here for easy access to a new floor area. Before we explore there, though, let's clear out the kitchen.
Perforated Raft
Take out the nearby spider, grab any nectar that's around and then smash the pots in the corner to reveal several PERFORATED RAFTS.

Doggy Bed
Walk up around the sink to grab some raw materials from breaking the pots then you can take the large DOGGY BED from here. Make sure to marshal your Pikmin back to base with all of these goodies just in case Moss is back on patrol.

Love Nugget
You'll also want to let the water out of the sink here by jumping on the switch and then grab two Love Nuggets.

Power Emblem
Now from the kitchen area you can ride a wire across the room that takes you past a table with a weird lock system on it (more on that in a bit) and over to the upper stair near where we were a little earlier. You can now grab the POWER EMBLEM and let the string down to make a shortcut.
If you use the fan on the ground in this area to blast up onto the table with the safe locks, you'll find that it is in fact the entrance to a bunker, and some playing card-related icons will now appear in the top right of your HUD. Keep finding playing card treasure around the room to eventually work out the code required. We'll return to this.
Before heading back up to the kitchen area, where you may have spied a tunnel entrance on the cooker hob, we'll instead head back over to the clay climbing section that you fixed earlier. Defeat the creature up here to nab its nugget and then head across to the far side of the TV to find the entrance to DOPPELGANGER'S DEN. Make sure to check out our full guide to Doppelganger's Den before continuing.
With the den completed, we can now make a beeline back to the kitchen worktop. Head to the cooker and ignore the flames as you open the tunnel entrance to FROZEN INFERNO. Note that you'll need FLAME-RESISTANT GEAR to attempt this dungeon! Make sure to check out our full walkthrough for Frozen Inferno when you're ready!
Light Blue Onion
Once you leave this dungeon make sure to hit the green switch beside you to start the fan on the floor so you can return again then drop down onto the moving platform. From here hop onto the open drawer and take out the hydro jelly to reveal a LIGHT BLUE ONION. Take this back to base to fuse a fourth onion, enabling you to call a mix of four different Pikmin types.
Fist-Force Combobot
We're back in the Hero's Hideaway now and down on the floor level to take out a few more bugs carrying nuggets before heading into the corner to the area shown below. Underneath the moving platform here there's pot to smash for FIST-FORCE COMBOBOT and then we're going to rebuild the clay ramp here. Be on the lookout for Moss or, even better, give him a beating to send him away for an extended period of time.
Buddy Display
Now head up the ramp and take the platform up to the table to defeat a green foe and nab the BUDDY DISPLAY. You'll also find the entrance to PLUNDER PALACE up here.
Now let's head back up to the kitchen worktop and use the tunnel to head down to the raised area of floor where we can now push a paper bag to make a shortcut to the rest of the ground floor. Now take out all the tiny bugs at the base marker and move the Beagle.

Searing Acidshock
We can make our way around the floor now taking out all the small red bugs, the large floating enemy and the frozen bugs to clear a path for retrieving treasures. With the area clear of opposition, let's head over and smash the pots to grab a SEARING ACIDSHOCK.
Sure-Footed Combobot
Now, take care of the spider bug that's hoarding the SURE-FOOTED COMBOBOT.
S.S. Peppermint
Now, let's move the nearby box out of the way to reveal a tunnel that takes us up to a wire we can ride to the kitchen island tabletop. There's an S.S. Peppermint to grab off a plates here.
S.S. Chocolate
There's also an S.S. Chocolate to nab, yummy, and then we can focus on taking care of the needle-shooting foe that we've met before. Just avoid his needles and then jump for attack when all his ammo has been spent.

Flarlic Upgrade #8
Once the kitchen area is clear of harm, grab the FLARLIC from the plate you can see in the image above!
Think-Tank Combobot
Now, before leaving the kitchen island, aim a few yellow Pikmin down onto the stool to grab the THINK-TANK COMBOBOT.

Mechanical Harp
We can then switch the orange switch to turn on the orange fan on the floor as a shortcut back here before hitting the blue switch to turn on the fan on the tabletop itself. Now ride this fan over to the side table to nab a MECHANICAL HARP.
Courage Emblem
Now we want to go back to the tabletop to ride the fan again and this time throw a Pikmin at the red off switch as we jump into the airstream so that once we land on the side table, the fan here will be on. This next fan will carry us over to some shelves with a DANDORI CHALLENGE, HEFTY HAULWAY where we can grab another castaway, as well as some strings to lower as shortcuts and a COURAGE EMBLEM. With this card collected you should now have all three numbers for the code at the bunker entrance.
Now with all of this done, we can head over to the bunker code and enter the numbers on the top right of your HUD. The bunker will open and it's time to face what appears to be Captain Olimar in a Dandori Challenge in LEAFY SHOWDOWN.
With Leafy Showdown completed, Hero's Hideaway is now 100% completed! It's time to take Olimar back to base camp! Of course, in order to finally confirm that this indeed is Captain Olimar, we need to run one more night mission when we get back to base. So make sure to jump into any night level you fancy and gather up a shot of medicine.
Now that Olimar is cured, the Rescue Corps can finally pack up and leave with their mission complete and you can sit back, relax and watch the game's closing credits.
However! Don't get too comfy as, due to an unexpected turn of events, we'll be back for two more areas full of Dandori action in Giant's Hearth and Primordial Thicket. This adventure ain't over just yet!
Make sure to check out our full Pikmin 4 Walkthrough Hub for more guides, hints and tips!


Comments 0
Wow, no comments yet... why not be the first?
Leave A Comment
Hold on there, you need to login to post a comment...