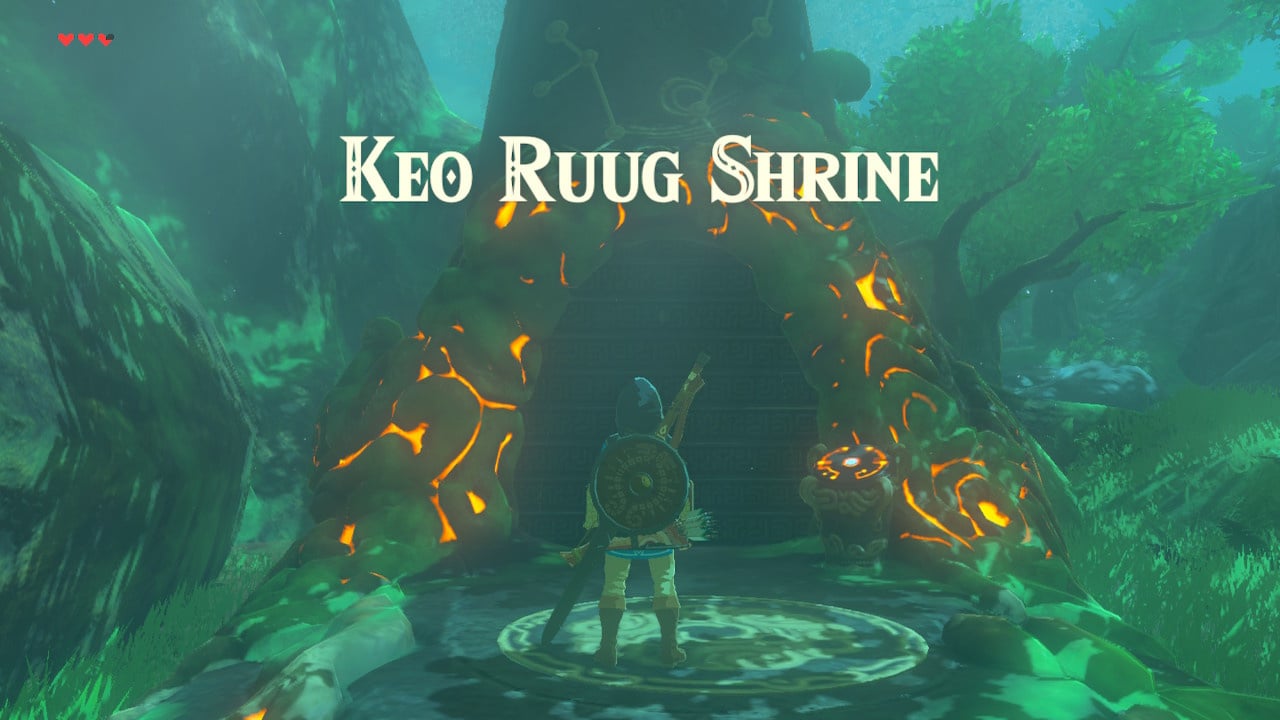
Keo Ruug shrine – subtitled ‘Fateful Stars’, is one of the most conveniently located shrines in The Legend of Zelda: Breath of the Wild. However, the constellation-themed puzzle is as tricksy as the inhabitants of the Lost Woods in which it can be found, thanks to an oft overlooked hint that nonetheless looms over you from the moment you enter the shrine.
In this guide, we’ll bring you up to speed on what you’re missing, as well as pointing you towards the shrine’s equally sneakily deployed treasure chest puzzle.
Subscribe to Nintendo Life on YouTube841k
How to find Keo Ruug shrine
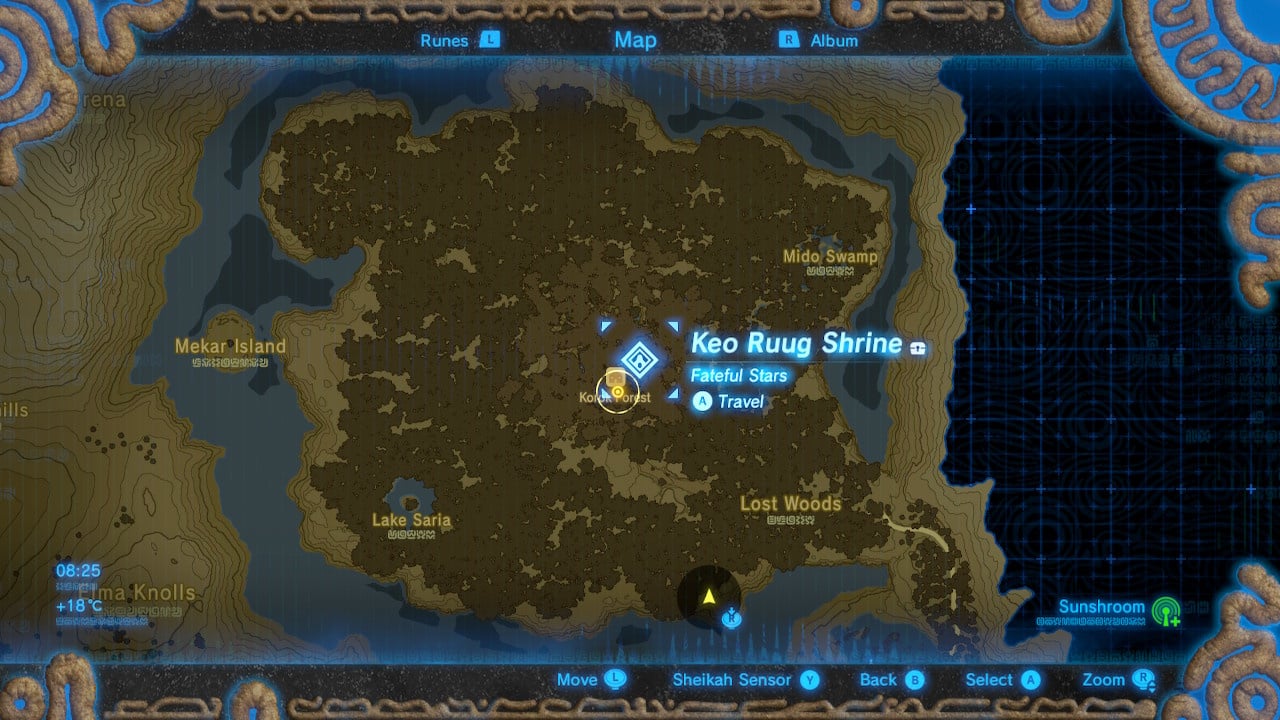
Keo Ruug shrine is actually the ‘home’ shrine of the Lost Woods, one of the most important locations in the game. Yes, that Lost Woods, the fog-covered home of the pesky Koroks (and their inventory-expanding pal, Hetsu), the Great Deku tree and most importantly, the sword that seals the darkness itself – the Master Sword.
Getting through the mists of the Lost Woods is a challenge in itself – thankfully, one which we’ve already made a guide for. And once you’ve made it safely inside, you’ll have a tough time avoiding Keo Ruug shrine.
If you are still having trouble: stand at the Master Sword’s pedestal, face the Great Deku Tree and follow the path to the right a short distance to find Keo Ruug;
How to solve Keo Ruug shrine
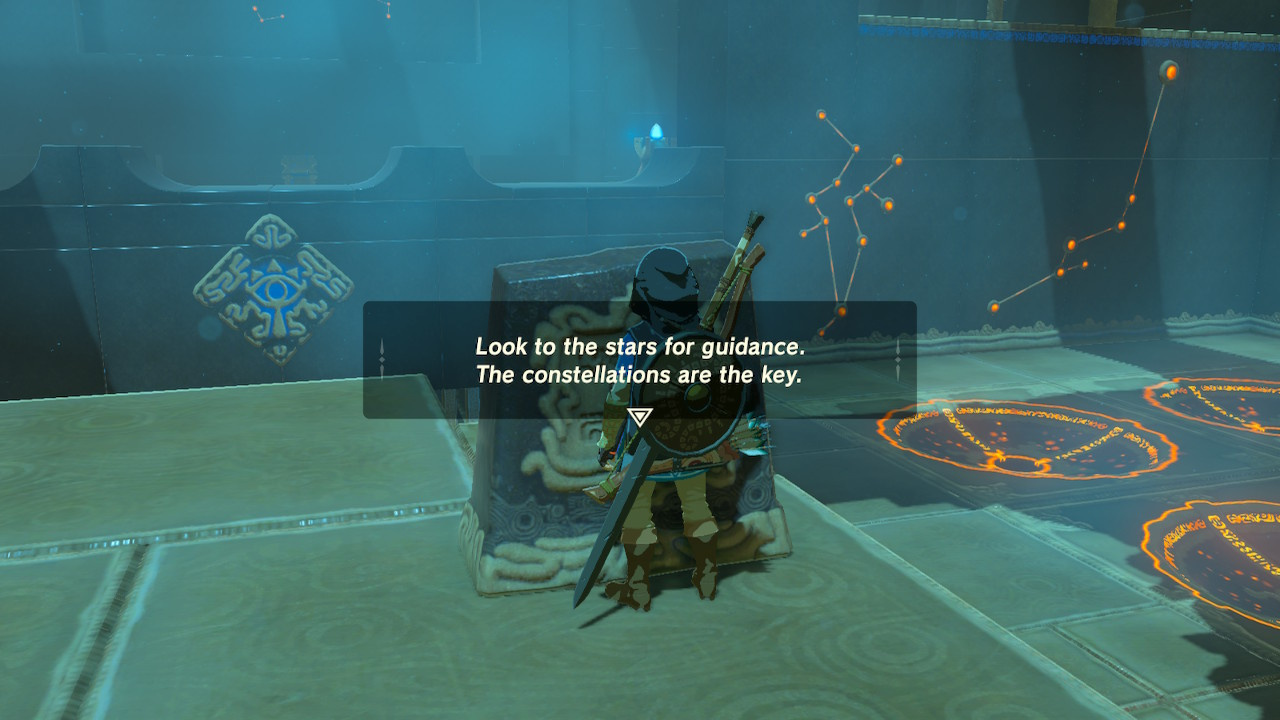
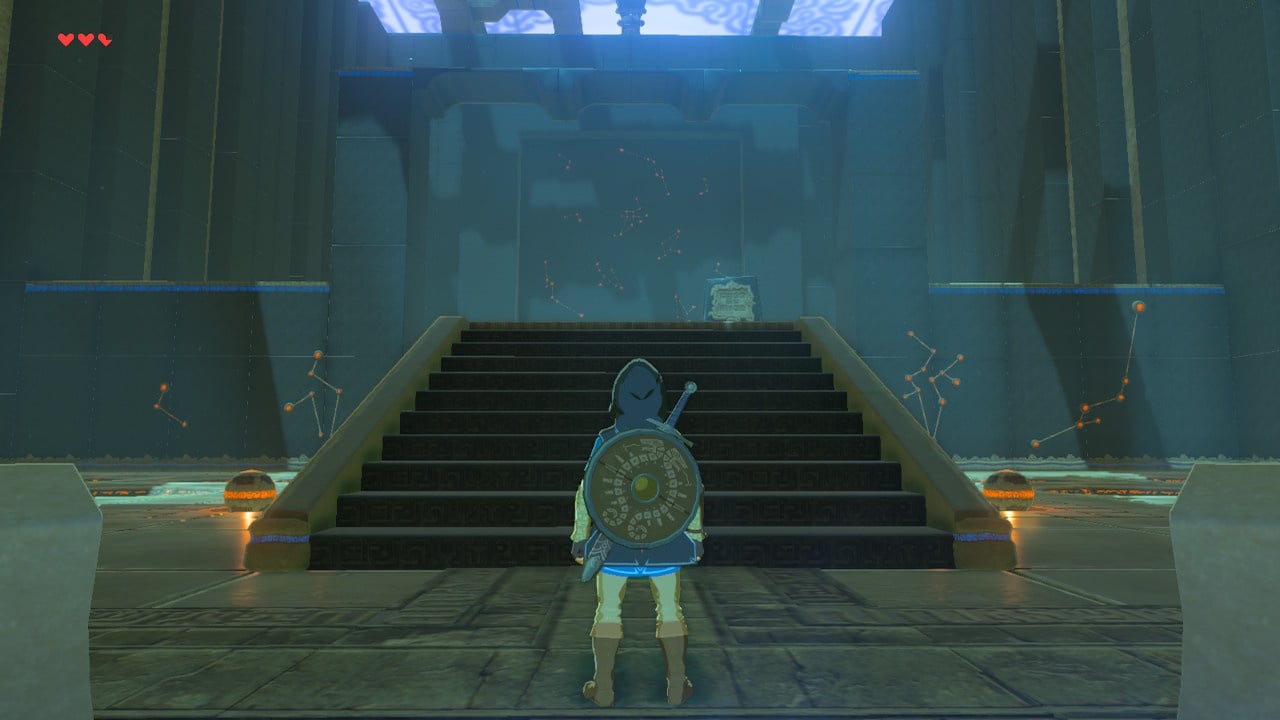
When you enter, you’ll see steps leading up to stone tablet, on which you can read a hint for solving this shrine:
Look to the stars for guidance,
The constellations are the key.
In the immediate area, you will also find:
- Two orbs either side of the ramp (4 total)
- Two rows of five sockets either side of the ramp (20 total)
- A large ‘constellation’ on the wall at the end of each row
- A set of illuminated pillars, counting down from 5 to 1
- A gated ramp down to the monk
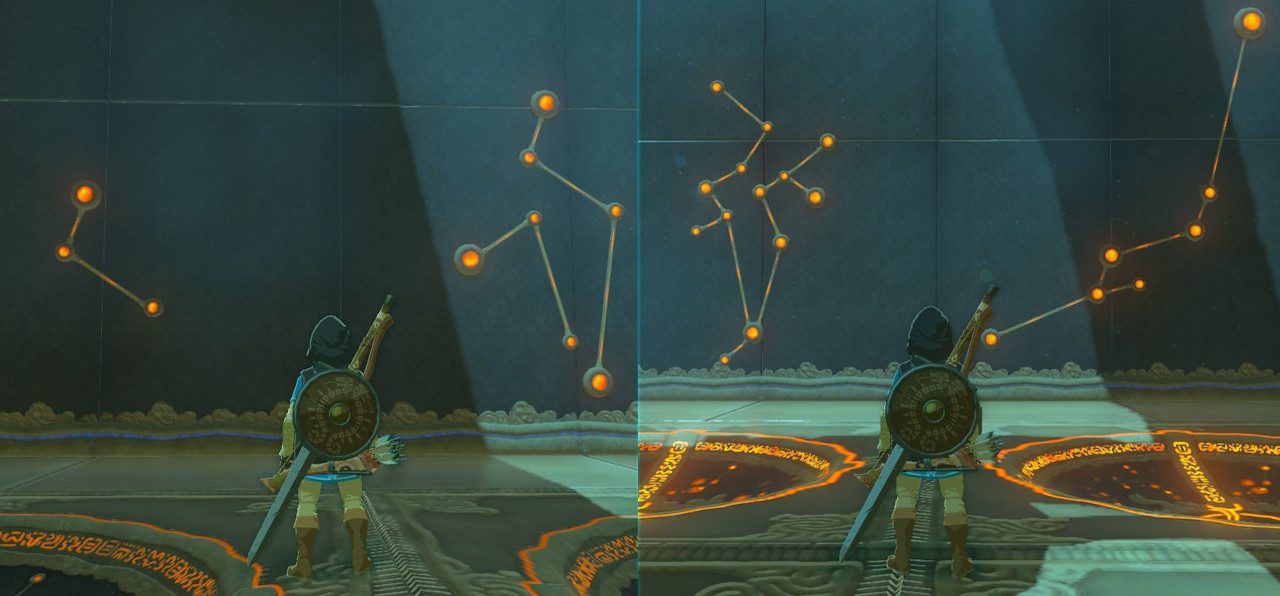
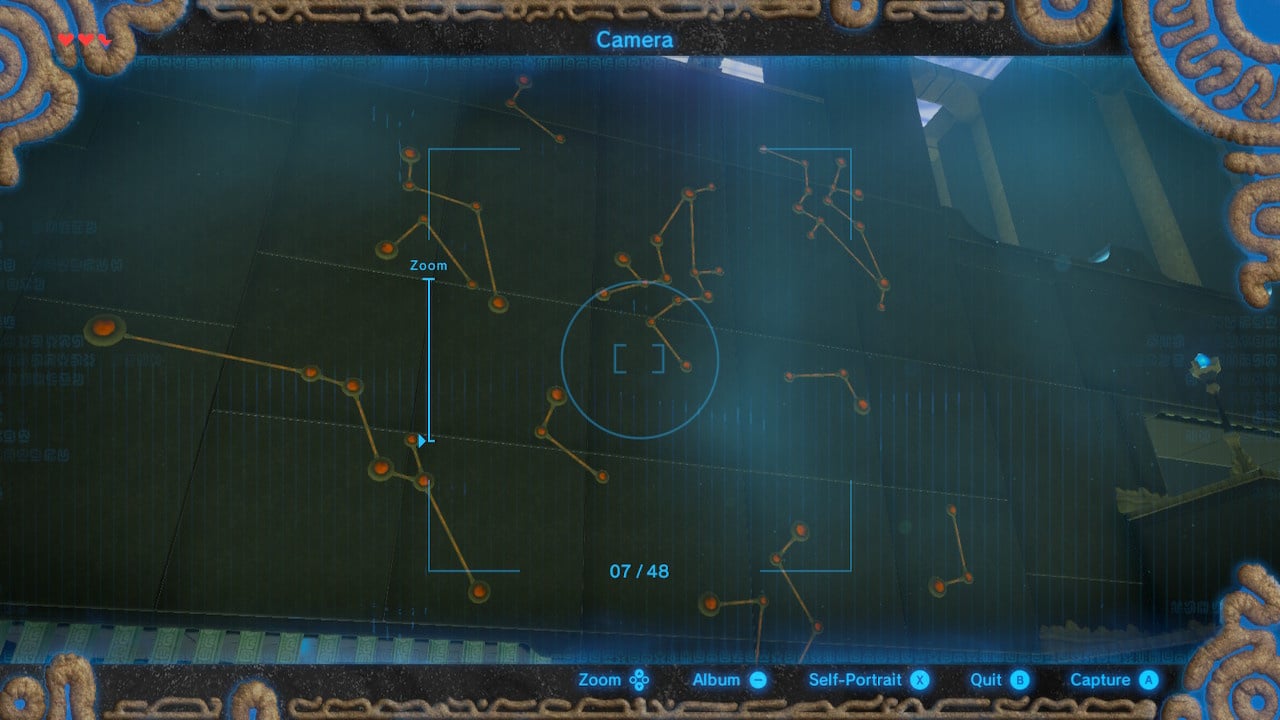
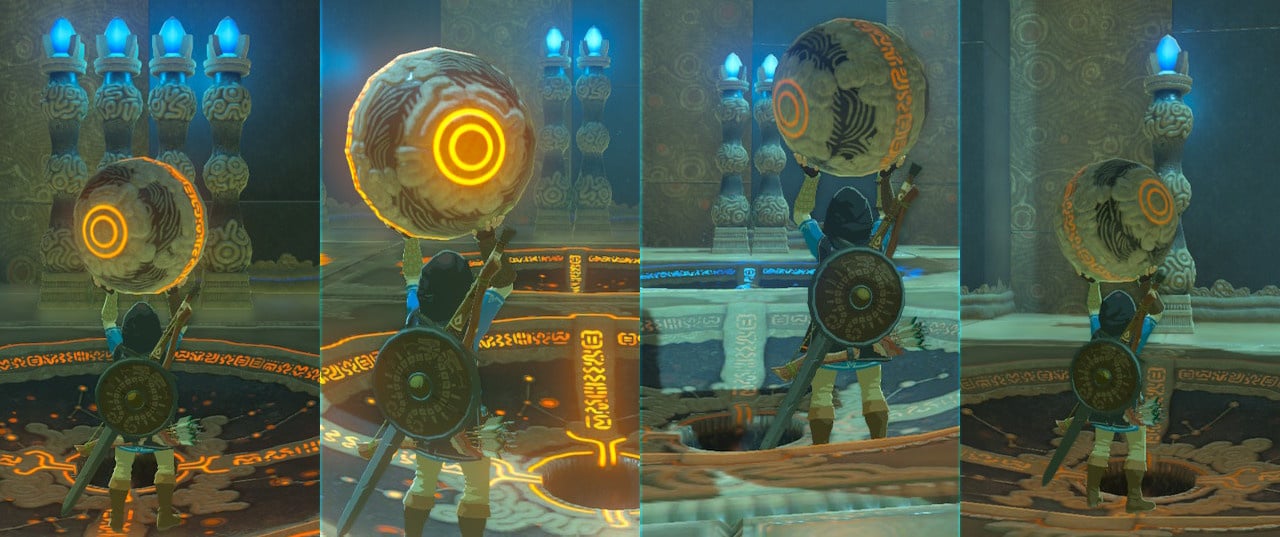
You’d be forgiven for thinking you have enough information to work on a solution at this point – possibly something to do with the number of stars or lines in each constellation. But no – the answer actually lies outside of your immediate area – on a mural depicting some familiar constellations on the far wall.
Once you realise this, solving the shrine should be easy: simply count the number of constellations of each type, and drop an orb in the correct socket indicated by the illuminated pillars.

Still experiencing problems, or just want to get out of this stuffy shrine and back to the adventure? See the ‘Keo Ruug shrine solution’ below.
Where is Keo Ruug’s treasure chest?
Judging by the number of people searching for a solution to this shrine even this far out from Breath of the Wild’s release, you may be ready to sprint across the suspiciously large second room to immediately cash in your tokens for that all-important spirit orb.
Instead, turn to your right as you descend the stairs, and you’ll see another gate (containing – you guessed it - this shrine’s treasure chest). Above it are another set of constellations…
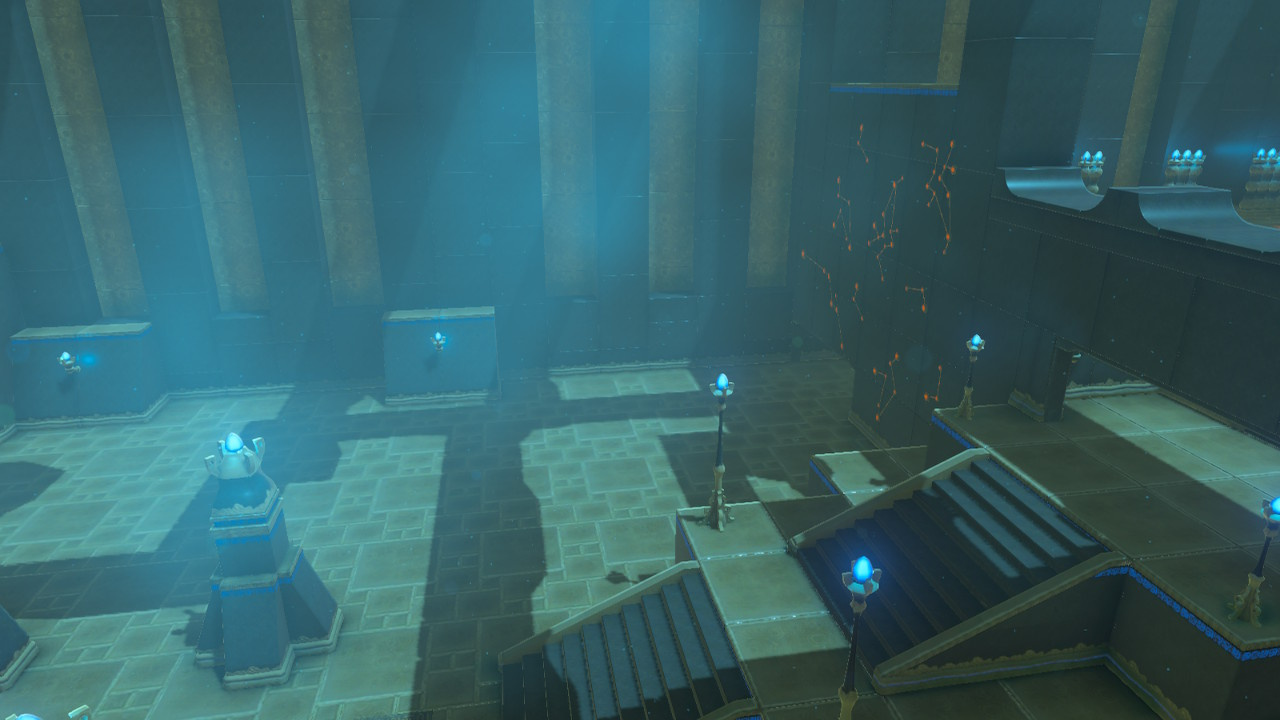
You can probably figure out the rest from here, so get out your camera, and get back to rearranging those orbs (or see the ‘Keo Ruug treasure chest solution’ section below if you just want to crack open that chest as quickly as possible).
Keo Ruug shrine solution

On the mural of the constellations you will find the following:
- 5 of the first type of constellation
- 3 of the second type of constellation
- 1 of the third type of constellation
- 2 of the last type of constellation
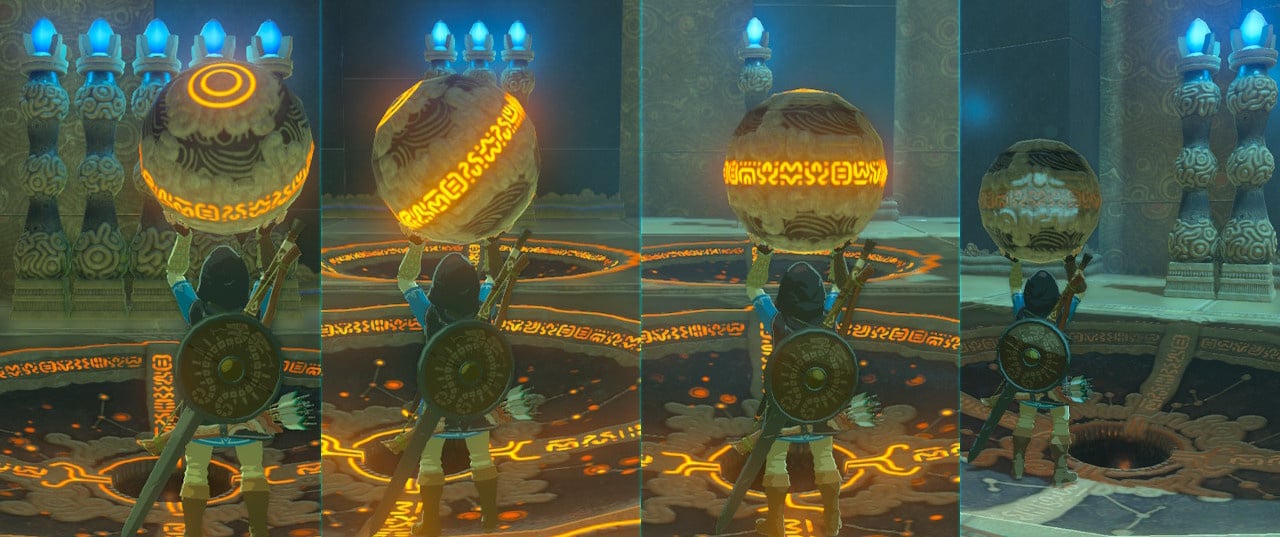
So drop an orb into the corresponding sockets, from left to right:
- 5
- 3
- 1
- 2
Keo Ruug treasure chest solution
On the wall of constellations above the treasure chest there are:
- 4 of the first type of constellation
- 2 of the second type of constellation
- 2 of the third type of constellation
- 1 of the last type of constellation
So return back up the stairs and place an orb into the corresponding sockets, from left to right:
- 4
- 2
- 2
- 1
This is part of our Zelda Breath of the Wild walkthrough, which includes All Shrine Locations And Maps and help with specific shrines, including the Keo Ruug Shrine Puzzle Solution, Mirro Shaz Shrine Puzzle Solution, Sha Warvo Shrine Solution, Shae Loya Shrine Puzzle Solution, Eventide Island - How To Beat The Hardest Shrine Quest, and Shee Vaneer And Shee Venath Shrine Answers and Solutions.
If you're just starting out, Getting Started And Beginner Tips will be useful. We also have BOTW guides to help you with the Tarrey Town Quest, how to get equipment such as the Hylian Shield, the Master Sword, the Green Tunic, and the Radiant Set, plus advice on the Best Clothing And Armour Sets and How To Find Every Item in the Master Trials DLC. We can help you find key places such as All Captured Memory Locations, All Great Fairy Fountain Locations, and Where to find The Lord of the Mountain, too.
If you're looking for general advice on various topics, you might want to check out the Best Recipes And How To Cook Food, How To Farm Star Fragments, How To Farm Dragon Parts, How To Defeat Guardians, How To Shield Surf Like A Pro, and How To Get Unlimited Korok Seeds. And if you're wondering what amiibos work with the game, our guide to All amiibo Unlocks lists them all.


Comments 0
Wow, no comments yet... why not be the first?
Leave A Comment
Hold on there, you need to login to post a comment...