
The Nintendo Switch and Switch Lite are a durable pair of consoles designed to endure the rigours of home and portable gaming. For the most part, we've been very happy with reliability of our Switch hardware - our launch systems are still going strong after being slung in backpacks, dropped into docks, and dropped on the floor too many times than we'd care to mention.
That's not to say the Switch hardware is perfect, though. Several issues have come to light since launch--some rather significant--which you may encounter after prolonged use of the console. In this guide we will address the most common Switch hardware problems and offer potential solutions and guidance if you find yourself up Switch creek without a paddle.
Subscribe to Nintendo Life on YouTube844k
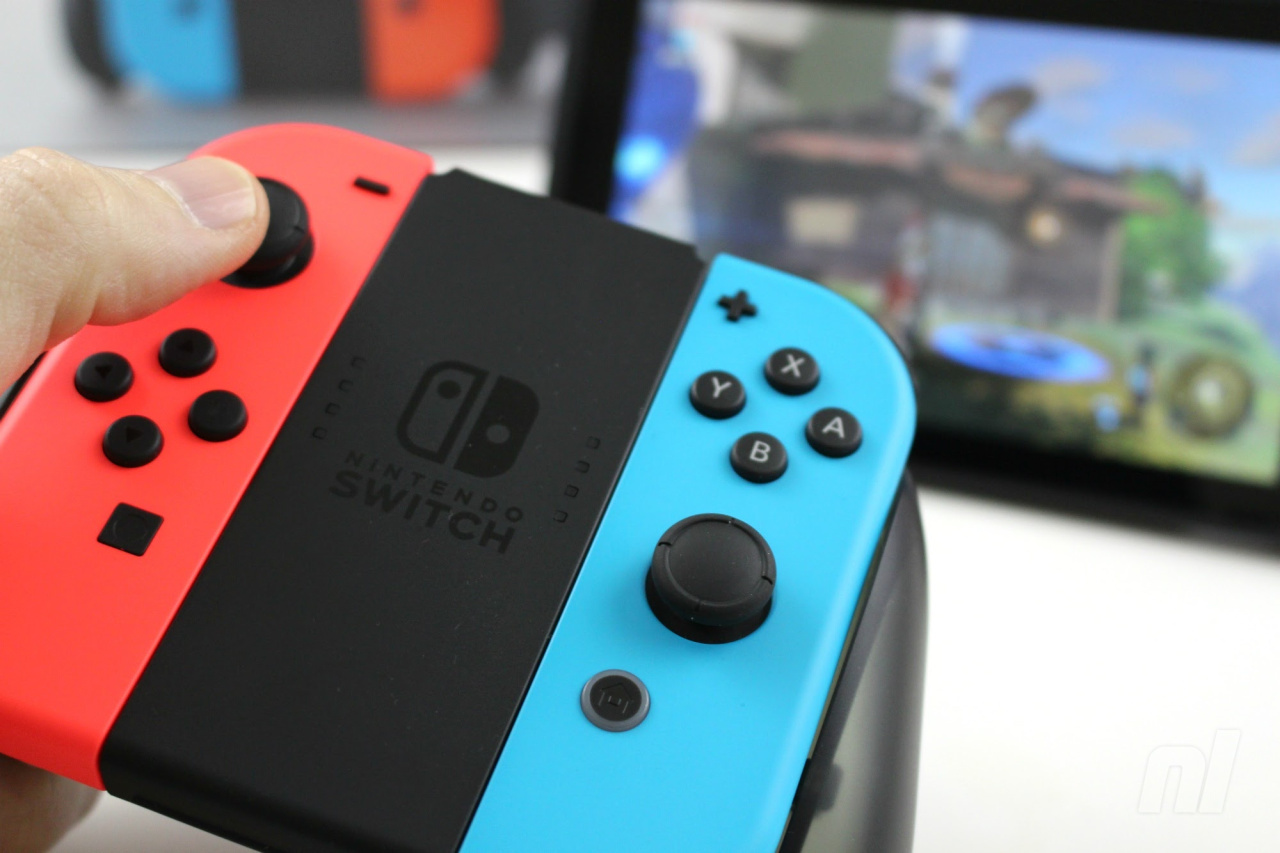
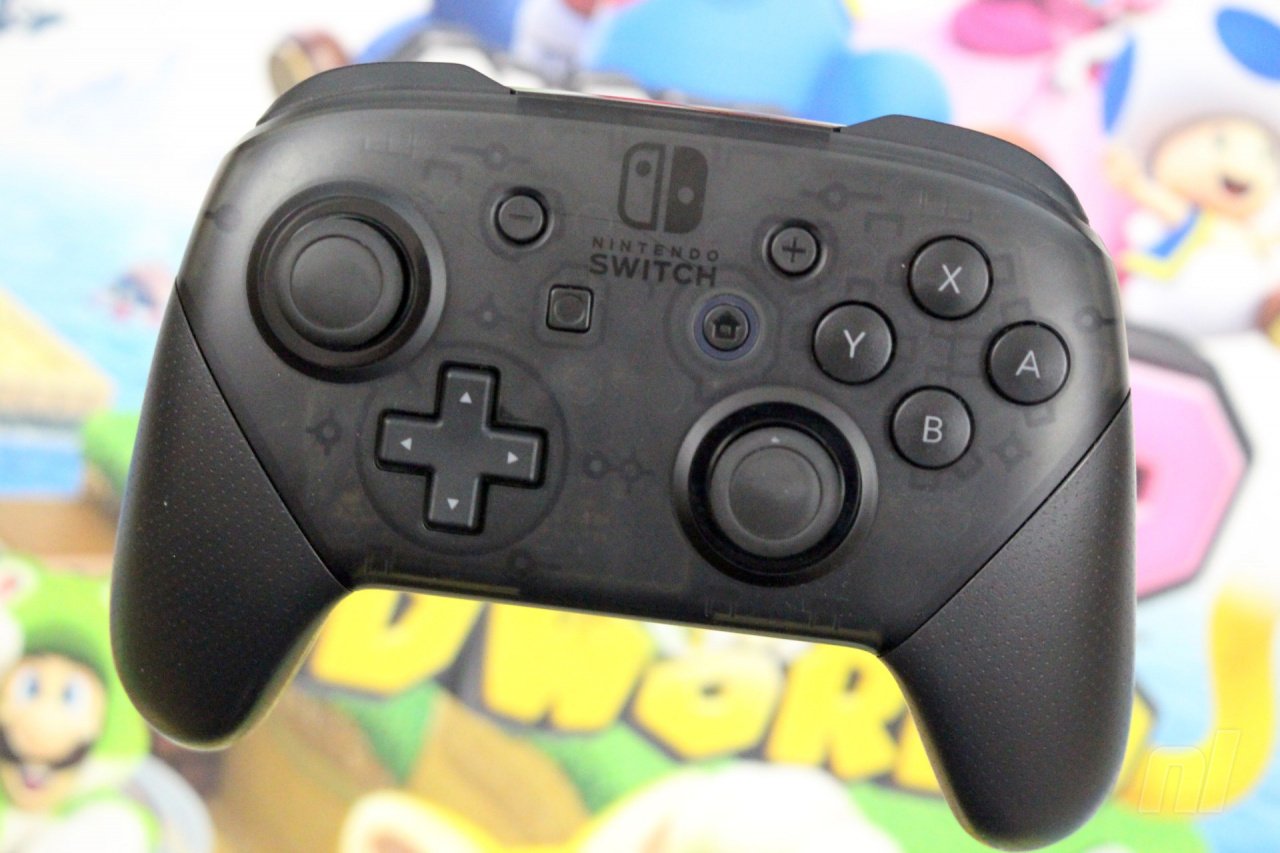
Switch Hardware Problem: My Joy-Con / Pro Controller analog stick is drifting
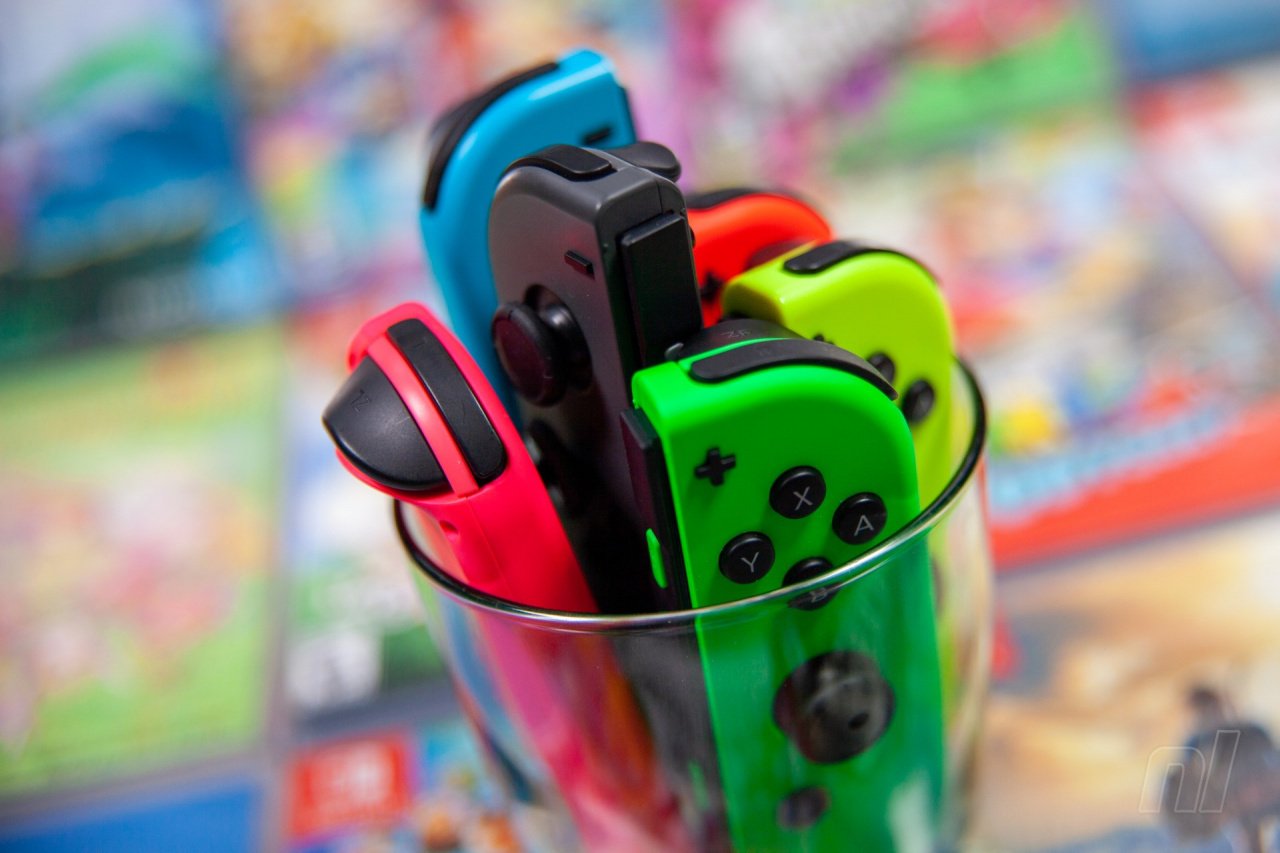
By far the biggest complaint with Switch hardware is the infamous Joy-Con ‘drift’ – a phenomenon where apparent wear to the contacts in the analogue stick mechanism causes movement to register without any pressure being applied.
Solution #1: Get Nintendo to repair / replace your Joy-Con
Nintendo is repairing Joy-Con free of charge in some territories (even outside of the guarantee period), although that's not true for all regions. Simply contact them and follow their instructions on how to send them to an authorised repair shop and you should have them back in a week or two, good as new.
Solution #2: Replace the Joy-Con analog sticks yourself
However, if (like us) you're not willing to wait that long, the process of replacing the sticks in the Joy-Con yourself is relatively cheap and painless, and it means you won't be stuck without a controller while Nintendo repairs them.
Our photo guide on how to repair drifting Joy-Con goes into forensic detail, so if Nintendo isn't replacing them free-of-charge in your region, repairing them yourself is by far the easiest, most affordable option.
Drifting analogue sticks in your Switch Lite present a more delicate problem. While self-repairs and replacements are entirely possible, we'd recommend contacting Nintendo with that one rather than cracking open your console. Remember, any repair work not carried out by an authorised repair person will likely void your warranty (if you've still got one).
If you're having issues with your Pro Controller, we've got a handy guide for Pro Controller drift, too.
Switch Hardware Problem: My Joy-Con disconnects from the Switch
A common issue at launch was with Joy-Con controllers--specifically left ones--frequently dropping connection to the console. This would happen in various situations, typically when the Joy-Con was more than a few feet from the dock, or if any large object was standing between the controller and the console.
While newer Joy-Con seem to be less affected by this irritating phenomenon (and our Pro Controller has always been fine), we still experience occasional issues with a yellow Joy-Con - a colour not available at launch and presumably manufactured after Nintendo had identified and corrected a minor manufacturing defect.
Solution #1: Send it to Nintendo for repair
If you're having Joy-Con connection issues, Nintendo may replace or repair it for free - the company's policy regarding Joy-Con varies between regions. In general, since the Joy-Con drift debacle Nintendo has been replacing and repairing the controllers free-of-charge more readily, even out-of-warranty Joy-Con. Contact them and see what they say.
However, if once again you don't want to be stuck for at least a week without your Joy-Con, there's another solution which has worked well for many people...
Solution #2: Add a piece of conductive foam yourself
Just after launch, Sean Hollister over at CNET discovered that Nintendo's 'repair' solution was to add a small square of conductive foam to help shield the controller's antenna from radio interference.
As detailed in our Joy-Con drift repair guide, it's easy enough to open up your Joy-Con, provided you've got the right tools. Conductive foam is cheap, so you haven't got much to lose in doing some DIY on your older Joy-Con. Just be sure to use conductive foam - an old bit of sponge or a squashed-up packaging peanut won't do squat.
Switch Hardware Problem: My Switch won't turn on
An unresponsive Switch that won't start up is obviously a significant problem when you want to blast through a level of something or check turnip prices. This has happened to us very occasionally in the past and, in our case (and hopefully in yours), it was no more than a hardware hiccup (or, perhaps more accurately, a software hiccup).
Solution: Make sure your Switch is charged and perform a hard reset
Ah, the ol' turn-it-off-and-on-again trick. To perform a hard reset, hold down the power button on the top of the console (not the Home Button on the Joy-Con) for around 12 seconds. Release the power button and press it once to turn the console on. Hopefully, the console should power on and be good as new.
If a hard reset doesn't work, check out our guide on how to fix a Switch that won't turn on for a few more ideas (using a non-official power adaptor could be the cause, for example). If none of those work, it's time to call Nintendo.
Switch Hardware Problem: My Switch won't read game cartridges
We've experienced this a few times when swapping cartridges out. Occasionally, the cart won't register with the contacts inside the console and the game doesn't appear on the menu screen.
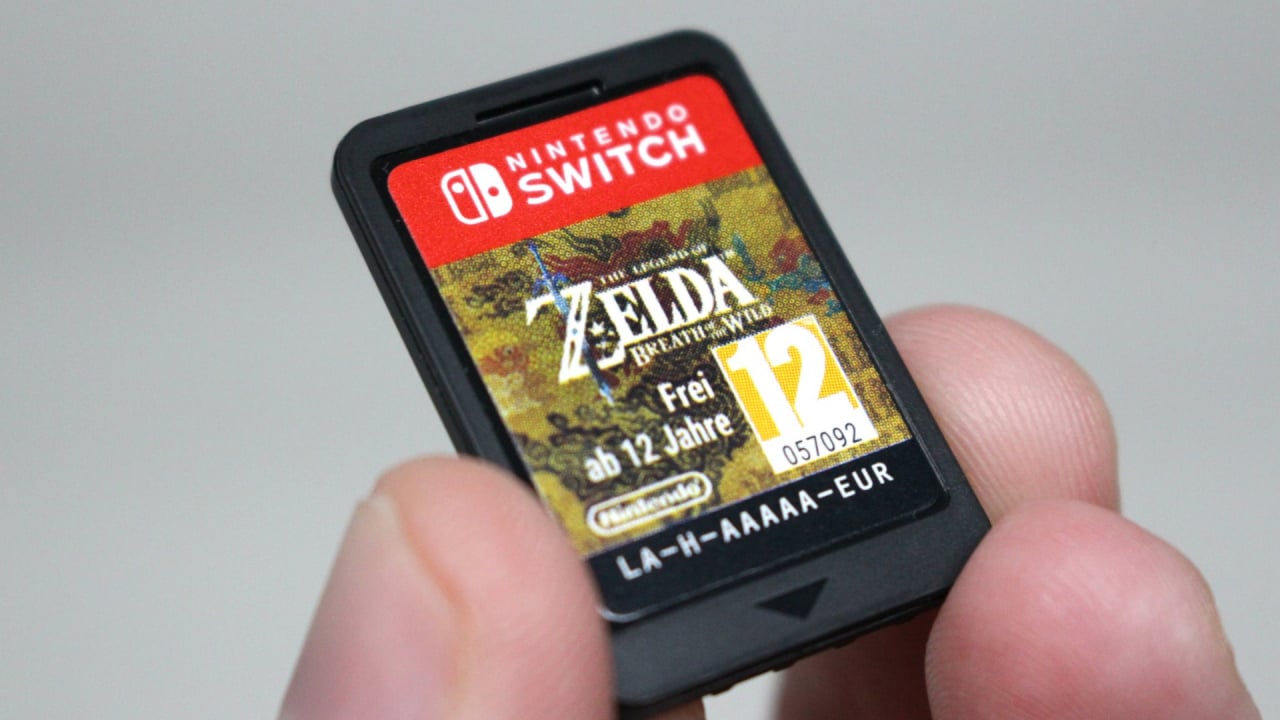
Solution: Remove the cartridge and check for debris
Assuming normal everyday use, there's unlikely to be a huge build up of dust or detritus in your Switch's game cart slot due to the cap over the opening - certainly nothing like the wodge of pocket lint we periodically remove from our cell phone's charging port. However, it's worth giving the cart slot a visual inspection and CAREFULLY removing any foreign objects with a thin pair of tweezers (with the Switch powered off, of course). Blowing into the slot is not recommended, although we know you'll probably do it anyway.
Also, inspect the cartridge itself and make sure the gold contacts are clean. They can be VERY CAREFULLY wiped with a microfiber cloth to remove any dust or residue that may have appeared. Once everything is clean, simply put the cart in the slot again and away you go.
If none of the above produces results, it's time to contact Nintendo.
Switch Hardware Problem: My Pro Controller D-pad registers inputs that it shouldn't
The Switch Pro Controller is a thing of beauty - we honestly couldn't go back to Joy-Con after grasping its rubbery loveliness. It's even got an honest-to-goodness D-pad, too, which is great for 2D platformers, fighters and more.
However, the D-pad n the Pro Controller isn't perfect, and it can often register inputs on the opposite axis than the one you intended (while moving from left to right, for example, the controller might briefly register an 'Up' or 'Down' input).
Solution: Put tape over the inner parts of the contacts inside the Pro Controller
Fortunately, there's a relatively easy fix for this if you've got the tools to take your Pro Controller apart. As first detailed back in 2017 on La Nueva Esculea by @ateijelo, disassembling your controller and applying tape over the innermost part of the contacts should prevent inputs registering inadvertently.
The instructions on the blog above are very clear and easy to follow, so check them out if you're suffering from D-pad imprecision with your Pro Controller. We would probably recommend covering a little less than 50% of the contacts (between 1/4 or 1/3 is ideal in our opinion), but it's a simple fix to remove the tape and find the optimum coverage. Just remember, as always, to be careful and take your time while taking your controller and other hardware apart.
Switch Hardware Problem: My Switch has run out of memory space
If you've been hitting the Switch eShop and downloading digital games (or you've been stung by a physical game which requires a hefty additional download), you may find your Switch's 32GB of storage filling up very fast indeed.
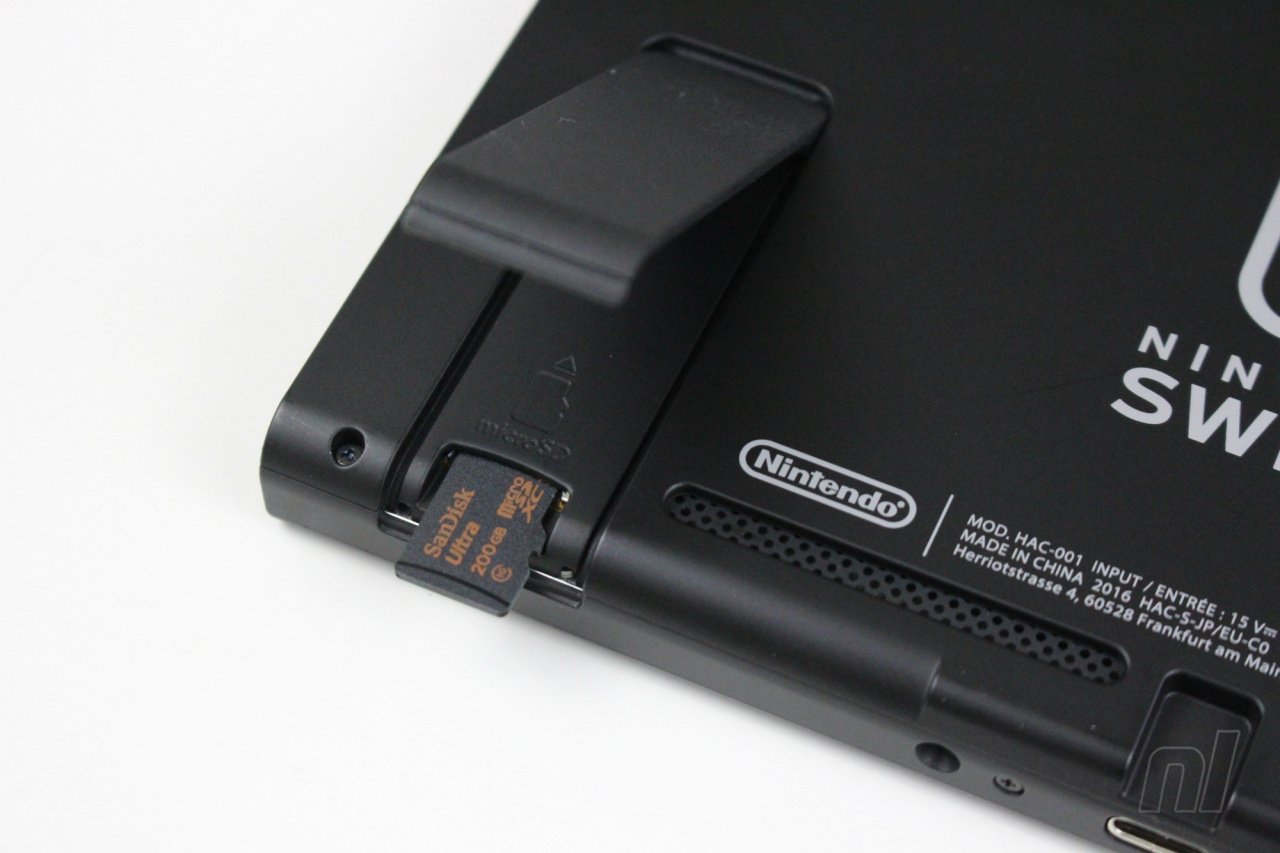
Solution: Expand your Switch's storage with a Micro SD card
This is the easiest solution on this page and bolstering Switch's onboard memory with some extra external memory is both simple and relatively cheap depending on the card you purchase. Check out our guide on the best micro SD cards for Switch to find the best deals on micro SD cards from 128GB to a whopping (and pricey) 1TB, plus how to install them.
Switch Hardware Problem: My Switch casing is cracked
A number of Switch owners (us included) have noticed small cracks appear in the casing of their console. This is reportedly due to the expansion and shrinking caused by heat, which causes micro-fractures to appear in the console's plastic housing (ours were near the fan and the headphone jack).
Solution: If the console is still under warranty, get the Switch replaced
If you purchased your Switch within the last 12 months, simply contact your original supplier or Nintendo and it should be replaced.
If you're outside the warranty period, unfortunately there's not much to be done. On the bright side, while cracks and missing grilles may be unsightly, they shouldn't affect the functioning of your Switch.
Switch Hardware Problem: My Switch is warping / bending
Another issue related to heat expansion, many players (us included) have noted that their Switch is warped or bending to a certain degree. While most cases are extremely minor (you'd have difficulty spotting the warping without a ruler or flat surface to test against), others are easily visible to the naked eye.
In the worst cases this can lead to problems with screen scratches when docking the Switch.
Solution: If the console is still under warranty, get the Switch replaced
If the warping is affecting the function of the console (i.e. safely docking the Switch without damaging the screen is impossible), Nintendo should replace it for you within a year of purchase.
However, minor warping isn't considered a defect. Unless you have a serious issue (or a particularly understanding retailer), you'll likely have to live with a slightly warped Switch. It gives it some character, no? No, we know it's irritating.
You might also want to consider affixing a microfiber cloth to the inside face of your dock to make doubly sure the screen doesn't rub against the plastic when you place the console in the dock.
Switch Hardware Problem: My Switch screen is scratched
If you've had issues like the ones above, or have simply been careless with your console and thrown your Switch in a bag with keys, coins and rocks, your screen may have picked up little scratches and marks.
Solution: Protect your Switch's screen with... a screen protector
It might seem simple, but the easiest way to prevent scratches is to apply a screen protector to your console, preferably the moment you take it out of the box. There are many options available for both the standard Switch and Switch Lite--we're partial to a nice tempered glass screen protector ourselves--and you'll be thankful for it when you drop your console on a gravel path and removing the scratches is as simple as peeling off the protector.
Obviously, that isn't going to help if you've already marked your screen. If that's the case and you can't live with a scratched screen, it's probably best to enquire about a replacement from Nintendo directly. Be warned, though, it won't be cheap. It is possible to buy replacement parts and do it yourself, but you'll need advanced knowledge and tools to make a good job of it. When all's said and done, it would arguably be far simpler to speak to Nintendo and get a replacement with an official warranty.
If you take your Switch out and about with you often, you'll find a carry case invaluable for keeping your console in top condition. Again, there are a wide range of carry case options available, from cheap-and-cheerful to luxuriously expensive. Whatever you go for, we recommend slipping your console in a case before throwing it in the bottom of your bag.
Switch Hardware Problem: My Switch screen has dead pixels
It's a fact of life that the odd faulty pixel can be found on any screen coming off a factory production line, but they're incredibly distracting if you're unfortunate enough to find them on one of your devices. From our perspective, any number dead pixels is cause for a replacement, although manufacturers often beg to differ on that point.
Solution: Speak to Nintendo
In general, Nintendo doesn't consider a 'small number of stuck or dead pixels' to be a defect, although the company is vague on specifics. We'd recommend contacting Nintendo and seeing what they say. The response may depend on how distracting the missing pixels are; a cluster of failures in the centre of the screen are likely to garner a more favourable response than a single dead pixel in one corner.
Nintendo Switch FAQs
Here are some other common questions Switch owners may have, along with links to our relevant guide:
- Which games don't work with Switch Lite?
- How do you share games and saves between Switch and Switch Lite? - Note: this is not currently possible with Animal Crossing: New Horizons.
Nintendo Support Contact
Nintendo can be contacted in a variety of ways (chat, email, phone, text, etc). Select your country/region after clicking below to head to your regional support page:
We hope these solutions have helped you. Let us know below if you've had an issue with your Switch along with how (or ''if') you solved the problem and we may add it to the list above.


Comments 15
This is the first comment!
I’ve been having an issue where one of my joy-cons will randomly disconnect while playing it in handheld. Then I have to pull the joy-con off and slide it back on to fix it. Happens once or twice each play session. Any quick fixes or is a Nintendo fix the only solution?
Hos about the shi..sub par...Wi-Fi chip. Is there a hot fix for that, which doesn't require spending money on stuff that should have been built in to begin with? I love my Switch, but I hate its Wifi capabilities with an 80s villain on drugs passion
and yet, the only issue i have had so far is that two of my joy-con controllers are having issues holding a charge. if i go more than a day or two without using them i end up having to recharge them before they are usable.
hopefully i won't have any other issues with my Nintendo Switch. and whatever happened to the days when a device could be hit with a hammer or dropped from 10 feet in the air and hit the ground (by accident) and not take any damage? and yes, i am exaggerating a bit.
"my Switch has run out of memory space"
Has anyone asked that as a legitimate problem before?
I feel like if the Switch ran out memory and you didn't know what to do, you probably shouldn't be playing video games to begin with.
Like seriously.
@stevenw45 In terms of your last paragraph, technology has made huge advances since then, and thus modern day hardware creates a lot of HEAT, and has a lot more things that can go wrong
Also something like the N64 for example, had no moving parts, it was passively cooled, where as something like a switch has a little fan inside it, with bearings and such.
I think the switch might passively cooled to a degree when in handheld, sometimes I swear the fan isn't running at all or at very least in very slow speeds, and only picks up when it needs to like in more demanding games
in a few years time I might look into opening my switch safely to remove any dust or dog hair that might be clogging up the fans
If your Joy-Con disconnect, there is a high chance it's dock related. I also have issues sometimes while my Switch is in the dock, but as soon as I remove it, I can go to the next room and still have a perfect connection.
@Doktor-Mandrake
i know that technology has made huge advances since then, which was why i was exaggerating with the example i used.
i never really paid attention to the cooling system of the N64 since i was about 9 years old at the time when it came out and a child doesn't really care about possibilities of a console system warming up.
as far as the cooling system goes for the Nintendo switch goes, its not flawed, it just that it can't always keep up with the system. Nintendo should create a firmware update for the system to help the users keep track of certain performance benchmarks of the system. it might be helpful when creating an area for storing their video game systems so they have a smaller chance of over-heating from long-term or over-use of the systems.
at least the Nintendo switch along-side other video game systems have a system in place for keeping track of the internal temperature of the unit in which tells the system to shut down or go to sleep mode when the system starts to over-heat.
i only had the issue with the Nintendo switch turning itself off without my permission once. it was during a game of animal crossing. at least it just enter sleep mode, instead of crashing like the Wii U. it can get really annoying when it happens.
it was so nice to see the Nintendo Switch wake up and let me continue with my session of animal crossing right where i left off as if nothing ever happened.
My Pro Controller Joystick drifts .... 13 Months old, started to drift like crazy - recalibration does not work ....hmpf. will never buy nintendo hardware - only 3rd party to save some money. cannot be as worse as the OG hardware XD
@stevenw45 Every modern hardware has this system in place, not just the Switch.. They use sensors to detect when things are overheating, on PC for example you can monitor the temperature of individual compenents, thus you can tell if things were getting hotter then normal.. Agreed something like that on the switch would be handy, would be easier to tell if temps were higher then normal, during hot summer days ect.
The fan in a switch is similair to that in a laptop, very small, with very delicate bearings.. I know for sure that can one day lead to issues long term..
I know people like to think Nintendo consoles are unbreakable but that really isn't the case at all
Can't say my switch has ever shut-off when playing a game, I'd be rather concerned if it was doing that and would be looking into checking if any of the vents are blocked or any hair/dust clogged up in criticial areas.. Some people think it's a good idea to just blow air compressor down the vents but I wouldn't recommend doing that you could just end up with dust going further into the unit
@Doktor-Mandrake
i know that every modern day hardware has sensors for that stuff and more and whatnot. i have been in the I.T field for way too many years. good thing that I and many others have animal crossing as a method of keeping us calm, cool, and collected regardless of what is currently bringing us stress.
in terms of people thinking that Nintendo systems are unbreakable; i wish that were true at times. but from my experience some of them seem that way because of how long i have had them. out of all of the Nintendo hardware i own; the only one that has stopped working is the GameBoy printer.
my Nintendo GameCube started having issues reading some of the Mini-DVDs. unfortunately CDs and DVDs have a tenancy to suffer from disc rotting. and unfortunately, one of the memory cards died a few years back. thankfully, they are a lot more reliable that the ones for the Nintendo 64.
you are lucky that your Nintendo switch never turned off on its own. i think the console only over heated because animal crossing seems to have a lot of demand on the system resources.
i haven't used that method to clean a system or a game cartridge since the days of the N64 when people some people used to blow on the game cartridge as a method of cleaning it even though Nintendo said not to do so.
in the instruction and safety manuals that come with the Nintendo switch, doesn't it tell you how to clean the system? i think Nintendo also posted it on their web site in the Q&A section of their web site.
@Sky1Eagle1 I am having the same problem, no idea why though.
Yup, I’ve read that cleaning out the contacts can help. But I need to get some compressed air. So far using a q-tip hasn’t helped much.
@stevenw45 I've only had my switch just a little over a year now which is maybe why I haven't run into that issue, also don't play AC and a lot of games I do play tend to be less demanding, only play my switch on the odd occasion too as not my main gaming device
Yeah optical based for sure can be the worse, cartidge systems I've always found the most reliable.. And yeah, I know someone who still blows on their cartridges, I never say anything as it's up to them what they do with their own games but I'd never do that
Some of my old n64 carts from a kid I can see the corrosion on some of the contacts from blowing on it and the moisture, thankfully not to the point any of them have stopped working afaik, but yeah as an adult I now know it's probably better to use cottonbuds/q-tips and to gently clean the contacts.. there's something quite satisfying about a cartridge taking ages to load up, turning console on/off, nothing, to give it a clean and have it work the first time!
I buy physical switch games and one thing that concerned me somewhat was the data retained on it, being flash memory and all, but with the advancements flash memory has made the switch cartridges should hopefully have long healthy lives
I can get quite OCD about hardware lifespans, to the point it really bugs me, pretty sure its partly the reason I have so many mini consoles and two raspberry pi's lol.. No moving parts, nice simple devices that can potentially live a very long life!
That's why I think in maybe about 3 years time or so I'd like to open my switch up and make sure nothings blocking up the ventilation, in terms of nintendos cleaning advice in manual I think that's just for cleaning the outer parts of the Switch more then anything
Have watched a few videos here and there of people opening a switch, the back comes off very easily and you can see the fan, though a little blocked off due to the big metal backplate but I think it's still accessible enough to check for any big dust/hair build ups and stuff.
Don't know how comfortable I'd feel taking apart mu switch any further though, though it's nice that parts like the cart reader are modular, and not soldered on or anything so should be easy to replace.. Sadly not so much the case with the battery, while likely replacement is glued onto the system
I get crazy OCD over this stuff lol, but yeah the Switch certaintly looks like a solid system, it's been a little over 3 years since it first came out and so far there's not been some huge failure rates across all launch title switches.. I also trust Nvidia enough to make decent hardware, I've been using them for years on my PC and like to think they make good, long lasting parts
Sorry for the rant didn't even realise its so long
@Doktor-Mandrake
if you only use your nintendo switch for basic gaming than you won't run into any over-heating issues with the Nintendo Switch,
having OCD about hardware lifespans can be a good thing. try using it to your advantage. learn how to do hardware developement.
i got into hardware development because i have three laptops and a lot of spare parts for them. i tend to keep hard drives, CD drives, DVD drives, and more from my older computers since they compatible with my newer laptops.
thankfully most of the parts for them will work with the others to the point of where i can take parts from one of my laptops to fix another. one of them is 15 years old and still works as if it is brand new with the exception of hardware compatibility with the operating system.
I'm not comfortable with opening up the Nintendo switch either. of course then for me its not so much because of the risk of ruining it, but because i don't have any spare parts for it. usually i wait for the devices warranty to expire before i start taking a device apart for experiment with it in one way or another.
i opened up the N64 once for modifying it. the most i managed to do with it was to upgrade the memory it it. the jumper pack upgrades the memory to about 16MB, but i upgraded it to 32MB or so. from what i remember game ROM sizes maxed out at about 32MB.
it didn't do much for the system except for me to keep playing the game for if the game cartridge got pulled out during game-play. the only performance benefit the system got received was that the game could be loaded to the memory in full making it so that game data from the cartridge would not have to be swapped out when going from level to level for games in which required it. however, there was a draw back to it; the system took a lot longer to start then it would be without the modification.
Show Comments
Leave A Comment
Hold on there, you need to login to post a comment...