Now that you've got your Charge Beam you can go about opening up all the locked charge beam doors scattered around Artaria, this gives you lots of options with regards to how you want to proceed and investigate next.
However, if you're having a little trouble figuring out exactly where to go now we can point you in exactly the right direction. Let's take a look.
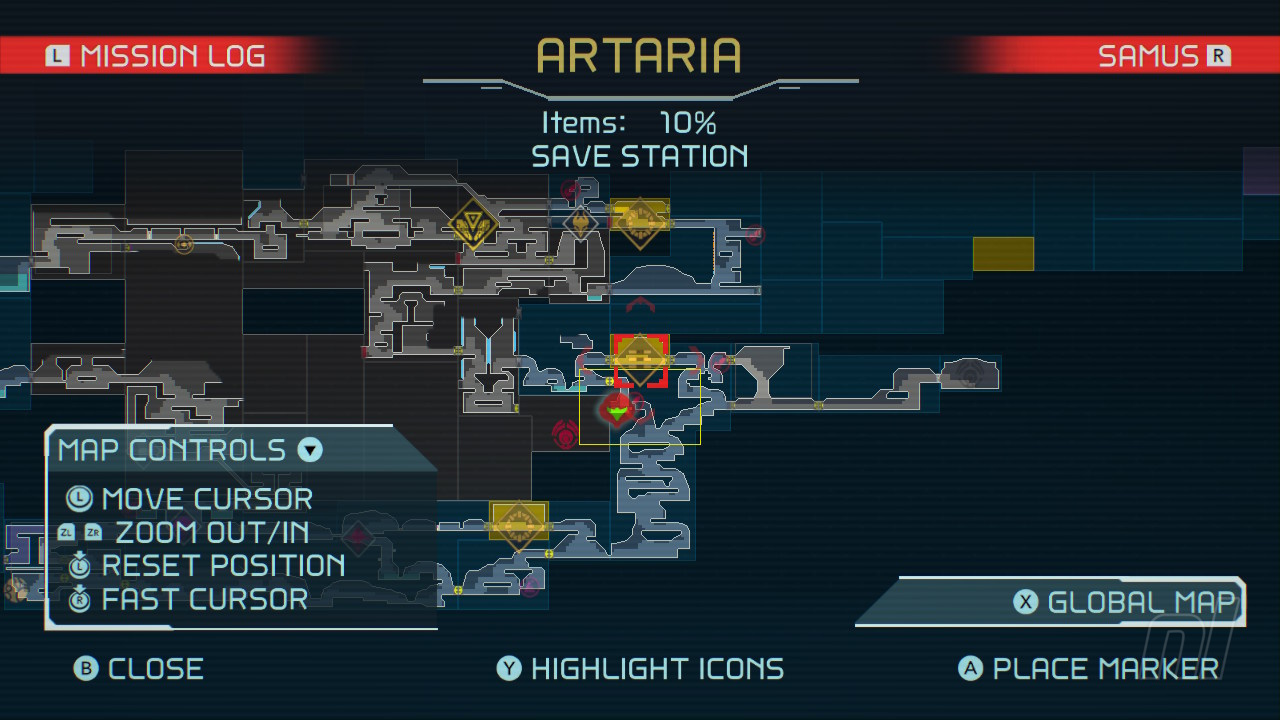
Once you've got your charge beam you want to use it to leave the statue room and then head right, keep heading right and then up until you reach the save station pictured below where you can now record your progress.
Subscribe to Nintendo Life on YouTube842k
From this room we are then going to head left into an E.M.M.I. zone where you'll need to creep carefully with the aim of moving upwards to the network station room directly north of your location. This network room has four doors, two of which are open, one of which is a locked thermal door and the top right of which we're now going to open with our charge beam to proceed.
From here it's straight shot right, destroy the beam blocks in the next room to get to the top, move right and through some charge beam doors and then down a long corridor, through another set of doors and drop right down the platforms to go left into another save station area. From here go left again and keep going until you encounter an interactive device which you will now use to redirect the thermal flow in the area.
Now we want to return to the network station with four doors and this time enter the thermal door on the bottom left which will open for you.
From here it's a case of making our way back to the E.M.M.I. area and through a handful of now open thermal doors as shown below.
Once through these you'll take a quick slide down a shaft and then head right through a charge beam door, slide through a small gap and face off against your first Control Unit. Beat this unit, get your Omega Cannon, take down the nearby white E.M.M.I. and you've just netted yourself a Spider Magnet. YES!
Need help finding your way forward after nabbing the Spider Magnet? Check out our next guide below to show you where to head next.
This guide is part of our Metroid Dread walkthrough and guide series, which includes all ability locations, all missile tank locations, all energy tank locations, all energy parts, all suit upgrades, all power bomb tanks, plus every compatible amiibo unlock, E.M.M.I. and boss battle tips, and other helpful tips to help you get through the game and get those post-game unlocks.


Comments 0
Wow, no comments yet... why not be the first?
Leave A Comment
Hold on there, you need to login to post a comment...