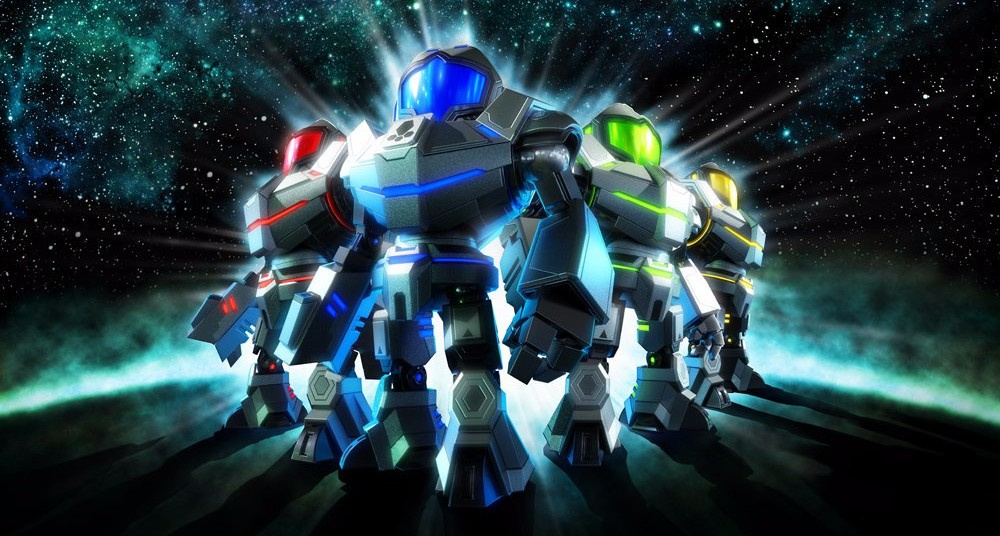
Look at you, fresh from boot camp standing tall and proud beside your shiny Project Golem Mech. Don't think this campaign will be a walk in the park; whether you fight alone or in a squad, the Bermuda System will be far from stable until we are done here cleaning up every single speck of Space Pirate scum. Read this document so that you have an edge over your enemies and don't embarrass us in front of other GFed units operating out there.
Bermuda System Overview
The events of Metroid Prime: Federation Force will take you and your squad to three different planets in the Bermuda system. Intel on each planet follows.
The First Planet: Excelcion
Resource-rich and extensively mined until two decades ago when a meteor impact sent Exelcion into a perpetual ice age. The ice covered wasteland that once harbored extensive Galactic Federation outposts and Research and Development facilities is now abandoned due to inhospitable weather conditions and violent local fauna.
We are retaking this planet because it's the perfect place to field test our shiny new Mechs and the Space Pirates seem to be fond of raiding our old facilities for salvageable material, and it is embarrassing to find our own weapons being used against our forces or being sold in the black market and as such, so it's time to send the Pirates a clear message regarding Federal claim over Excelcion.
We highly recommend taking Flame Shot ammunition along your sorties if the mission profile allows it; fire is a natural weakness to the indigenous lifeforms of Excelcion and a useful resource to melt down frozen areas inside our compounds that might lead to intel or materiel that can be useful for this campaign's smooth progress. Plus, it is rather amusing to watch Space Pirates running around on fire.
The Second Planet: Bion
The second planet in the Bermuda System holds many secrets and dangers below its vast scorching deserts. Bion was once home of an ancient and mysterious race that seem to live by the religion of the "Orb". Our expert xeno-linguists are having a hard time deciphering exactly what this "Orb" is and since we are in the sector anyway, we have been ordered to investigate and retrieve as much information as possible on this ancient civilization.
Beware that the enormous temples hide deep and complex underground passageways and are most likely booby-trapped to fend off raiders like the Space Pirates - who seem to have taken an interest in this mysterious "Orb" as well. As such, expect trouble from both long deceased civilization and current enemies of the Galactic Federation.
Your other enemy in Bion is the heat. If your mission profile allows it, make sure to make room on your Mech for some Freeze Shot ammo. Besides cold being a natural weakness to the indigenous lifeforms who have adapted to the ways of the desert, frozen foes can't move, can't shoot at you and take twice the damage from your other weapons. It is also perfect when you want to make sure those Space Pirates stick around in one place while you make your - ahem - "strategical retreat". You use can also freeze and break some lava sections found inside the temples.
The Third Planet: Talvania
Talvania was once the prosperous home of an advanced robotic race that mysteriously packed their bags up and left. Their legacy is extensive however, with vast and advanced constructions one can easily spot from orbit since most of them extend to vast areas of the planet's surface.
However technology is not meant to run by itself for centuries without maintenance and the planet has become rather hazardous due to breakdowns and the malfunctions of several systems that are still running, so don't touch anything down there you are not supposed to. We are sad to report that Space Pirate activity in Talvania is the highest in the system. Expect trouble down there from more than automated defense systems.
Since the automated defenses present on the planet are mechanical, taking along some Shock Shot ammunition on your sorties is highly advised. Not only they will short out anything the ancient robot masters of this planet left to defend their technological secrets, but they will also provide a rather shocking experience to any Space Pirates that might stand in the way of your mission objectives.
*INTEL UPDATE*
Bounty Hunter Samus Aran - who is also currently deployed in the Bermuda System - confirmed what Federation Navy already suspected: the Space Pirates have extensive bases and support facilities deployed in Talvania and are using the planet as a staging area for their own operations in the system. Do not expect them to abandon their positions without a fight.
Combat & Rules of Engagement
There are several different approaches to every mission you will be assigned in the Bermuda System Campaign. Being sent into a mission alone and channeling your inner Samus is radically different from operating as part of a four-man squad. Make sure you read the next paragraphs for optimum efficiency.
Solo Deployment
Reserved for the best of the best among you, solo deployments stack the odds against your Mech considerably. But if your foes think that makes you easy prey, the boys at R&D have got a few surprises up your Mech's metal sleeves…
1) The Lone Wolf
The usage of the Lone Wolf Mod is forbidden within Squad deployment and although it's not mandatory, you would have to be Mother Brain kinda mad to pass on it if you are deployed solo. This mysterious Mod doubles the damage output of your standard beam weapons while also halving the damage taken from any source to your Mech. A shame Galactic Federation rules of engagement forbid it from being standard equipment - we could have taken over the Bermuda System and cleaned it from Space Pirates without the help of Samus in half the time. Also don't worry about breaking your Mech and losing this Mod to damage; unlike regular Mods, the Lone Wolf Mod is indestructible. It is also immediately available to new recruits.
2) The AI Combat Drones
It's a rookie mistake to forget to equip the AI Combat Drone before deployment so unless you want to be the laughing stock of the whole G.F.S. Aegis crew, make sure you double check before jumping into the dropship. AI Combat Drones are small autonomous flying units that follow you around. They are equipped with a rapid fire beam weapon that does about the same amount of damage as your regular beam cannon shot. You can deploy up to three of them when taking on missions alone or use them to fill slots if you're short on allies for Squad deployment.
The obvious advantage is the considerable amount of extra firepower on your side but these clever drones will also spot and engage enemies before you even notice them. If you hear them shoot, make sure you try to identify what threat they are engaging. AI Combat Drones are poorly armored and can be targeted and destroyed by your foes, so if you find yourself relying on them a lot, make sure you take on Mods that enhance both their plating (Drone Plating I, II or III) and their firepower (Assault Drones I, II or III). Word of caution: You will need to find these on the field first.
3) The Repair Capsule
It is wishful thinking that you will be able to take on a mission without the need of mid-action repairs. As such, always make sure you reserve at least two slots to take Repair Capsules with you. Each will repair 50 HP to your Mech and you can often find refills among GFed supply boxes. Remember you will need to shoot the capsule out of your cannon arm and pick it up for it to repair your Mech. Do not mistakenly shoot them at your enemies in the heat of combat - that would be highly embarrassing. You can enhance Repair Capsule effectiveness by equipping mods (Optimized Capsules I, II or III) once you find them on the field.
Squad Deployment
A good four-person squad is not made up of four solitary Mech jockeys acting alone like some deranged Bounty Hunter. A good squad is one that moves and functions as a unit, with each individual knowing his task and specific roles within the team. Here are some pointers for efficient squad operations.
1) Role Play
Customizing your Mech with correct Mod and ammunition loadout configuration can deeply affect the outcome of a mission. Instead of trying to be a Mech-of-all-trades, assume a function that will benefit your squad the most: Assault, Heavy Weapons, Area Defense or Mechanic. Just make sure you warn your team what you're carrying by using the appropriate voice command in the lobby. We don't really need four Mechanics carrying nothing but Repair Capsules to fight off Space Pirates, do we?
2) Leave No Mech Behind
Keep a lookout on both your own Mech HP and your team mates. A single operating Mech with Repair Capsules can recover all of its fallen comrades. If you happen to be the last Mech standing, do not hesitate to retreat to a safe location and try to stock up on enough Repair Capsules and then attempt to rescue your fellow soldier's Mechs one by one. Keeping a cool head under pressure will make you the hero here.
3) Communicate
Sometimes the noise of beams shooting at enemies is enough communication for a squad, but never forget to customize your pre-defined radio chatter phrases for any eventuality, such as the need for assistance. If you don't want to use the D-Pad, some quick reflexes with the stylus on the bottom screen will allow you to send communication at the time of need. Practice this a bit, it comes very handy in later missions.
4) Stand Aside
Avoid single file formation unless the environment strictly forces your team to do so. Making sure your squad mates have a clear line of sight is essential for mission success so spread out evenly to make sure you deliver as much firepower as possible. You do not want to be the guy who accidentally steps ahead of one of the Super Missile that would decide the mission's outcome.
5) Rookies At The Back
More likely than not you will find yourself joining a squad deploying into an unfamiliar mission. If you do not know what lies ahead, consider taking on a support role and let your squad mates lead the way. No one likes the rookie who ruins a mission by running wildly ahead attracting unwanted attention to your squad. Don't be that guy!
General Strategy

Last but not least, here are seven general guidance pointers that might just make or break a mission's successful outcome.
1) 19 Medals
Do your best to get 19 mission medals. This is the amount of proof of value to the higher ups to unlock all three Mod slots on your Mech. This is a real difference maker, so prioritize this goal.
2) Aim High
Score extra points by sniping at Space Pirate heads. A head shot does double damage so it is also a more efficient way to deal with their ranks. Assuming you are using default control configuration (A type) practice to do this by holding "L" to lock one in your sights, press "R" and tilt slightly up so your rapid fire beam hits them in their head. +50 points are awarded to headshot kills, so make sure they count.
3) Aim Big
A patient soldier is an efficient soldier. We know it is often dangerous to keep holding your charge beam on it's third and final level since it causes your Mech to move really, really slow. However hit any foe with the full charged shot and you will be rewarded with a "Blasted" bonus, awarding you an extra +100 points to you tally. Even better, take out a Space Pirate with a fully charged shot to the head for a +150 "Pulverized" bonus. Beware that most enemies will notice your intentions (namely the Space Pirates) and will dodge, leaving you vulnerable and looking rather silly in front of your squadmates. Make sure those charged shots count.
4) Thrust-Dodge Everything
No amount of Mech armor will keep you in once piece from repeated blast and explosions, so make sure you thrust-dodge every chance you get. While having a target locked on with "L" (standard control layout), press Left or Right on the analogue at the same time as you hit "B" for your jets. You usually clunky Mech will swiftly dodge on your chosen direction, avoiding any incoming attacks. Space Pirates are often fond of doing this as well, so compensate accordingly by shooting into their intended dodge path. Be careful of losing awareness of your surroundings by dodging extensively with a single target locked on. You might dodge in front of your squad mates cluttering their line of sight, dodge into even more danger than you're evading or more embarrassingly: dodge off a cliff.
5) Charge & Collect
Often neglected but incredibly useful, charging up your beam cannon to level three will actually attract nearby ammunition refills, shaving precious seconds from the mission clearing time while efficiently restocking your ordinance at the same time. Even more useful: You can use the Charged attraction properties to drag the Ball-like artifacts used as keys in the many temples of Bion. Use this if you are having trouble with the shooting required for the game of pseudo-golf that the ancient Orb-worshiping race seem so fond of. But make sure you don't drag them to close to you, their electrical properties will damage your Mech.
6) Safe Distance
We still can't believe the boys at GFed R&D did not equip any Mech with any sort of melee weaponry. We hope this oversight is correct in future campaigns because the Space Pirates are incredibly adept at CQC (Close Quarters Combat), with most of their units having melee weaponry that will make some big dents in our shiny new metal toys. Be kind to the repair crews of the G.F.S. Aegis by declining dance invitations from Space Pirates and keeping your distance. Remember they aren't the brightest stars in the universe either so use Decoys, Mines and Force Fields in case you need to make sure that they do keep their distance from you or a target you need to defend.
7) When In Doubt, Super Missile
It might take up four slots and you will only get one to mess around with but if the mission profile allows it, make sure you take it! This bad boy has such a high yield warhead that it can take out enemy bosses with single hit, probably eliminating any other foes nearby as well while shaving many seconds from your mission time. You can further enhance its capabilities by several mods Mods like upgrading its already devastating firepower with Super Payload I, II or III or increase the chances of getting extra Super Missiles with AUX Ammo Replicator I, II or III.
If you really, really want to make sure nothing is left standing after you fire one of these, add Blast Radius to your Mod slots. Like all Mods (except Lone Wolf), you will need to find these in the field. Since most of the time you will only have one of these, make sure you make it count: It could be the difference between stunning victory or shameful defeat.
That is about as ready as we can make you. Now go out there and kick some Space Pirate behind - don't let a girl running around in Chozo armour make us look bad.
Good luck and see you online, trooper!


Comments 29
Feel free to drop any questions here and I will get back to you, but try to remain spoiler free because we only get the game in Europe in 2 weeks.
Pretty good tips! I'll get around to playing this game sometime! Hopefully before the servers die down! I know there will be a dedicated followimg playing this game though.
I apologise in advance to @Shiryu for saying this, but... here come the "how you're supposed to enjoy this game" articles that Star Fox Zero got and Mighty No. 9 didn't!
@AlexSora89 Hmm, I didn't cover that on this guide.
Maybe I should have...
@Shiryu
And that is why I love this site - sparring is always fun!
Sorry, but I'm out.
Thank you, @Shiryu ! I will definitely try this out!
@Malpais See you online.
Very cool article. Looking for people to play online with is the only real issue I guess for me. I made a thread for it here about 9 hours ago, but nothing. Sadly many didn't give this a chance.
I'm planning on getting this game tonight or tomorrow. I know there's been a lot of negative response for this game but I have been pretty excited about it. I think the concept is cool and it's good to have online support. Reminds me a little bit of Helldivers.
If we play solo is the game still good?
@Nin_Myski The first few levels were, but I hear it gets too hard to enjoy for one person later on. I've played online with random people but I want someone on my friends list to play
I think this is Nintendo's first FPS? Splatoon and all previous Metroid doesn't count. This is a true run and shoot game, but as always Nintendo add little touches and changed the mechanics to make it fun and challenging.
The auto lock on is unlike other FPS game, it still required gyro to fine-tune the aiming. If the target is moving to the right you need to shoot a little bit more to the right. I think this makes the game more challenging than just lock on and fire. FPS is really meant for PC with mouse and keyboard, on console it required auto aiming which takes the fun out of the game, but here in this Metroid you still need good aiming skill which makes it fun.
The default control is still better, using the nub on the New 3DS is tedious. It's awkward to use the ZL and ZR, makes my hands tired holding the 3DS at the top.
Damn it! I can't wait! If I wasn't away playing a gig this weekend - I might even have downloaded it onto my North American 3ds. . . .
That's new
@Shiryu It looks like a quite useful guide, congratulations.
@VanillaLake I learned all of this the hard way... Y_Y
@Whopper744
I replied to your thread, but no response.
Anyhow, I'm start the game up and do a mission to get the hang of things.
MH Generations, don't you worry- I'm not abandoning you. I'll be back soon... promise
@Shiryu LOL Too bad for Europe to get this so late, same for America when they had to wait for months for Yoshi's Woolly World.
@VanillaLake Yep, gonna have to wait until my friends get this and by that time vacations will be over...
Ok, did the training missions, unlocked campaign and mods, and checked out the amiibo support.
So far my impressions...
I like it. The game feels very well polished, and the ambience and designs are well done. Just all the little sound effects fit perfectly is if you were really playing one of the main series games.
And that's what I'm struck by the most- how much this game really does feel like Metroid. It feels different at the same time simply because you're a federation soldier amd the art style is a little different but, honestly it seems to fit the handheld well. I didn't like it in screenshots but now that I'm seeing it on my actual handheld system with my own eyes I have to admit that it fits well.
I can't speak to how fun the campaign is because I'm just now starting out, but thus far I've got no complaints.
One more thing- the controls. I actually prefer the Gyro over the C-stick. It's just easier. The controls (using setup A with Gyro) are basically like the Prime games on GameCube, where the left analog not only moves you forward and back and left and right, but also rotates you, the only difference being when you hold R, instead of the left analog then mimicking a second analog for aiming, it allows you to use Gyro for fine-tuning. This is meant to be combined with holding L to lock on which is exactly the same as previous games.
Will update as I play more.
Played the first two levels with a group of strangers and liked it so far. Although, two people in my group were higher ranked and already played the mission and they were kinda racing through all the objectives. There are some bonus objectives for each level, but not so easy to communicate that to the other players, unless I guess you refuse to step on one of the four pads required to open a door. Anyways, because the others already knew what to do in the mission - I felt like I was tagging along and got last place in points and didn't get to keep the mod I found on the level. The highest points pick first and so on. Nonetheless, the game is well put together and I hope the online community picks up because groups were slim pickings when I tried searching.
@Blastcorp64
Same here, just played first 2 missions, first with 2 others, second with one other (someone dropped out). I did well first time, but second mission it was like you said. The other guy wanted to do everything himself because he obviously had already played the mission before and knew where all the mods were kept.
I guess the solution to that is just play the level solo later if you want to get the mods, right? That's my plan.
I do wish it had an option to play with friends online though. Random lobbies is lame. What's the point of even having friends on your gaming device if you're not allowed to make lobbies with them.
@Blastcorp64 "and already played the mission and they were kinda racing through all the objectives". Typical.
@JaxonH Even if one player grabs all the Mods, in the end everyone takes turns picking which one they want, one at a time. Pretty fair system.
@JaxonH yeah, playing single player to collect the mods was what I was thinking as well.
@Blastcorp64
As @Shiryu mentioned, regardless of how well you do you still get to pick mods at the end which admittedly is a fair system, but if you want the best ones, guaranteed, single player is the answer
@VanillaLake I figured. I don't have much experience with squad based online MP. Now that I'm thinking of it - luigis scarescraper was similar with everyone for themselves clamoring for high score and collectibles.
@JaxonH I just need to get better. I ranked 4th and there were only two mods collected (one that I picked up in the level) and lost out.
Tap here to load 29 comments
Leave A Comment
Hold on there, you need to login to post a comment...