XCX - Combat guide
Image: Nintendo Life

Combat is core to the Xenoblade Chronicles franchise, and the series has its own unique, incredibly moreish battle system to dig into as you blast your way across Planet Mira.

If this is your first Xenoblade adventure, or even if it's just been a little while, the battle system can be A LOT to take in, especially all at once.

So, with this in mind, we're going to attempt to break combat down into its most important aspects, giving you a bit of a mental grounding in the basics, before we layer on some more mechanics.

Subscribe to Nintendo Life on YouTube840k

Ok? Let's go then.

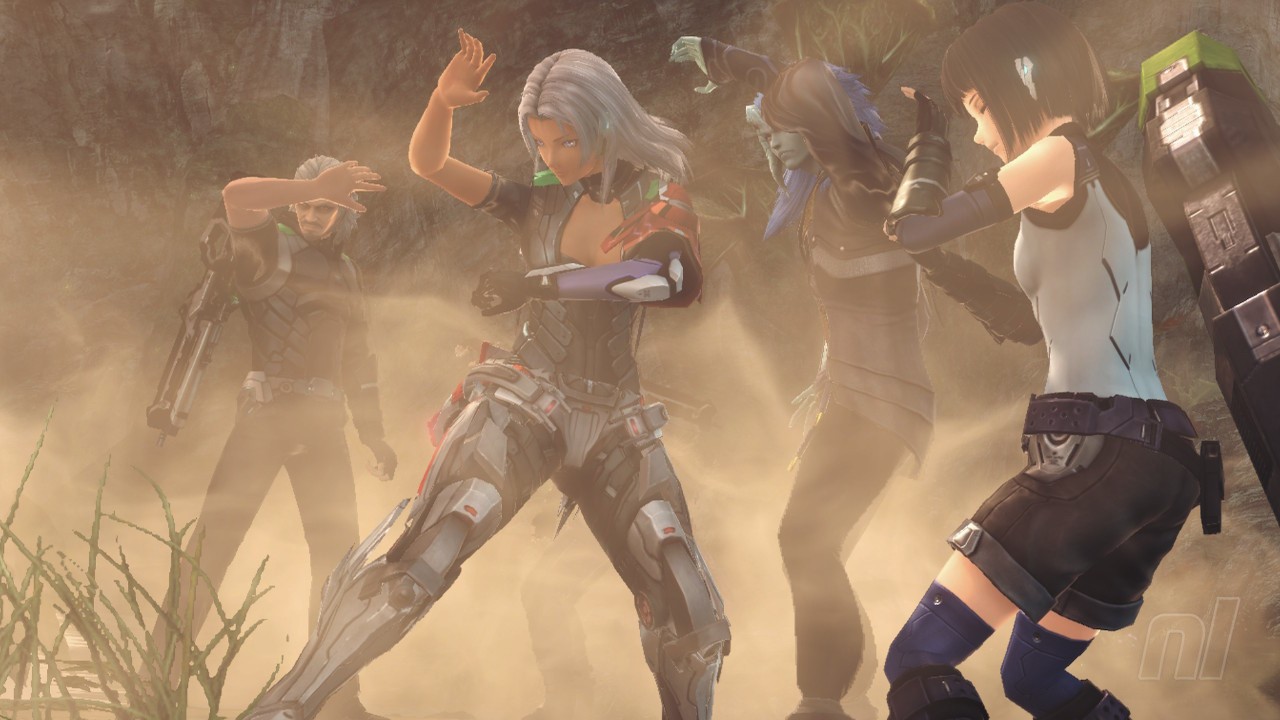
Xenoblade Chronicles X Combat Explained - The Battle System Basics

Before we begin, a quick note. There's a lot to digest here, so we recommend reading it with the game in your hand to get a better understanding. Mechanically, Xenoblade is a very different beast from something like Breath of the Wild, but take the time to learn and tame it, and you'll find it equally rewarding!

Let's begin with the basics.

Your character Auto-Attacks

Firstly, Xenoblade games use an auto-attack combat system, so your character will attack at timed intervals with whatever weapon is currently equipped.

In this Definitive Edition, it's as simple as pressing 'X' to quick-switch between weapons, so swapping between guns and knives, as an example, is a good idea early on, just to get a feel for the different timings. You'll note, as you get used to any character, how they set themselves and prepare to execute their auto-attacks, and how this process takes a few precious seconds.

XCX - Combat guide
Image: Nintendo Life

Importantly, the timings on auto-attacks reset when you move, so you need to consider this as a fundamental part of the flow of fighting. If you interrupt the animation of an auto-attack by moving, it slowly starts again, which could leave you wide open to attack or missing an opportunity to hit your enemy.

Arts are powerful moves with cooldowns

Whilst auto-attacking, you can also activate Arts, which run on a very simple cooldown mechanic.

Arts are displayed as circular icons deployed both left and right of the UI. As you fight you want to focus on your Arts cooling down and timing your use of these, mixing with auto-attacks, for maximum effect.

There are five different colours of Art in the game;

  • Orange - Melee attacks
  • Yellow - Ranged attacks
  • Purple - Debuffs
  • Green - Support (healing/buffs)
  • Blue - Aura Arts

As you fight, your party members will call for support, you respond by choosing the pulsing Art icon in time and have a skill check in the form of a Soul Challenge QTE (more on this down the page). Do it right and you'll boost your Tension Points (again, more on that later), heal up your team, and gain buffs.

Arts can be Overcharged

A simple but very important little mechanic, this.

When your Arts are ready to use, you can let the cooldown timer run around again, and a few more times after this, depending on the Art, to overcharge it through levels.

Overcharged Arts pay your patience back with bigger damage and buffs, so consider this and work it into your timings.

Skills boost your stats

Skills supplement all of your auto-attacking and explosive arts shenanigans with buffs to stuff like your HP. Nice and simple.

They can also be upgraded through a bunch of levels to give you bigger boosts, and even unlock a few new fighting skills in the process.

Skills unlock as you go, and it's a good idea to check in and upgrade them from time to time. It can be very easy to forget in favour of spending points on Arts! However, when you can raise your HP by over 50 or 60%, skills are definitely an aspect to pay a lot of attention to.

Front/Side/Rear positioning and Movement is incredibly important

Movement is the next essential aspect to Auto-Attacks in Xenoblade's combat. To signify this, most Arts come with bonuses to their effects, if you first get into the right zone around your enemy to use them.

So, it's crucial to pay attention to the onscreen indicator telling you whether you're to the Front, Side, or Rear of your enemy while attacking.

Using Side attacks or Rear attacks on the Front of an enemy will still cause damage, but reading the Art's description and attacking from where it says to will cause more damage and other effects, such as Topple or Stagger, as a bonus.

Topple and Stagger? Wait, what?

Topple and Stagger

Let's keep this really simple. First you Stagger, using an Art that staggers from the correct position.

This naturally softens up a target for Toppling, which will lead to them falling over or opening up in some other way for you to then get lots of attacks.

You want to be staggering and toppling at every opportunity. Get stuck in and get used to the positions required by the Arts you use in order to leave strong foes open to attacks from your entire team.

Some characters won't be able to Topple, and there are deeper wrinkles we can get into about team setups, stuff we've covered in detail in our Best Builds guide, but for now — and especially if you are just starting — it's fine to just get comfortable with the core concepts of auto-attacking and then start thinking about when and where to Stagger and Topple. It's all very easy once it clicks.

Defending

Defending can be a bit of an odd thing in these games, at first. It can feel as though you are fully exposed. But we like to consider that the enemy's attacks follow the same rules as ours, in that they need positioning to be fully effective. It gives us a sense of cohesion as we fight and reminds us to keep moving and aim our attacks properly.

With this in mind, movement — which you should be incorporating a lot of anyway — is a key part of defending. Keep where you need to be for successful Arts attacks of your own, with the odd step back when you see something very obvious coming.

We also swear by big jumps every time it looks like something like an area-of-effect attack is about to happen. Of course, tank characters can get in the mix more. The same rules apply for Classes, some can take more punishment than others.

Of course, proper defence in Xenoblade depends on the various Arts and Skills you have equipped. Also, using barriers, upgrading Skills that affect your defence — and that of your entire party — and using better armor.

Tip: Relax, focus on timing Arts and Auto-Attacks as the most important thing at all times. Be in your rhythmic flow for those things, and the defending will happen as part of it all.

Tension Points (TP) - AKA The Most Important Thing™

TP is essentially the energy you need to perform Arts.

However, you can't just drink a big potion and fill this up. You need to attack. Some Arts buff the amount of TP you gain, sometimes for the entire party, and reading the various Arts and Skills you unlock, taking the time to know what they do, will see you start to feel which Arts work best to keep your TP levels flush.

Now this can get complex as the game goes on, but we're going to keep it simple, because you'll pick the deeper stuff up as you relax into using the system.

Auto-attacking will raise your TP, so you're bagging it on-the-fly, earning more when you position correctly, or do something like Staggering, or following a Stagger with a Topple. All very straightforward: Attack well, earn TP; know what your Arts actually do, earn even more TP.

Your weapons also have TP Ratings. These ratings will increase how much TP you earn, the higher they are. Simple. Consider this when setting up, as TP regenerating quickly means more Arts available at all times.

Note, too, that with the new UI in this edition, you can see more clearly which Arts use TP to function (there's a little TP sign on them). It's also much easier to see the icons for Arts Pulse when they are primed for a Soul Voice Challenge...

Soul Challenges

As we already touched on in the Arts section, Soul Voice Challenges are QTEs that you instigate by hitting a pulsing Art at the right time. These can absolutely turn the tide of battles, pulling you out of all manner of scrapes when you get them right.

TP boosts, healing for the whole team and buffs galore await. Just practice that timing and you'll have this down and providing constant re-ups of health in no time.

Soul Challenges also raise team morale — the little bar you can see in our screens, and this improves the rate of Soul Challenges — meaning more buffs and healing, as well as making your party more effective overall. Who knew?!

Also, as an aside, you can go into the Soul Voices menu in the game to get into a lot more detail on these. Your characters can also be switched around a little. In this menu — when you are ready — you'll see the conditions for various effects, and how you achieve them.

Quick Cooldown lets you recharge Arts instantly

A new mechanic for this Definitive Edition, quick cooldown allows you reuse your Arts instantly by hitting 'Y' and using some of the energy from a little green gauge on your UI.

Again, this seems minor, but the change to allowing you to re-use moves, well, it reframes the flow of the entire combat system, as it gives you a chance to hit Soul Voices you may have missed, as well as pumping your TP up way faster, so Overdrive plays a much larger role.

Which leads us into...

Overdrive

Overdrive could have a whole article of its own, really. But essentially all you need to know to get a foothold is that it's a super-state of attack that cleaves chunks out of enemy health bars, boosts buffs and healing, and all that good stuff. You want to have that big Overdrive cog in the middle of the Arts icons spinning, primed, and ready to go.

To do this, you need to hit the activation point of 2000/3000 TP points. You can see these TP points accumulate in the UI.

Once in Overdrive (and again we are keeping this very basic on purpose), you then seek to extend it by earning more TP and then feeding it into the Overdrive to keep it going.

Elma, as an example, can eventually just sit in Overdrive for entire scraps — she is much stronger on foot than a Skell in some respects because of this — and so building your attack game around priming the Overdrive is essential.

Skells, just to cover briefly, have their own Overdrive system, but it is much slower, and it also can't use the new quick cooldown mechanic.

Appendage Damage through targeting

You can cycle through enemy appendages with the 'R'+'Y' or 'A' to select appendages on enemies.

The first bonus to taking the time to do this, is that you can cripple and disable various attacks by destroying the appendage that performs it. A spider with a busted poison sac is a spider who can no longer poison you, innit.

XCX - Combat guide
Image: Nintendo Life

This system also nets you end-of-battle bonuses for knocking off certain appendages, so it's worth indulging in, not to mention the fact that destroyed appendages explode and cause further damage. Hooray.

As a side note, you may also find that cycling down through appendages on a large foe will help with any camera issues. "If you can't see its face, aim for its ankles," as my mum used to say.

Aggro and the blue line

Aggro in Xenoblade Chronicles X: Definitive Edition works as it does in most other games. By attacking a lot and getting up into a foe's face, you attract its attention. You will know when you have an enemy's undivided attention when a blue line shows up between you and it.

As you play around with Arts, you'll notice that some of them raise or lower Aggro. This can be used in a few ways in combat, chiefly to direct your opponent's ire in the direction of someone best placed to soak it all up.

Battle Commands - giving your team orders

This is another part of the battle system that's easy to forget, especially early on when you don't really need it. Battle commands can be called up on the bottom right of the UI (press '+' during battle) and allow you to give your squad a whole raft of team and individual orders.

XCX - Combat guide
Image: Nintendo Life

See a party member with a full TP who isn't deploying their Overdrive? Get into the commands and order them to use it.

This stuff can take a battle that's about to go very badly and swing it right round your way. Get used to monitoring your team's meters and issuing orders early, and you'll do it as second nature when it counts later on.

Healing

Arts can heal, as you'll already know, as will successful Soul Challenges.

However, by going into the Battle Commands, you can also use Battle Items, such as TP boosters and any healing items you've collected to get yourself back to full fighting fitness. It's good to have a stock of these going into big fights!

Lastly, remember you can Toggle Targets

Really basic, but worth sticking in here at the bottom: Toggling your selected targets is as simple as using the 'R' and 'L' shoulder buttons to cycle around any onscreen foes.

There are also a number of settings in the control menu pertaining to how the game selects the next enemy, so take a look if you fancy fine-tuning this aspect.


With all of this knowledge ingested, you should — hopefully — have a bit more of an idea, on a basic level, of what is going on from moment to moment, and that's all you need to get going! There's plenty more to consider, but those basics should put you in good stead.

Make sure to hit us up with your combat tips in the comments.