The screenshot button is back on Switch 2, and Nintendo has made it easier than ever to share your snaps with the world.
In this guide, we'll run through everything you need to know about Switch 2 screenshots, including how to take them, manage them, and transfer them to your phone, PC or Mac.
How To Take Screenshots And Videos On Switch 2

To take a screenshot on Switch 2, simply press the square button on the left Joy-Con to capture your current screen.
To record a video on Switch 2, press and hold the square button on the left Joy-Con to capture the last 30 seconds of gameplay footage.
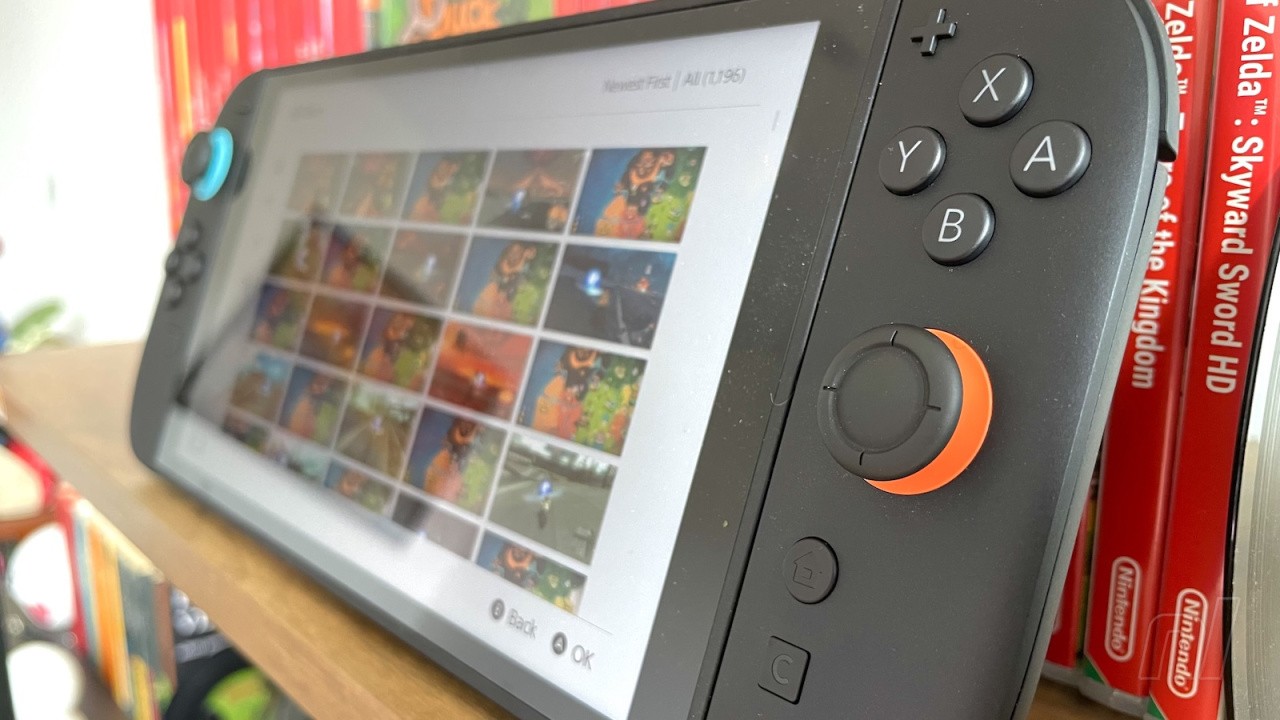
You can view all screenshots and videos by selecting the 'Album' icon on the Switch 2 Home Screen.
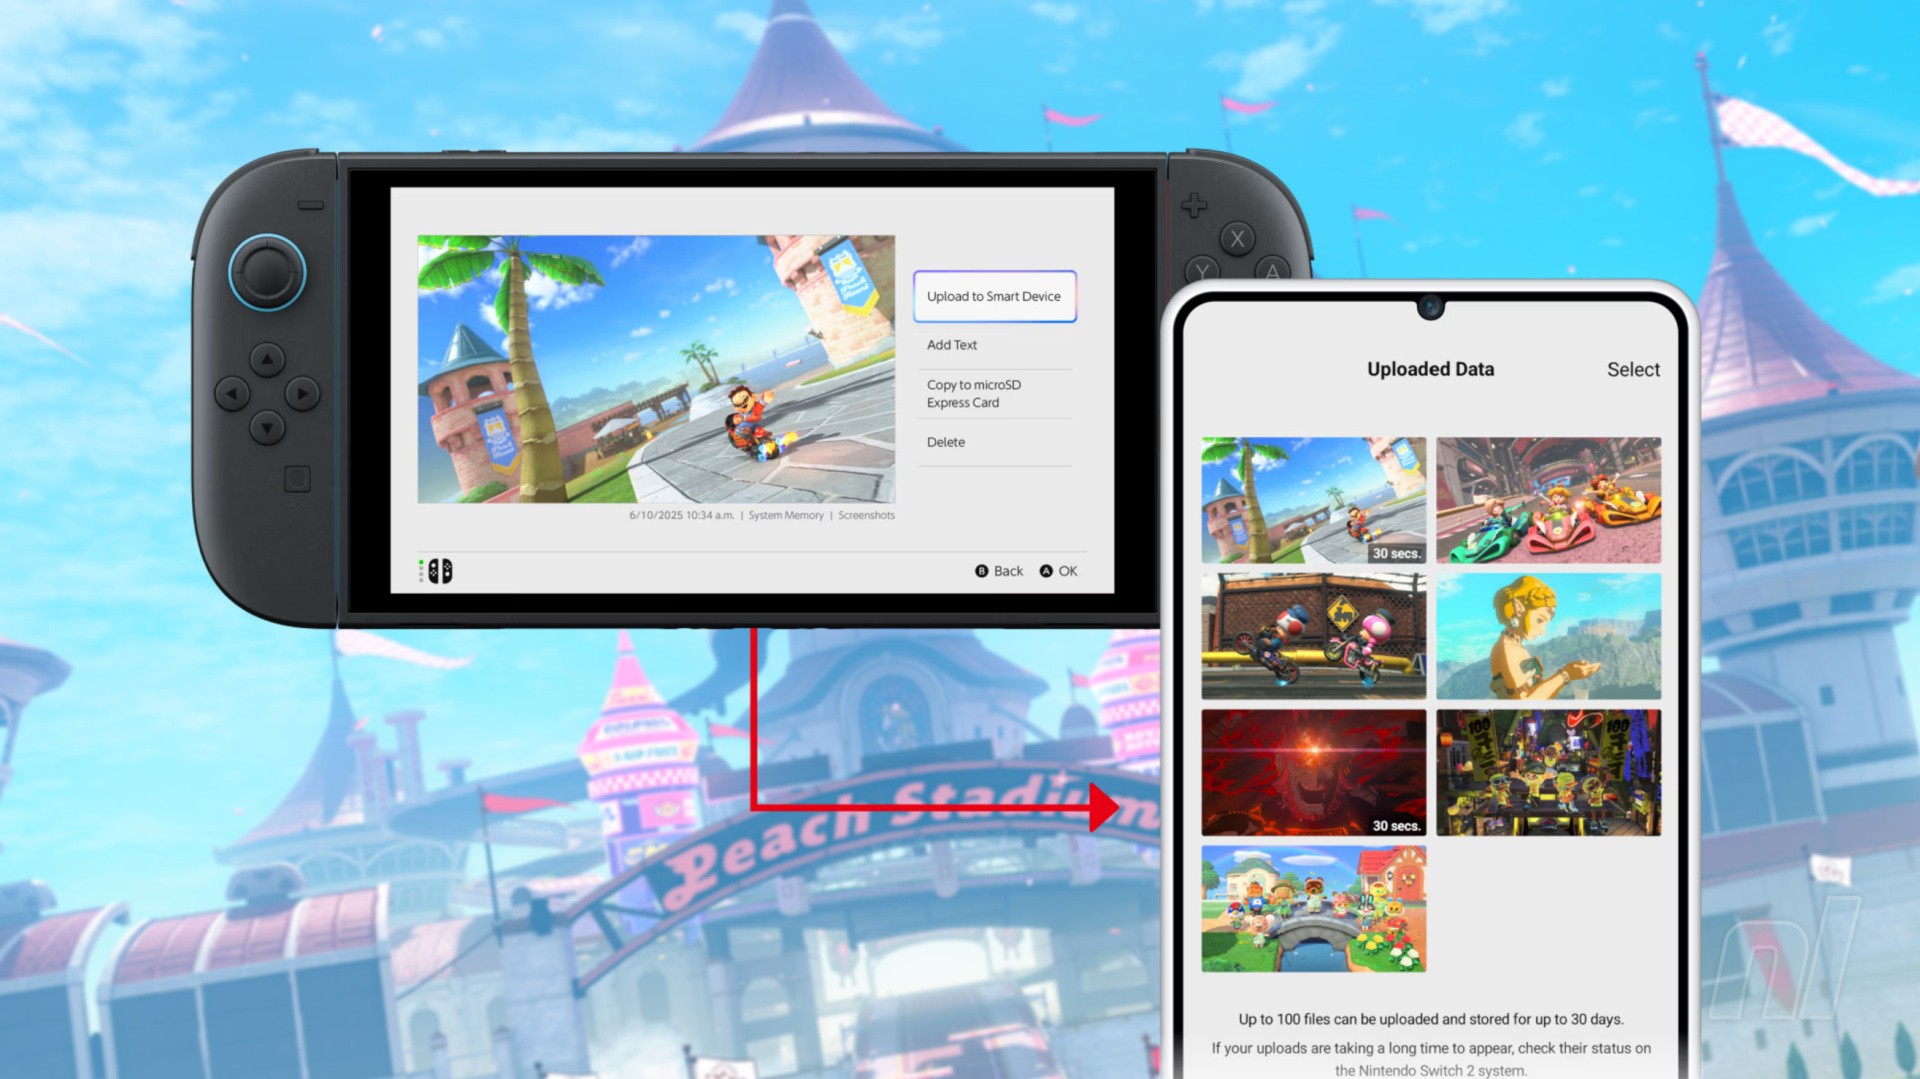
How To Transfer Switch 2 Screenshots And Videos To A Smartphone
It's super simple to transfer screenshots and videos to a smartphone on Switch 2, and it's all thanks to the Nintendo Switch mobile app.
Here's how to transfer media via the app:
- Download the Nintendo Switch App on your smartphone and sign in using the same Nintendo Account as the Switch 2 from which you wish to transfer screenshots.
- On your Switch 2, head to 'Album' and select the image(s) you want to transfer by opening the screenshot, pressing 'A' and choosing 'Upload to Smart Device'. You can select multiple images at once by pressing 'Bulk Actions' > 'Upload to Smart Device' on the left menu bar.
- Choose your Nintendo Account from the select screen and press 'Upload'.
- In the Nintendo Switch App, press the blue 'Album' icon on the bottom menu bar to view all your uploaded data — you may have to drag upwards to refresh the page if you don't see your latest upload.
- Press and hold images to save up to 10 at once, or share them via your connected apps.
To cut out the middleman, you can set your Switch 2 to automatically upload to the Nintendo Switch App. To do this, head to 'Upload Settings' on the left menu bar in your Nintendo Switch 2 Album, select 'Automatic Uploads' and ensure the slider is moved to the right.
All screenshots and videos will only be uploaded to the app if your Nintendo Switch 2 is connected to the internet, and any transfers will pause if you are in a GameChat session or are using other communication features.
How To Transfer Switch 2 Screenshots And Videos To A PC
Our go-to method for getting our screenshots and videos from Switch 2 to a PC or Mac is to follow the above steps to transfer the media to a smart device, and then share them to our PC from there, either via Cloud storage or AirDrop (on Mac).
If, however, you'd prefer to do things manually, you can still upload your screenshots and videos to PC via a good old-fashioned cable.
For this approach, make sure you have the following:
- A Switch 2 system with screenshots and/or videos on it
- A USB-C to USB-C wire or a USB-A to USB-C cable
- A PC or Mac
1. Head to 'Settings' from the Switch 2 home screen, scroll down the left menu to 'Data Management', then down the right menu to 'Manage Screenshots and Videos'.
2. Connect your Switch 2 to your PC or Mac using a USB cable, and select 'Copy to PC via USB Connection'.
Note: you can only transfer screenshots and videos via the bottom Switch 2 USB-C port — not the top one, nor hooked up via the dock. If you have the cable running from anything other than this bottom port, you know what to do.
3. If you're using a PC, you're almost there — we have more advice for Mac users below. Your Switch 2 should pop up either in Explorer or as a camera under 'This PC'. You'll find your screenshots and videos already sorted into neat little folders, which you can navigate through as you would any other removable storage device.

4. When you're done, press 'Disconnect' on your Switch 2, and you're free to unplug all those messy wires!
How To Transfer Switch 2 Screenshots And Videos To A Mac
Transferring media from a Switch 2 to a Mac should be much the same as it is to a PC, though there's an added step thanks to macOS not supporting Media Transfer Protocol (MTP). While the likes of Android's official File Transfer app and third-party extensions like MacDroid provided a solution back in the days of Switch 1, neither seems to work for Switch 2 transfers.
We are investigating other software options and will update this guide should we find a solution. Until then, we'd recommend using the smart device transfer and uploading to your Mac via the Cloud or AirDrop.
Nintendo Switch 2 Screenshots FAQs
Still having screenshot struggles? Here are a handful of frequently asked questions that might help you along your way:
How many screenshots can I send at once?
You can select up to 20 screenshots and videos to send to your smart device at once.
The Nintendo Switch App can hold up to 100 screenshots and videos for 30 days. Once you exceed this 100-image limit, it will start to get rid of the oldest uploads to make way for the new ones.
Why are my screenshots too bright?
If you are noticing that your docked screenshots are coming out too bright and overexposed, you might have your HDR settings incorrectly calibrated.
To tweak the image's brightness on your HDR-compatible TV, navigate to 'Settings' > 'Display' > 'Adjust HDR' and bring the slider down a little to the left to reduce the bright lights.
We hope this guide has been helpful. Be sure to check out our other Switch 2 guides for even more useful info.


Comments 0
Wow, no comments yet... why not be the first?
Leave A Comment
Hold on there, you need to login to post a comment...