As with its prequel, Splatoon 2 contains a series of collectible scrolls - dubbed Sunken Sea Scrolls - to find that help expand on Hero Mode's narrative. There are quite a few hiding in Splatoon 2's depths, and we've tracked all of them down.
Read on to find out where and how to get your tentacles on these elusive documents.
Tentakeel Outpost
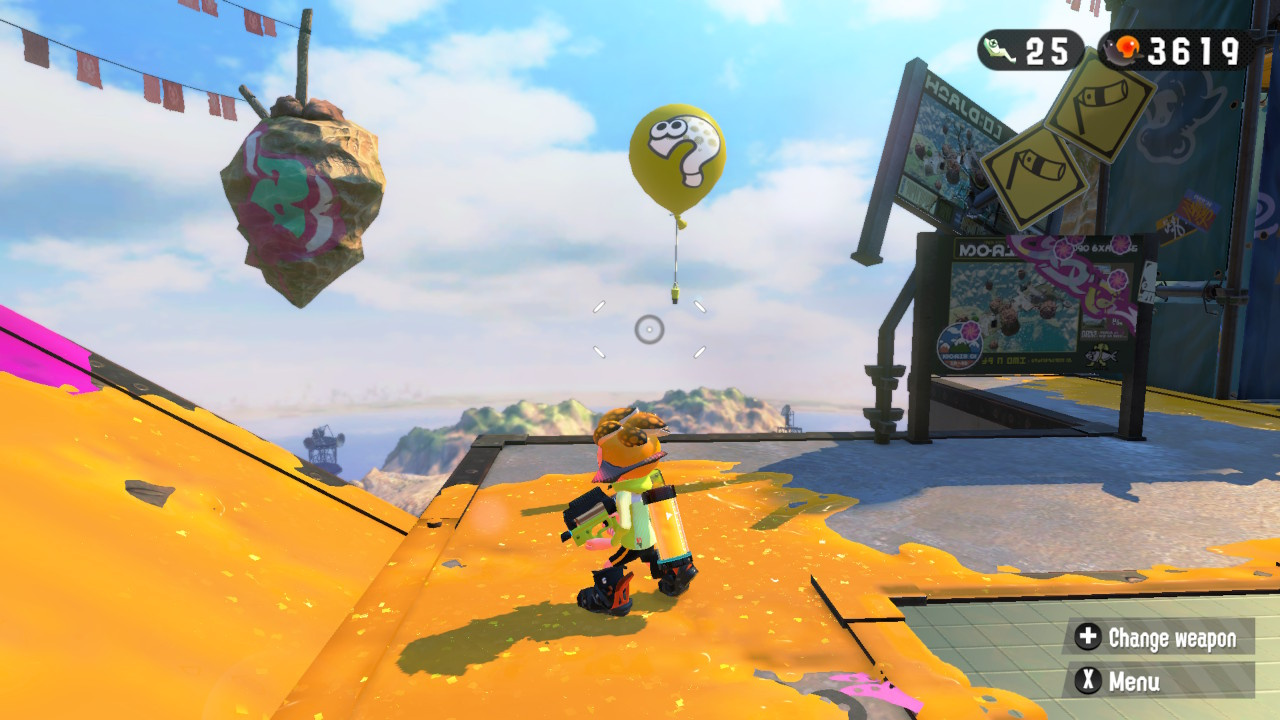
When you first arrive in Tentakeel Outpost, go straight ahead until you see a yellow balloon on your left. Pop it and follow the arrow to find another yellow balloon. Pop that, and keep repeating this process until you pop the balloon that gives you the scroll.
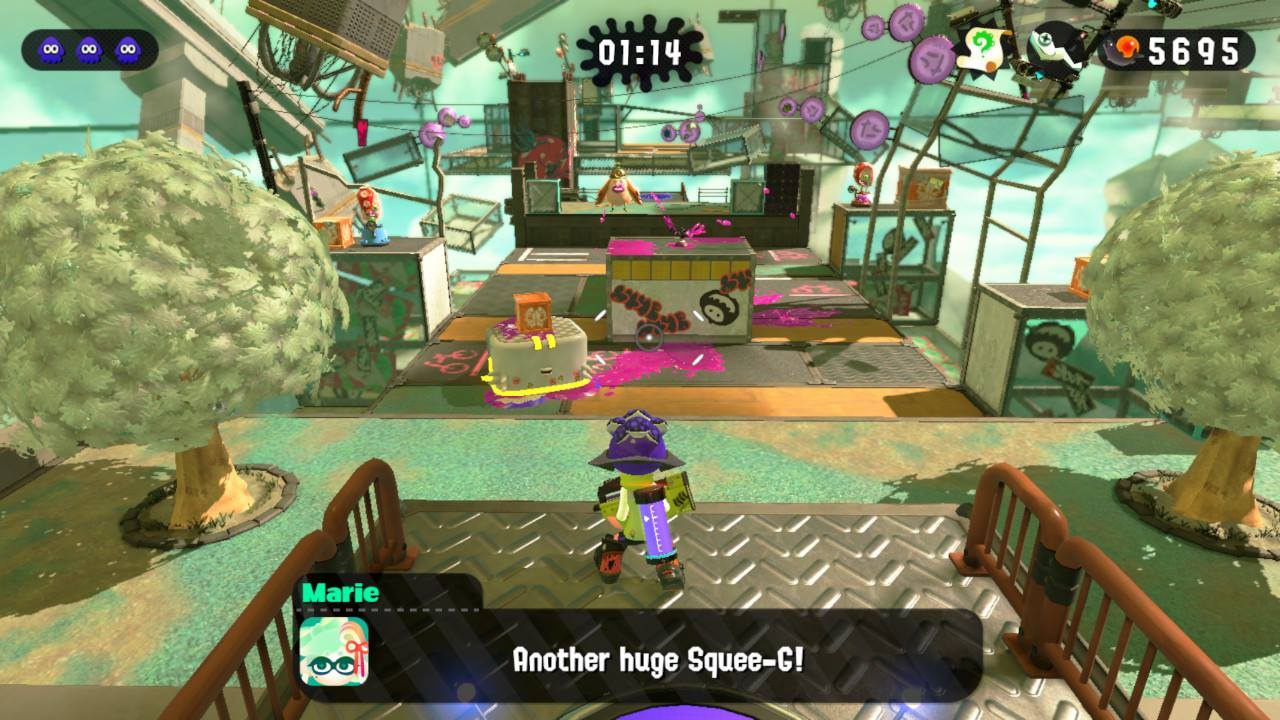
Return of the Octarians
The first Sunken Scroll is located late in this level, so don’t worry about rushing through the early portions. At one point, Marie will tell you to slip through a gate and fall through three squid rings.
Once you’ve done that, head to your left and look down to find a small walkway. Follow the walkway until you see a box lying on a grate. Ink the metal wall directly beneath the grate, make your way up and smash the box to reveal the scroll.
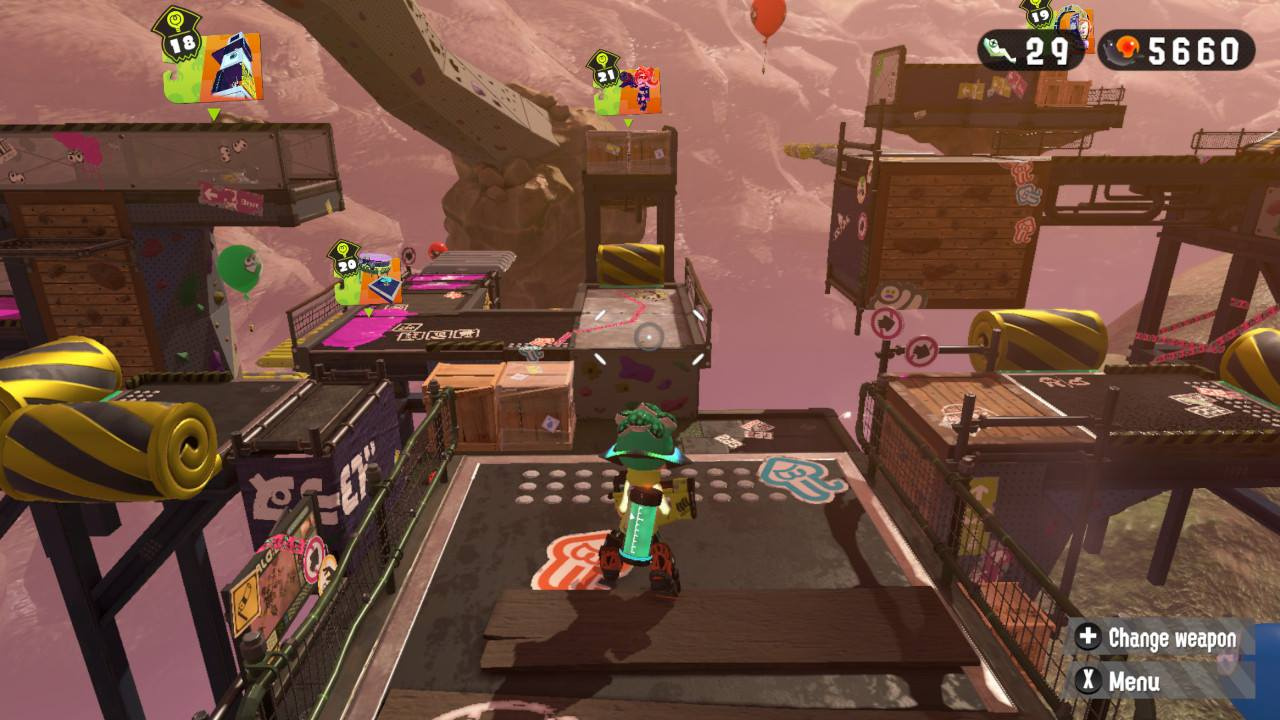
Welcome to Octopia
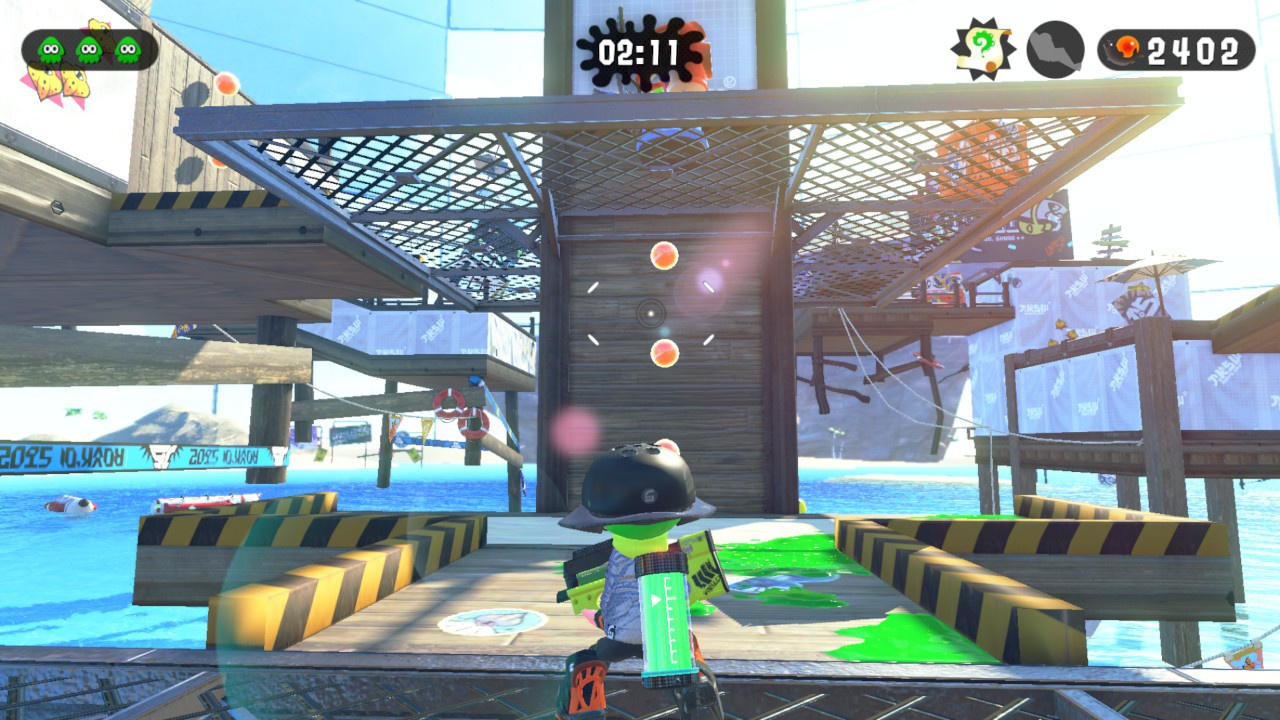
Unlike the last level, this level’s Sunken Scroll is found quite early on. You’ll come to a point where you a see the tower pictured above. Climb it and make your way to the next one behind it.
Rather than climb the next tower, move to the right and look over the ledge to find a platform covered in enemy ink. Lay some ink down and descend. Once you’re down, round the corner to the left to find a lone crate with the scroll inside.
Sunset Octocopter
To find the scroll in this level, you’ll want to proceed through the level until you face and obstacle in which you have to climb a wall in which massive ink rollers continuously repaint the wall you need to climb.
Quickly ink then scale the wall while the rollers are retracted. Once you’re atop the wall, look over the railing to your right to find a ledge. Jump down to it, then round the corner to find a vertical wall with launchpads. Use that to climb to the top of the tower where the scroll will be waiting.
Suction-Cup Lookout
From the start of the area, walk to the boss kettle directly ahead and look to your right to find a green balloon. As before, pop it and follow the arrows to find subsequent balloons to pop; get them all and you’ll get a scroll for your trouble.
Enter the Octohurler
Proceed through the level until you come across several Octohurlers on moving platformers. Eliminate the Octohurlers, then hop on one of their platformers and ride it down and around the bottom of the stage, where you’ll find the scroll nestled between two boxes in plain sight.
The Octopark
The Sunken Scroll in this level is at the end of the stage, just before the Zapfish, so feel free to fight your way through to your heart’s content. In the final area, you’ll need to grind your way up to the Zapfish, but along the way a squid ring that will seemingly through you off course will appear. Jump through it, then smash the box on the platform you land on to reveal the scroll.
Octozeppelin Invasion
After you reach the second checkpoint, defeat the first octarian you see, then use the grapple point to reach the second platform. To your right you’ll see two boxes, but if you look beyond them at the platform behind the one you’re standing on, you’ll see an unactivated rail.
Throw a bomb to activate the rail, then go around the corner and grapple up to the next platform. Once you’re up there, you’ll be under fire from an array of cannons. Hide from the first shot, then go to the left where you’ll see the rail continuing off into the distance. Jump down onto the rail and follow it to the end.
Once you land, there will be a bunch of boxes; smash them and grab what’s inside, then hop up onto the ledge using the steel box toward the back and smash the box on the railing to get the scroll.
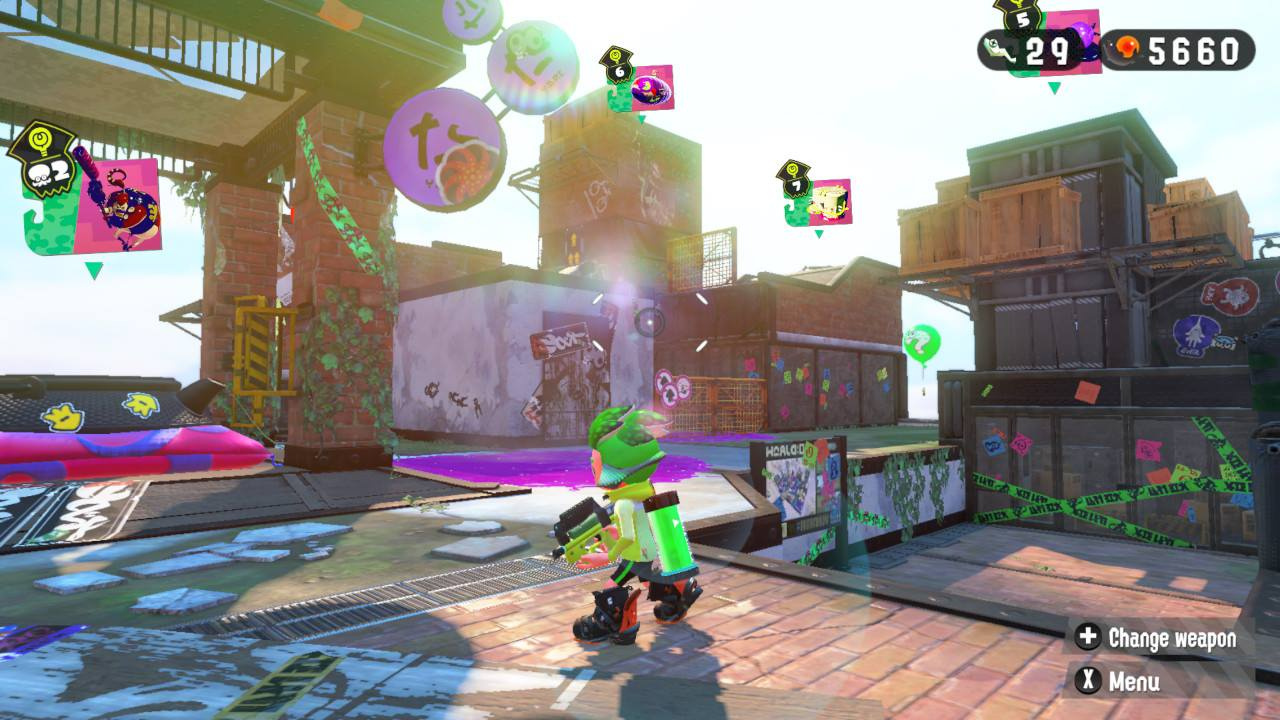
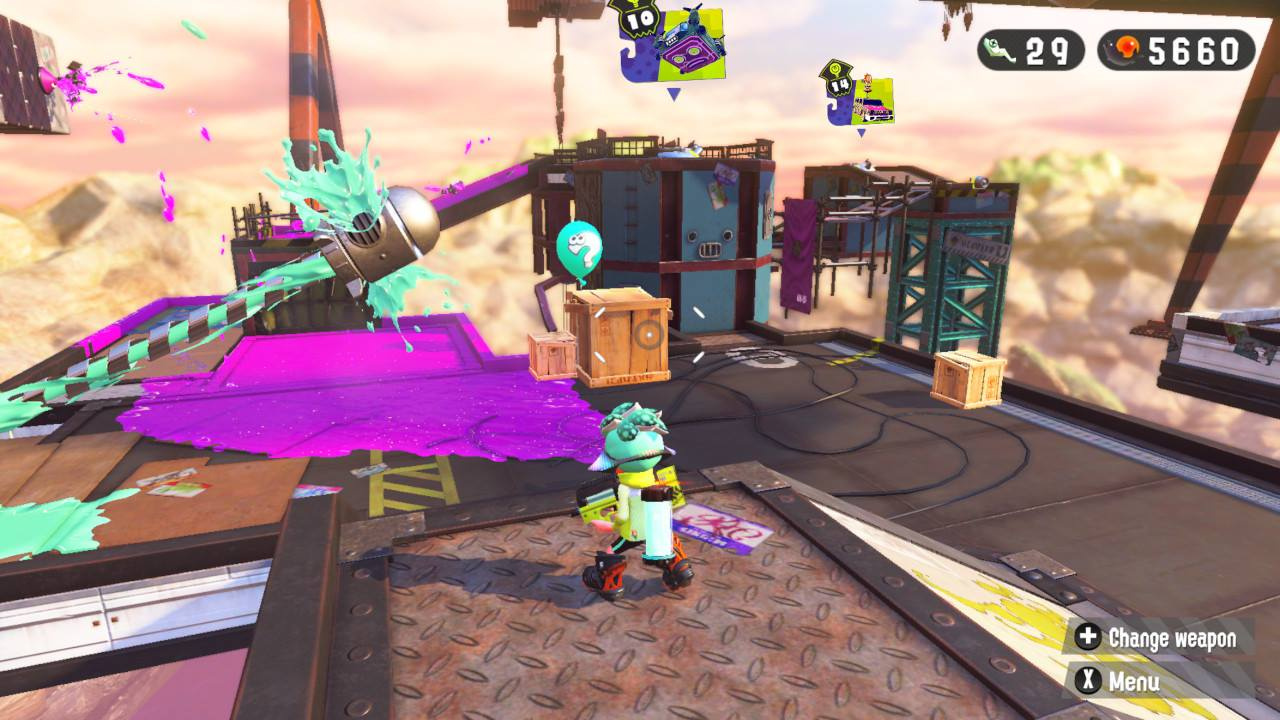
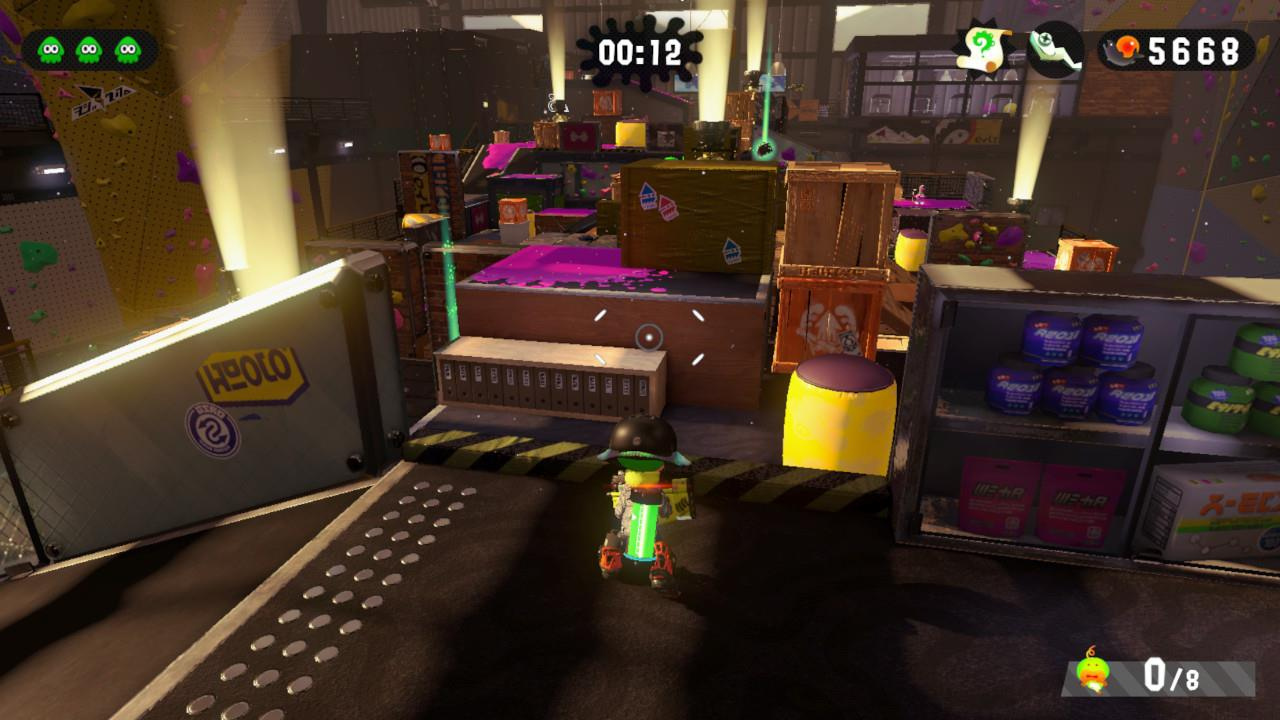
Back-Alley Cleanup
The Sunken Scroll in this level is in the open area where you encounter your second Industrial Squeegee, pictured above. Rather than go straight ahead, you’ll want to venture to the upper right, where you can find a ledge to drop onto.
Jump down onto the ledge, then round the corner. There you’ll find a small box. Smash it to retrieve the Sunken Scroll inside.
Spinning Campground
About halfway through this level you’ll come across an area in which you have to travel across six inkfurlers on opposing sides to form a bridge. The fourth inkfurler extends much farther than the others. Follow it to reach a platform on your left which houses a box containing this level’s Sunken Scroll.
Octoling Strike
This stage will have you battling several Octolings, so be careful as you make your way to the scroll. To find the scroll, hug the left wall and keep traveling North. Eventually you’ll come across a splash wall; destroy it to reveal a large box containing the scroll.
Beaker’s Depot
From the starting area, ride the rail in front of you to its end, then look to your left to find a light blue balloon. As always, pop it and follow its trail to earn another scroll.
Octoseeker Shakedown
In this level, you’ll need to take a leap of faith to find the scroll. Work your way through the level until you reach the first checkpoint. Shoot the sponge in front of you and climb it, then shoot the sponge directly in front of you again and climb it as well.
Round the corner to your to your right to find a series of four sponges; don’t shoot them all. Instead, soak one in ink, walk to the edge and then look down to find another set of four sponges. Shoot downward to hit one, making it easier to land on, then take a leap. When you land, you’ll find a small platform with a launch pad and two boxes. Smash them, take the scroll inside, then finish the level.
The Floating Garden
To get the Sunken Scroll here, you’ll need to keep an eye on what’s going on below you. Make your way to the second (name of enemy you have to chase.) Rather than chasing it for the key, make your way toward the locked vault, however, instead of turning toward it, go the opposite direction. You’ll see a small area of mesh beneath your feet. If you look down you’ll see a small platform. Kill the enemy down there and collect the scroll it drops.
Octo-Resort Spring
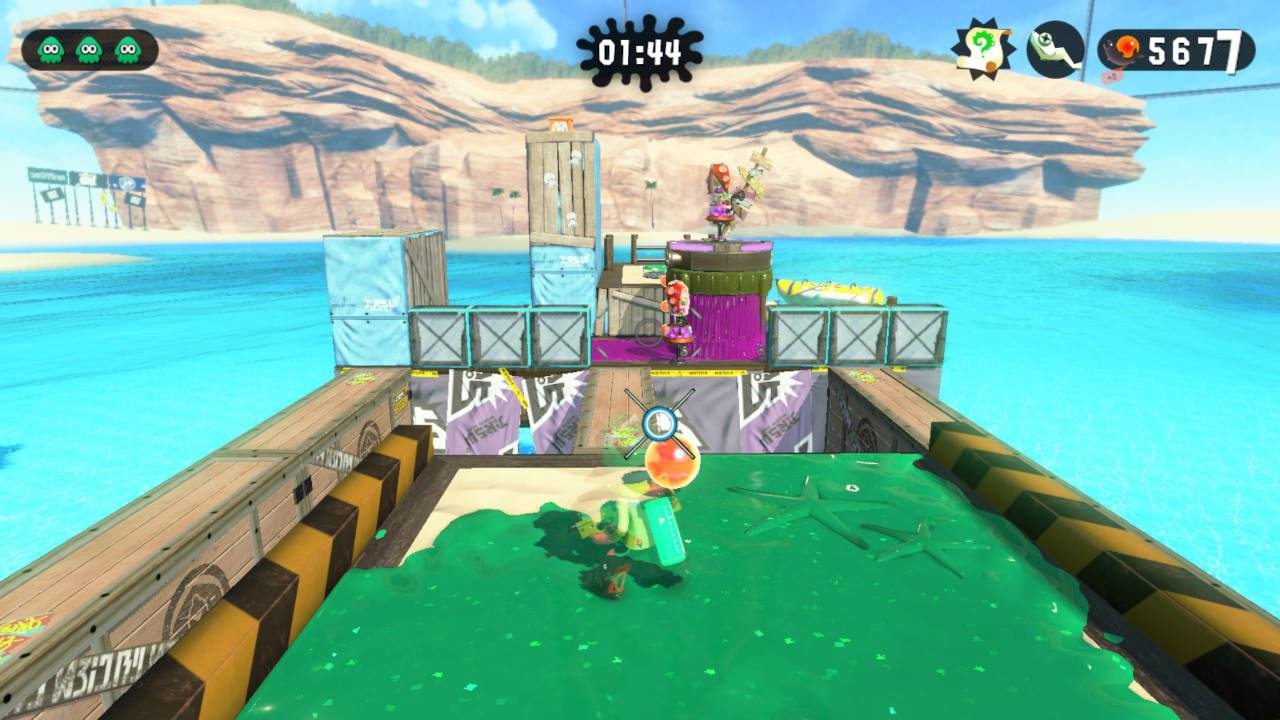
Just after the second checkpoint here, you’ll come across the area pictured above. The scroll is on top of the tower to the left, but getting there can be tricky. You’ll need to make your way to where the flooder is and let it pass, then hang a left, ink the wooden wall, climb it, then use that same enemy to pass near the tower, ink it and climb.
Dancing Floors
About halfway through this level you’ll encounter an area with two sprinklers rolling around trying to ruin your day as well as a tower in each corner. Above them is a grapple point, which is the only way to ascend that platform.
Wait for one of the sprinklers to pass under the grapple point and use the opportunity to land on top of it. Wait for the sprinkler to pass by the upper-right-hand tower then ink and climb it to find a box containing the scroll.
Parking Garage
The Parking Garage’s Sunken Scroll is easy to miss, as you’ll be busy dodging Octosniper fire. The relevant section will see you traveling in a circle around your assailant as you make use of cover to shield yourself from its Charger.
As you make your way around, you’ll come to a checkpoint. Once you reach the checkpoint, walk off the platform to the right, then turn around and swim over the low barricade to find the Sunken Scroll out in the open.
Octoling Assault
It’s time for another battle with the Octolings, and this time the scroll is under lock and key. The key is very close to your starting position, just walk forward and drop off the first two small drops. As soon as you come off the second drop, turn around to find a small box; smash it to find your key.
Once you have the key in hand, push forward through the stage, killing any Octolings and collecting any mini zapfish you find. Be careful not to collect all eight as you’ll leave the stage once you’re done. Once you reach the back, use inkfurlers to climb up to where the Octolings spawn, then head right to find the scroll in a transparent box. Unlock the box with your key, get the scroll and collect any remaining Zapfish.
Slimeskin Garrison
The balloon you need to chase this time around is green and can be seen from the starting point, slightly to your left near a pair of inkfurlers. Follow the balloons, popping them at each turn to net yourself another scroll.
Secret Bowling Alley
The first stage of Slimeskin Garrison’s Sunken Scroll is deep inside the stage, but is out in plain sight, for the most part. When you get to the part of the stage that contains massive Octoballers rolling toward you and a cannon with which to take them out, you’ll know you’re in the right place.
When in the cannon, if you look directly ahead you’ll see a box perched atop a tower near where the Octoballers spawn. Make your way to this tower and swim up it, then smash the box to get your prize.
Octocommander Fortress
This sunken scroll is hidden nearly at the end of the stage. Once you reach the final checkpoint, drop onto the rotating platform below you; on it you’ll find some boxes. Smash them, grab the scroll and finish the stage.
Towering Heights
Again, at the final checkpoint, you’ll find this stage’s Sunken Scroll, though this one is in plain view. Simply shoot the sponges in the middle, climb them and claim the scroll.
The Experimentorium
The Experimentorium is unique in that it contains branching paths. You’ll have to take them all at some point, but you can tackle them in any order you so choose. We’re here to find a Sunken Scroll, however, so you’ll want to take the middle launchpad when you come across the wall with three of them near the beginning of the stage.
Cross the first small section of grapplinks to reach a checkpoint where you’ll see the Sunken Scroll on a platform suspended in the air with a grapplink hanging nearby. There will five grapplinks to help angle your descent, but you won’t want to use them all. After you hit the third grapplink, quickly turn left and start firing your gun at the switch on the floating wall. If you don’t make it on the first try, don’t worry, there’s a launchpad underneath you that will send you back to the top to try again. Repeat as many times as necessary until the switch is activated, then go back up to the top and hit all five grapplinks to continue on your path and grab the scroll which will now be just before the launchpad taking you back to the starting point.
Propellerland
As its name implies, this level is all about propellers, and to get the scroll, you bet you’ll need to use them. There are two keys in the first part of the stage. To get to the scroll, you’ll need to collect one of them. Once you have a key, unlock the first propeller in the starting area. Once you’ve done so, shoot the propeller to raise you to a platform containing a locked vault. Don’t worry about the vault for now as you’ll unlock it later.
Once you’re on the platform, turn around and shoot the propeller again to raise it. Once the platform reaches its peak, you should see a switch. Shoot the switch and Marie will comment that something has unlocked. Walk around behind the locked vault to find a new path with the scroll at its end.
Octolings Ahoy!
It’s time once again to do battle with the Octolings. This time, you’ll be joining the fray in Moray Towers which has a bit of an infamous reputation among squid kids for being a little too sniper friendly. It seems as though the team at the Squid Research Lab is aware of this fact as they’ve placed Octosnipers in some of the best perches the map has to offer, which means getting to our scroll is going to be a bit more of a hassle than usual.
Fortunately, this scroll is easy to come across if you know your way around. To get the scroll, make your way across the center of the map to the opposite tower, then start to climb the winding walkways until you reach the cannon. When you reach the cannon, you’ll see a small area just ahead and to your left with some boxes and a wall made of grating. Smash the boxes, turn into your squid form and jump through the grating, then change back in mid-air. You’ll land on a little platform with a box on it. Smash the box and then grab the scroll inside.
Cephalon HQ
This Sunken Scroll is a bit more complicated than most, owing to the layout of this map. When you start here, take the yellow platform and keep your eye to the left to find a light blue balloon. We recommend taking the Splat Charger with you as the balloons in this challenge spawn far away.
Underground Expressway
To get to this, the first of the last of the Sunken Scrolls, you’ll want to go all the way to the very end of the stage, right up to where you can see the Zapfish. Rather than grab the little guy, look over the edge of the platform of you’re on to the right and spray some ink down there. Eventually you’ll hit on a small, narrow platform. Once you’ve located it, jump down to find the scroll waiting for you, then follow the hallway back to the industrial Squeegees and to the Zapfish itself.
The Octogalaxy
Near the end of this stage, you’ll come to a checkpoint with large white obelisk-like structures in the distance. Hop on the rail to make your way to them. After a few seconds you’ll have a short window of opportunity to jump over to another rail. Jump over to that rail and ride it to where it ends. You’ll land on a platform with some boxes. Smash the boxes to get your scroll, then continue on to the end of the stage.
Transfer Junction
Just after the second checkpoint in this stage you’ll find a tower with two Octarians shooting at you from on top of it. Climb the tower and splat them, then walk up to the edge of the tower and look below to find a sponge. Ink the sponge, then jump down onto it and turn around to find the scroll.
Platform Madhouse
At the end of this level, just before the Zapfish you’ll be riding a platform that is slowly turning as you shoot some taiko drum-like targets to keep it in motion. Just before the end of your ride, you’ll see a small red switch on near the farthest corner of the platform holding the Zapfish. Shoot the switch from your platform to reveal a launchpad.
Take the launchpad to a hidden island in the level, then lay down some ink to get the enemy on the island to faceplant, revealing another launchpad on its back. Take this launchpad to the top of a tower of boxes. Shoot all the boxes to claim a ton of power eggs and the scroll, then use the launchpad under all of them to jump right back to the Zapfish.
Paradise Lanes
As you work your way past Octoballer after Octoballer, you’ll come upon an area where there are two distinct lanes of the annoying obstacle coming your way. Make your way up the left lane, then shoot the valve to send a geyser of ink spraying into the air. Swim up to the top of the geyser then jump across to the right lane. Break the box to your right to find the scroll.
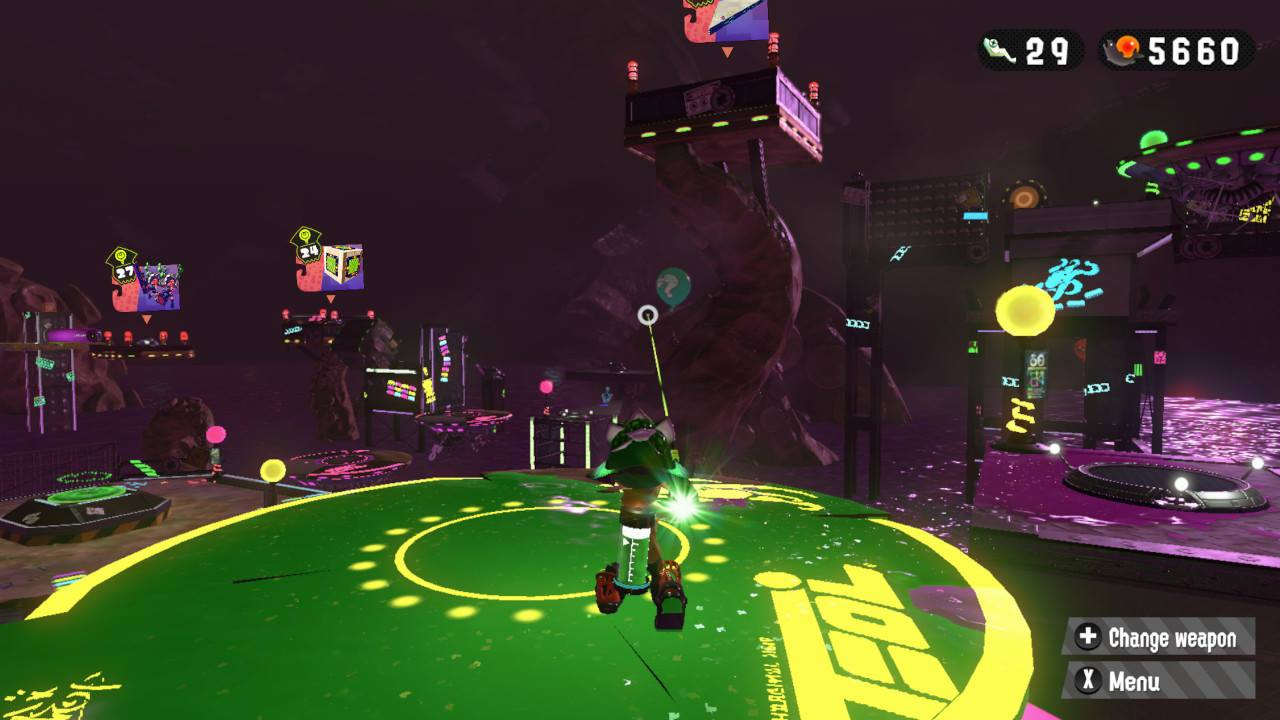
Octoling Workout
The fifth and final battle with the Octolings also serves as the stage for the location of our final Sunken Scroll. This scroll is cleverly hidden, but if you know where to look, it’s a piece of cake to get. From the starting point go a little bit to your left, the box pictured above should be immediately visible. Head over to it and replace the Octo ink with your own to reveal a box containing the scroll.
And just like that, you've filled out your notebook, stickers and all. What's next for your Squid Kid? Let us know with a comment below, and happy splatting!


Comments 17
Not going to spoil it!
Yo
wish there was a way of scanning bayonetta's amiibo to get some sweet bay items in-game. maybe her hair.
Thank you (read this in the very deep voice of the flower pots in Banjo's Mad Monster Mansion).
Spoilers, spoilers everywhere.
Scrolled straight to the comments section. Not going to read the article until I've played the game myself and hopefully can find these so called scrolls. Happy hunting!
Great job yet again Steve. Ill make sure to come check if I miss any.
@Shiryu Thanks! There's much more to come!
That sunken scroll on Platform Madness was just ... ugh! I replayed the level four times trying to find it XD
@GoldenGamer88 I did read it in that voice and it sounds suspiciously like "F--- you," like it did back in Banjo Kazooie.
@thesilverbrick Haha, never noticed that and I've been completing BK pretty much 2 to 3 times a year for 14 years or so.
Bookmarking this page for later.
Thanks in advance. 😀
@Fandabidozi You're welcome!
Do some of the scrolls still unlock weapons for the online mode?
Supremely helpful for that one last scroll. Never would have taken a leap of faith. Any chance of a guide like this for the sardinium?
@shani No, they're just for fun. To unlock the weapons for online you need to beat each level once with them. It sounds nuts, but it's actually kinda fun because some of the levels adjust for your weapon choice (such as the 4th boss fight). It might be a chore for some people, but I'm enjoying it.
@Steve_Bowling
Collecting the sunken scrolls unlocks something? Or it's just for the sake of collecting them all?
Show Comments
Leave A Comment
Hold on there, you need to login to post a comment...