With Star Fox Zero now in stores, you all have the chance to enjoy it for yourselves - we think it's a gem, but ultimately the Wii U audience will decide.
In order to help you with the game - should you want assistance - we've already shared a getting started guide and details on how to unlock all the stages. We're wrapping up our guide coverage of Zero with these tips for fighting some of the game's biggest bosses. Some of these are tricky, and we're aiming to make the battle that bit easier for you. It's worth checking out our preceding guides first, and we're following a similar stage order here, albeit leaving the story finale until the end. If you don't like spoilers, then don't read too far.
In any case, we hope these tips and videos prove useful.
Corneria - Enter Star Fox - Androsa
The first time you face this boss you only have the standard Arwing with no transformation. As a result you'll take it down the long way - you do this by targeting the dishes that are firing beam weapons. They're split between the top and bottom half of the ship, so a good approach is to sweep through one side at a time. Multiple passes will likely be necessary, and when you see beams charged up (the dish glows orange) be sure to adjust your flight path to dodge the attack. One final tip is to be not fly under a section as you destroy its dish, as it breaks away from the boss and could harm you!
Now, on your second playthrough of the level later on you should have the Walker. This is your route to 'Mission Accomplished', as you quickly defeat the enemy by only destroying one dish. When the section falls away it reveals an entry - use your first-person GamePad view to navigate towards it, and once inside transform into the Walker. Run through and you'll meet a 'core' like that seen in the game's second level, Sector Alpha. Blast away at the crystals with your lasers and / or bombs, using ZL and the right stick to strafe as needed. The video below shows how this is done.
Titania - A Fox in the Desert - Scrapworm
If you don't know the tricks to this fight it can be fiendishly difficult, but is very manageable when you know what's coming. We've going to assume you're fighting it as part of an initial run-through without the Gravmaster. As this is an all-range battle remember that you're in full control of the throttle with up on the left stick - if you don't use the throttle you'll come to a dead stop.
This mechanised worm has a primary weak spot by its mouth, but this is often covered up. When the fight starts you attack the exposed core and the worm emerges. In the initial phase you want to get away from the front and target weak spots on the sides, while one is a little higher and may require you to hover. Sometimes the worm will slam down and swing around, so try to hover to avoid this.
When you destroy these weakspots the worm will face you, so quickly get a little distance and train your aim on its mouth. When it glows read and opens fire a charge shot missile (it will lock on) and unleash as many other quick shots as you can. When it glows purple it's preparing a tractor beam - rather than try to dodge it just ensure you're at a good distance, as the mouth is exposed when the beam grabs you - unleash a charge shot and lots of attacks to make it drop you.
At one or more points after this the worm will burrow underground and shoot out some small enemies - target their glowing purple spots. You'll then need to repeat the attacks on the weak areas to the side and top once again.
After a lot of damage it'll start to suck in the sand, with Slippy warning you to outrun it. Boost away from the central point until you have a decent amount of room, turn around and then bombard the core. Once that's done you should be nearly there. Keep attacking the mouth when it squares up to you, and the job should be done.
Fichina - Frostbitten Fray - Mother Strider
This is a tough boss, it must be said, and you're going to need full mastery of the Landmaster and Gravmaster. The first phase is targeting red weak spots on its legs - take down three of these that are next to each other and it'll fall down. At this stage you need to transform into your Gravmaster, gain some altitude and attack the red weak spots on the top end of it - these represent the top area of the legs you've just shot away.
When you've hit those you need to boost out of the way and, more than likely, switch back to the Landmaster. Please not that the legs are colour coded. Amber weakspots are those that you've destroyed top and bottom but have grown back, so target red areas underneath - don't blow out amber legs again, as they don't unlock new weak spots on the top side. You need to repeat this process - shoot three legs, fly and hit the top areas - until all weak areas are gone.
Occasionally it'll leap up into the air and slam down. You can see the shadow but, frankly, it's tough to avoid damage. If you're very quick you may be able to boost clear.
An alternative approach, meanwhile (in the video below), is to back away and hover with the Landmaster - either way works when executed well.
You're not done yet though. A central area on top is now the focus, so now you need to shoot out legs again (any ones as long as they're next to each other are fine). When it stumbles the central core is briefly exposed. We mean it when we say it's brief - you need to fly up there (or hover with the Landmaster) and get shots away promptly, and then get out of the way quickly as it regains its footing. It's advisable to have saved your bombs for this point, as with such limited time you'll want to do the most damage possible on each attack.
Fortuna - Dangerous Skies - Monarch Dodora
Well, this is another awkward boss encounter. This metallic phoenix thing is a tough fight, as it has multiple tricks up its sleeve. It has weak points on its chest, tail and back, all of which are targeted.
After an initial run at its chest Dodora will take flight, and you'll need to make liberal use of Target Mode (ZL) to check its positioning and adjust. The first target is the tail, but be wary that it fires a deadly beam as you attack it - be quick in taking it down and try to manoeuvre to safety when it shoots. When that's down you want to target the two zones on its back as aggressively as possible. Temporarily switching the GamePad view to the TV (with the Select button) may help.
After doing a fair bit of damage Peppy will suggest it's getting tired. At this stage get to the central platform and transform into the Walker. It'll create a wall of wind and attack from the outside. When the wind is gone get back into the Arwing setting and the second half of the fight is underway. Its tail and one back section weak points are back, so target these once again - some other small enemies will also come into the reckoning, so quickly shoot them down when they're in your view.
The fight ends, ultimately, when the back and chest points are destroyed, the tail is optional. The front point is extremely dangerous to attack as it unleashes a barrage of fireballs. Try to find angles above and below to limit the hits you take, and use your bombs to target the front area. You don't want the final part to drag on, as it'll easily shoot you out of the sky.
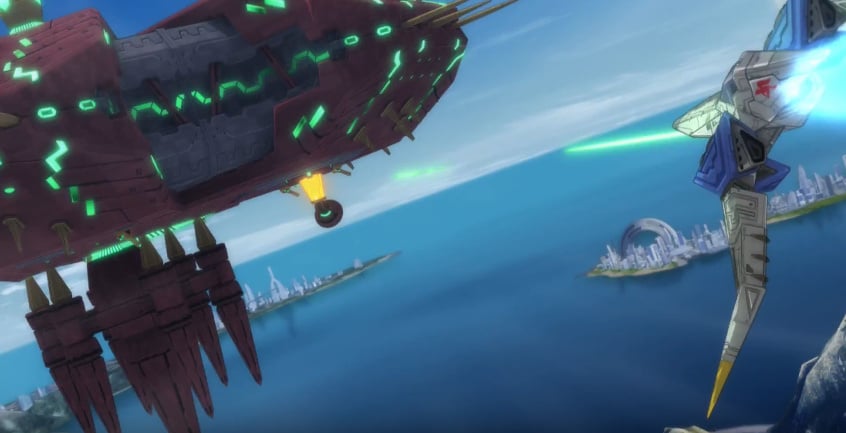
Sector Omega - Blasting Through - Attack Carrier
Here's one of the most nostalgia-fuelled enemies of the entire game. Its weak points are all initially in its front, with two on its right and one of its left.
As this is in All-Range mode you'll need to manage space well - initially, when the fight begins, you simple need to avoid contact with the enemy. What we have in the early stages is a game of cat and mouse - try to get some distance (using the ZL view for perspective) before approaching the boss. It should square up to you, at which point you need to apply the brakes (down on the right stick) and blast at the openings. Sometimes it'll fire at you, while on other occasions enemy fighters will emerge. By now you should be well-honed in the controls, so continue to manoeuvre, square up and blast away at weak spots.
The second phase of this fight is trickier. The Carrier opens up to reveal multiple guns in its core shaped like crystals. You need to destroy all of these. After initially opening up the ship will rotate with deadly beams - angle yourself alongside the ship while shooting at the exposed cores. Don't worry if you take a few hits as there should be multiple silver rings available nearby.
Corneria - Hidden Plans
In this late stage you come up against Gigarilla, which isn't quite as tough as its intimidating form would suggest. First of all, ignore logic from Nintendo games that say glowing red areas are weak spots - shooting Gigarilla's chest and hands will do it no damage at all.
Its weakness is on its backside, marked by a cross (rather humorously). Though it's tempting to use Target View to fly behind in the Arwing, the simplest method is to deploy as the Walker and quickly dash under its legs. Get a decent distance away and hit ZL lock on, which will automatically swing your Walker to face it - use GamePad aiming to blast away at the weak spot. After a couple of seconds it'll swoop around and stamp the ground, at which point you repeat the process.
Once its backside is blown away you need to transform into your Arwing. Use Target Mode (with ZL) to get around behind it but then let go of ZL and fly towards the hatch. Transform into the Walker nearby, land on the platform and hack the panel. This is undeniably tricky, but there are points where Gigarilla charges or shoots and pauses for a spell - they can be key opportunities.
Aquarosa - Floating Target
This is a Boss level unlocked via Corneria's portal, so there's no preparation for this one. This time around you're attacking the same boss but with a slightly different design and based on the sea, so the targets are still dish-shaped cannons. In theory you're unlocking this quite late, and it's a tricky encounter. Not only are you dodging beam attacks, but there are relatively aggressive ships attacking you in the air. If a red exclamation mark shows, do a somersault to get them off your tail.
The first half of this fight involves attacking the dishes on the upper-level, so the key is to watch for imminent beam attacks and be aggressive in shooting them. After a period, however, electrical energy can be seen around the central area, this means an electromagnetic shield is being deployed, so you need to fly away from the boss as it expands; watch closely and you'll see it start to recede, at which point you initiate a fresh run.
When most of the dishes on the top are down the boss will rise up and you'll need to target cannons on the lower level. The difficulty ramps up here as more cannons shoot at you, while the electromagnetic shield becomes more frequent and moves quicker. You'll be ducking in and out frequently, but a handy note is that your lasers do shoot through the shield. So in this latter stage begin your run towards the boss with the receding shield, shooting as you go.
Great Fox - Cosmic Dodora
This fight is tricky not only because the boss is awkward, but because you've already come through what is a gruelling extra stage. You already know about Dodora's attacks and weakspots from the previous entry above.
A twist here is that Great Fox helps you out. ROB tells you when its cannon is ready, and you need to get Dodora to follow you in front of your home ship - it does huge damage. A couple of these passes combined with the damage you do should see it off.
Hunter - Lone Wolf
This isn't the only face off with Star Wolf, of course, but this one is distinct from the standard dogfighting in other encounters. Wolf brings out some new tricks here, such as transforming into a wolf shape and using a charge move.
The initial tussle is a standard albeit difficult fight - we recommend that when Wolf uses his ground form you nail him with Bombs when he pauses, a great way to drop his health quickly. You can also drop into Walker form, which is a handy way to focus Wolf on the ground.
The key point comes when he starts charging you. He glows red and, a moment later, zooms towards you. If in the air dodge this with a somersault (X button), while on the ground you'll want to use the Walker's evade. If the charge connects it does a lot of damage, so the key to victory is in dodging it.
Venom
Now, this is a guide, so spoilers are a given. But still, this is the final boss, so if you don't want to see it or know about it go no further. We'll even put the awesome 'The Battle Begins' animated show below so you don't see any of the text.
Still here? If you are then spoilers of the ending are below.
As expected, Andross is your foe, and he's certainly easy to beat when you know how, but potentially frustrating if you don't. It starts off with you on the outside in the 'Target Mode', and beams are fired that you need to dodge by navigating up and down. When they stop you need to find an entrance - there are lots of platforms, but you need to look at the GamePad view for those that are glowing blue. Find a blue platform, fly up to it and go through in Walker form.
Now you're fighting Andross himself, and your first targets are weak spots on his hands. Initially his moves include opening them up ahead of a punch - easy to get hits in to make him flinch - and two squashing attacks. We recommend locking on to Andross with ZL here - when his palm emerges above you combine dodging with shots on the weak spot. When both palms come in and pause as if to crush you it's relatively easy to get in enough hits to make him abort the attack. When one of the hands is destroyed he'll unleash a wave of energy. As soon as a hand explodes transform into the Arwing and get through an exit promptly.
You then repeat the initial step - dodge beams of energy and, when they've stopped, use the GamePad view to find a blue entrance. This time around (back in Walker form) you're battling one hand, though a variation is that it'll grab you in a tractor beam. Blast away at the weak spot as it draws you in, flying to safety when it drops you. When this hand explodes you need to fly outside again, before dodging more beams and re-entering through a blue platform.
Now we're into the home stretch as you fight Andross' head. We recommended locking on again, and the weak spot you're targeting (when open) is the mouth. One move is for the head to spit debris towards you - keep dodging to the right while constantly firing at the weak spot. In another move the head will pause and then charge towards you - again, dodge rapidly while firing at the head. Finally it will rotate a beam around the room - when it's low you need to hover, and drop back to the ground when it lifts up; the beam will go around four times in each attack.
Through all of this you will stun Andross, prompting him to go dizzy. When this happens quickly switch to the Arwing and boost to the opposite end of the room; as you transfer back to the Walker use ZL to point towards Andross and there's a weak spot on his back. Bombard it with hits, and after two or three of these attacks he will be defeated.
There's one more step, Andross pursues you into a portal tunnel as you make your escape, with your Arwing facing towards you. Simply wait for him to pause and look in one direction and weave out of the way. After a few times doing this an event triggers, but there's one more thing to do to get a 'Mission Accomplished'. When Andross turns away from you right at the death hit B to turn 180 degrees. Quickly shoot the weak spot to finish him off for some extra hit points.
Phew, that's it! Those are the major bosses. There are some Star Wolf skirmishes too that are down to dogfighting skills, and our stage guide (linked below) has a few pointers for sub-bosses, but hopefully this guide will help you past the toughest encounters.
Further Reading:


Comments 9
I want to look at all of these but for now I'll scroll past it all and save myself from spoilers. I'm picking the game up later and want to see these all as a first time reaction when I'm playing
Just played the first couple levels. Really enjoy the game so far. Yes the controls take a lil bit to get used too, but they are awesome. I'm glad they are making good use of the gamepad for a change. Co-op is good to do while adjusting to the controls. Star Fox Guard has been fun too, but I can tell it is going to get stressful. c:
Give us a guide to guard!
@TheHeroOfTime333 I know what you mean. I never read guides unless it's strictly necessary. Just beware, Nintendo Life has been flooded with Star Fox Zero articles.
Huh. I was thinking the reason Andross was all Silver was because he was another robot just like the fake Andross in 64, but a shame that was just it.
Ah well, maybe Nintendo will surprise us with a free update or DLC...
Just finished the first run a couple hours ago. It was pretty much a blind run since my only experience with 64 was beating it once at a friends place 20 years ago, that and a few stages of 64 3D (didn't bother finishing it). None of that experience transferred over, sadly. It's not really that difficult once you see what's going on. Failures for me were usually about getting greedy with the medals and power ups. Kept dying on Andross because it took a while to figure out how to deal with the tractor beam (pulling back on the L-Thumb prolongs the attack, just like the original Star Fox Andross fight), and the inside rotating laser attack (just dove quick as it came). Controls got a lot easier once I figured I have to ignore the gamepad completely until absolutely necessary. It also helped that I got used to the game's aiming in 3D space (the two squares basically form the boundaries of a corridor that your shots travel through). I basically let my body take over the aiming, as it was ready, pun intended. It's also really easy to spray shots around at the right speed to shoot a formation of enemies with the gyro sensor. It's not as sensitive as Splatoon aiming, though. It's somewhat akin to the old Atari Star Wars vector arcade game from the 80's and its funky yoke control. Good thing I'm used to it, I've been playing that game since it came out.
When my pad finishes charging, it's time to take on Arcade Mode.
Interestingly when I first got to Corneria with no walker mode I tried to fly into the open hole and got thrown into walker mode. It made for an interesting introduction to the vehicle.
I used to be awesome at the old Star Fox games....Andross has killed me 5 times so far in this one.
@Acein210 I did!
Tap here to load 9 comments
Leave A Comment
Hold on there, you need to login to post a comment...