During your escapades in Zelda: Tears of the Kingdom, you may very well happen upon your first Sage's Will quite by accident as you explore the many sky islands that hover high above the surface of Hyrule.
In this guide we'll explain the purpose of these items as well as showing you the locations of all 20 Sage's Wills. Let's take a look!
Subscribe to Nintendo Life on YouTube844k
Zelda: Tears Of The Kingdom: All Sage's Will Locations & How To Use Sage's Will
What Are Sage's Wills & How To Use Them
A Sage's Will is a collectible that can be found in chests dotted exclusively around the sky islands in Zelda: Tears of the Kingdom.
Once you've got four Sage's Wills, you can take them to a Goddess Statue in order to strengthen the bond between Link and his Sage pals, in turn improving their abilities.
Focus your Sage's Will power-ups on the Sage you tend to use the most, as it gives them a nice attack boost than can really help out in tough battles.
Before jumping into the search for all the game's Sage's Wills, pack plenty of Zonai tech; elixirs, arrows, bows, batteries, and anything else that will help you navigate the sky islands, and take on some large foes such as Gleeoks and Flux Constructs.
Now, let's look at where to find them all the Sage's Wills.
All Sage's Will Locations
Eldin Sky Archipelago, 1765, 2267, 0827
Jump in the Eldin Canyon Skyview Tower to easily glide over to this small island, defeat a few constructs and grab this first Sage's Will from the chest.
South Eldin Sky Archipelago, 1779, 0978, 1226
Head to the location shown below in the South Eldin Sky Archipelago, then make your way to the southernmost island of this group.
Once there, head down to the lower level and inside, where you'll spot some metal panelling covered in roots. One side of this box is missing its panelling so just chop the roots out of your way to hop in and grab your next Sage's Will.
Sokkala Sky Archipelago (Akkala Highlands Sky), 3819, 1635, 1110
Head up to this region of the sky to reach the great big stone globe. Head inside and use Ultrahand to rotate the globe so that the main opening sits level with the floor, half on the topside and half beneath.
You can now climb down and through the opening to reach underneath the floor to find a chest.
Water Temple Entrance - The Great Wellspring of Hyrule, 3418, 0644, 1317
Head to this multi-levelled island and drop down to beside the shrine here (Igoshon Shrine). Here you'll find a Flux Construct with a Sage's Will chest on its shoulder.
You can choose to defeat the construct and take your prize or simply yank it off with Ultrahand, open the chest and flee the scene.
Lanayru Sky Archipelago, 2915, 0530, 0950
We're back inside another great big spinning globe. This time there's a Zonai Fan hard at work turning a central wheel.
Shut the fan down and then manually manipulate the globe to have its main opening at horizon level. Now drop down to nab the Sage's Will in a chest under the floor.
Lanayru Sky Archipelago, 3011, -0230, 0894
Another Flux Construct with a chest on its shoulder for you this time, and with enough stamina you should be able to reach this small island from the furthest south island of the Water Temple area.
North Necluda Sky Archipelago, 1817, -1122, 0923
You can take off from the eastern side of Great Sky Island to reach this area which has a launcher at its centre. Turn the wheel to direct it at the small landmass shown below to boost yourself over and find the chest you're after.
Faron Sky Archipelago, -0319, -2587, 0894
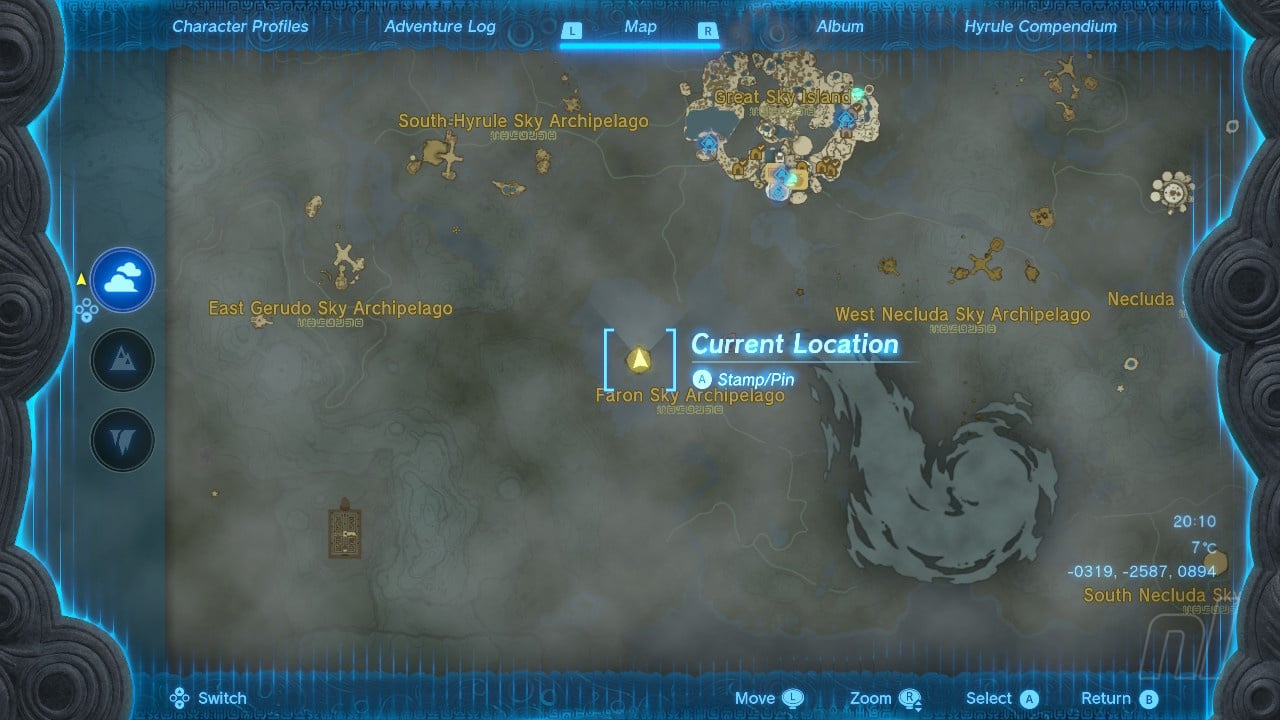
This time we're going to head directly south from the Great Sky Island to reach another Flux Construct face-off. Travel to any point or shrine on the south coast of Great Sky Island and glide your way over and down to this one without need for elixirs or anything besides your trusty paraglider.
South East Necluda Sky - Directly Above Eventide Island
In order for us to reach this one there's some work to do and it's essential to pack plenty of fans, rockets, wing devices, batteries and elixirs to make a flying machine that'll go the distance.
Blast out of Rabella Wetlands Skyview Tower and land on the islands to the east where you'll find Kumamayn Shrine. Before you get to the shrine here you'll need to make use of lots of Zonai Springs to get to the largest island of the group. Once you're here, head to the easternmost point, near the Flux Construct III and then use your flying device or whatever else you've come up with, and as many batteries and elixirs as needed, to fly all the way over to the far southeast of the map.
When you get to the island directly above Eventide, you'll get a King Gleeok-shaped surprise. So you'll need to prepare yourself for this eventuality too. Stock up on food and get plenty of arrows, Keese Eyeballs, and a fancy bow to make things easier.
Once the Gleeok is defeated you'll receive a chest containing the Sage's Will as a prize. This is a super tough one to grab overall, so we suggest you wait until you've got plenty of stamina, hearts, a strong multi-shot bow, and plenty of experience dealing with Gleeoks.
South Necluda Sky Archipelago, 2576, -3604, 0894
This Sage's Will sees us launch ourselves from the very same island that we used to kickstart our flight for the last Will. Use Kumamayn Shrine as a shortcut or blast out of Rabella Skyview to get here.
Now all you need to do is point the central launcher at the island to the south and fire yourself at it. Link will easily make the trip and once you land you'll simply need to yank the chest off the Flux Construct III here.
South Hyrule Sky Archipelago, -0953, -1735, 1006
A fairly easy one this time. You can reach the island shown below by taking off from In-isa Shrine on Great Sky Island. If you find yourself coming up short, you can land on the island close to it and use the Zonai platforms and rockets to give yourself a final push.
Once on the island, you'll find an upper and lower water pool. Grab the log from the upper pool and then use Ultrahand to place it behind the water gate on the lower pool. When you've got it in place, use Ultrahand to lift the gate and attach it to the log to stop it from closing again. You'll find your chest at the bottom of the drained pool.
East Gerudo Sky Archipelago, -1961, -1777, 1140
Another easy one to get to. Jump into Gerudo Canyon Skyview Tower and head east to reach the island with a launcher on it. From here you can launch yourself to the north west to reach the island with our chest on it.
Once here, there are three levels, the surface and two lower areas. Head to the middle area, grab the Zonai Mirror device and drop it down the crevice beside the Zonai flame device so it lands on the lower floor. Now head down here to find a cage with the chest inside. Make sure it's daylight (set a fire to rest if not) then extend the mirror out to catch sunlight with Ultrahand and use it to reflect onto the mirror above the cage to open it.
South West King Gleeok Battle, -4445, -2725, 1419
This 13th Sage's Will is another toughie, comprising of a long jaunt from either East Gerudo Sky Archipelago or some slick wing device action after launching out of the Gerudo Highlands Skyview Tower. We recommend heading to the furthest west you can in the group of islands in East Gerudo Sky Archipelago, as this island has wing devices, fans and launch pads, everything you need to make the journey - so long as you've got enough battery power.
Now, just as with the South Necluda Sage's Will, you'll need to fight another King Gleeok to get your treasure chest. So pack plenty of arrows, keese eyes, a good bow and plenty of health items and elixirs. Good luck!
West Hyrule Sky Archipelago, -2285, -0393, 0894
Our next one is another Flux Construct battle and to reach this small island, if you don't have any nearby shrines activated, we want to launch ourselves from Gerudo Highlands Skyview Tower and make for the collection of islands just a short glide north of your position.
Head to the island we've indicated below and you'll find a Zonai platform which you can use to propel yourself by fan, rocket or whatever method you prefer, to the platform where the construct battle awaits you.
Once on the island, it's business as usual, take out the Flux boss and nab the chest. If you don't fancy the fight, you can also just pull the power block off the boss so it disassembles briefly and then quickly open the chest before diving off the island.
North Gerudo Sky Archipelago/Starview Island, -3457, -0264, 1938
A multi-step effort for our 15th Sage's Will. There are numerous ways to approach this, but we kicked off by blasting out of the Gerudo Highlands Skyview Tower to land on the nearby island with a pool on it, as shown in our pics. Once here, take out the construct on the Zonai platform and use rockets and/or fans to get the platform up and away towards the large globe structure ahead.
Once you've got some height, you want to make a flying device to get even closer to the globe island containing our prize. Remember you only have around a minute before your current platform disappears so work quickly! You can make an airbike - check out our guide to this quick and easy vehicle - or even just make a hot-air balloon and get as high up as you can, then gliding onto the globe should be straightforward.
Now that you're at the globe, which reveals itself to be Starview Island once you step inside, you'll need to solve a quick light puzzle. To do this, jump down to the central platform in here and rotate the centre mirror so that it's facing the yellow lock ahead and up a little. Now turn right and you'll see the mirror to your side is lit up. Use the air currents in the cave to follow this light beam, turning the mirrors you come to as you go in order to line the light up with the next mirror in the chain.
You'll eventually bring the beam back to the mirror you turned in the centre, activating it to open the lock revealing a secret shrine. Once this is done, turn the mirror you are at to the right a little until it meets the yellow lock sat facing up in front of a caged area. This will open the cage and give you access to the chest containing your Sage's Will. Phew!
North Tabantha Sky Archipelago, -3780, 1572, 1237
This next Sage's Will is sat in a chest on an island directly above Rito Village. To get here we launched up and out of Rospro Pass Skyview Tower just north of Rito. From here it's a fairly easy glide south to a waterfall that you'll see hanging down from the island we want to get to. Stock a single stamina replenishing elixir or meal here and you should be able too reach the waterfall and then travel up it utilising your Zora Armour. (Make sure to check out our guide to finding the Zora Armour if you've yet to get this vital outfit!)
Once on the island, to get to the chest containing your Sage's Will you'll need to make your way to the westernmost area by either putting together devices to travel on the rails or by whipping up your own method of air traversal. There are plenty of minecarts, rockets, fans and wing devices lying around to make use of. We were lazy and used Autobuild to make a dirigible.
South Hebra Sky Archipelago, -3068, 2129, 0647
If you happen to still be in the location of the last Sage's Will chest on our list, you can simply dive off that island above Rito Village and easily glide over to this next one. If not, a short glide east from Rospro Pass Skyview Tower will get you there too.
Once you've arrived, you'll need to reach the northernmost island of the two here. Luckily they're connected by a rail and there are plenty of hooks and fans and rockets around to build a suitable method of traversal to get to your chest!
West Hebra Sky Archipelago, -4470, 2168, 1252
Ready for another King Gleeok battle? Yep, neither are we. But once you reach this platform on the far west of the world map, that's exactly what you'll need to get into in order to nab this Sage's Will.
From Rospro Pass Skyview Tower, head north to glide onto the island containing Ijo-o Shrine. From here, you'll need to get yourself some serious air if you're going to reach the platform, which is close but very high up. Build yourself an airbike, hot air balloon, rocket-powered wing device or whatever you prefer - there's a Device Dispenser on the island with rockets and flame emitters - and head up as far as you can to then glide over and engage the King Gleeok.
Once again, make sure to bring a good bow, lots of arrow and plenty of healing meals and elixirs to this battle, and good luck!
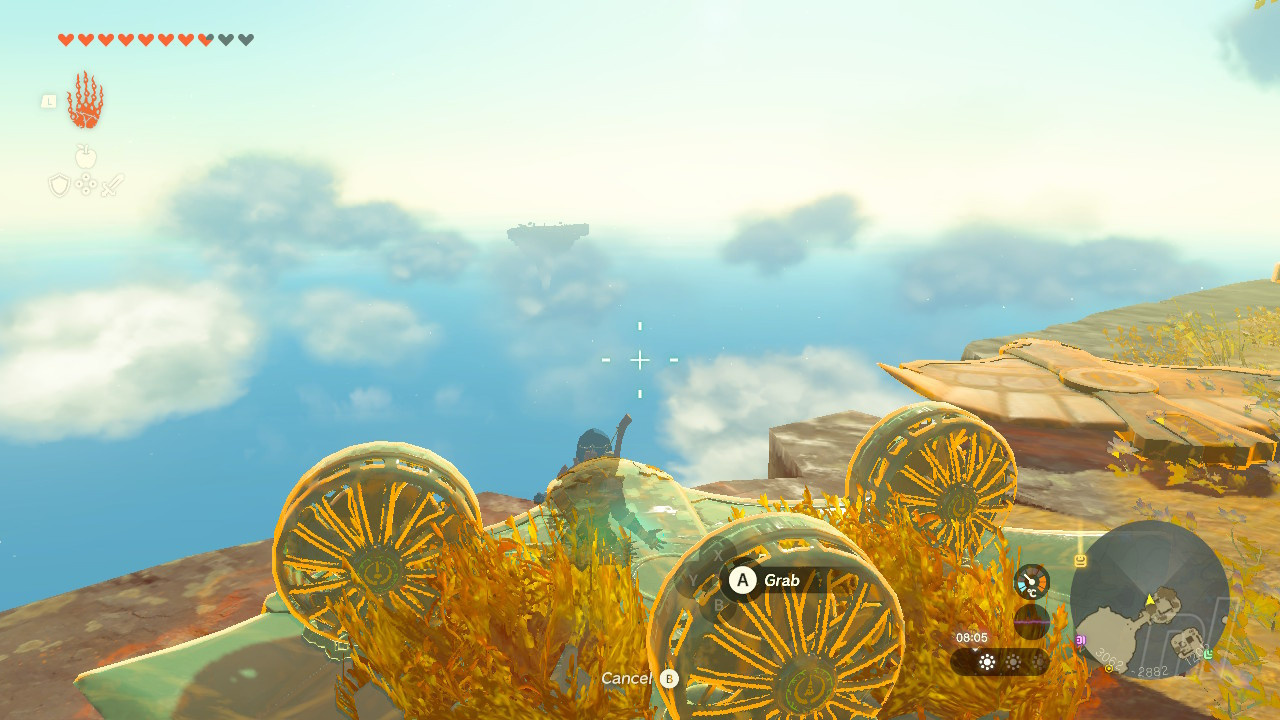
Thunderhead Isles, 0967, -3306, 0846
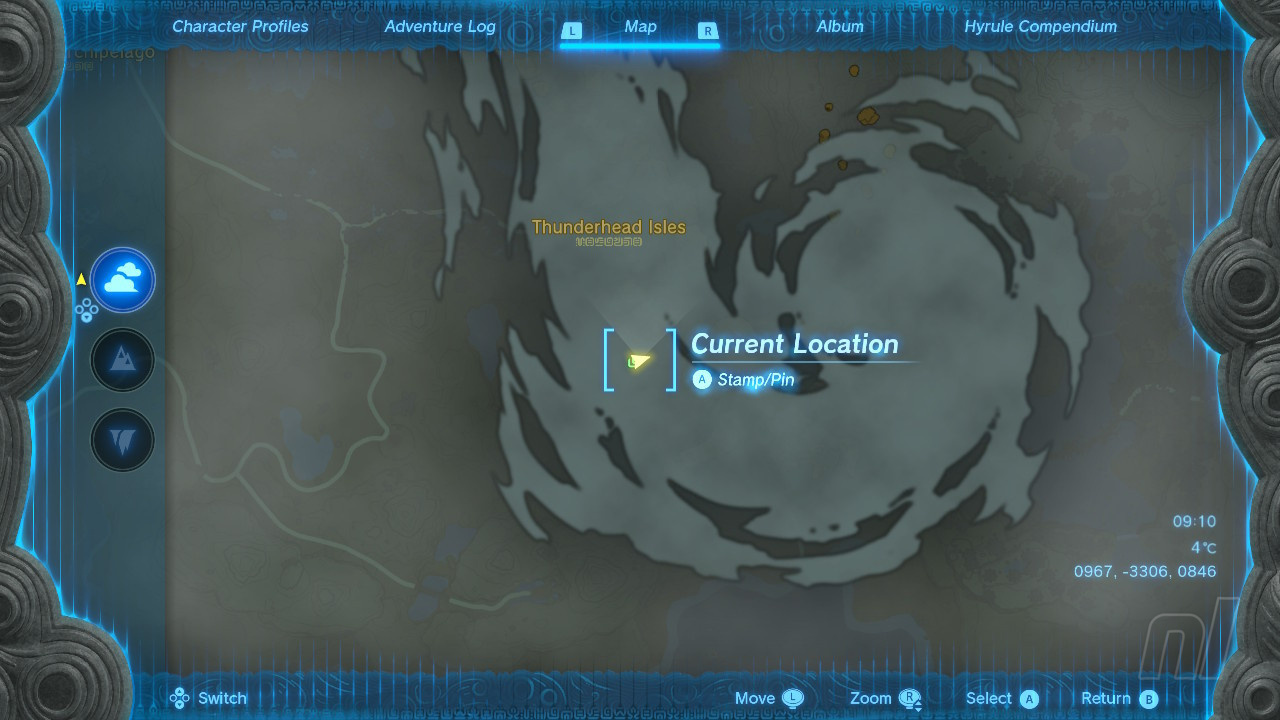
We're heading into that big whirly storm on your sky map now. To reach this area we launched from Rabella Wetlands Skyview Tower. From here, we glide a short ways to the waterfall slightly to our west then ride up this using our Zora Armour. Once on this island you can see the storm swirl just south and a little lower than your location. You can now construct a flying device to get you a little closer and into the clouds themselves.
The best way to locate the exact island we need to glide to here is to mark the surface map with a pin directly underneath it. Check out our map below to see where to place this pin, which is in Guchini Plain, east a short way from the Highland Stable. As you approach the islands stay well above the clouds and you can easily then see down to the islands below you, preventing you from getting lost in the fog.
Once on the island you will be shrouded in fog, making it a little hard to see, but you'll be able to make out breakable boulders on the ground. Smash these to then drop down into a small cavern containing your treasure chest.
Dragonhead Island, 1309, -3210, 0459
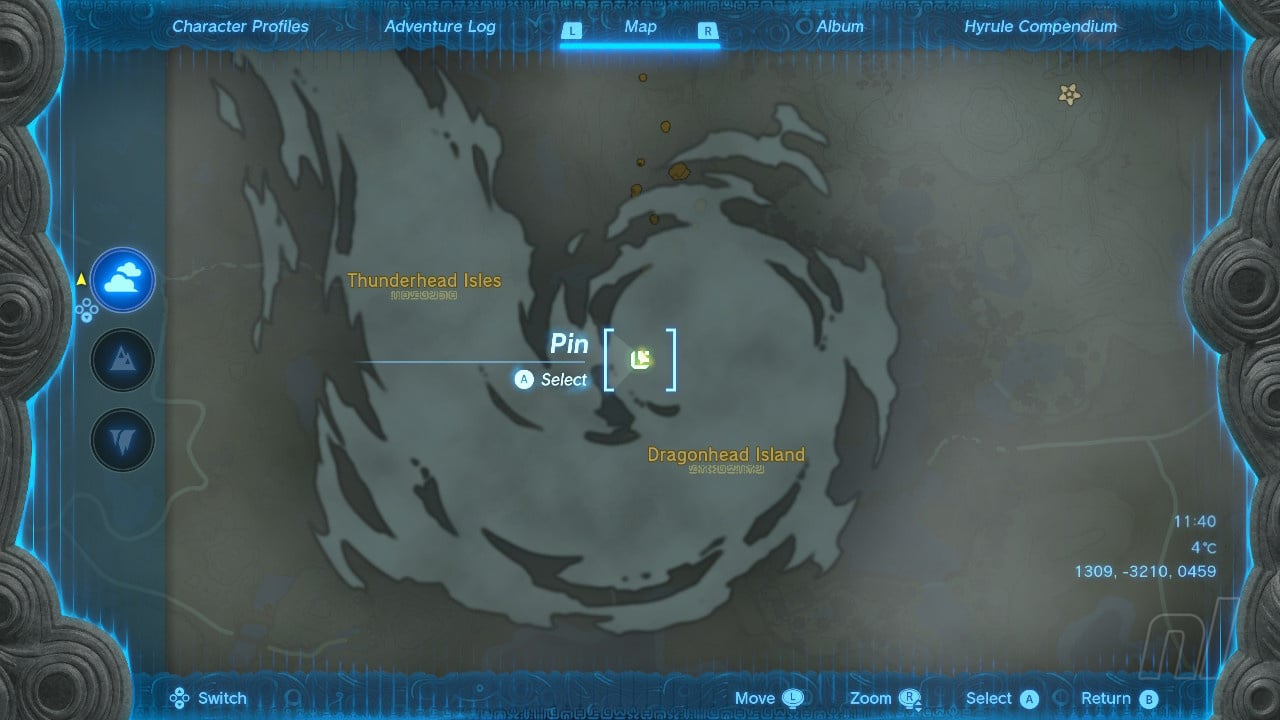
Our final Sage's Will and this one is near to our last one in the swirling clouds around the Thunderhead Isles. We're going to stick a pin in our surface map once again to make things easy, just slightly east of where we placed it for our last Sage's Will, just north of Floria River.
With your pin in place you can simply glide out into the fog and mist and then drop down over the pin marker, if you're still on the islands from our last Will. If not, blast up and out from Rabella Wetlands Skyview Tower, ride the waterfall up to the island slightly to your east - as we did in our last entry - and then make your way via vehicle to your marker.
The chest is sat in the open this time for an easy final grab. Congratulations, you should now have all the Sage's Wills in the game!
For more handy guides, check out our Zelda: Tears of the Kingdom walkthrough for all of your adventuring needs.


Comments 1
Fantastic guide. Thanks for putting this together!
Show Comments
Leave A Comment
Hold on there, you need to login to post a comment...