Schema Stones are a collectible reward you'll find throughout Zelda: Tears of the Kingdom. Most often found in the darkness of the Depths, these stones contain blueprints that are automatically added to your Autobuild ability menu, giving you a quick and easy selection of useful contraptions to help make your exploration a little easier.
We've been busy exploring Hyrule and have created a list of all Schema Stones and where to find them, making it easier for you to gather them all up and give yourself as many traversal options as possible.
Subscribe to Nintendo Life on YouTube848k
Of course, you'll might come up with variations on many of these yourself, the bridge being a good example, but it always helps to have a little nudge into all the possibilities brought to you by a bunch of Zonai tech, your Ultrahand ability and a little imagination.
Let's have a look at all Schema Stones and where to find all of them.
[note: this list is a work in progress and we'll add more schema stones as we find them!]
Zelda: Tears Of The Kingdom: All Schema Stones Blueprint Locations
Fanplane
Once you get your Autobuild ability at the Great Abandoned Central Mine in the Depths you'll have to square off against Master Kohga for the first time. Once you've found and defeated him, speak to the Construct to get this one.

Hot Air Balloon
The Hot Air Balloon is your reward for completing the early game Mystery in the Depths quest. Once you've done so, head to Lookout Landing and speak with Josha to get your Phileas Fogg on.
This will also allow you to get a new quest from Robbie where you'll be able to unlock the Shrine Sensor. Check out our Shrine Sensor guide for details on how to get this nice little device.
Dirigible
The Dirigible is located in the Abandoned Lurelin Mine, which you can find in the far south east of the Depths. The Mimufus Lightroot is closest to this area and we recommend diving down from the Meda Mountain Chasm and heading directly south to reach it.

Beam Cycle
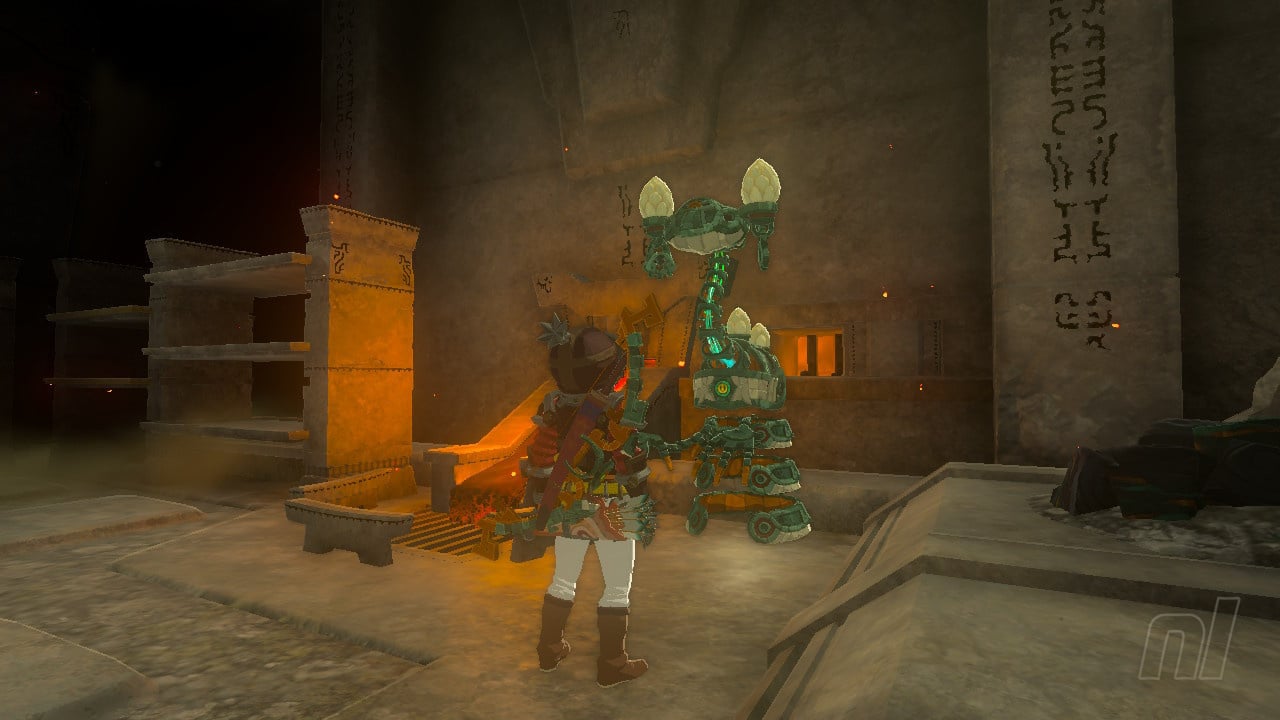
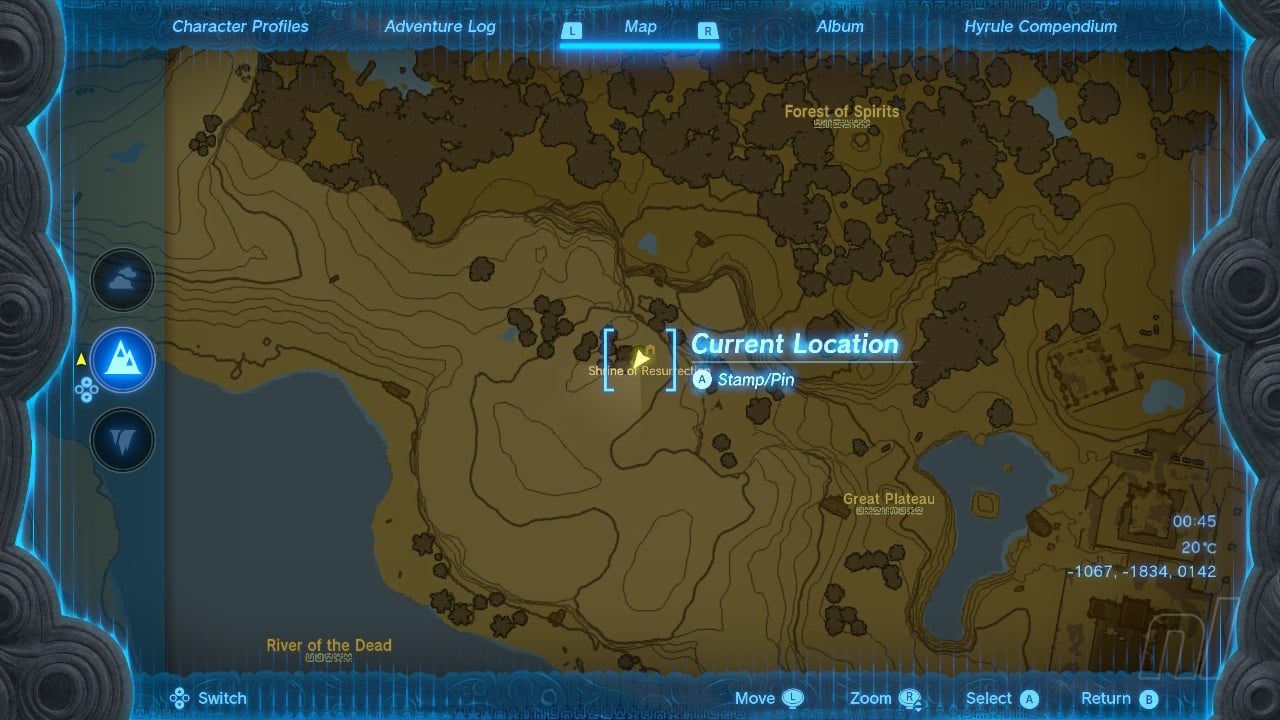
A little change of pace for this one as you'll find it on the surface of Hyrule to the west of the Temple of Time. Find the little cave here that houses the Shrine of Resurrection, then drop in and down the hole at the back of the room with the Bubbulfrog — which you shot hit to get one of those rather nice Bubbul Gems. Scrap with two Yiga Clan members and nab your blueprint from a Construct.
Bridge
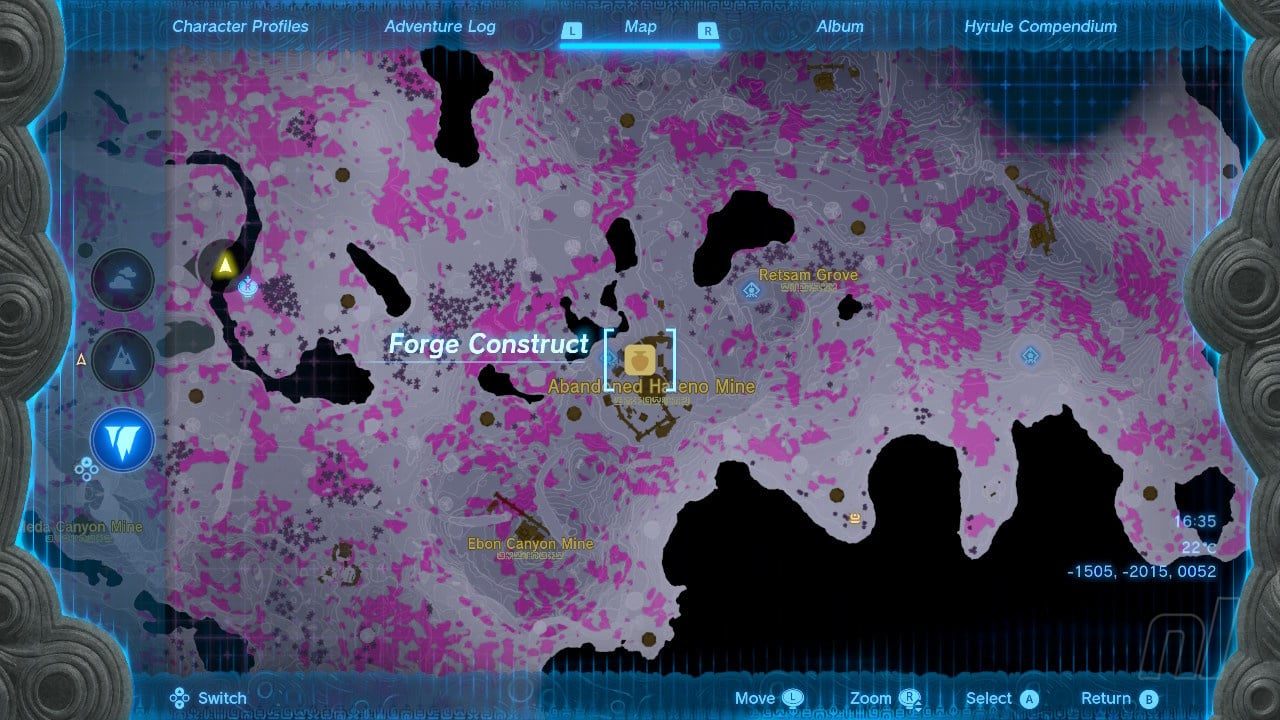
To find the Bridge blueprint, you'll need to head to the Abandoned Hateno Mine and speak to the Construct there.
The mine is directly under Hateno Village and Meda Mountain or Naydra Snowfield Chasms are the closest points to get there from the surface. Stick a marker on Hateno Village and jump down to reach your location.
Bolt Boat
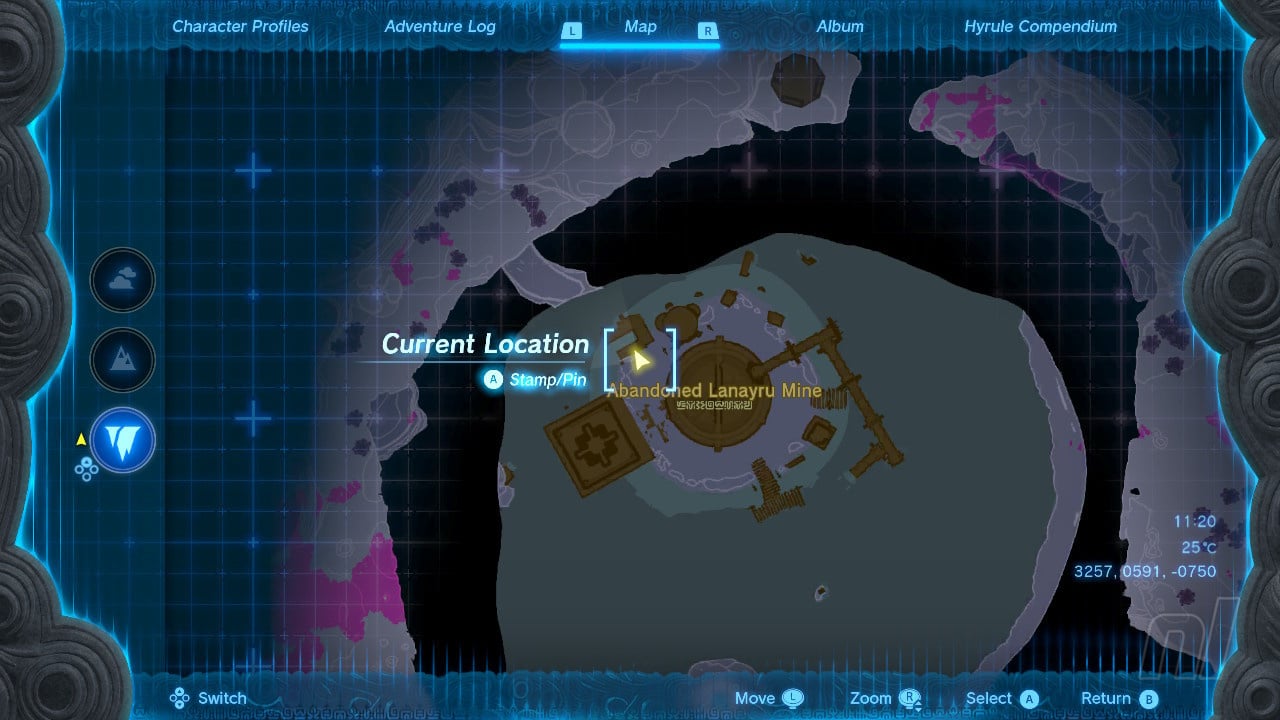
You'll find this in the area where you fight Master Kohga for the third time. You'll need to head to the Abandoned Lanayru Mine.
The Mine can be found in the south east, directly north of the Hateno Mine, the nearest Lightroot is Kawagom Lightroot and, as the mine sits directly under Zora's Domain, South Akkala Plains Chasm should get you there fairly quickly. Just speak to the Construct in the area to nab it.
Rocket Platform
Head for Rito Village Chasm then drop down to reach the nearby Abandoned Hebra Mine. Here you can speak to a construct to learn this build.
In order to actually find Rito Village Chasm, you'll need to go to the surface location we've marked in our map below. Head here, then jump or climb down to find the little cavern that we've pictured. This leads you into the chasm and straight down to the mine.
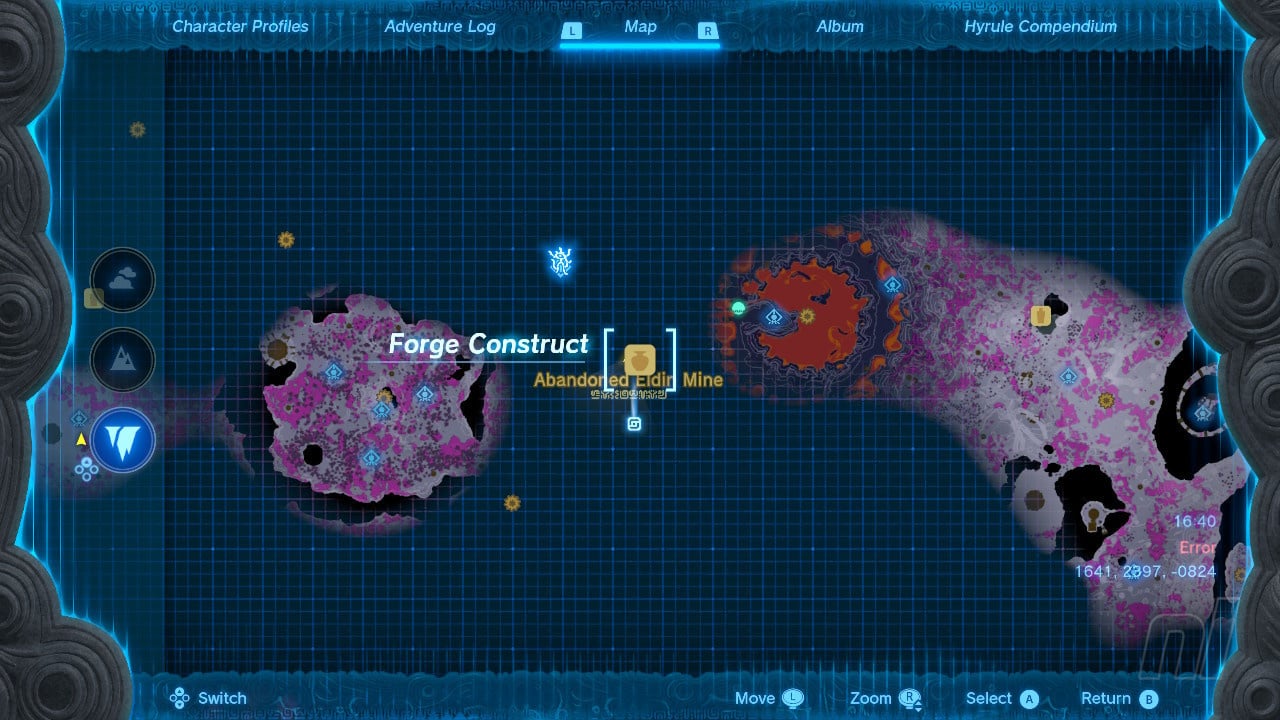
Automated Ally
We're off to the Abandoned Eldin Mine in the Depths now, which is right beside the Fire Temple and directly below Goron City to be precise.
Head to the location indicated in our map below, or pinpoint Goron City on the surface map and then make your way to the marker to grab the blueprint off a construct. To get here quickly, we recommend diving down the Death Mountain Chasm and heading straight west.
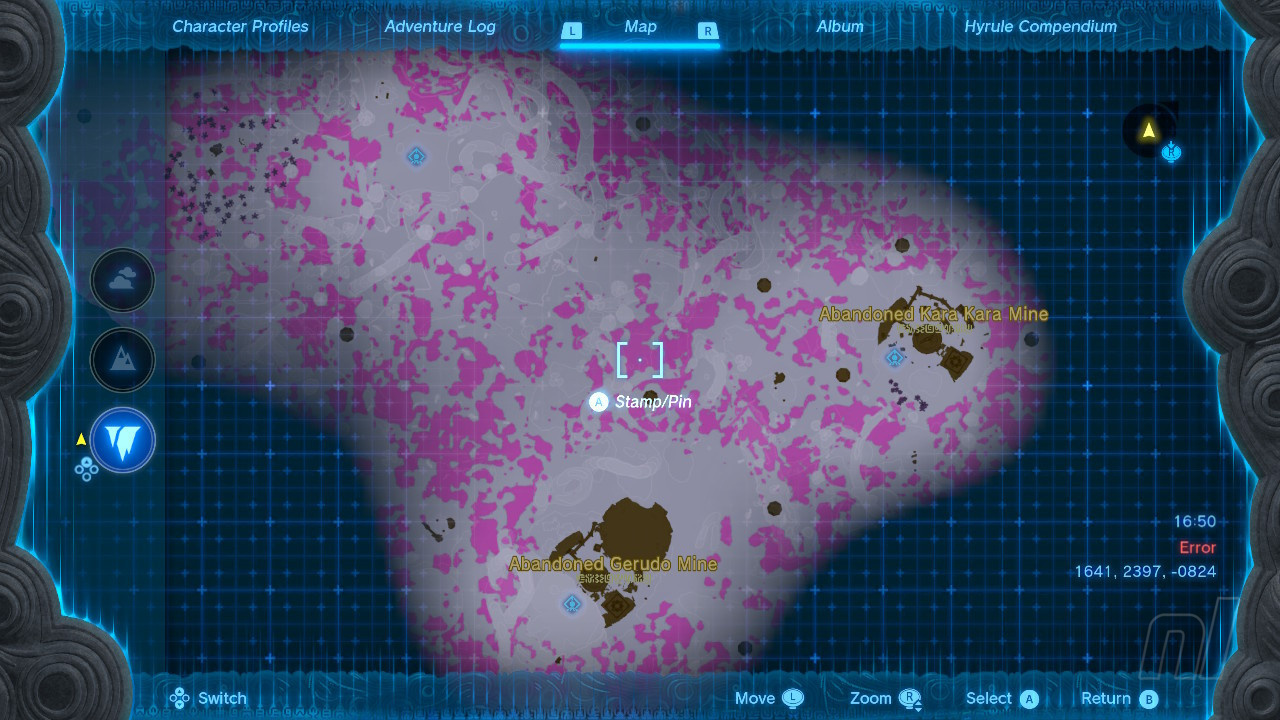
Hovercraft
Zoom over to the Abandoned Gerudo Mine, in the south west of the Depths, and you'll have to duel Master Kohga in order to get your hands on this schematic. He's airborne this time, so make sure to bring arrows and bombs. For the second phase, get ready to utilise your surroundings and paraglider to get in for melee hits.
For a quick route to this are, you can use the East Gerudo or Birida Lookout Chasm as the mine is pretty much equidistant between both.
You'll be driving around Hyrule in style with these schematics. For more handy guides, check out our Zelda: Tears of the Kingdom walkthrough for all of your adventuring needs.


Comments 3
What the heck are you guys talking about with the lightning boat?
I've spoken to all the constructs at the Lanayru mine, before and after completing Kohga's quest, and there is no such schema stone.
There is only the bolt boat.
Your list is also missing several schema stones, as far as I can tell there are 12 in the game. I have 12 after clearing out the Depths and everyone I've spoken to who has cleared out the Depths also has 12.
If there is actually a 13th schema stone called the lightning boat which is somehow different from the bolt boat, then please provide evidence, such as a screenshot of it in your Autobuild menu.
And please explain what the actual requirement is for getting it, because it definitely isn't what you said.
As it stands right now this just seems like an incomplete and inaccurate list, and not helpful for those of us seeking reliable information.
@Nick24 I think it is the British localization for that fishing trawler blueprint. You know, the one that shocks fish and scoops them up. I noticed quite a lot of regional differences when it comes to names in this game.
@darlenevile I don't think so.
The fishing trawler is obtained from a Yiga schematic, not a schema stone. You get it from one of the Yiga bases in the depths, not from any of the mines.
Show Comments
Leave A Comment
Hold on there, you need to login to post a comment...