It wouldn't be a video game without some kind of method to take pictures, would it? The Legend of Zelda: Tears of the Kingdom brings back the camera function, allowing you to take photos of all sorts of wonderful creatures and items on your journey across Hyrule, to help fill up the Hyrule Compendium.
You don't start out the game with the camera, however, and you might entirely miss it if you're in a rush to explore the world. Here's how to get the camera function for the Purah Pad, as well as how to take photographs.
Subscribe to Nintendo Life on YouTube845k
Zelda: Tears Of The Kingdom: How To Take Pictures
How to get the camera
To get the camera for your Purah Pad, you'll need to complete the Camera Work in the Depths Main Quest. This becomes available after you activate Lookout Landing Skyview Tower and get the Paraglider.
How to complete 'Camera Work in the Depths'
Despite being a 'main quest', Camera Work in the Depths is pretty easy to miss. Once you've got the Paraglider and are about ready to set off on your adventure proper, Josha will walk down the stairs and start mumbling about "talking to Goggles", which is Robbie. Once she's gone underneath Purah's lab, Josha will have a red '!' above her head, which indicates that she has a quest for you. Talk to Joshua and Robbie to initiate the quest.
Josha wants to investigate the Depths, but Robbie is concerned about her doing that, so he offers to go and wants Link to come along to test out the Purah Pad's camera function.
You want to go to Hyrule Field Chasm, a large chasm which is south of Lookout Landing. The chasm is right next to Jionsin Shrine, so you can just fast-travel there if you've already cleared the Shrine. The coordinates are roughly -0253, -0300, 0018. But, as you should have unlocked the Lookout Landing Skyview Tower, you can also see it on the map as a large black and red blob. Dive down the chasm to enter the Depths.
Once there, if you turn to the south, you'll spot something that looks like a giant tree bud with roots. This is a Lightroot, a fast travel point in the Depths. Activate it to unlock the Nisoij Lightroot.
From Nisoij, you want to head to coordinates -0776, -0434, -0470, which is where Robbie roughly is. If you're struggling, you can light the way by throwing Lightbloom Seeds at the ground to light up the path. You'll know you're on the right track as you'll be heading towards a second Lightroot, the Iayusus Lightroot.
Speak to Robbie who wants you to take a picture of the large statue right by the Lightroot. Oblige, and then talk to him afterwards to show him the photo. Once that's done, return to Lookout Landing and talk to Josha to complete the quest.
You can find out where you need to go in our guide on how to get Autobuild, which is part of a second side quest that you unlock after getting the camera.
How to take pictures with the camera
The Switch has the built-in screenshot function for those stunning vista shots, but the camera in Tears of the Kingdom is used to collect data on items, enemies, creatures, and more. As such, if you're a real completionist, you'll want to know how to use your camera.
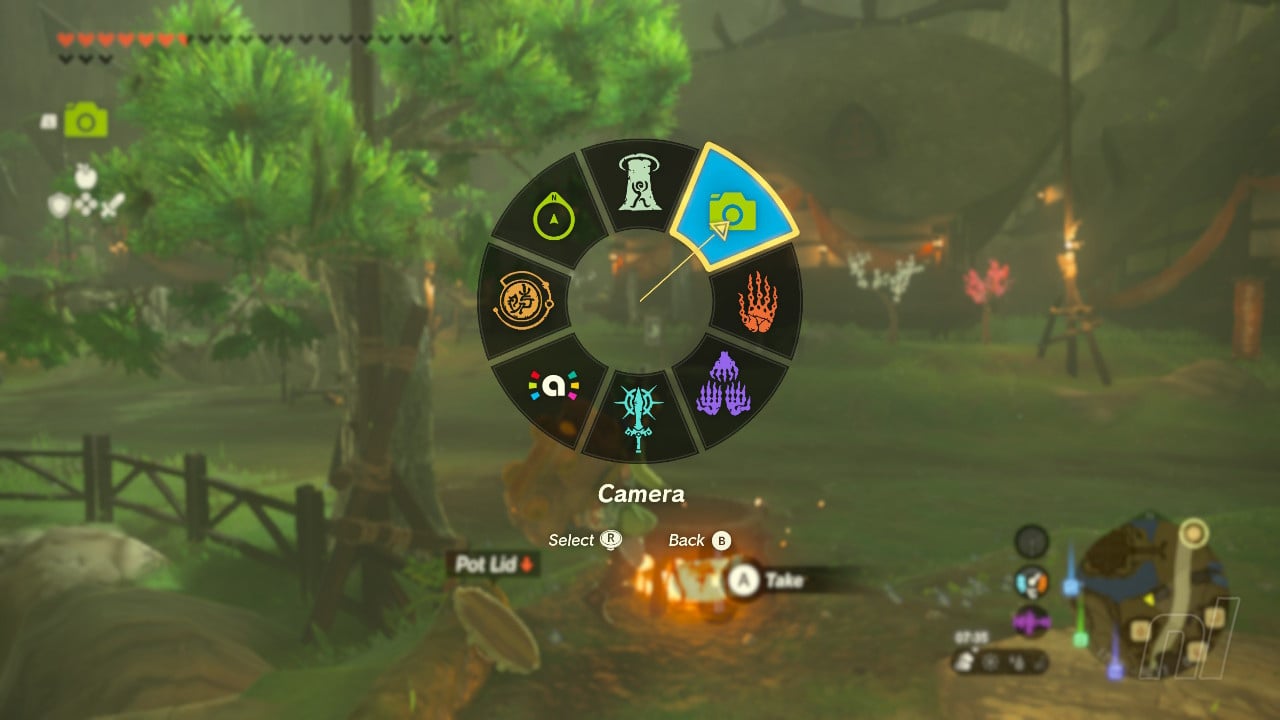
You access the camera the same way you access all of your abilities — by pressing the 'L' button. This brings up your ability wheel. The camera is next to Ascend on the top-right of the circle. Select it by using the right stick, and then let go to bring up your camera.
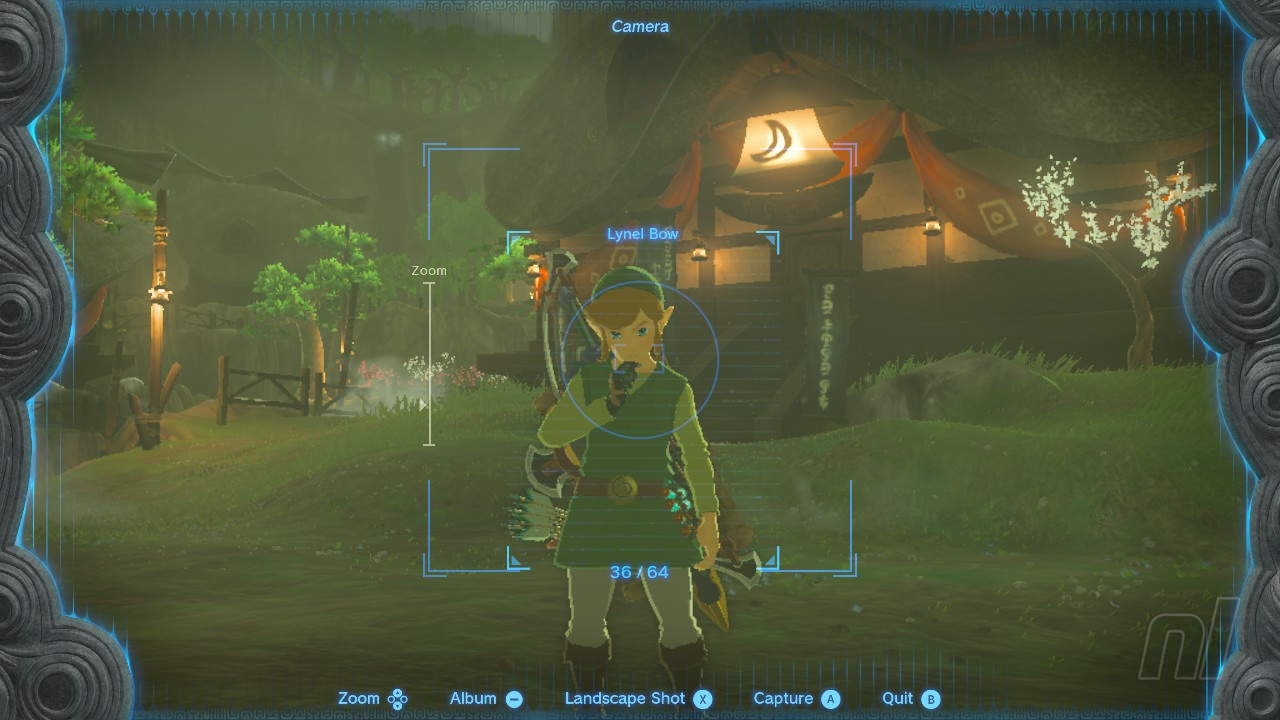
Using the right stick, aim your camera at whatever you want to take a picture of — the name of the item or creature will flash up once it's in frame. You can zoom in with the arrow buttons.
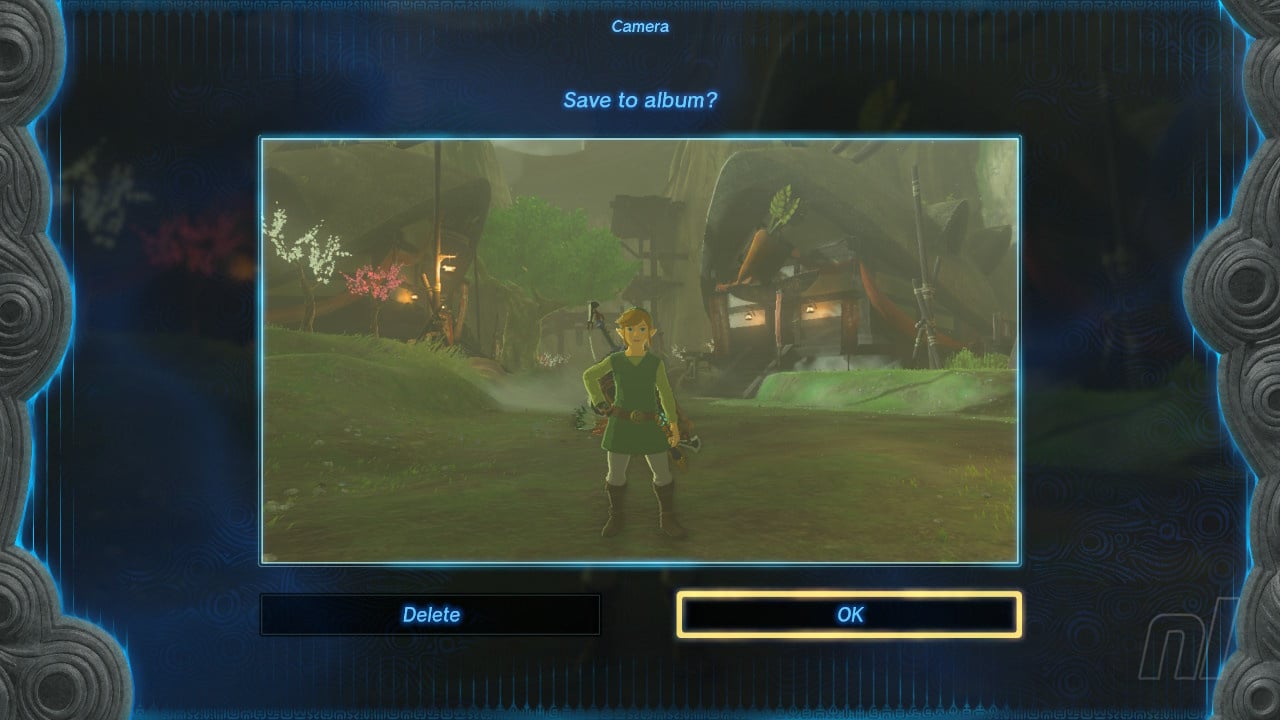
If the name is in red, you don't have the item in the compendium, and if it's blue, you do. Once you're happy, press, 'A' to take the picture, then save it to your album.
How to take a selfie
Perhaps you don't really care about Hyrule at all and you just want to take pictures of Link in the most ridiculous places. Well, fortunately, you can do that.
When you're using the camera, you can press 'X' to swap to Self-Portrait Mode. then, using the left analogue stick, you can put Link in a number of amusing poses. Again, zoom with the arrow buttons, A to snap the picture, and ta-dah.
How many pictures can I save in my album?
You can save up to 64 photos in your album, and once you hit that limit, you'll need to delete some in order to take more.
Access your Album by pressing the minus button, then press 'X' to enter Select mode. Select the photos you want to delete with A, and press X again when you're done.
Master Sword? We think Link is the wielder of the Master Camera. When you're not taking screenshots of your adventures in Hyrule, make sure you check out our Zelda: Tears of the Kingdom walkthrough for all of the hints, tips, and guides you need.


Comments 0
Wow, no comments yet... why not be the first?
Leave A Comment
Hold on there, you need to login to post a comment...