As you roam the vast open world of Hyrule in Zelda: Tears of the Kingdom, you'll eventually happen upon enormous three-headed beasts known as Gleeoks.
A recurring enemy throughout the Zelda series, they're some of the toughest opponents you'll come across in the game. These are overworld bosses that need to be approached in just the right way to ensure victory.
Let's take a look at where to find the Flame, Frost, and Thunder Gleeoks in Tears of the Kingdom, and how to defeat them.
Subscribe to Nintendo Life on YouTube848k
Zelda: Tears Of The Kingdom: All Gleeok Locations And How To Beat Them
What is a Gleeok?
A Gleeok is a dragon with multiple heads that first made its debut in the original NES game, The Legend of Zelda.
Tears of the Kingdom marks this fearsome foe's first appearance since Phantom Hourglass, and these variants come boasting three heads and tons of power. They also come in four different types — Flame, Frost, Thunder, and King. We'll be covering the three elemental Gleeoks in this guide, and we have a separate guide on how to defeat a King Gleeok.
How to prepare to fight the Gleeoks
Taking on a Gleeok can be a lengthy fight the first time you engage one, so it helps to make sure you're packing the right items. Fortunately, the rhythm and rhyme of Gleeok battles are generally the same for the most part, with two distinct phases. So these tips will apply to all types of Gleeok.
Arrows are a must for these fights, and you'll need plenty to ensure you can target the Gleeok's three eyes, taking each one out in order to down the beast and get in for some melee damage.
You'll also want to make sure you have plenty of cooked meals as you'll likely need to heal during battle. Consider the elemental damage of the Gleeok you're currently facing when prepping your recovery items. Elixirs and meals that give you boons and boosts against fire, ice and lightning are the order of the day here.
Another helpful tip is to make sure to nab some fairies before you engage a Gleeok. Fairies bring you back to life with a few hearts when you die and, happily, there's usually a sky island containing up to three fairies located near to where you'll find all of the surface Gleeoks we'll be concentrating on in this guide.
Apart from these essentials, just make sure to consider the obvious stuff. Ensure you've got suitable armour - the Rubber Armour Set helps negate lightning damage, for example. Some of these fights take place in harsh conditions so pack gear that will help you in hot and cold climates. And if you can afford it and have the right materials, make sure you use the Great Fairy Fountains to upgrade your armour.
As a final pointer before you glide into battle, shooting the heads on a Gleeok is easily the trickiest part of the fight, enabling yourself to quickly target and take down each eye will make things much easier. With this in mind, make sure to pack plenty of Keese eyeballs (caves are your friend here) to make use of their homing properties when attached to your arrows. Regarding bow selection, grabbing a bow that shoots double or triple arrows, or bows that have a high rate of fire like the Royal Guard's Bow. These make the task of taking out heads much easier.
You may also want to consider beefing up your stamina wheel, as we'll be spending some time in the sky during these scraps. Hearts are also not a bad idea, as Gleeoks do a lot of damage. Go and seek out those Shrines so you can upgrade both.
Where to find the Gleeoks
Below we've listed all of the locations you can find each of the elemental Gleeoks. There are three of each on the Surface, and if you manage to defeat them, they will respawn after the next blood moon.
Flame Gleeok
- Rayne Highlands, Ancient Columns, Tabantha Frontier, -3606, 0416, 0261
- Bridge of Hylia, Lake Hylia, -0049, -2476, 0039
- Gerudo Highlands, Spectacle Rock, -2118, -2634, 0400
Frost Gleeok
- Biron Snowshelf, Hebra Mountains -3740, 3000, 0342
- Gerudo Mountain, Gerudo Summit (Gerudo Highlands) -4033, -0959, 0708
- Tabantha Tundra, Hebra Mountains -1826, 2997, 0240
Thunder Gleeok
- Coliseum Ruins, Hyrule Ridge, -1142, -1232, 0056
- Herin Lake South, Faron Grasslands, 1114, -3589, 0067
- Akkala Citadel Ruins, South Akkala Highlands, 3426, 1320, 0336
How To Defeat A Flame Gleeok
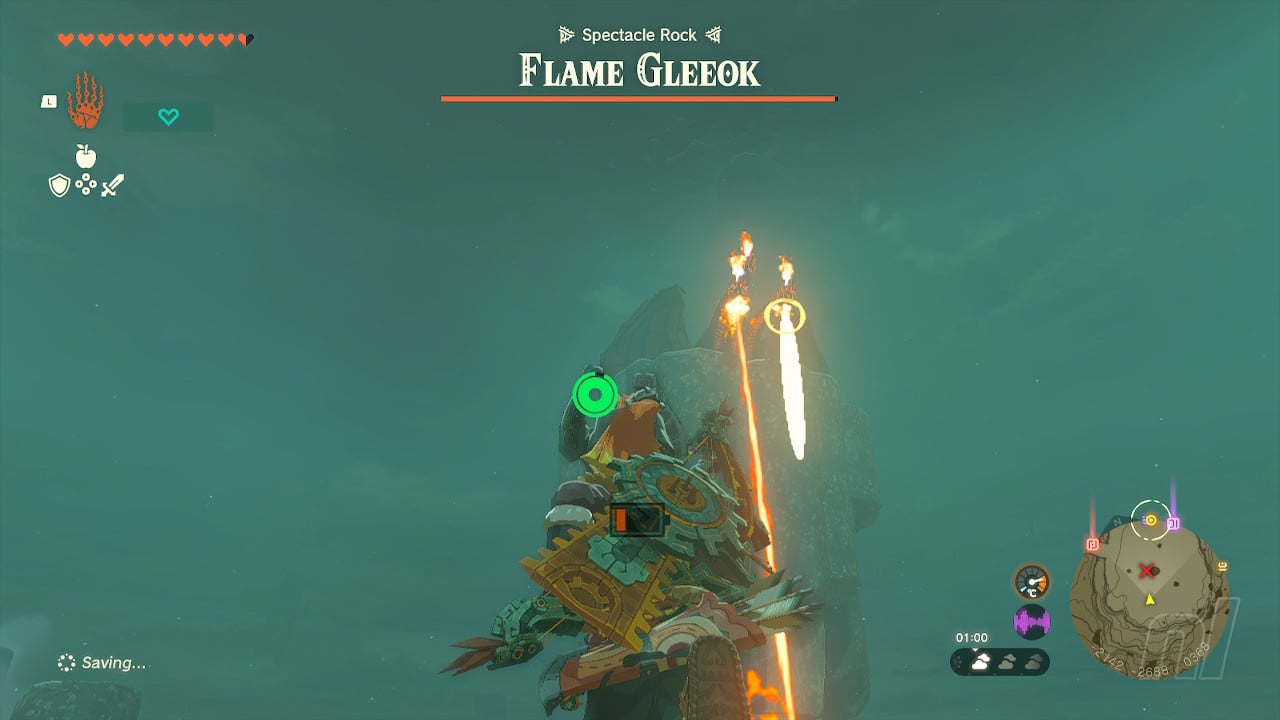
Starting off here we've made for the Flame Gleeok located at Spectacle Rock in Gerudo Highlands.
Before starting this battle we recommend shooting up and out of Gerudo Canyon Skyview Tower and landing on the sky island within easy reach that features a pool with three fairies to capture. Once you've nabbed these essential creatures, you can drop straight down onto Spectacle Rock to engage your prey.
And dropping down from above is something to make a priority during these fights, as slowing down time as you draw an arrow in the air gives you ample time to target and destroy all three Gleeok eyes if you give yourself enough height.
As you drop into the range of the Flame Gleeok, enter slo-mo by pulling out your bow and then bring up your inventory to fuse useful items before loosing your arrow. We recommend either Ice Fruit or Keese Eyeballs, but anything will do the job as long as your bow is strong.
Lock on to each eye, destroy it and, once you have each of three eyes finished off, the Gleeok will drop to the ground for a short period of time. Now is your chance to rush in, lock onto a head and whale on it with your best weapon - again, some sort of ice fusion will work well here, but if you don't have any just go with your best material. You'll need to repeat this process several times and use the environment to your advantage.
When on the ground, you can hide behind the smaller central rock to give yourself decent defence against the Gleeok's incredibly damaging fire beams. You need to stay well clear of these because one hit is enough to take you out and use up one of your fairies. When you need to sort weapons or fuse a new item, heal or regain your composure, this rock will give you ample time and cover to sort yourself.
As for the larger rock formation, the one the Gleeok is resting on when the fight begins, you'll want to use this to gain height to enter slo-mo and target its heads. Use Ascend from the base here as soon as you've battered the Gleeok on the ground and you can get up top quickly and then glide off and into slo-mo before the beast has managed to recompose itself and get properly airborne again. Keep gliding off, taking out the heads, dropping down to beat it on the ground and then repeating the process to end this first phase.
The second phase occurs once you've got your enemy down to around about a quarter of its health bar. At this point the Gleeok will rise up higher than before and hover in the sky, signalling that it's preparing a huge fireball attack. Get under the cover of the rock formation you've been ascending up and wait for the fireball to strike. If you're in cover it'll miss you completely and you can now quickly ascend to the top of the rock then use the updraft created by the blast to glide upwards all the way to the Gleeok's level to take its eyes out one last time.
Successfully take out all three eyes and the Gleeok will drop all the way down to the ground causing it huge damage and allowing you to get in for what should be the final few melee hits to finish it off. Good job!
How To Defeat A Frost Gleeok
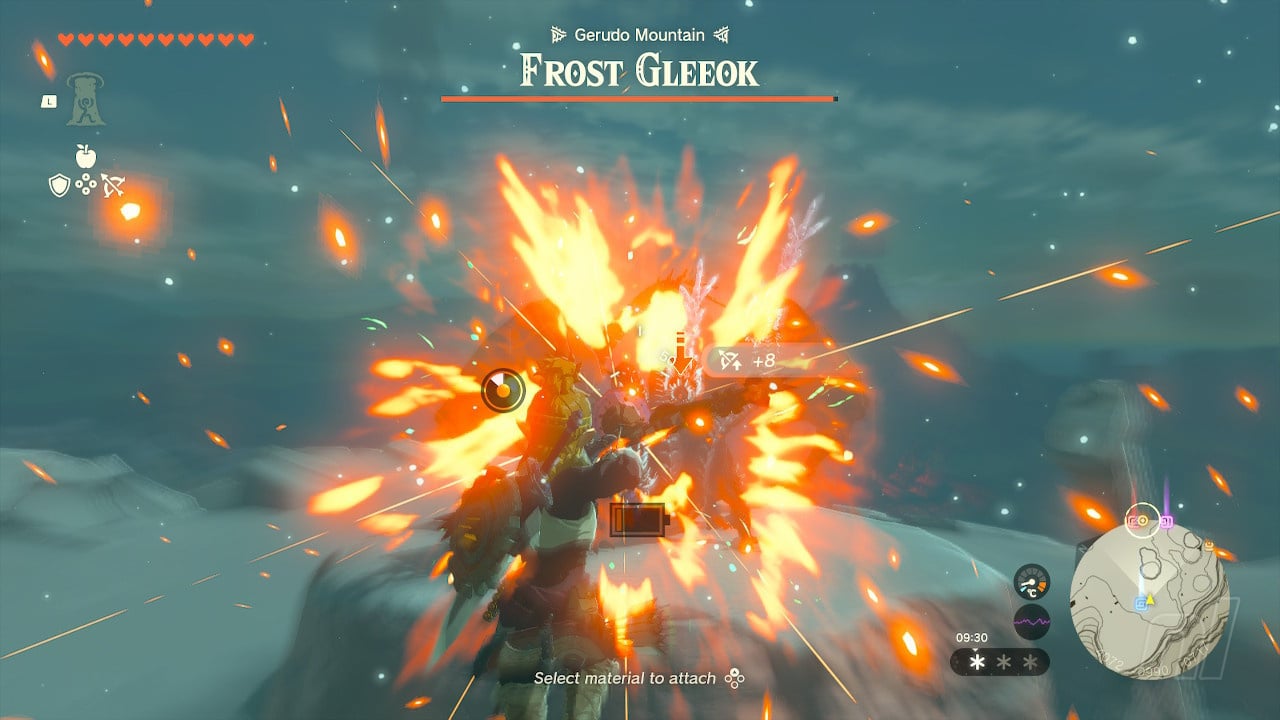
Taking on the Frost variant is similar to the Flame Gleeok, except instead of water and ice-based materials, make sure you use your best fire materials like Fire Keese Eyeballs, Wings, Fire Fruit, and so on.
We've chosen to use the Frost Gleeok at Gerudo Summit to illustrate our tactics here and we want to ensure we've got a way to get airborne so we can slo-mo the attacks on our foe's heads.

In this location, you'll find a giant stone sword on one side of the central hill, as shown. Use Ascend on this to get yourself up and able to glide into slow motion with your bow ready. Once again. use those keese eyeballs for homing attacks and the fire versions for some extra damage in comparison to their vanilla variant.
Destroy all three eyes and the Gleeok will drop down allowing you to get in and whale on it. We want to repeat this process, avoiding the beast's instant-freeze ice attacks by putting the central hill between yourself and it until we reach the second phase.
The second phase sees the Gleeok rise up into the air to an unreachable height. It will then start to rain down huge icicles that you'll need to avoid. As they fall, you now need to zero in on an icicle and climb on top of it once it's embedded in the ground. Once on top, quickly use Recall on the icicle to have it reverse all the way back up into the sky and above the icy vortex to the Gleeok.
Now glide close to the beast and take out all three heads again. The Gleeok will drop all the way to the ground and you can follow it to get in the final shots of the battle. Two down!
How To Defeat A Thunder Gleeok
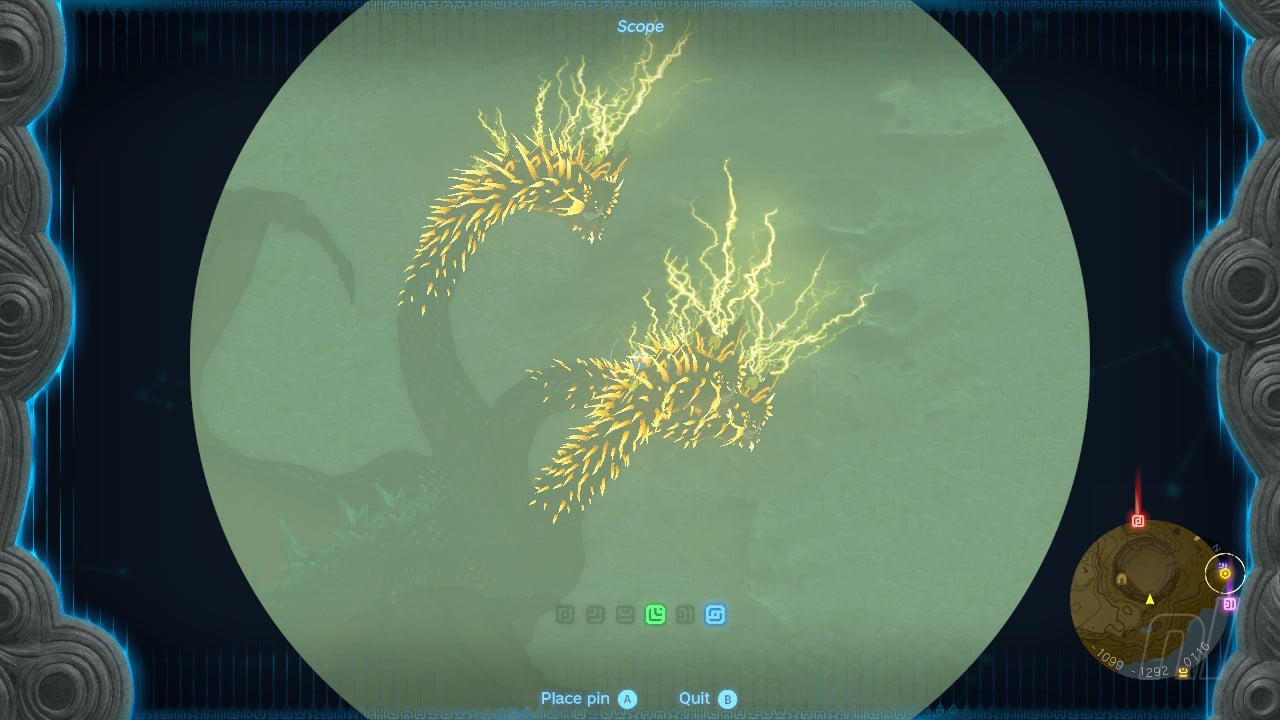
This time we're off to the Coliseum Ruins, in the southwest of Hyrule Field, to take on a Thunder Gleeok. This Gleeok has rather foolishly landed itself right inside the coliseum here, making this battle a fairly simple one as we can very easily Ascend through the levels of the arena to get a nice height advantage.
Once again, the first phase is straightforward stuff. Take out the heads, make use of Ascend to get a height advantage and batter the beat on the ground when given the chance. There's lots of cover provided by the arena's multiple levels and you really have the upper hand here in terms of agility and speed of movement.
If the Gleeok flies higher up, you can also use the extra levels to keep up with it, making sure that it doesn't get too far away from you. It doesn't have an elemental weakness, so just use your stronger weapons and Fuses on your arrows to do as much damage as possible.
Once you've got it down to around a quarter of its health bar, you'll move onto a second phase that sees the Gleeok lift up into the air and bombard the arena with lightning strikes that randomly strike the arena. They can also strike higher platforms too, meaning it's easy to glide high up.
Avoid the lightning strikes using the ample cover afforded by the arena and then use the air current in the resulting craters to ride up to the Gleeok's level to knock its eyes out a final time, drop it to the ground and finish it off with melee attacks.
Gleeok Drops
Once you've bested a Gleeok in battle, make sure to gather up all your rewards. The Gleeoks will drop five Gleeok Wings, excellent for long-range bow attacks; one Gleeok Guts, for making powerful elixirs; and elemental Gleeok Horns, which are some of the best Fuse materials you can get.
Defeating the Flame Gleeok will net you a horn that's fantastic for doing extra damage against the Frost Gleeok when you get around to attempting that battle.
Good luck in your battles against the Gleeoks! For more handy guides, check out our Zelda: Tears of the Kingdom walkthrough for all of your adventuring needs.


Comments 1
You missed one. There's a fourth flame gleeok flying high in the sky above Tribly valley in Eldin.
Show Comments
Leave A Comment
Hold on there, you need to login to post a comment...