Trading sequences are a recurring element in the Zelda series – you’ll pick up one item that a character is looking for, trade it and they’ll give you another item, and so on. However, the one in Link’s Awakening is unusual in that it is unavoidable if you plan on actually completing the game. This is part of our Zelda: Link's Awakening walkthrough which helps you navigate through the entire game.
Subscribe to Nintendo Life on YouTube844k
Zelda Link’s Awakening Trading Sequence
Because you’ll have to follow these steps sooner rather than later, we’ll guide you through the steps of the trading sequence as they become available to you – and the first four items are available from the very beginning.
Part One
Getting the Yoshi Doll
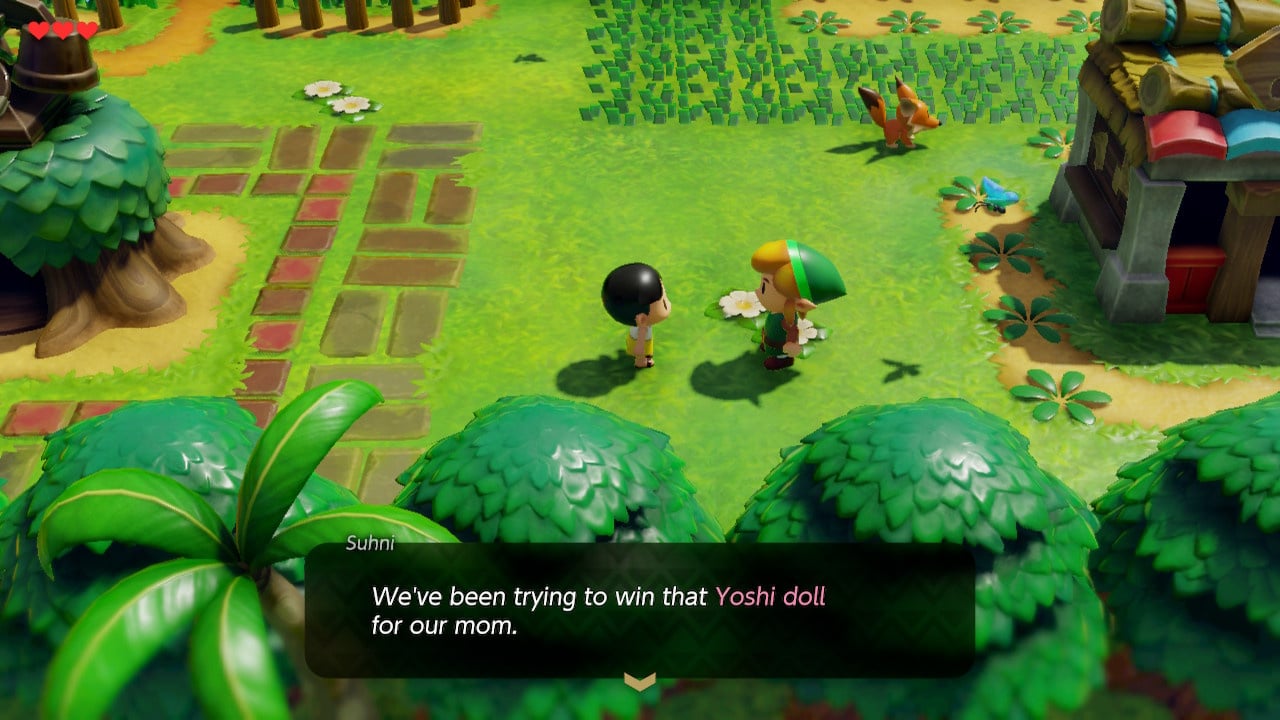
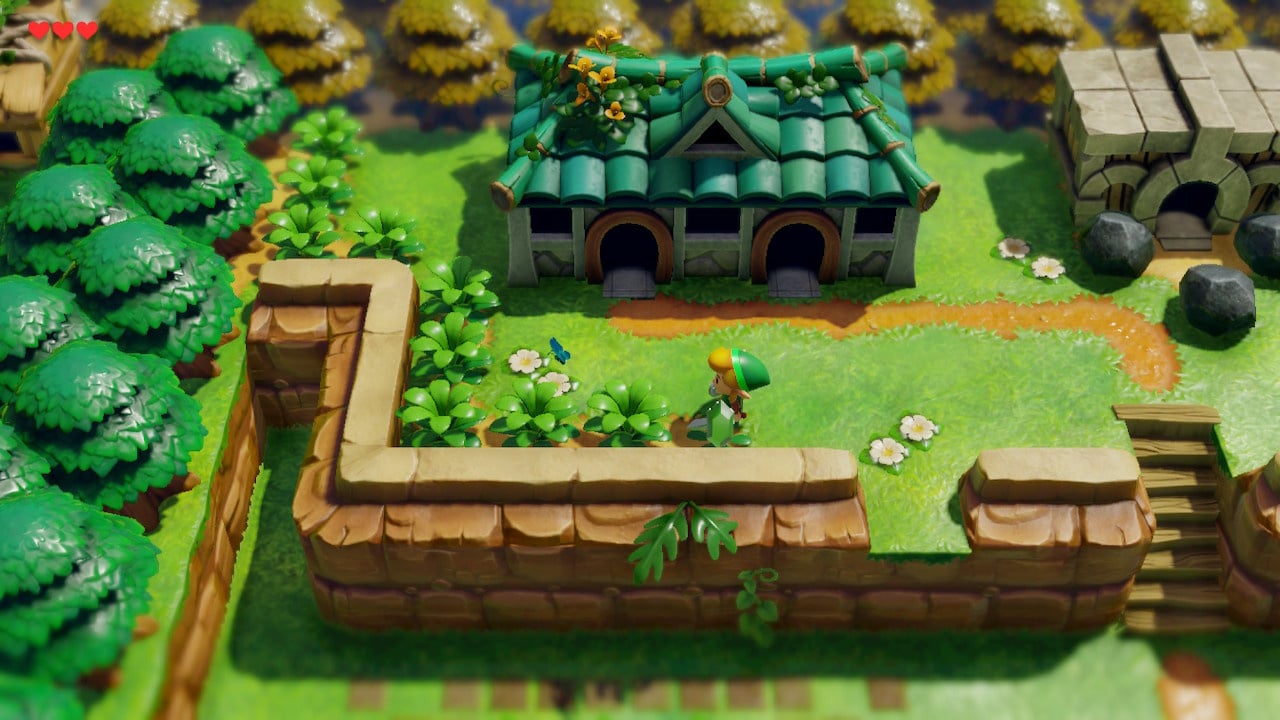
While exploring Mabe Village you will undoubtedly come across the house in the southeast offering the wonderfully named ‘Trendy Game’ – a UFO catcher/claw crane game in which you can win various prizes. Directly outside a kid named Suhni mentions that he has been trying to win the Yoshi Doll in the game, and while you’d be forgiven for feeling like you have bigger windfish to wake, helping him get that doll will serve you well in the long run.
Once you have 30 to 50 Rupees or so (chop some of the nearby grass for some quick cash) head inside and play the game.
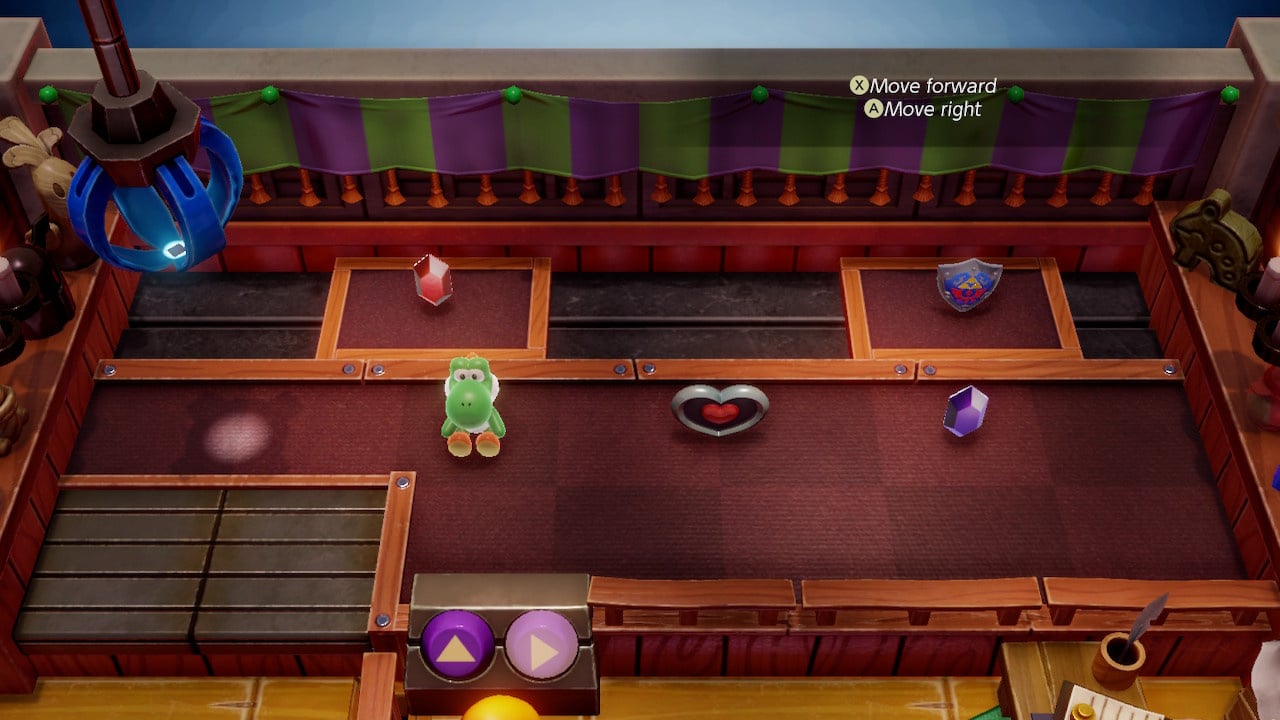
The claw crane is 10 rupees a shot – and not exactly the easiest thing to nail first time. Press X to move the crane forward and A to move it to the right: just like real claw machines, you only get one go at moving the crane in each direction, so if you over/undershoot you’ll find you’ve wasted a turn.
Press X to move crane forward, try to get the light of the crane as close to the centre of the carpet square as possible (as in the screenshot above).
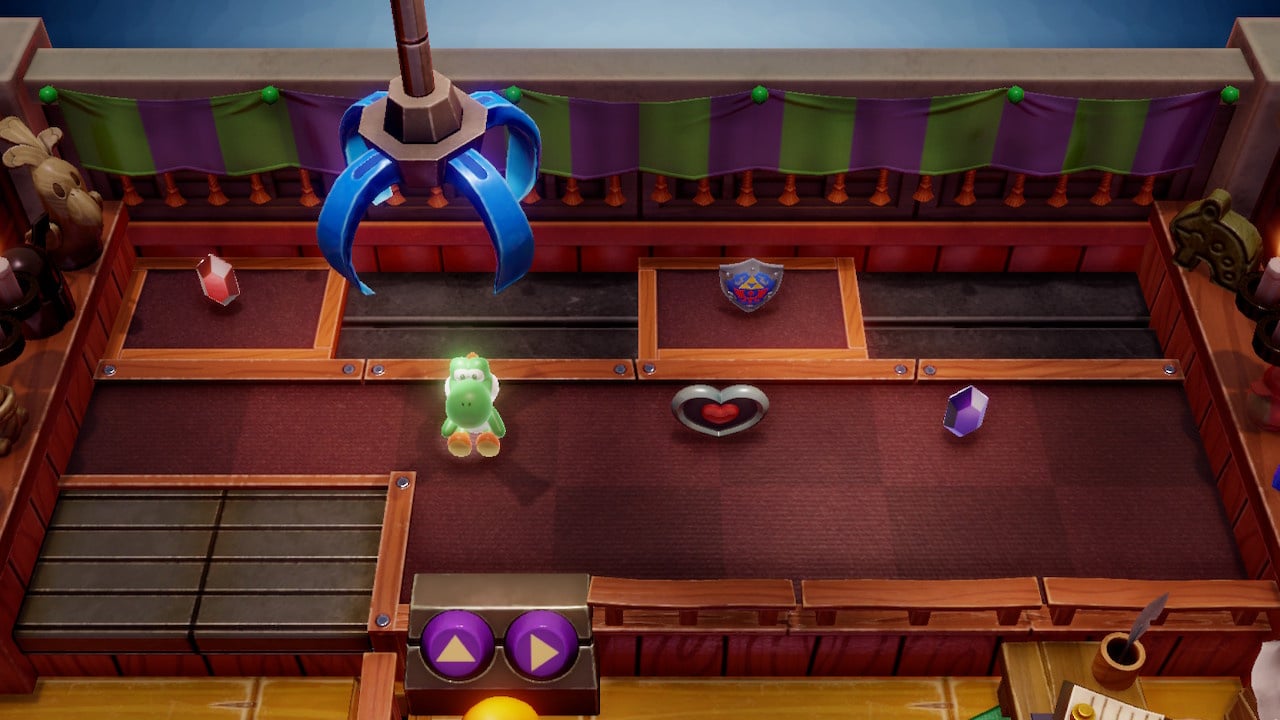
Next, press A to move the crane to the right until the light is directly above the Yoshi Doll’s head – hopefully you’ll grab the doll, if not, keep trying until you are successful (clear some more grass outside if you need to have another go). You may also want to have a go at grabbing the heart piece
Yoshi Doll for Ribbon
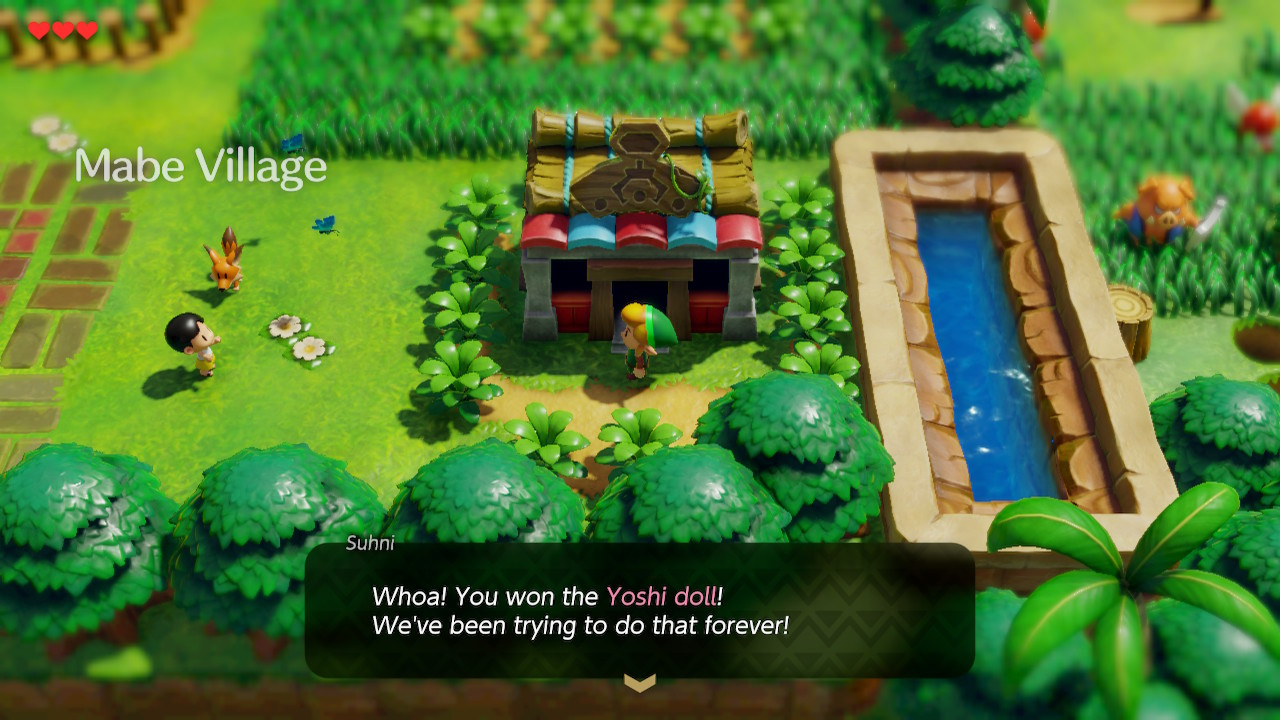
Step outside with your adorable Yoshi doll for some bad news – Suhni pounces and asks if you’d like to donate the cute but functionless doll to his mother, Mamasha.
As the needs of the questline outweigh your legitimate need for plush merchandise, head north to the house which he describes as:
‘the one up north with the two doors’
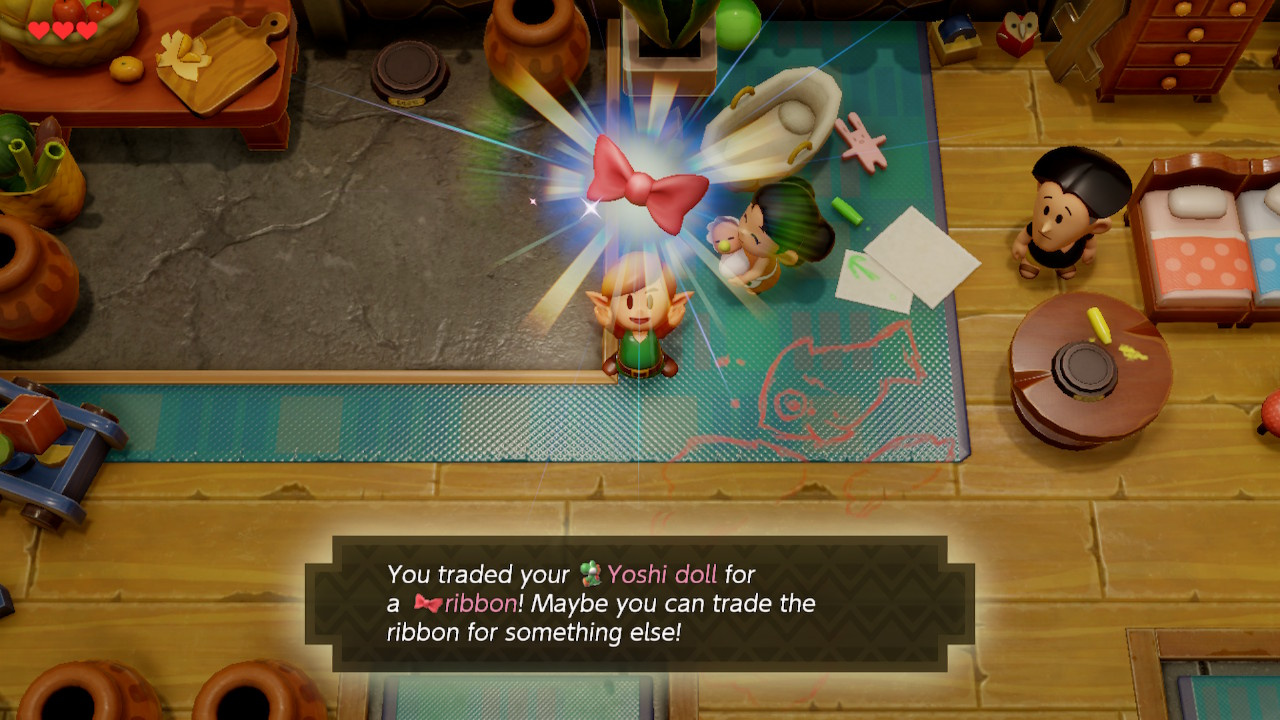
Inside, Mamasha asks that you trade the Yoshi doll. In return, she’ll give you a ribbon. “Maybe you can trade the ribbon for something else!” muses the game. Maybe indeed.
Ribbon for Dog Food
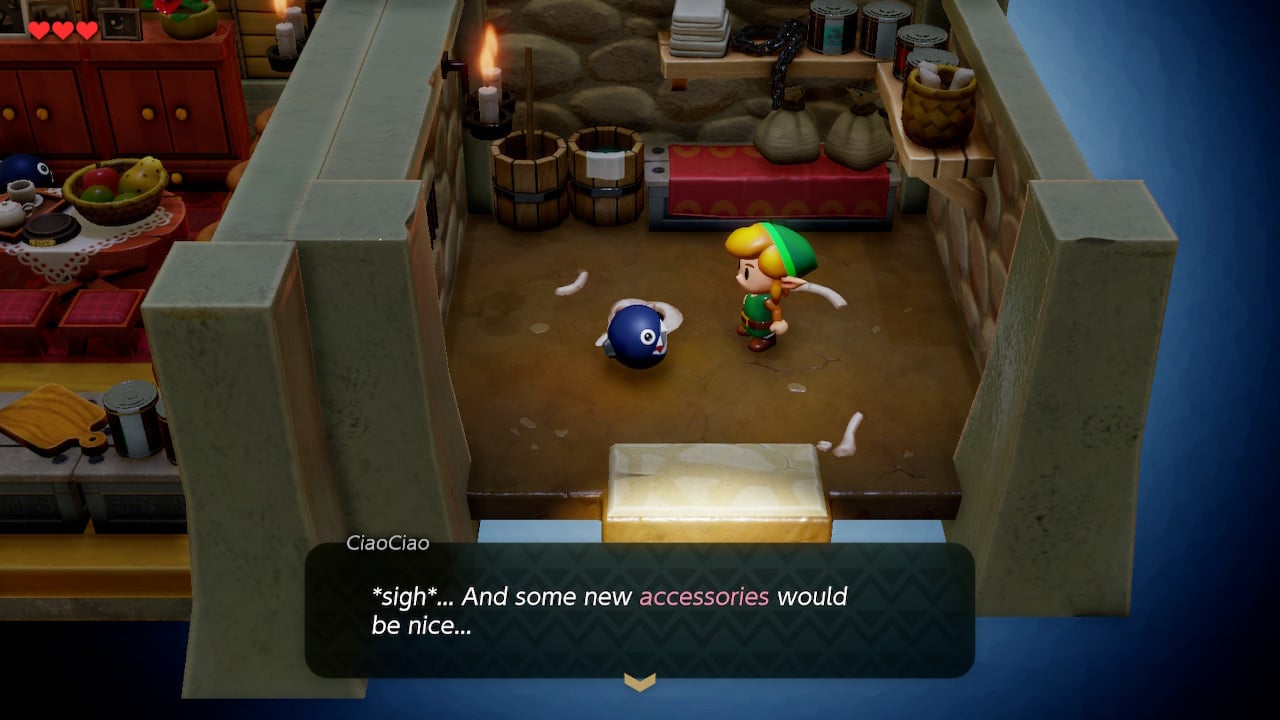
On your travels you may have already come across the CiaoCiao, a very fashion forward Chain Chomp who is after a new accessory. Ciao Ciao can be found in the kennel on the side of the house in the centre of Mabe Village.
Obviously, the Ribbon you received is the perfect accessory for any spherical giant-toothed metallic horror, so speak to Ciao Ciao, hand it over and receive the Dog Food.
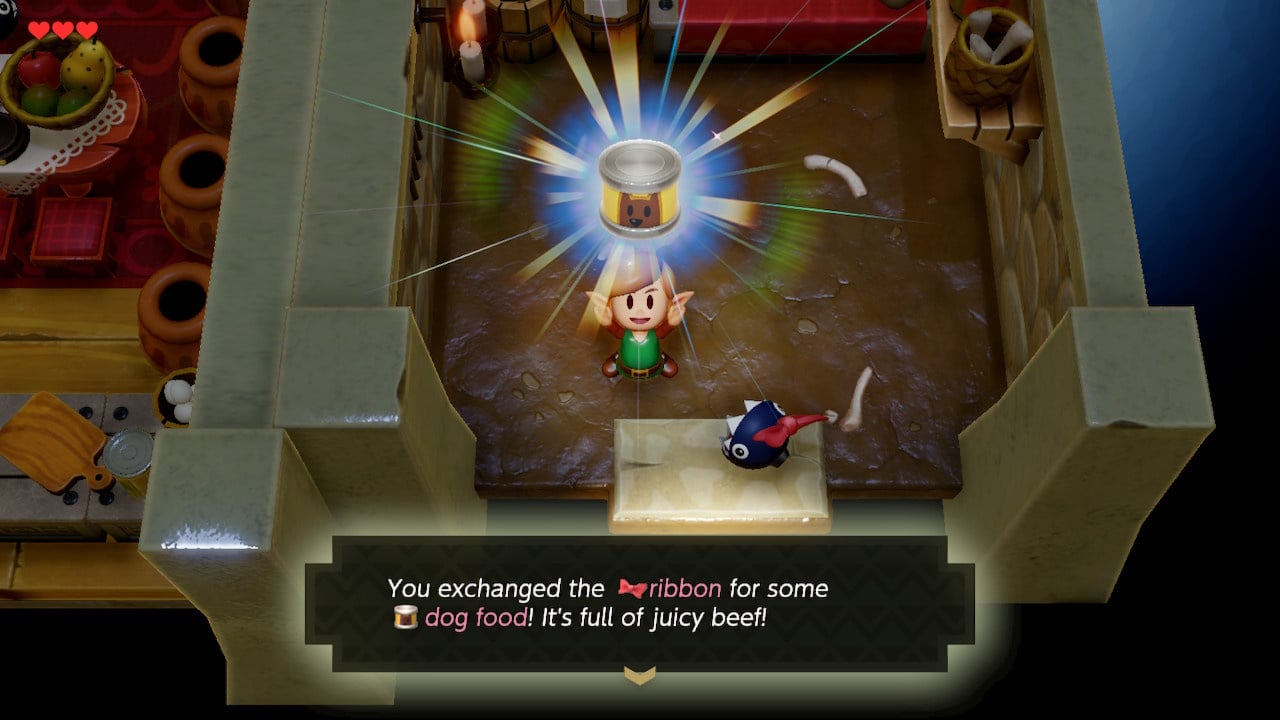
Dog Food for Banana
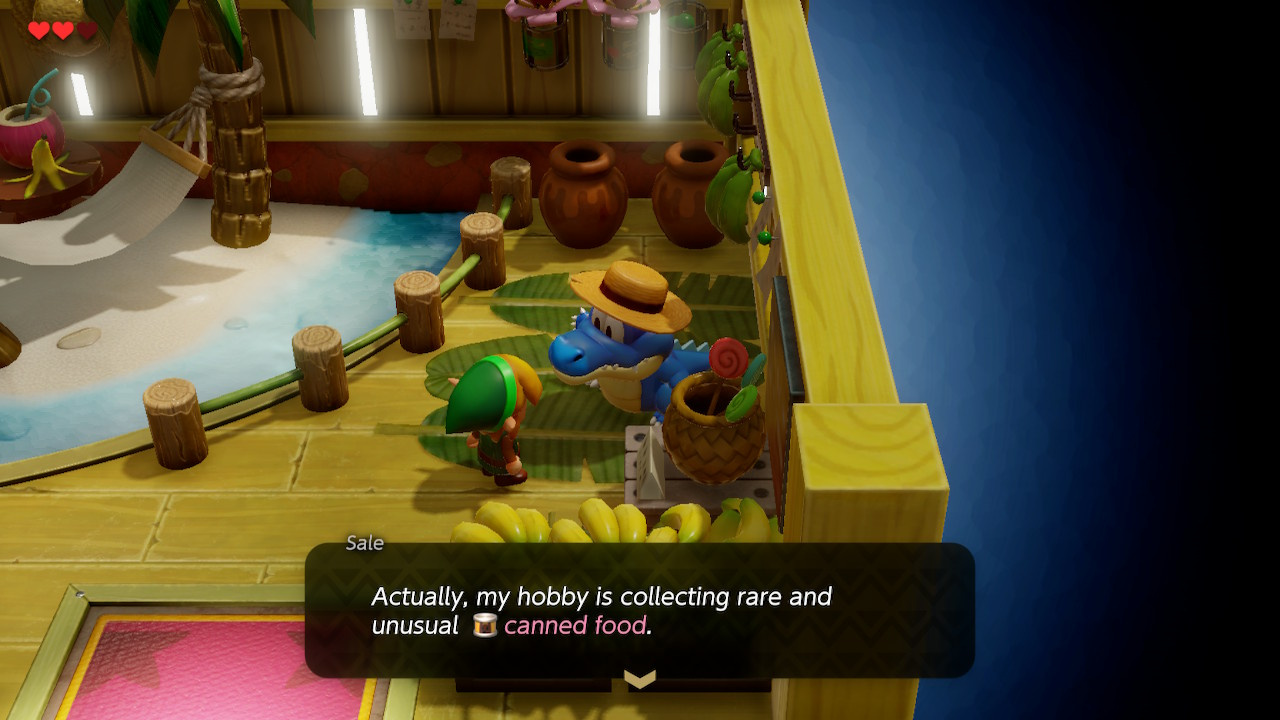
South of Mabe Village, you may have found the banana plantation and the house of Sale the blue alligator. In addition to a sideline in fetching headwear, Sale also mentions that his hobby is collecting rare and unusual Canned Food.
To get to Sale’s house, leave Mabe Village via the south exit and jump down the ledges – instead of going down the final set of steps to the beach, head east and follow the path (in the Switch version you will notice the ground changing to a yellow/orange colour when you’re at the right elevation).
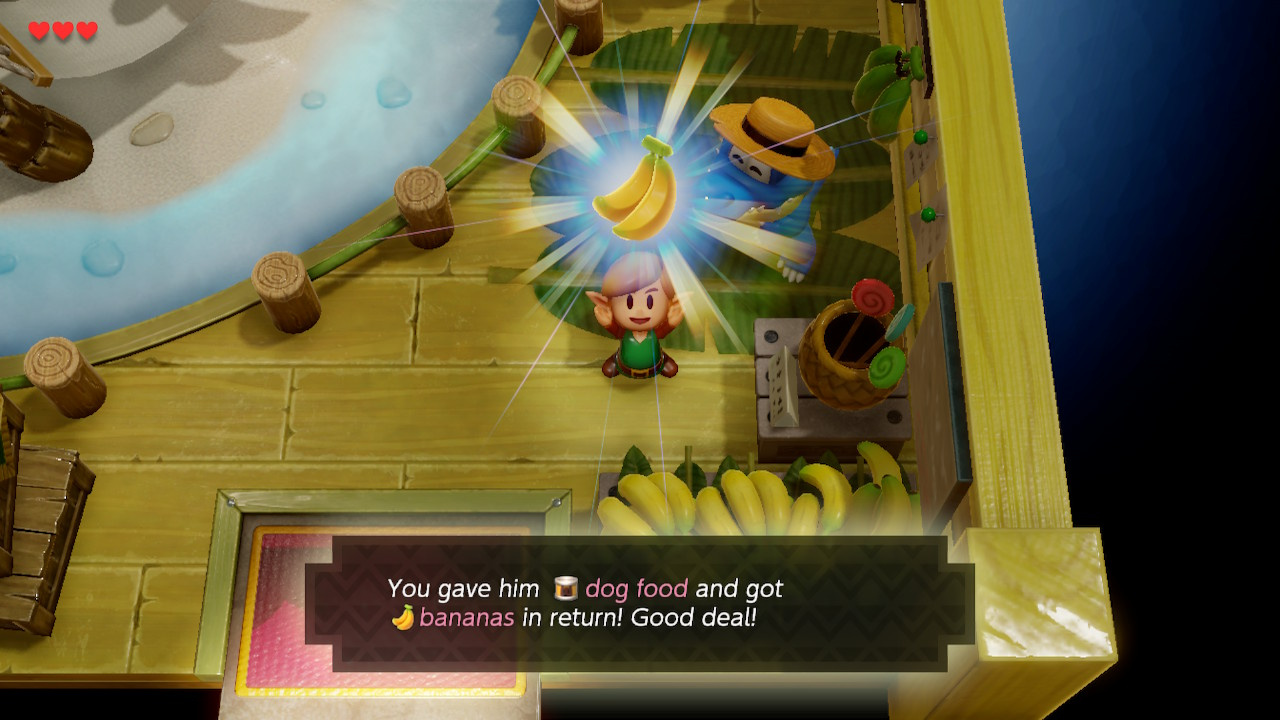
Bring the Dog Food to Sale and you’ll receive some Bananas in return. Unsurprisingly, you’ll be on the lookout for a monkey to take them of your hands (not the one on the plantation – he’s just a local jerk).
Part Two
Bananas for Stick
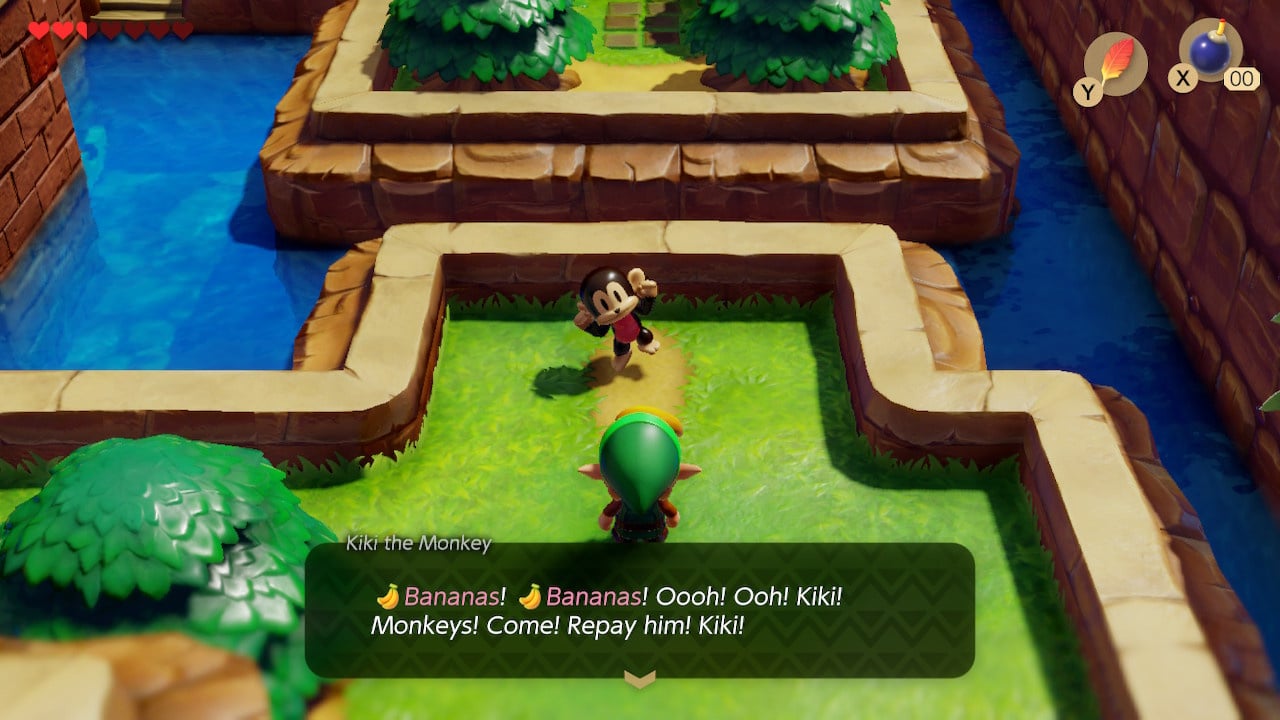
Kanalet Castle’s main gates are unsurprisingly shut fast. Instead, you should head east alongside the moat to find an alternative route.
In the eastern corner you will find Kiki, a friendly monkey who isn’t afraid to uphold stereotypes: if you have followed the trading quest, you should have a bunch of Bananas which Kiki will request. Kiki and a troop of Monkeys will suddenly set to work building a bridge across the moat for you.
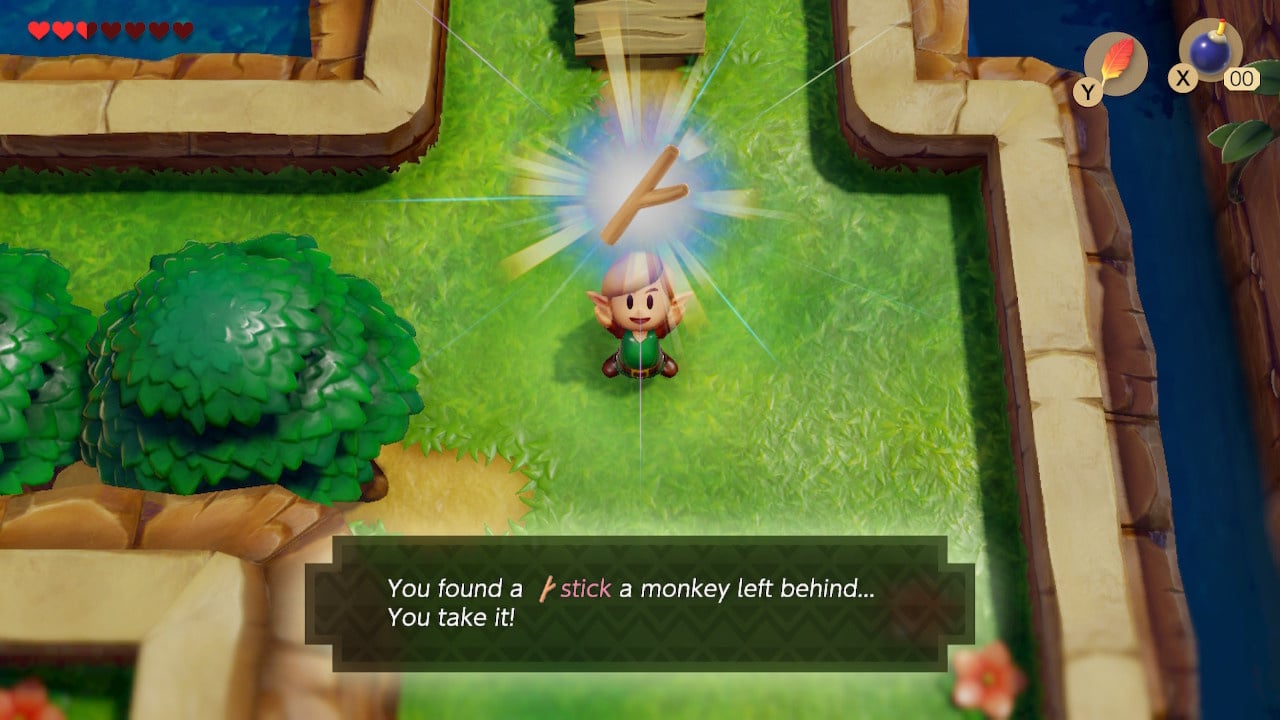
With the bridge completed, the monkeys leave, and Link acquires a stick for use in part three of the trading quest.
At this point you can head north to gain access to Kanalet Castle, but you may want to circle and climb the hill to the south – at the top is the shell mansion (deposit your secret shells here for a reward), as well as shining patch of dirt which transforms into another warp point.
Part Three
Stick for Honeycomb
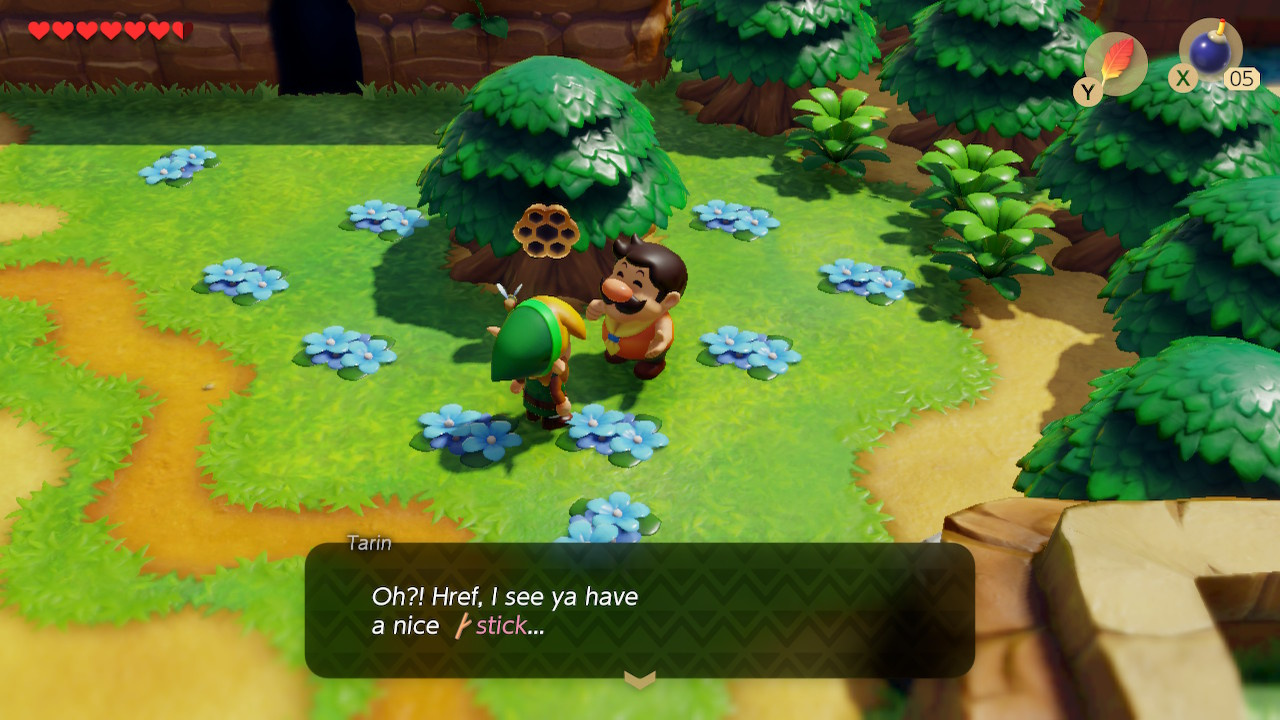
Head to Ukuku Prairie and look for a tree north of the lake and smallest hill – Tarin is here looking at a bee’s nest
Oh?! Link, I see ya have a nice Stick…
Can I borrow it for a second?
Hand it over and things go exactly the way you expect: Tarin gets chased by a swarm of bees.
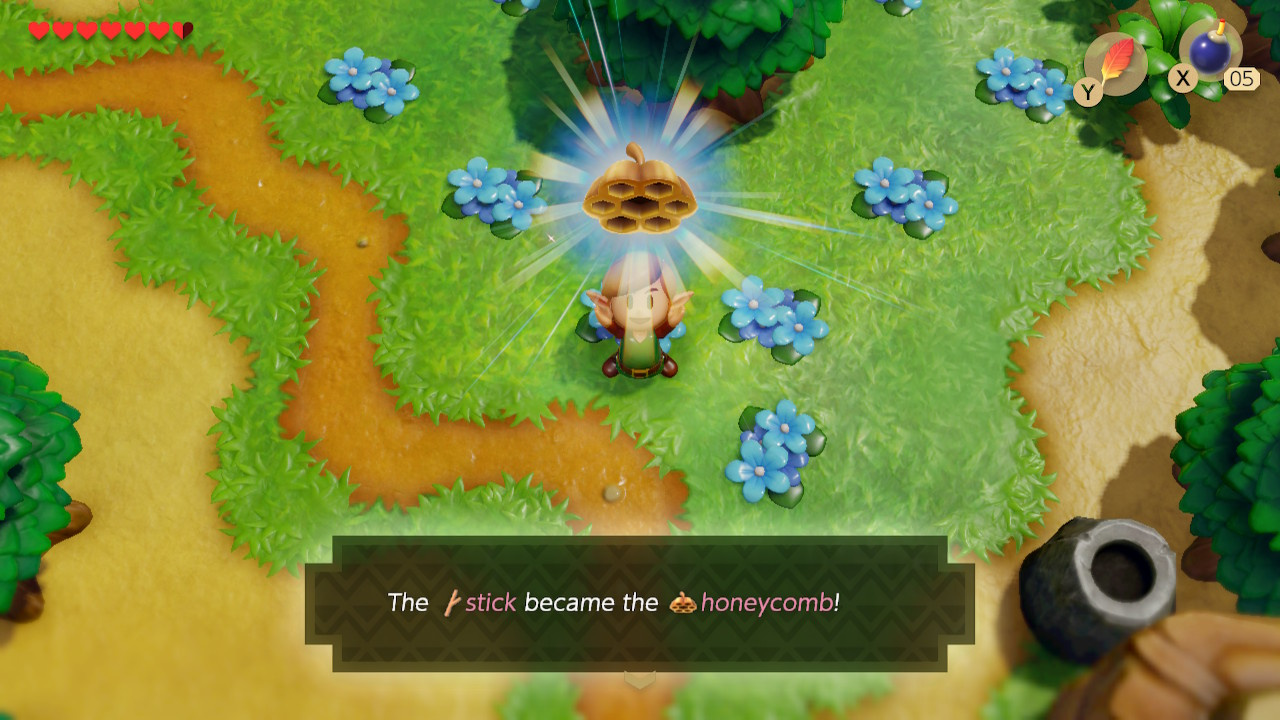
Tarin’s loss is your gain – Link will lose the Stick and receive the Honeycomb. We’ll find a recipient for that item just a little later in this guide.
Honeycomb for Pineapple
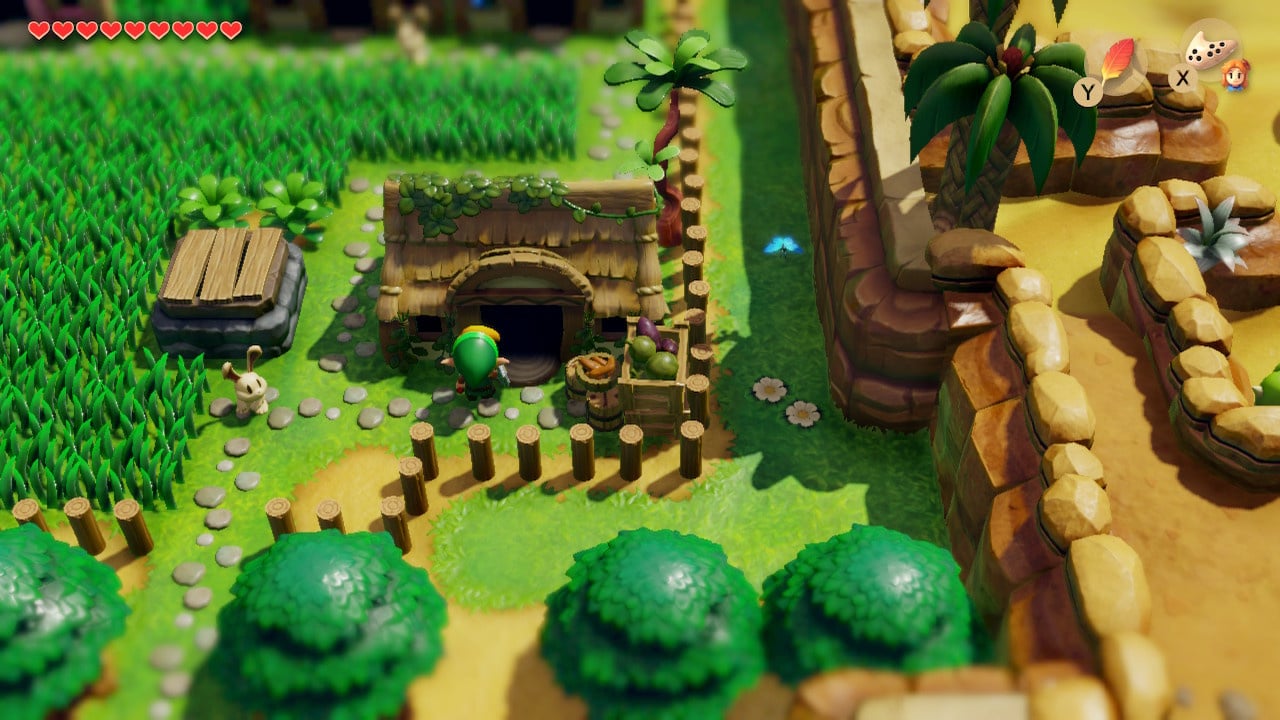
Head into the house in the south-eastern corner to meet Chef Bear, who sniffs out your honeycomb:
Hi ho! Hey, you! Is that possibly a honeycomb you have?
I just ran out! Will you swap it for a Pineapple?
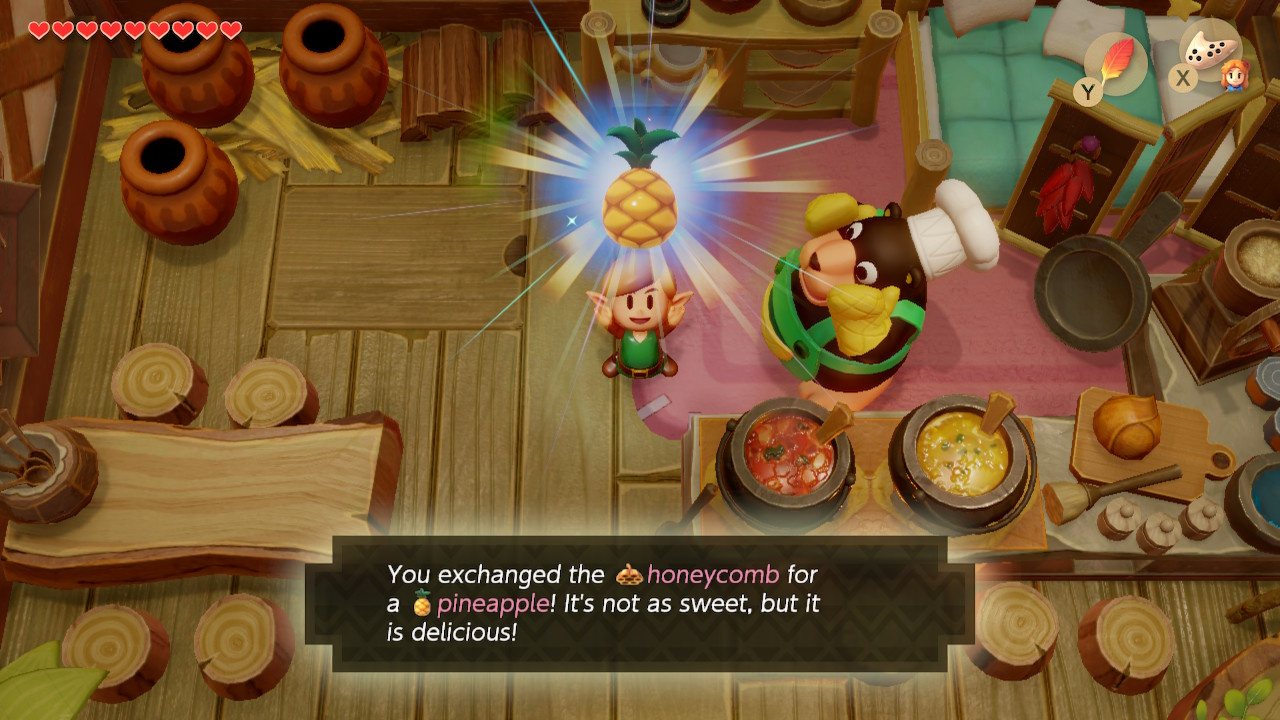
Hand the honeycomb over for the Pineapple. Again, we’ll find someone who’ll take that item off your hands later in this guide.
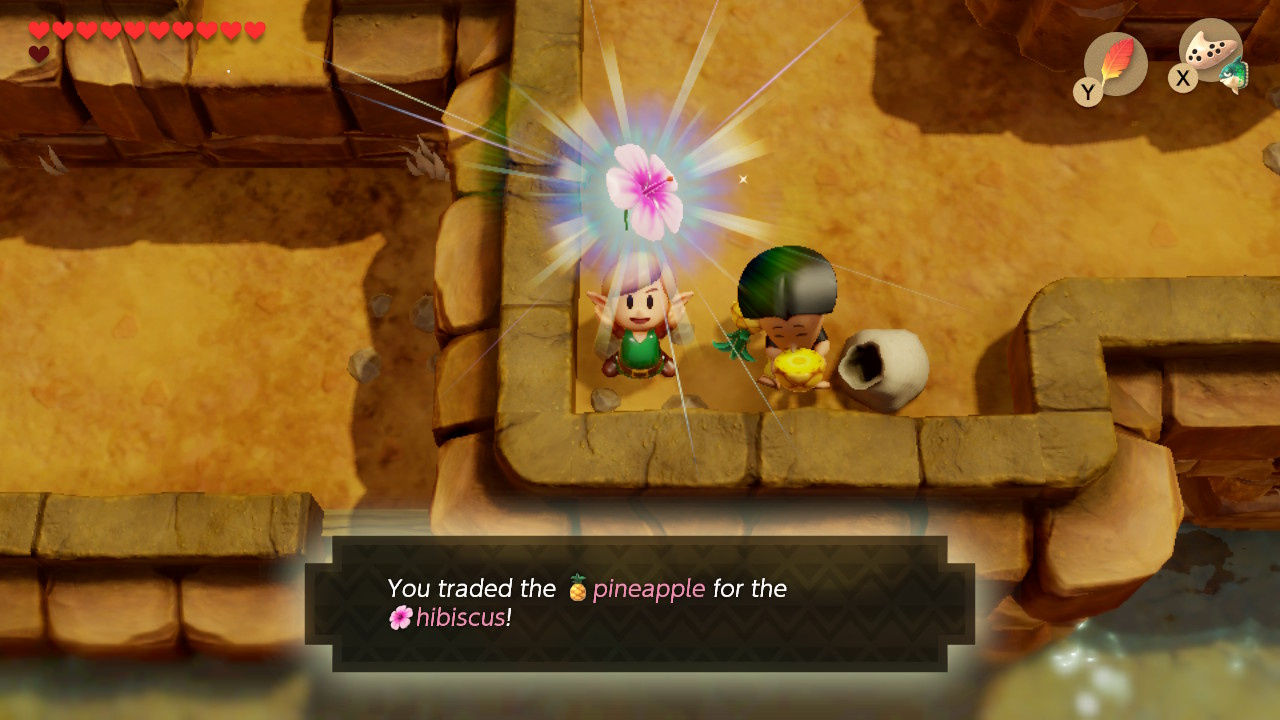
Pineapple for Hibbiscus
Head up through the cave system and you’ll meet Papahl, husband of the mother you gave the Yoshi Doll to earlier. His prediction came true – he’s lost and hungry, Thankfully, you recently became the proud owner of a succulent Pineapple, which Papahl is all too happy to relieve you of. In exchange he’ll give you a Hibiscus – a flower that you may have heard someone in the Animal Village asking after. Technically you can advance the trading quest further right now, but as we’re so close to the Angler’s Tunnel already, we’ll follow the trading sequence up in Part Six.
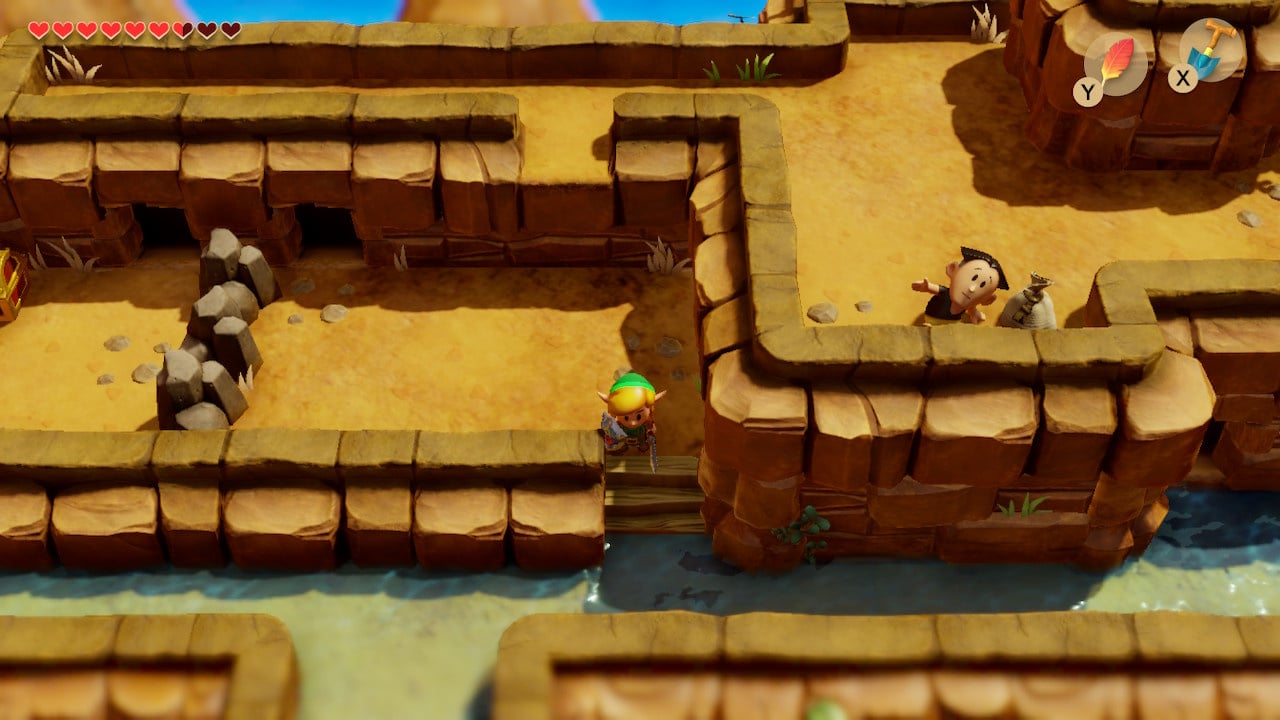
Jump down from the ledge and head east. Jump to the Angler’s Tunnel entrance below and head inside. The steps to the right will return you across the river and are useful if you fancy wandering off to tackle something else.
Part Four
Hibiscus for Goat’s Letter
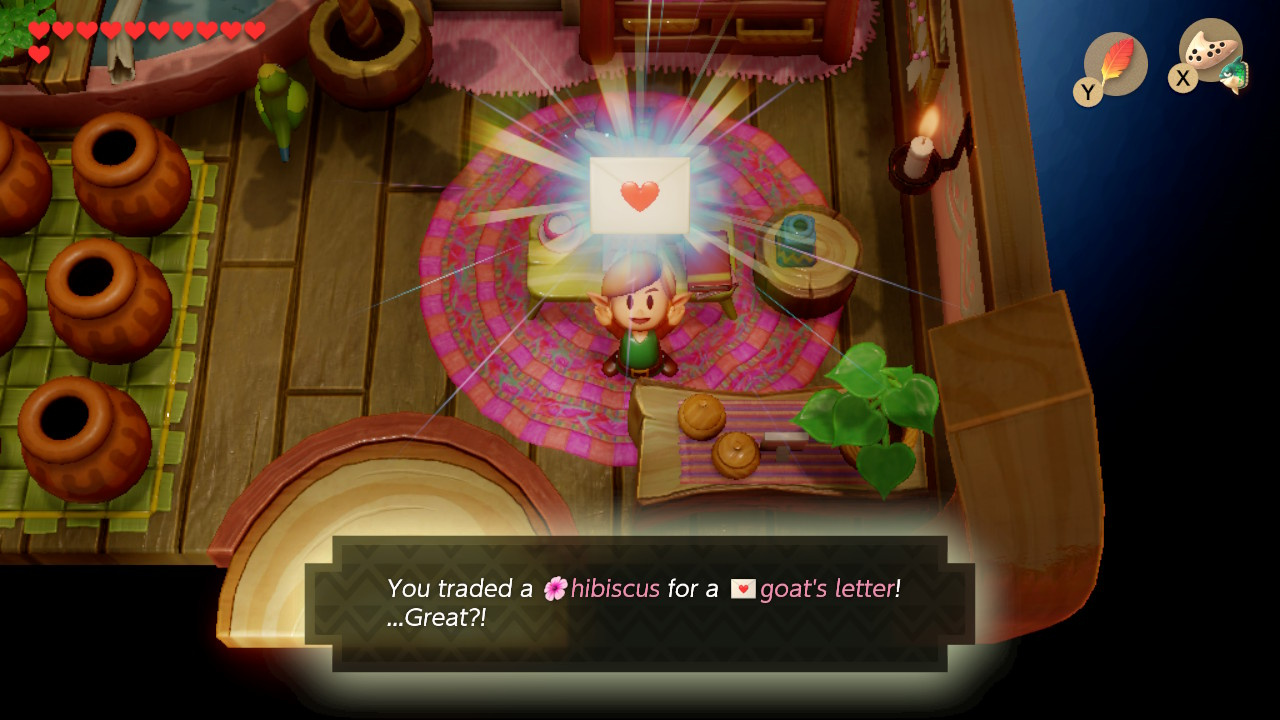
Having received the Hibiscus from Papahl near the Mountain Waterfall, you may recall encountering a goat in the Animal Village looking for one. Her name is Christine, and she lives in the third house in the north of the village.
Oh, you brought me a Hibiscus! How Sweet!
Well, since you are such a gentleman, I have a request to make of you. Will you listen?
I would like you to take this letter to a Mr. Write who lives on the border of the Mysterious Forest, please!
[You traded a Hibiscus for a Goat’s Letter! …Great?!]
You know, sometimes I can’t help eating a delicious piece of paper, even if it’s a letter to my darling Mr. Write…
How embarrassing!
(It’s worth noting that if you return once you have delivered the letter to Mr. Write, Christine will give you a secret seashell.)
Goat’s Letter for Broom
Cast your mind back to your early adventures and you may remember a house in the northwest of the map, north of the Mysterious Forest. This is the home of Mr. Write, a letter-writing fanatic and subject of Christine’s affections. (He’s also transparently the same design as Dr. Wright, the Mayoral advisor in Nintendo’s SimCity ports and an obvious reference to SimCity creator Will Wright. Subsequent events are assumed to be non-biographical).
Hand over the Goat’s Letter and Mr Write will be very pleased:
What’s this?! A letter for me?!
I’m so happy!
And look! The letter came with a photograph!
Christine has indeed enclosed a photograph – it’s not exactly a true likeness, but Mr. Write seems impressed nonetheless:
Mmm… She’s so beautiful… I must give you something for your trouble…
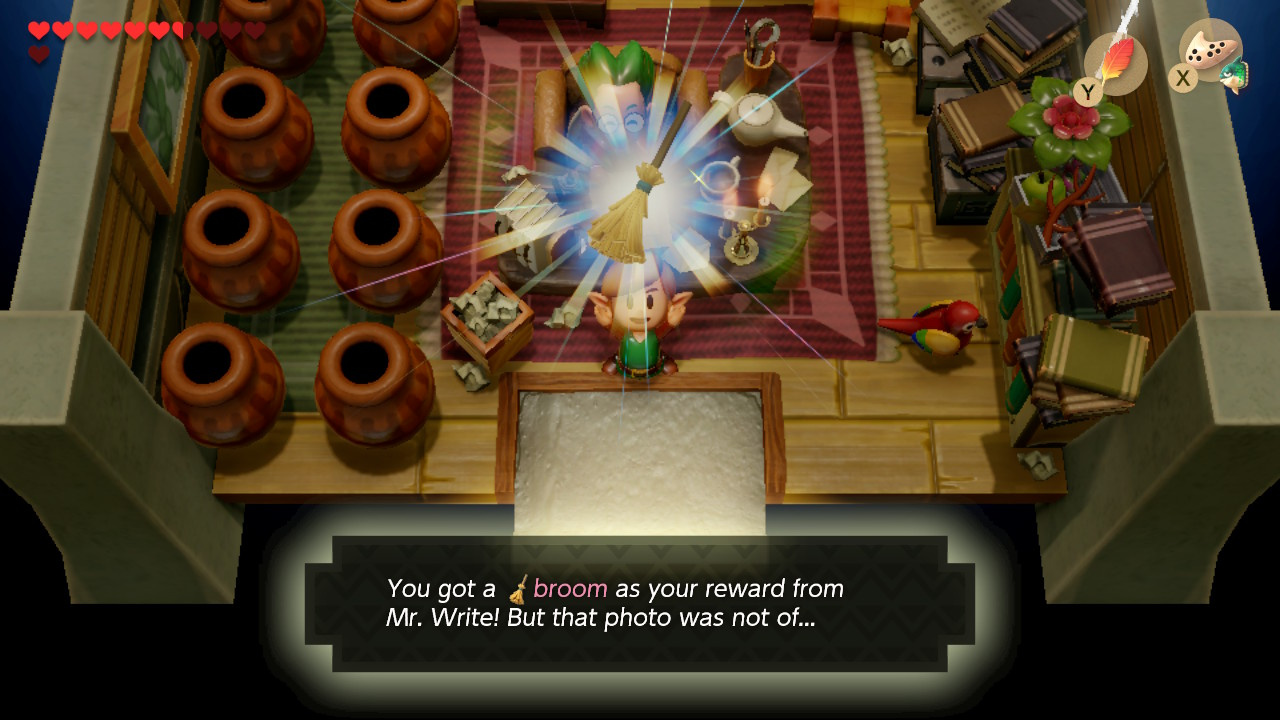
Hmm… Well, it looks like all I have is this Broom… How’ll that be?
[You got a Broom as your reward from Mr. Write! But that photo was not of…]
Oh boy! Letter writing is such a great hobby!
With Mr. Write successfully catfished, you should head to Mabe Village to find a new owner for your Broom.
Broom for Fishing Hook
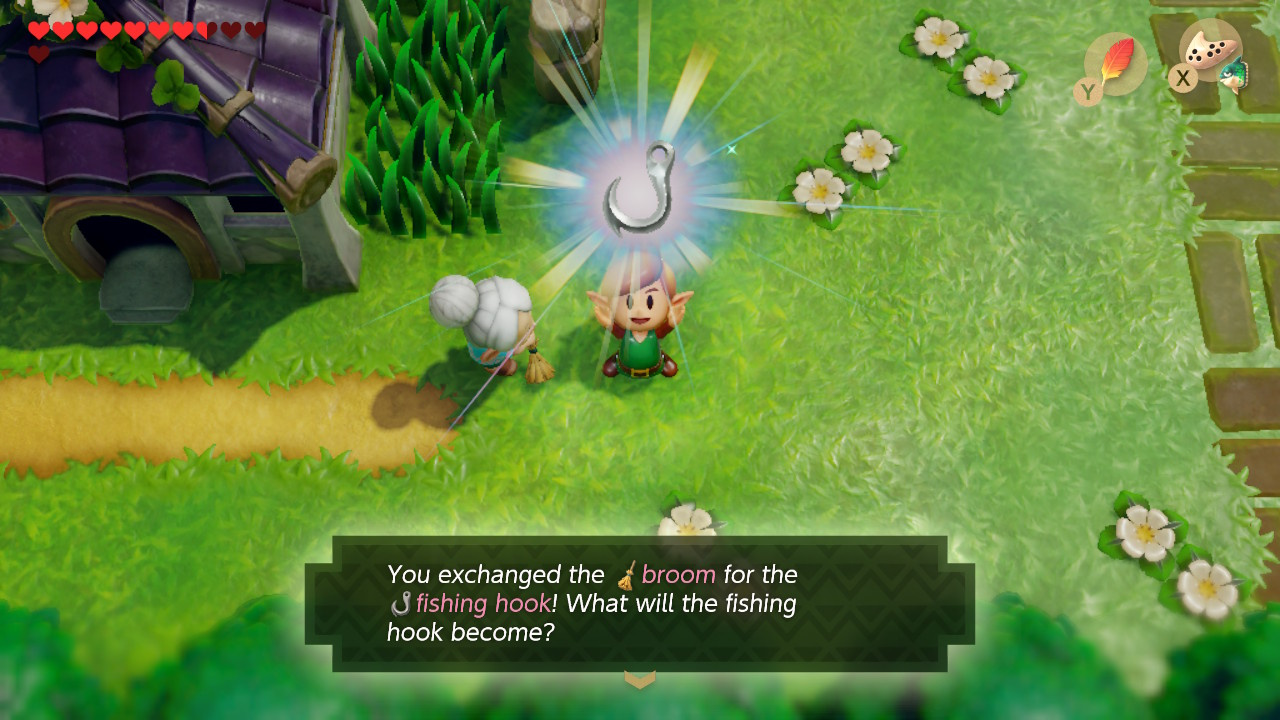
While you’d be forgiven for assuming that the person on Koholint Island most likely to be in need of a broom would be the Witch that lives barely seconds away from Mr. Write, video game logic is rarely so convenient. Instead, Grandma Yahoo can be found outside of the house immediately south of where BowWow is chained up, complaining about a broken Broom. Approach her with the replacement and she’ll excitedly say:
YAHOO! YAHOO! A new Broom?!
For me? It is, isn’t it?!
Ok! In return, you can have this Fishing Hook I found when I swept by the riverbank!
[You exchanged the Broom for the Fishing Hook! What will the fishing hook become?]
YAHOO! A new broom! Superb!
Fishing Hook for Necklace
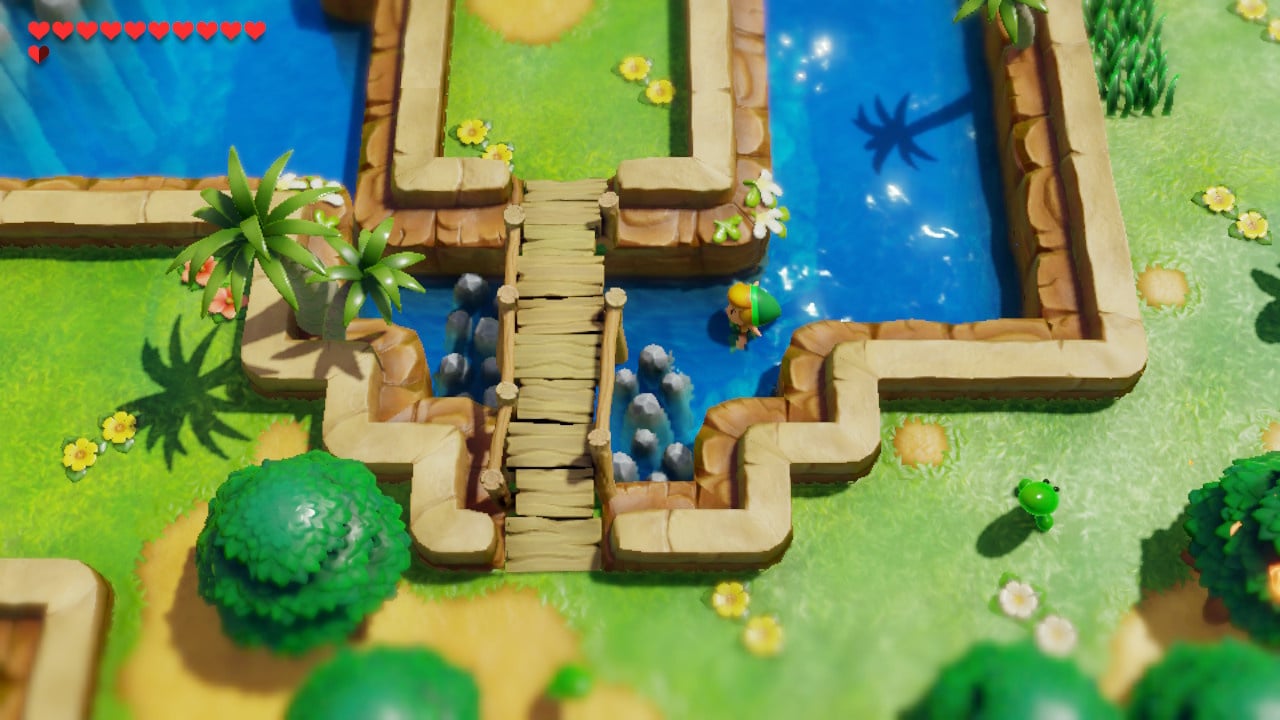
The trading quest now finally brings us to Martha’s Bay, the area where we will find the next dungeon. Martha’s Bay is south of Kanalet Castle, West of the Animal Village and East of the Ghost’s house. Play Manbo’s Mambo and warp to Animal Village. Head west and take one of the sets of stairs into the water. Head south into the little inlet in the southeastern corner of the bay – swim under the bridge and enter a sidescrolling area where you will find a fisherman.
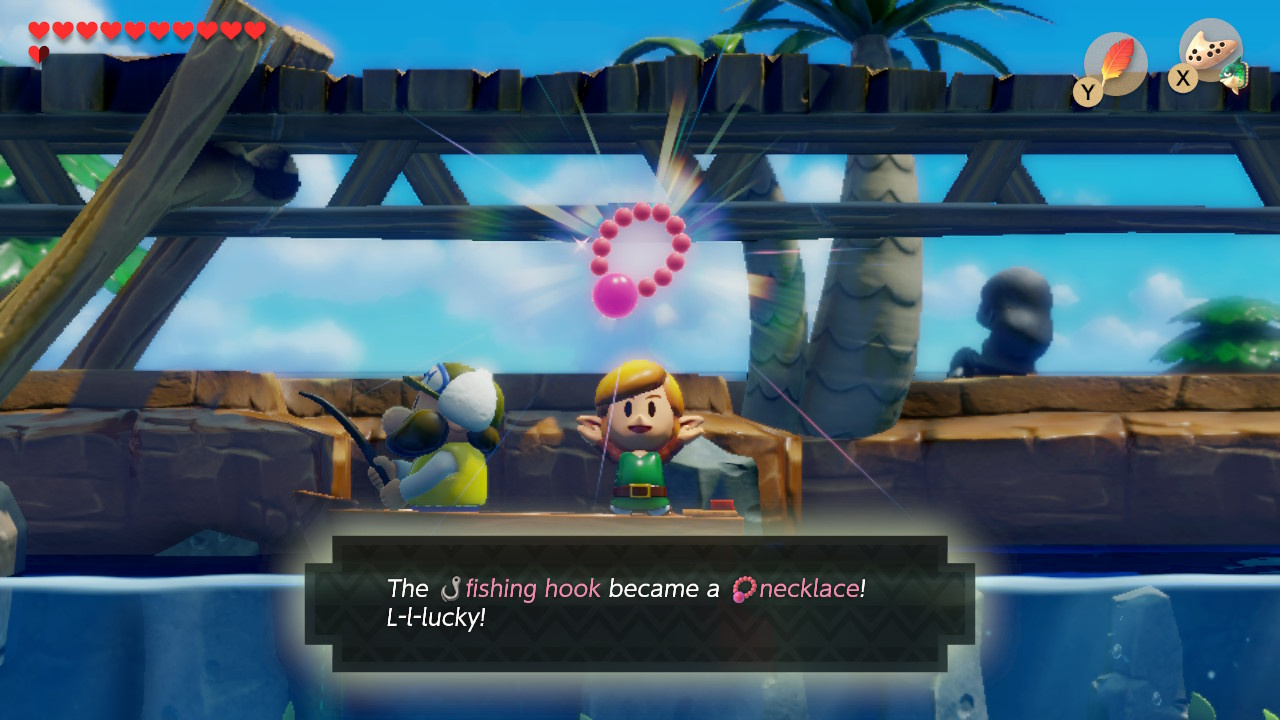
Hop out of the water and onto the boat, then speak to the Fisherman:
Oh! What is that you have in your hand? It’s not a Fishing Hook, is it?
You had better let me have it. I’ll give you my next catch if you let me have it…
Keep your eyes open and watch a pro at work.
The Fisherman casts his line and quickly snags something:
My, that’s a BIIIIG one!
[The Fishing Hook became a Necklace! L-l-lucky!]
Necklace for Scale
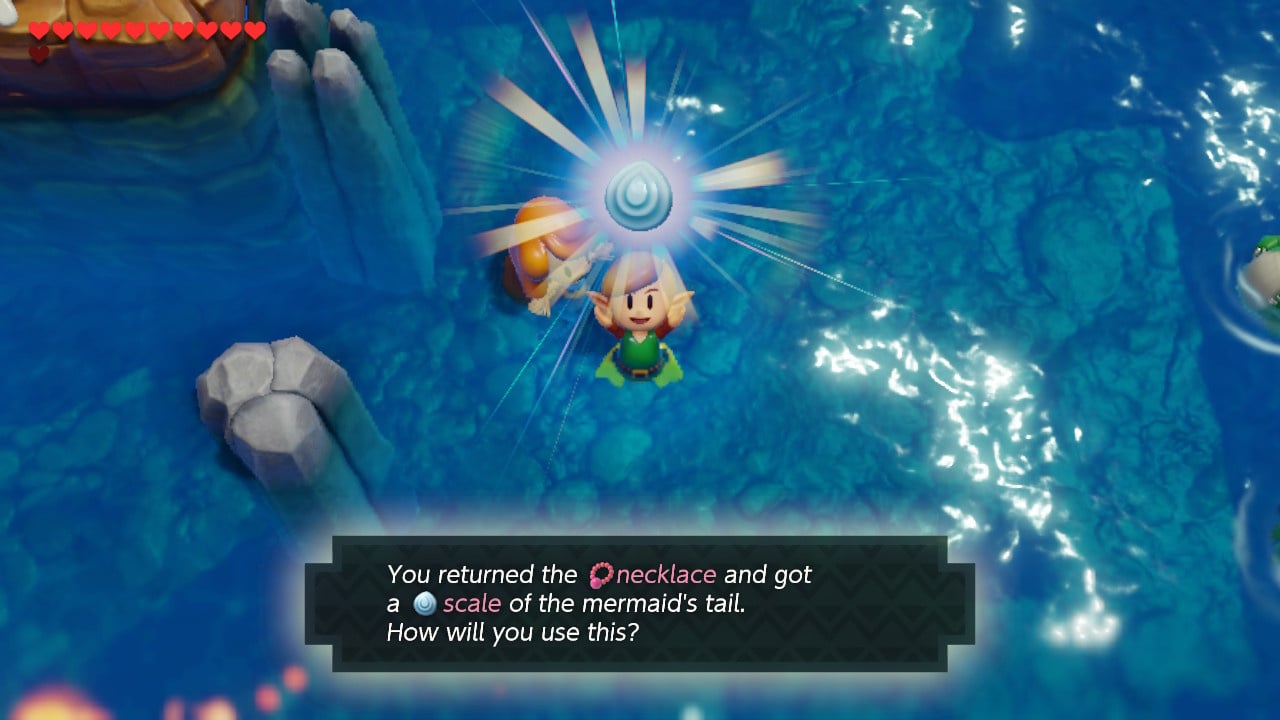
You won’t have to go far to find the owner of the necklace – look for the Mermaid in the open water to the north of the bay:
Ahh! That’s it! That’s my Necklace! Give it! Give it back!
I will give you a scale as I said!
Promise! You’ll only take one!
[You returned the Necklace and got a Scale of the mermaid’s tail. How will you use this?]
The answer to that question will have to wait for now, as we’ve gone as far as we can with our current abilities – rest assured, we’ll be finishing the quest once we leave the next dungeon.
Part 5
Scale for Magnifying Glass
Climb out on the east bank of Martha’s Bay and head south of the bridge you found the fisherman under. Hookshot across the inlet using the wooden box on the other side and head north.
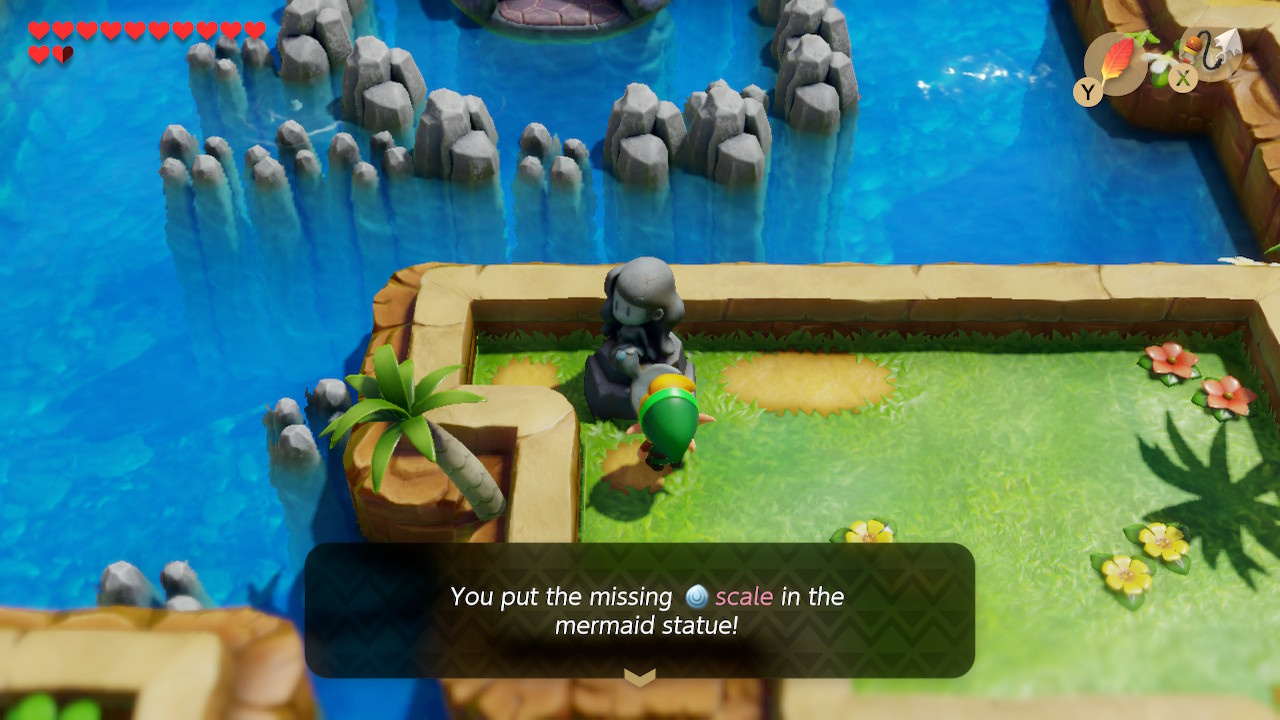
Here we find a Mermaid Statue apparently missing a scale. Replacing the scale, it suddenly moves aside and reveals some steps.
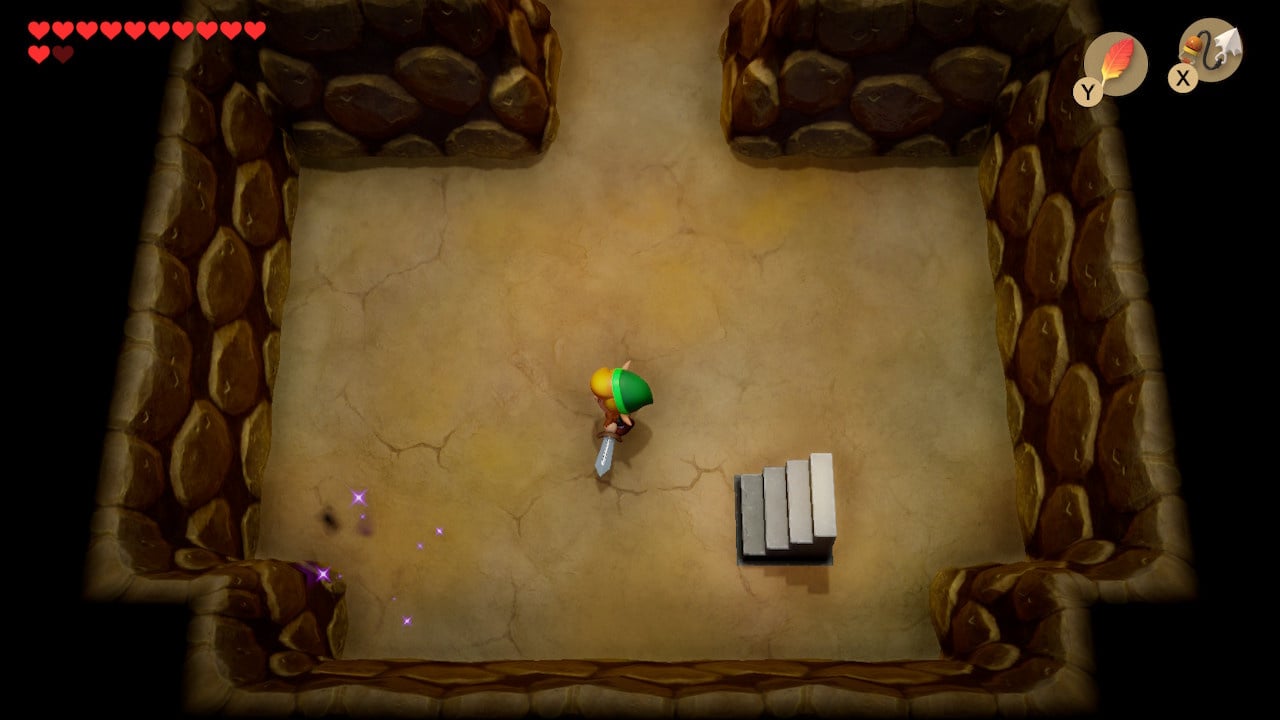
Head down the steps – you will be hassled by invisible opponents. Either quickly head to the top or hit them with a charged sword attack as you hear them get close.
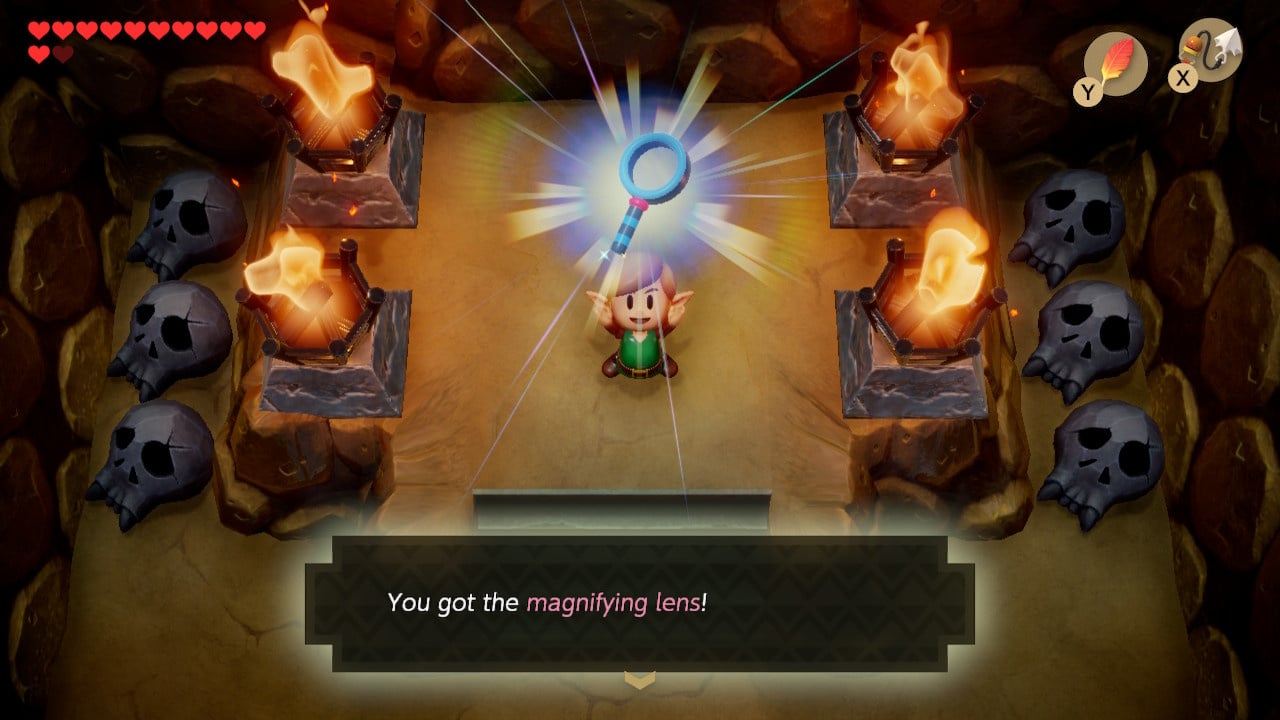
You will see a magnifying lens on a raised area at the top of the cave. Pick it up – its effects are applied automatically for the rest of the game.
Primarily the magnifying lens’ allows you to read a particular book in the Mabe Village library for directions to a particular dungeon. We’ll leave heading there until relevant – there are, however, a couple of places where your new-found skills of perception come in handy – let’s head to them now.
With the trading sequence complete, you are able to visit the Wind Fish's Egg, Complete the maze and Defeat the Final Boss as part of our Zelda: Link's Awakening walkthrough.


Comments 2
I don't know why I'm reading about this game... probably because I might be getting it today!
I'm getting link's awakening in like 10 minutes and I need help. I've never played a zelda game except for LTTP on switch. Does anyone have any tips? I know about battling and heart pieces, but nothing else. HELP ME OUT HERE
Show Comments
Leave A Comment
Hold on there, you need to login to post a comment...