Continuing part seven of our Zelda: Link's Awakening walkthrough we enter the sixth dungeon, the Face Shrine, finding the Map, Compass and getting the Powerful Bracelet along the way.
Subscribe to Nintendo Life on YouTube848k
Face Shrine Walkthrough
Finding the Powerful Bracelet
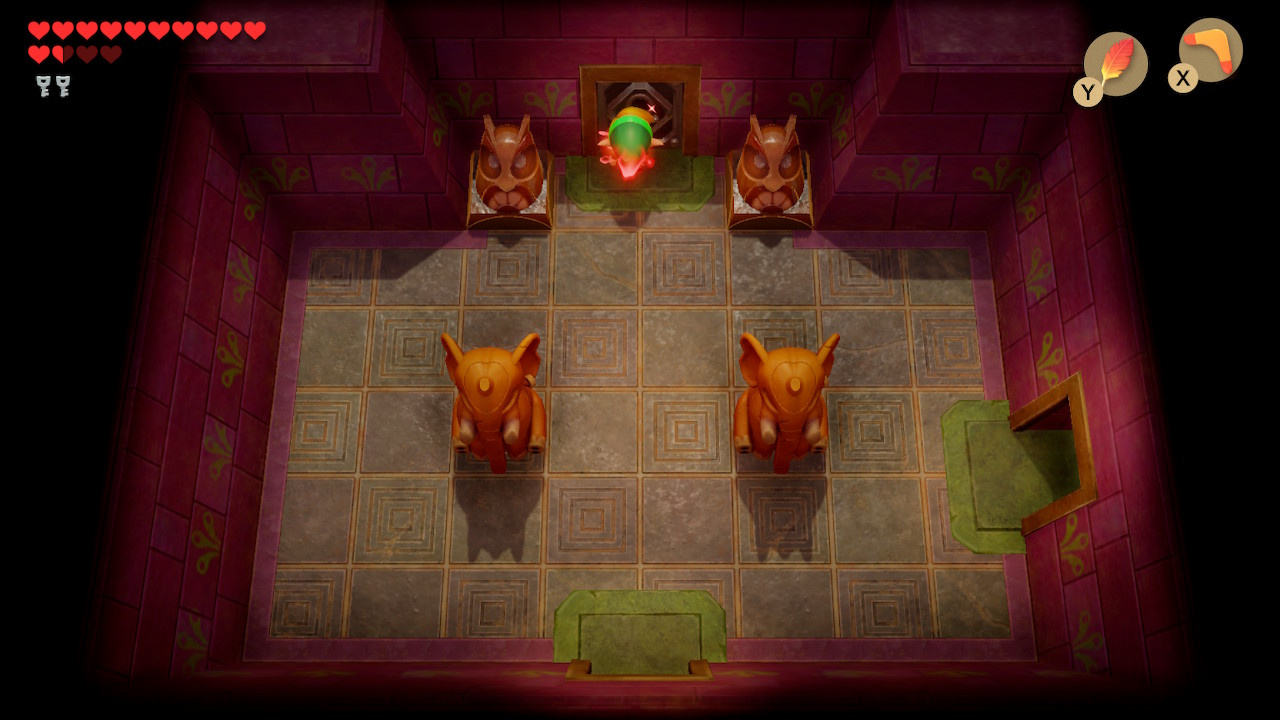
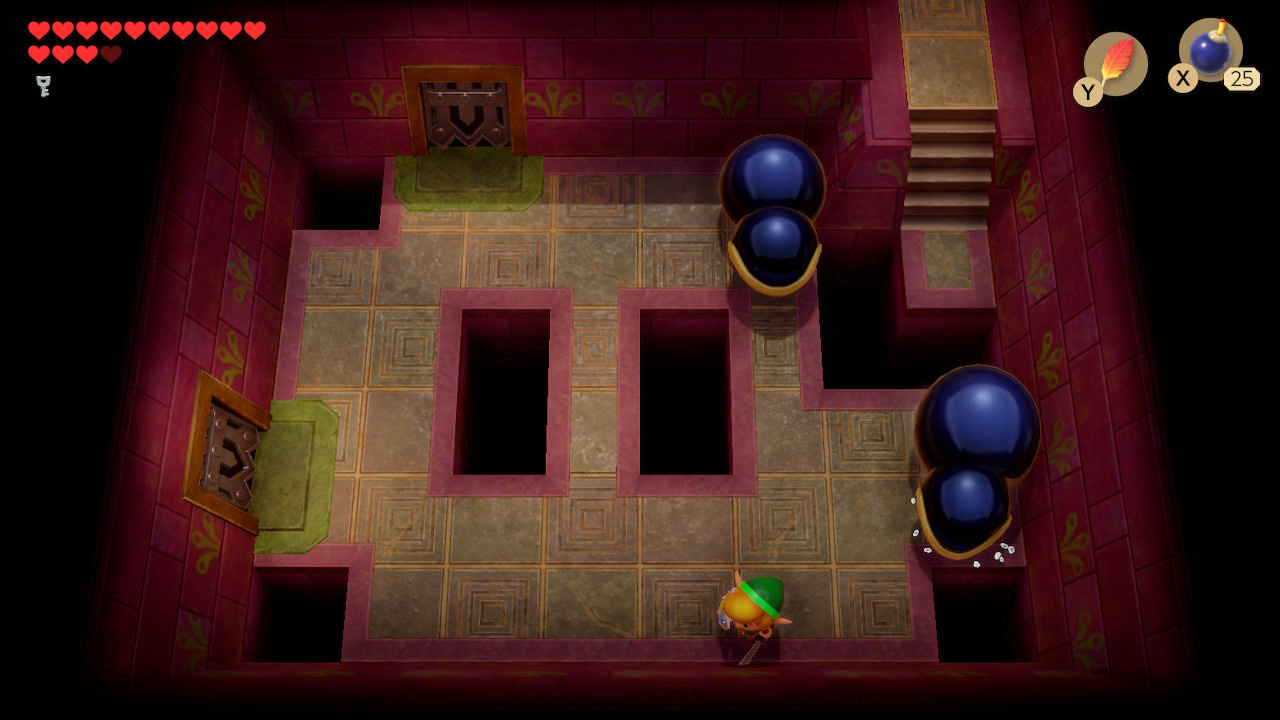
Unusually, our first task in the Face Shrine won’t be to track down the various items that help us understand the layout of the place: instead, we’ll be claiming the dungeon’s key item first and using that for the remainder of the dungeon. Head left to start your search.
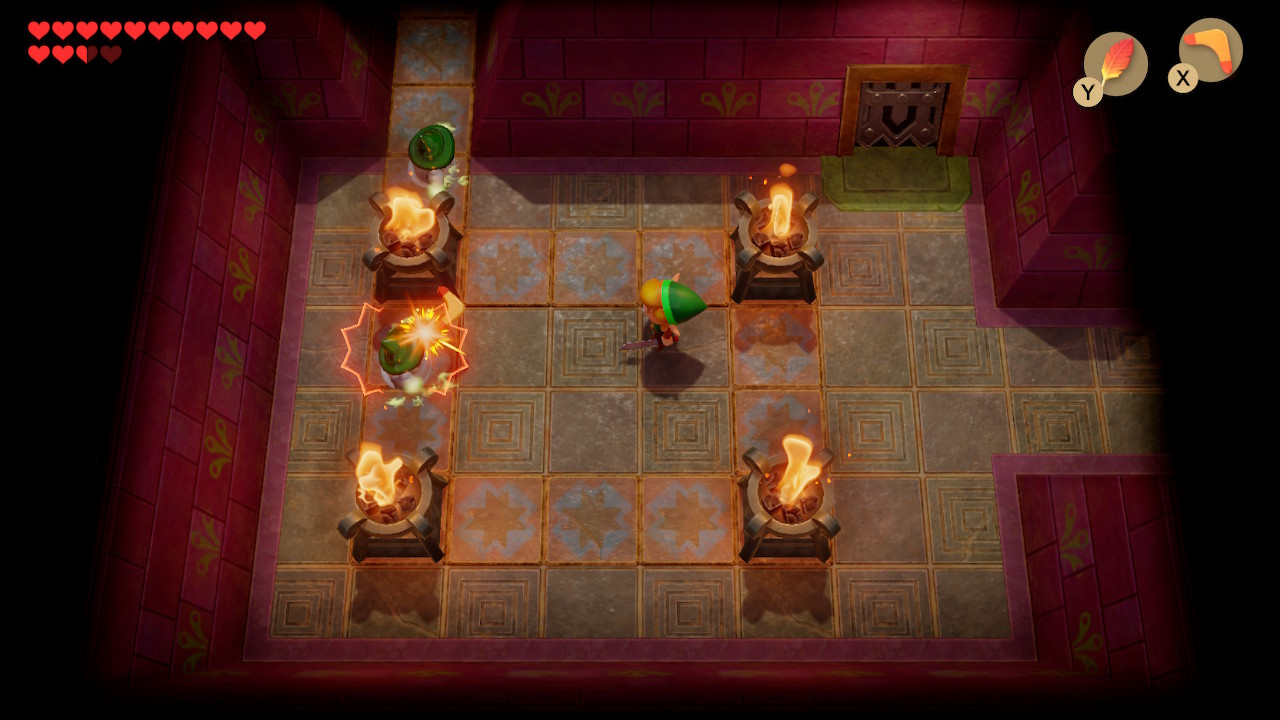
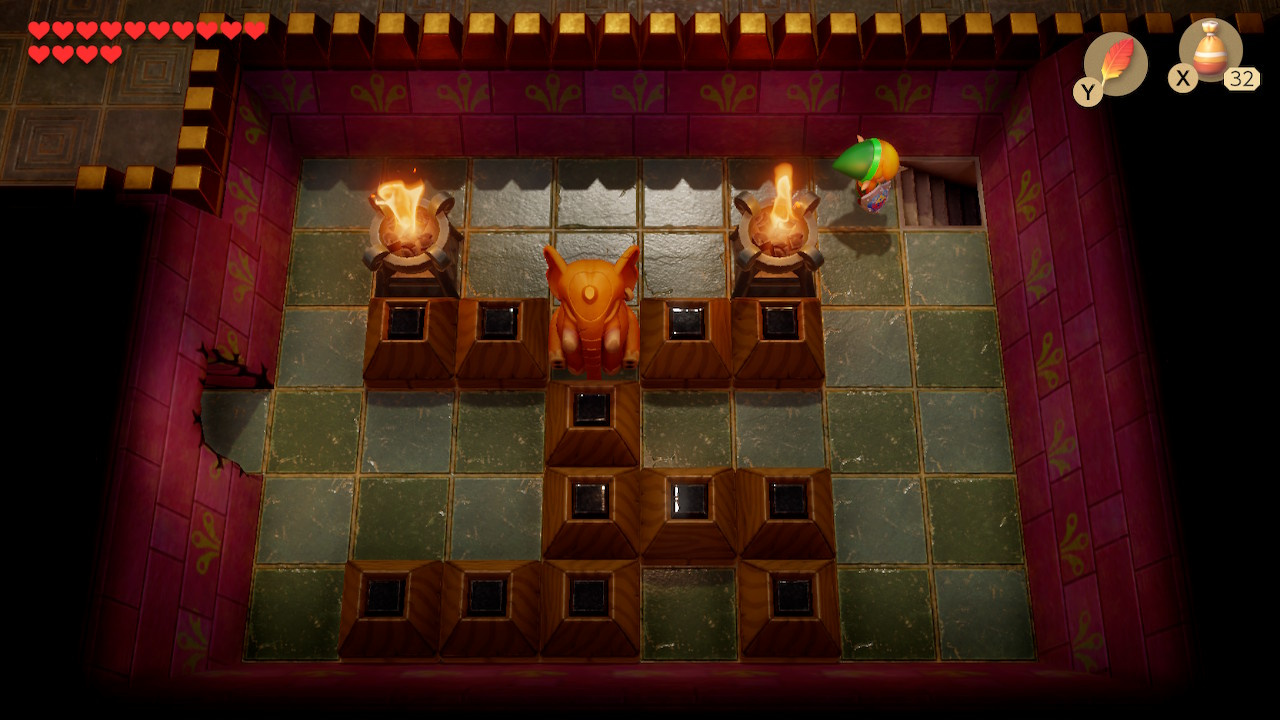
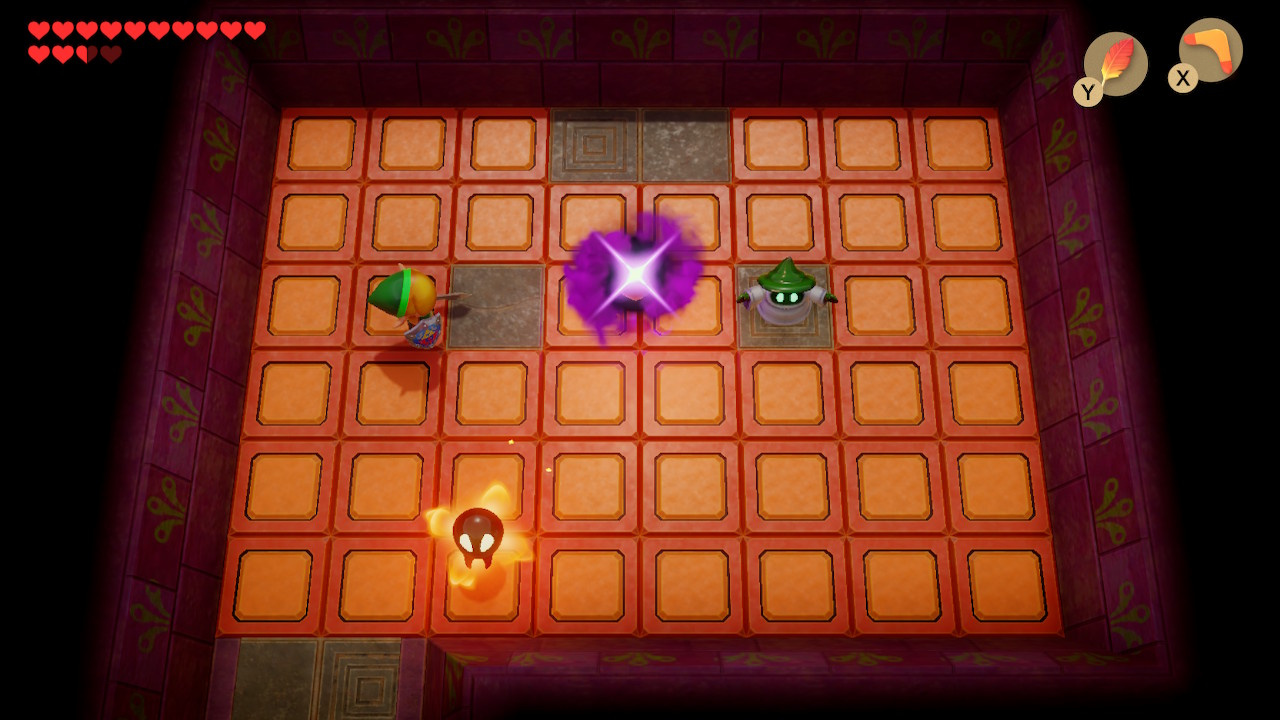
Your first enemy encounter will be with a group of Wizzrobes – expect to see a lot of them in this dungeon. They will continuously disappear and reappear under their hats and throw a fireball at you. Damage them with arrows, your boomerang and/or a bomb. Clearing the room opens the gate on the right – currently a dead-end with a 50 rupee chest and an elephant-shaped statue that you cannot currently lift. The left corridor should be followed instead – head up and then left.
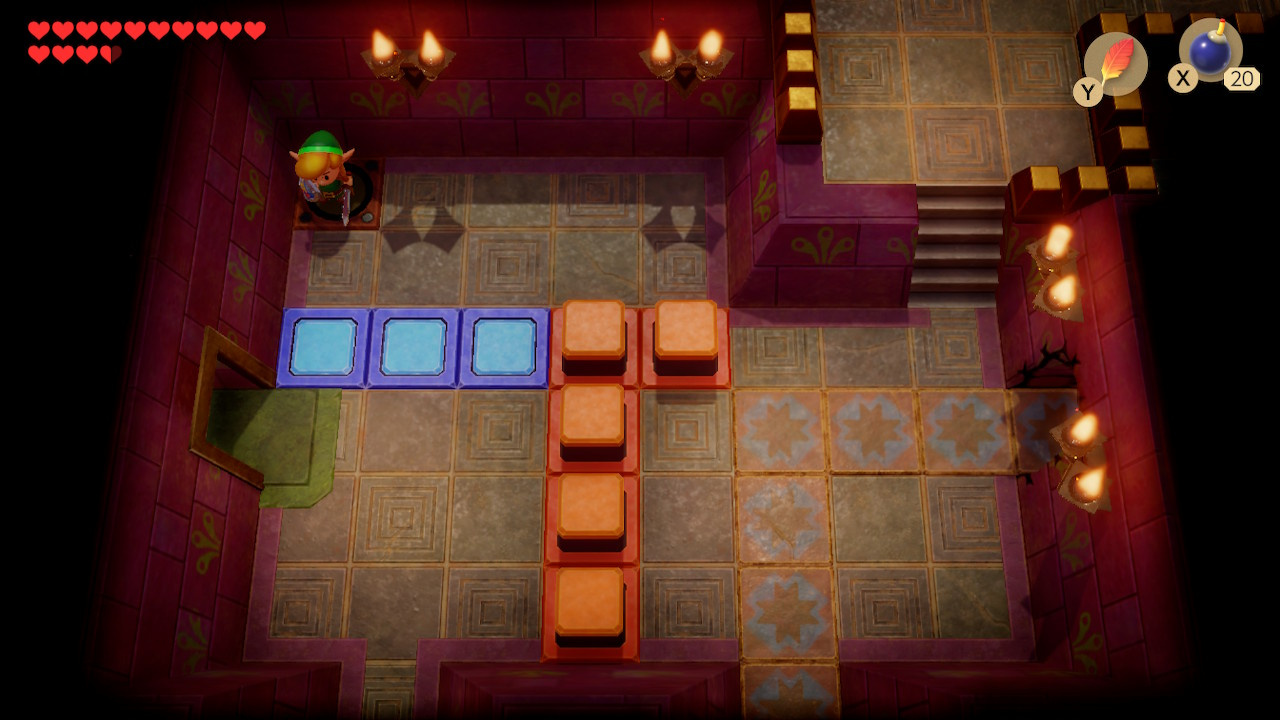
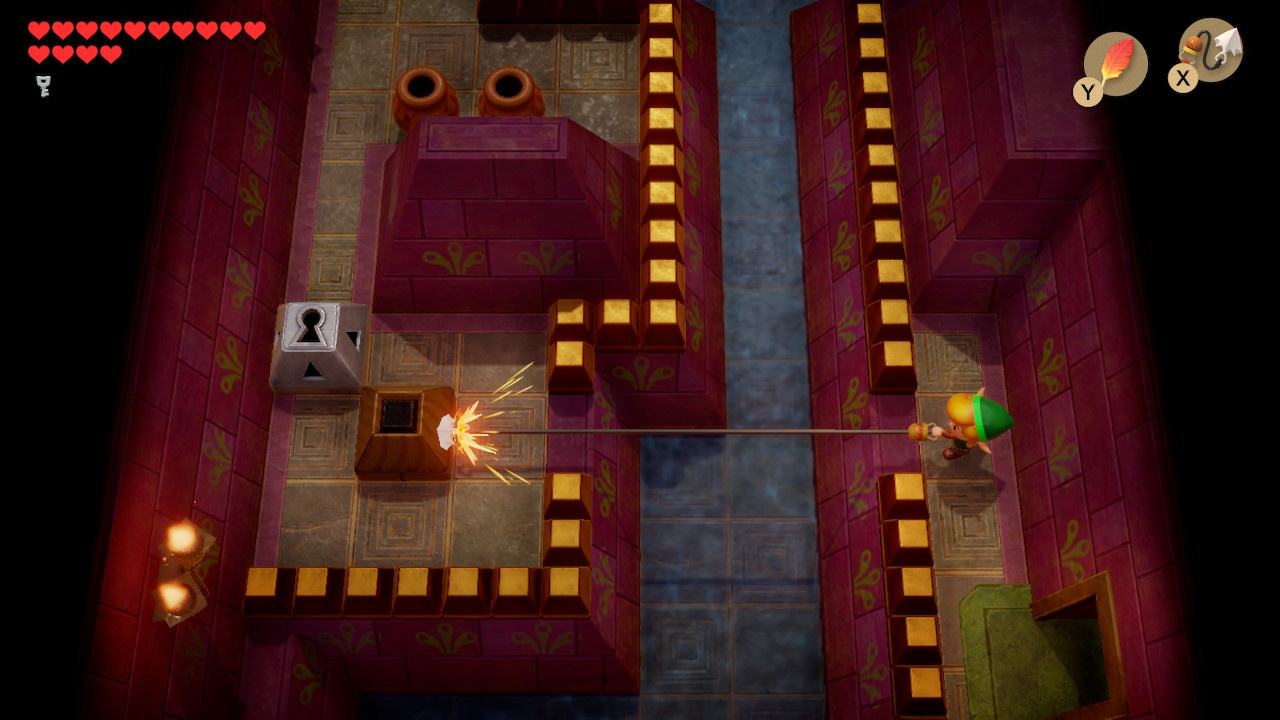
The next room contains a mask mimic (you have more options for taking it out than just the charged sword attack now, e.g. the Boomerang), a gem switch, two narrow corridors and two currently unopenable doors.
Note that when the gem switch is hit the orange barriers will stop you from progressing further – the trick is to lay a bomb, walk beyond the barriers and wait for the bomb to explode, cycling the switch. Do this once (lowering all blue barriers, raising all orange) and head up one screen, using the righthand corridor. Bomb the broken wall to the right and step through.
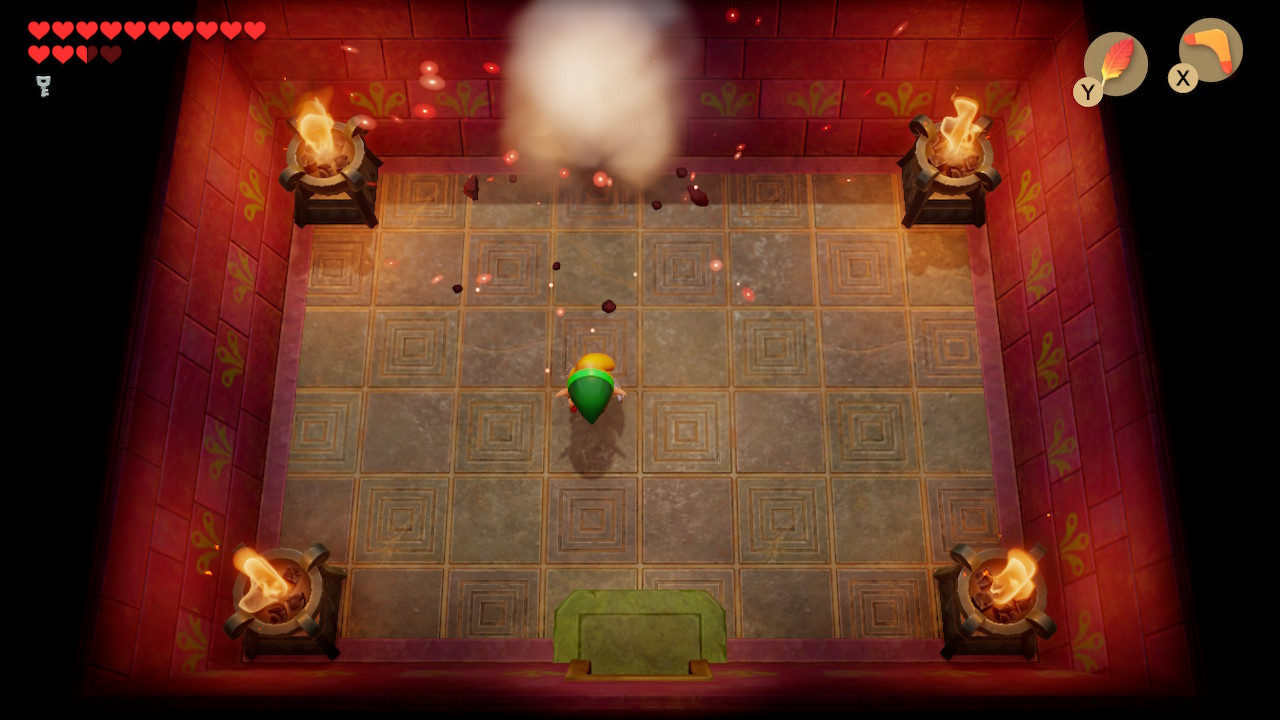
Circle the next room, killing the Zol (green blobs) as you go, throwing magic powder on the torches to get some light. With all enemies killed, a set of steps will appear in the upper right.
Head through the next sidescrolling area, taking care to avoid the giant bubbles as they bounce around.
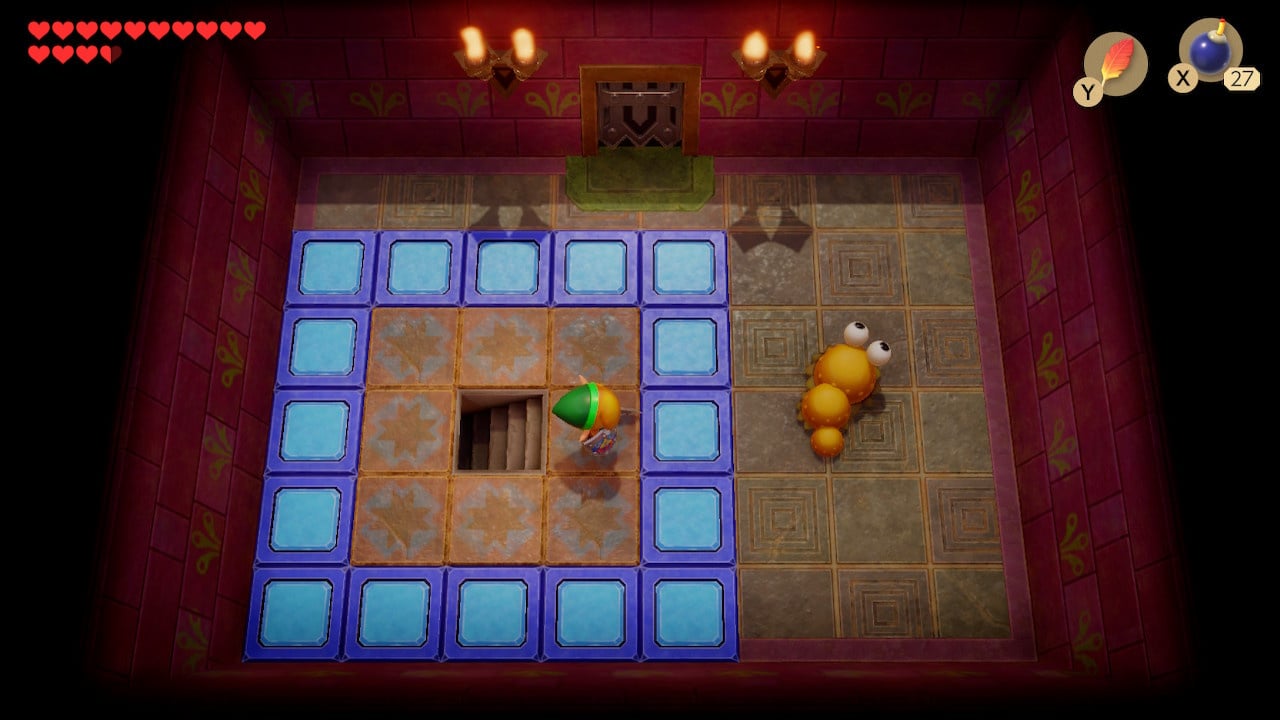
You emerge in a room which should have a ring of lowered blue barriers, a mini-moldorm and a couple of Wizzrobes. Remove all the enemies to open the door at the top and head through it.
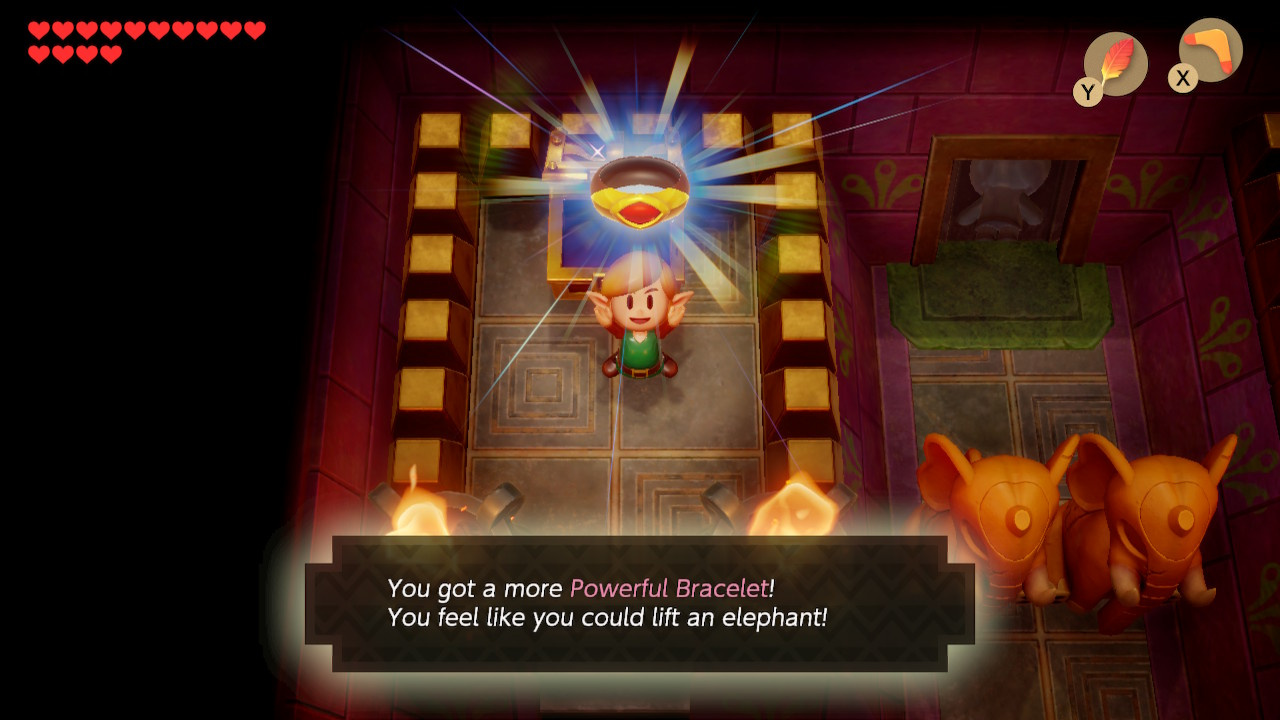
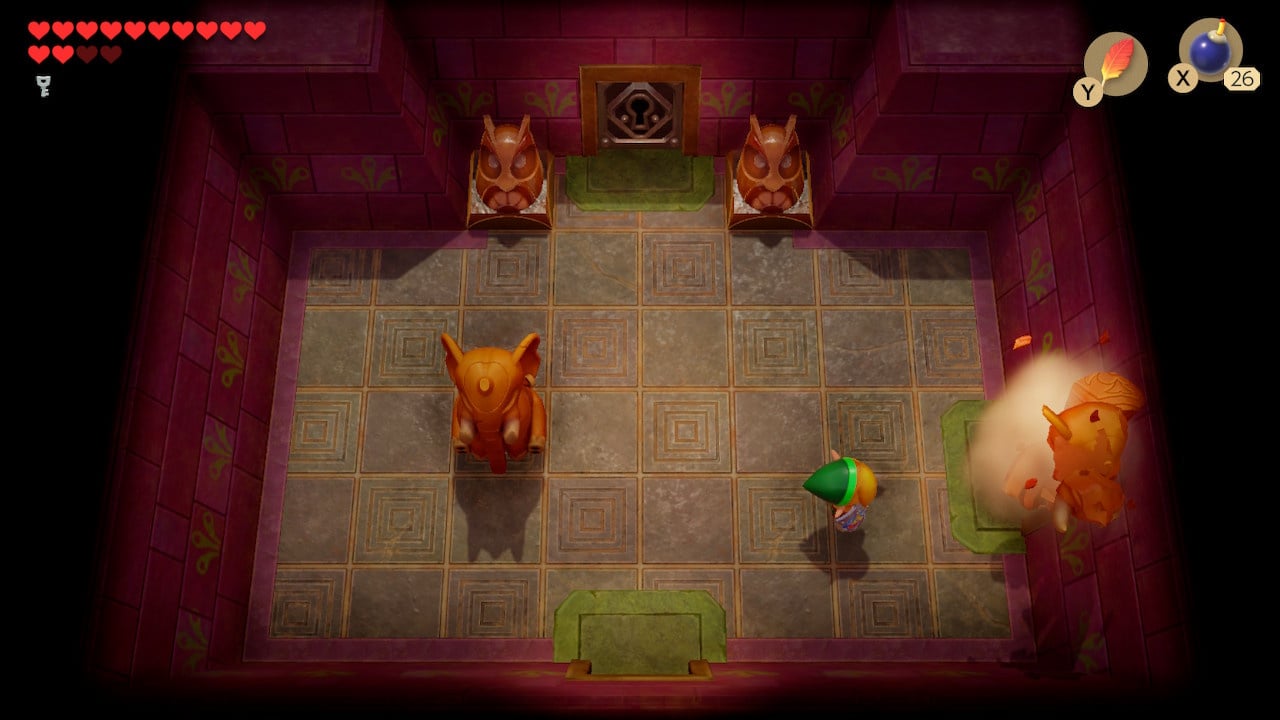
The next room contains two raised areas, with a chest on the lefthand one. Inside is the Powerful Bracelet – an upgraded Power Bracelet that will let you shift even heavier objects – including all those elephant statues you keep seeing. Try it out for yourself and head out the one-way door in the top.
Locate the Face Shrine Dungeon Map, Stone Beak and Compass
You will find yourself back in the room with the gem switch and the mask-mimic. You can use your newfound strength to hurl the Elephant Statue at the righthand exit with the pot on it – head through for a health-pickup and 100 rupees (if you head south, you will find yourself back in your first Wizzrobe encounter).
Return to the mask-mimic room and head up the lefthand corridor, bombing the gem switch as you go to raise the orange barriers again.
Clear the next room of pots to locate a switch in the upper-left corner. Step on it to open the door on the left.

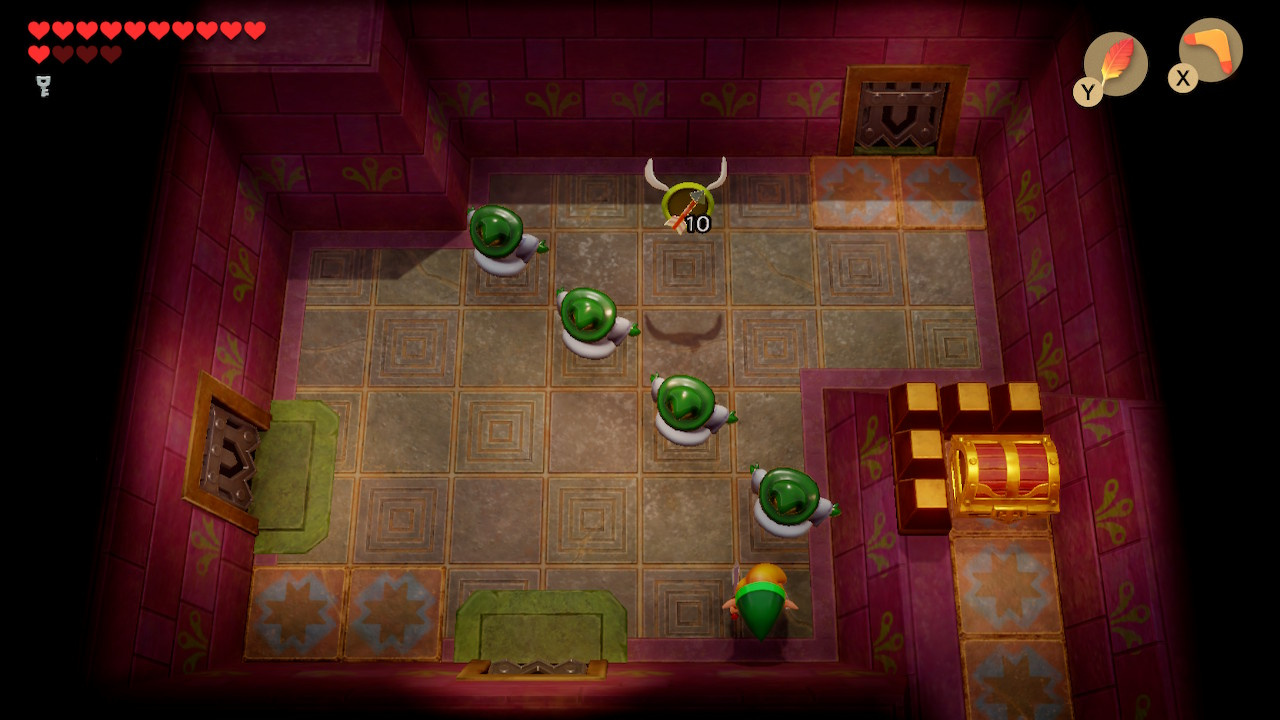
You’ll encounter a group of Wizzrobes in the next room – work on killing them all. One Wizzrobe will appear behind the orange barrier – the boomerang will pass through the blue and orange barriers, but you can also throw bombs to attack/work the gem switch.

With all Wizzrobes culled, the Dungeon Map will appear in the upper right of the room. Leave the room via the north exit, ensuring that the blue barriers remain down.
In the next room you will want to head into the narrow corridor in the upper right.
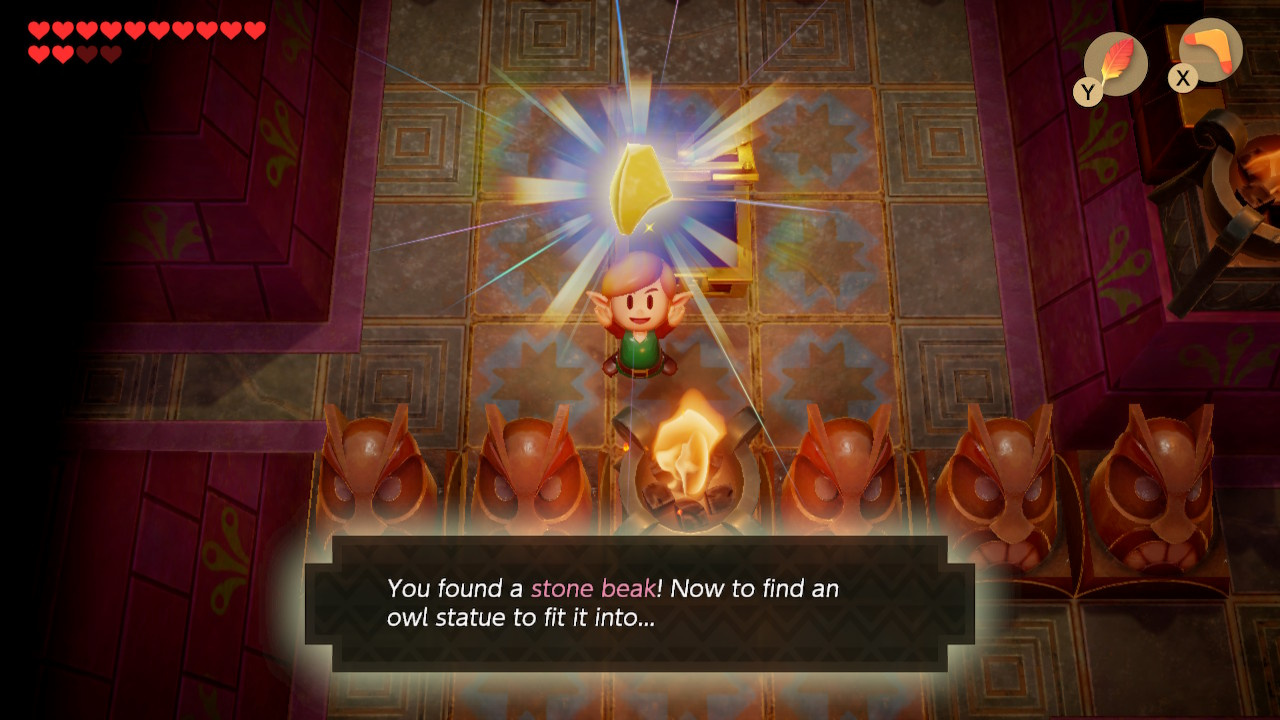
This narrow corridor leads you to another chest – this time containing the Stone Beak.

Return to the previous room and throw one of your pots at the pottery door to break it. When through, turn right down another narrow corridor.
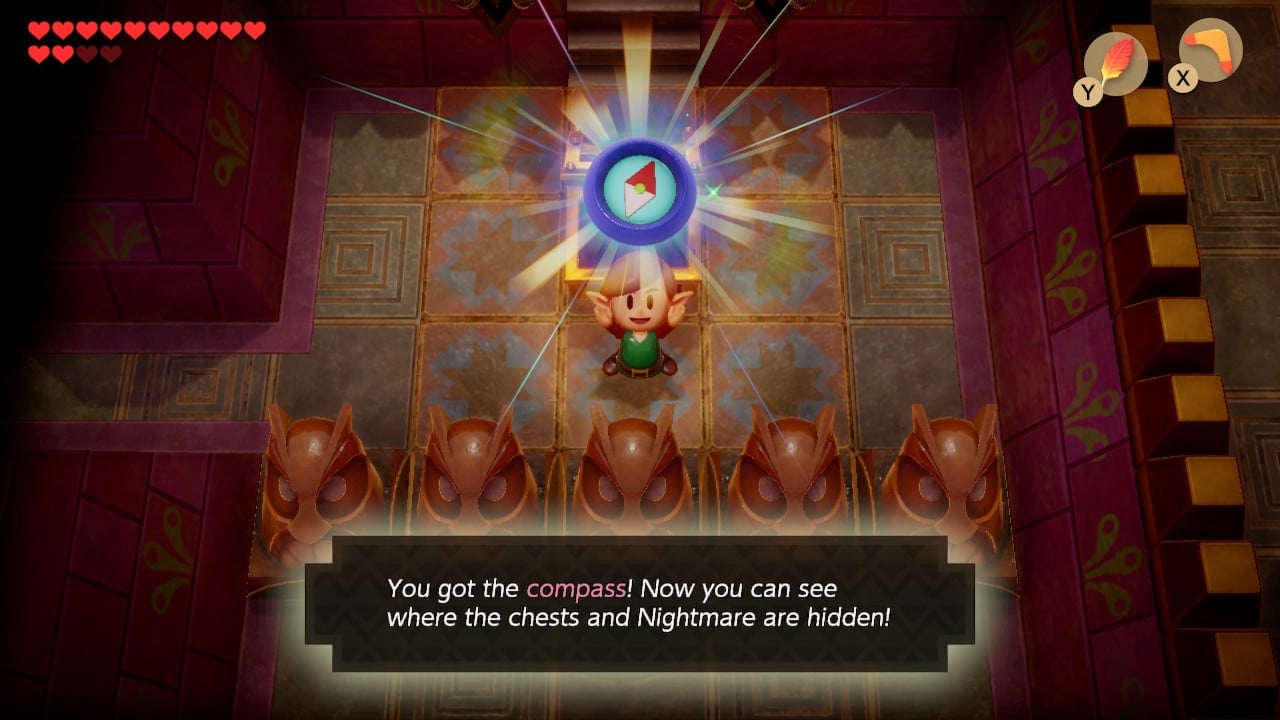
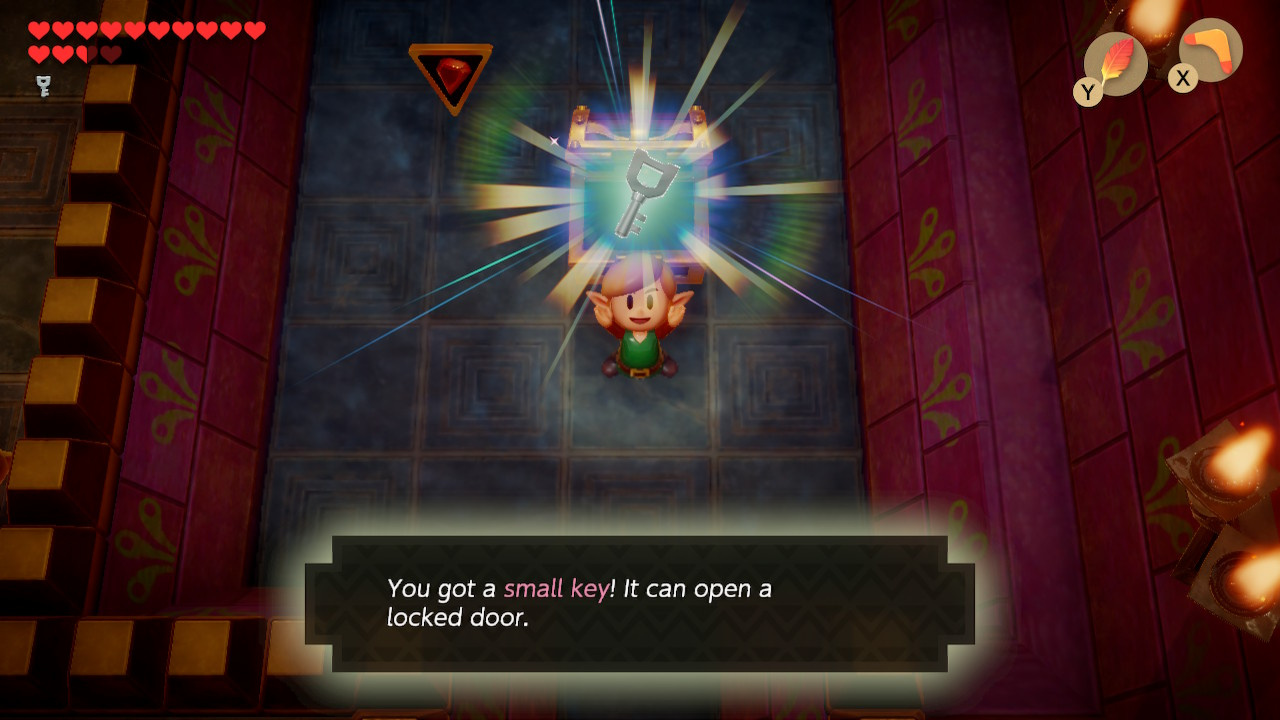
This next room contains yet another dungeon item chest – open it to claim your Compass.
Defeating Smasher - Face Shrine Miniboss
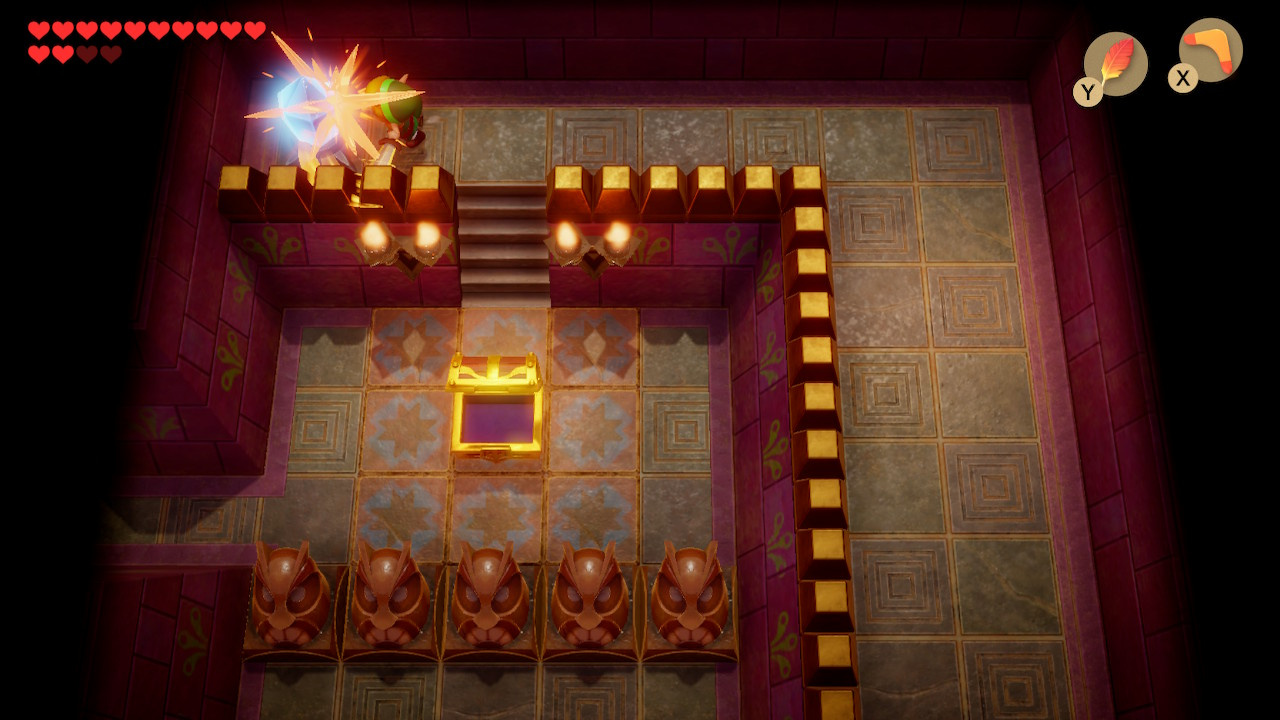
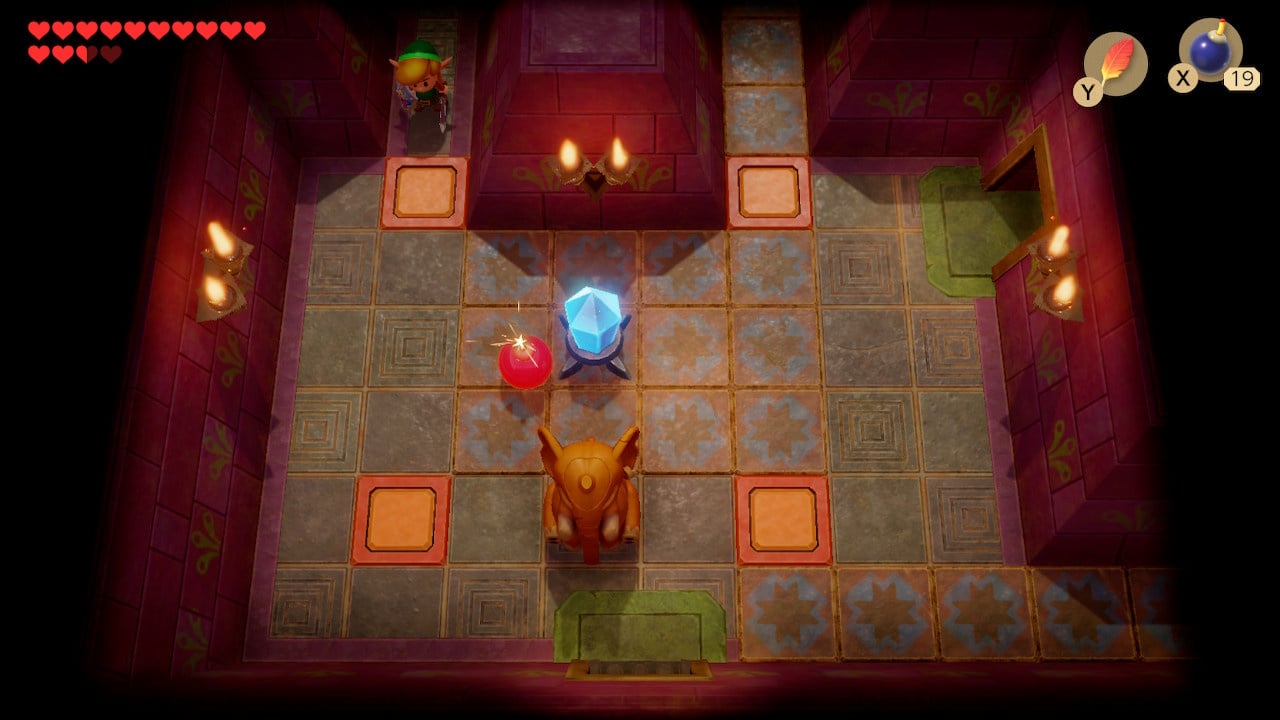
The room with the Compass also has another gem switch – cycle this once to raise the blue barriers and lower the orange ones.

Return left to the previous room and throw a pottery elephant at the door on the top wall.

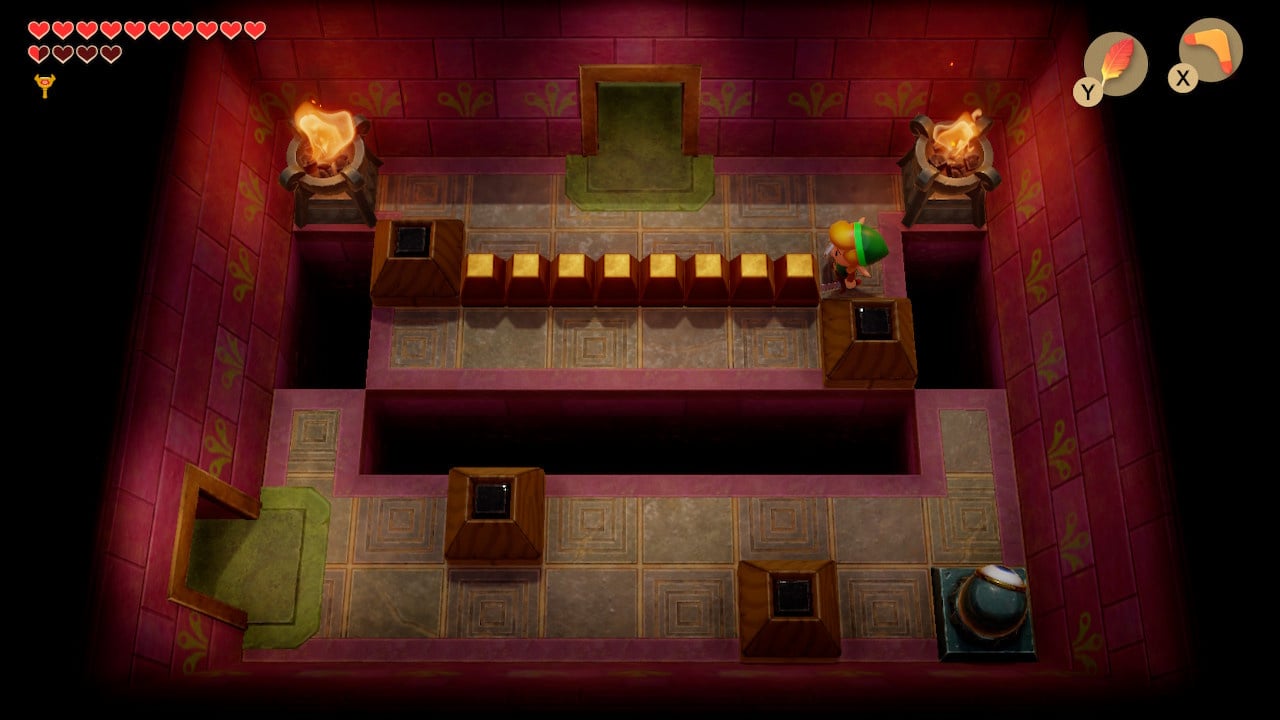
The next room presents a new puzzle type to learn, but let’s get our loot first. You will enter with the blue barriers raised and the orange barrier lowered – open the chest for another 100 rupees then duck out of the dungeon by climbing the steps – you will emerge in the Raft Rapids area – open the chest for a secret seashell, and head back into the dungeon.
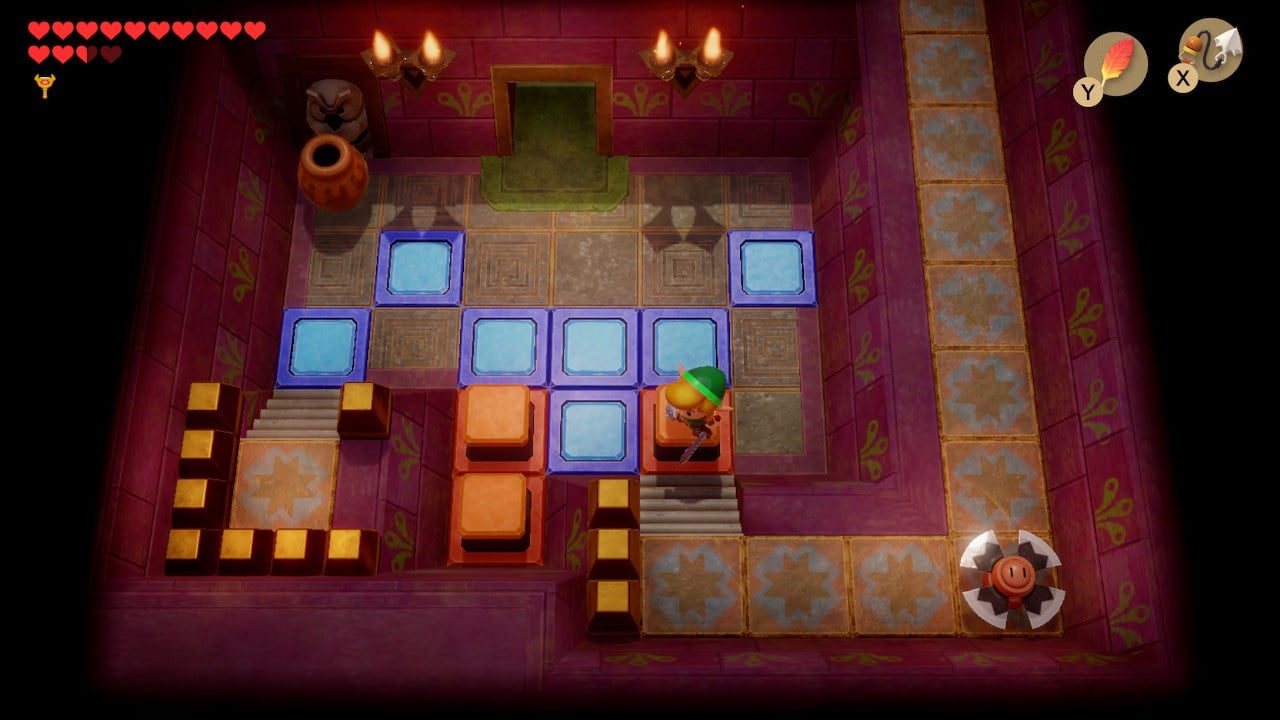
Now, to deal with the chess pieces: throw them a few times to get used to how they work – they move similarly to real knight pieces in chess, moving either diagonally left or right of where they are thrown from (they travel a little further, however). If you pick up the black knight, stand on the fourth floor-tile from the left, in the lowest row, and throw to the left, the knight should bounce into the left receptacle.

The White Knight requires similar treatment – face/throw right on the fifth tile from the left, first row (as pictured). This will open the lower door. Before you leave, you will also have to lower the blue barriers – throw a bomb or your boomerang to achieve this.
Take the righthand exit in the next room (returning to the room with the gem-switch where you got the compass). Before you leave, cycle the gem switch once to lower some upcoming orange barriers. Follow the path to the right until you reach a room filled with (lowered) orange barriers. You will once again encounter some Wizzrobes (as well as a bouncing fire-skull ‘bubble’ enemy) – kill the Wizzrobes to receive a Small Key.
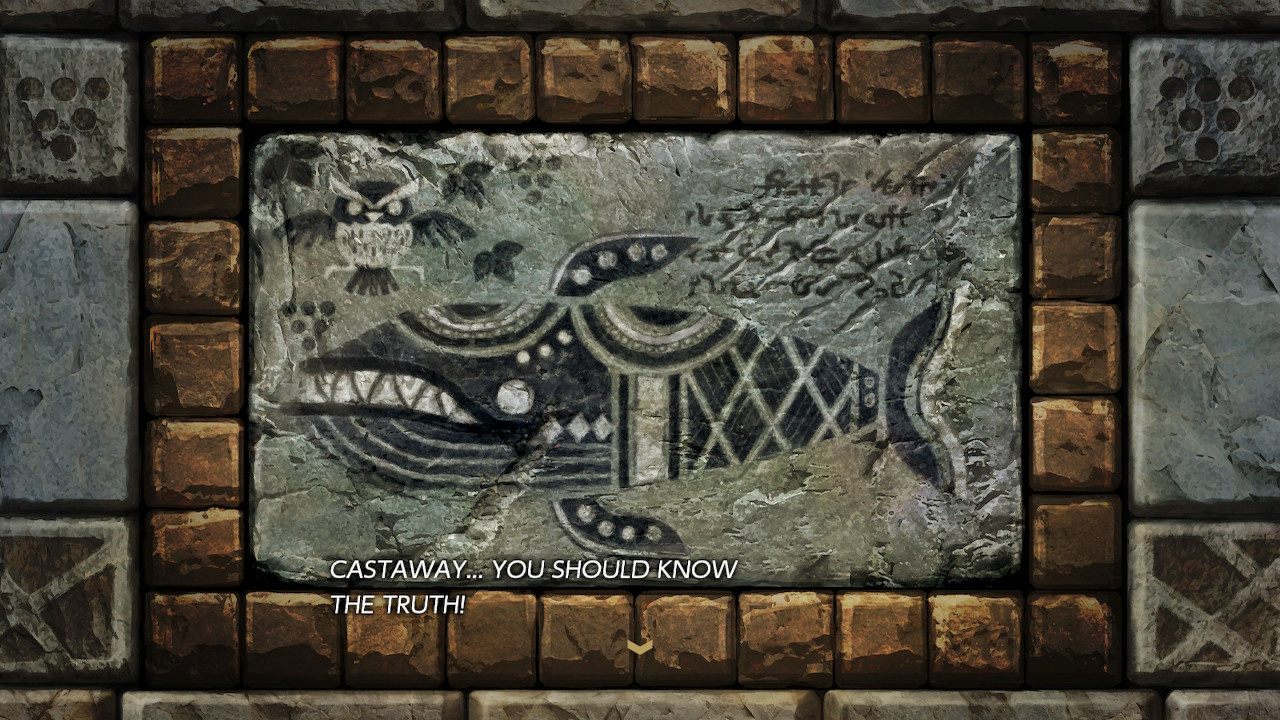
We’re essentially done in this wing of the shrine. If you head south from the current room you will see an Owl Statue on the other side – optionally, you can circle back here (it’s up some steps in the room where you bombed the wall to find a route towards the Powerful Bracelet). It will say:
Enter the space where the eyes have walls…
Otherwise, return to the very first room of the shrine (either by walking it or using Manbo’s Mambo). Head right this time. Hop over the conveyor belts with the blade traps. In the next room, you will have a series of floor tiles thrown at you – do your best to dodge and jump them, and once all are gone you can leave via the top exit.
In this eastern wing of the shrine you will find yourself in a room with two elephant statues, a locked exit to the top, and a pottery door to your right. Throw one of the elephants at the righthand exit first, and head through (we’ll be back for the locked door soon).
The next room locks you in with a large group of Wizzrobes. Take them out one by one to secure a way out (or three). Take the upper right exit.
You will enter a long hall with stairs down to a flooded trench. Follow this to the end and open the chest you find for a second Small Key.
Backtrack to the room with the locked door and spend one of your keys.
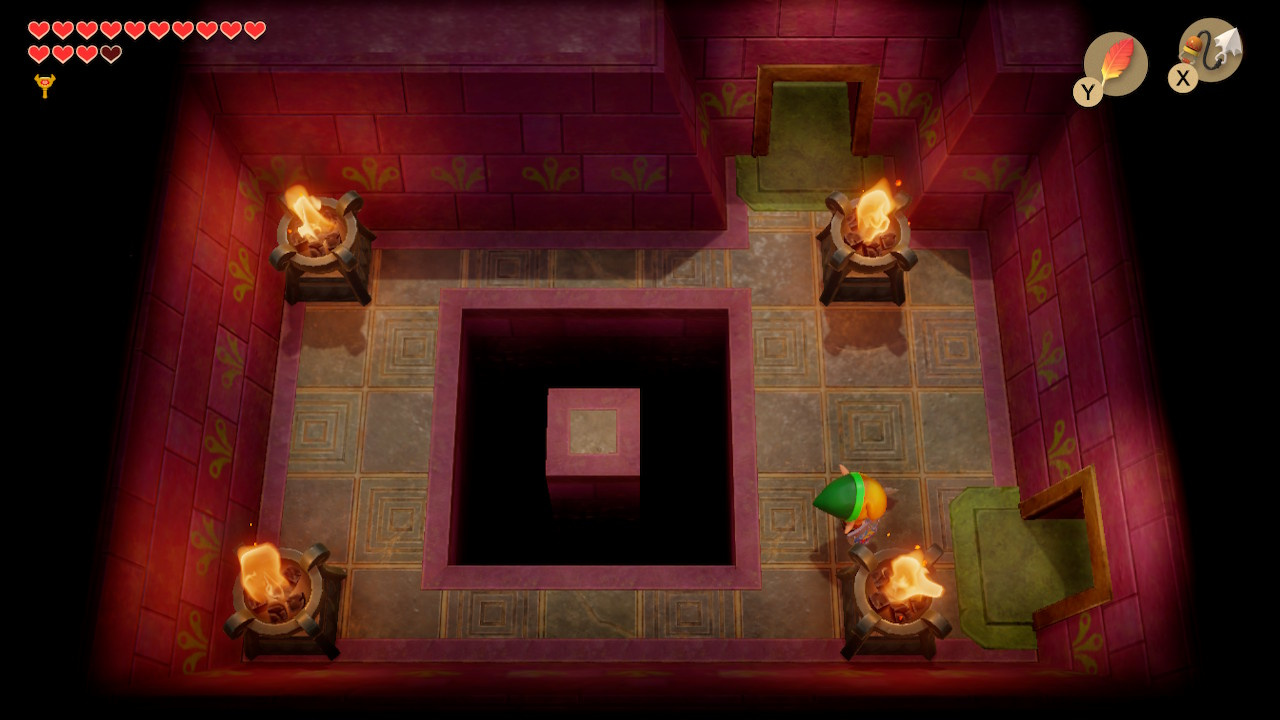
Bomb the top wall in the next room and head through.
This is the lair of the Smasher – a miniboss who carries a heavy metal ball to throw at Link for heavy damage. He’s quick to pick it up once thrown, but if you avoid a throw and get to the ball quick enough, you can turn the tables and throw it back at him. After four hits, he explodes and you can continue your journey.
Finding the Face Shrine Nightmare Boss Key
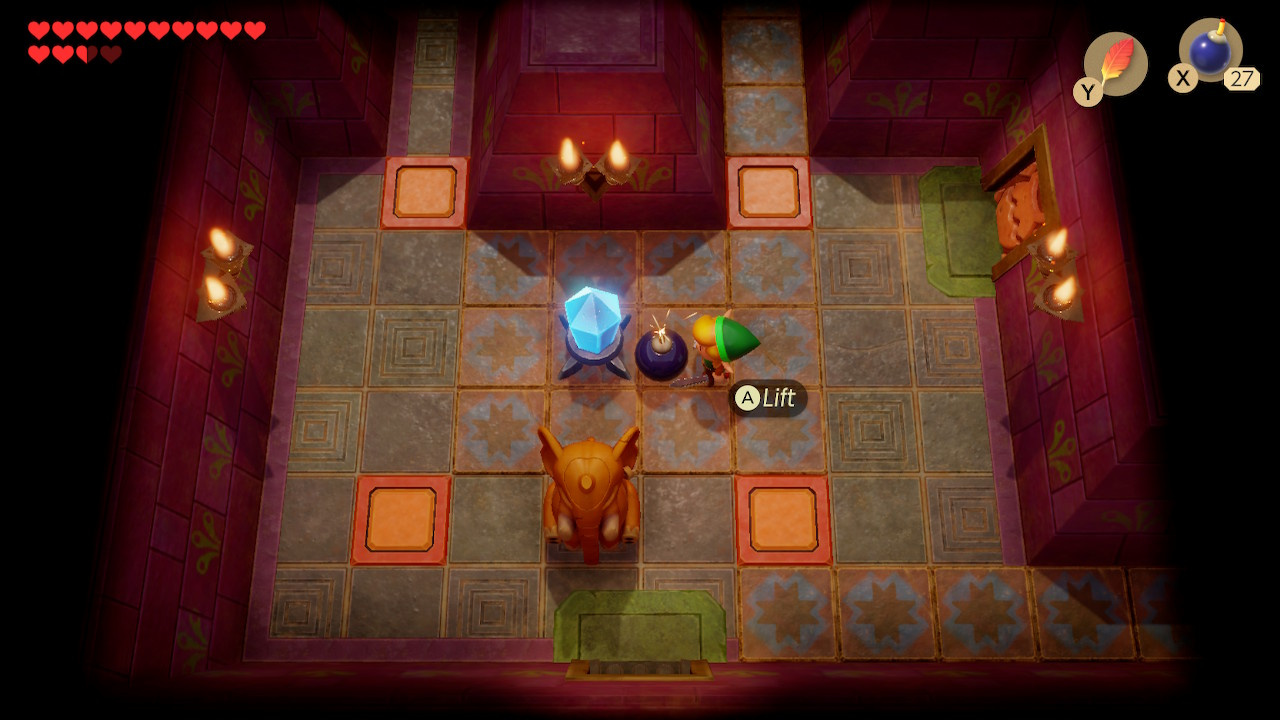
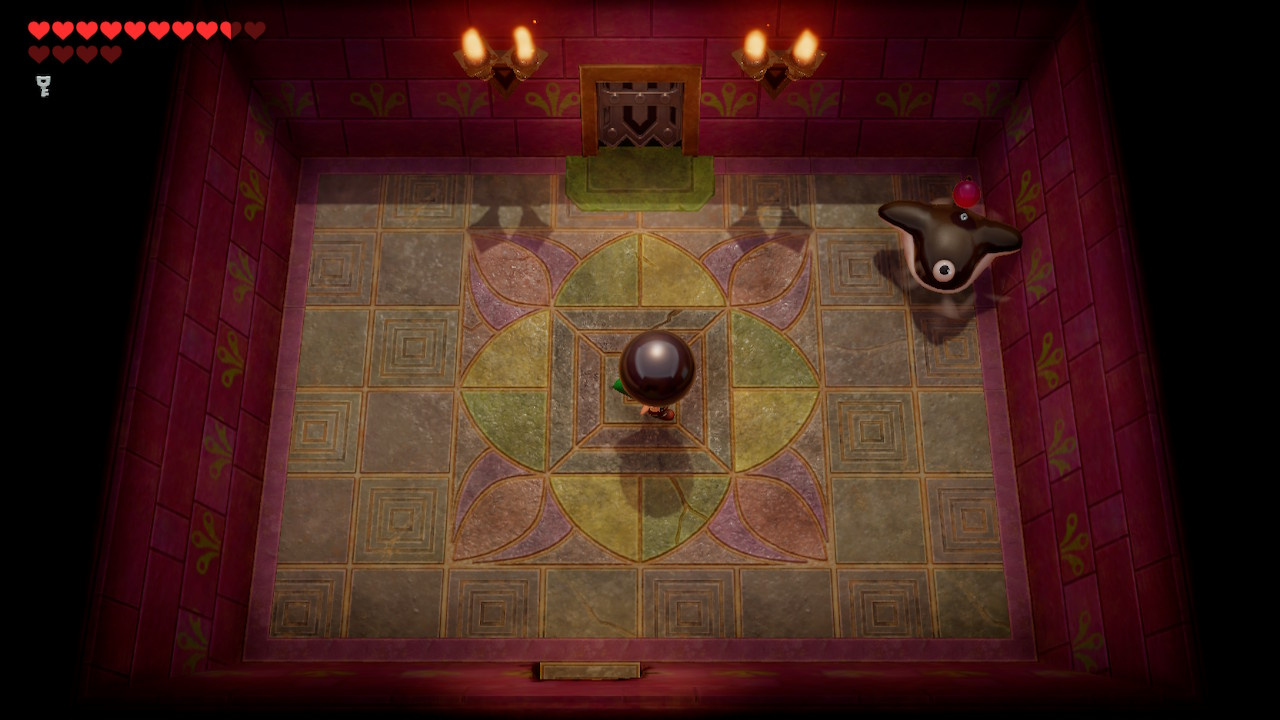
If you repeatedly continue heading north after defeating the miniboss, the same three rooms will unexpectedly loop again and again. The real exit is a hidden staircase in the room above the miniboss arena – lift the left-hand Elephant statue to uncover a staircase.
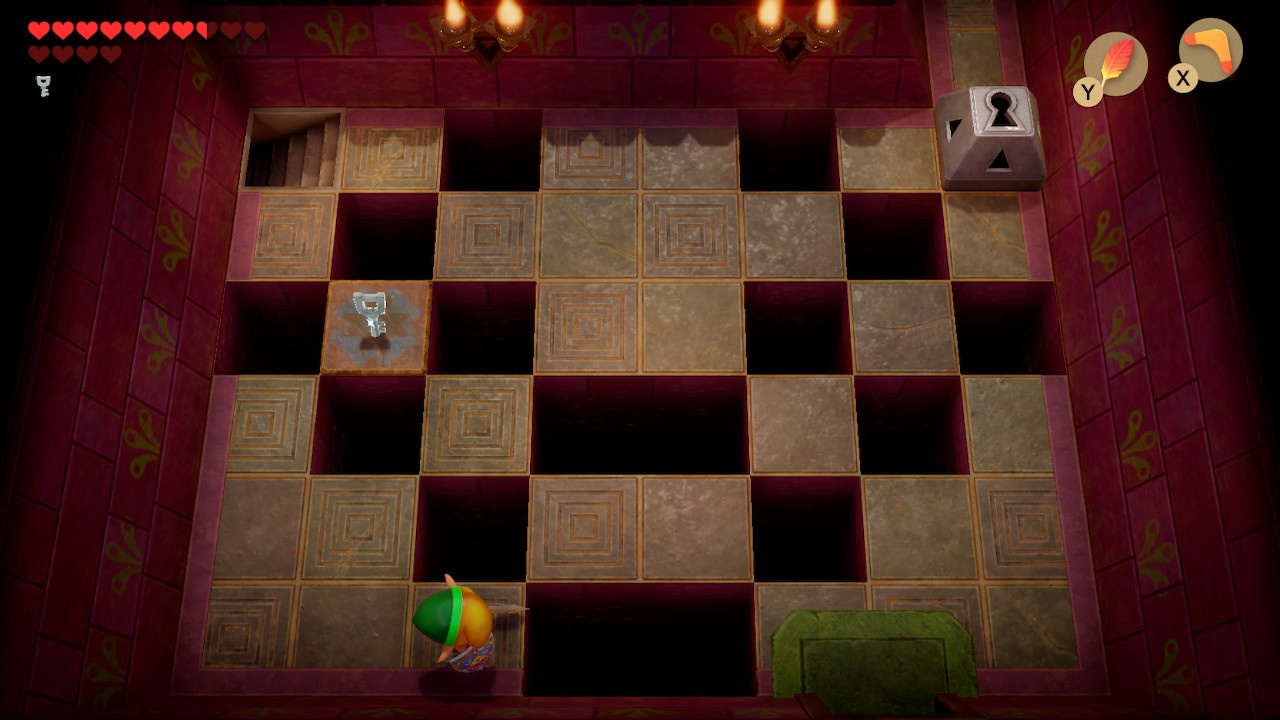
After an underground sidescrolling section, you emerge into another room where you can expect to be assaulted by flying tiles. This time, there are pits to fall into when the tiles a thrown. Instead of immediately using the lock block and escaping, jump and dodge all of the tiles to be rewarded with another Small Key. Now use the lock block and follow the path, smashing open another pottery door with an elephant statue on the way.
You will find that you are moving back towards the western wing of the dungeon – you will have to deal with a chess-piece puzzle that you will have seen from above earlier. The solution to this one is relatively easy. Firstly, throw the black knight left from the tile below the right socket
Then throw the white knight right from the tile below the left socket. Head left and take the stairs in the next room.
You’ll find yourself in another sidescrolling area – use your dash to dodge both sets of thwomps.
The room you emerge into will feature two locked doors and three Poe’s Voice enemies (rabbit eared enemies that need to be bombed). Take the top door, and do the same in the next room.
You will be locked in another room with a chess puzzle. Claim your loot – a cool 300 rupees. Stand on the fourth tile from the left on the second row and throw the white Knight.

Lower the blue barriers by throwing a bomb or your boomerang at the gem switch. Stand on the corner blue square and throw the black knight to the right. Return to the room with the Poe’s Voices and take the lower door.
The next room contains a familiar sight – a repeat of the Dodongo Snakes miniboss from the Key Cavern. As before, place bombs in front of their mouths and wait for them to eat enough to explode. Leave via the left exit once the deed is done.
You will find yourself on the upper level of the long hall with the flooded trench. Use your hookshot to get across to the other side and spend your Small Key in the lock block there. Head upwards and throw the pots out of the way of the Owl Statue, which will say:
To open a treasure chest, use the pots around it.

Throw a pot at the chest to open it and receive the Nightmare key. As you leave, check the gem switch is set to orange (this will leave orange barriers raised). Jump in the flooded trench and exit to the south.
Defeating the Face Shrine Boss
Leaving the long hall via its lower exit, you will enter the room in which you fought the four Wizzrobes. Take the lower exit this time. In the next room, the Owl Statue will state:
Hop on top of the crystals to move forward.
Climb the steps directly below and drop off the ledge and onto the raised orange barrier. Jump to the single barrier on the right, and then head up the stairs and leave via the raised area. The chest in the next room contains some of Crazy Tracy’s lotion.
At this point you will need to loop back to the room with the flying tiles (from the beginning of the Nightmare Key section above.) This time, head south – you will find a room with a Vacuum Mouth in the centre – when it stops inhaling, jump and swing your sword at it. Tour the rest of the room and take out all green Zol to open the door to the right.
Take out the Wizzrobes in the next room to open the upper door. On the right side of the room you should jump the gap diagonally to access the upper area – just avoid the pit and the laser gaze of the Beamos in the lower right.
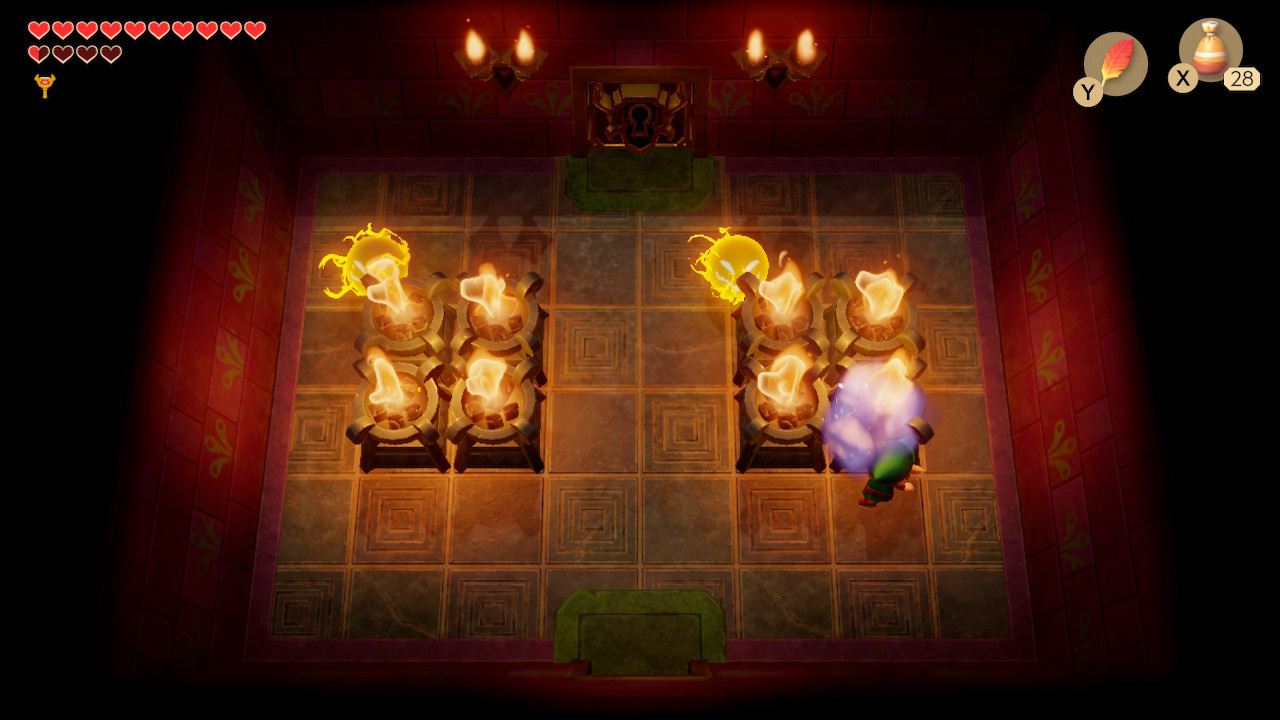
Light the torches in the next room to take out the Sparks and open the Nightmare door.
Scary, right? Time to fight and continue our Zelda: Link's Awakening walkthrough by learning How To Defeat The Face Shrine Boss before heading back outside to find Bird Key Location, Mountain Tower and Resurrecting the Rooster.


Comments 0
Wow, no comments yet... why not be the first?
Leave A Comment
Hold on there, you need to login to post a comment...