Welcome to our Luigi's Mansion 2 HD walkthrough guide series! Here we'll give you a 100% guided tour of the multiple haunted mansions on offer in Luigi's second spooky offering. With step-by-step details on how to progress through each area, alongside full guides for All Boo Locations and All Gem Locations, this is your one-stop shop for this remastered version of the game.
Subscribe to Nintendo Life on YouTube848k
Luigi's Mansion 2 HD Walkthrough Guide: B-3 - Graveyard Shift
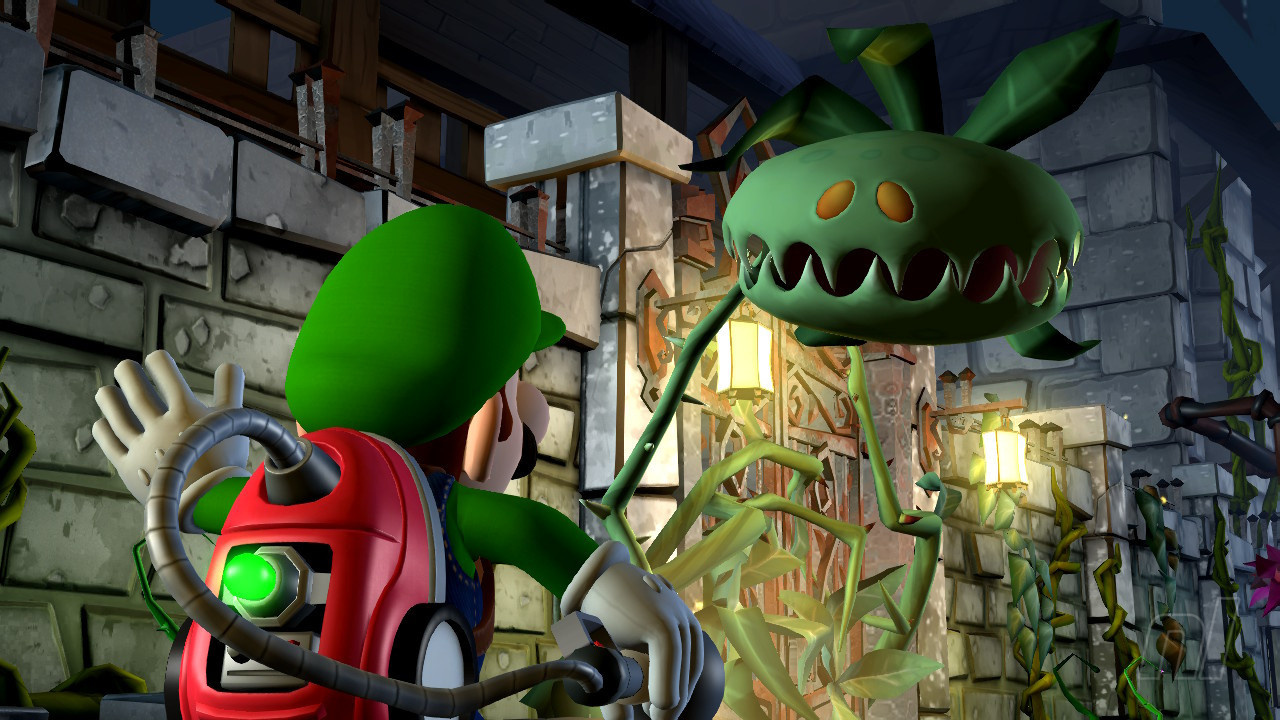
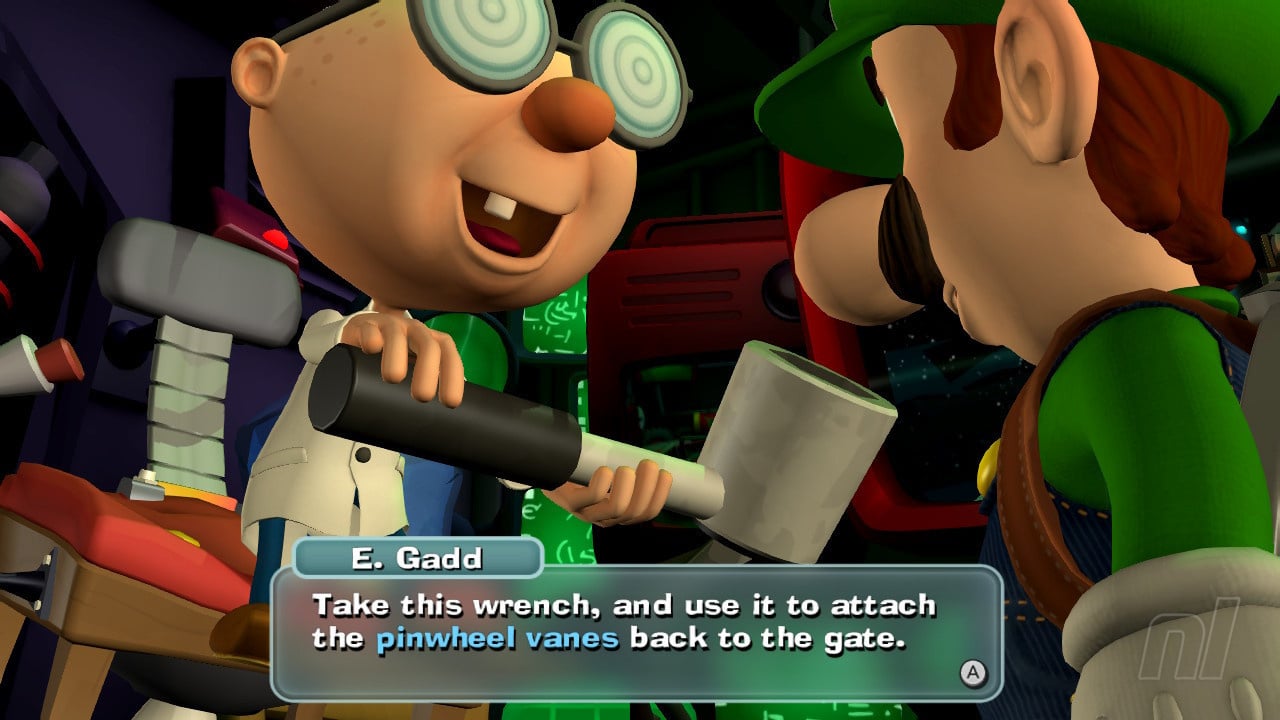
Armed with a wrench, we're off to fix the broken gate now in order to make our way to the hollow tree and the next dark moon piece.
At the entrance we need to fill the wooden bucket with water in order to resurrect a few plants. Once done you can shoot the monster plant and the gate will open up. You'll also find some money spiders over by the tree should you investigate it again.
In the courtyard you'll face off with three slammers and a greenie before you can then interact with the pinwheel device. Spin the lock with your Poltergust to open the way forward and into the hollow tree.
Haunted Towers Gem #6
This gem requires us to go to the lobby stairs. Here we can use our dark-light on the wall to reveal some pipes, then crank the water pressure up full blast. At the bottom of the stairs, use the dark-light again on the wall, there's a clue with the doormat, to reveal a secret entry to maintenance.
Head in with all the other parts done correctly and a little plant will grow thanks to the water you just diverted. Use its spiky fruit to destroy the plant ahead and grab the gem from the chest.
Make your way up the wooden stairs now, after noting the small passageway and some water on the base level.
Moving up the stairwell you'll encounter a greenie at the top of some moving steps, then another will block your path before you reach the top. Here you need to pull the web ball to the torch flame to open up the hidden tunnel. But wait! The professor now says you need to visit the crypt to get a special key. He's quite a demanding pal, isn't he?
Now turn around and Luigi will interact with the dangling web ball to take a shortcut back down to the ground floor. Use the web balls here to light the main webbing and enter the tree root.
Haunted Towers Gem #7
Before heading into tree root, let's explore both sides of the main Hollow Tree area to reveal a left and right nook. One has a bucket which we can take and fill in the central hollow pool. Now bring the water to the plant root in the right nook and help it grow. Now flash the resulting plant for your gem.
Inside the tree root is small and cramped so just move along and grab the two green roots at the end of the path, as shown below, one is hidden behind some removable shrubbery. This will open a secret compartment that shoots you skyward to the Old Graveyard.
Haunted Towers Gem #8
The back of the statue from whence you just arrived has lots of treasure so walk behind and gather it up then aim upwards at the bird on the first gravestone to see another gem which can be hoovered up.
Move along here checking for treasure as you go and keep going across until we reach a coffin which can move down when stood on. We aren't heavy enough quite yet though! Let's turn around and head up the main path to open the large door into the crypt.
Boo - Booluga
In the crypt you'll find a painting of Toad. Use your dark-light device to free him and then we'll get a new objective to take him to the bunker. Before leaving the crypt, you'll find a vase with a dog bone and then you can use your dark-light on the right side of the room to find a hidden vase. Inside this vase is our next hidden Boo!
Once you've defeated the Boo, let's take a trembling Toad back outside into the graveyard.
Note! If you can't get Toad to leave the crypt, even when tapping the "X" prompt at the door, it's because he's hysterical. Simply stun him with the strobulb and he'll sort himself out.
As soon as the pair arrive in Old Graveyard, we're in for a fight with a trio of tricky sisters.
This fight seems tough, but the strategy is simple. The three ghouls will circle you, taking it in turns to have a little peak in their mirrors as they do so. Flash the peeking ghost to grab them in the usual manner.
To make things easier, start with the small yellow ghost, it goes down easy, this gives you more room during whilst using your Poltergust on the others. Avoid the rushing attacks as you hoover and this fight will be shortlived.
It's important to note here too that, every time you tussle with the sisters, a bat will fly past in the area. Stun it with the strobulb to get more heart energy every time, making the fight much easier if you are struggling with getting hit.
Once the fight is done, head down to the right to the coffin we tried to use earlier. Toad will refuse to go in the water so stun him and use your Poltergust to get him over. The weight of both of you will be enough to activate the coffin down to the sewers.
To the left is a dead end with a fun mini-maze game hidden in a coffin. To the right, go into the second set of bars to reach the chest. The bars here are fake! Now we move on to Gardener's Lab. Here we can once again help Toad over some water and then send him to safety via the old device in this room.
Mission complete!


Comments 0
Wow, no comments yet... why not be the first?
Leave A Comment
Hold on there, you need to login to post a comment...