Captain Toad: Treasure Tracker is now available in North America and Europe, adding another excellent title to the Wii U library. In this game the goal for Captain Toad and Toadette isn't simply nabbing the star at the end of each stage, but also picking up three gems hidden throughout each level. These become vital in unlocking later content, so they can't be ignored.
Some of these gems can be tricky to find or reach, so we thought we'd help you out. Below you'll find a step-by-step guide to finding all of the gems in Episode 1 of the game; episodes 2 and 3 will follow in the next two days. Whether you want a walkthrough for your first play, or just pointers to gems that have eluded you, we've got you covered.
The first 18 stages are below — enjoy!
Plucky Pass Beginnings
The first gem is right within view when starting the stage. Walk around the corner just ahead and rotate the camera to see a doorway that leads right to it.
Subscribe to Nintendo Life on YouTube845k
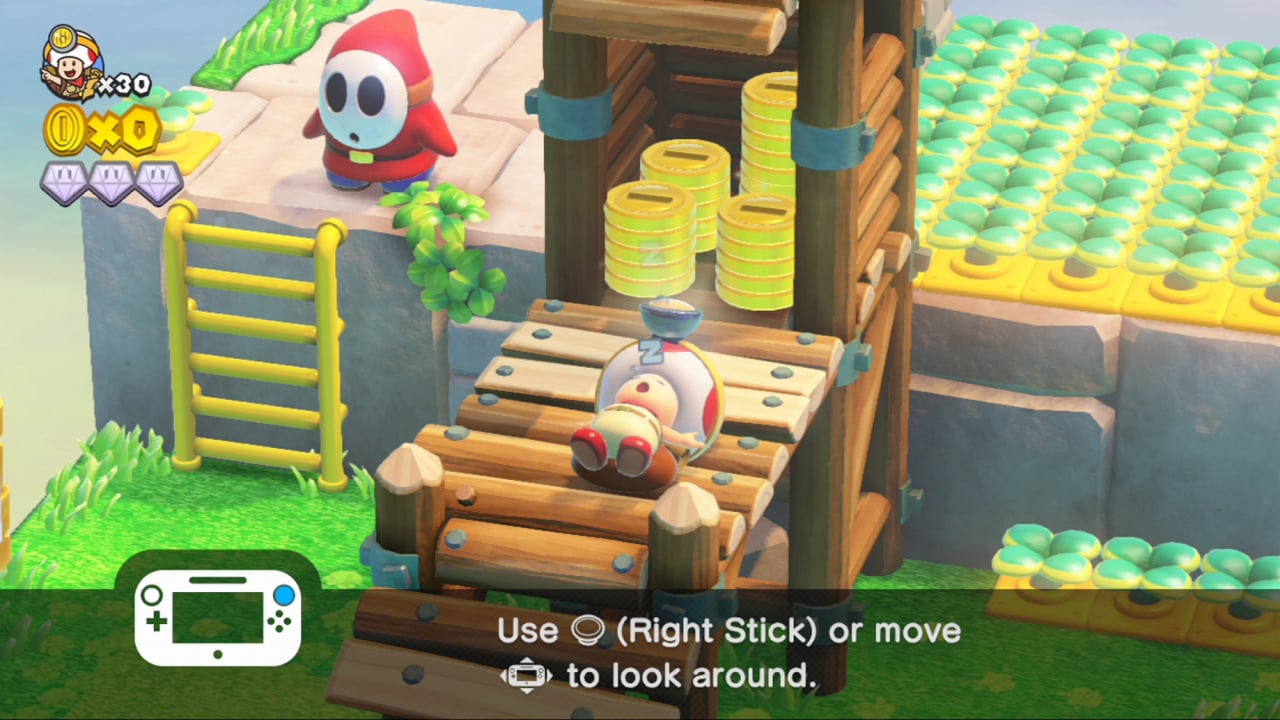
Right after taking the elevator up, there's a POW block surrounded by bricks with a gem located on the other side. Pluck one of the three turnips (along the wall) from the ground and throw it at the POW block to earn your way through.
After raising the platform with the staircase that leads to the star, turn around and walk up to the Blue Toad to be given the last gem.
Walleye Tumble Temple
Once you've reached the rotating platforms in the water, walk on the first one and wait for it to line up with the patch of grass behind the level's first Walleye. This is where you'll get gem #1.
After crossing the rotating platforms in the water and walking through the doorway to the back wall of the stage, you'll see two spinning spheres. When the first sphere stops and the platform inside is horizontal, run straight across (not through the door) to reach a hidden area. In here you'll find a turnip stem that, when pulled, will reveal the second gem.
At the very tip top of the stage, once you've reached the other end of the bridge that crumbled at the start, use a turnip to stop the first Walleye in his tracks and then grab the gem right within view.
Touchstone Trouble
Note: Follow these steps in order from one to the next.
From the starting position, move Toad onto the pink platform right ahead. Once there, use the touchscreen to tap the blue and pink platforms once each, which will reveal a tiny opening containing the first gem.
Immediately following the last step, touch the blue platform so it's level with the ground that Toad is currently on. Then, rotate the camera until a turnip stem is in view. This isn't a turnip at all – it's a key! Pluck it from the ground and then walk back to where you started the stage. From here, walk down the yellow ramp and unlock the door with the giant lock on it to nab the second gem. Make sure you're hasty with the key though, because it returns to the ground if you take too long.
Now, head back up the ramp, across the pink platform, and then to the blue area where the key was found. Once here, tap the pink platform to align the ground with an opening. Walking into the opening, touch the blue platform, and rotate the camera until the third gem is within view. Grab it.
Mushroom Mesa
Right from the start of the stage you should see a window in the rock wall ahead and a gem on the other side of it. Since you can't enter here, walk around the corner where you'll find two doorways. Enter the second doorway and rotate the camera back to the side of the wall where you began the stage and you should have a clear view and route to the gem.
When reaching the main platform with the two Shy Guys walking around the mushroom statue, use the nearby turnips to dispose of both Shy Guys to be rewarded with a gem.
When climbing down the ladder and reaching the section with the three touchstones, follow these steps: Lower the first and walk into the opening. Raise the first, lower the second, and raise the third. Walk across into the space located within the third touchstone and then lower it. Now, rotate the camera until you see an opening with a gem in it and collect it up.
Double Cherry Palace
After you drop into the hedge maze, be on the lookout for a turnip stem that tries its best to evade you. Corner it and pull it out of the ground to reveal a mole. This little guy will then reward you with a gem.
After dropping from the floor that contains the hedge maze, keep your eyes out for a doorway on the left side of the third floor down, which will contain the second gem.
On the fourth floor down, rotate the camera to the other side of the building to find another moving turnip stem. Catch it to get the final gem of the stage.
Shy Guy Heights
When you reach the third yellow ladder (it's much taller than the first two), climb up. Then, walk across the two small bridges along the top of the hedges and fall down to the platform containing the gem.
After crossing the bridge that you had to rotate with the Spinwheel, walk around to the backside of the building to find a couple of birds and a row of turnips. Pull up the standalone turnip to get a pickaxe, rotate the camera until a row of gray bricks on the rear side of the building are within view, and break through them to reveal a Toad that will cough up another gem.
Next you'll come to a platform with two Shy Guys and two Shy Guy-shaped shrubs. Either sneak past these two or use turnips to take them out; then climb the yellow ladder between the shrubs. Once on the next floor, head through the doorway on the left and rotate the camera to the other side of the building. With this angle you should see a doorway containing a gem within. Nab it up.
Spinwheel Library
Note: Follow these steps in order from one to the next.
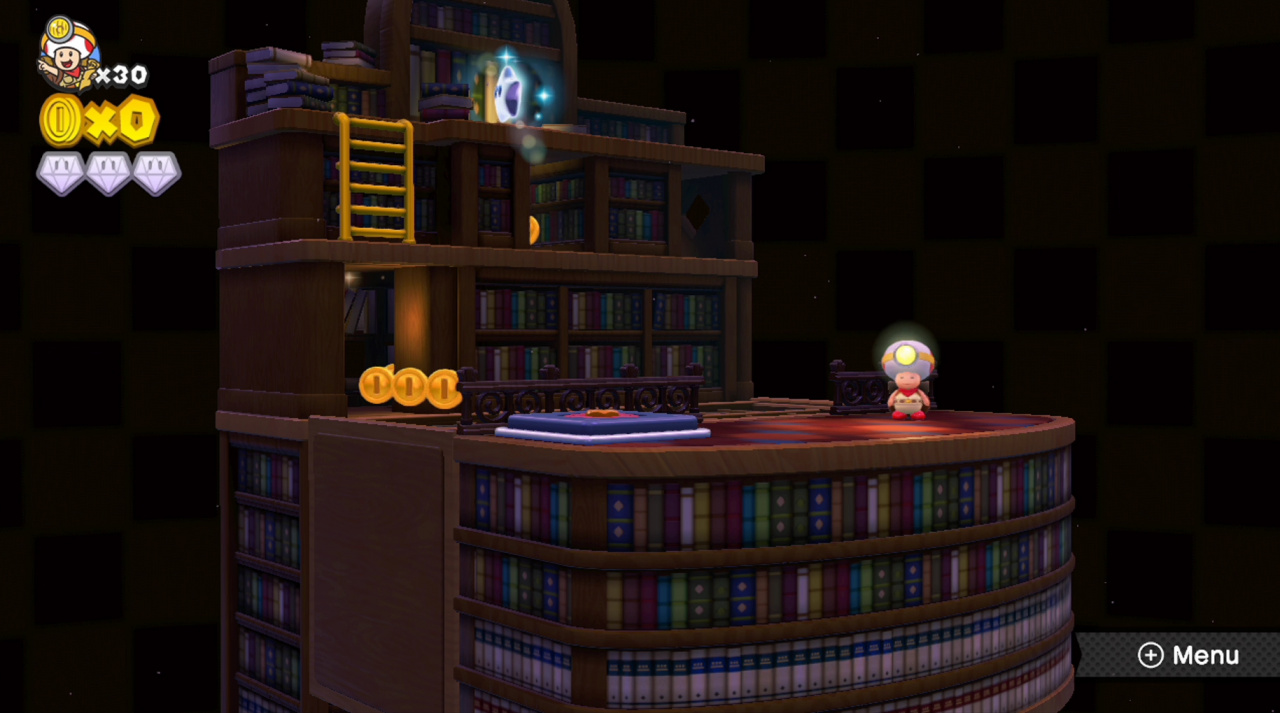
Walk over to the spinwheel and rotate it clockwise so the platform moves 90 degrees. You'll know you've done it right when you see a gem within a doorway directly ahead.
Head back to the spinwheel and turn it counterclockwise so the platform is in its original position (which is flat). Walk through the doorway on the other side and rotate the camera for a view of the backside of the building to reveal a purple pipe. Hop in. Once on the bottom of the stage, head down the small staircase and over to the Blue and Yellow Toad. The Blue Toad will reward you with a gem just for showing up.
Once again, head back to the spinwheel. Once there, rotate the platform counterclockwise one time and then walk up the stairs to get the gem that's been in view all along.
Mine Cart Tunnel Throwdown
Before doing anything else, rotate the camera until you see the gem in an opening behind the mine cart. When you drop into the mine cart, be ready to turn around immediately and shoot a turnip at the gem to collect it.
After the first downhill slope, on the left side of the track you should see a POW block surrounded by bricks. Shoot the POW block to break the bricks and reveal a gem. Shoot it.
Immediately after obtaining the last gem, there's a stack of bricks rising in and out of a platform on the left side of the track, and it's surrounded by Para Biddybuds. There's a gem located on the top of the stack – shoot at it with turnips to collect it.
Spinwheel Bullet Bill Base
When you get to the first spinwheel, rotate the staircase on the outer wall until a doorway with a gem inside is exposed.
Now, rotate the spinwheel so it connects that same staircase with the walkway above and head up. When you reach the next spinwheel – it has two Bullet Bills intermittently shooting over it – quickly run up to it and rotate the Bullet Bill platform 180 degrees so it crumbles the two nearby grey bricks, revealing the second gem.
Down at lava level you'll come to a Bullet Bill cannon that fires a single bullet at a time. Walk through the narrow pathway that the cannon resides on, avoiding Bill, and get to the spinwheel. Once there, use the spinwheel to aim the cannon at the two bricks on the square platform that moves back and forth across the lava. When one of these bricks is broken, you'll be able to get across to the other side, where you'll find the last gem tucked away in the corner.
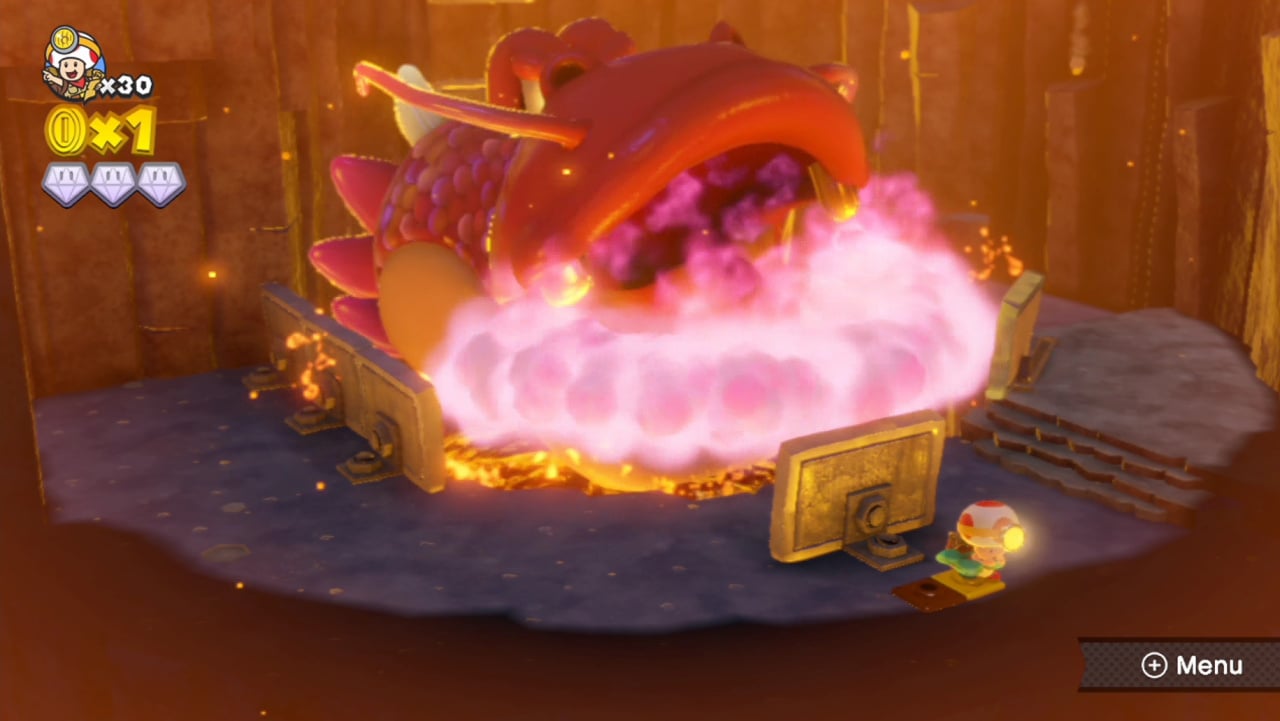
The King of Pyropuff Peak
As you're sneaking from cover to cover after being greeted by the unfriendly dragon, you'll come to a wall with a gem located on the other side… the dangerous side. Between the waves of fireballs, race around the wall and capture the gem.
Once you climb the first ladder and the lava below begins to rise, quickly have a peek behind the next ladder to find another ladder on the backside of the small wall moving back and forth. Climb on it and line up with the gem that's to the right.
When you come to a row of four turnip stems inconveniently planted between walls of cover, pluck the fourth one in line to get the last gem of the stage.
.
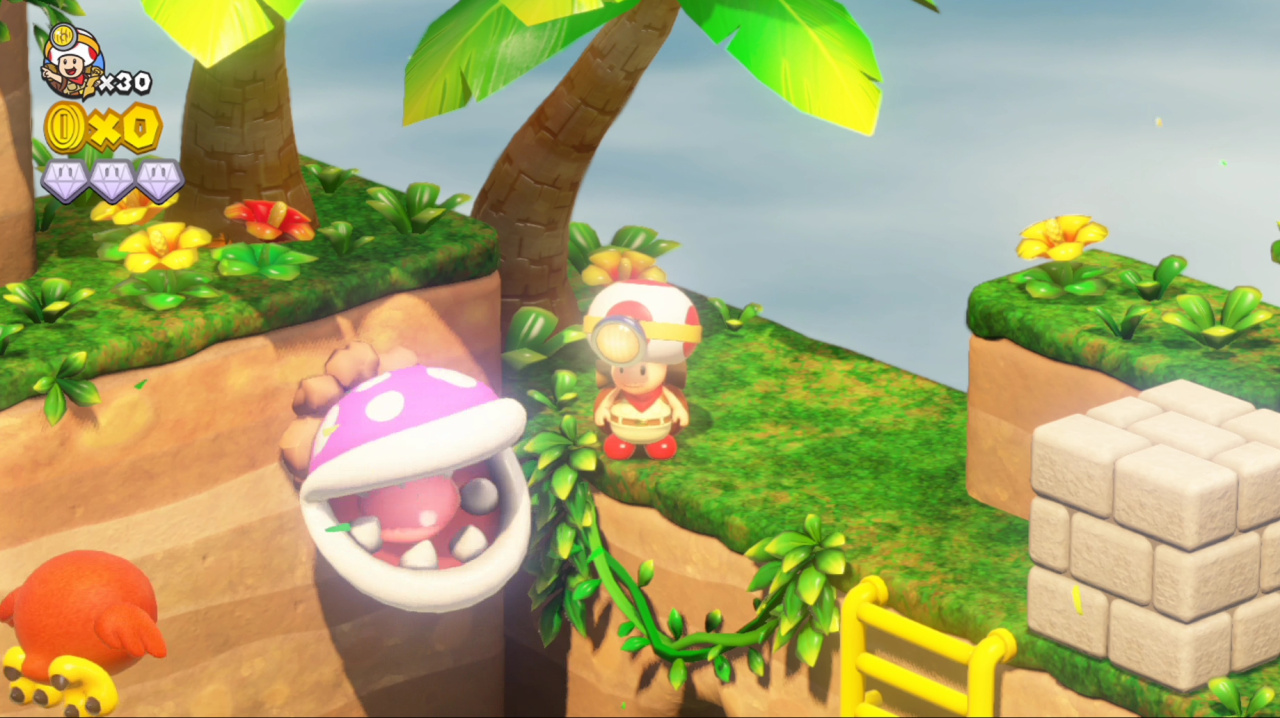
Piranha Creeper Cove
When you start the stage you should see a gem staring at you from a hole in the rock wall dead ahead. The entrance to this gem can be found directly in front of the Piranha Creeper that's doing his thing just to the right.
After going up the ramp from the beach and walking through the passageway that leads to the back wall of the stage, you should see a gem in the bottom right-hand corner of the screen. To reach it, wait for the Piranha Creeper to retract fully into the pipe and then run ahead at full speed without looking back. It shouldn't be challenging as long as you get the timing correct.
When you cross the large wooden bridge at the top of the stage, it will fall down behind you. Turn around, walk down the collapsed bridge and pluck the plant from the ground to receive the last gem.
Briny Bowl Swimming Hole
On the ocean floor you should see a row of three Cheep-Cheeps swimming back and forth. Below them will be three stems. Pull up the stem furthest from the gold pipe to uncover a gem.
To get the gem located on the floating wooden platform, first take the blue pipe up to surface level. Once here, walk to the edge of the partial staircase and look into the water below for a blue pull switch. Drop off the stairs and onto the platform containing the blue switch. When you give the switch a tug it will send you to surface level and the gem should be only inches away.
Immediately following the previous step, you should notice the partial staircase that you previously walked off of has descended to the ocean floor. Drop back down there and use those stairs to reach the last gem, which is right out in the open.
Turnip Cannon Jungle
Right off the bat, take the yellow staircase down to the next floor and walk through the passageway directly to the left of it to find a purple pipe. Ride it down. When you reach the bottom you'll meet with another one of those pesky moles burrowing below the surface. Run him down and pluck him from the ground to get a gem.
When heading back to the yellow ladder from the first step, you should see a lone stem at the end of the walkway to the right. Sneak past the Piranha Creeper and avoid the bird flying overhead to pluck the stem from the ground and earn the second gem.
Once you enter the turnip cannon, look up and to the left to find a gem floating in the rock wall. Shoot a turnip at it and it's onto the next stage.
Pop-Up Prairie Town
Pulling the very first pull switch of the stage will cause a platform to rise. At the base of that platform will be a small opening containing a gem. You know what to do.
When you get to two pull switches that are side by side, pull the first, which will cause a building to rise. On the side of that building you will find a door that leads down to a basement concealing the next gem.
Head back to the side-by-side pull switches and now give the second one a tug. Doing this will allow you to walk onto the floating blue platform, which will get you to the final gem if you blow on the mic on the GamePad.
Drop-Road Dash
Note: All of the gems in this stage are out in the open.
After you've crossed the first boost pad and made a left turn, you should see the first gem to the left of the drop block road. Quickly run along the pathway to get it, but be sure not to touch too many drop blocks or you won't leave yourself a way out.
This gem is just around the corner from the last. First, have a breather on the green block and size up what's next. What you need to do is sneak past the Parabiddy Buds at just the right moment, so time it well and make your way along the pathway to obtain the gem.
When you come to the next green block, have yourself another rest. There are three turnips here, and directly on the other side of the drop-block pathway you'll see the last gem. To get it you'll need to toss a turnip its way and be quick doing it.

Bizarre Doors of Boo Mansion
In front of Boo Mansion there are two columns. Behind the right column you'll find a stem, and pulling it up will net you a gem.
When you reach the three touchstones with doors on them, move the bottom stone to the right and the top right stone to the right. Now walk through the bottom touchstone door to reach the gem.
Arriving at a towering stack of Goombas, tap the touchstone door located above them so it moves a space to the left. Next, lure the Goombas into the corner – without falling from the ledge – and then hurry through the door on the side wall to drop out above their heads, acquiring the gem and flattening out each enemy on the way down.
Blizzard on the Star Express
When starting the stage, Toad will need to weave between three pairs of crates before reaching the next train car. If you rotate the camera around, you'll find that there's a gem tucked away within the third set of crates just waiting to be gathered up.
Once you've reached the section of the train car with two passenger rooms located within, you should see the gem hiding in the closet of the room with the touchstone in it. Once you've entered that room by dropping in from the walkway above, head into the closet and nab that gem.
When arriving at the far end of the train car loaded with touchstones, you should see a stack of bricks along the wall. To break these you'll need to head into the next train car and avoid the Parabiddy Buds to pluck the stem in the middle of the room from the ground. You'll find that a Pickaxe is located here, and once you have it — and the super cool music has commenced — head back into the previous train car and bust up the bricks to unearth the third gem.
Wingo's Watchtower
Before heading up the watchtower, you'll notice that there are pull switches by each corner of the structure. Head to the pull switch in the back right corner and give it a tug. When the short column erects from the ground, climb the ladder on it to reach the first gem.
The second gem is a few floors up along a walkway on the backside of the watchtower. When you naturally make your way to this area, avoid interacting with the pull switch just before the gem and collecting it will be as easy as walking over to it. If you interact with the switch, the platform it's on will raise and the gem will be blocked off.
The third gem should be visible when nearing the top of the watchtower. You don't need to do anything fancy to reach this one, just wait for the boxes with the ladder on them to align with the ledge above, and then run in the opening to get the gem.
Be sure to check back in the next two days for all the gem locations in episodes 2 and 3, while you can read more about the game in our Captain Toad: Treasure Tracker review.


Comments 8
AAAARGH! SPOILER!
This just helped me get the last of the gems I needed for Episode 1. Thanks!
@cfgk24 Assuming you're not being sarcastic, why'd you bother clicking then?
@TreesenHauser lol. Just so I could shout Aaaaargh! Spoiler!
@NintyMan guess it depends on the person. I got almost every gem on the first play through of each stage, getting any missed gems added maybe 10-15 minutes of play time for me.
I've been trying to find all the little posters on the walls in some levels, if you tap them you get an extra coin
@Goomba77 Really? Cool tip! I played the entire game thoroughly for the sake of these guides and didn't even realize that.
@DRL yeah, made me smile
I'm already in the third episode. I also finished all the "bonus" 3D World levels as soon as they were available...
Show Comments
Leave A Comment
Hold on there, you need to login to post a comment...