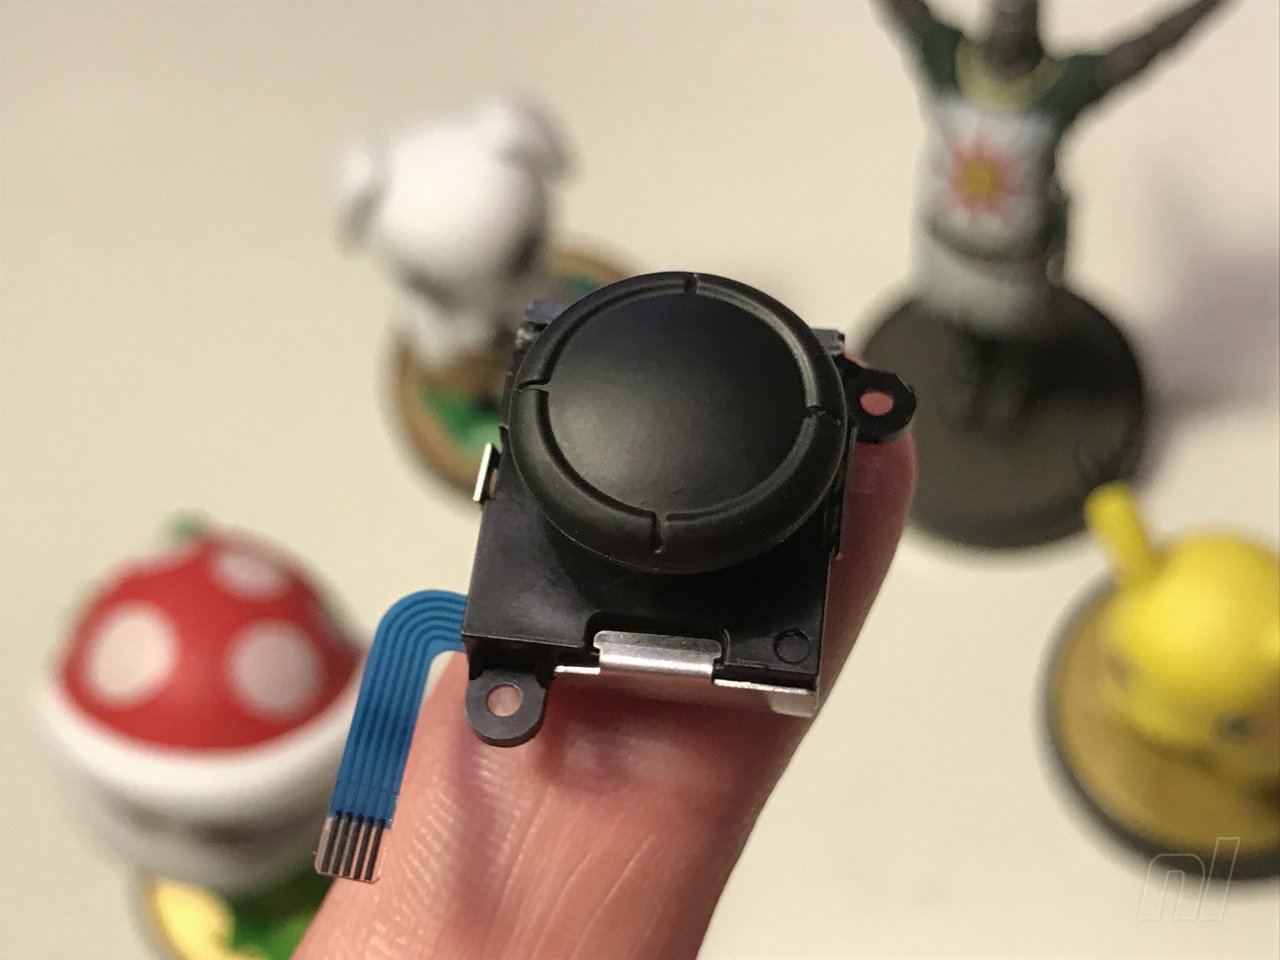
Solution 4: The Really Nuclear Option - Stick Disassembly
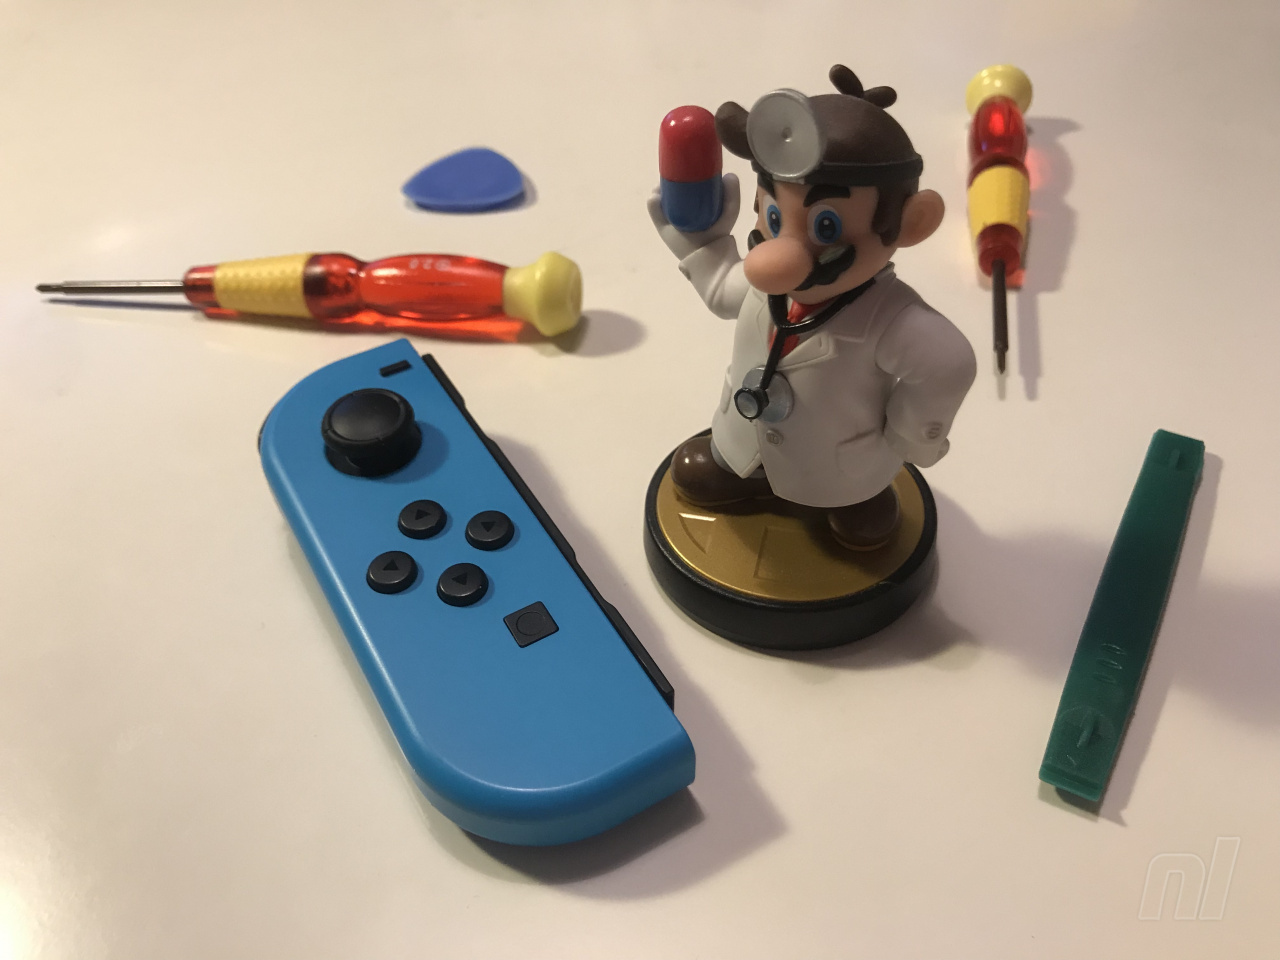
What you’ll need:
- A pair of super thin pliers or a small slotted screwdriver
- A pair of strong, thin tweezers
- Alcohol (to clean the contacts)
- A cotton bud/Q-tip
- Patience
Firstly, don’t do this. Seriously, it’s more trouble than it’s worth and it’s much easier to simply replace the stick. You’ll need the proper tools, a sterile workplace, a strong arm and the steadiest of hands if you’re to avoid introducing more dust and detritus into the thing than you clear away. Get yourself a new stick and save yourself a headache.
Still here? Hmm. Fine, you’re as stubborn as we were, so we’ll show you the steps. It involves bending metal and then crimping it as close as possible to the original position. Last chance!
Okay, let’s do this…
1. Firstly, you’ll need to bend back the two clips either side of the base so that they’re free from the black plastic ‘teeth’ gripping them. This is the only easy part.
2. Next, you’ll need to work your tweezers or screwdriver under the tabs clamping the backplate to the plastic. You can do this from either end, although it’s easier to get under the sides of the end with the two clamps. Try to avoid stabbing yourself or ripping the ribbon cable.
3. Once the backplate is unclipped, turn over the unit so the stick is facing down – you don’t want the plastic contents emptying over your workspace. Carefully prise the backplate away until you can push it away from the rear clip.
4. Now you’ve separated the main assembly from the backplate, it’s time to clean the contacts – the tiny metal parts of the main assembly and the corresponding areas on the ribbon. These were the parts we were trying to clean from the outside with Solution 2 and it's wear-and-tear here which is arguably the cause for the whole 'drift' debacle. You may find it easier to take apart the stick assembly but take note of where everything goes – it’s fiddly to put back together.
5. All clean? Now, to reassemble everything! Holding the plastic part so it doesn’t empty its contents everywhere, clip the backplate on one end (if you’re having trouble use your tweezers or pliers to bend back the single-clipped end a little) and carefully press down until the backplate’s flat again. This is easier said than done because you’re fighting against the spring. Patience and perseverance.
6. Once the clip is back over the black plastic, use your pliers to carefully crimp the backplate and get it looking as close as possible to how it did at the start. They'll never sit completely flush, but the clips should do their job well enough. Press the side clips in again over the plastic teeth and – hopefully – you’ve just repaired your analogue stick without stabbing yourself in the hand with a screwdriver or losing a vital component along the way. Reassemble the Joy-Con and you're good to go.
So, hopefully one of these solutions worked for you and saved you some dollar. Have you had any success with these solutions? Are there any other methods you’ve used to salvage malfunctioning controllers? Let us know in the comments.
Further reading: Guide: How To Fix A Drifting Nintendo Switch Pro Controller


Comments 159
Yeah I got a drifting joycon. It sucks.
just the fact that we have this problem makes me sad. i cant believe these expensive controllers bug out so easily
I fixed a pair of drifting Joy Cons a few weeks back. Unfortunately it involved popping into Smyths and buying a new pair for £70.
What else was I going to do? Not play Smash?
My left joycon had the drifting issue and the shell was cracking, so i bought the parts and switched it out. It cost me $15 for shells for both Joycons and the replacement stick, and as long as you pay attention which screws go where, the whole process wasn't too bad. I would recommend checking for anything else you might want to fix and do it all in one go.
I found fixing the d-pad on the pro controller more finicky to be honest.
Yup my left stick started drifting upwards, bought some new ones and ordered new replacment stick from amazon (only £7), mainly because I needed some anyways for some friends coming round for Mariokart night.
Option 5: send it back to Nintendo and ask for it to be replaced under warranty as it's a design flaw and not a user related fault.
No drifting issues like the ones described here, but I have severe connecting issues, causing the left joy-con to drift/freeze/slow response/re-connect etc.
Maybe it is my apartment that is full of interferences, but it is a big problem, however, no issues with the pro-controller.
I did solution 2 from the video. It’s a short term fix but it works. You can buy replacement sticks from amazon for 7 pounds. Since I play the switch nearly always docked I just use the pro controller. The pro controller really is great and it’s better than the Wii u pro controller in your hands
I just got my left joy-con back from Nintendo yesterday. It took 6 days to get it back and cost a little over $40.
What makes you so sure that there isn't one Joy-Con out there that is Pandora's box? I'm going into hiding... just in case.
Replacing my left one this weekend. Hoping Nintendo reviews the design of these things. Mines just over a year old.
Just call Nintendo and threaten a class action lawsuit for their faulty Joycon design and they will replace it with a new one for free.
Yeah joy-con drift is a major problem, at least for me. I’ve had the problem 3 times in 2 years. Both my joy-cons went to went to Nintendo and they fixed both for free cause it was still under warranty. But now my left one is doing it again. I’ve done the cleaning, and it still does it. I think I’ll have to replace the stick itself. I got a new set (I wanted some new colors anyway), so when I feel brave enough, I’ll open it up and give it a shot. It’s worth trying to fix it, cause man, it’s just so annoying.
I've had my left joycon drift up a couple times since I bought it over a year ago. All I did was take a clean toothbrush and lightly scrub the ball while rotating the stick in every direction. Immediate fix both times.
I can't see Nintendo doing anything about this as it looks good for sales!
No issue with Joy Cons here, just the Splatoon Pro Controller - I'm on my third one, all replaced FOC by Nintendo UK as they were under warranty. Had huge issues getting them to actually sort it and admit they lost the paperwork to prove it was within the warranty period. All bought through the Nintendo UK Store too!
May try the toothbrush or electic contact cleaner route. Been using compressed air, but that doesn't seem to have helped completely (though it does help some). I appreciate the replacement guide for the stick. Anyone know if these after-market sticks work better or do they also have the drift issue after time?
"unless you’re a sucker for watching Link repeatedly jog off cliff edges"
I really need to get my mind out of the gutter
It's typicically dust that causes drifting due to the open design at the base of the stick. I've blown them out multiple times to fix it (feels like the N64 days). Unfortunately it always comes back. If the sticks had the ball design at the base like the GameCube and pro controller, this problem wouldn't be so rampant. I have 4 Joycon and all of them have developed this problem. Nintendo needs to addresss this with a hardware fix for future Joycon. Otherwise I'm hesitant to buy anymore.
My issue hasn't been drifting, more that when I push the stick right on my left joy con it doesn't always register properly but believe it stems from the same issue. Just blown under the little rubber fold and works as a temporary fix.
I too have had this issue, in both Joy-Cons. It was a slight problem in the left one, but the right one was pretty much unusable. After attempting (and failing) the other methods of recalibrating and cleaning, I ultimately did the nuclear option and replaced the control sticks.
Sadly, though, I did strip one of the screw heads, and to get it out, I had to use a Dremel tool to cut into the corner of the casing, and then twist it apart. So there's a rather deep gash in the corner of one of my Joy-Cons.
Even more sad, though, is that I have to go back in and fiddle with some of the buttons, as they somehow got moved while I was replacing the control sticks.
For now, though, I am playing my Switch using a Pro Controller, which I bought as an alternative when this drifting issue popped up (or I should say, got worse).
My left joy con controller drifts bad. It loves to shoot up all the time, and makes playing games like Stardew Valley a living nightmare.
I've tried the "use a can of air to blow out dust" trick suggested all over the Internet, and it doesn't do jack to help lol. The calibration trick also does not fix it.
I ordered one of the tri wing screwdrivers off of Amazon, so I can take it apart and work on it. That should show up this weekend, so we will see if I can clean it out from the inside.
I'm not so much upset that the joy cons end up having issues, but what does annoy me is the sheer cost of the joy cons themselves. It wouldn't be that big of a problem if I could buy an official joy con for $20 or $25 dollars. I would just buy a new one when one goes bad if that was the case.
The fact that the joy cons are so insanely expensive is why it bothers me that they go bad rather quickly. A controller that expensive should last longer, and not be so easily jacked up by .... dust.
I mean really. A $60 controller that is defeated by a spec of dust.
(>.<)
@fiben1002 I have not tried a toothbrush yet. Will try that tonight. Thanks
mine only drift when detached. noticed playing zelda on the tv.
i think i have the blutooth issue that a piece of foam fixes or whatever. if i ever really care to play on the tv i'll just get a pro controller anyway. the included dock thing is fine but not comfortable enough for long term use imo.
This article was so on time. I have the drift issue as my left joycon drifts upward. Drives me nuts cause I thought for the longest it was a bluetooth communication issue, and it's really been getting in the way of me playing with people. I've been all through step one, re-calibrating, re-calibrating, re-calibrating, turning off the Switch, and updating controllers (Even returning them to factory settings, which "seemed" to work, then same old issues). I really didn't want to spend the time sending it in to Nintendo for a fix as even though I have a pro controller, I will be forced to play my Switch docked until the joycon comes back. Plus my whole "send package-receive package" situation is a little wonky at the moment. Is compressed air a solution in any way?
@PharoneTheGnome
Hope it helps! Make sure you get the bristles down in the crevice a little. Hasn't failed me yet.
I had drift on my right joy con, replaced the stick with cheap one from amazon and no issues so far. I did end up breaking one of the ribbon cables inside for the leds but will replace that at a later date .
Compared to every other Nintendo controller these Joy-Con are really prone to get messed up one way or another, quite soon after normal use, especially the analog sticks.
It's the sole reason I don't buy many Switch games (local multiplayer games are an automatic skip at this point). I have to save up for new controllers all the time (and it's not fun to play new games with a controller that moves on its own after just a couple of months).
In my opinion, Nintendo should make a Joy-Con revision! Also, they should be blocked from selling more of the current faulty version. It's not too much to ask for a 80€ controller that can handle at least 5 years of gaming, but the Joy-Con don't even work for 1 year.
Been having left drift on some extra joy-con I bought last year. I've tried all the fixes that don't involve opening it up except for contact cleaner. I will try that and then if it doesn't work just order replacement sticks and attempt it myself. My bf is pretty handy so I might just coerce him into it.
@PharoneTheGnome
I absolutely agree. Even just one replacement joycon is 50 bucks, so you’re almost better to just get a set of cool colors instead. And I get that things go bad over time, but dust should not wreak these so quickly, and even having to clean them like this is kinda ridiculous for the price that they are.
I try and play as much as possible with the GC controller, until I can pick up a Pro. The Joy-Cons are just so tiny and the drift is kinda annoying.
I just sent mine to Nintendo. Sent all 4 bad joycons I have for $30
Just want to comment that I've experienced drift recently on a left joy con, and also near the launch of Switch. Joy con are great and I love them, but they also aren't up to the standard of quality I expect from Nintendo products.
@Fabicom the ole fan boy comment. You know someone has a flimsy arguement when you go there. I like Nintendo, also like Sony and Xbox... I’ve owned every Xbox, Every Sony machine including all their handhelds and I haven’t owned every Nintendo.....
The amount of consoles they have shipped in first two years the % of issues seen on line is tiny but people are yelling loud and making it more than it is.
I look after my console and I’ve had no issues. Same as all my hardware. No console is perfect but to suggest switch is shoddy??? Cmon.
I’d have accepted that the joy cons aren’t as robust as they could be.... but shoddy? Not it the right hands
A word of warning, I did the contact cleaner solution a few days ago, and while the sticks now work fine, I've been having trouble with some of the buttons. The ZL, -, and Home button don't want to respond when pressed every time. Not sure the exact reason, but I'm trying to clean them out again and see if it helps.
@Yorumi it is and it was intentional. I stand by that describing the switch hardware as shoddy is way OTT.
An article about Joy cons and how they have way more issues than they should - I’m on board with.... they clearly have issues... to lump it all in and call the whole console shoddy is a massive stretch
THANK YOU! It was driving me mental and I didn’t have the sense to check in the settings until now...and it worked! Yay!
I've been getting this on both joycons. I can get it to go away (it lasted a few days) but it's came back. Interestingly they have both just run out of charge for the first time in 16 months. I'm thinking perhaps it's charge related.
I would like to add I must have had over 1000 hours use with these joycons and only just had the problem. If I had to replace them I think I've had my moneys worth. Nothing lasts forever.
If this comes down to a hardware defect regardless in warranty or out of warranty they should replace it. Buyers expect a working hardware should get it replaced at cost to Nintendo to make a wrong a right. If they want good PR admitting fault and replacing would go along way to show good faith to their FanBase and buying consumers.
i mean replacement analog sticks are like $2.50
I got one of my left Joy-Con's stick changed, and now it works wonderful. But I have to say, it took a year for my left Joy-Con to drift, I can't say the same for the new pair I got after, they started to drift as soon as 6 months later after I purchased them. I'm going to get them fixed as well.
You forgot "Chucking your Joycon across the room in a fit of drift-induced rage"! This method has worked for me several times already.
Seriously, though, thanks for this guide. The step by step instructions and clear pictures are especially appreciated.
I’m hoping Alex does a video for joycons that keep saying they’re detached from switch when in handheld mode even though they are still attached
I got some nasty drift too!!
I am not very pleased these things should last for years
Wow, NL, this is the most in depth, useful, fantastic article you guys have cranked out, possibly ever! Fantastic work, with iFixit levels of detail for a Nintendo specific problem. This is a milestone day for NL!
Also, big kudos to Nintendo for a pot module with a clip-in ribbon connector?! That's not a cheap way to do this part. Normally the analogs are just surface mounted and soldered down. Replacing XBox or DualShock sticks requires re-soldering it, not just plugging a new one in.
@Stocksy I don't think it's shoddy, this is probably the highest quality minature bi-directional clickable pot on the market for them to have used....but....there's no denying that the minature bi-directional clickable pot, even if it's the best there is, isn't the most reliable device in the world. Not Nintendo's fault, but the drift problems with the part are pretty rampant,. and the tiny internal parts are just going to be that way. It's a lot more excusable on a mini XY Pot than on a full sized one like the XBox sticks that infamously drift.
Mine started drifting shortly before I got Smash. It is sad that they have started to fail already so soon, but at least we have options to fix it. Will try the tutorial to see if contact cleaner is enough, otherwise I will have to check aliexpress for a new set of joysticks. Thanks for explaining it so well!
Very good article. I did number 4 to my right joycon a few months ago and now it work like new.Just WARNING, make sure dont touch anything before remove the battery, if you touch the wrong place with a metallic tool, that may cause to blow one fuse and the battery will stop working. So the first and most important step is like the article says, removing the battery. I had this issue while trying to fix it and had to weld to bridge the blown fuse (it was very difficult because this fuse is soooo tiny). Summarizing first step , remove the battery then whatever you want.
@Stocksy The joycons are crap. I've sent each side away twice for repair for drift, and the only person playing the system is me, carefully, as a 40 year old man who knows how to treat his hardware. There is simply no way you can make me believe this is isolated.
I've been looking at videos to fix the joy con drift for the past few months. Already spent $80 ($30 plus $10 shipping) to send in my joy cons for repair 3 different times and I wasn't going for #4.
In the end I just bought a pair of yellow joy cons on sale at Target with a 2-year extended warranty to be safe (still less than $80) and now still working up the courage to go nuclear option 3 with the blue ones.
Besides the connection issue, I had not a single problem with my Joy-Cons. And (at least in my case) the connection issue is related to the Switch dock.
@Yorumi Just looking at the internals in these pictures, there's nothing shoddy about the Joycon. On the contrary they took the superior, more expensive route to most things that almost no other consumer electronics would use. That doesn't mean there may not be design gaffes, but if there weren't it wasn't due to cutting any costs, but just legit design oversights (or output problems at Foxconn, which would be shoddiness but not from Nintendo's design.) The design itself is top notch.
The Pro controller is a separate product (an accessory.) First run was bad....I have a sneaking suspicion that was a Foxconn problem. The sticks fell apart badly, the d-pad wasn't gated properly, it was a mess. Nintendo's been designing d-pads for almost 40 years, and I strongly doubt they didn't gate it right in the design. Have you tried a newer pro controller? The D-pad feels right after that first batch. Yes, it should have been recalled, yes, that's a Nintendo fail. But not a design fail.
The warping thing....no comment....that was such an odd phenomenon. The bricking...yeah, USB-C should have been standard, but to be fair to Nintedo, they designed the Switch implementation before the standard was even finalized. It's not uncommon for first gen interfaces, especially with USB's various (bad) iterations and design-by-politics history to not meet standard. Same for SATA and PCI Express. I'd rather they stuck with convention, but since they pre-date the convention, and that kind of issue is common with new interfaces....I can't point big fingers at Nintendo on that. Plus, that aspect was probably nVidia, and if you've ever used a nForce board, you know nVidia's history with standardless new interfaces......
The warping thing aside (I still believe that's a transport issue mixed with battery issues), and Pro controller is a separate product with a bad first run, in terms of Switch specifically, we're talking a pre-standard bus implementation, and the Joycon issues. The antenna placement/gain may be an issue by design or assmbly (or FCC/TUV concession), and the pots seem failure/dirt prone, but that's nothing on the design, it's a part purchased sealed and whole, it's just installed on the board.
I mean, really, we have pictures on this thread, if you can look at that and call that shoddy design, you should crack open some of your other electronics and see what industry standard looks like...
@Yorumi
You donˋt want to tell me, that you're one of these people who believe the Switch is warping and bending because it gets soooo hot? 😂😂😂
Ah look, a article about the drifting. A few weeks back I noticed this while playing Smash and Octopath traveler, but mostly during menu's. Its still very irrititating though.
"unless you’re a sucker for watching Link repeatedly jog off cliff edges"
Lol, it can't be that bad can it? I mean, to me the drifting gets immediately canceled out when I move the stick. That's probably why I noticed it so late in Smash, you are always on the move in that game.
The only other Nintendo controller (or buttons) I ever had malfunctioning, was the N64 analog stick that didn't respond before being pushed over halfway up (which made running in quite a few games impossible, therefore rendering the games unplayable), and the up direction of the original GBA D-pad, together with its R button, that no longer functioned unless I pressed it hard enough to have an impression of it in my fingers.
Now I have six joy-con, two of which have a defect in the joy-stick-clicky-button ("L3" on PS), and two have had occasional drifting issues.
edit: I have (had) countless Nintendo systems and controllers, from all generations (only never had a Virtual Boy or any 2DS), because I used to collect Nintendo stuff like a lunatic, and had a 16 player LAN Gamecube set-up. Oh and I must add, the New 3DS analog nipple thing is BAD. Is it still considered malfunctioning if it was never very functional to begin with?
Had it in both controllers, and had to send one in twice.
It’s such a rampant issue it should qualify for a class action lawsuit. I don’t mean a big-money payoff, but an indefinite warranty and free fix at any time.
Recently shipped mine to Nintendo (for the third time) & just when I thought things couldn't get much worse, get a mail from them today saying they've just my Switch for repair but may not to be able to get it back to me for 4 weeks! due to their annual stock take currently taking place.. something tells me I'm just not meant to own a Switch.
@Yorumi I'm not sure it's as simple as that. Japan went through much of the same hollowing out of their manufacturing and industrial infrastructure we did in the 90's and '00s. The problem with producing at home is much of the supply chain isn't actually there anymore. The factory you contract for fab may have close, or moved to China, probably buckled under the weight of competing against Foxconn (which, you can't compete with slavery...it's always the most economical option) and even if the fab is still there, the components manufacturers are all gone and in China. We have the same problem here. Even if you WANTED to build electronics here, you either can't, or you need to charge 3x the price for a boutique item. As a result only particularly high end things or specialty manufacturer things tend to be made in "first world" countries. And Nintendo gear is mass market.
That's far bigger than a Nintendo/Foxconn thing. That's a "the entire first world sold out their future, economic stability, and manufacturing self sufficiency to China in exchange for 10-20 years of below cost goods and now we're permanently, completely effed until the next world war fixes it, assuming anyone is left to notice.)
Japan being Japan, I suspect most Japanese companies strongly prefer to build there if it's actually economically feasible. It's just that it isn't. Foxconn is the Amazon/Walmart of manufacturing. They devour all in their path. Although technically they are Taiwanese, not Chinese.....whether or not you believe that's the same thing depends on your stance on One China.
Thanks for this, I've just recently started to get this problem. Did we really need it over 4 pages though? Come on.
With so many pictures and steps, it makes sense to separate the stages with a page each.
@Yorumi US and Japan can still manufacture, but at higher cost, with longer turnaround times, and is thus reserved for higher end and more specialty product (or product where IP rights are important.....) And the output is heavily compromised in volume.
Quality dropped since Foxconn took over (surprise surprise), but some of that is also that no company can afford to build products at mass market prices designed to last 30 years (overbuilt.) Plus investors (read: banks, fund management firms, etc) evaluating every line item for every fraction of a penny spent not yielding at least 4x returns.)
Unfortunately it's a different world that 20 years ago, and no part of that difference is positive.
@Henmii It is that bad. BotW becomes almost unplayable, as a common strategy is to stand on the very edge of something and drop bombs on difficult to fight enemies. One false move screws that completely.
@Stocksy By Nintendo standards, it's definitely shoddy. If you haven't had these issues, good for you. But I've owned every Nintendo console including the Virtual Boy, and the Switch is the first one where I've had major control issues (both joy cons and pro controller), and I know quite a few people that have had the same issues.
I agree that sometimes internet people blow up these issues way out of proportion, but in the case of the Switch controllers there's definitely multiple real issues, either due to poor design or bad construction. And the fact that the controllers are so expensive only makes it worse.
I was going to get on here and ask how wide spread this issue really is, then I saw the lengthy comments section. I’ve had my newest switch and had the left drift but it was fixed by simply power cycling the console. I should note that I had 3 controllers paired at the time which is really 5 devices. A pro controller and 2 joy con sets.
Makes me worry some, just redesign it Nintendo. Or release a “new improved”
Joy con you can sell if you can’t admit there’s a problem.
@Yorumi Worse, even where you can, trying is self defeating since it's just as likely to break as the cheap stuff, but unlike in the past when you just take it to the repair shop across the street, now you have to ship it to a service center either on the other side of the country, or in some other country.
@philosteen,
Hmm, that's not good then. I just don't get why Nintendo made those analogue-sticks that bad. With past Nintendo devices I never had any trouble.
My left joycon (same one I had replaced at lauch) now sticks down. It is really obvious in the eShop where is jumps all the way down the list with just one tap.
My $29 Xbox 1 controller I got at Walmart for my PC has been rock solid for years. And still rocking my launch PS4 controller after 6 years (And use both 3X as much in any given week)
Not as durable as days of old for sure
I've had issues with 3 joycons so far but have never had issues with any other gamepad for any other system. I thought it was my friends who were screwing things up here but I'm thankful for the video and will try it out.
I had my left one start drifting just after the warranty expired, but Nintendo repaired it for $20. Then shortly thereafter the right one developed the same issue. Since it's not as noticeable in games, I let it go. I finally bought a new set this weekend. Hope they last.
I just want to add more info to this subject. I recently had a brand new joy con drift. Link kept running for a few seconds after I'd let go of the left joy con joystick. It happened in Kindgom new lands also. It makes me wonder if there could be wireless interference, or if the processor is lagging in processing joy con data coming in.
@Fabicom "Are you implying that everyone that has had this problem is not careful with their Switch then? Just because it hasn't happened to you, it doesn't mean the problem is not there. You've got a really lousy argument. "Fanboyism" at its best. Next."
Actually some where fault of the user if that was so true then this hardware would be failing left and right but sadly your point didn't make any credibitably settings. To say "substantial" is at best Trolling.
@Fabicom "This is precisely my point. Compared to other Nintendo consoles, the Switch is not that great. There's a substantial amount of people reporting the issues too, so there's no way these are "isolated cases"."
Your point has no point. The sales figures already show your decision is more or less failure at best. Those cases were not supported those were more or less anecdotal but had no way to verify them as well. So before you say something you can't backup with verified data as to the real problem or lack of problem caused by the user.
@jobvd Had a Drifting Pro Controller actually... Just sent & repaired!
I had to send the left joy-con to Nintendo last summer because of this and the fact that it was too easily removed from the console. They fixed it.
But a few weeks ago the drifting problem happened again, Sega Ages menus browsing upwards all the time warned me, and tried to clean it without any result. And then tried the firmware update and recalibration, the one method they always tell you just because they have to... And it worked!
@shaneoh I did this, but the problem returned shortly after. Not saying this is the case always, but I did end up doing the recalibrate option for a drifting right joystick that hasn't become a problem again in the past nine months. So it is nice to have these options that weren't there it seems even a year ago when I originally sent it in for repair.
N. 3 and 4 are the real solutions. I did the n.4 one month ago and now my joycons are like news. The only way is open it
@Nico07
Definitely do the first two options first as that may be all you need, but sending it to Nintendo as a warranty claim should be done before options three and four.
It is astonishing how well the Switch has sold when you consider that the Joy Cons are perhaps Nintendo's worst ever performing controllers.
I have this happening on both JC but what’s worse is that I waited 3 weeks for an official external company which operates under Nintendo and they did NOT repair them.
I came back at home and 30 minutes after there was drifting. Luckily in Europe we get 2 years of warranty so I will be sending them again until it’s fixed. I REFUSE buying new JoyCon.
@jobvd i got one as well(only the left joy-con), but it only drifts when on a menu part of something or to a corner in pokemon quest and stops drifting when i tap my joy con on something. just a small tap, about as much impact as it gets when its put into the side of the switch. i didn't have this issue until i started playing lets go eevee and it hasn't really bothered me all that much so i've been putting off going about fixing it
The original left blue Joy-Con that came with my switch drifts up a bit. I'll have to try this out!
My right stick on my Wii U Gamepad stutters, and Nintendo wants $100 to fix it. I know its sorta off topic... but... guess I’ll just play the Switch for now. Thankfully most of my Virtual Console doesn’t need that right stick. My joycons drift too sometimes.
I bought a third party Switch controller that looks and feels almost like an Xbox One pad and I've been meaning to calibrate it. Hard to explain but I noticed that the analog sticks were off while playing Minecraft with my daughter. I doubt that recalibrating will fix the issue but I'm hopeful.
I am sure I am not the only one that hopes a Joy-Con revision is in the future for both the rumored new Nintendo Switch and the old one. I have a feeling it wouldn't be that hard of an issue to fix.
I have not had any issues so far. I would be curious to see a purchase date mapped against failures to see if it was primarily early adopters or some other reason. I can see the rails becoming a problem because they seem too loose but so far no issue there either. I did purchase an extended warranty so I have almost another year left.
Followed the step with the Contact Cleaner today for my Kid's Switches and their controllers are back to 100% with no drift or "glitches" as they call them. Thanks for this!
I've never had the drift issue, but 2 of my 4 joycons have recently developed issues with the tiny shoulder buttons. Means i cant use them in sideways mode as i can't even sync them to the switch like that.
Will these methods work on the Wii U. Also do they have replacement switches. I got drifting stick. Tried the calibration method but that didn't work.
Good thing I never use the joy con
@Stocksy my pro controller still plays perfectly. my left joycon started drifting violently almost a year after purchase.
Swapped out my left stick today using the top rated part on Amazon UK. Much easier than I thought it was going to be. Used this guide. Recommend it to anyone out of the warranty to give this ago and save a few pennies.
Just sent both of mine back. I got an email back a week later saying it would cost £29 to fix my left joy-con and the problem was due to Operating system problem. Then the next day I got another email about the right joy-con. Same problem, same £29! £58! I rang Nintendo UK up to say what exactly is wrong as operating system does not sound like something I have done. They said in actuality it was the analogue stick needed replacing and something like the circuit board was damaged.
I said that I could buy a new set for this price but they said it was the price of repair or we can send it back. I said send them back unprepared. I will now try your cleaning/repair methods. If I totally break them I can just buy some new ones and not be out of pocket.
I just finished up putting in a new joystick and it works great! No drifting Joy-Con anymore. Thanks this really helped!
the third and fourth step seem risky
Just popped down to screwfix to buy some wd40 electrical contact cleaner, my joycons have been unusable for months with extreme drift. The moment i sprayed under the flap it was almost back to brand new, the left joycon isnt 100% fixed but this has made them like almost new.
Hopefully it lasts, but damn that was impressively quick acting stuff....
@retroxdp
Yeah, I just treated mine to the SNES cartridge blow treatment... few good blasts like I was trying to get Duck Hunt working, and the drift is gone! I'm sure there are some drastic situations, but I'm betting a little dust prevention and HP Air could fix most common drifting probs.
What if you don't have electric contact cleaner for Solution 2? I don't have any myself.
Erm, why has this been re-posted??? As this was originally posted back in MARCH
What was edited? I mean, it's a semi-useful article but... what changed? lol
Has anyone actually taken Nintendo to task over this? It is clearly a widespread problem, I have had it happen with my right joycon, but I can't remember any games website approaching Nintendo about this and as far as I am aware there has never been a redesign as new joycons can be just as susceptible.
Nintendo Life should approach Nintendo and see what, if anything, they are going to do about it.
Three out of my four Joy-Cons have issues. And they all started when the things were just a few weeks old and still hardly used.
I have the Mario Odyssey red Joy-Cons and a pair of grey ones. The right red Joy-Con has an analogue stick that won't click anymore when pressed, removing that functionality altogether.
The right gray Joy-Con randomly disconnects and reconnects immediately after. The left gray Joy-Con has an analogue stick that drifts.
Really disappointed in their quality. Especially for the insane price.
Bought a 2nd set the other day and a can of compressed air, just so i can get the current pair working again. Probably will take a trip to B&Q to get a small screwdriver set, and have one of the specialist screwdrivers on order from Amazon so i can open up the Joycon.
It's stupid that the Joycons can be defeated by dust, and that a replacement set costs as much as it does to fix them.
Going to get some sticks and fix my Joycon. Save for a redesign, the Joycon might always have the drift problem so best to buy the parts and learn to fix.
I still want to know what new models are releasing before I buy a new set. I expect a pro version to have its own set of Joycon and that's what I'm most likely to go for. The mini had better not have the drift problem if they're integral.
I've had problems with joy cons and pro controllers.
I had always seen Nintendo controllers as reliable until the Switch.
Mine is messed up too, going to have to open it up.
Hey, wondering if anyone from this awesome community can help as 5 months of searching has brought up zero answers...
My switch works great in handheld mode with both joycons connected, but I can't play docked as both joycons refuse to sync when removed from the base unit or when slotted into the joycon grip. Even holding them next to the switch doesn't get them to sync up, but when they are physically connected they work a treat. I've gone through every forum, checked interference issues, factory reset the switch twice, disconnected and reconnected both joycons, gone through every setting in the menu - nothing seems to work. When I use my joycons on another switch they work fine with no troubles though...
My switch also won't connect to the Internet unless I literally hold it against the router but once it connects its then fine to wander around my house. I've tried everything to get the joycons to work whilst disconnected.
If anybody has any ideas or even if someone has also experienced these issues it would be great to hear from you... Even if its just to know I'm not alone in this!!!
Many thanks in advance, hopefully somebody can help me - I'm genuinely stuck! Muchos gracias! ❤️
I have a weird situation here. I seem to only be experiencing left stick drift in the Mana Collection. In both Secret and Trials, my character keeps trying to move to the right, and the cursor goes crazy in menus. But it doesn't happen in any other game. I have no idea what to think. It makes the Mana games almost impossible to play, though. ☹️
Yeah, I'm no Mr. Fix It so my solution is to just buy a new one. For now anyway. But if it proves to be a persistent problem, I might be shopping for analog sticks.
@Stocksy I've never had a problem with any other platforms official controllers, except ps2 when I tried to see if they still worked like 5 years ago... You're really butt hurt, dude. A quick google search will reveal many yt vids and reddit (and other forum) posts complaining of this glaring issue in the design. Too bad, Nintendo made something that is flawed, it happens... Might as well admit it.
Thanks, I'll try solution 3 as 1 and 2 failed. Great article and useful repost!
@jiffymalaise I've had trouble with the wireless connectivity on my switch also. The left joycon sometimes disconnects when playing with the switch docked. (absolutely infuriating when you're on a good run in Cuphead!)
And it consistently has trouble connecting to wifi, especially when docked, and my wireless router is only about 6-7 meters away and in direct line of sight to the dock. It even shows full signal strength in the switch internet settings but refuses to connect. One solution for the internet problem when playing docked is to buy a wired LAN adapter. I don't play online very often so I haven't bothered getting one, and when I do need to connect my switch to the internet I use it handheld and just sit right next to the router.
I've been buying Nintendo products since the original NES and I was always impressed with the quality and durability of Nintendo hardware, never had any issues before. I've had a lot of fun with the switch but the quality of the hardware leaves a lot to be desired and in that way I'm disappointed with it. It's a shame because the concept of the switch is so fantastic.
Perfect timing for this article. Last year, I had one of my original Joy-Cons develop an irreparable drift that required warranty service to fix, and now, a year later, the other Joy-Con has developed a problem as well as a third Joy-Con from a pair I purchased around the same time.
I just don't know how a company like Nintendo with a reputation for making bulletproof hardware could produce something as fragile as the Joy-Con joysticks.
At any rate, at least this article offers viable solutions that don't require me to spend $40 on out-of-warranty repairs, or $70 on a new set of Joy-Cons.
I am on the second set of joycon now and it starts to drift as well. The joycon is badly designed. I refuse to buy the third one until they corrected the design or will upgrade to pro when it gets released.
I tried options #1 and #2 for a while, but no luck.
I've done option #3. For $10 or so, I got 2 sticks and the tools to open up the joycon. Took about 20-30 minutes because I was going slowly and then had to get that tiny spring for the top button back in place twice because I hesitated while putting things back together. But - that stick is working just fine now. I have another to tackle at some point, but my primary is working fine.
And agree with others - this shouldn't be a problem for as much as these things cost to replace at the consumer level.
I just scrubbed my two flakey Joy-Cons with a clean toothbrush, and that seems to have done the trick. The joysticks weren't "drifting", they were just slow to recenter, one from the right, and one from down. I scrubbed thoroughly around the base, making sure to get the bristles into the joint. Some brief testing on the calibration screen showed expected operation. We'll see how long it lasts, but it's a good first step before you start squirting goop inside, or disassembling your controller.
Four of my five joycons developed drifting problems, one only a month after purchase. In some cases it was at severe that my character in Skyrim would run left at full tilt, stop when I moved it right, then instantly resume running left one i let go of the stick, multiple times in a row.
Blowing compressed air helped a bit, but temporarily, though for the newest one it helped for almost two months.
Ended up sending them in under warranty (2 year warranty here in the EU), they repaired one, said the other was fine, somehow, the launch ones are still in repair with the Switch.
"on the whole – it’s a solid, durable bit of kit"
The Switch is the only console I ever owned that I had to send back in for repairs during the first two years after purchase, and that includes several handhelds. It's anything but solid. And how in the hell did they manage to make to screen be pushed out in one corner by the digitizer cable? Phone manufacturers had this solved for years!
Cya
Raziel-chan
Blaming it on Tetris...
Hasn't happened to me yet. Neither has the cracking. Or the launch issues. Man, my Switch is durable.
Okay, so scrubbing with a toothbrush didn't fix it. I thought it did, but playing Breath of the Wild last night revealed "drifting" on both joysticks, so I guess the next step is the electrical contact cleaner.
A word of warning for anybody attempting #2, the "skirt" is referring to a piece on the shaft of the joystick and not the rubber cap on top. Just take my word for it that the rubber cap is VERY difficult to reinstall correctly.
Both my joycons have drift issues (especially the left stick) and a temporary fix is holding the stick down to make it click and twirling the darn thing around. It seems to move the crud out to stop the drift for a while.
Best thing to do is just book a job with Nintendo and send the darn things in. Opening them up to try and fix them if you don't have experience playing with electronic components may not have the desired result.
i not have switch yet, but my wii u gamepad have this issue in left analog stick, with 2 years and half use.
Wii u users, anybody have this issue too ?
@Stocksy Dude... I bought my switch 2 months ago.. My left joycon started drifting 2 weeks after buying it.. Shoddy is an accurate description. a 300$ console should not start malfunctioning so soon after purchasing it.. Especially one thats so expensive. I love Nintendo... But the fact that my joycon is already drifting proves that the joycons are in fact "shoddy". Nintendo should accept responsibility for selling people crap controllers.
Also.. If you go to youtube... You will see.... ALOT of people are having the same issue... It appears most people are having issues with the left joycon..
@graysoncharles You should NOT have to buy a new joycon... Those things are WAYYYYY overpriced for how CRAP they are.. I would NEVER complain about something if it wasn't seriously pissing me off.. I will never buy another Nintendo product. I didn't pay 300$ to send in my joycon and wait up to a month to get it back.. I'm insanely disappointed with Nintendo..
@Mqblank This is why im afraid to send it to Nintendo.. If they try to charge me for repairs.. I will LITERALLY never f*** with Nintendo again. Im not in the habit of complaining about products.. But my left joycon drifts so bad.. I just got my switch 2 months ago.. It started drifting after 2 weeks..
@Timboyx I would send it back as soon as possible since it is still under warranty.
What about when it's not a joycon issue? We've been having issues for a long time drifting up on the left stick, Nintendo told us its electrical interference and move away from electronics (ha, device heavy household in the middle of a large metro city - not happening). Bought hubby a wired controller, like the Pro but cheaper, that drifts to the left on the left stick. Gave up last night and bought new joycons, paired them and guess what, they drift up on the left stick too. Brand new, out of the box. Can't find any info on that in amongst all the drift issues caused by dust...
I've had this issue with mine for a while, and it has been manageable... until I got Super Mario Maker 2. Mario keeps flying all over the dang place. Hopefully these methods work.
My left joy-con drifts, does anyone know if hori's is better?
Mine just has an issue where it tells me I’m out of battery even when it’s charged. I love my Switch but I’m disappointed with how delicate it seems to be.
I undertook "the nuclear option" as NL refers to it twice — it took me about 1.5 hours in total for 2 joystick replacements, and they both work fantastically. And prior to that, I had never so much looked at a circuit board, so it really is something anyone can do (the fact that I busted two joycons just by being so rough with the joystick should indicate I'm not exactly a delicate soul!).
NL's guide above is great, but I had not seen it prior to my undertaking and went by this video instead (also very helpful): https://www.youtube.com/watch?v=cMHl7GwbEb0
Wait what! Did you recommend disconnecting/reconnecting electrical connections WITH THE BATTERY STILL CONNECTED?!! This is definitely not a good idea - disconnect the battery first to avoid shorting anything out, injury or explosion.
The Really Nuclear option works wonders, because it seems that the problem is that there is an excess of semiconductor material there which causes the dust inside and makes the stick drift. After cleaning both of my sticks so far, after 3 months, I haven’t had any problem at all.
Lets hope it stays that way.
@boxyguy yea nothing like Sony's that completely fail after short term use.
The stick in my right Joycon broke after a fall, so I ordered a handful of new sticks from Zedlabs in the UK and some tools from a local online shop. Very cheap solution which took me about 30 minutes to complete. Now one of my replacement Joycons has started drifting after very heavy use, so I guess I'm at it again.
I updated my controllers and my left joy con is working like magic with the crosshair being dead center without movement! Spending $70+ for new controllers is not cheap at all when you’re far from rich lol. Hopefully some of you guys had success because we should be buying games for the collection and NOT replacement joy cons.
So after about an hour, my knowledge in electronics, and a joycon repair kit, I have made some discoveries. I do not get the drift with the battery in normal configuration and the vibration box connected. Now it may not be the vibration box, or it could be a combination of both the vibe box and the battery, but I have successfully forced it to drift and stopped it from drifting. My theory is Electromagnetic Interference or EMI. The battery being so close to the joystick is the problem, along with what I suspect, is a latent catastrophic failure (or simply put a damaged run on the board due to normal production of the circuit card itself). The battery lines are acting as an antenna, sending a signal that is being picked up by the small area that is exposed or damaged. While it gets stuck in one direction, as soon as you tap the joystick the opposite way, the signal is cancelled out and stays at rest. The exposed area is acting as a hold switch in a sense, essentially keeping the circuit energized.
Looks so difficult I'll use the guaranty while it lasts. Thanks anyway!
@Stocksy If a £280 console comes with a faulty controller then they are allowed to say that their hardware is shoddy
People can stop @ing me every time Nintendo life rinse and repeat this article. It’s old and my comment is ancient. I have no desire to talk anymore on this.
People clearly have issues. I have two lots and two pro controllers and no issues. I have no more to say.
If we want Nintenso to serously adress the issue and change the hardware design, then we should all start calling the joy-con the "pain-con".
When people in videos and on reviews start using regularly the term pain-con nintendo will surely do something.
Just got around to replacing my left red one. I used my fingers with the ribbons. It's a little less risky because my fingers aren't sharp like tweezers but, boy was it finicky. Many thanks.
I'm more interested in getting my hands on that white one .
I have this problem but with the Pro Controller. I have no idea how to fix it, and re-calibration didn't help.
I replaced my sticks last year and since i was gonna take my JoyCon apart anyway, I got clear JoyCon replacement shells with coloured buttons and a D-Pad on the left JoyCon. Best mod I ever applied to anything, having that D-Pad makes so much more sense!
My Power-A deluxe audio controller has a slightly drifting joy-con & this is no help for it.
Commenting a bit late on this.
I just did option 4 (The Really Nuclear Option).
Working like a charm for a yellow left joycon, and all good in calibration screen. No need for alcohol, just cleaned with Qtips. Warning, it's NOT for the faint of heart. Thanks NL for this tutorial. I can finaly use my yellow joycons again !
@dartmonkey You mention that the screws in the back of the Joycon are not the stock screws. I have been trying to track down what size screws (or how else I need to describe them) I need to get to replace mine. Could you give me any direction with that? I'm specifically wanting to replace them with non-Y screws like in the video, so I have avoided the eBay and Amazon listings for replacement packs.
@McGingerchops In my experience non-official shells tend to come with standard (non-Y) screws. Apparently, they're M1.4 screws (5mm)
https://www.reddit.com/r/NintendoSwitch/comments/77szvn/psa_replacement_screws_for_joycons/
I just send my joy con and nintendo repaired it for free, i thought that is a thing now, since it is a design flaw?
@shaneoh with USPS having major delays and in the middle of the pandemic, it will be weeks if not longer without them. Not really a viable option.
Dude, the fact I need to do this sucks. My Wii U is getting drift, but I got that in 2014. My controllers started to drift after 6 months.
@MrGreen315
That comment is nearly a year and a half old
@Solaine I have 19 Joy-Cons between 4 Switches. You will not believe how many times they have been sent in. How is this problem not solved yet? What ever they fix them with makes matters worse. I normally send 4-5 to them every 3 months.
@Bunkerneath People run into this issue A LOT. Probably good to have it showing up in search results by reposting. Good at catching traffic.
@buggysdad Well, since the first comment (March 2019), in the end I bought some new ones to cover me and sent my controllers in to be fixed. So far have had to send in three, two for drift and one for the R button not working.
Each time they have fixed it for free.
@buggysdad that really does sound annoying. At the very least they are fixing it for free i guess, but its hit or miss if your problem gets solved or not. for me it did, but looking through the comments it seems that you are either lucky or unlucky depending on where you are sending it in
it does not work this sucks
IT GOT WORST DO NOT TRY THIS
I was having pretty bad drift issues on all 4 of my joy con, and the contact cleaner worked to solve the issue on all of them, although I did find the home button on one no longer worked, still I’d say worth the risk
Tap here to load 159 comments
Leave A Comment
Hold on there, you need to login to post a comment...