Proper Zelda-style dungeons are back in Tears of the Kingdom, and if you're following our recommended order, the first dungeon you'll come across is The Wind Temple.
Situated above the Hebra region, you'll visit this dungeon along with Tulin after crossing the Rising Island Chain as part of the Tulin of Rito Village Main Quest.
Here's how to get through the Wind Temple — The Legendary Stormwind Ark.
Zelda: Tears Of The Kingdom: Wind Temple Walkthrough
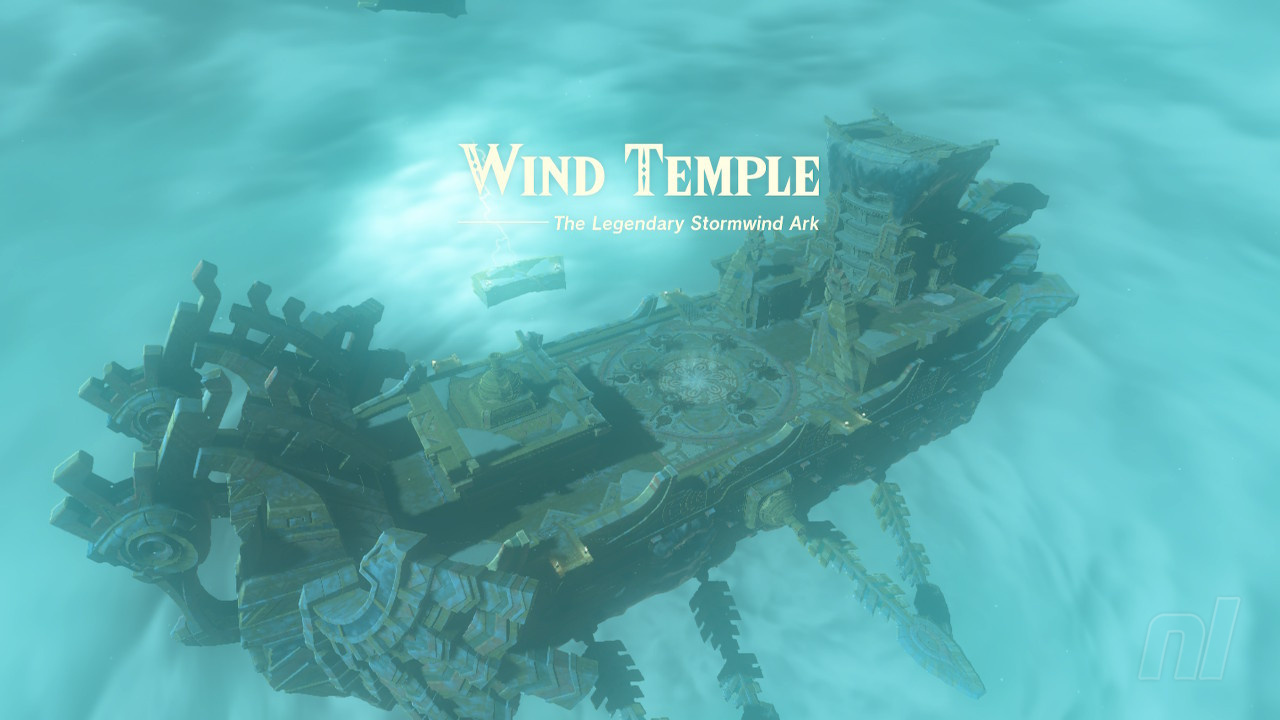
The Legendary Stormwind Ark is a huge boat-shaped temple floating above Rito Village and the Hebra region, but from the centre of this legendary Wind Temple, a huge chill is blasting out and causing the tundra that has swept across the bird people's land.
Once you examine the circular Zonai terminal in front of you and to discover that the centre of the boat can be opened, but it's currently locked. You need to find the five locks on the Stormwind Ark and open them in order to unlock the hatch and quell the storm. All five locks will be shown on your map.
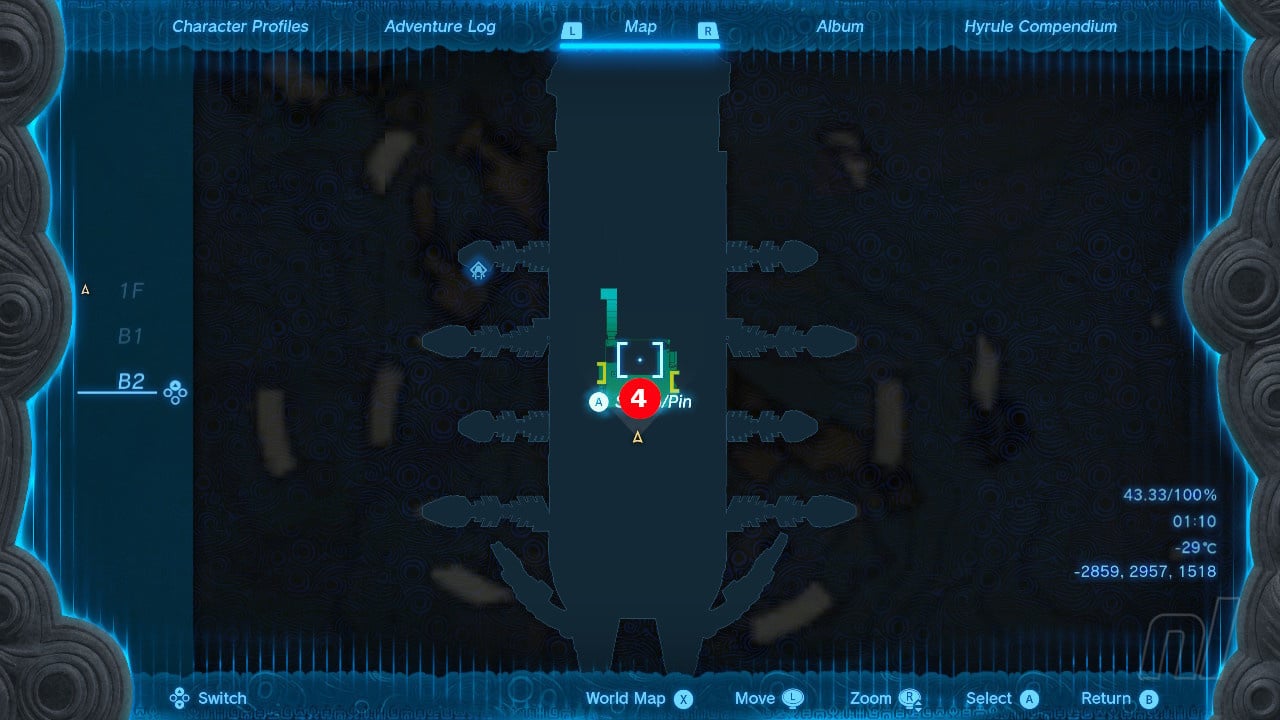
Dungeon Map
Remember, if you get lost at any point, you can always warp back to the entrance of the temple using the Purah Pad and fast travel.
We've numbered the locks on each map in the order we completed them in. However, you can complete each of them in any order you want.
1F

B1
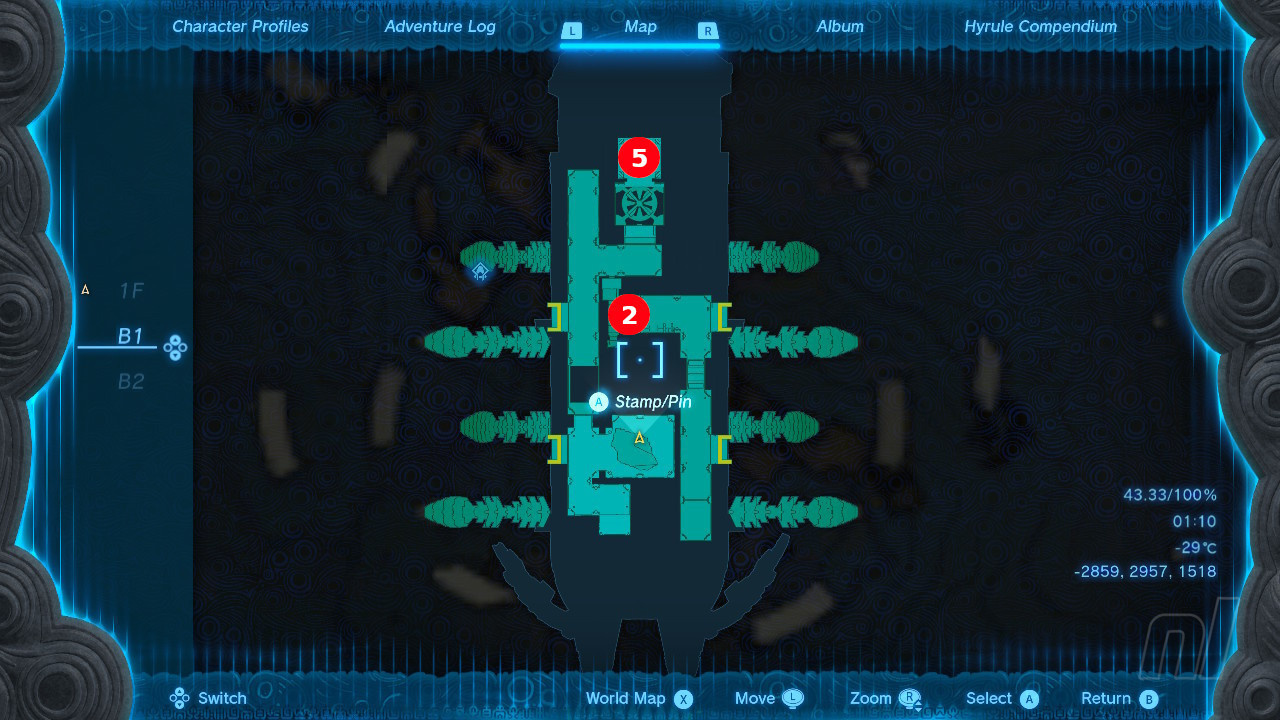
B2
Open the five locks
Lock 1
From the hatch on 1F, head towards the front of the boat. There are two rooms facing each other, each blocked off by metal gates. The first lock is in the right-hand room.
Using Ultrahand, grab one of the icicles on the floor and stick it to the level next to the gate. Then, with Ultrahand, pull the level to the right to unlock the gate. Inside, use Tulin's Power of Wind to activate the first lock.
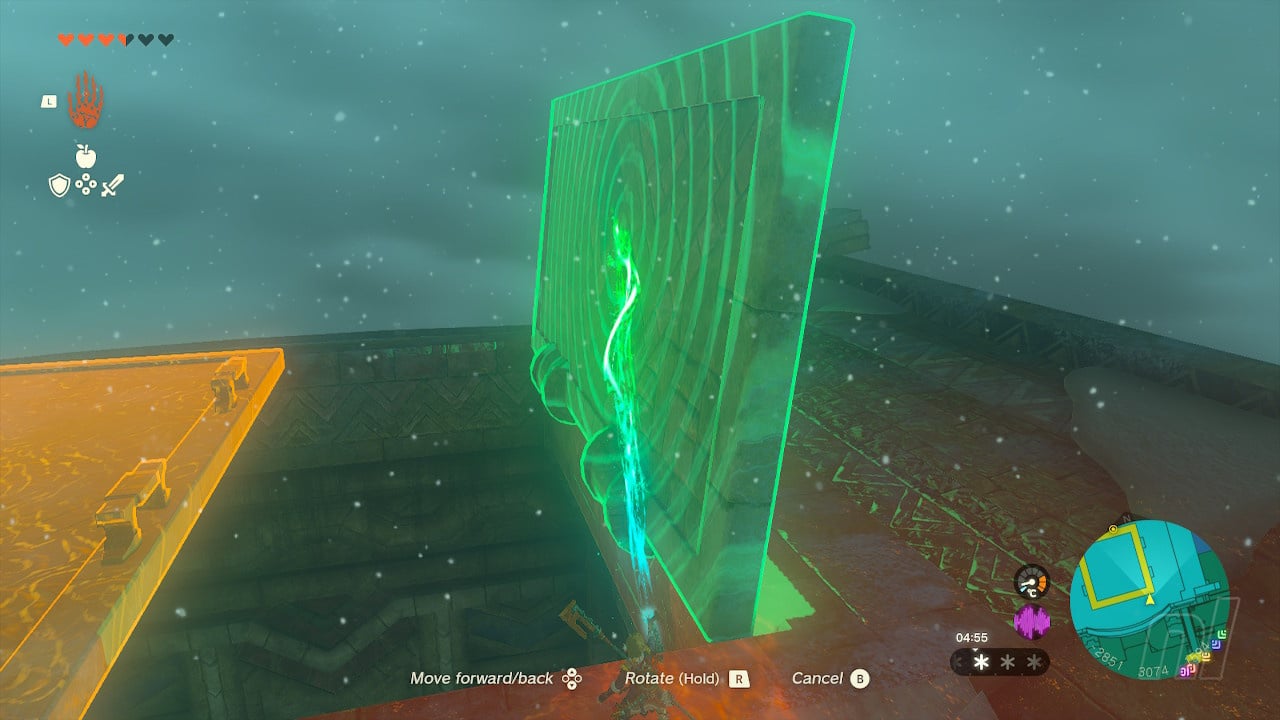
In the opposite room, melt the ice to reveal a chest with a Soldier II Spear. You can also right the gust of wind in the centre of the ship to the right-hand side of the front, melt the ice floor, and get to a chest containing a Zonaite Shield. On the left-hand side of the top part of the ship, melt some more ice to reveal a chest with 10 arrows.
Lock 2
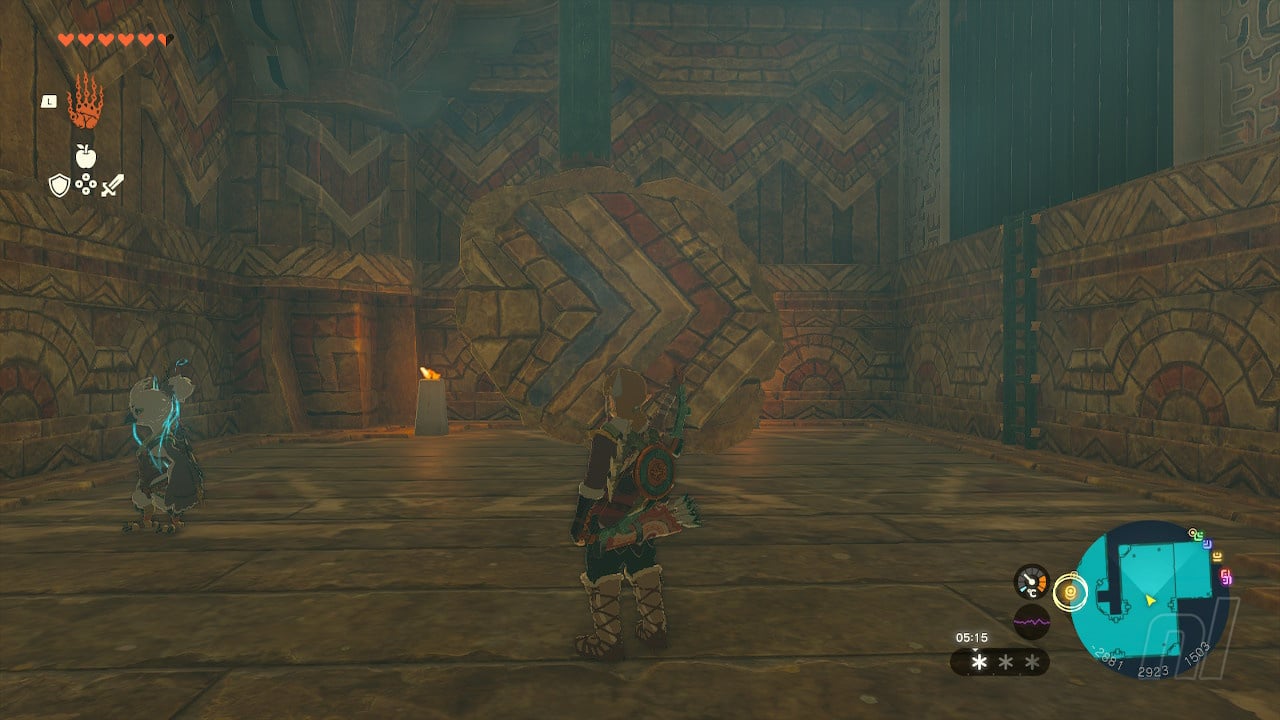
Leave the room and jump off the left-hand side of the boat. Glide towards the ice-covered hole, melt the ice, and head inside to reach B1. On the giant spinning gear, use Recall and ride the gear north into the next room.
In here, you'll spot a large gear system on the wall, but it's missing a connection. Break the icicles on the ceiling, and use Ultrahand to stick it in the gap to get the gears moving and open the gate. The second lock will be in the next room.
If you follow the stairs from here, you'll find a room with lasers. Avoid them by crouching and climbing to get a chest with a Ruby in it.
Lock 3
Back on 1F, jump down the left-hand side of the boat. You can glide towards one of the smaller ships if you want to use the sails to gain some height and head towards the back end. There should be an open window you can get through to return to B1.
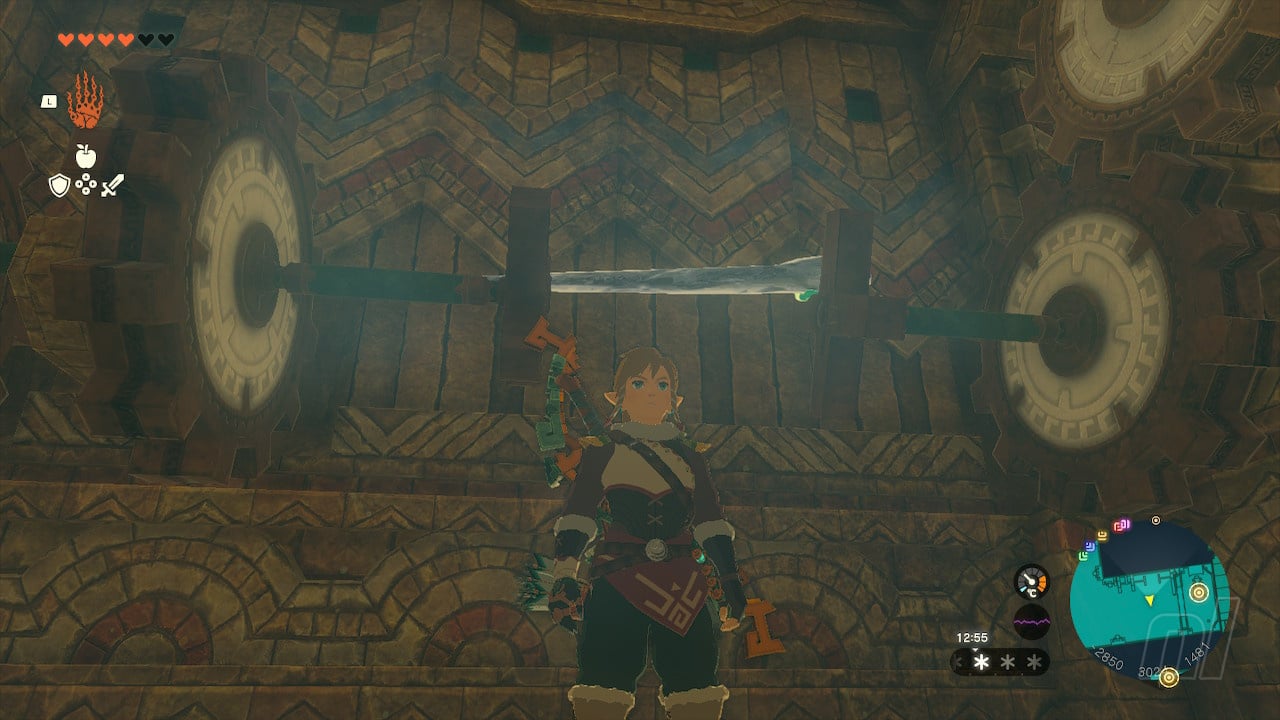
Turn right, and then use Tulin to help you glide across the icy gap. Fight the Construct up the stairs and then use Ascend on the raised level to go up to the next floor. You'll see a gear with a rod sticking out, and some large stone slabs with arrows on them.
On one side of the hole is a chest containing a Captain I Reaper. Just move the stone slabs out of the way, which you'll need for the next puzzle.
Use Ultrahand to stick the stone slabs on the stick, and then get Tulin to blast it with a gust of wind to open the gate to your right. Climb up, and you'll find the third lock.
Lock 4
You need to glide underneath the boat to reach the lock on B2. You can do this either from the ship's deck or from the right-hand side of B1 where Lock 2 is.
You don't need to do anything fancy here — just use Tulin's wind power to open up lock number four.
Lock 5
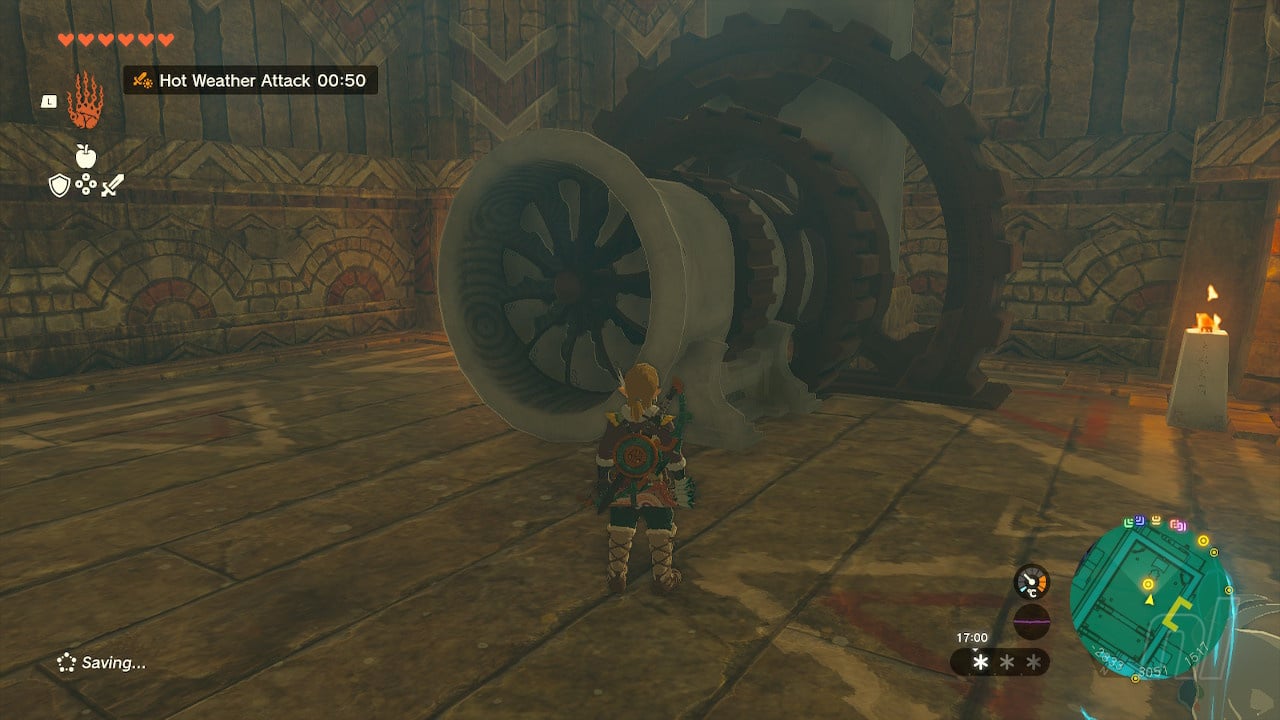
Return to 1F (you can get there using the stairs near the B2 lock, or by using Ascend) and using the turbine underneath the hatch, ride the wind with your glider and head to the highest point at the front of the ship. Use Ultrahand to open up the heavy doors at the top, where you'll see a drop with lasers.
Dive down and be careful not to be hit by the lasers. You can readjust with your glider using the fan at the bottom of the shaft. You want to land on the platform on the north side of the map. When you do, walk in, open the chest with a Soldier Blade, and activate the final lock.
Once you've opened all five locks, Tulin will tell you to head back to the centre of the ship. Examine the Zonai terminal to open the hatch and find out what's been causing the blizzard.
How to beat the Wind Temple Boss
You've got this far — well done. Now it's time to take on The Scourge of the Wind Temple.
Make sure you have lots of arrows and stamina-healing food for this fight as you'll be airborne for the entire thing. it's a pretty easy fight and makes for an excellent Zelda-style boss introduction. if you're really struggling to take down this giant centipede, however, check out our Wind Temple boss guide.
That's your first dungeon down. Next stop, the Eldin region and Goron City! Or maybe this is your last stop already. Whether you're doing this first, second, or last, make sure you check out the rest of our Zelda: Tears of the Kingdom walkthrough for all of the tips, hints, and maps you need to make it through your journey.


Comments 2
wasnt a big fan of this one. honestly i think the divine beasts are way better than people make them out to be the puzzles in this one were so simplistic
If you want to save arrows and have fun, you can fly and crash through it's icy underbellies once the spikes are gone.
Tap here to load 2 comments
Leave A Comment
Hold on there, you need to login to post a comment...