Captain Toad: Treasure Tracker is now available in North America and Europe, adding another excellent title to the Wii U library. In this game the goal for Captain Toad and Toadette isn't simply nabbing the star at the end of each stage, but also picking up three gems hidden throughout each level. These become vital in unlocking later content, so they can't be ignored.
Some of these gems can be tricky to find or reach, so we thought we'd help you out. Below you'll find a step-by-step guide to finding all of the gems in Episode 2 of the game; you can read our episode 1 guide here. Whether you want a walkthrough for your first play, or just pointers to gems that have eluded you, we've got you covered.
The episode's 18 stages are below — enjoy!

Chute Scoot Slopes
See the big red slide directly in front of Toadette when starting the stage? If you turn the spinwheel that it's attached to, the slide will move out of its initial position, revealing an opening hidden on the wall it was previously obstructing. This is where you'll find gem numero uno.
If the red slide from step one is aligned with the blue platform below, you can slide down and be in line to earn the next gem. To do so, use the spinwheel on the blue platform until the blue slide is connected with the ground below. It's on this slide that the gem is located, so slide on down and gather it up!
When you come to the spinwheel that manipulates the yellow slide, line it up with the series of slides that leads to the end of the stage. Before you slide on down, move the camera so you have a view of the large red section of slide below, where you'll see the final gem resting on the far edge. Be prepared to get it as you make your way down.
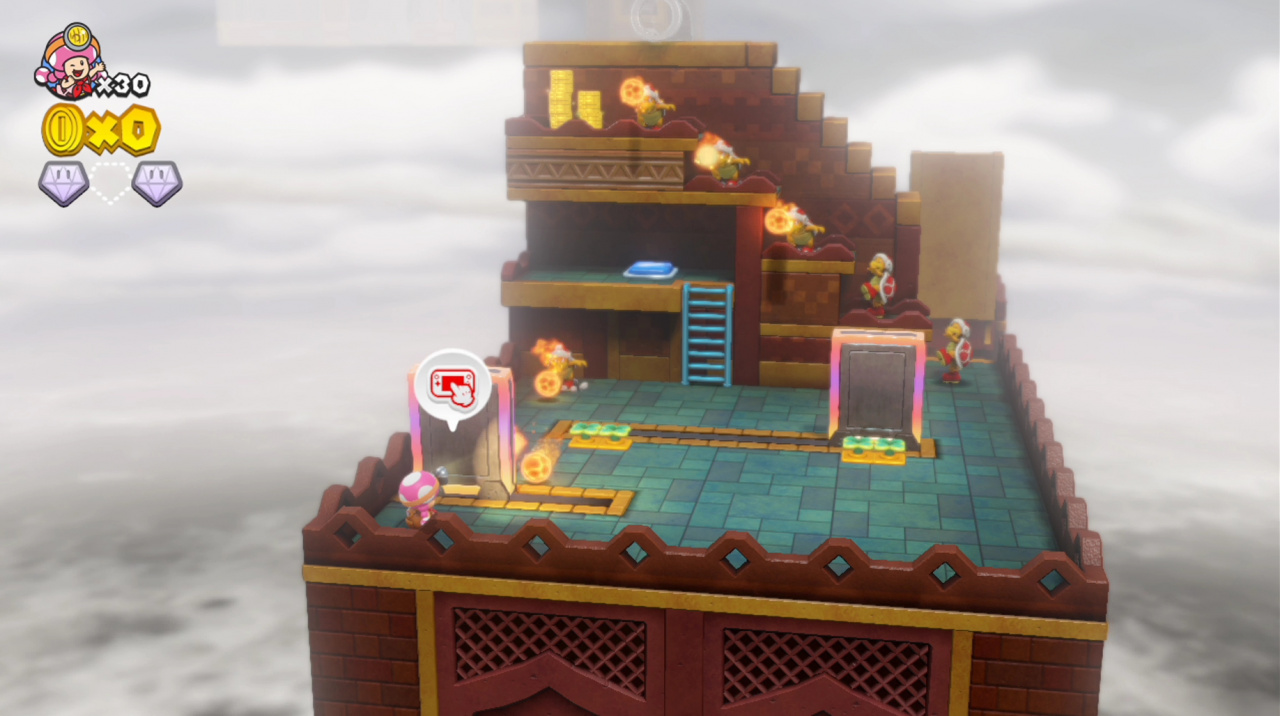
Stumper Sneakaround
After stepping on the first P-switch, head across the wooden bridge that is now accessible and you should arrive at a turnip stem. This isn't a turnip at all, actually – it's another key! Once you have the key within your grips, drop down to the floor below where the yellow ladder is coming for. Here, you'll find a Piranha Creeper that's moving in and out of a long corridor. Either throw the key at his head to take him out or run past when he's out of the way to reach an area with a locked door that contains the first gem.
The second gem can be found on top of one of the totems right beside where the key was acquired in the first step. To get it, you will need to get to the wooden bridge above them and walk across their heads when they align – pretty simple stuff.
At the ground floor of the stage is where you'll find one of those troublesome moles who's hiding a gem. Run after him and pluck him from the ground to gain your treasure.
Mine Cart Sunset Rundown
Another minecart stage means quick movements and awareness are required to collect all of the gems. The first gem can be seen behind the mine cart from the start of the stage. Once you're in the cart and you've passed the three Piranha Petes, be ready to aim for the gem dead ahead of the cart to nab it.
The second gem is directly ahead of the cart after a couple more turns and getting it requires nothing more than one great shot, so shoot away!
Shortly after getting the second gem, be on the lookout for a POW block surrounded by bricks to the right of the track. Shoot a turnip at the POW block to bring the gem out into the open and then shoot the gem to collect it.
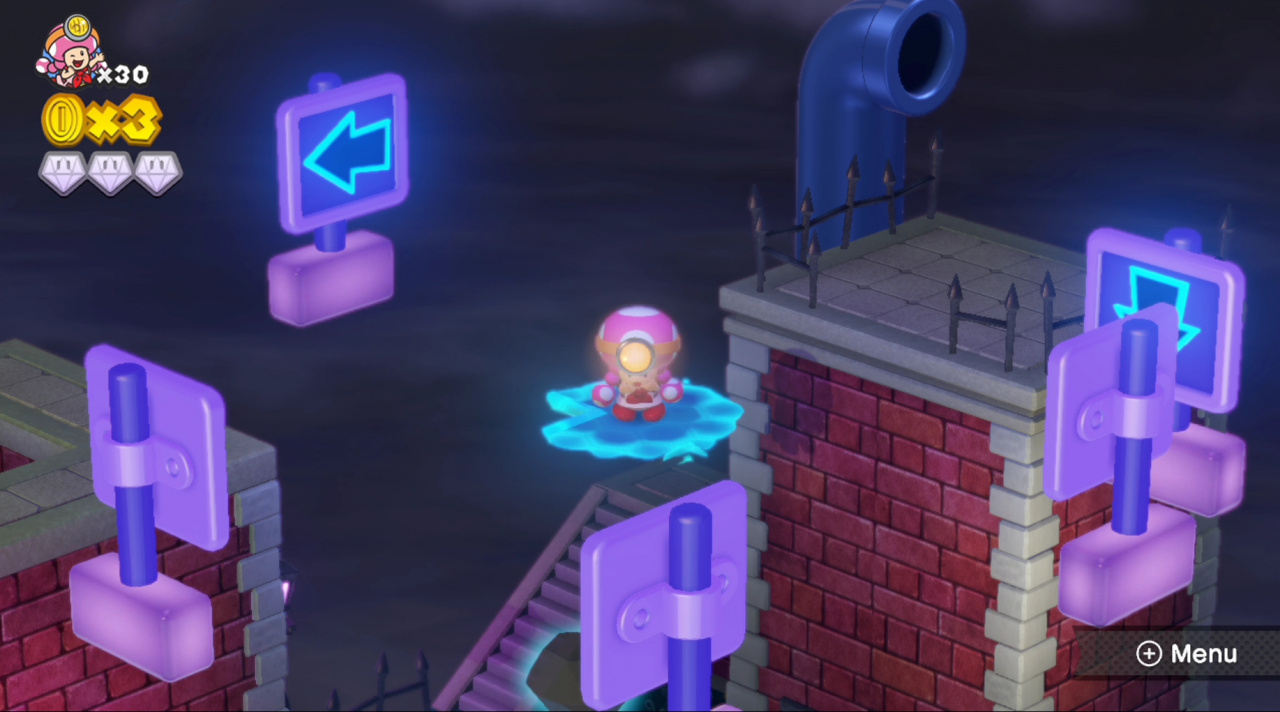
Sinister Street Signs
On top of the building across from the one you start the stage on is a P-switch that will uncover a gem. Follow the hidden pathways to the right to get there, fall on the switch, and then get the gem from inside the cage that rises.
The next gem is in the corner of the stage and it appears to be floating on nothing. If you follow the hidden pathway directly ahead from the starting point and then make a left at the sign with the right arrow, you'll be right there.
The final gem is located within the stack of bricks next to the P-switch on the ground floor. To get it, lure the Chargin' Chucks around so they break through the bricks, and then run in to grab it when there's an opening.
Floaty Fun Water Park
The first gem is very easy to get. When you begin the stage you should see a red bench with an opening in a wall to the right of it. Walking into the opening and rotate the camera to find a tiny space with a gem in it.
After falling on the P-switch that raises the water, head into the yellow pipe and hold left on the analogue stick to fly out of the spout of the pipe with a gem above it.
Take the yellow pipe to the top of the stage and then head down to the corner that's missing a piece of fence. Walk off this ledge and fall down to the ramp below. Down here you'll find a couple pairs of Cheep-Cheeps swimming around. Avoid them and head to the opposite corner to nab the final gem and a few stacks of coins.
Drift-Along Canyon
When riding the first raft and avoiding the hammers being thrown by the Hammer Bros., be ready to chuck a turnip at the POW blocks keeping you from entering an opening in the wall. Once they're out of the way and the raft lines up, walk into the opening and behind the wall to get a gem.
Before hopping on the raft on the backside of the stage, grab the nearby turnip, walk back through the door behind you, and use the turnip to bust down the wall of bricks surrounded by POW blocks. Now, head over to the pull switch, which will take Toadette to the top of the stage. Up here you will find two moles attempting to evade you, and one of them will have your precious gem… if you can catch him, that is.
When riding the raft on the backside of the stage and avoiding the Bullet Bills, be sure to get a good view of the pile of bricks surrounding a POW block. When you have a window of opportunity and you're close enough, throw a turnip at the POW block to reveal a gem. You'll then need to throw a second turnip over there to acquire the gem, so be speedy.

Sliding Slab Shuffle
As soon as you've walked up the triangular touchstone and reached the second floor, hang tight for a moment. If you tap the asymmetrical touchstone located on this floor, it will move out from the wall. Turn the camera around to see that there's an opening in the tallest wall of the touchstone. Get inside. Once there, tap the touchstone again and you will be taken to the adjacent side of the stage, where you'll find a gem.
When you're on the ground floor of the backside of the stage, you should see a gem placed right in front of the Bullet Bill cannons. Use the touchstone and the dip in the floor to avoid the bullets and reach the gem.
This part is all about timing, so be cautious. At the top of the stage there's a row of three cannons residing on a touchstone. As soon as the bullets launch, walk up the ramp to the flat part of the touchstone. Once there, immediately tap the touchstone so that it shifts to the other side of the wall. Now quickly walk down the ramp to a platform with a turnip stem, which is actually the final gem.
Spooky Specters at Shadow Manor
Note: Keep in mind that ghosts can be neutralized by shining your headlamp on them.
From the beginning of the stage, follow the right wall through a small opening in the wall ahead. Rotate the camera and walk up the ramp to the upper walkway. Now, follow that walkway through a door that will lead to the first gem.
To the left of the opening you first entered in the last step, there's another doorway. Walk through here and climb the yellow ladder to the next floor. Instead of taking the next ladder up, walk along the narrow walkway to the left of the ladder to find a gem all the way at the end.
When you reach the highest point in the stage you'll come to a spinwheel. If you have a look in the distance, there's a gem that looks to be floating in the rafters. Follow the narrow pathway to get to it. Two giant Boos will attempt to obstruct, so be prepared to shine your light on them.
Draggadon's Revenge
Right next to the staircase at the start of the stage is a narrow opening and a concealed pathway. Walk through here, moving the camera around Draggadon for a better view, and collect the gem at the end.
When you come to the first blue platform that's activated by blowing in the mic, instead of riding it all the way to the top, there's a walkway about halfway up – get onto it. On the other side of the small wall is a stem that happens to be connected to the second gem. Give it a few pulls between Draggadon's fireball attacks.
A little higher up you'll come to a microphone-activated platform flush with the floor. If you raise it up, a space will open underneath it that you can drop into. Once there, lower the camera until you have a view of the gem within this space.
Spinwheel Cog Ruins
After you've created a pathway across the red rotating blocks and reached the spinwheel on the other side, use it to rotate the orange blocks until a gem is exposed. Go get it!
Immediately following the events of the last step, head back to the spinwheel that controlled the orange blocks and rotate it until the closest orange block is now turned into a walkway. Cross it to find a gem chilling on a platform.
When you cross the green blocks and arrive at the three Walleyes, carefully slip past them to reach a purple pipe. Take the pipe for a ride to the underside of the stage, where you'll meet with a blue Toad that coughs up a gem.
Wind-Up Stairs
As soon as you cross over the grates and onto the large chunk of stage that's moving, walk down the tiny ramp and through the doorway. Rotate the camera until you can see the gem and then get it.
On the second floor of the large portion of the stage that moves up and down, there's a doorway on the inner wall that leads to another gem. You might need to rotate the camera around to the opposite side of the stage to get a clear view of it.
Have you noticed that there's another moving platform, a much smaller one, on the other side of the stage? Make your way over to it when the floors align and drop down a couple of ledges to find a gem.
Up 'n' Down Terrace
All of the gems in this stage are out in the open and can be seen with a little bit of camera manipulation. Because there are no defining landmarks, it's hard to indicate precisely how to reach them. What you need to do is use the P-switches to create pathways to each one. Two of the gems are effortless to gather, but there is one that requires a specific action. See the gem on top of the hedges with three coins leading to it? To get near it you'll need to make sure the correct walls are raised so you can travel across the top of them. Just before you arrive at the spot on the other side of the coins, pull the enemy from the ground and take him with you. You're going to need to throw him across the gap at the gem to collect it.
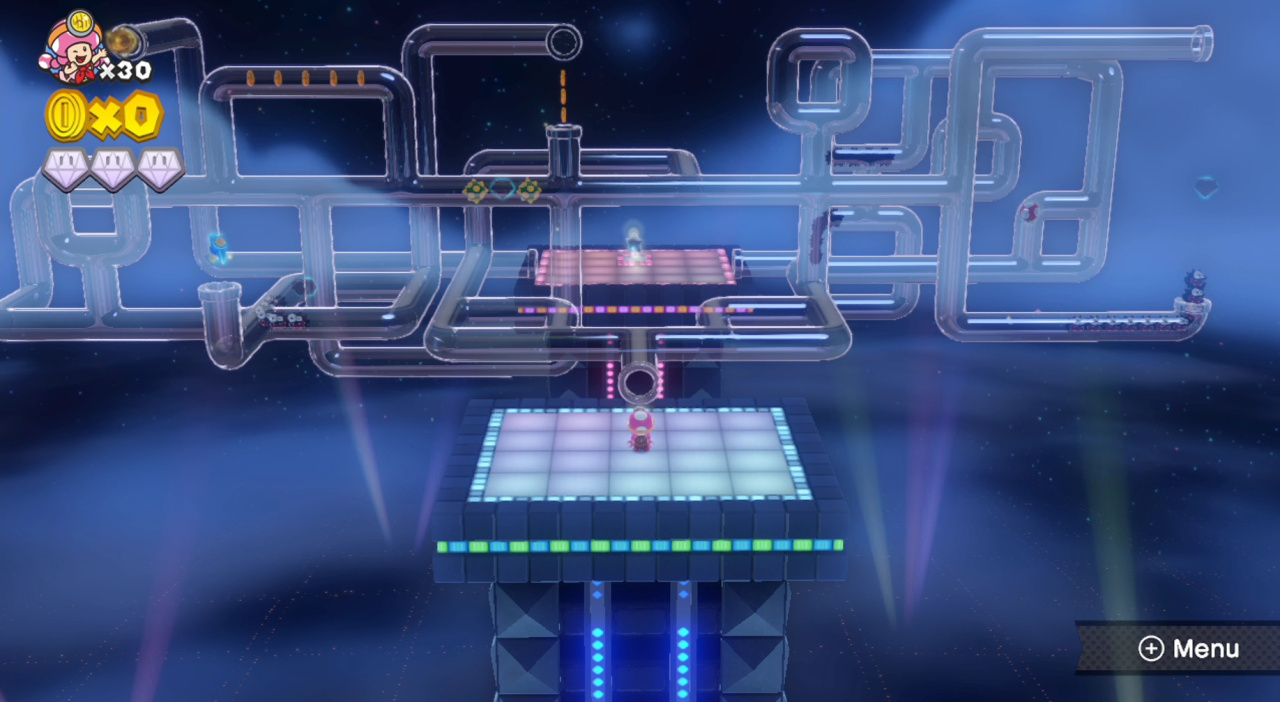
Clear Pipe Puzzleplex
This is a very tricky one to explain, as gems are located throughout a maze of pipes; it may take multiple playthroughs to grab them all. At the start of the level you can look around and check out the full stage before beginning your journey; the easiest gem is to the right, in which you keep going in that direction and aim to fall down from one pipe to the other, grabbing the gem in the middle. For the other two you'll need to focus on the left side of the level, with one in a loop with enemies to avoid, while another is nestled between two hazards. Plan for the latter carefully, as you'll need the pick-axe to break through and grab the gem.
Midnight in the Wandering Woods
See the gem just ahead from the starting point? There's a small yellow ladder that leads to the platform – climb up it and then use the tops of the wandering trees to reach the area to get the gem.
This one's a little bit tricky. See the lone stem on the platform just near where you started the stage? Go up the ramp and then use the wandering trees to get to it. Now that you have a key in your possession, throw it over the fence that's located behind the other set of wandering trees in the same area, and then make your way there by climbing the ladder, getting on the top of the trees, and then dropping over the fence. Once you've grabbed the key back up, take it past the ring of Boos, where you'll find a locked door. Head through it and into the purple pipe. Now that you're at the underside of the stage it's all about catching and pulling these moles from the ground to earn a gem.
Getting the last gem is fairly easy. Near the end of the stage, just below where the star is located, there's a small cave and the gem is inside. Sneak past the row of wandering trees and make your way over there to get it.
Double Cherry Spires
See the towers on the left and right side of the stage, the ones aligned with the central tower? When you raise these up by stepping on their corresponding P-switches, rotate the camera so you can see the newly revealed doorways located at the base of each structure. In both of these concealed areas you'll find a stem. The stem inside the tower near the locked door will reward you with a gem, while the other in the tower across the way gives you a key. To use this key you'll need to throw it over the fence that divides the stage in two parts, then have your Toadette double pick it up and transport it to the locked door.
The last gem can be seen floating in the air directly above the spot you were standing at the start of the stage. When you make it to the second floor of the central tower, you will have just passed over a turnip stem. Pluck the turnip from the ground and throw it over the railing to get the final gem.
Bullet Bill's Touchy Trials
The first gem is attached to a stem on the other side of the two grey bricks at the start of the stage. By lowering the touchstone, the Bullet Bills will break the bricks, and then you can get what you're after – simple stuff.
Once you've reached the middle walkway on the backside of the stage, cross over the touchstone and into an opening in the wall. Now that you're inside, tap on that touchstone that you just crossed over and you should see a gem located within it. Walk in and get that gem!
Need help with three
For the final gem you'll need to progress through the stage until you're stood on a high touchstone on the left edge (from the perspective of where you started. You drop down to a lower-level touchstone, but before advancing towards the side with the star, look the other way and you should see a gem at the top of a ramp; tap the touchstone you're standing on to reach it.
Spinwheel Sky Fort
Note: Follow these steps in order.
Head forward and around the corner until you reach a spinwheel, and just beyond it you should see a couple of POW blocks and bricks surrounding a gem. Lure the red Bullet Bill to this area so he collides with one of the POW blocks, which will allow you to get the gem.
Now, head back to the spinwheel and turn it until the orange section allows you to cross to the other side of the stage, and then head over. When you arrive at another spinwheel, which will rotate the green chuck of the stage, turn it until you see a gem in the corner nearest to where you're at. This one is super easy to get – just avoid the Bullet Bills firing from the two cannons and you're all good!
Go back to the second spinwheel and rotate it so the green section moves 90 degrees counterclockwise, creating a path that leads back to the first spinwheel. Head over to it. Now, rotate that spinwheel so the orange section flips 180 degrees, and then make your way back around to the other spinwheel. Once there, you should see a lone stem on the other side of the red cannon. That's where you'll find the last gem of the stage.
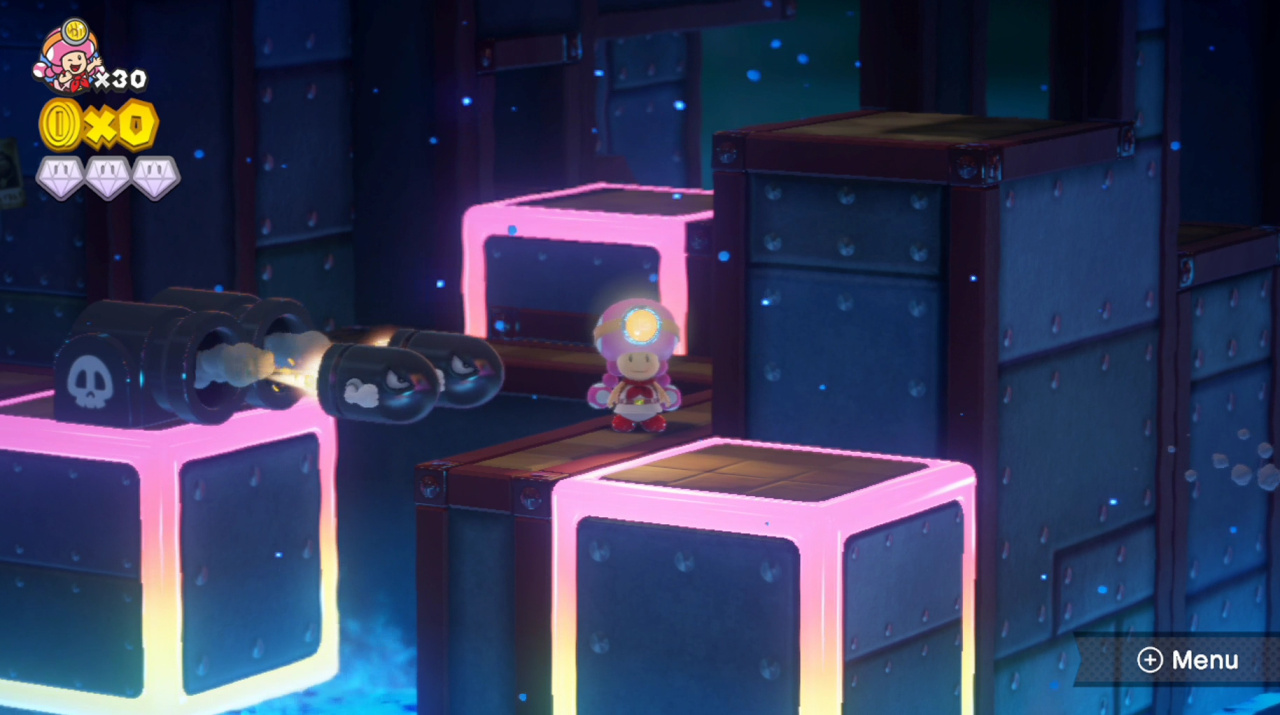
Battle Tower Blitz
The first gem is hiding within the very first tower that you shoot to upon starting the stage. Once you've reached the ladder on the left side of the tower and climb up to the P-switch, a passageway will open directly below, revealing a pipe. Before you enter this pipe, rotate the camera around to the back of the wall and you should see that the pipe has an offshoot containing a gem. Enter the pipe and hold over on the analogue stick when approaching the offshoot to get the gem.
When you reach the tower with the three Toads hanging out, you might notice that a section of the wall is missing to the left of the pipe. Rotate the camera and take the ladder down to find a room concealing a gem.
Arriving at the tower loaded with Goombas, Hammer Bros and grey bricks, you should see a pullswitch right in the middle of the chaos. Make your way to it and pull it up to enter a turnip cannon. The final gem is hidden within the grey bricks in the upper right corner of the stage. Shoot 'em up with the cannon to get it.
Be sure to check back tomorrow for all the gem locations in episode 3, while you can read more about the game in our Captain Toad: Treasure Tracker review.


Comments 2
So NLife deleted these, then brough them back. Nice, I missed them.
Complete gem guide:
"Look it's right there, go get it".
Tap here to load 2 comments
Leave A Comment
Hold on there, you need to login to post a comment...